We all love pizza or some kind of fast food. But what if your favorite fast food brand’s workers uploaded an unsettling video violating the health codes on social media – (there goes all your branding efforts down the hill)
Would you still be up to try that brand? I don’t think so. The least you would do is stop going to that specific franchise.
Similar happened in the case of Domino’s where two workers uploaded a video on Youtube from Domino’s kitchen while preparing pizza and violating the health standards. The video went viral, and the company faced strong backlash over it.
With the right crisis response Domino’s averted serious consequences (more to the story).
While the advantages of social media are obvious, there are also some social media risks to be aware of. When something goes wrong, brands risk losing their reputations.
Companies must be cautious about what they publish online, and they must have a plan to address any issues that develop.
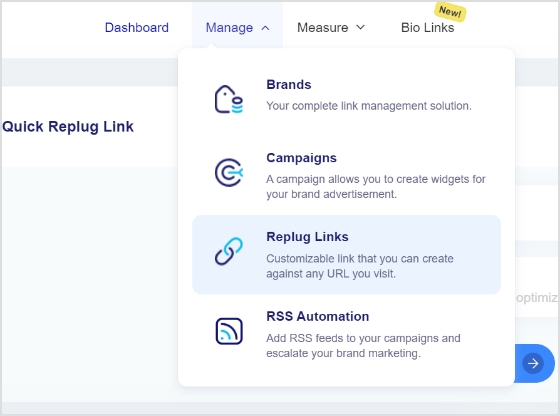
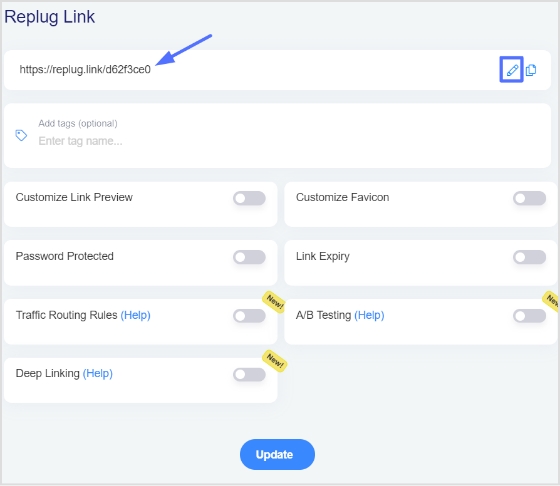
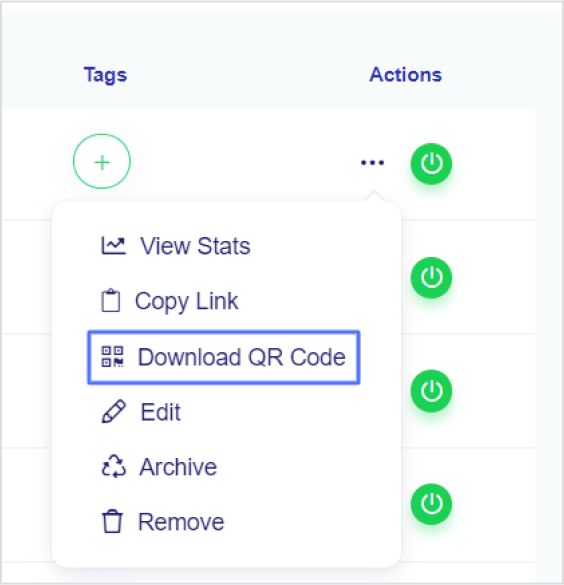
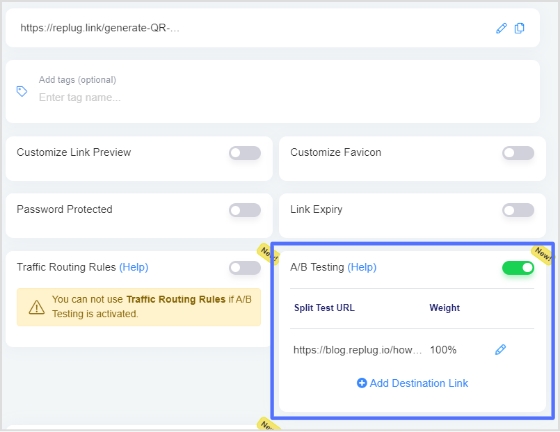
For teams managing multiple campaigns, monitoring brand mentions, or sharing content across social channels, using Replug.io can help streamline link management and make content sharing more secure and trackable.
In this blog, we will make sure that you stay on top of your social media game with proper risk mitigation techniques, and maintain engagement with your audience and increase your sales effectively.
What is social media risk management for brands?
The key to effective social media risk management for brands consists of proactive monitoring, rapid response to negative content, clear social media guidelines, employee training, and crisis communication plans.
To maintain a positive brand image and minimize potential reputation damage, businesses need to understand how social media managers drive brand engagement and stay sharp at all times.
Did You Know!
“Report finds 164% increase in cyber threats targeting brands” (ZeroFox)
Benefits of a social media risk management
Here are the key benefits of social media risk management strategies.
- Safeguards brand reputation
- Enhances data security
- Brand growth and engagement
- Mitigates legal risks
- Customer trust:
- Proactive crisis management
If you don’t have the right risk response strategy, then you can end up like United Airlines, where the passenger Dave Caroll’s guitar was damaged. When he took his case up to the airline, it refused to fix or replace his guitar.
In response, Dave wrote a song “United you broke my guitar”. The song got over 9 million views, and more importantly, United Airlines investors lost $180 million as the stock price dropped by 10% after the incident.
However, before moving to the risk management strategies, it’s important to know what kind of social media risks brands are open to.
Major social media risks for brands
It’s necessary for every brand, social media manager, community manager, customer services etc, to have knowledge of the risks that brands can face.
1. Social media security risks
Social security risks can harm your info and identity. Avoid sharing too much, weak passwords, or strange links. Stay safe with strong passwords, cautious sharing, and distrust of unknown emails. Just like locking your door, secure your online stuff!
When you must share URLs on social media or in campaigns, using a trustworthy link shortener ensures your links are clean, branded, and less likely to trigger suspicion, which can help protect both brand reputation and user trust.
Here are different kinds of social security risks for brands, you must be aware of:
- Reputation damage:
Negative comments, reviews, or misinformation can harm a brand’s image. - Data breaches:
Hackers gaining access to customer or employee data can lead to trust loss. - Phishing attacks:
Employees might unknowingly reveal sensitive info to fake emails. - Social engineering:
Scammers might manipulate employees for confidential data. - Account hijacking:
Hackers taking control of a brand’s social media accounts can spread false information. - Inappropriate content:
Sharing or being associated with offensive or inappropriate content. - Intellectual property theft:
Competitors or others stealing a brand’s ideas or content. - Crisis mishandling:
Poorly managed crises can worsen public perception. - Lack of control:
Employees’ personal posts reflecting poorly on the brand. - Miscommunication:
Messages being misinterpreted can lead to PR issues.
Did you know!
“Up to 40% of social media users are estimated to have experienced some form of social engineering or phishing attack.” (GITNUX)
The CNN hacking case
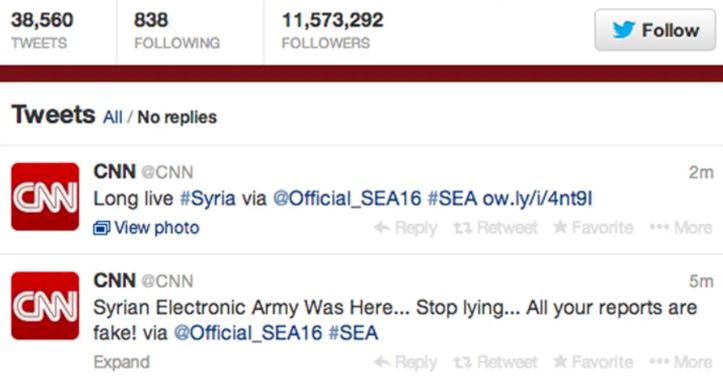
In 2014, the official Twitter and Facebook accounts of CNN were compromised by a hacktivist group, the Syrian Electronic Army (SEA). The hackers posted false information, which spread rapidly, damaging CNN’s credibility and potentially influencing the public.
CNN’s response
CNN’s initial response was somewhat delayed and lacked coordination, allowing the false information to gain traction. However, they swiftly regained control of their accounts, deleted the false posts, and issued clarifications.
What could have been done?
To enhance crisis management, CNN could have benefited from faster response times, clear communication strategies, and pre-established protocols for social media account security. This case underscores the need for organizations to proactively prepare for digital threats and have effective crisis communication strategies in place.
2. Legal risks
Social media legal risks encompass potential legal problems arising from online activities, such as copyright infringement, defamation, and privacy violations.
Here are different kinds of social media risks brands need to be aware of:
- Copyright infringement: Sharing content without proper authorization can lead to copyright claims.
- Defamation: Posting false or damaging statements about individuals or businesses can result in defamation claims.
- Privacy violations: Sharing personal information without consent might lead to privacy lawsuits.
- Trademark violations: Unauthorized use of trademarks can result in legal action.
- Advertising regulations: Violating advertising laws or not disclosing sponsorships can lead to penalties.
- Data protection Laws: Mishandling customer data may breach data protection regulations.
- Contractual Issues: Breaching contracts with influencers or partners can result in legal disputes.
- Employment matters: Employee social media usage can lead to HR and legal challenges.
- Regulatory compliance: Not adhering to industry-specific regulations can lead to fines.
- Misleading content: Sharing false or misleading information might breach consumer protection laws.
Interesting read: How to Understand and Maximize Your Reach on Any Social Network
3. Financial risks
Managing social media risks effectively is crucial to mitigate these potential financial impacts and maintain a positive brand image, customer trust, and business growth.
Here are some major financial impact on brands that occur due to weak social media risk management:
- Customer loss:
Poorly managed social media risks can lead to a loss of existing customers and difficulty in attracting new ones due to negative perceptions. This is why it’s crucial to keep track of TikTok analytics and analyze interactions on Instagram, Twitter, and other platforms to prevent this from happening.
- Legal expenses:
Violations such as copyright infringement or privacy breaches can result in legal fees, fines, and settlements, draining financial resources.
- Crisis management costs:
Dealing with social media crises requires resources for crisis communication, PR efforts, and reputation repair, leading to additional expenses.
- Difficulty in ROI measurement:
Relying on misleading social media metrics can lead to misguided decisions and ineffective strategies. Measuring the actual return on investment from social media efforts can be challenging.
The British Petroleum Gulf oil spill: A risk management debacle

The BP oil spill in the Gulf of Mexico is widely known, and social media has played a crucial role in magnifying and uniting public anger over BP’s management of the crisis in that region.
BP’s brand value has taken a hit of more than $1 billion as a consequence of the situation. Notably, the “Boycott BP” Facebook page has garnered the support of over 750,000 individuals.
Moreover, discussions surrounding “BP” have surfaced across various online platforms, including more than 9,000 blogs and over 23,000 tweets. Impressively, these discussions on Twitter have collectively generated approximately 49.5 million impressions.
4. Competitor risk
Social media risks related to competition involve potential negative impacts that arise from interactions and activities on social media platforms involving competitors. These risks can impact a business’s reputation, customer perception, and overall competitive standing.
Here are some social media risks related to competition:
- Comparative marketing gone wrong:
While comparative marketing can be effective, it can backfire if not executed carefully, leading to legal issues or public backlash.
- Customer poaching:
Competitors might target your customers with enticing offers or campaigns, attempting to shift their loyalty away from your brand.
- Stolen strategies:
Your rivals might closely monitor and replicate your successful social media strategies, diminishing your unique competitive advantage.
- Disinformation or rumors:
Competitors might spread false rumors or disinformation about your products or services, impacting customer trust and potentially causing financial harm.
5. Innovation risk
While social media can be a powerful tool for innovation, it also comes with certain risks. Here are some innovation-related social media risks to be aware of:
- Premature exposure:
Sharing innovative ideas or products too early on social media can lead to competitors gaining insight and potentially launching similar initiatives before you do.
- Copycat competition:
Competitors might quickly replicate or modify your innovative concepts after seeing them on social media, reducing your competitive advantage.
- Expectation management:
Overhyping an innovation on social media can lead to unrealistic customer expectations, making it challenging to meet those expectations in reality.
- Critique and negative feedback:
Innovative ideas can attract critique and negative feedback on social media platforms, potentially discouraging further development or affecting your brand perception.
Interesting read: A Complete Guide to Building a Brand Marketing Strategy
Social media risk management plan for brands
One of the best examples and case studies of crisis management that brands highlight is the Johnson and Johnson’s Tylenol incident.
In 1982, Johnson & Johnson faced a crisis when seven people in the United States died after consuming Tylenol capsules that had been tampered with and laced with cyanide. The company swiftly responded by recalling 31 million bottles of Tylenol, worth around $100 million. They cooperated fully with law enforcement and established a hotline to inform the public about the situation.
Johnson & Johnson also introduced tamper-evident packaging, which later became an industry standard. Their transparent and responsible crisis management approach is often cited as a model for effectively handling product-related emergencies.
Below are more details on this story and crisis management in this video of Retro Report.
Here’s a social media risk management plan tailored for brands for effective crisis management.
1. Risk identification:
- Identify potential social media risks, such as reputation damage, data breaches, legal compliance issues, and crisis events.
2. Risk assessment:
- Evaluate the potential impact and likelihood of each risk to prioritize them effectively.
3. Prevention and guidelines:
- Establish clear social media usage guidelines for employees, including appropriate content and engagement practices.
- Enforce strong password policies and enable two-factor authentication for all brand accounts.
4. Monitoring and alerts:
- Utilize social media monitoring tools to track brand mentions, sentiment, and potential threats.
- Set up real-time alerts for unusual activity or security breaches.
5. Data protection:
- Implement stringent data protection measures, including encryption, secure data storage, and regular security audits.
6. Crisis response plan:
- Develop a comprehensive crisis management plan with predefined actions for addressing negative events.
- Assign specific roles and responsibilities for crisis communication and resolution.
7. Legal compliance:
- Stay informed about relevant laws and regulations related to social media usage and advertising.
- Ensure all social media content and activities comply with legal requirements.
8. Third-party app evaluation:
- Thoroughly vet and monitor third-party apps or tools used for social media management.
- Ensure these tools adhere to strict security and privacy standards.
9. Incident handling:
- Establish a well-defined incident response process to swiftly address social media-related incidents.
10. Communication strategy:
- Develop a clear communication plan for addressing stakeholders, customers, and the public during a crisis. – Prioritize transparency and timely updates.
11. Regular audits:
- Conduct regular audits of social media accounts, content, permissions, and security settings.
12. Employee training:
Provide ongoing training to employees about responsible social media practices, data security, and crisis communication. Use Plus AI to create engaging presentations to support these efforts.
13. Continuous improvement:
- Regularly review and update the risk management plan to adapt to evolving social media trends and emerging risks.
FAQs about social media risk
What is the biggest risk in using social media for a business?
Biggest risk in using social media for business is reputation damage.
What are the main risks of social media?
Main risks in using social media for brands are reputation, data breaches, legal compliance & misinformation.
What is risk management in social media?
Planning to identify, assess, mitigate, and monitor social media risks.
What are the risks of social media to an organization?
5 types of risk management are strategic, financial, operational, compliance and reputational risks.
What are the 5 types of risk management?
5 types of risk management are strategic, financial, operational, compliance and reputational risk management.
How can you reduce the risk of using social media?
Reduce risk of using social media to educate employees, follow privacy guidelines, use strong passwords, and monitor activities.