LinkedIn isn’t just a social network; it’s your digital passport to the professional world, connecting you with like-minded individuals across diverse industries. Your LinkedIn profile is your virtual business card, offering a snapshot of your identity and capabilities.
Elevating your LinkedIn presence goes beyond mere self-promotion – it’s about forging meaningful connections, fostering engagement, and creating growth opportunities.
If you’re eager to take your LinkedIn game to the next level, buckle up as we discuss nine practical tips to amplify your profile and skyrocket your post views for unparalleled engagement.
1. Craft compelling content
Create valuable content
Elevate your LinkedIn game by crafting content that speaks directly to your target audience. Identify your audience’s needs and interests, and deliver tangible benefits, immediate results, or fascinating insights. Remember, it’s not about you; it’s about what your readers want.
Utilize a mix of text, infographics, gifs, and videos to keep your content diverse and engaging. Employ writing techniques such as short sentences, line spacing, emojis, storytelling, and visuals to enhance readability.
Republish Content
Unlock the potential of your content by republishing it strategically. According to research, not everyone visits LinkedIn multiple times a day, so reposting content (with a 10-day gap) can increase reach and engagement. Focus on delivering unique insights with each repost, ensuring each post feels fresh and valuable to your audience.
2. Complete your profile
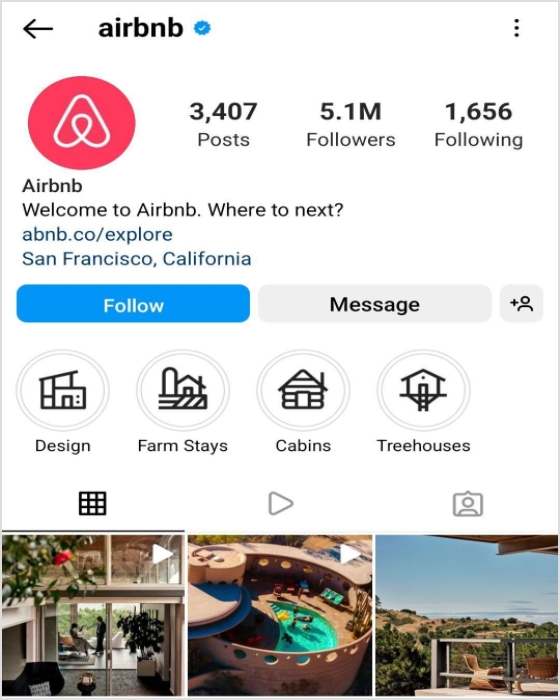
Your LinkedIn profile is your professional identity. Make sure to complete it. Ensure you have a standout header image, use your professional name, invest in a professional photo, and craft a compelling summary showcasing your talents.
Keep your work experience, education, certifications, and specializations up-to-date. Growing your network to at least 500 connections significantly boosts visibility.
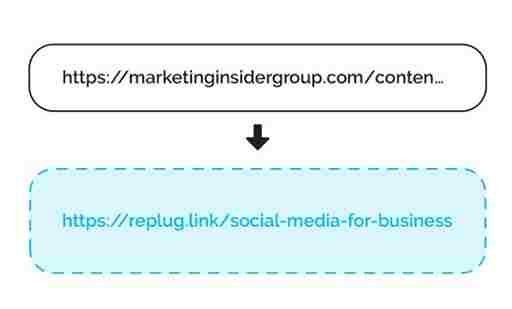
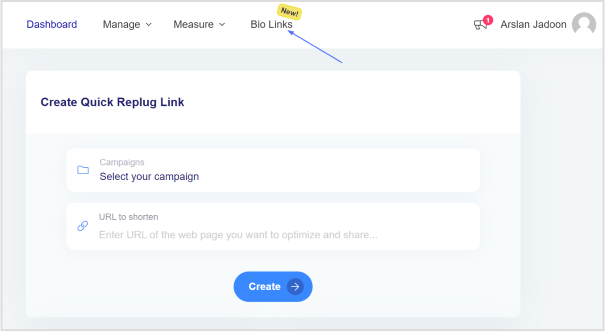
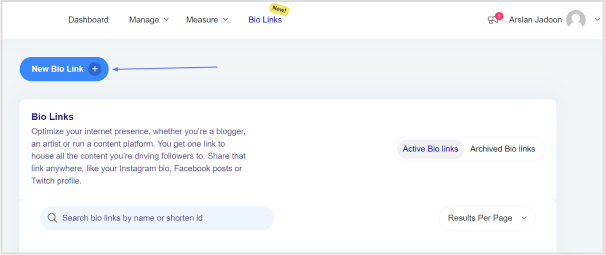
3. Shorten the links you share
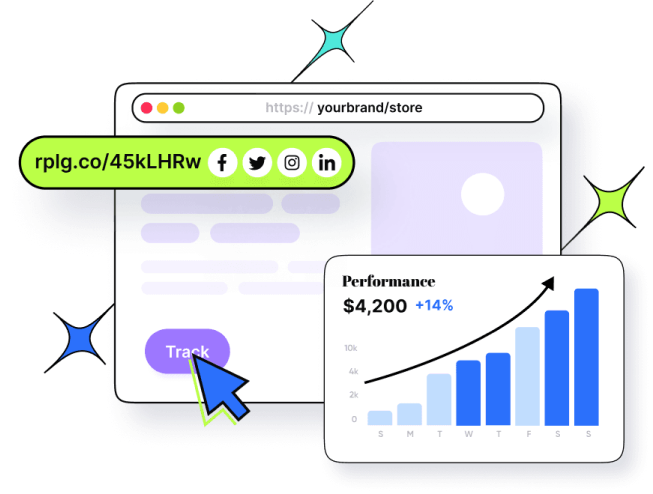
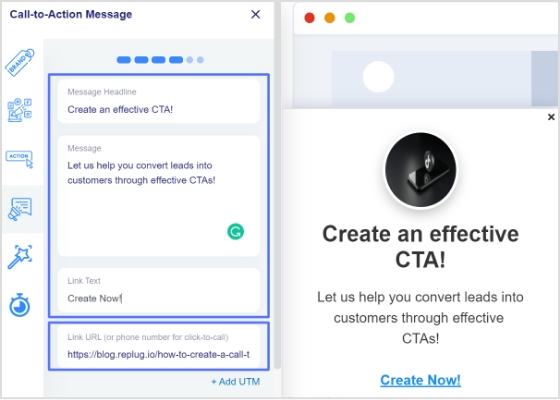
Long, unwieldy URLs can detract from the professionalism of your content. Replug’s link shortener not only cleans up your links but also provides valuable tracking metrics. It’s about more than just character count reduction – crafting connections that resonate with your audience.
With our LinkedIn link shortener, you can share concise, branded URLs that stand out in professional posts and messages. This helps boost credibility, improve engagement, and make every LinkedIn share more impactful.
Maximize marketing ROI
by transforming ordinary URLs into branded short links that convert.
Try Replug for free
4. Maximize Engagement
Respond to comments
Engage with your audience by responding to comments on your posts. This not only pushes your content back to the top of feeds but also establishes a connection with your audience. Thoughtful responses create a sense of community and encourage future engagements.
Re-share other people’s content
Expand your network and visibility by re-sharing content from other LinkedIn members. This not only puts you on their radar but can also make you visible to their network. Use this strategy to build on others’ insights, reinforcing your thought leadership.
Get your employees and executives involved
Harness the power of employee advocacy by encouraging your team to engage and share company content. Employee posts can reach over 5X further than official company posts. Use eNPS questions to identify highly engaged employees who can serve as strong advocates. Implement processes to notify the team about content creation and leverage employee advocacy platforms for streamlined content sharing.
Leverage the power of tagging to drive attention to your posts. Tagging influential individuals or relevant pages can not only attract their attention but also increase visibility to their networks. Use tagging strategically as part of a team-wide strategy to amplify your reach.
6. Use hashtags
Utilize the potential of hashtags to increase the visibility of your posts. Choose relevant and trending hashtags, but keep it limited to around 5 per post. Aligning your content with popular hashtags can connect you with individuals and groups interested in similar topics.
7. Diversify your content
Diversify your content to keep your profile fresh and appealing to different audiences. From text and image posts to engaging videos, document carousels, and interactive polls – incorporating variety adds depth to your profile and resonates with a broader audience.
8. Consistent posting
Posting regularly sets a rhythm for your audience and benefits the LinkedIn algorithm. It’s not just about frequency; it’s about establishing reliability. Consistency builds anticipation for your insights, updates, or industry thoughts, encouraging views and engagement.
Embrace the power of video content on LinkedIn, focusing on native videos for a better user experience. Use captions for accessibility and convenience. Simplify video sharing across your team using platforms like ContentStudio.
Post regularly
Consistency is key to maintaining a vibrant LinkedIn presence. Post updates regularly, aiming for at least 2-3 times a week. Test different posting days and times to align with your network’s online activity. Use social media scheduling tools to manage regular posting without overwhelming your team.
Enhance your LinkedIn journey with Replug
Professional, accessible linking is the secret sauce of a successful LinkedIn strategy. Replug.io is not just a link shortener; it’s your tool to craft connections, engage authentically, and grow confidently.
Invest time in understanding Replug’s analytics. It’s not just about shortening links; it’s about understanding your audience’s behavior.
Ready to take your LinkedIn game to new heights? Explore Replug’s pricing plans and elevate your LinkedIn profile with style.
A complete link management solution
for marketing professionals & agencies.
Try Replug for free
FAQs
Why craft engaging content on LinkedIn?
Crafting engaging content on LinkedIn is crucial for boosting profile visibility, expanding your network, and creating valuable connections.
How does Replug enhance URLs on LinkedIn?
Replug’s link shortener improves the appearance of URLs on LinkedIn by making them cleaner, more professional, and trackable, enhancing overall content presentation.
Why is posting consistently essential on LinkedIn?
Posting consistently on LinkedIn is vital for building audience trust, staying relevant in feeds, and maximizing the algorithm’s benefits, resulting in increased visibility.
What is the role of scheduling tools in LinkedIn marketing?
A social media scheduling tool plays a crucial role in LinkedIn marketing by enabling users to plan and automate posts, ensuring consistent posting frequency and optimal audience engagement.
How do scheduling tools help manage multiple LinkedIn accounts efficiently?
Scheduling tools streamline the management of multiple LinkedIn accounts by coordinating posts, ensuring consistency, and optimizing content delivery for efficient social media marketing.
Your brand identity is the heartbeat of your business, the visual and emotional essence that sets you apart in a crowded market.
In this short guide, we’ll outline actionable steps that go beyond aesthetics, ensuring your brand not only stands out but becomes a memorable and trusted presence in the minds of your audience. So, let’s get started!
What is brand identity and why is it crucial?
Brand identity is the visual and conceptual representation of a brand. It encompasses various elements that communicate the brand’s personality, values, and characteristics to its audience.
This identity serves as the face of the brand, creating a distinctive and memorable image in the minds of consumers.
Key components of brand identity:
Logo: A unique visual symbol that represents the brand.
Color palette: A consistent set of colors associated with the brand.
Typography: Specific fonts used in brand communications.
Visual style: The overall aesthetic, including imagery and design elements.
Brand voice: The tone and style of language used in communication.
Tagline or slogan: A concise phrase that encapsulates the brand’s essence.
Why brand identity is crucial?
Your brand identity is more than just a logo or a color scheme; it’s the heartbeat of your online persona. It encapsulates the essence of your brand, conveying its personality, values, and promises. Beyond the visual elements, a robust brand identity is the key to unlocking several critical objectives in the digital realm.
Key objectives:
Memorability: A strong brand identity helps a brand stand out and be remembered in a crowded market. Consistent visuals and messaging create a lasting impression.
Differentiation: In competitive industries, a distinctive brand identity sets a brand apart from competitors, making it easily recognizable.
Authority and Trust: A well-crafted brand identity communicates professionalism and builds trust. It establishes the brand as an authority in its industry.
Consistency: Brand identity acts as a guide for maintaining consistency across all marketing channels. Consistency reinforces brand recognition and credibility.
Scalability: A flexible brand identity can adapt and evolve with the brand’s growth. It remains relevant across various stages of business development.
A complete link management solution
for marketing professionals & agencies.
Try Replug for free
How to create a brand identity: 5 essential steps
1. Define your brand purpose:
Mission and values:
Clearly articulate why your brand exists, the values it stands for, and the problems it aims to solve.
Differentiation:
Identify what sets your brand apart from competitors.
2. Research the competition:
Competitive analysis:
Study competitors’ brand strategies to understand the market landscape.
Identify gaps:
Look for opportunities to differentiate your brand from others.
A complete link management solution
for marketing professionals & agencies.
Try Replug for free
Integrating your brand identity: A strategic imperative for business success
Creating a compelling brand identity is a pivotal step toward establishing a distinctive presence in the market. However, the true power of a brand identity lies in its seamless integration into various facets of your business. This integration ensures that your brand is not just a visual entity but a cohesive and recognizable force that extends across all touchpoints.
Let’s explore how you can effectively integrate your brand identity into different aspects of your business for maximum impact.
Website integration:
Your website is the digital storefront of your brand. Ensure that your brand identity is reflected in every pixel. From logo placement to color schemes and typography, the website should be a consistent extension of your brand personality. Effective logo design is crucial for ensuring brand identity is communicated seamlessly across all digital platforms.
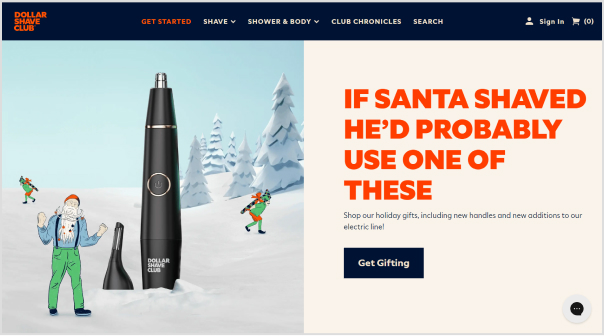
Take cues from successful brands like Dollar Shave Club, whose website design perfectly complements its bold and irreverent brand identity.
Physical storefronts and packaging:
Even in the era of digital dominance, physical touchpoints matter. Extend your brand identity to your physical locations and product packaging. Whether it’s the layout of your store, the design of your storefront, or the packaging of your products, ensure a uniform visual experience.
Apple exemplifies this by translating its minimalist and sleek brand identity seamlessly into its physical stores and product packaging.
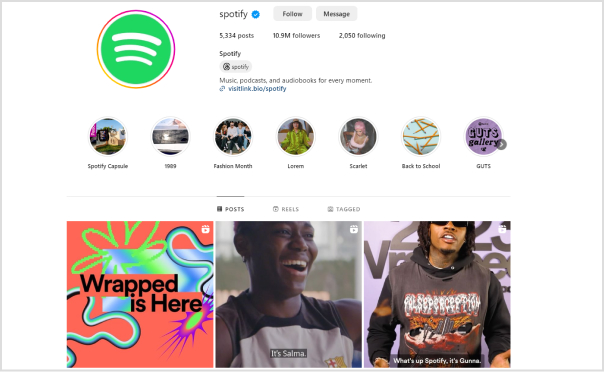
Social media presence:
Social media is a dynamic platform for engaging with your audience. Align your brand identity across all social media channels. Consistent use of visuals, language, and tone reinforces brand recognition.
For inspiration, look at how Spotify maintains a vibrant and music-centric brand identity across its social media platforms.
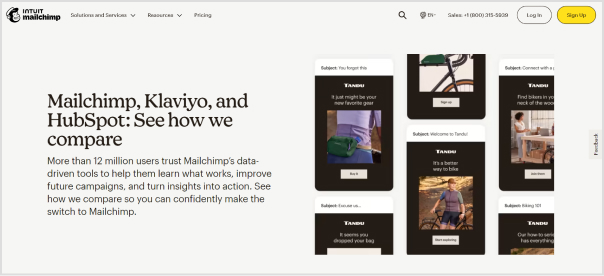
Content marketing efforts:
Your content is a direct reflection of your brand voice. Whether it’s blog posts, videos, or infographics, infuse your brand identity into every piece of content. This not only enhances brand consistency but also creates a unique and memorable brand narrative.
Mailchimp maintains a friendly and consistent brand voice across various content channels.
Packaging and presentation:
The way you present your products or services speaks volumes about your brand. Ensure that your packaging aligns with your brand identity. Whether it’s the color scheme, logos, or overall design, packaging should reinforce your brand’s visual language.
Think about how Coca-Cola’s iconic red and white branding extends seamlessly to its packaging, creating a strong and consistent visual impact.
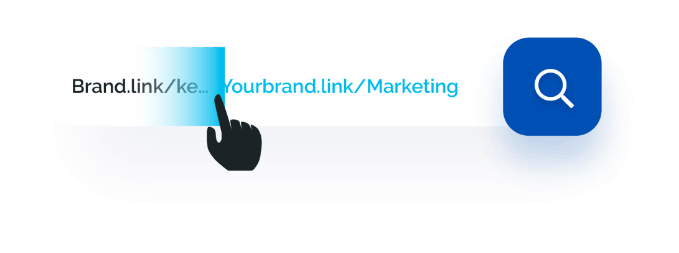
Utilizing a custom URL shortener:
In the digital age, even your online links contribute to your brand identity. Leverage a custom URL changerto create branded short links. By doing so, you not only enhance brand visibility but also build link trust.
This small yet impactful step allows you to put your brand on every link you share, increasing brand awareness in every digital interaction.
To take full control of your branded links, explore Replug, i.e., an all in one link management platform designed to streamline and optimize your link-sharing strategy.
Closing note:
Integrating your brand identity into various aspects of your business is not just a choice; it’s a strategic imperative. Consistency across digital and physical touchpoints not only strengthens your brand’s recognition but also builds trust and loyalty among your audience.
Regularly reassess and refine your brand integration strategies to stay in sync with evolving market trends and consumer expectations.
Maximize marketing ROI
by transforming ordinary URLs into branded short links that convert.
Try Replug for free
FAQs
What are the key elements of a successful brand identity?
The key elements include a distinctive logo, a cohesive color palette, consistent typography, a unique visual style, a defined brand voice, and a memorable tagline or slogan.
How can I develop a memorable and distinctive logo for my brand?
To create a memorable logo, focus on simplicity, scalability, and symbolism. Ensure it aligns with your brand’s personality and values, making it instantly recognizable.
How can I integrate my brand identity into my website effectively?
Integrate brand identity into your website by aligning colors, typography, and logos with your brand. Ensure a consistent tone in content and imagery to create a unified online presence.
It’s unbelievable how LinkedIn went from an ordinary job platform to a flourishing social network with more than 930 million members.
Over time, it has become a top choice for businesses, freelancers, digital marketers, and many other online professionals in the industry.
If you often share links, like blog posts, case studies or resources, and want a simple way to manage, track, and brand them all in one place, Replug can help you keep your URLs organized and professional.
But you know what’s the interesting part? Users of LinkedIn are going out of their way to keep the readers hooked, now-a-days.
It’s pretty cool. If you also want to build a super-engaged audience on LinkedIn, you’ve landed in the right spot.
There are times when one might run out of post ideas. But worry not! We’ve got your back with many unique and captivating LinkedIn post ideas to help you overcome such conditions.
What to post on LinkedIn?
Long-form content
Native document posts (PDFs)
Carousels post
LinkedIn Live
Posts containing polls or stats
Native Video Posts
Posts including hashtags and emojis
Consistently posting valuable content can lead to more profile views, connection requests, and, ultimately, more opportunities for career growth or business expansion.
Below are the best LinkedIn post ideas with examples. Making these ideas part of your LinkedIn strategy, and start getting more likes and impressions on your LinkedIn posts.
1. Share how-to guides, tips, or growth hacks
Sharing little tips, ideas, or hacks is the best method to attract a broad audience and keep them involved in your content. Linkedin users enjoy methods, secrets, and techniques. But the key lies in understanding what sets your content apart.
You can share the following type of content:
List the dos and don’ts of your job
Guide on how to enhance a specific skill
Recommend valuable or productive tools
Hacks to increase platform engagement
Favorite book or online course
Tips for creating engaging Linkedin content
Share any personal experience
Personal branding tips
Updates in your industry
Views on any upcoming update
Best websites for working remotely
Tips on LinkedIn profile optimization
Advice on communication with clients
Networking tips
Any financial advice
What unique perspective or expertise do you bring to the table? Is there a fresh take on a popular topic or a hidden gem to be discovered? By pointing out these differences, you can create a sense of suspense, enticing the viewers to explore your content further.
2. Native visuals posts
Regarding LinkedIn, where professionals strive to showcase their expertise or brand, content acts as the backbone.
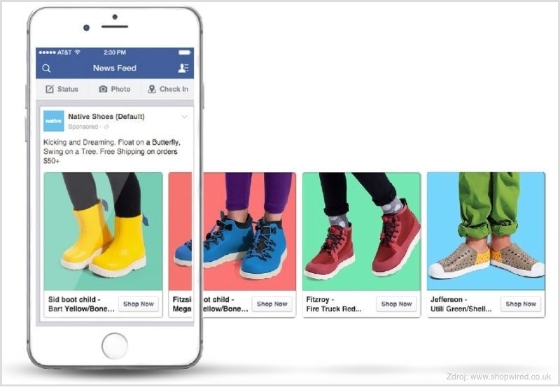
Images featuring catchy text
A native image post generates 2x comment rate than a post without images. So craft a compelling image that perfectly aligns with your message. The key lesson here is to utilize the image + text strategy on LinkedIn.
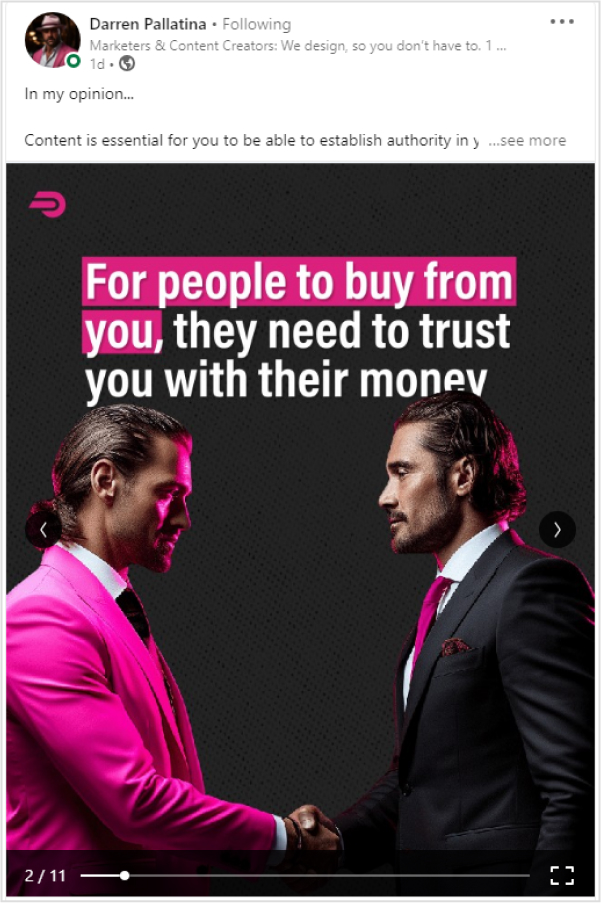
You can also use carousels, an updated style that lets you add multiple pictures and videos to a single post, giving your audience a visually appealing experience.
Just like this carousel by Darren Pallatina regarding lead-generation marketing content.
With carousels, it’s easy to tell a behind-the-scenes story, like a step-by-step strategy, how a product is made and launched, shortcuts or processes, etc.
Native video posts
Posting videos on LinkedIn has a 5x higher engagement rate than plain text posts. Whether it’s a thought-provoking industry insight, a behind-the-scenes glimpse of your work, or a captivating story, videos can captivate and engage your connections like never before.
Here we spotted Ryan Musselman sharing a video post on Linkedin.
Add in some video teasers
Speaking of visual content, putting video teasers on LinkedIn can warm up the audience before the actual LinkedIn video post emerges. It creates curiosity, and it helps you reach a new audience. You could upload the full version later on your LinkedIn profile.
And when you need to download your LinkedIn videos for repurposing, consider using a LinkedIn video downloader to make the process hassle-free.
3. Share long-form content
Let’s say you haven’t designed any LinkedIn visual posts. Now what on earth should you post? Where to start? What else to publish for now? You can post long-form content, such as text-only posts, PDFs, articles, etc.
Here’s how
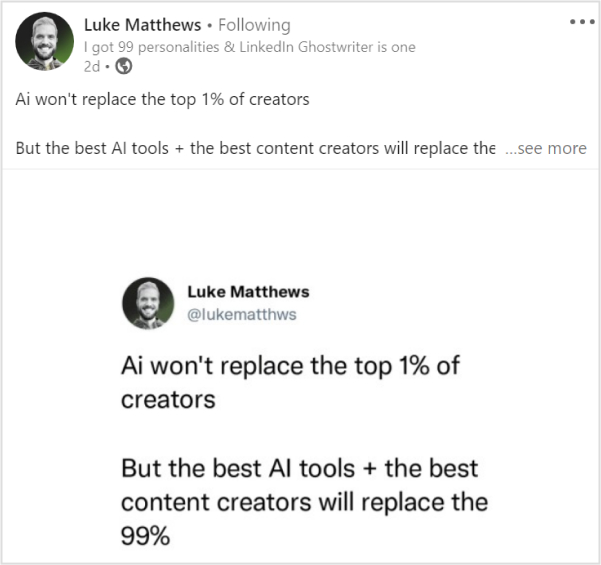
Long text-only LinkedIn posts
It doesn’t matter if you write a concise two-liner or a 600-word text post; the length of the text has no significant effect on the value of your message. You’re good to go if it hits the bull’s eye.
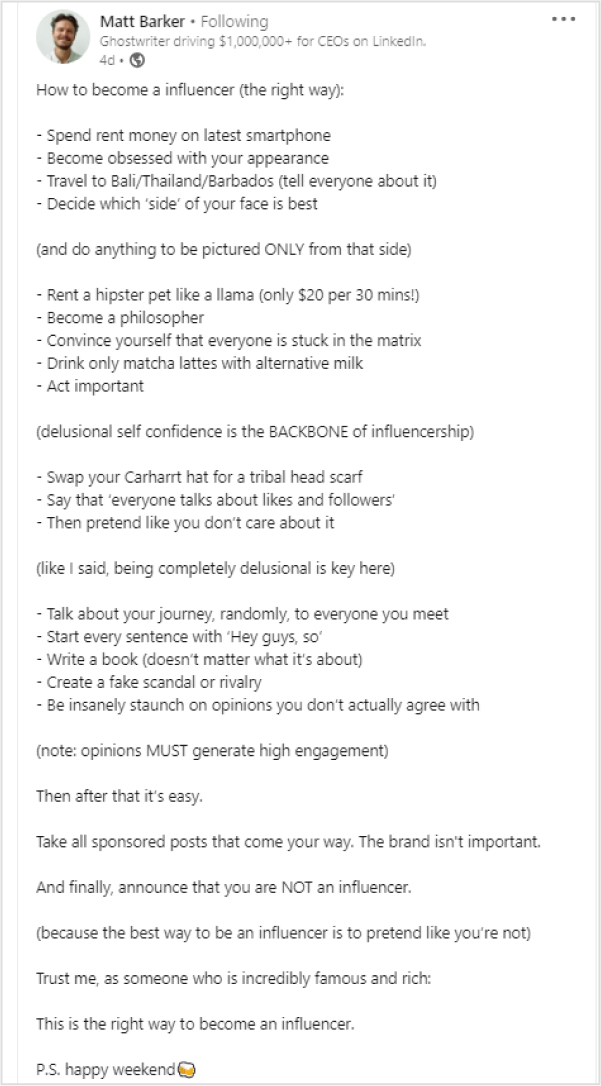
Let’s look at Matt Barker’s post, a top LinkedIn content creator sharing his views on how to become an influencer (the right way) through a long text-based post.
Though long texts can be boring sometimes, try adding emojis, relevant hashtags, give value, be helpful, personalizing your posts, and be controversial, this will make your posts more engaging.
Linkedin article
LinkedIn also allows users to share blogs and articles. Your posts may include links to external articles. And if you’re at a loss for words, turn any old video from YouTube or PDF file into an article and publish it. Also, this allows you to utilize existing material and present it in a different format for your audience.
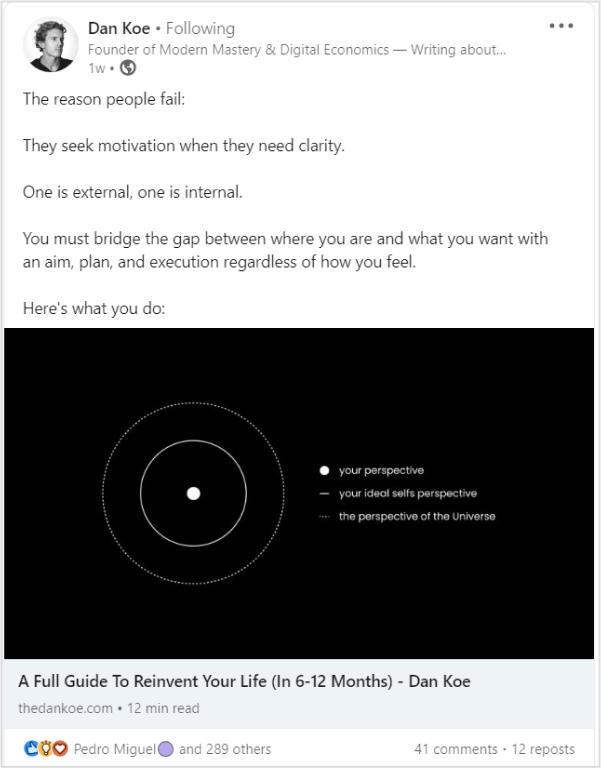
Here Dan Koe on LinkedIn shared an article in his post.
The biggest perk of this tactic is that you post on LinkedIn more often. What else do you need?
Share native documents
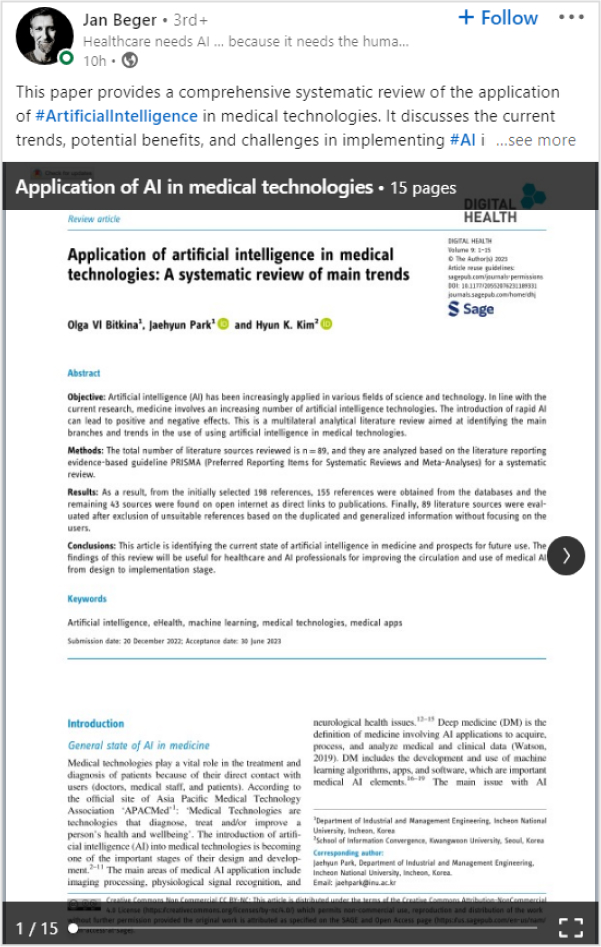
Sharing LinkedIn documents while writing posts gives your audience a more comprehensive perception. Make a lasting impression and seize the attention of your LinkedIn network by sharing PPT or PPTx slides, PDF, Doc, and Docx, just like Jan Beger shared a PDF file on LinkedIn regarding how healthcare needs AI.
The deck has 15 pages, but the post is providing value and relevance in each slide. It will encourage the creators dedicated audience to explore his content further.
4. Post reviews & opinions
Whether it’s a new gadget, a trendy fashion item, or even a restaurant, you recently dined at, writing a review allows you to express your opinions and provide valuable insights to your audience.
You can share reviews about
Top AI tools
New software in your particular industry
Future of any specific skill
Success secrets of any well-known brand
New books
Reactions towards a myth.
Replying to FAQs
Try keeping up with what’s popular online by responding to current trends and events. Anything that has to do with your business can be a great way to keep up with the latest trends.
Just like Alex Cattonion LinkedIn shared a post regarding the hyped-up Barbie movie marketing campaigns. How copywriters, marketers, and business owners can grow from studying the Barbie Movie pre-launch campaign.
By doing so, you can connect with your audience on a more personalized level and stay on top of the trends.
5. Quiz your audience or throw infographics
It’s readily apparent that people get bored when constantly bombarded with the same type of content. Therefore, trying out new things and deviating from the usual content-posting approach is beneficial.
Linkedin polls and quizzes
Quizzing your audience or conducting polls on LinkedIn are some compelling ways to catch the users’ attention.
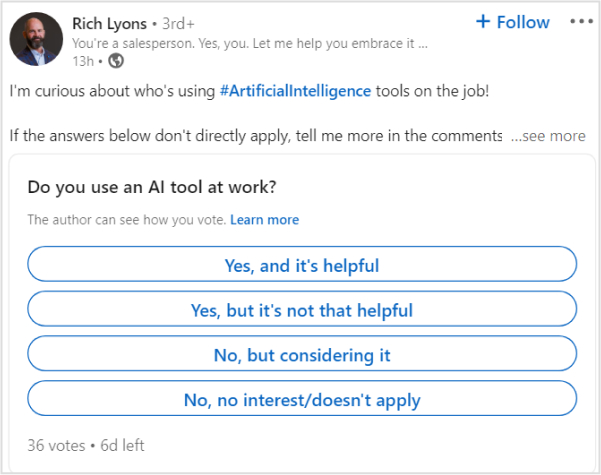
LinkedIn has a poll feature you can try out alongside other LinkedIn posts and see how it works. Let’s take a good example of a Rich Lyons LinkedIn poll post.
Now, Lyons has conducted an AI-related poll that is quite interesting and also relevant to his niche. Make sure you’re not asking your followers about something they don’t know or care barely about.
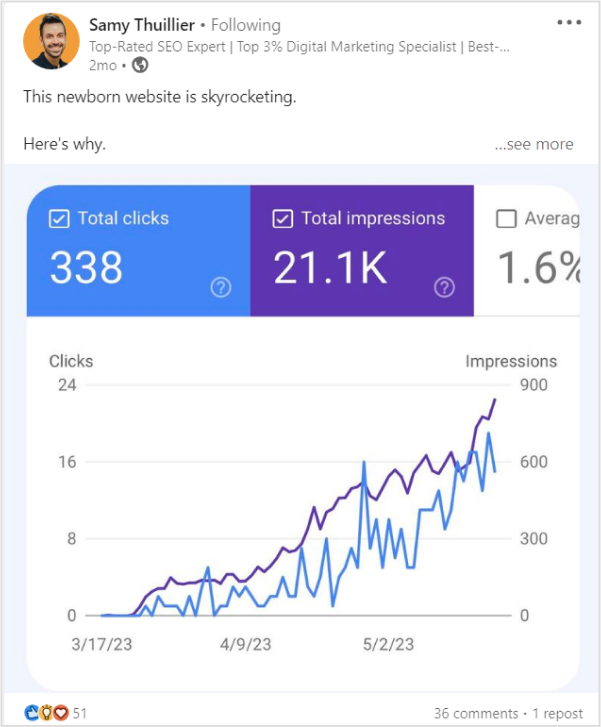
LinkedIn stats posts
Sharing statistics related to your industry, business milestones, or helpful data can be an effective strategy to initiate meaningful discussions and engage with people.
Just like Samy Thuillier shared his new website traffic stats on his LinkedIn profile.
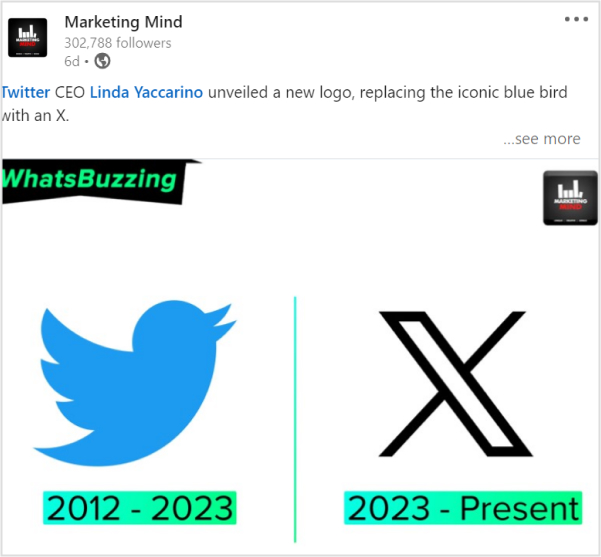
6. Share industry news
If you run out of new LinkedIn post ideas, just keep an eye out for news and changes in your field and share them with your readers.
Just like: influencers and experts often share news related to their fields and get many responses through likes, comments, and shares.
Still confused? Here’s one example:
Marketing Mind shares news relevant to its niche, which is social media and digital marketing. They posted news about Twitter. How it went from being called Twitter to X.
7. Add short-form content
Listen here, LinkedIn rockstars. You are mistaken if you believe only long-form content and native PDFs can help you succeed on LinkedIn. The ideal LinkedIn profile ought to balance lengthy and concise content.
Let’s look at the best types of short-form content.
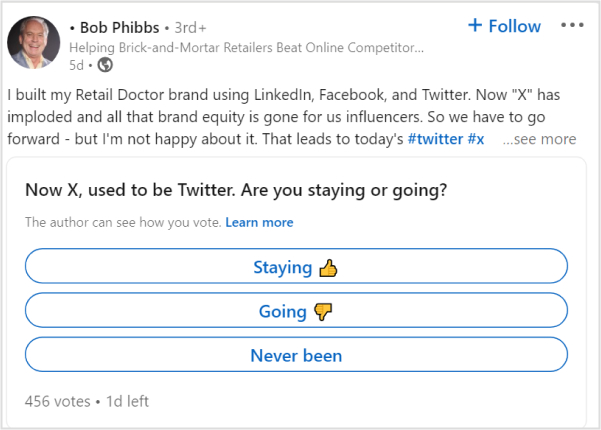
Ask questions from your audience
LinkedIn is the perfect platform to connect, learn, and have a little fun along the way. So go forth, my fellow LinkedIn friends, and let those questions fly! Ask questions from your audience just like famous LinkedIn content creator Bob Phibbs did so:
Add funny posts
People love content they can relate to. So try adding humor to your content. Thus, you can effectively convey your message and engage your audience.
Share job openings
From job posts shared by companies to recruitment updates from industry leaders, there’s always something new and exciting happening on LinkedIn. So, if you’re looking to stay in the loop or share some great job opportunities with your network.
Share something from a book
As avid readers, we all know that feeling when a particular quote or excerpt from a book resonates with us on a deep level. It acts like a little nugget of wisdom that we want to share with the world. Just like this insightful quote by Dan Koe.
Event reminders
Responding to ongoing trends and events can help you keep up with trends online. You can share new updates, event reminders, upcoming launches, and anything trendy.
8. Share snippets of communication & add hashtags
You can share funny, valuable, informational, or any other general snippets on your LinkedIn posts. These can be with a conversation between you and your friend, any top-content creator, a general meme, etc. It will create a deeper, more personal connection between you and your audience.
Here we spotted Teslimat Ishaq sharing a chat snippet with one of her friends on LinkedIn.
Add hashtags
Adding relevant hashtags to your LinkedIn posts can ultimately bring up your posts. It’s a crucial part of LinkedIn SEO. So, if you want to stay at the top, add useful, popular hashtags to your posts. Though the most trending hashtag on LinkedIn right now is #strategy – 5,064,006 followers,
#culture – 4,728,967 followers
#fashion – 4,215,758 followers
#business – 3,663,739 followers
#networking – 3,566,063 followers
#hiring – 2,443,907 followers
#health – 2,270,357 followers
#inspiration – 1,145,015 followers
9. Share inspiring stories
Have you ever found yourself in a situation where you don’t feel like creating unique, new LinkedIn posts? We’ve all been there. Whether it’s a lack of inspiration, a busy schedule, or simply feeling unmotivated, it’s completely normal to experience a temporary slump in your social media activity.
Here’s a genius yet creative idea. Share inspiring yet motivational stories on LinkedIn. It can be your personal story (User Generated Content) or someone else story.
We loved how Matt Swin on LinkedIn shared a post inspired by the global superstar Weekend’s life:
Matt shared 3 branding lessons to learn from Global Superstar The Weeknd. How the artist is making serious waves in the industry. Guinness World Records declared that “The Weeknd is officially the world’s most popular artist.”
10. Make bold predictions
Let’s say you notice that everyone is following the same trend. And you also wanna pull up something regarding that trend but with a sense of spice and curiosity.
You can always share your opinion on future industry trends or make a bold prediction related to market changes.
Still confused? Check out this post by Tim Stoddart
How Tim shared a short-form content-making prediction regarding AI. However, the best thing about making predictions is that you are neither right nor wrong.
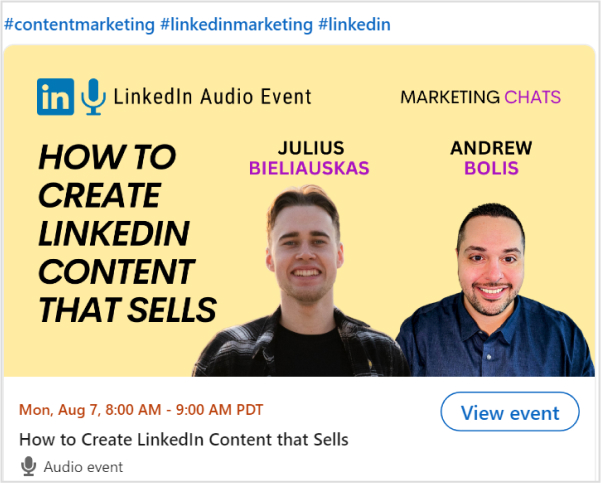
11. Try LinkedIn live
Live videos have a massive 24x engagement rate and 7x more reactions. So if you want high engagement on your profile, share live content in unique ways. For example,
As a result, both creators will grab high engagement and high-quality leads, as they will be assisting people with their LinkedIn branding tips and relevant content.
12.Create appreciation or celebration posts
When facing writer’s block or running out of ideas, remind yourself of Newton’s law “every action has a reaction.” Similarly, this goes for LinkedIn content strategy as well.
You can create engaging posts through feedback or a response. It could be a praise, a celebration, a myth, or a frequently asked question. You can even look back to a milestone that you achieved or something you regret.
Still confused? Have a look at Paul Starbuck’s celebration post on LinkedIn.
Do you want to take full advantage of your marketing efforts? Posting on LinkedIn should be a crucial part of your LinkedIn content strategy. As 92% of B2B marketers use LinkedIn to find quality content.
That said, it’s no secret that content fuels your social media marketing engine. So put out helpful content to engage the readers. Here are a few tips for a perfect LinkedIn content strategy.
Connecting with the right audience
Statistics showed that most LinkedIn users worldwide are between 25-34 age groups. So in order to maximize your brand content ROI. It’s necessary to take the right audience in the loop.
Engaging with people
You can boost your LinkedIn engagement rates using these tips.
Keep your profile updated to keep things fresh
Showcase your work on LinkedIn with engaging descriptions
A great profile photo and cover increase engagement
Helping others with no expectations
Post regularly and be active on LinkedIn
Put out the best content
Listen up, folks! The secret to social media success is as simple as sparking conversations with your amazing content. It doesn’t matter what you’re into, just get those chats rolling and watch the magic happen. Once people notice a healthy discussion, they start jumping on the bandwagon. And that’s how most brands win attention on social media.
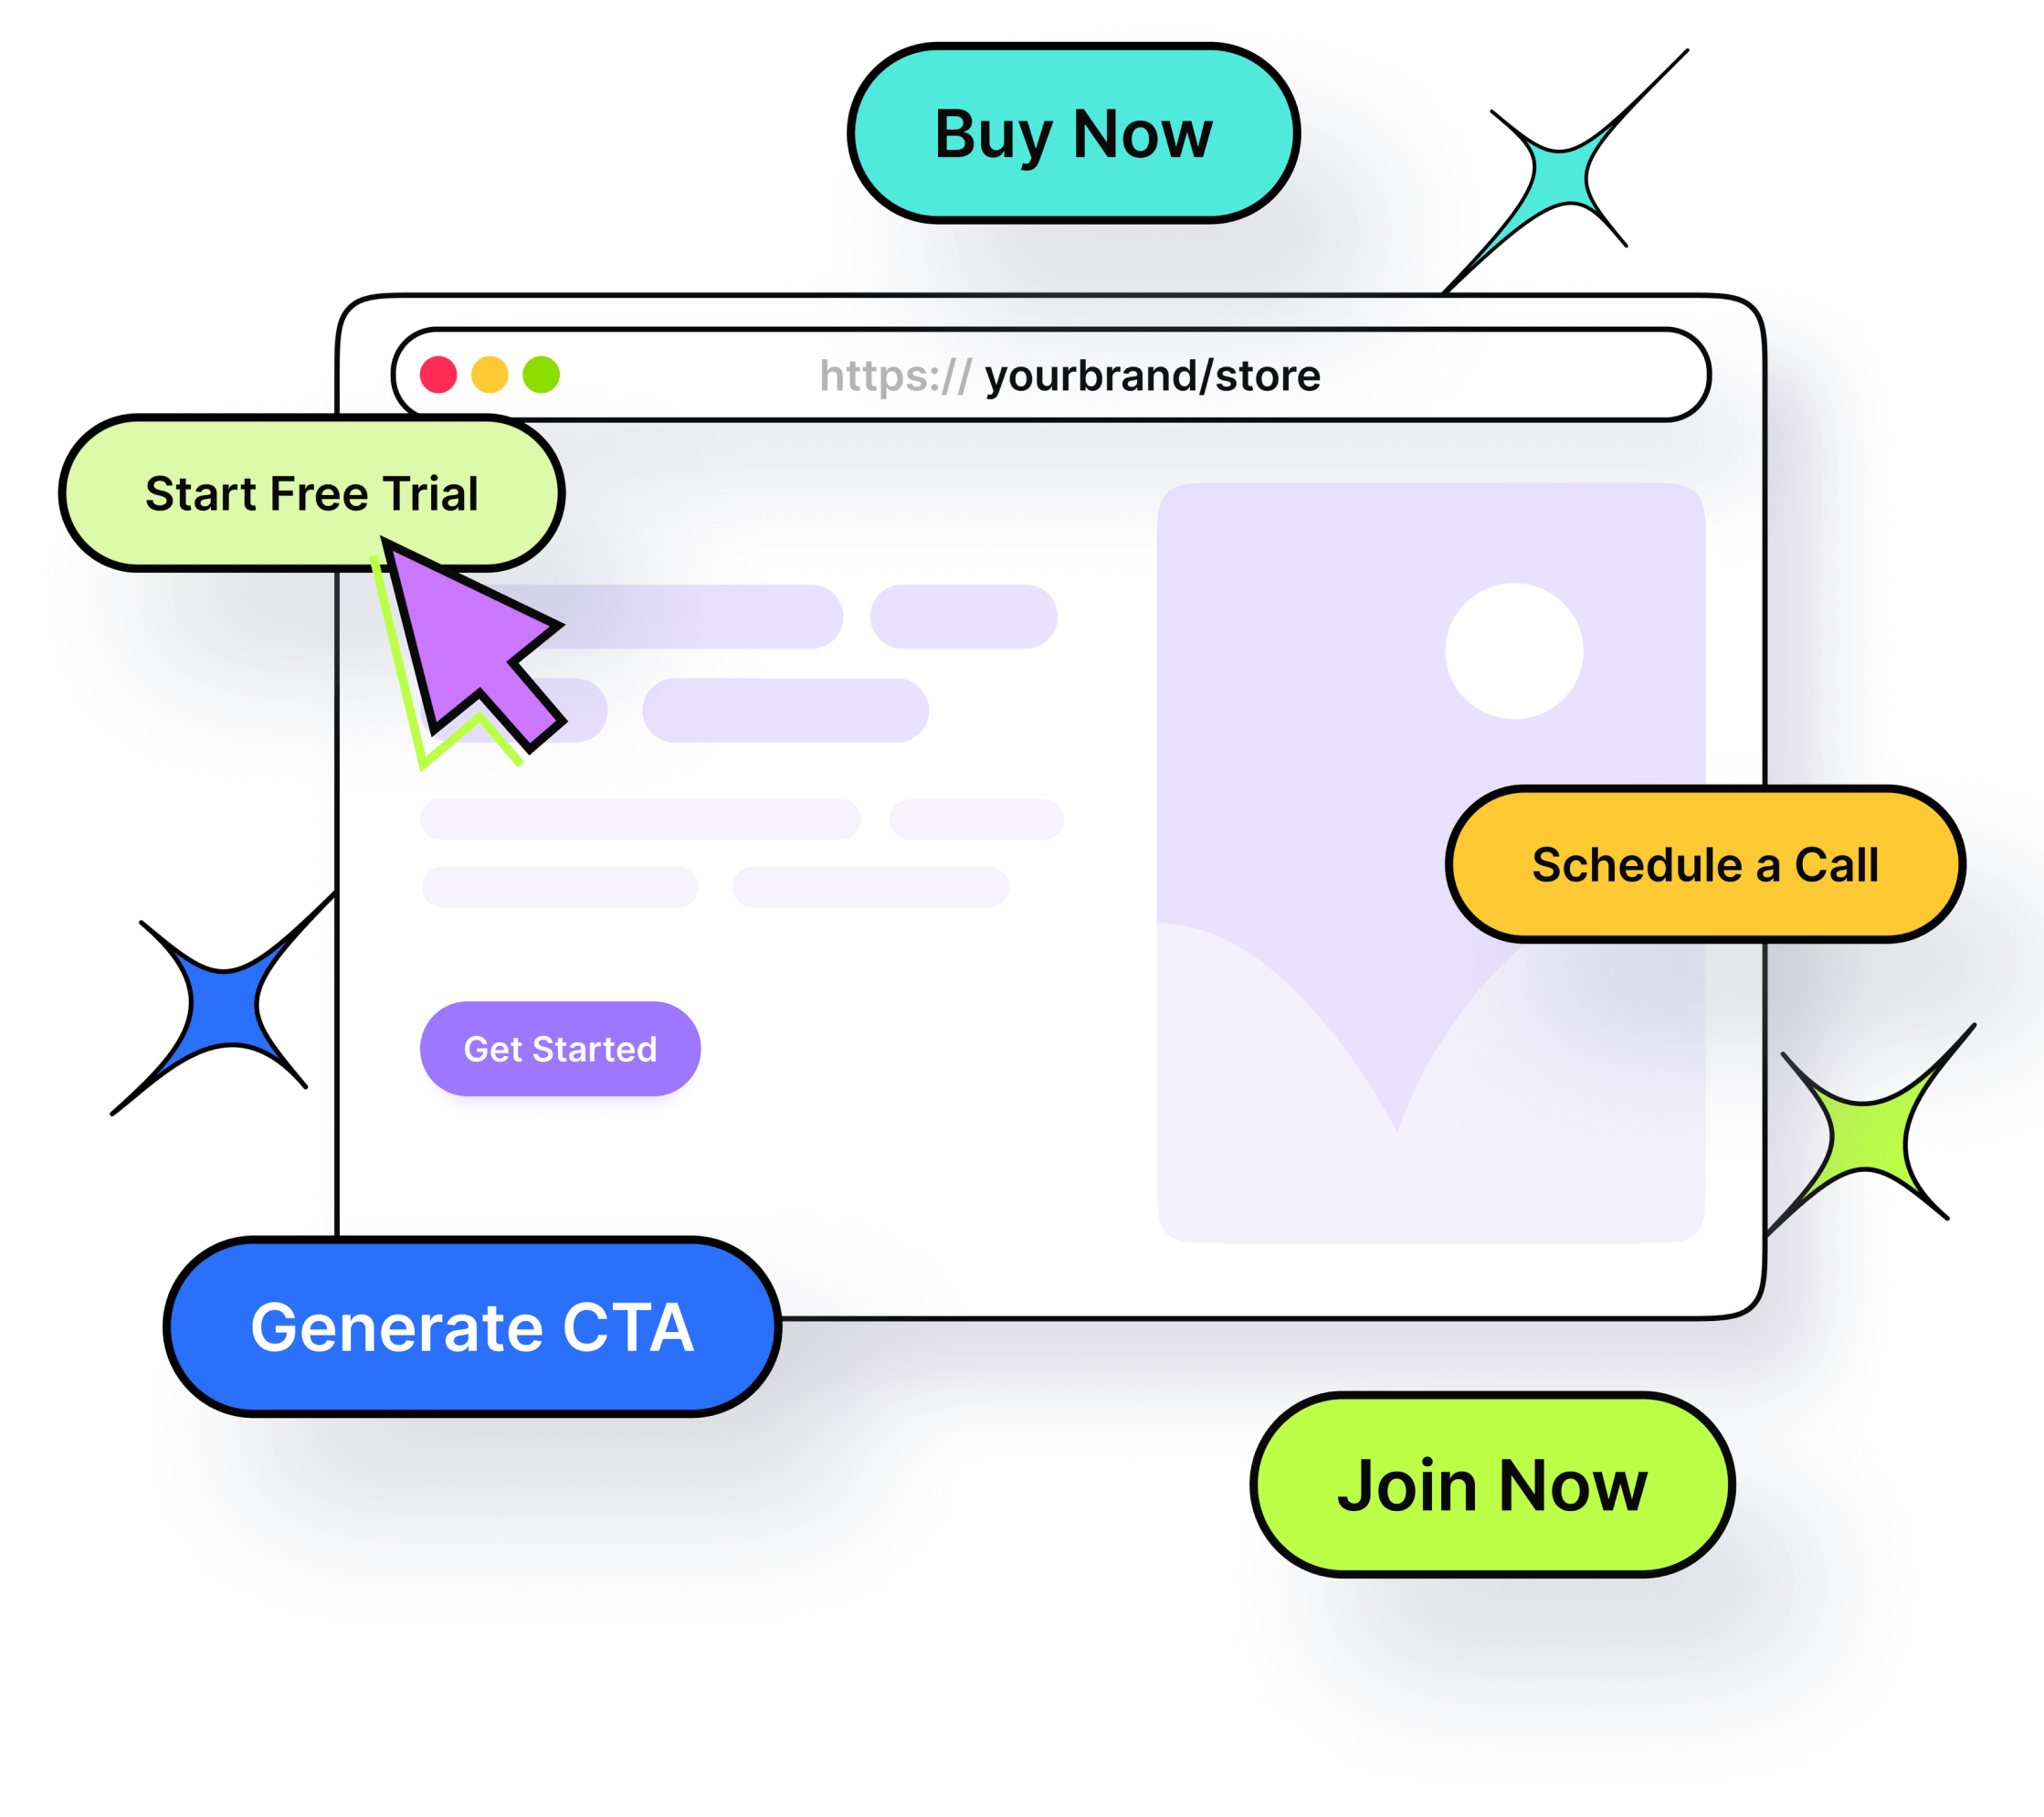
Use Branded Links
LinkedIn is the best source to generate leads, as it is more effective compared to Facebook and Twitter. Rich leads can be grabbed by sharing branded URLs within your posts.
Branded short links and CTA’s have proven successful for specific marketing campaigns. They are good for company branding and for analyzing your campaigns.
Note: By using a custom URL shortener, you can turn long resource links into clean, branded URLs that look neat in your posts and are easier for your audience to click and remember.
So, that’s it, guys! We appreciate the dedication to reading to the conclusion. Your time and effort are very much appreciated.
Frequently asked questions
What is a good first LinkedIn post?
A good first LinkedIn post introduces you professionally, showcases skills, and expresses passion for your field. Keep it concise, engaging, and include a professional photo. Share goals or recent achievements for a positive impression and networking opportunities.
What is the best time to post on LinkedIn?
– Post during business hours – Posting on Tuesdays and Wednesdays
What is a viral LinkedIn post?
Any posts above 100 thousand impressions and 500+ likes is considered as a viral post.
What is an impression on LinkedIn?
An impression on LinkedIn refers to the number of times a post or content is displayed on users’ feeds or profiles. It represents the potential reach and visibility of the content, indicating how many users have been exposed to the post, regardless of whether they engaged with it.
One urgent email or one simple click, and a whole marketing campaign can go off the rails. URL phishing thrives on that split second when someone taps a link without thinking.
Research shows that billions of spam emails are sent every day, and phishing links sit behind most data breaches reported by companies worldwide.
For teams who are pretty passionate about links, those everyday URLs can turn into silent entry points for attackers. Stolen logins, drained ad accounts, fake checkout pages, and damaged brand trust are all very real, possible outcomes.
The good news is that this threat is fairly predictable once you understand how it works. This guide breaks down what URL phishing is, how attackers design their tricks, real-life examples, and clear steps to stop them.
Let’s start with a quick overview of what this digital world attack actually means!
What is URL phishing: A brief overview
URL phishing is a type of phishing attack that uses a “deceptive link” as its primary weapon.
Attackers send emails, texts, social posts, or ads that point to URLs they control, but dress them up to look safe and familiar. The victim lands on a fake page that copies a real site, such as a bank, ecommerce store, ad platform, or company login portal.
The primary goal is simple, i.e., to get the person to enter something of significant value. That might be usernames and passwords, card numbers, one‑time codes, or even full identity details. Sometimes the fake page also drops malware or steals active browser sessions in the background.
What makes URL phishing so dangerous is that a single convincing link can bypass firewalls and security tools, because the victim opens the door by clicking it.
Why is URL phishing important?
URL phishing matters because it is one of the most common starting points for data breaches and account takeovers.
Studies have shown that phishing plays a key role in the majority of reported infringements, and the number of phishing sites has grown several times over in just the last few years.
Setting up a fake website and buying a domain is cheap, so attackers can easily send millions of messages at a very low cost.
For marketing teams, agencies, and online businesses, this attack hits right where work happens: email campaigns, social posts, ads, and landing pages filled with links.
Note: One successful phishing URL can compromise brand accounts, ad platforms, payment systems, or CRM tools in minutes. Understanding the URL phishing meaning, how it works, and where it shows up is now basic security knowledge, not just an everyday IT problem.
How does URL phishing work?
At a high level, URL phishing follows the same script. An attacker sends a message with a crafted link, stirs up urgency or curiosity, and funnels the victim onto a fake page.
That page collects data, then often bounces or redirects the user to the real site, so nothing feels wrong. Under the hood, though, there are several specific tricks you will see again and again.
URL phishing with masked links
Masked links hide the real destination behind friendly text. On an email or web page, the visible part might say “https://yourbank.com” or “View invoice”, while the underlying URL points to a completely different location. Since most people click the blue text without checking the status bar, attackers count on this gap.
Note: Masked links show up in email campaigns, PDF invoices, and social posts, and they are a core building block of many URL phishing types or schemes.
URL phishing with open redirect
Some trusted sites use redirect parameters, such as “?redirect=” or “?url=”, to send visitors to another page after login or tracking.
If these redirects are not locked down, attackers can seamlessly plug a malicious address into that parameter. The phishing link then starts with a real domain, but ends on the attacker’s page. This makes the URL look safe at a glance and helps it slip past filters.
Note: Open-redirect abuse is common in phishing emails that claim to come from well‑known brands.
URL phishing via similar-looking domains
Another typical URL-phishing style relies on domains that look almost identical to legitimate ones.
Scammers register addresses with minor spelling changes, extra words, or swapped characters. For example, “paypaI.com” with a capital “I,” or “secure‑yourbank‑login.com”.
Some even use characters from other alphabets that look like normal letters, which is where “IDN homograph tricks” come in. To a busy reader on a phone, these fake domains can pass as the real thing.
Types of URL phishing
URL phishing is not a single trick; it is a family of methods focused on altering or hiding how a URL looks. Most real attacks combine two or three of these styles at once.
Knowing the main URL phishing types makes it much easier to explain risks to your team and to spot red flags in daily work, efficiently.
Link masking
Masked links appear to point to one thing but send you to another. The clickable text, button label, or even preview image suggests a trusted destination, but the “href” or underlying address points somewhere else.
Marketers use safe link masking to create clean, trackable, and SEO-friendly URLs, yet attackers mimic the same approach to hide phishing pages behind “reset password” buttons or fake unsubscribe links.
Note: Hovering over the link on desktop is often enough to reveal the mismatch.
Open redirects
With open redirects, the first part of the link uses a well‑known domain, which builds quick trust. Buried after a parameter, though, is the actual malicious URL that the redirect will send you to. Email filters and users may focus only on the front of the link and miss the rest.
Note: Because open redirects target real websites rather than just fake ones, they can be harder to block without smart URL filtering and scanning.
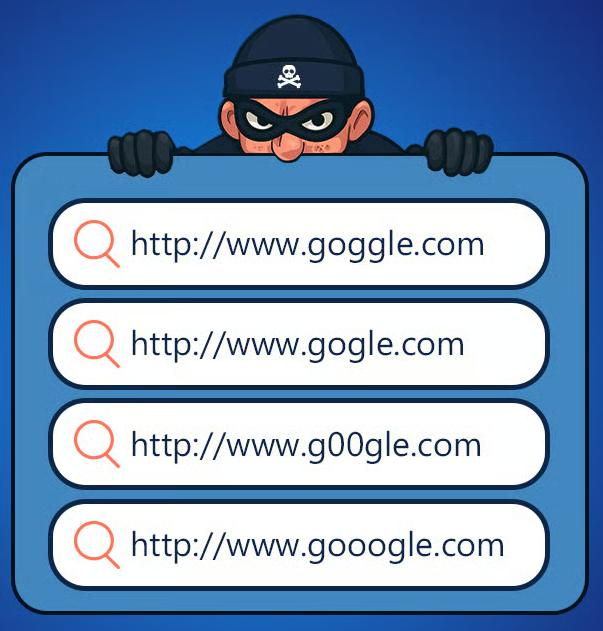
Typosquatting
Typosquatting, sometimes called “URL hijacking”, uses domains that look like common typing mistakes. An attacker might buy “goggle.com” or “facebokk.com” and fill them with phishing pages or ad traps.
Users might land there by typing the address wrong, or by clicking a link in a message where the typo is easy to miss.
Note: This method works exceptionally well on smartphones, where small screens make subtle spelling changes hard to see.
IDN homograph attack
IDN homograph attacks use characters from other writing systems that look like regular Latin letters. For example, a Cyrillic “ä” can look the same as an English “a”.
Spammers combine these characters to build domains that appear identical to real ones when pasted into a message.
Note: To the human eye, “ɢoogle.com” or “payάbill.com” looks normal, but the browser treats them as separate domains controlled by the spammer.
Doppelgänger domains
Doppelgänger domains remove or rearrange dots in ways that trick people and, sometimes, internal tools. Instead of “mail.company.com”, the attacker might register “mailcompany.com”. In a long email header or auto‑generated link, that missing dot can be tough to notice.
Note: These domains are often used for internal phishing, targeting staff who expect messages from systems such as HR, payroll, or CRM tools.
HTTP/HTTPS phishing & spoofing
Many people see a padlock icon in the URL address bar and feel safe. Attackers take advantage of that habit in two ways:
Some phishing sites still use plain HTTP, hoping rushed users will not notice the missing padlock at all.
Others get a valid TLS certificate, so the fake site shows HTTPS and a padlock just like the original.
In simple words, HTTPS only tells you the connection is encrypted, not that the site itself is honest, so you still need to read the domain name carefully.
Common URL phishing methods
Once cybercriminals have a deceptive link, they still need to deliver it and dodge basic filters. Here are some of the most typical methods they use to make URL phishing harder to spot in real inboxes and feeds.
Mixing legitimate links with malicious links
Instead of sending a message with one shady link, attackers blend a bad URL into a message full of normal ones. For instance, an email might include real links to a privacy policy, a help center, and social profiles, plus a single phishing URL on a “verify now” button.
Basic scanners that only flag messages full of flawed links may let this pass. To a human reader, the mix of known and unknown links can also feel more trustworthy.
Abusing/exploiting URL redirects
Intruders often chain redirects together so that the first few steps look normal. A phishing link might go from:
A URL shortener → to a tracking domain → to an abused open redirect on a real site → and finally to the fake page.
Each step makes it harder for simple tools to see the end destination. Shortened links are especially popular here, since they hide the full path.
This is the main reason why any short URL generator used in campaigns should be tied to a transparent review process, and destinations should be checked for phishing behavior before links go live.
Hiding malware inside image files
Some campaigns do much more than steal passwords. They also aim to drop malware, like info‑stealing trojans or remote access tools. One trick is to hide harmful code inside image files or to make the entire email or message a single clickable image.
Filters that look mostly at text might miss it. When the victim clicks the image, they may download a file or open a page that abuses a browser flaw. From a user’s point of view, it just looked like a harmless graphic or banner.
Major signs of a URL phishing attack
The good news is that URL phishing leaves clues behind. When people know how to identify suspicious or malicious attempts, those attempts become apparent. They no longer hide among the noise, even when there is a lot going on.
Camouflaged URLs
If the visible link text or button label does not match the address shown in the status bar when you hover, that is a strong warning sign. Another clue is when a PDF or image has clickable areas that jump to unrelated domains.
Note: Any mismatch between what a link claims and where it goes deserves a slow, careful look.
Urgent/threatening SMS notification
Phishing texts often claim that an account will close, a package will be returned, or a fine will be added unless the person clicks right away. They may use generic names like “Bank Support” or “Delivery Team” and link to shortened URLs.
Real companies rarely threaten customers in this way over SMS, so urgency plus a link from an unknown number should raise suspicion.
Subdomain-spoofed URL
Attackers love domains where the real brand name sits on the left, not at the end. Think “paypal.security‑alert.com” instead of “paypal.com”. Many people scan only the first part and ignore the actual registered domain on the right.
Note: When reviewing links, the part directly before “.com”, “.net”, or another main ending (i.e., TLD) is what really counts.
Unknown / Red-flag senders
If the sender address appears random or misspelled, or does not match the name shown in the display field, be careful.
Even if the name says “Support”, the real email or text might come from a throwaway domain with a long string of numbers.
Note: Combine that with an unexpectedly long URL, and you’ll have a strong hint of URL phishing at work.
Extra characters or symbols in links
Phishing URLs or links often use extra dashes, numbers, or words like “verify,” “secure,” or “update” glued next to brand names. For example, “secure‑yourbank‑login‑247.com”.
While some companies use long tracking URLs, an overload of symbols around a brand name, especially in a message you did not request, should make you pause and think for a while.
Misspelled web addresses
Simple spelling errors in the domain, like “faceboook”, “linkedln”, or “goggle”, remain very common. On mobile devices, these mistakes are easy to miss.
Note: Any time a link to a well‑known site looks slightly off, type the address manually in the browser instead of tapping the link.
To recap the main signs, you can think in terms of this quick reference:
Sign
What to look for
Mismatched link text
Button or text says one thing, but the status bar shows another domain
Extreme urgency
Threats or time pressure, plus a link from an unknown sender
Odd subdomains
Brand name at the start, not near the end of the domain
Strange sender address
Display name vs. real email does not align
Extra symbols/keywords
Many dashes, numbers, or “secure/verify/update” keywords around a brand
Spelling mistakes
Minor typos in famous domains
How to identify a URL phishing attack
Spotting URL phishing is mostly about slowing down and checking a few details more critically and thoroughly. A quick, repeatable routine can block most attacks before they go anywhere near your credentials.
Double-check the URL
Before clicking, hover over the link on desktop or press‑and‑hold on mobile (without opening) to see the full address. If it seems off, copy and paste it into a plain text editor to read it clearly and carefully.
When in doubt, skip the link and go directly to the site by typing the address yourself or using a saved bookmark.
Inspect the domain name spelling
Focus on the part of the URL right before the main ending, i.e., the top-level domain such as “.com” or “.org”. Look for:
swapped letters,
extra words,
or numbers added to a brand name.
Compare it to how the real site is spelled or previous emails you trust.
Carefully review all the content
Phishing pages and emails often reuse logos and colors but may miss details in wording and layout. Watch for:
These small slips, paired with a link that asks for sensitive data, are a strong signal of trouble.
Verify the connection protocol (HTTPS)
Check for “https://” and a padlock in the browser, but treat it as just one check, not a final verdict. Click the padlock to see who the certificate was issued to and whether it matches the brand you expect.
If the page asks for passwords or payment data over plain “http://” with no padlock, close it right away.
Real-world examples of URL phishing
Real attacks tend to follow familiar storylines, and reviewing URL phishing examples can help teams recognize these patterns quickly. Walking through a few common ones makes it easier to brief your team and spot similar patterns in inboxes and chats.
Suspicious-login / Account-breach phishing alert
A message arrives in your inbox claiming there was a “suspicious login” to your email, ad account, or social profile. The email uses your logo, includes rough location details, and pushes a “Review activity” button.
That button leads to a fake login page with a URL that looks similar but not exact. Once you enter your credentials, the attacker can log into the real account, change settings, and lock you out.
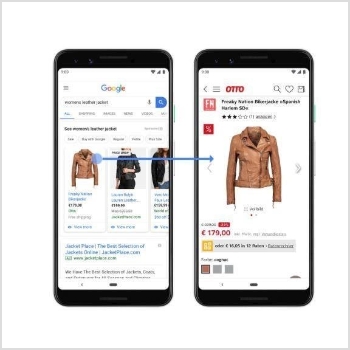
Fake e-commerce scam
Someone searching for a popular product finds a top‑ranked ad or link with a slightly misspelled brand domain. The site looks like a real store, complete with realistic product photos and reviews.
At checkout, the page asks for full card details and sometimes extra personal data “for verification”. The victim might never receive a product, but their payment details are now in criminal hands.
Donation-scam alert
During a natural disaster or viral news event, emails and social posts appear asking for urgent donations. They copy the name and logo of a well‑known charity, but the links lead to look‑alike domains that accept card payments or crypto transfers.
In some cases, the page also prompts visitors to log in to their email or payment account via a fake portal, capturing even more sensitive data.
FedEx delivery phishing scam
A text or email claims a FedEx package cannot be delivered due to an address problem or an unpaid customs fee. A short link promises a quick way to “reschedule delivery” or “pay a small charge”.
The link goes to a fake shipping page where victims enter card information or login details for a delivery account. Spammers then use that data for fraudulent purchases or to target other services that reuse the same password.
Best practices for preventing URL phishing
Intercepting or blocking URL phishing takes more than one tool or tip. The strongest defenses combine technology, smart habits, and clear processes that fit how teams already work.
Here’s how you can protect yourself from URL phishing:
URL filtering
URL filtering compares web addresses against lists of known bad sites and policy rules before allowing access. They can block entire categories, such as phishing, malware, or newly registered domains.
In a business network, this acts like a safety net under your users, catching many dangerous clicks before a page even loads.
Link protection
Modern email and collaboration tools can rewrite links so that every click first passes through a scanning service. These systems scan URL phishing patterns in real time, follow redirects, and block access if the final destination looks suspicious.
For marketing and agency work, this adds a background guardrail around campaign links and inbound messages.
Security hygiene
Basic habits go a long way:
Multi‑factor authentication for important accounts
Strong, unique passwords stored in a password manager
Regular software and browser updates
Limited use of admin accounts for daily work
These steps reduce damage even if a phishing URL steals a single password, and they close many holes that malware tries to exploit after a bad click.
AI-based protection
Many security platforms now use machine learning to spot previously unseen URL-based phishing. Instead of waiting for a domain to appear on a blocklist, they look for patterns in the URL, page content, hosting setup, and behavior.
An AI‑driven URL phishing detection system can flag suspicious sites seconds after they appear, even in fast‑moving campaigns.
Cybersecurity & security awareness training
People remain the last line of defense, so training should be part of everyday work, not a one‑time event.
Short sessions and phishing simulations teach staff what a phishing URL example looks like, how attackers push emotional buttons, and how to report concerns.
Over time, this builds a shared habit of pausing before clicking any link that seems out of place.
Check the domain’s reputation
Before trusting a link, especially one used in paid campaigns or newsletters, check the domain with:
reliable reputation services,
browser safety checks,
or built‑in security tools from your email provider.
These checks can reveal if a domain is very new, tied to prior abuse, or listed in threat feeds. For brand protection, monitoring for look‑alike domains related to your name also helps spot problems early.
Warnings for suspicious domains
Modern browsers and security products often display full‑screen warnings when a site is known to be phishing or malicious. Teach teams never to click past those alerts just to “get work done faster”.
If a warning appears on a link used in a campaign, stop and review where that URL came from before doing anything else.
Use a URL phishing scanner
Dedicated tools can scan URLs for phishing signs before anyone visits them. These scanners follow redirects, check SSL, compare against threat intelligence, and sometimes even analyze page content in a sandbox.
Note: Building a quick “scan URLs for phishing, then share” step into content and campaign workflows sharply reduces the odds that a bad link ever reaches your audience.
How does Replug help businesses defend against URL phishing attacks?
For marketers, agencies, and online businesses, links are vital daily, and that makes them a favorite target for attackers.
Replug is built as a short URL generator and an all-in-one link management platform that keeps those links organized while still giving teams the tracking and branding they need.
Instead of dealing with risky redirects or generic shorteners, you manage every link from a single, hassle-free central dashboard.
A complete link management solution
for marketing professionals & agencies.
Try Replug for free
Here is how Replug fits into a safer link strategy:
Centralized link control
When you create or edit a link in Replug, you do so from a single dashboard rather than across multiple tools. This makes it easier to review destinations before sharing them, retire old or suspicious URLs, and keep a clean inventory of links used across email, ads, and social posts.
Custom domains & branded links
With these, Replug turns long, messy addresses into clean URLs that clearly belong to your brand. Audiences learn to recognize your branded links and can spot impostors that try to copy them.
Note: This simple visual cue makes it harder for attackers to use random short links or look‑alike domains to impersonate you.
HTTPS & controlled redirects
Replug serves short links over HTTPS by default. Because every redirect runs through your chosen domain, your team can standardize how links are created and reviewed, rather than relying on unknown public shorteners. This reduces the risk of hidden redirects sneaking into your campaigns.
Link rules & campaign structure
Teams can agree on internal rules (e.g., which domains are allowed in campaigns, or which roles are allowed to publish new links), then apply those rules inside Replug workspaces. Consistent naming, tags, and UTM parameters also make it easier to spot any URL that does not look like it belongs.
Analytics & anomaly spotting
Replug’s click and traffic reports show where visitors come from, which devices they use, and how often they click. Sudden spikes, traffic from unexpected regions, or unusual referrers can act as early warning signs that a link is being abused or that someone has copied a campaign URL for phishing.
Agency & multi-brand support
For agencies and partners, Replug’s workspace structure and branding options keep everything organized under your own domain while still centralizing link management. You can run many client workspaces, apply consistent link practices across all of them, and quickly adjust or disable URLs if something suspicious appears.
QR codes & cross-channel links
Replug can easily generate QR codes that point to your branded short URLs, so the same review and tracking process you use for links extends to printed material and events. If you need to update a destination due to a phishing concern, you can change the target behind the short link without reprinting the QR code.
Used this way, Replug becomes a controlled hub for your marketing URLs. It does not replace dedicated security products, but it makes it far easier for teams to share clear, branded, and trackable links while keeping a close eye on how those links are used.
Summing up
URL phishing is not some rare, advanced hack; it is a daily threat built around simple tricks with links. Attackers twist URLs through masking, typos, redirects, and fake HTTPS to pull people onto convincing copycat sites and steal whatever they can.
By watching for some unique signs in links, building habits like double‑checking domains, and using tools that scan URLs for phishing, teams can cut this risk to a much lower level.
If your work depends on sharing links with customers or followers, using a carefully managed short URL generator should be part of that plan.
Replug.io gives you branded and trackable links, centralized link control, and HTTPS by default, so every click feels safer for both your team and your audience. It is well worth giving Replug a try!
Frequently asked questions
How to report URL phishing?
First, report the phishing message to your internal IT or security team so they can warn others and block related URLs. For a more detailed scrutiny, you can also forward full phishing emails, including headers, to national bodies such as the U.S. Cybersecurity and Infrastructure Security Agency, and use in‑product report buttons in mail or browser apps.
What is an example of URL phishing?
A common phishing URL example is an email that appears to come from your bank and says, “Confirm your account”. The button text shows the bank name, but the real URL is something like “https://secure‑yourbank‑login‑help.com”, which is not the bank’s domain. The fake page then collects your username, password, and sometimes one‑time codes.
How to detect URL phishing using machine learning?
Machine learning models analyze many features at once, such as domain age, URL length, character patterns, hosting data, and page content. A URL phishing detection system can learn from past attacks and flag new URLs that look or behave like known phishing sites, even before they appear on public blocklists.
How do attackers deliver URL phishing attacks?
Attackers send phishing URLs via email, SMS, messaging apps, social DMs, fake ads, and even via QR codes on printed materials. They often spoof trusted brands, fake order updates, or support tickets, and they use urgent language to push quick clicks before people stop to inspect the link.
How to spot a phishing URL?
Look closely at the domain name, especially the part right before “.com” or similar endings, and watch for spelling errors or extra words. Check whether the message was expected, review the page design and wording, and be cautious if the site asks for passwords or payment data after you followed a link instead of typing the address yourself.
What to do if you clicked a suspicious or phishing URL?
If you clicked but did not enter any data, close the tab and run a quick antivirus scan to be safe. However, if you entered your credentials, change those passwords right away, turn on multi‑factor authentication, and tell your IT or security team so they can watch for suspicious activity and reset any affected sessions.
Provide a sample phishing URL for testing purposes?
Do not use live malicious URLs for training or tests. Instead, work with your security team to set up safe demo domains in a controlled lab, or use documentation domains such as “example.com” while you explain how typos, extra words, or strange websites or subdomains might look in a real attack. This keeps practice safe while still teaching people what to watch for.
Instagram has transitioned from being a mere social media platform for image sharing to a crucial marketing channel for businesses. With its extensive and engaged user base, it has become a space where products meet consumers, and connections evolve into transactions.
However, successfully leveraging Instagram for sales involves more than just visually appealing images—it requires a strategic approach.
Why sell your product or services on Instagram?
Selling your products or services on Instagram can significantly amplify your sales and broaden your audience reach. Here’s why:
Global popularity:
Instagram stands out as one of the most widely used social media platforms globally. By showcasing your products here, you tap into a vast user base, increasing your chances of discovery by a diverse audience.
Massive user engagement:
Social media users dedicate an average of 145 minutes, roughly 2 and a half hours, each day to their online interactions. With over a billion users worldwide, Instagram provides an extensive platform, ensuring your content reaches a considerable number of individuals.
Interactive platform:
Instagram offers a highly user-friendly environment for product sales. It allows creators to directly engage with their followers, fostering meaningful relationships. The simplicity of posting photos and videos serves as an effective means to promote your products and connect with your audience.
How to Sell on Instagram: Top 10 Strategies
Let’s delve into the essential steps to capture the attention of Instagram users and convert them into customers.
Set up your Instagram business account
Commence by ensuring that your Instagram profile is set up as a business account. This unlocks features such as Instagram Insights, contact information, and promotional tools, essential elements for driving sales. Optimize your profile by including a compelling bio, clear contact details, and a link to your website.
Tip: To enhance link accessibility, consider using Replug Link-in-bio, enabling the creation of a custom landing page containing multiple essential links.
Building robust brand awareness on Instagram involves a combination of artistic flair and strategic planning. Define your brand’s identity and values, emphasizing what sets you apart. Maintain consistency in visual aesthetics and messaging to create a recognizable and trustworthy brand image.
Replug’s short URLs can be advantageous here, providing a clean and uncluttered appearance while tracking engagement with individual products or campaigns. Engaging storytelling, facilitated by Replug’s analytics, adds a personal touch to your brand.
Create compelling visual content
In the visually-driven Instagram ecosystem, high-quality images and videos are not just aesthetic enhancements but crucial elements influencing sales.
Craft content that creatively showcases your products, utilizing Instagram’s visual features purposefully. Experiment with different formats while ensuring that your brand’s identity remains at the forefront of presentation.
Develop engaging captions and hashtags
While visuals catch the eye, captions add depth and substance. Craft captions aligned with your brand voice that encourage interaction.
Effective use of relevant hashtags enhances post visibility, acting as SEO for the Instagram algorithm. Research and select hashtags that resonate with your brand and specific posts, avoiding excessive and irrelevant tagging.
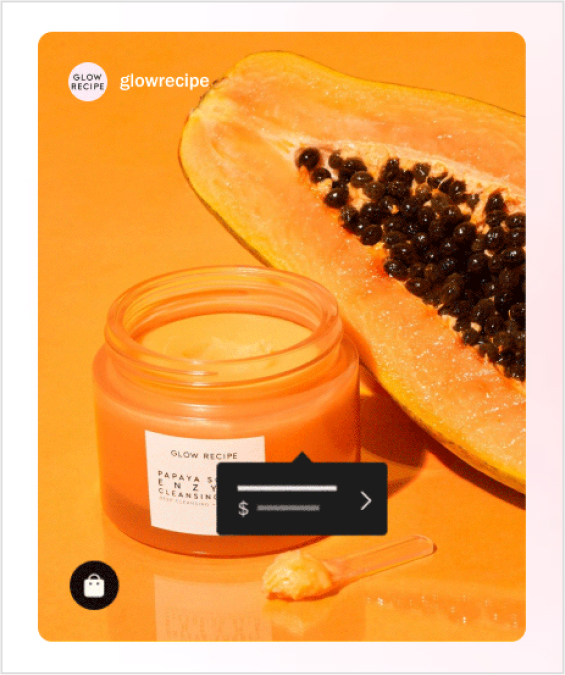
Create saleable posts
Saleable posts provide an interactive shopping experience directly within Instagram. To create a saleable post, set up your Instagram account for Sales and tag products in your posts, linking them to your online store. Ensure the post includes high-quality visuals, product tags, brief descriptions, a clear call to action, a “Shop” tab, and a link to your online store.
Tip: Replug’s link tracking can further enhance the analysis of user engagement with your posts.
Make use of Instagram stories and highlights
Instagram Stories offer a dynamic layer to your brand by providing a behind-the-scenes look at your business.
Use features like polls, questions, and stickers to engage your audience in a two-way conversation. Highlights serve as curated galleries, providing a visually appealing and permanent display of your best stories. These features contribute to a more engaging profile for both new visitors and potential customers.
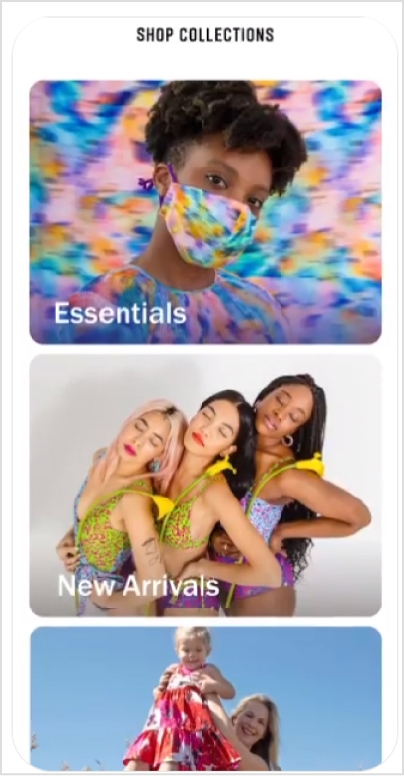
Utilize Instagram Shopping features
Instagram Shopping allows you to create a digital storefront by tagging products in your posts.
This feature transforms the shopping experience into a fluid and engaging process. Craft a visually pleasing journey for users by organizing your products in a way that reflects your brand’s charm.
Collaborate and embrace influencer marketing
Collaborations and influencer marketing are strategic approaches to expand your brand’s reach in the crowded Instagram space.
Select influencers aligned with your brand identity to effectively broaden your audience.
Analyze performance
Sustainable growth on Instagram requires data-driven decisions.
Utilize Instagram Insights to understand user engagement and combine it with Replug’s link tracking for more detailed analysis. This combination allows you to refine your strategies, better understand user behavior, and ultimately reach your sales goals.
Optimize Instagram link in bio
The Instagram Link in Bio feature plays a crucial role in directing your audience to specific landing pages, promotions, or other essential links. Given that Instagram allows only one clickable link in the bio, it’s imperative to make the most of this limited space.
This is where tools like Replug’s Link-in-bio feature become valuable.
By using Replug Link-in-bio, you can create a customized landing page that consolidates multiple essential links. Whether you want to showcase your latest products, highlight special promotions, or provide links to other social media channels, Replug’s Link-in-bio offers an efficient gateway to everything your business has to offer.
Custom Landing Page: Create a landing page that aligns with your brand aesthetics and provides a user-friendly experience.
Multiple Links: Showcase a variety of links, such as new product launches, promotions, or additional social media profiles.
Replug Analytics: Utilize Replug’s analytics to track the performance of each link, gaining insights into which content resonates most with your audience.
Regular Updates: Keep the links in your Link-in-bio updated to align with your current business priorities and campaigns.
Closing note:
As you start your business on Instagram, remember that the platform’s popularity and engaged user base offer a prime opportunity for expanding your reach. Leverage the strategies discussed to not only boost sales but also to cultivate meaningful connections with your audience.
Regularly assess the performance of your strategies, keeping a pulse on audience preferences and platform trends. With dedication and strategic implementation, your Instagram presence can evolve into a powerful tool for driving sales and building a loyal customer base.
A complete link management solution
for marketing professionals & agencies.
Try Replug for free
FAQs
What are the benefits of selling on Instagram?
Selling on Instagram can boost sales and broaden audience reach due to its popularity, massive user base, and engaging platform.
How do I set up a business account on Instagram?
To set up a business account on Instagram, go to your profile settings, select “Switch to Professional Account,” and follow the prompts to fill in business details.
What strategies enhance brand presence on Instagram?
Strategies for brand presence include maintaining consistency in visuals, engaging with followers, and utilizing user-friendly features for product promotion.
Which tools optimize Instagram links for business?
Tools like Replug can optimize Instagram links by providing link tracking, analytics, and customization features for a seamless user experience.
How can I create shoppable posts on Instagram?
Create shoppable posts by setting up Instagram Shopping, tagging products in your posts, and providing essential details to guide users to the checkout page.
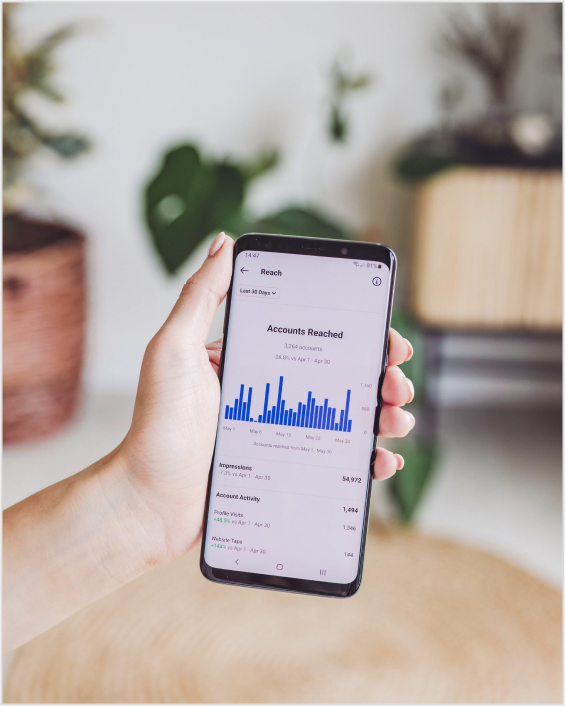
Understanding how to measure engagement on social media is important in today’s dynamic world in which every click, share, and comment shapes your brand’s online presence.
This guide is critical for those interested in tracking social media engagement. It will highlight essential metrics and introduce the capabilities of Replug in this context. So, let’s get started!
Why tracking social media engagement matter?
Social media platforms are not just virtual spaces; they serve as storefronts, customer service hubs, and stages for your brand’s performance. The engagement levels indicate whether your brand’s narrative resonates and if your virtual audience is genuinely interested.
Choosing the right metrics is crucial to avoid misleading data for your team or Facebook ad agency to interpret. The right metrics provide both quantitative data and qualitative insights, offering a comprehensive understanding of audience interaction. Regular social media reporting helps track these metrics effectively and make data-driven decisions for future strategies.
12 essential social media engagement metrics:
Let’s break down the 12 social media engagement metrics and provide explanations for each.
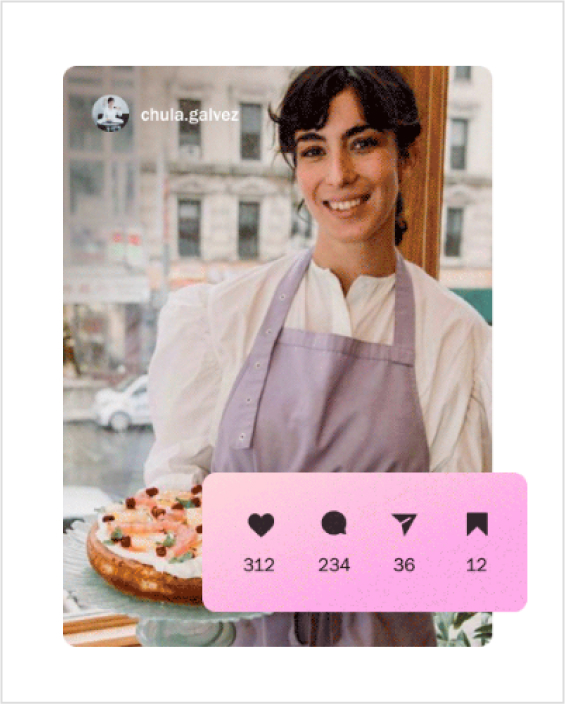
Likes, comments, reactions, shares, etc.
Likes:
Indicates how well your audience receives your content. The more likes, the higher the positive reception.
Comments:
Reflects deeper engagement. Comments often signify that your content has sparked curiosity, agreement, or even disagreement.
Shares:
Equivalent to a digital word-of-mouth recommendation. When users share your content, it demonstrates that they find it compelling and worth sharing with their circles.
Brand Mentions
Captures instances where users talk about your brand, providing insights into brand sentiment, context, and organic reach.
Video views and video completion rate
Video views:
Indicates the reach and initial interest in your video content. Platforms like Facebook count a view when a user watches for more than three seconds.
Video completion rate:
Measures the percentage of viewers who watched the video till the end. A high completion rate indicates engaging content.
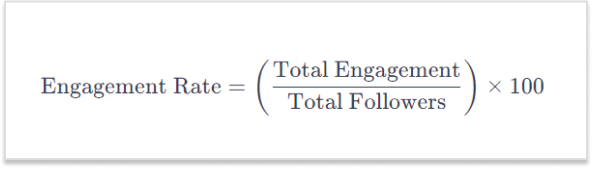
Engagement rate
Offers a holistic view of content performance by combining likes, comments, and shares. It helps understand engagement relative to the number of followers.
Amplification rate
Reflects how share-worthy your audience finds your content. It is determined by the ratio of shares per post to the total number of followers.
Represents the total number of people who have seen your post. It focuses on how many people have been exposed to your content.
Impressions
Total number of times your content has been shown on someone’s screen, regardless of clicks. It indicates how often your content is being seen.
Share of voice (SOV)
Measures how much attention your brand gets compared to competitors. A high SOV means your brand is dominating the conversation in the industry.
Audience growth rate
Measures how fast a brand’s following increases over a specific period. It reflects the brand’s popularity and appeal.
Conversion metrics
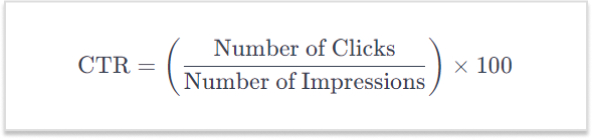
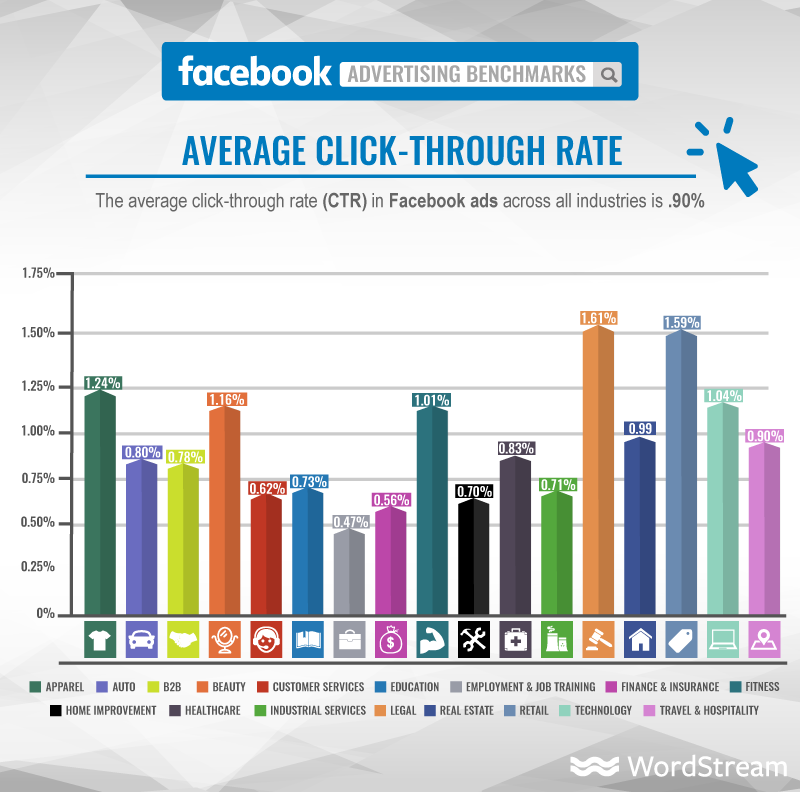
Click-through rate (CTR)
Represents the percentage of users who click on a link in your post. It measures how effective your content is in compelling users to take the next step.
Pertains to visitors landing on your website through direct links from social networks. It reveals how well social media channels drive users to your main platform.
Conversion rate
Measures the percentage of users who take a desired action after interacting with your content, such as signing up or making a purchase.
A complete link management solution
for marketing professionals & agencies.
Try Replug for free
Replug: Your toolkit for social media engagement
Enter Replug.io, a powerful link management tool designed for comprehensive social media performance metrics. Beyond URL shortening, Replug offers a range of features:
Deep dive analytics:
Replug’s analytics transcend mere click tracking. Gain a comprehensive view of user interactions, including their origin, the timing of clicks, and the devices used. This detailed insight empowers brands to refine their social media marketing strategy based on the specific moments when their audience is most engaged.
Branded links:
Move beyond generic links. Replug empowers brands to create short links that are customized and branded according to their preference. These not only enhance brand recognition but also boost click-through rates, as users are more inclined to click on links they trust.
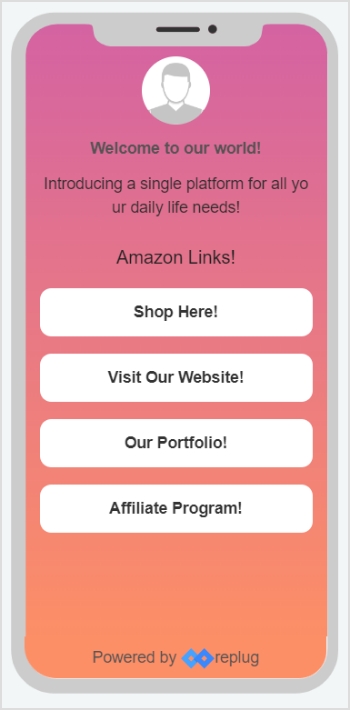
Link-in-bio tool:
Maximizes engagement opportunities within a single trackable link, perfect for platforms like Instagram.
Real-time data:
Things move fast in the digital realm, and Replug ensures you stay ahead. Real-time analytics allow brands to pivot on the fly. If a particular post is gaining traction, you’ll know instantly, enabling you to allocate resources strategically and capitalize on emerging opportunities.
A complete link management solution
for marketing professionals & agencies.
Try Replug for free
Conclusion:
Understanding and measuring these metrics empowers you to assess the impact of your social media efforts, refine your strategy, and build genuine connections with your audience. Each metric plays a unique role in providing insights into different aspects of your social media engagement.
Effective measurement of social media engagement is simplified with Replug’s intuitive features. Beyond mere numbers, Replug provides insights that ensure your connection with your audience is genuine, informed, and impactful.
FAQs
What is social media engagement?
Social media engagement refers to the interaction and participation of users with your content on social platforms. This includes likes, comments, shares, and other actions that indicate audience interest and involvement.
Why is social engagement important?
Social engagement is crucial for building brand awareness, fostering customer loyalty, and driving online visibility. It enhances your connection with the audience, influencing how your brand is perceived in the digital space.
With a staggering 5.04 billion users worldwide, social media has become an omnipresent force, shaping the way individuals connect, share, and engage in the digital era.
What makes URL-shortening tools effective for social media?
URL-shortening tools enhance the user experience by creating concise links and improving aesthetic appeal and character usage. They are particularly effective on platforms with character limits, ensuring a clean and user-friendly presentation.
Why use branded links to improve click-through rates?
Branded links build trust and recognition, encouraging users to click. They convey authenticity and are more likely to be clicked compared to generic links, ultimately boosting click-through rates and enhancing overall engagement.
Is Replug suitable for businesses of all sizes?
Yes, Replug is designed to cater to businesses of all sizes. Its versatile features and scalability make it adaptable to the needs of small businesses, startups, and large enterprises alike, offering a comprehensive solution for social media engagement.
In a digital landscape where email usage continues to soar, with 4 billion users currently, and projections indicating a climb to 4.6 billion users by 2026 (source: Statista), the significance of effective email marketing cannot be overstated.
Sometimes, even the most well-intentioned email marketing can hit a few bumps. For best results, many marketers use a centralized link management platform to organize, brand, and track all their campaign URLs, ensuring every link in your email strategy stays professional and measurable.
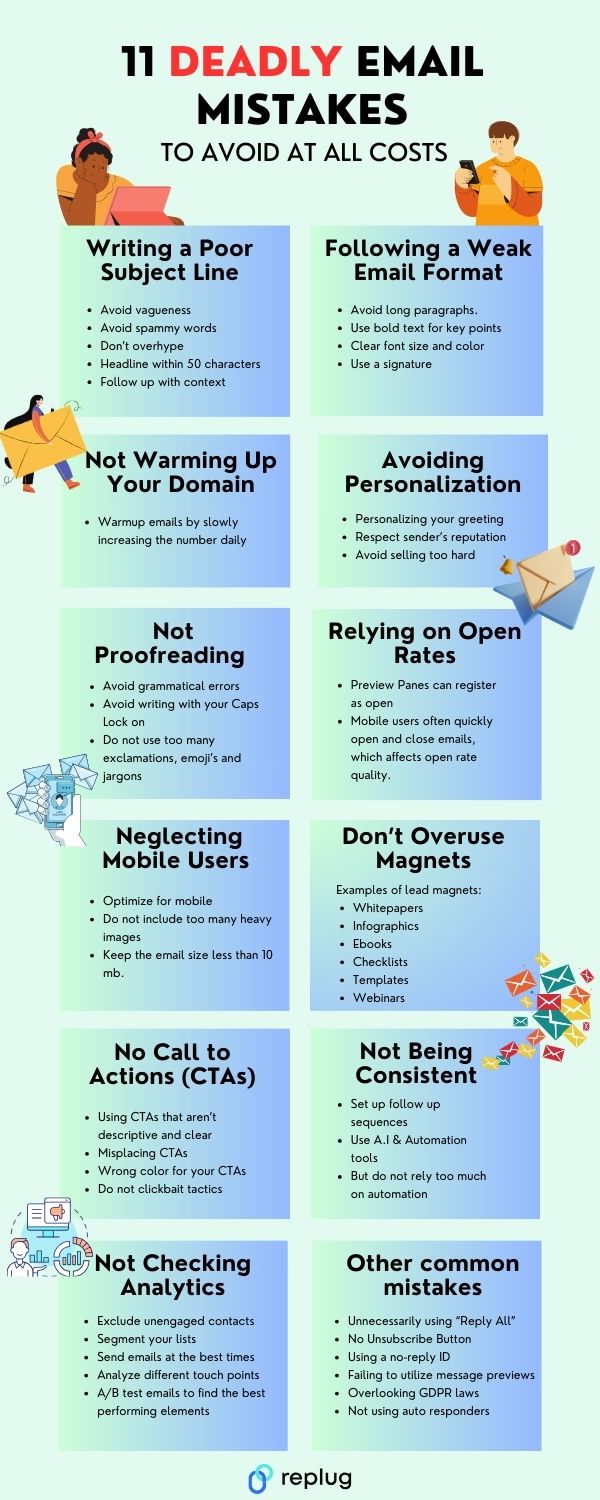
However, let’s take a closer look into the common email mistakes to avoid in email marketing.
To avoid these pitfalls and keep your emails clean and trustworthy, you can use Replug to generate a branded short URL, making every link you send in emails neat, easy to click, and easy to track.
Why do people make email mistakes?
A study by Tessian has reported that 34% people send emails to the wrong person due to the pressure of sending emails quickly. While the remaining identified, fatigue, distractions and overload to be reasons for such email mistakes.
Further, the findings of a survey by Grammarly on workplace emails., reported 93% of participants admitted to making errors in their emails.
Further findings are as below
64 percent of respondents acknowledged making embarrassing typos or grammatical errors.
63 percent reported sending incomplete emails.
50 percent stated that the recipient misunderstood their intended message.
Common email mistakes
The most common errors while sending emails are as under.
The address doesn’t exist:
This error occurs when the provided email address is invalid or does not correspond to an active email account, possibly due to a typo, a non-existent domain, or an outdated email address.
Solution: Double-check the email address for accuracy. If possible, verify the recipient’s contact information and ensure that there are no typos. If uncertain, reach out to the recipient through alternative means to confirm the correct email address.
The email could not be delivered:
This error indicates a general failure in delivering the email, often due to network problems, server unavailability, or a temporary disruption in email services.
Solution: Wait for a moment and try resending the email. If the issue persists, consider reaching out to your email service provider for assistance. Check your internet connection and ensure that there are no ongoing service interruptions.
The recipient’s mailbox is full:
When the recipient’s email inbox reaches its maximum storage capacity, new emails cannot be delivered.
Solution: Contact the recipient through an alternative method to inform them about the issue. They will need to clear space in their mailbox to receive new emails. Alternatively, suggest using a file-sharing service for larger attachments.
The email has been rejected by the server, flagged as spam:
Email servers often employ spam filters to identify and block unsolicited or potentially harmful emails. If your email is flagged as spam, it might be rejected by the recipient’s server.
Solution: Review your email content to ensure it doesn’t trigger spam filters. Avoid using excessive capitalization or including suspicious links. If possible, ask the recipient to check their spam folder for your email and mark it as “Not Spam.”
The domain doesn’t exist:
This error occurs when the specified domain in the email address is not a valid domain or is no longer active.
Solution: Verify the domain spelling in the email address. If there’s a mistake, correct it. If the domain no longer exists, try reaching out to the intended recipient through alternative means to obtain their updated email address.
Facebook, like any other website, can also benefit from SEO practices. This can be done by covering these key elements of Facebook SEO.
Optimizing your page’s profile information, such as the page name, description, and keywords.
Posting high-quality and relevant content optimized for social platforms and search engines.
Building a strong network of followers and engaging with them regularly.
Encouraging people to share and interact with your content.
Making sure your page is publicly accessible to search engines.
Utilize social management and optimization tools to improve branding.
What is Facebook SEO?
Facebook SEO is the process of optimizing a Facebook page to increase its visibility in search results on the Facebook platform and other search engines like Google. This can be done by improving the page’s profile information, posts, photos, and followers. By optimizing your Facebook page, you can make it more likely that people will find your page when they search for related topics or keywords on Facebook or other search engines.
15 techniques for Facebook SEO
Here are several ways to optimize your Facebook information for better visibility and accessibility in search results:
1. Know your audience
Understand who your target audience is and what kind of content they are interested in. Tailor your content to their interests and needs.
2. Optimize your page’s profile
Make sure that your page’s profile is fully filled out and includes relevant information about your business, such as your website URL and contact information.
Use a descriptive and keyword-rich page name: Your page name should accurately reflect the products or services you offer, and include keywords that people might use when searching for your business.
Write a compelling page description: Your page’s description should be a brief summary of what your business is all about, and should also include keywords.
Set your page’s privacy settings to “Public”: Go to your page’s settings and make sure that the “Who can see your future posts?” option is set to “Public.” This will allow search engines to crawl and index your page’s content.
Add contact information: Adding contact information like your business address, phone number and email address can also help people find your business more easily.
Use categories: Assign your page to one or more categories that best describe your business.
3. Claim unofficial pages
When advertising on Facebook, it’s important to claim and manage any unofficial pages that may be created by the platform or users. These pages may contain incorrect information and can negatively impact your brand’s reputation. Proper management of your main Facebook page and all other associated pages is essential for building a strong presence on the platform.
It’s important to note that claiming an unofficial page does not guarantee that it will be removed, but it will give you control over the page’s content and messaging. Also, it’s important to keep the page updated with relevant and accurate information in order to provide value to the audience.
4. Add keywords in your page’s “About & Bio”
Use keywords that are relevant to your business in the “About & Bio” sections of your page as it will help search engines understand the context of your pages.
5. Use friendly URLs for your Facebook Page:
Build brand consistency by creating SEO-friendly URL’s. These are custom links that can be created for a Facebook page to make it more memorable and easier for people to find. It can improve SEO by making it easier for users to remember and share the link. Utilize personal branding tools to increasing overall brand awareness.
6. Add your website link to the page
Adding your website link to your page can help search engines understand that your website and your Facebook page are related.
Posting high-quality and relevant content that provides value to your followers. This will encourage them to engage with your content and share it with others.
Use interactive content: Use interactive content such as polls, quizzes, and surveys to increase engagement and encourage people to share your post.
Post regularly: Posting regularly will help you to keep your page active and relevant and will increase the chances of your post appearing in the news feed of your followers.
Share someone else’s post: Sharing post of others will create a community feel and will help you to increase your visibility in search results.
Share your page: Sharing your Facebook page with your friends, family, and colleagues and ask them to share it with their network can also help drive more followers.
8. Optimize your posts
Using keywords in your post’s title, caption, and text that are relevant to your business and what people might use when searching for your business.
Use hashtags: Use relevant hashtags to make your post more discoverable and increase its visibility in search results. It will help search engines understand the context of your post and make it more discoverable.
9. Post on the best time
By posting during peak activity times, your posts are more likely to be seen by a larger audience, which can increase engagement and participation. Use analytics tools to track the activity on your page and identify the best times to post.
According toContentStudio’s study, Thursday is the best day to get most engagement on Facebook. Whereas, Tuesday, Wednesday and Fridays are also good days to post.
10. Run Facebook Ads
Use Facebook ads to reach a larger audience and increase your page’s visibility.
Use Facebook targeting: Facebook’s targeting options allows users to reach people who are more likely to be interested in your business.
Run retargeting Ads:Retargeting is a form of online advertising that allows you to show ads to users who have previously interacted with your website or content.
Collaborate with other pages: Collaborate with other pages in your industry to reach a larger audience and increase your page’s visibility.
Explore Meta partnership ads: Meta’s partnership ads scale creator content across Facebook, from feeds to reels.
Engage with your followers: Respond to comments and messages, and actively engage with your followers. This will encourage them to continue following your page.
Host contests and giveaways: Hosting contests and giveaways can help you to increase your followers and engagement on your page.
Use influencer marketing: Reach out to social media influencers in your niche and ask them to share your page with their followers.
Get external links pointing to your Facebook page from other websites.
13. Create compelling CTAs
Call-to-Action (CTA) ads can be an effective way to guide potential customers through the sales process and encourage them to take a specific action. To create a successful CTA ad, make sure the language is clear and concise, and addresses the needs and pain points of your target audience. Use a sense of urgency but avoid making unrealistic or aggressive claims. This can help increase your reach and audience by promoting your solution to potential customers.
AI-powered Facebook Messenger Chatbots can be a valuable tool for businesses looking to improve their customer service, lead generation, and marketing efforts.
Customer service: Chatbots can provide 24/7 customer service by answering frequently asked questions, troubleshooting issues, and directing customers to the appropriate resources or human agents.
Lead generation:Chatbots can be programmed to ask qualifying questions and collect contact information from potential leads, which can then be passed on to the sales team.
Marketing: Chatbots can be used to deliver personalized and targeted promotions, content, and offers to customers based on their preferences and behavior.
15. Use Facebook management & optimization tools
URL link management tool
It’s also important to note that using a vanity URL can also be a great way to make a link more memorable and shareable.
How to create vanity links?
URL Shorteners!
URL shorteners can be used to improve SEO on Facebook by creating shorter, more manageable links that are more likely to be shared. These shortened disguised links improve the visibility of the link on Facebook and are more likely to be clicked on.
Use Replug’s custom URL maker free online to create a branded short link for the webpage you want to share on Facebook.
With Replug you can not only shorten links but it also assists in several other ways explained below. It is an all-in-one link management platform for businesses and agencies.
Deep linking improves engagement
Deep links can improve brand engagement by allowing users to directly access specific pages or content within an app or website, rather than just the homepage. This can help to increase the chances of users finding the content they are looking for and engaging with it, which can lead to increased shares, likes, and comments.
Google and Facebook recommend the use of deep linking for mobile apps for a better user experience, if the app is installed it will open the content within the app, otherwise it will direct to the website.
In summary, using deep links can improve engagement and Facebook SEO by making it easier for users to find and engage with specific content, and by making advertisements more effective.
Increase online visibility using bio links
Having a bio link on a Facebook page gives you a great opportunity to connect online users to your other accounts. A bio link allows users to access all important information related to you or your brand through a custom designed web page. Most platforms have a restricted space, i.e. mostly only allow to place a single link in profile. But with bio links you can add multiple links and add other key information as well.
Create clear and compelling call-to-actions
Using clear and compelling call-to-action phrases such as “Learn more” or “Sign up now” encourage users to click on the link.It becomes easier for users to find and engage with specific content, and makes advertisements more effective. Here’s an example.
Track clicks and conversions
URL shorteners come with built-in analytics that allow you to track the number of clicks on the link, which can help you understand how well your content is performing on the social platform.
Retargeting
By targeting users with personalized ads that have already visited your website, you can increase the chances of them returning to your website or engaging with your content. Retargeting can be done by using Meta Pixel, a small piece of code that can be placed on your website, it allows you to track the actions of users who visit your site and then use that information to create targeted ads.
Additionally, retargeting can also improve the click-through rate (CTR) of your ads, which is a key metric used by Facebook’s algorithm to determine the relevance and quality of your content. This can lead to improved visibility and engagement of your content and advertisements on the platform, which ultimately can help to improve your Facebook SEO.
Facebook management tool
Social media management tools can improve Facebook SEO by helping businesses to:
Create and schedule optimized posts:
Social media management tools can help businesses create and schedule posts that are optimized for Facebook’s algorithm, using keywords and other best practices for SEO.
Track and analyze performance
Social media management tools can provide businesses with detailed analytics on their Facebook page’s performance, including metrics such as engagement, reach, and click-through rate. This data can be used to inform and improve SEO efforts.
Monitor and respond to comments and messages
Social media management tools can help businesses keep track of comments and messages on their Facebook page, and respond to them in a timely and professional manner, which can help improve engagement and build trust with customers.
Identify and engage with influencers
Social media management tools can help businesses identify and engage with influencers in their industry, which can help to increase brand awareness and attract more backlinks to their website.
Automate repetitive tasks:
Social media management tools can help businesses automate repetitive tasks such as scheduling posts, sending direct messages, and tracking analytics, which can save time and improve efficiency.
Monitor competitors
Social media management tools can help businesses keep an eye on competitors and industry trends, which can help inform their own strategy and stay ahead of the curve.
It’s worth noting that these tools are just one aspect of a comprehensive SEO strategy, but they can be very helpful in improving a Facebook page’s visibility, engagement and performance, which can help in improving the overall SEO of the website.
FAQs for Facebook SEO techniques
Do Facebook ads improve SEO?
Facebook ads can help improve SEO in a few ways:
– Drive more traffic to the webpage – Increase brand awareness, – Improve website’s visibility and searchability – Collect data on your target audience
Do Facebook posts count as backlinks?
While Facebook posts themselves are indirectly counted as backlinks. Social media platforms, like Twitter, Instagram, and LinkedIn, and it could be a way to drive more organic traffic to your website.
What are the 5 stages of SEO?
There are four stages of SEO: keyword research, title optimization, url optimization, content optimization and backlink building.
What are the 4 types of SEO?
– Technical SEO: This type of SEO focuses on the technical aspects of a website, such as its architecture, code, and site structure, to make it more easily crawlable and indexable by search engines. – On-Page SEO: This type of SEO focuses on optimizing individual web pages in order to rank higher and earn more relevant traffic in search engine results. This includes optimizing the content and meta data of the page. – Off-Page SEO: This type of SEO focuses on increasing the authority and trustworthiness of a website, typically through link-building efforts and contextual backlinks service. – Content SEO: This type of SEO focuses on creating and optimizing content in order to rank higher in search engine results. This includes researching keywords, creating high-quality content, and optimizing the content for search engines.
Note that these types of SEO often overlap and work together in a comprehensive SEO strategy.
What is the golden rule of SEO?
The Golden Rule of SEO is to create valuable and relevant content for users.
Gone are the days of mundane Spotify links. Introducing smart links for music – your all-in-one ticket to global music domination.
Imagine sharing your songs, albums, and playlists seamlessly across platforms with just one link! It’s not just convenient for your fans; it’s a vibe! But here’s the magic – it’s not just about sharing; it’s about understanding.
Dive into the analytics playground! Discover where your fans are grooving, and what beats they vibe with, and turn those insights into your superpower. It’s not just music; it’s a connection that spans continents. Don’t just share your music; make it an experience!
Make smart links part of your promotional strategy; it’s what will convert listeners into lifelong fans. Let’s make your music journey unforgettable!
What is a smart music link?
A smart link for music is a single, easy-to-share link that directs listeners to your music on different streaming platforms like Spotify, Apple Music, YouTube, etc. It’s like a virtual business card for musicians. Instead of sharing multiple links, you share one smart link, and it automatically takes your fans to the right platform based on their location and device.
This becomes even more powerful when promoting tracks created or enhanced with tools like minimax music, helping artists distribute and market their AI-powered productions more efficiently.
Services like Replug, Linkfire, Linktree, and others help musicians create these links, making them convenient for fans and providing analytics and marketing tools for artists. A comprehensive music industry directory can further enhance these resources by connecting musicians with additional promotional opportunities and industry contacts. It’s a neat way to promote and share your music hassle-free!
Boost your conversion rates with irresistable CTAs with
Musicians can elevate their online presence by effortlessly creating smart music links using Replug’s innovative bio links feature. This bio link acts as a centralized hub, providing your audience with a seamless experience to explore and enjoy your music across platforms like Spotify, Apple Music, and YouTube.
Here’s how to create a smart link for music using Replug:
Step 2: Once logged into your Replug account, head to the Replug dashboard and locate the “Bio Links” feature.
Step 3: Initiate the bio link creation process by clicking on the “New Bio Link” button.
Step 4: Opt for the content block that aligns with your needs from Replug’s diverse options, such as social icons, links, RSS feeds, audio, video, text, or cards. In the case of music links, you can choose from links, audio, and social icons.
Step 5: Once all desired content blocks are added, proceed by clicking “Next.”
Step 6: Further personalize your bio link page by specifying your brand name, uploading an avatar, and adding a title and subtitle that aptly represent your content or brand.
Step 7: Review your bio link page during the creation process to ensure it aligns with your intentions.
Step 8: In the final step, enhance your bio link’s appeal and effectiveness by considering additional features or marketing elements.
Step 9: Save your bio link, and it will be ready to integrate into your bio.
With the bio link generated by Replug, effortlessly share diverse links and content with your audience, making it an invaluable tool for content promotion and marketing on the platform.
Boost your conversion rates with irresistable CTAs with
Using a smart music link with Replug offers numerous benefits for musicians and content creators:
Streamlined promotion: Smart music links consolidate multiple streaming platform URLs into a single shareable link, simplifying the promotion process. This ensures that audiences can access your music effortlessly, regardless of their preferred platform.
Enhanced accessibility: With a Replug smart music link, your audience can seamlessly switch between platforms like Spotify, Apple Music, and YouTube, catering to diverse listener preferences. This accessibility increases the likelihood of engagement and plays.
Centralized hub: Replug’s bio link feature serves as a centralized hub for your music and other content. It provides a cohesive and organized space where your audience can discover and explore various links, creating a unified online presence.
Customization options: Tailor your bio link page to reflect your brand identity. With features such as customizable colors, profile pictures, and content blocks, Replug allows you to create a visually appealing and personalized experience for your audience.
Analytics insights: Gain valuable insights into audience behavior through Replug’s analytics tools. Understand where your audience is engaging, and which platforms are most popular, and use this data to refine your promotional strategies and content.
Consistent branding: Maintain consistent branding across platforms by customizing your bio link page. This ensures that your audience recognizes and associates your brand identity with every interaction.
FAQs
What is a smart music link, and how does it benefit musicians?
A smart music link is a consolidated link that directs users to music on multiple streaming platforms. It benefits musicians by simplifying promotion, providing analytics insights, and enhancing accessibility for fans across various platforms.
How can I create a smart music link?
To create a smart music link with Replug, login, access the “Bio Links” feature, click “New Bio-Link,” add content blocks like social icons or links, customize, and save. Replug’s user-friendly interface streamlines the process.
Can I customize the appearance of my bio link page on Replug?
Absolutely! Replug allows extensive customization, including profile pictures, brand names, avatars, color schemes, and short links, ensuring your bio link page aligns with your brand identity perfectly.
What analytics insights does Replug provide for smart music links?
Replug’s analytics offer valuable insights into audience behavior, including engagement locations and popular platforms. This data empowers users to refine their promotional strategies.
Supercharge your marketing with Replug’s Call to Action generator!
Learn how to create irresistible CTAs to boost your brand’s visibility and multiply conversions.
This guide will show you the easy steps to leverage Replug’s magnetic feature for maximum sales impact. Let’s turn your clicks into conversions and elevate your digital success with Replug!
What is a CTA campaign in Replug?
In Replug, a Call-to-Action (CTA) campaign serves as a powerful message to showcase your deals, offers, and sales to your audience. By using CTAs, you can effectively broadcast your message and prompt your audience to take specific actions that lead to sales.
When you opt for the call-to-action feature in Replug, you encounter three distinct options in the subsequent step:
Button:
Ideal for redirecting visitors to your primary source, this option enables you to create a clickable button or link, providing a direct pathway for your audience to take the desired action.
Link:
Similar to the button, this option allows you to redirect visitors, providing flexibility in creating clickable links to guide your audience towards the intended action.
Form:
If your goal is lead collection, selecting the Form option is key. This choice enables you to integrate with various third-party Email Services for effective lead gathering.
Replug seamlessly integrates with several third-party email services, including but not limited to:
Convertful
MailerLite
MailChimp
Sendlane
ActiveCampaign
Moosend
Aweber
SendPuls
and more.
By understanding and leveraging these options, you can tailor your Call-to-Action campaigns in Replug to effectively engage your audience and drive the desired outcomes, whether it’s through clickable buttons, links, or lead collection forms.
Boost your conversion rates with irresistable CTAs with
Step 2: Navigate to the Manage section on the main dashboard and click on “Campaigns.”
Step 3: Click the “Create New Campaign” button in the campaign section.
Step 4: Select or create a brand for your new campaign and click the “Next” button.
Step 5: Choose a name for your call-to-action campaign on the campaign type page.
Step 6: Select the Call-to-Action option and click “Next.”
Step 7: Choose your CTA type (e.g., Link, Button, Form).
Step 8: Select a theme for your CTA; for example, you can choose a pop-up theme.
Step 9: Enter your URL, upload an image for the CTA, and click “Next.”
Step 10: In the CTA message section, write your headline, message, and CTA button text. Enter the URL for the CTA.
Step 11: Move to the CTA customization section, where you can add colors for the background, text, CTA button background, and CTA button text. Click “Next.”
Step 12: In the final step, select the seconds after which the CTA will be displayed to the user. Alternatively, choose the “On exit-intent” option to display the CTA when the user intends to exit the page.
Step 13: Save the campaign.
Boost your conversion rates with irresistable CTAs with
Effectively monitoring your Call-to-Action (CTA) campaigns with Replug is crucial to ensure their success and optimize for better results. Here’s what to monitor and analyze using Replug:
Dashboard overview:
Gain instant insights into your campaign’s success with overall statistics, including Clicks, Unique Clicks, Conversions, and Conversion Rate, displayed prominently on your dashboard.
Clicks performance:
Delve into the performance of your CTAs by analyzing the clicks metric. Understand how many users engaged with your call to action and track click trends over time.
Conversions performance:
Monitor the effectiveness of your CTAs by examining the Conversions metric. Track the number of desired actions taken by users and assess the overall success of your campaigns.
Visitors by browsers:
Understand your audience better by exploring the browsers they use. Identify popular browsers to optimize your CTAs for a seamless user experience across different platforms.
Visitors by operating system:
Gain insights into the operating systems your audience employs. Use this information to tailor your CTAs for compatibility, ensuring a smooth interaction on various devices.
Visitors by country:
Explore the geographical impact of your CTAs. Identify which countries are most responsive, allowing you to target specific regions more effectively.
Visitors by source/referrer:
Uncover the sources or referrers driving traffic to your CTAs. Determine the most successful channels and adjust your marketing strategy accordingly to maximize reach.
By leveraging these monitoring features provided by Replug, you can track the key performance indicators of your Call-to-Action campaigns. Whether it’s understanding user behavior, optimizing for different platforms, or targeting specific regions, Replug equips you with the data needed to refine and enhance your CTAs for optimal results.
Boost your conversion rates with irresistable CTAs with
To further boost your campaign performance, consider using a short link generated by Replug to simplify sharing, improve tracking accuracy, and make every CTA more effective.
FAQs
How can Replug’s Call-to-Action campaigns benefit my business?
Replug’s CTAs can significantly enhance your brand’s visibility, multiply conversions, and maximize sales impact. The platform provides a user-friendly interface to create compelling CTAs tailored to your specific goals.
What types of CTAs can I create using Replug?
Replug offers versatile CTA types, including buttons, links, and forms. You can redirect users, collect leads, or guide them to perform specific actions based on your campaign objectives.
How do I track the performance of my Call-to-Action campaigns on Replug?
Replug provides comprehensive statistics, including overall clicks, unique clicks, conversions, and conversion rates. You can monitor performance trends, analyze clicks and conversions, and gain insights into visitor behavior.
Can I customize the appearance of my CTAs on Replug?
Yes, Replug allows you to customize your CTAs extensively. You can choose different themes, add colors to the background and text, and optimize the appearance to align with your brand identity.
What kind of analytics does Replug offer for my CTA campaigns?
Replug provides detailed analytics such as click heatmaps, device and location insights, and even integration with third-party analytics platforms. This allows you to make data-driven decisions for refining and optimizing your campaigns.
Can I use Replug’s CTAs for lead generation?
Absolutely! Replug offers a Form option where you can integrate with various third-party Email Services to collect leads effectively. Choose the Form type when creating your campaign, select your preferred email service, and start gathering leads seamlessly.