With around 1.9 billion monthly active users and roughly 23 million videos uploaded every single day, TikTok is basically the internet’s busiest social media platform right now.
That’s a lot of content, and honestly, not every video deserves a permanent spot on your profile. Maybe it’s an old cringe post, a trend you jumped on too early, or a video that just didn’t land the way you hoped.
Whatever the reason, knowing how to clean up your profile or build a solid TikTok archive before hitting delete is a skill every creator needs.
Ready to take control of your content? Let’s walk you through exactly how to delete a TikTok video, step-by-step.
How to delete a TikTok video
No matter if you’re doing a quick profile cleanup or just removing one awkward post, deleting a TikTok video is super straightforward. Just follow these simple steps, and that video will be gone in seconds.
Here’s how to delete a video on TikTok (step-by-step):
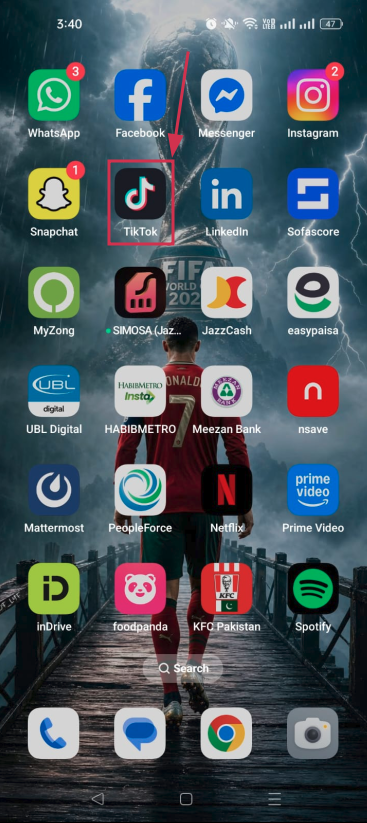
Step#01: Open the TikTok app
Launch TikTok on your phone and make sure you’re logged into the right account.
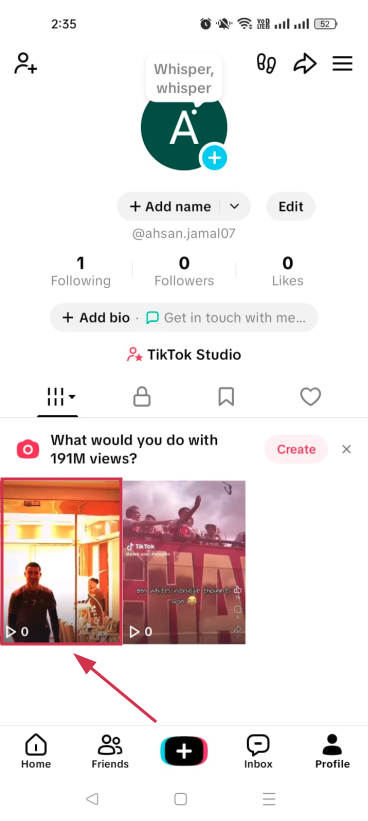
Step#02: Tap “Profile”
Hit the “Profile” icon at the bottom right corner of your screen to head over to your personal profile page.
Step#03: Tap on the specific video
Scroll through your posted videos and tap on the one you want to delete.
Step#04: Tap the three dots icon (⋯)
Once the video is playing, look for the three dots icon (⋯) on the right side of the screen and tap it to open more options.
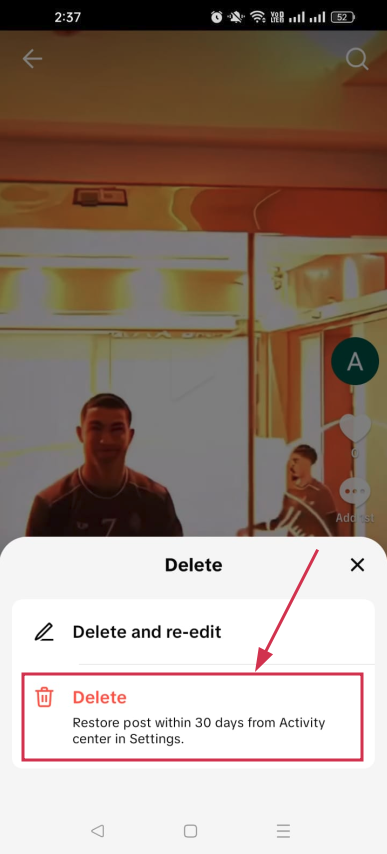
Step#05: Tap the “Delete” icon
A menu will pop up at the bottom. Scroll through the options and tap the “Delete” icon. It looks like a trash can.
Step#06: Tap “Delete”
A confirmation prompt will appear. Tap “Delete” one final time, and your video will be removed from your profile. That’s it!
Note: If you need to make minor edits to a video you’ve recently uploaded, TikTok offers a “Delete and re-edit” feature. This option removes the post from your profile while preserving your original footage, audio, and caption, allowing you to update the video without starting from scratch.
How to delete videos on TikTok
TikTok currently doesn’t offer a feature that lets users delete all of their posts at once. As an alternative, you can use the “Activity Center” to make up to 50 videos private in a single action.
This removes them from public view, leaving them visible only to you, which can serve as a practical alternative to deletion.
To bulk-privatize your videos, follow the steps below:
Step#01: Launch the TikTok app
Open TikTok on your iPhone or Android device and make sure you’re signed into your account.
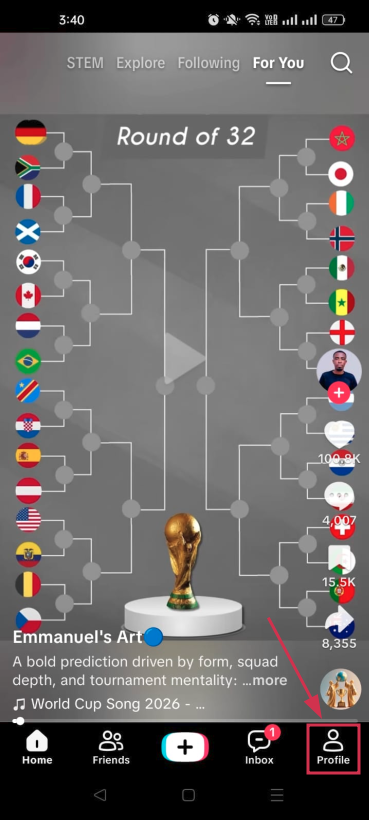
Step#02: Tap “Profile”
Tap the “Profile” icon in the bottom right corner to navigate to your personal TikTok profile page.
Step#03: Tap the “Menu” icon (☰)
Look for the three horizontal lines (☰) in the top right corner of your profile and tap on it.
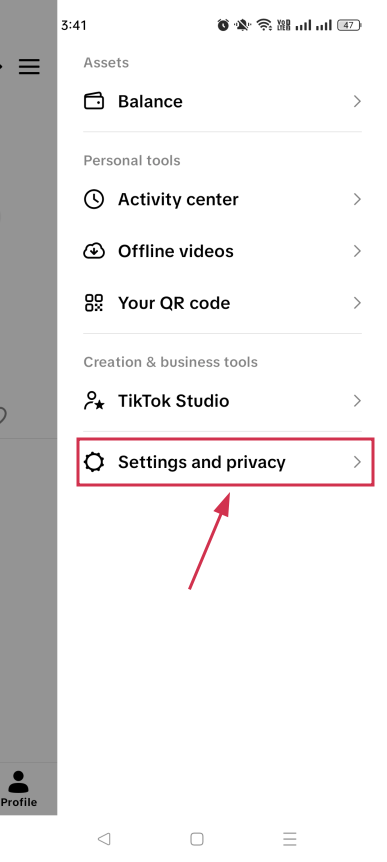
Step#04: Tap “Settings and privacy”
From the menu that slides open, tap “Settings and privacy” to access your account settings.
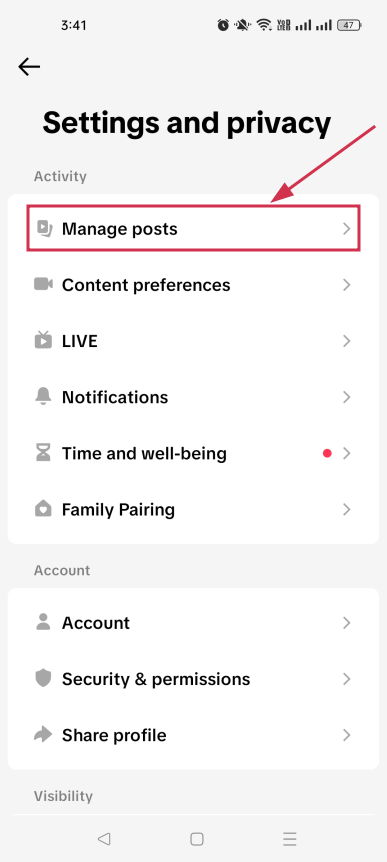
Step#05: Tap “Manage posts”
Under the Activity section, find the “Manage posts” option and tap on it to see your content management options.
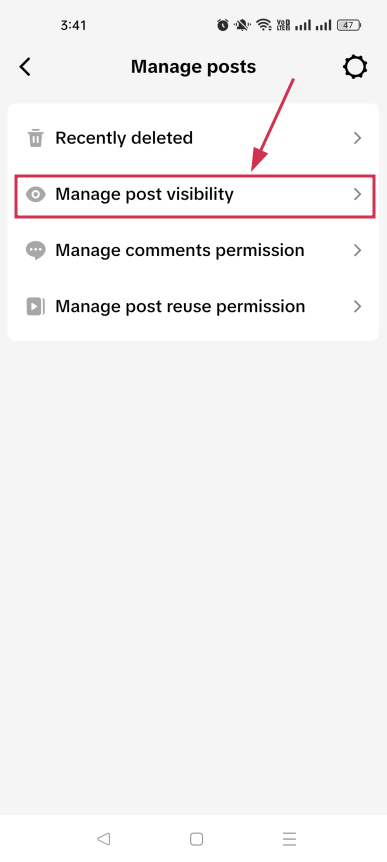
Step#06: Tap “Manage post visibility”
Tap on the “Manage post visibility” option. This is where you can control who sees your videos all in one place.
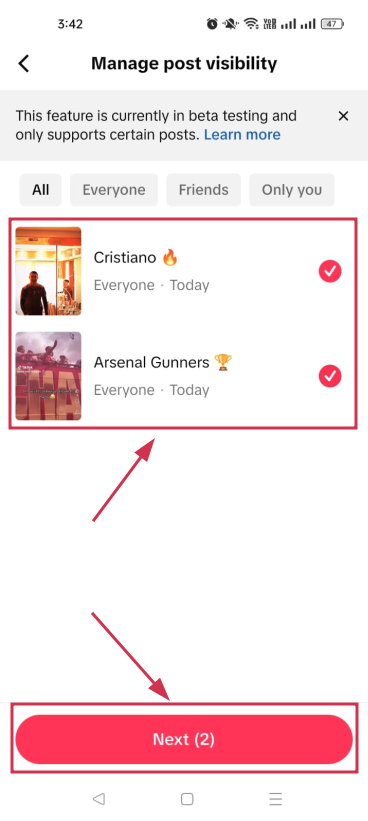
Step#07: Select the videos and tap “Next”
Select all the videos you want to hide from your profile, then tap the “Next” button to move forward.
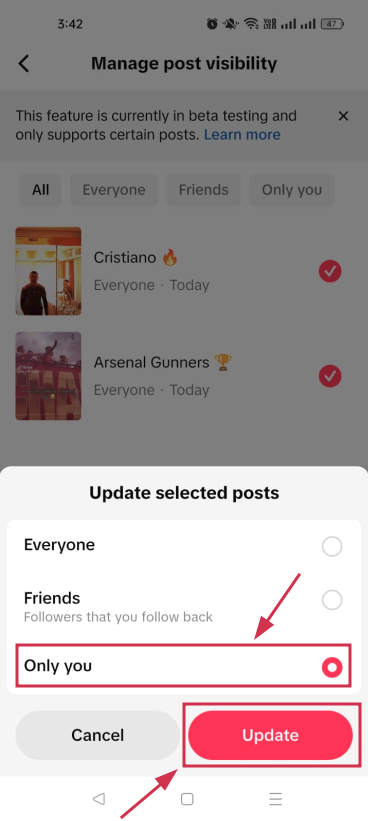
Step#08: Tap “Only you”, and hit “Update”
Select “Only you” from the prompted options to make the selected videos private. Then tap the “Update” button to save the changes instantly.
Note: Keep in mind that if your goal is to permanently remove videos from your account, TikTok requires each video to be deleted manually, one at a time.
Whether you’re deleting a single video or quietly hiding a bunch of old posts, TikTok gives you simple ways to keep your profile looking exactly how you want it.
While you’re tidying things up, it’s also worth thinking about how you share your content going forward. Tools like Replug can genuinely level up your TikTok game!
Its custom URL shortener lets you turn messy links into clean, branded ones you can actually track. Plus, if you ever want to save a video before deleting it, Replug’s free TikTok downloader has you covered.
Give it a try; it’s free and takes seconds to get started!
Frequently asked questions
How to delete TikTok video after posting?
Yes, you can absolutely delete a TikTok video after it’s already been posted. Simply go to your profile, tap on the video you want to remove, hit the three dots icon (⋯), and select “Delete”. Confirm it one more time, and it’s gone for good.
Just keep in mind that once deleted, all the likes, comments, and shares on that video disappear along with it. So make sure you actually want it gone before tapping that final button.
How to mass delete TikTok videos?
TikTok doesn’t have a built-in feature that lets you delete all TikTok videos at once. You’d have to go through each one manually, which can take forever if you have a lot of posts.
The good news is there are free third-party tools (e.g., ClearTok or Redact) that make this much easier, or you can simply privatize the videos you don’t want to show up on your profile.
How to delete a TikTok video without the three dots?
If the three dots icon isn’t showing up on your video, don’t panic. You can also try going to your profile, tapping on the video, and then tapping the “Share” button instead.
It will open a list of options, inside which you will also find the “Delete” option. Tap it, and your video will be deleted right away.
Note: Deleted videos aren’t permanently gone immediately. They remain in your account’s Activity Center for 30 days before being fully erased.
How to recover a deleted TikTok video?
To recover deleted TikTok videos, you have 30 days to restore them directly from the app’s Activity Center. After 30 days, videos are permanently removed from the platform.
Open TikTok → go to your profile → tap the menu (three-line) icon → go to “Settings and privacy” → tap “Activity Center” → look for “Recently Deleted”.
Now, tap the video you want to recover, followed by tapping the “Restore” button to confirm.
How to delete TikTok story?
TikTok Stories automatically disappear after 24 hours, but if you want to remove one before that, it’s easy.
Open the TikTok app and go to your profile. Tap your active story to open it, then swipe up on your story to open the full options menu. Tap “Delete”, and confirm by tapping “Delete” again. Your story will be removed instantly.
Alternatively, you can tap the three dots (•••) at the bottom-right of the story screen and select “Delete” from there.
It is necessary to deactivate your Facebook account before you can deactivate your Messenger account. Once you have deactivated your Facebook account, the option to deactivate your Messenger account will become available.
Deactivating your Messenger account from a computer or laptop is impossible. You can only deactivate a Messenger account from the Messenger application settings on your smart devices, i.e., mobile or tablet.
Here’s how to deactivate Messenger app quickly:
Step 1: Open the messenger app from your mobile phone.
Step 2: Tap the profile icon in the top right corner.
Step 3: Tap account setting from the account menu.
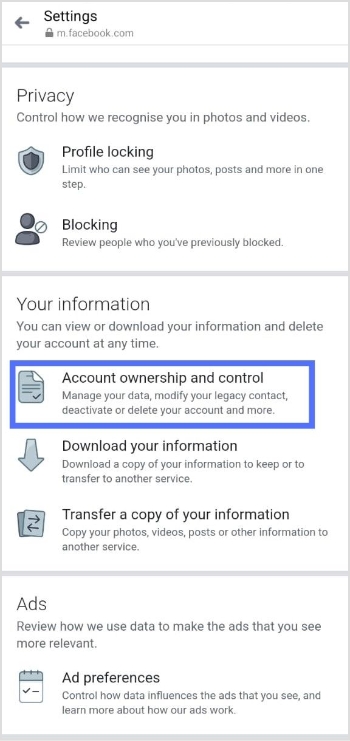
Step 4: Tap account ownership and control.
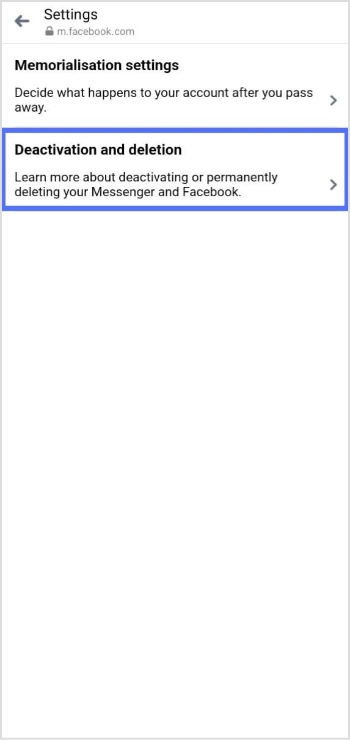
Step 5: Tap deactivation and deletion.
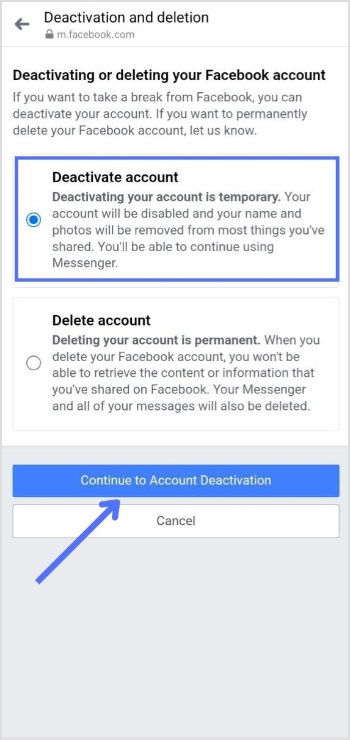
Step 6:Select Deactivate account, then tap continue to account deactivation.
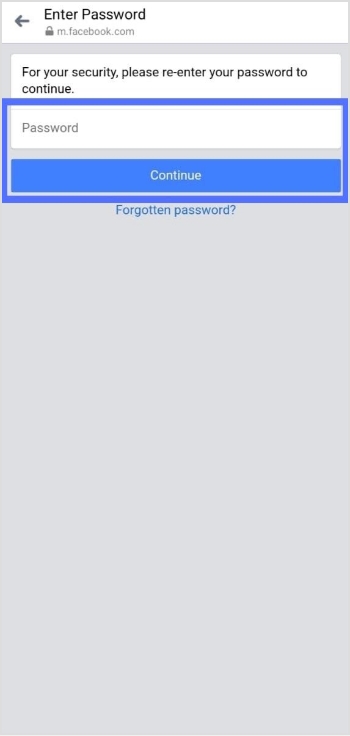
Step 7: Enter the password and tap continue, and your Facebook account is deactivated.
Now your Facebook account is deactivated, you can easily deactivate your Messenger account.
Maximize marketing ROI
by transforming ordinary URLs into branded short links that convert.
Try Replug for free
Step 8: Again tap the profile icon in the top right corner.
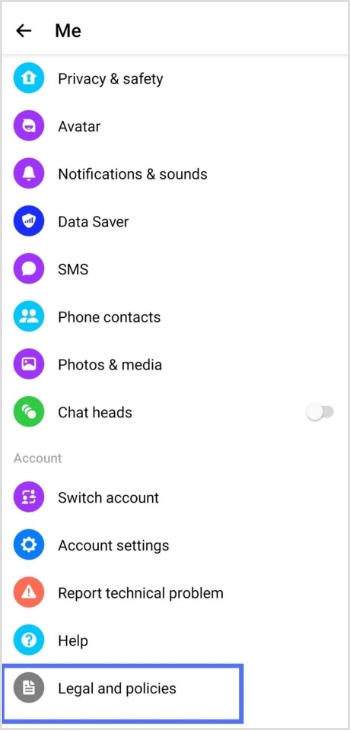
Step 9: Scroll to the bottom and select legal and policies.
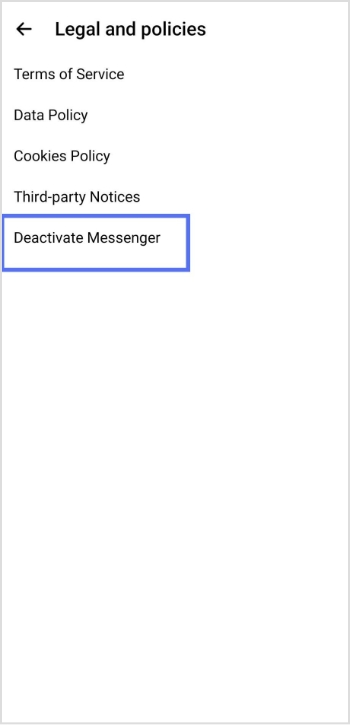
Step 10: Tap deactivate Messenger.
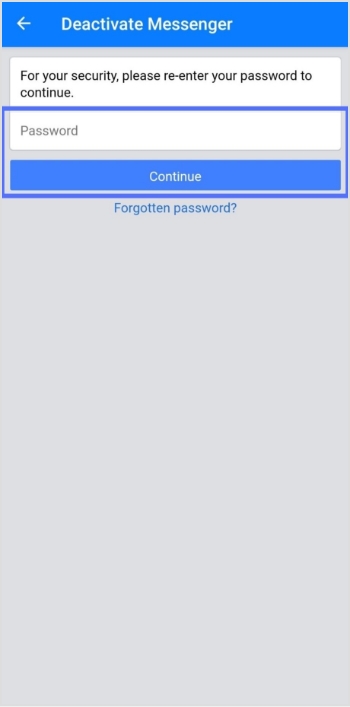
Step 11: Enter your password and tap continue. Your Messenger account will be deactivated.
To reactivate Messenger, simply log in with your username and password.
Deactivating your Facebook account will not automatically deactivate your Messenger account, as the two are separate platforms.
If you deactivate your Messenger account, your profile will not appear in search results, but your past messages and comments will still be visible to others. If you want your messages to disappear after a certain time, you can turn on the vanish mode by swiping up while in a conversation.
Important Note: If you manage many links, perhaps sharing guides or resources about privacy and account settings, Replug.io can help you keep your URLs organized and trackable in one place. Also, if you plan to share this guide with friends afterward, using this efficient link shortener makes the URL cleaner and easier to share!
If your Messenger account has been deactivated, you will not be able to access your account or use the Messenger app. When you try to log in to the app, you will see a message indicating that your account has been deactivated.
If you are unsure whether your Messenger account has been deactivated, you can try logging in to the app to see if you can access your account. If you cannot log in and see a message that your account has been deactivated, your account has been deactivated.
If you want to reactivate your Messenger account, you will need to follow the steps to reactivate your Facebook account first, as your Messenger account is linked to your Facebook account. Once you have reactivated your Facebook account, you can use the Messenger app again.
What will my friends see if I deactivate Messenger?
If you deactivate your Messenger account, your friends will no longer be able to see your online status or send you messages through Messenger. However, your past messages and comments will still be visible to them, but they will not be able to contact you through the app.
Your profile will also be removed from the Messenger app’s search results, so your friends will not be able to find you within the app. If they try to send you a message, they will receive a notification that you are unavailable.
If you want to make all your messages and comments disappear from the app, you can switch on the vanish mode by swiping up while conversing. This will cause all of your messages in the conversation to disappear after they have been read. However, this feature is optional and will not affect your account status.
Are you a TikTok creator or business looking to track the performance of your content on the platform?
Understanding your analytics can help you create more effective and engaging content and optimize your TikTok marketing efforts.
If you’re looking for a powerful tool to manage link tracking, marketing campaigns, and social traffic, Replug.io offers a full suite of link-management and analytics capabilities that seamlessly integrate with your TikTok strategy.
This ultimate guide will show you how to check your TikTok analytics. Also, get the insights you need to succeed on TikTok.
So, keep reading till the very end!
How to check analytics on TikTok through a mobile phone?
Step 1: Open the TikTok app on your mobile phone.
Step 2: Tap on the profile icon in the bottom right corner.
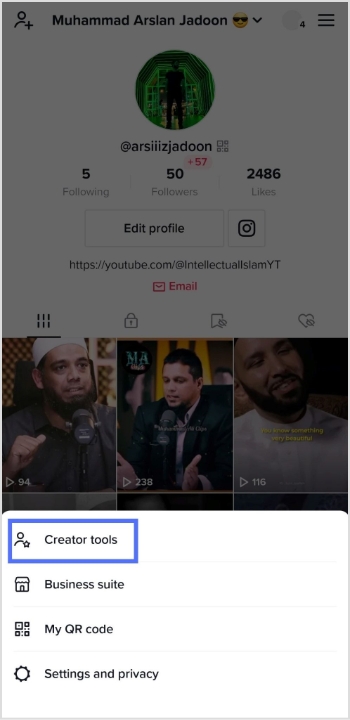
Step 3: Tap on three horizontal lines in the top right corner.
Step 4: Tap the creator tools menu to see the analytics.
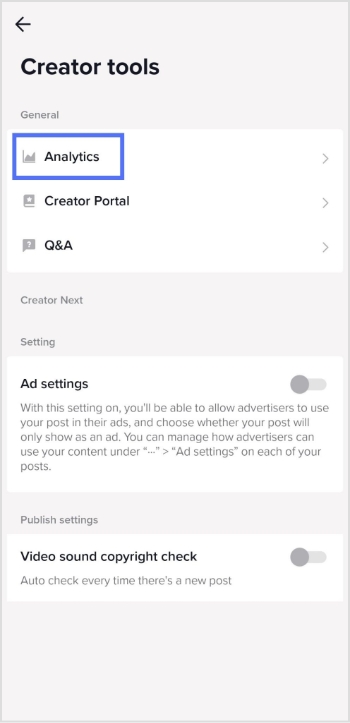
Step 5:Tap the analytics menu on your mobile screen.
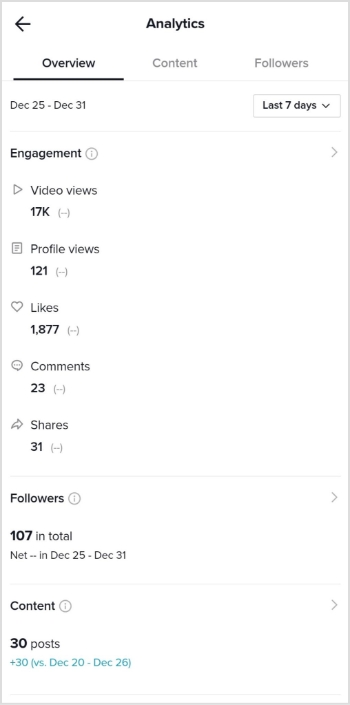
Step 6: You will now see the Analytics screen on your mobile device.
It’s worth noting that TikTok’s analytics may not be 100% accurate, as the platform uses algorithms to estimate specific metrics. However, the data should still give you a good overall idea of your content’s performance and how it compares to other content on the platform.
Note: Want to clean up long, messy URLs before you post them on TikTok? You can easily shorten a URL for free to make your bio links look neat and professional, helping you boost click-through and overall engagement. Also, tracking link is never easier than before with Replug!
Maximize marketing ROI
by transforming ordinary URLs into branded short links that convert.
Try Replug for free
How to Check analytics on TikTok Through a computer device?
Step 1:Log in to TikTok on your computer or laptop.
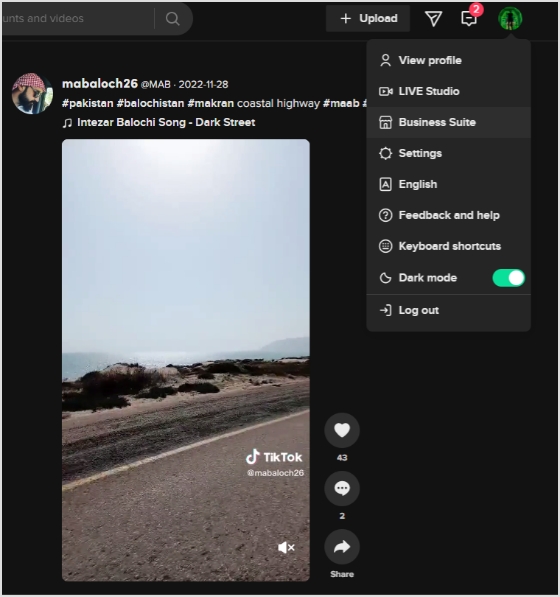
Step 2: Click on your profile icon in the top right corner.
Step 3:A drop-down menu will open. Click business suite from the drop-down menu.
Step 4: Analytics screen will now open. You can check the performance of your content and more.
How to Understand Tiktok Analytics?
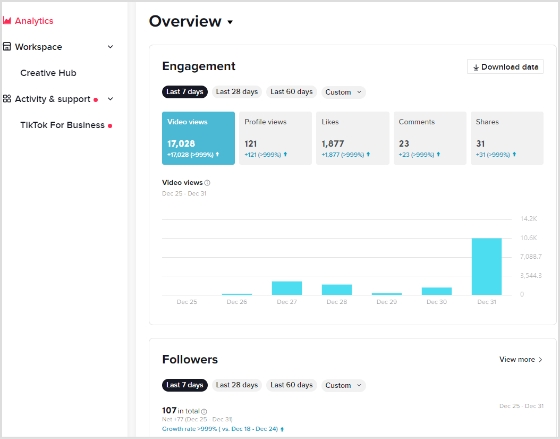
On TikTok, you can access analytics for your account by navigating to the Creator Studio. There are three main categories of analytics: Overview, Content, and Followers.
Overview: The Overview section provides information about your followers, video views, profile views, likes, and comments. Within this section, the Engagement tab lets you see metrics such as likes, comments, and shares for your videos within the chosen time frame.
Content: The Content tab offers more in-depth data and analytics for each video you post, including total views, total likes, comments, shares, average watch time, percentage of people watching the entire video, traffic source type (such as your profile or the For You feed), and audience territories. All content metrics are only available for the last seven days.
Followers: The Followers tab shows you insights about the community you’ve built on TikTok, including information about the locations of your followers and their activity times. You can also see your profile views and track changes in follower growth. If you have LIVE access, you can view analytics for your live streams in the LIV tab. This includes metrics like total views, new followers, total time, and diamonds earned.
Creating a call to action using a URL shortener can effectively drive conversions and encourage users to take a specific action. Using a reliable URL shortener like Replug to create a call to action has a few key benefits.
First, it can shorten link that are long and complex, making them easier to share and more visually to appeal. Sharing a link in a social media post or on a platform with limited space for long URLs can be beneficial.
Second, URL shorteners can help to track clicks on a link, which can help understand the effectiveness of your call to action.
Finally, URL shorteners can make creating custom and branded links easier, which can help build brand awareness and make your link more memorable.
How to create a call to action using Replug?
Use these simple steps to create a call to action that inspires users to take action that will benefit your business or organization.
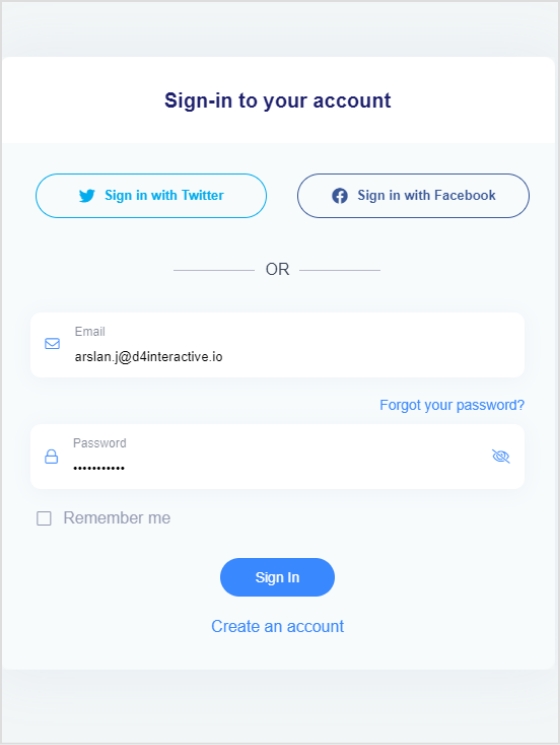
Step 1: Sign in to Replug or create an account if you’re new.
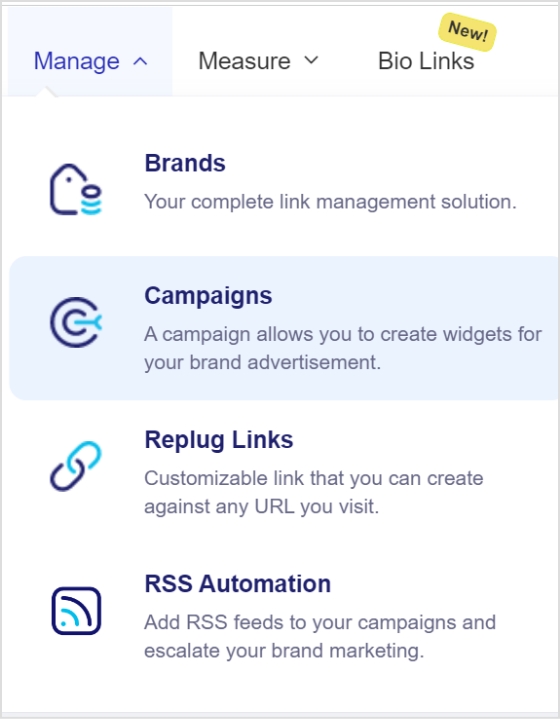
Step 2: Go to the manage section on the main dashboard page and select campaign.
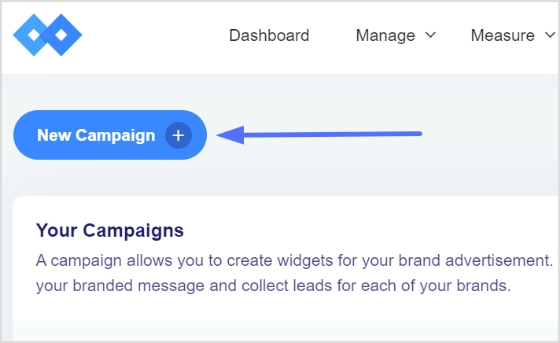
Step 3: Click on the “create new campaign” button in the campaign section.
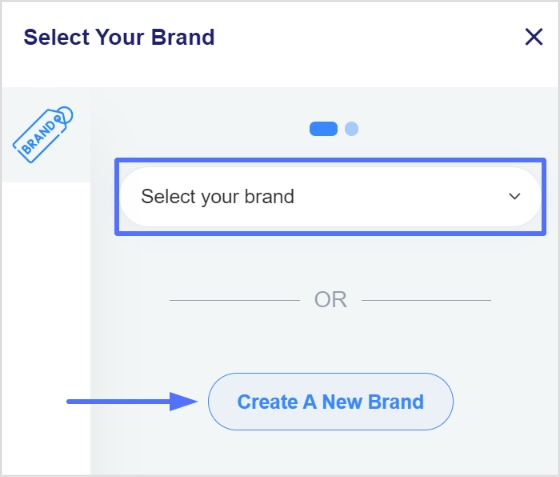
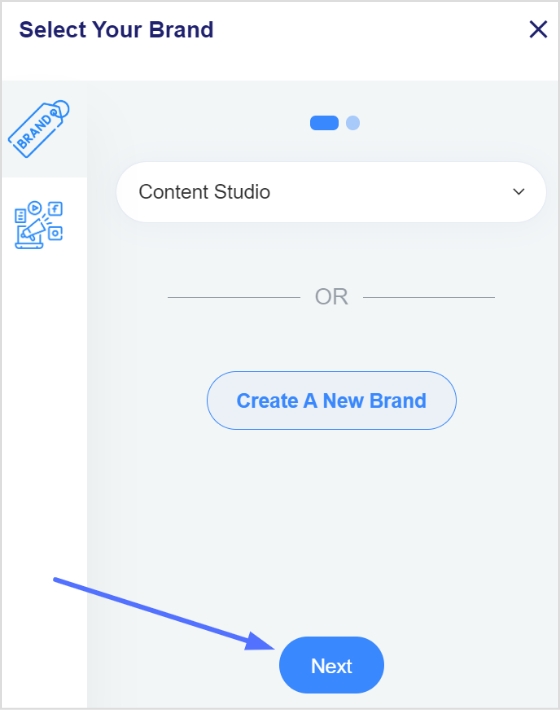
Step 4: To create a new campaign, you must select a brand first. You may choose an existing brand or create a new one if not already been created.
Step 5: Click the next button once you’ve selected or created a brand.
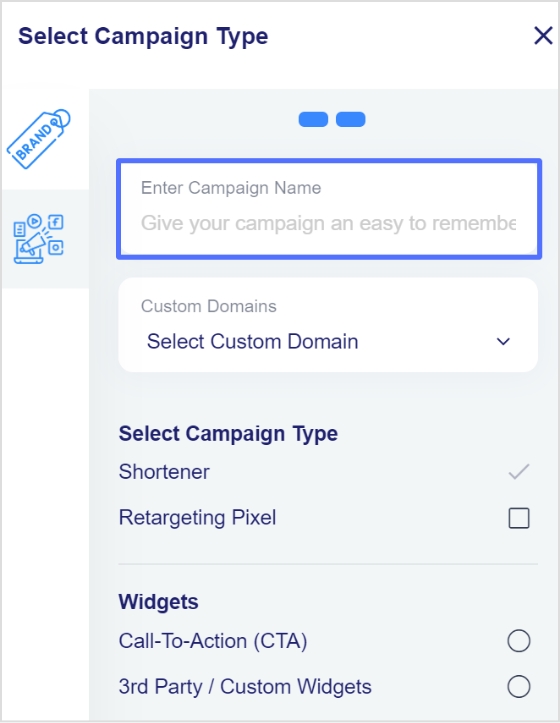
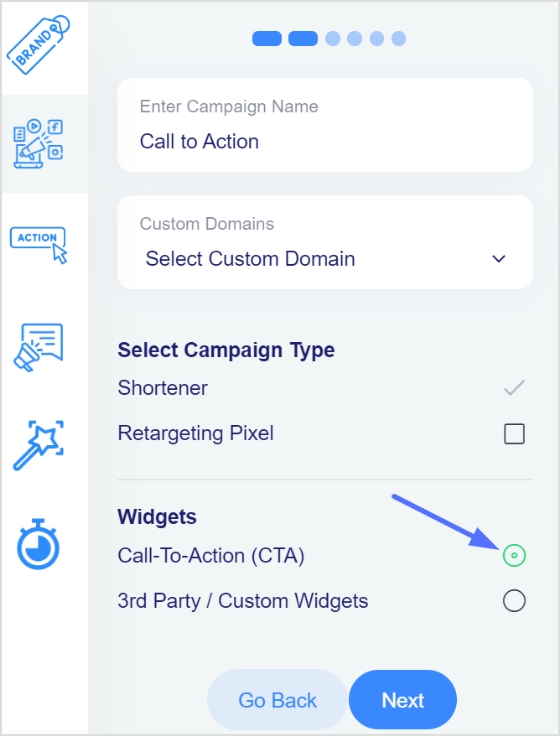
Step 6: You will now see a page for choosing a campaign type. Choose a name for your call-to-action campaign here.
Step 7: Select the call to action option from the campaign type page and click the next button.
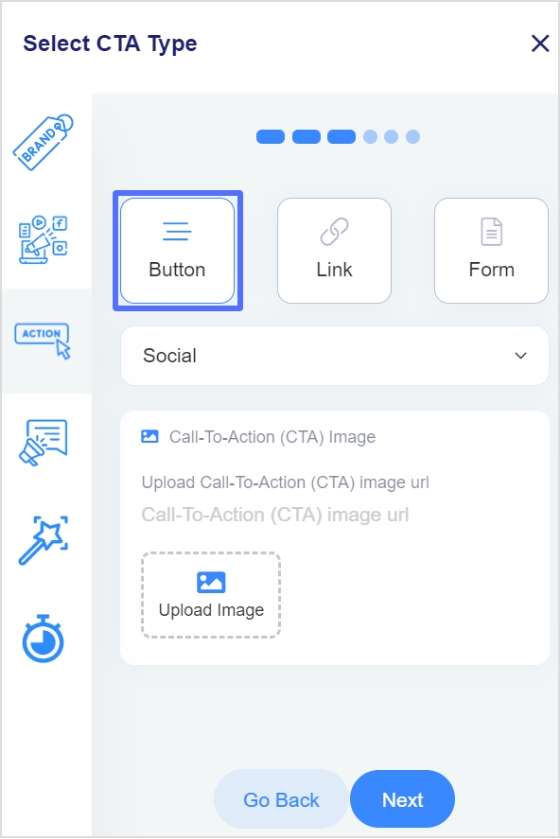
Step 8: Next, select your CTA type; here, we’ve selected a button CTA.
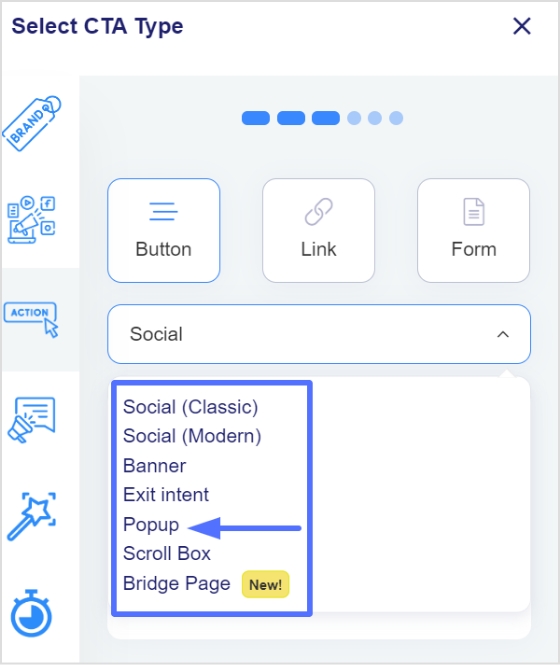
Step 9: After selecting the CTA type, you need to select the theme for your CTA. Your CTA’s appearance depends on your CTA’s purpose. As for this case, we have chosen a popup CTA theme to appear after clicking the shortened link.
Note: Read more about the use cases for different theme types to understand which CTA theme is perfect for you.
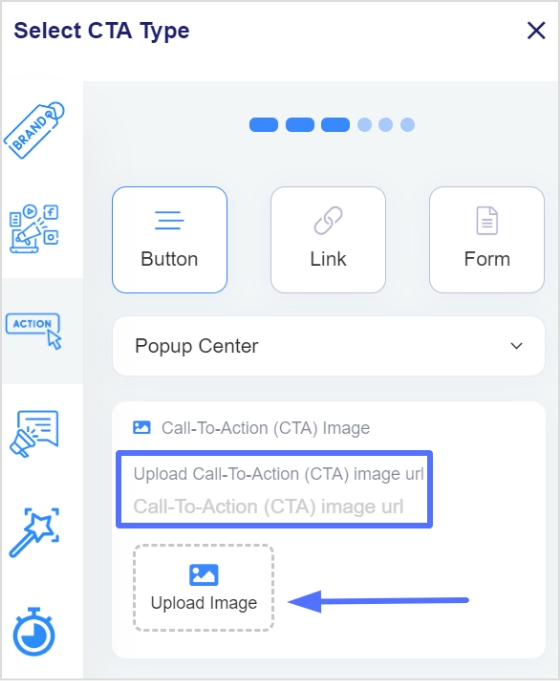
Step 10: Enter your URL, upload an image for the CTA, and click Next.
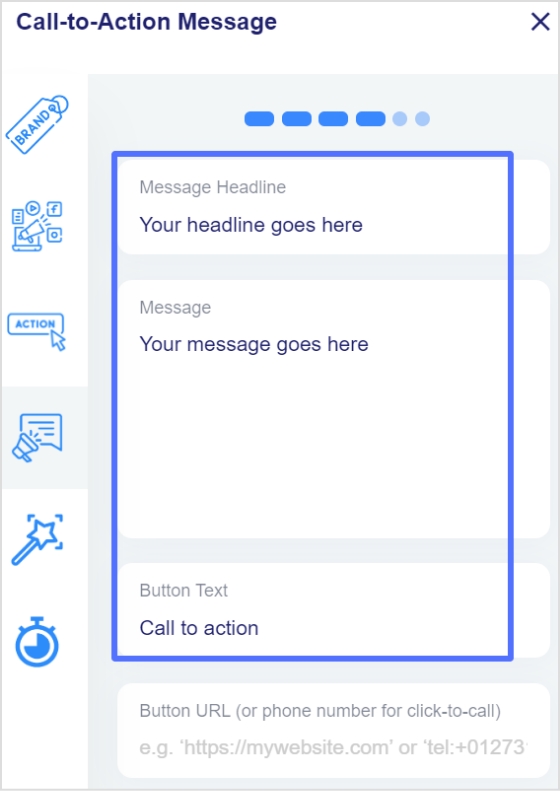
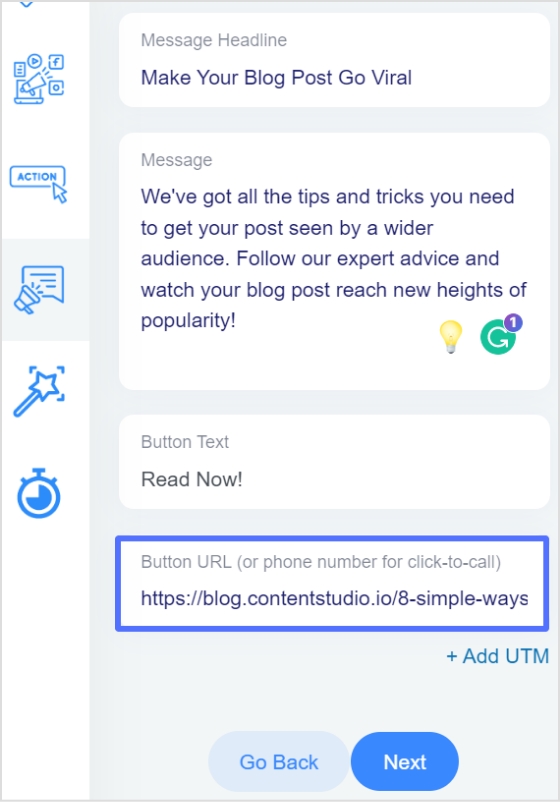
Step 12: You are now in the CTA message section. Write your headline, message, and CTA button text.
Step 13: Enter your CTA button’s URL or phone numberin the last block, and click Next.
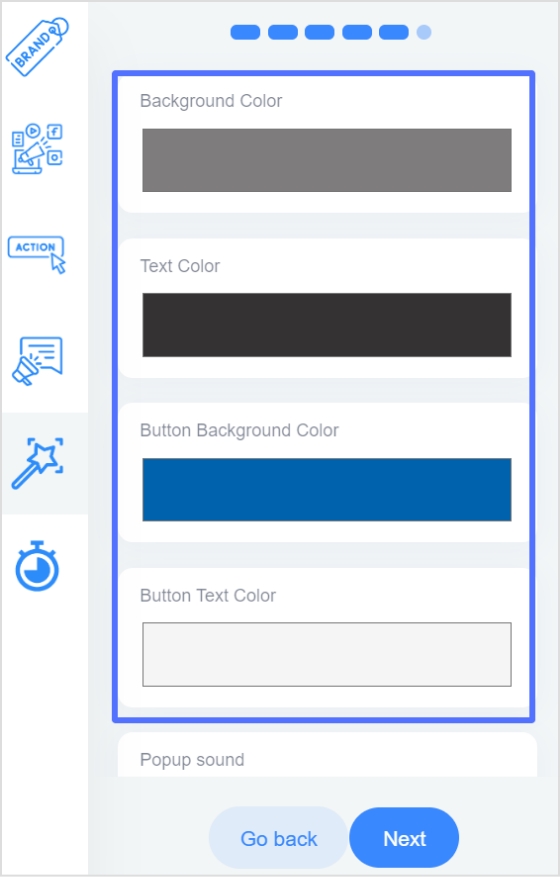
Step 14: You’re now in the CTA customization section, where you can add colors. (Background colors, text colors, CTA button background colors, CTA button text colors). Choose your colors and click next.
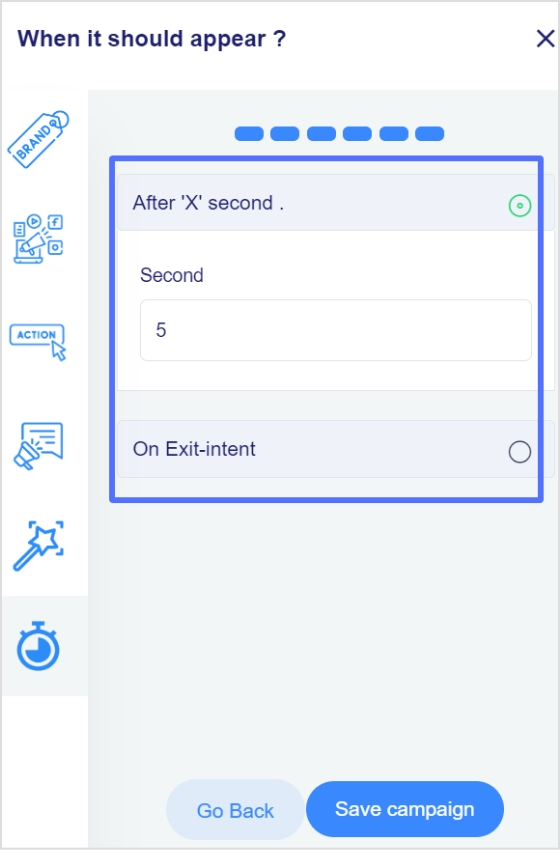
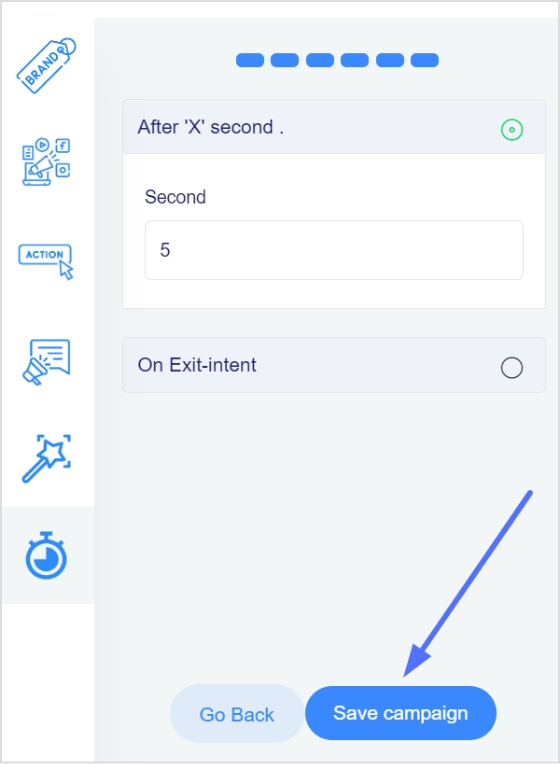
Step 15: In the final step, you will select the seconds, after which the CTA will be displayed to the user. Alternatively, you can select the “On exit-intent” option, which will display the CTA when the user wants to exit the page.
Step 16: Save the campaign; now, you can share it across other platforms. Ensure that your newly created campaign appears in the campaigns section.
Did You Know?
Replug is a top-notch link optimization platform that can also help to track the effectiveness of the CTA. It offers analytics tools that allow you to track how many clicks the CTA receives. This can help you determine which CTAs are most effective and optimize your marketing efforts accordingly.
FAQs
What are the 3 features of a strong call to action?
Any CTA should have these three key features:
1. Clarity: A strong call to action should be clear and straightforward so that the reader knows exactly what they are being asked to do. This means using actionable language, such as “click here” or “sign up now,” and avoiding vague or confusing phrases.
2. Urgency: A sense of urgency can be a powerful motivator, and a strong call to action should convey a sense that the reader needs to take action immediately. This can be achieved through time-sensitive language, such as “limited time offer,” “act now,” or by highlighting the benefits of taking action immediately.
3. Relevance: A strong call to action should be relevant to the reader and the context in which it appears. This means that it should be tailored to the specific needs and interests of the audience and should align with the overall goals and message of the campaign or piece of content. By focusing on the reader and their needs, a strong call to action can increase the chances of conversion.
What elements are in CTA?
There are a few key elements that are typically included in a CTA:
– Action verb: The CTA should include an action verb that tells the reader what to do. Some common action verbs used in CTAs include “click,” “sign up,” “download,” and “register.”
– Button or link: The CTA should include a button or link that the reader can click to take the desired action. The button or link should be prominently placed and easy to find.
– Benefit: The CTA should include a benefit or reason for the reader to take the desired action. This could be a discount, exclusive content, or a chance to win a prize.
– Sense of urgency: The CTA should convey a sense of urgency or time sensitivity to encourage the reader to take action immediately. This can be achieved through time-sensitive language or by immediately highlighting the benefits of taking action.
In 2026, standing out on YouTube isn’t just about great content; it’s about being easily found.
With over 2 billion+ logged-in monthly users and millions of new channels launching every year, discoverability is more competitive than ever.
One simple yet powerful way to boost your channel’s visibility and memorability is by optimizing your YouTube URL. Turning that long, auto-generated link into something sleek, branded, and easy to share.
According to creator insights, channels with branded URLs see significantly higher engagement and clickthrough compared to generic ones, making it a small tweak that delivers a big impact.
Whether you’re building a personal brand or scaling your business on YouTube, conquering your URL is a practical step every creator must know.
So, without any further ado, let’s get started!
What is the YouTube URL name?
When we talk about URL names on YouTube, we’re simply referring to the web addresses that take people straight to your content, i.e., a specific video, a playlist, or your entire channel.
A URL is the address you type in the browser bar to reach something online, like:
https://www.youtube.com/watch?v=…for a video or
https://www.youtube.com/@YourHandle for a channel.
On YouTube, every piece of content has its own unique URL. The primary purpose of these links is to make it easy for viewers to find, share, and come back to what you’ve created.
For channels, YouTube used to let creators set a custom URL (like /c/YourChannel), but now handles (starting with @) effectively act as your channel’s branded URL.
In short, your YouTube URL name (or handle) is the human-friendly web address people use to find your channel or videos, and choosing a clear one helps with branding and sharing.
Can I change my YouTube channel URL name?
Yes, but with one important twist (and it’s different from how it worked in the old days).
You can’t directly edit an old custom URL once it’s been set, but you can change your YouTube channel’s address by updating your handle.
Handles now act as your official channel URL (e.g., youtube.com/@YourHandle), so picking a new handle effectively gives you a new URL.
Here’s the latest update on this:
📌 Custom URLs you set in the past can’t be changed now. They’ll still work, but you can’t edit them.
🔁 You can change your YouTube handle, which updates the newer handle-based URL format.
This means yes, you can change how your channel link looks. You just do it by picking a new handle in YouTube Studio. Feel free to tweak your handle until it feels right for your brand!
Note: You can edit/update your handle twice every 2 weeks (14 days). However, keep in mind that changing your channel name may remove your verification badge.
How to change the YouTube channel URL name?
Changing your YouTube channel’s URL name today means updating your YouTube handle, because that’s what creates your branded address like youtube.com/@YourHandle.
Once you pick a new handle, YouTube automatically updates your channel URL to match it, as long as the handle is available.
Here’s a simple step-by-step guide you can follow:
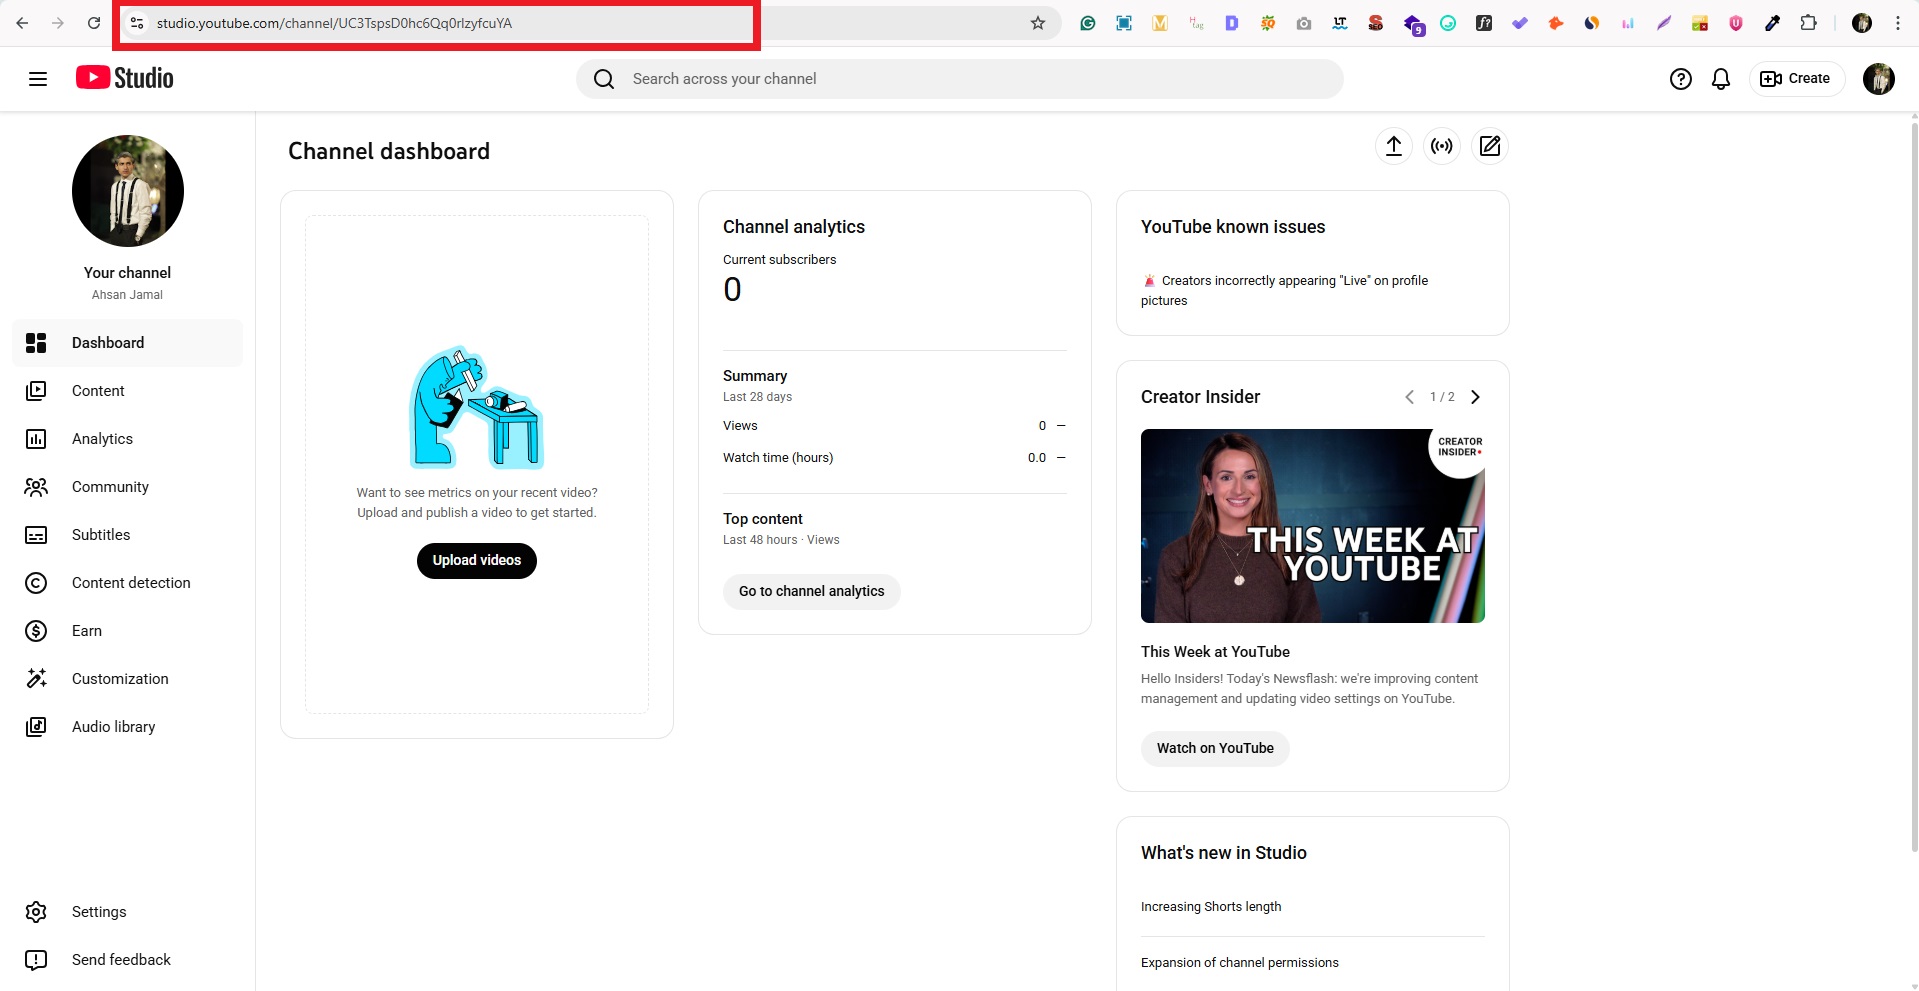
1. Sign in to YouTube Studio: Log in to your YouTube account and go to YouTube Studio.
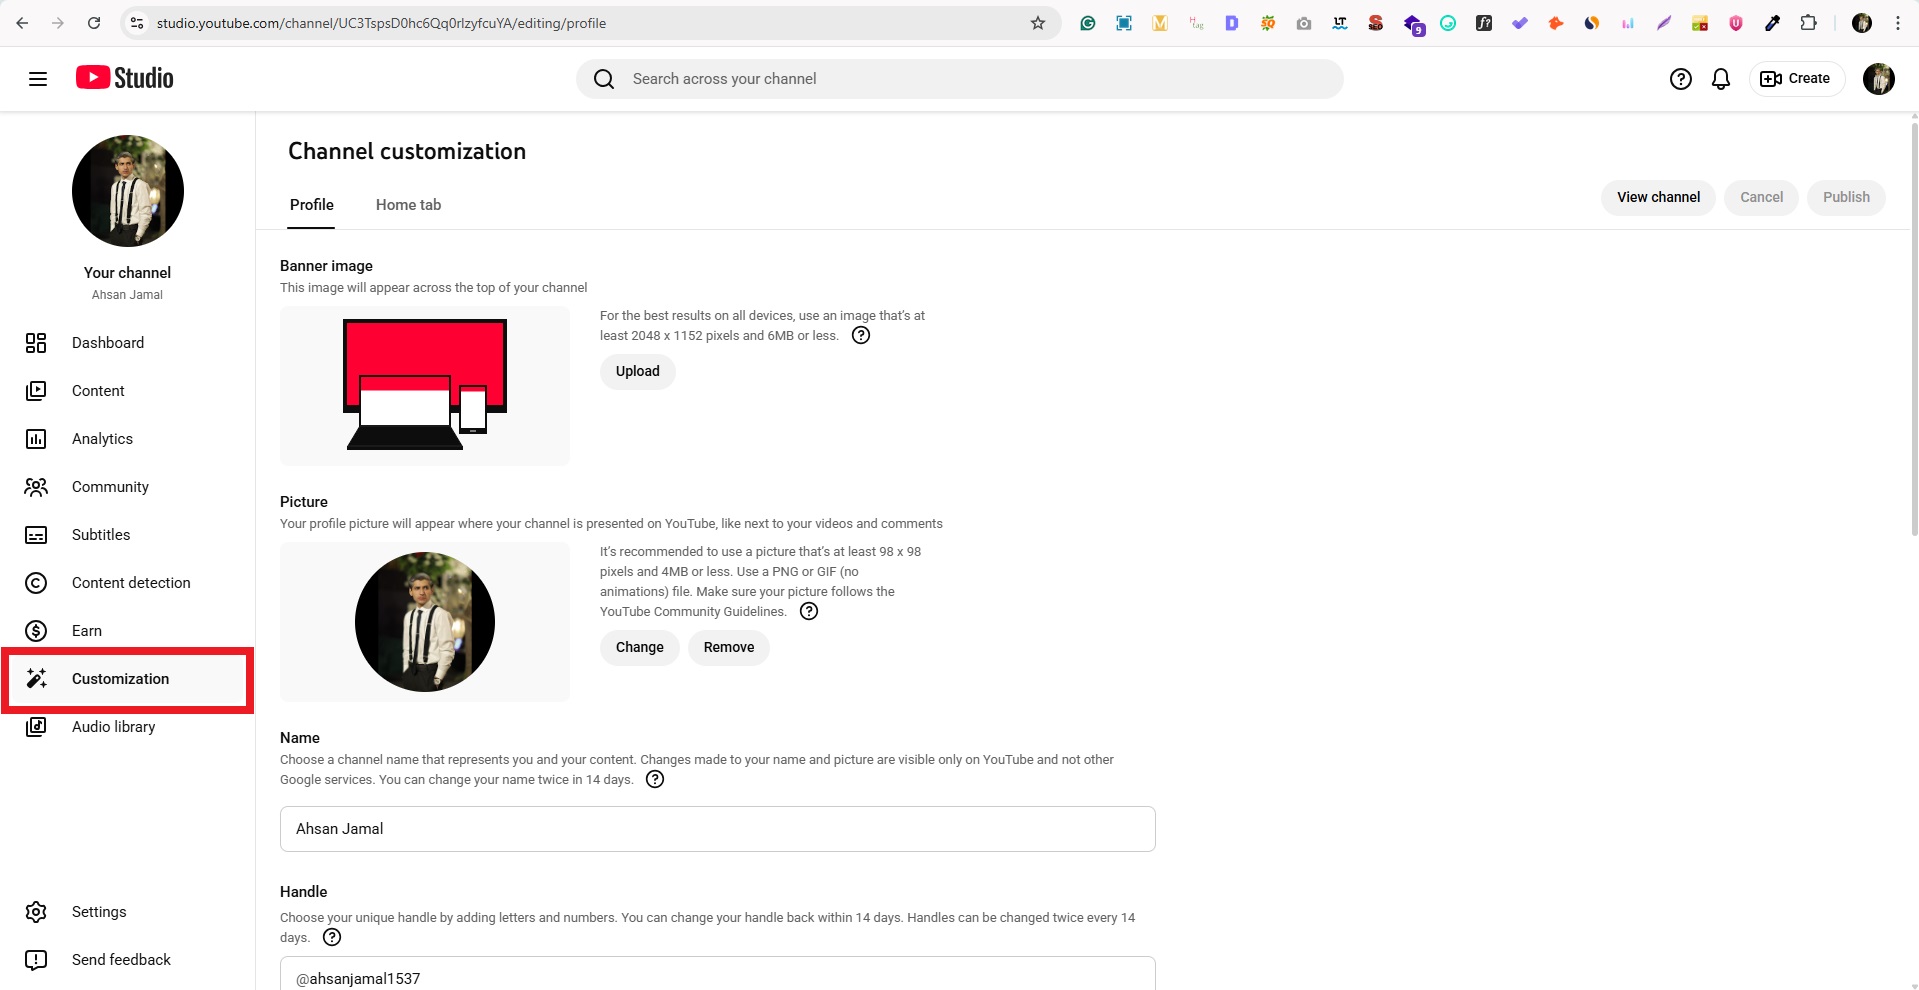
2. Go to “Customization”: From the left menu, click “Customization,” then “Basic info.”
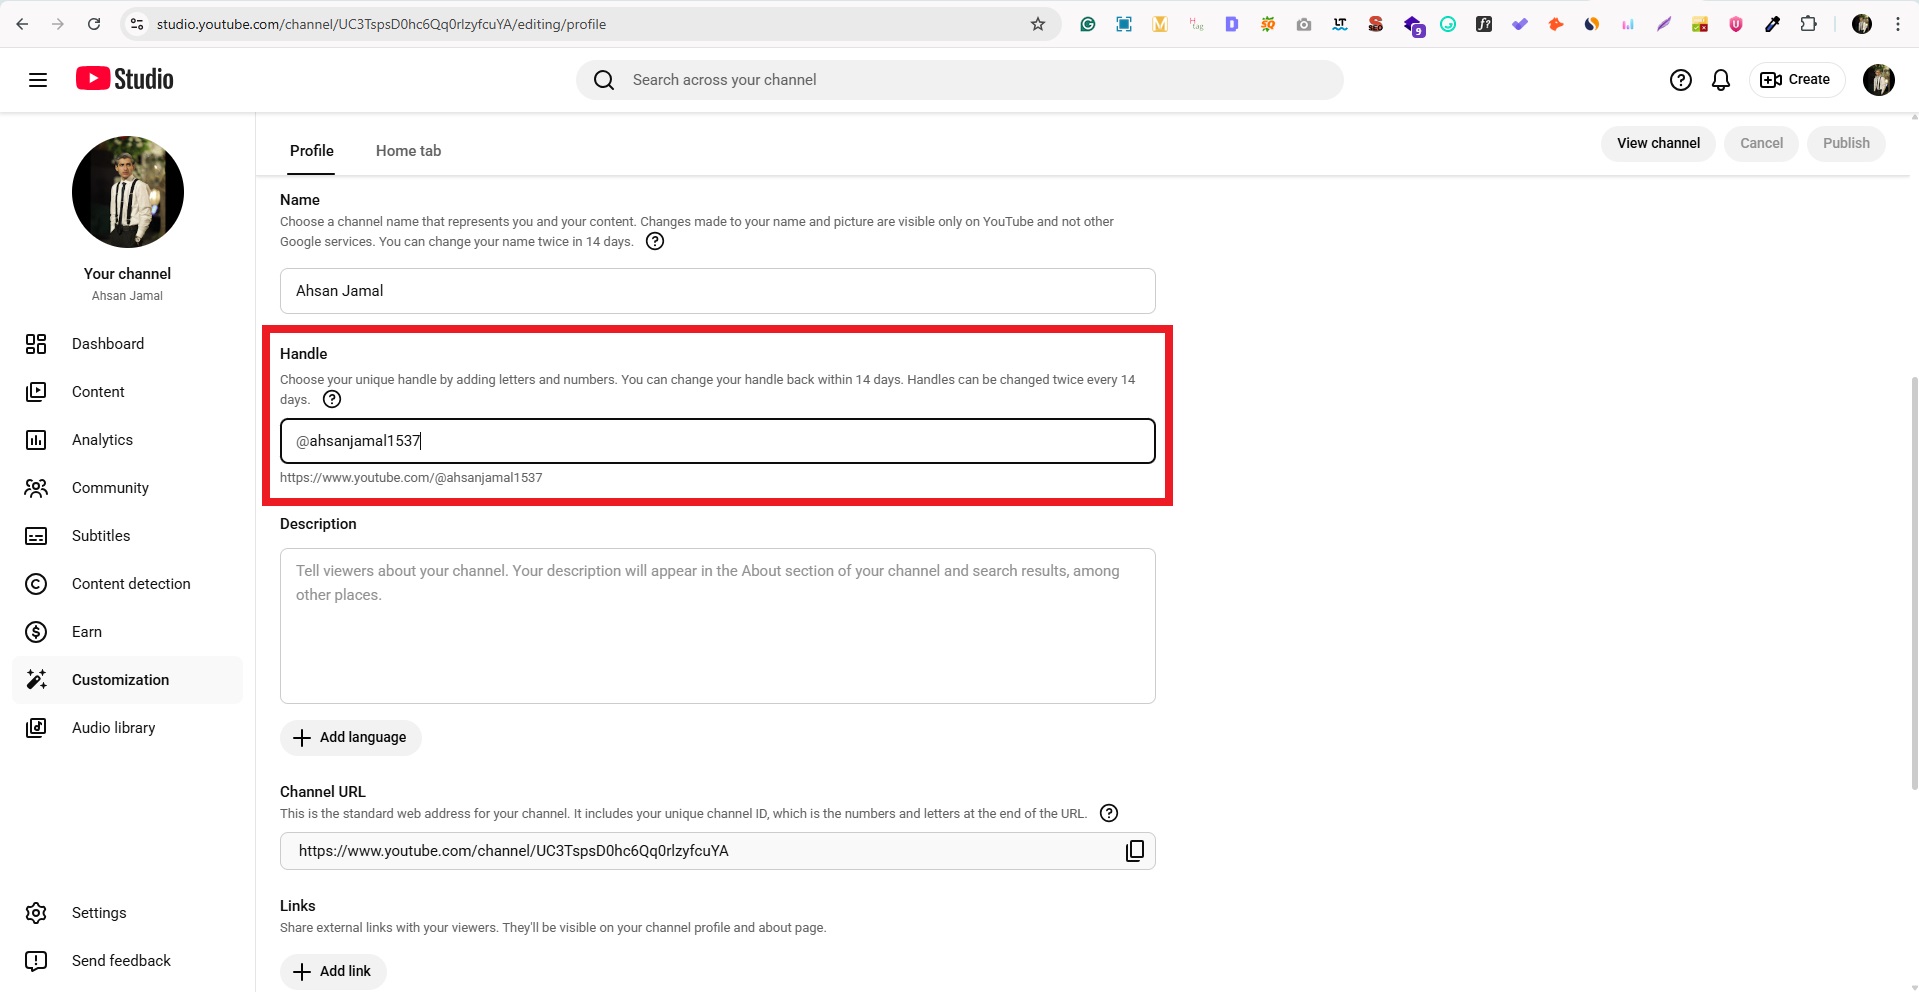
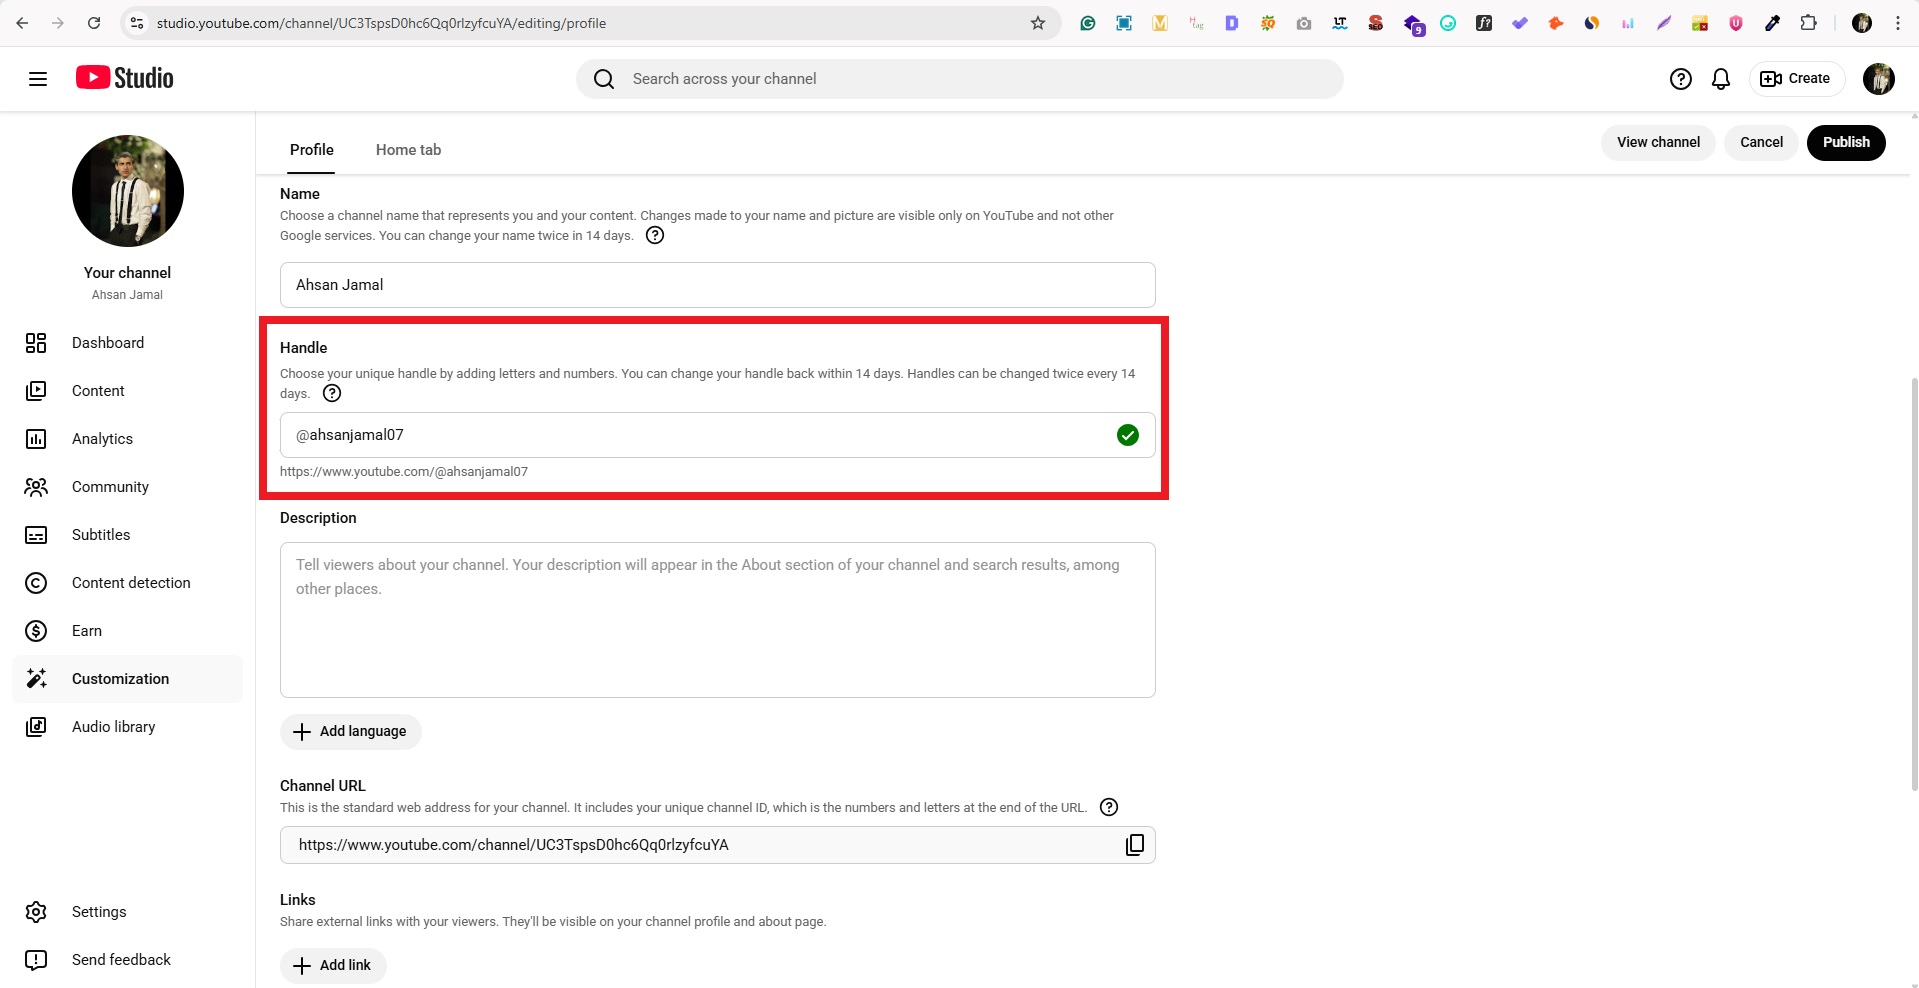
3. Edit your handle: Under the “Handle” section, click the text box to edit the current handle.
4. Choose a new handle: Type your new @handle (like @YourBrand) and check if it’s available.
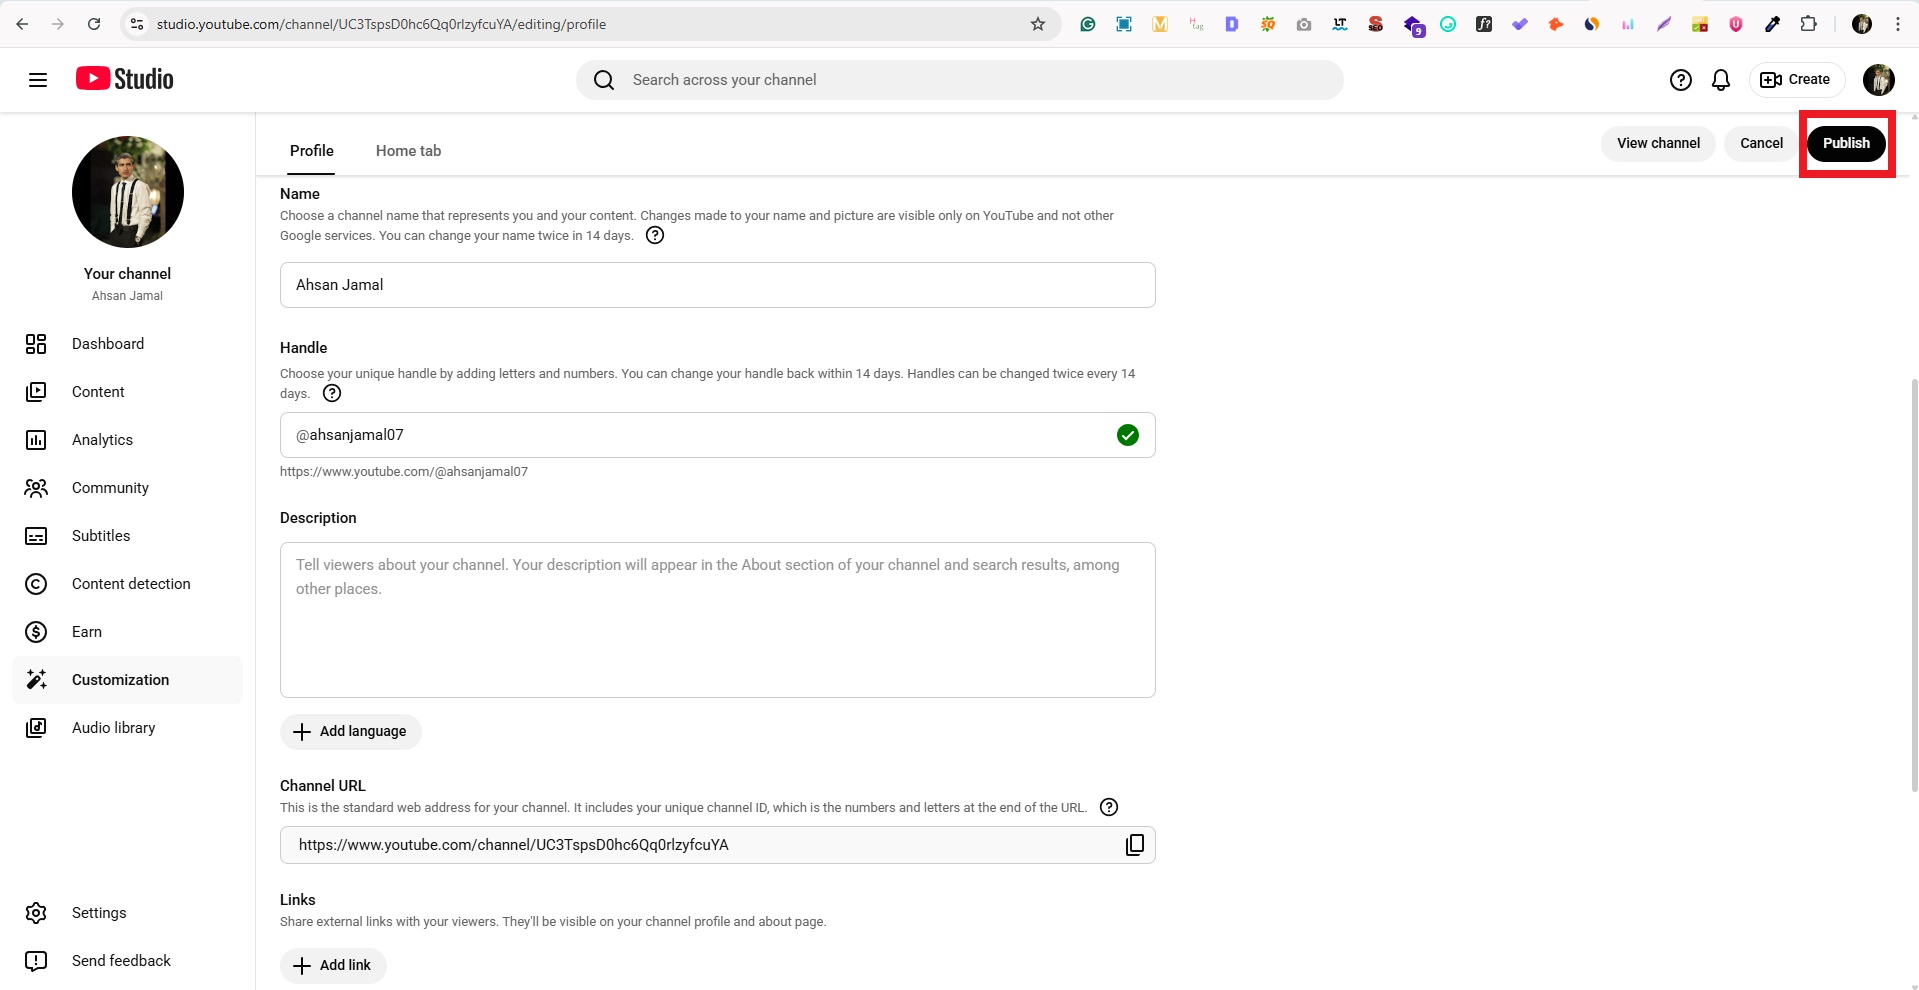
5. Publish your changes: Once you’re happy with it, click “Publish” to save and update your channel URL.
That’s all there is to it!
After this, your channel URL will work with the new handle. And, please don’t forget to update any old links you’ve shared elsewhere online!
How to change URL name on YouTube on phone?
Updating your YouTube URL name on your phone is all about changing your handle in the YouTube app, since that’s what now determines your channel’s web address.
Handles are free to update and show up everywhere on the platform once saved.
Here’s how to change link name on YouTube on phone, step-by-step:
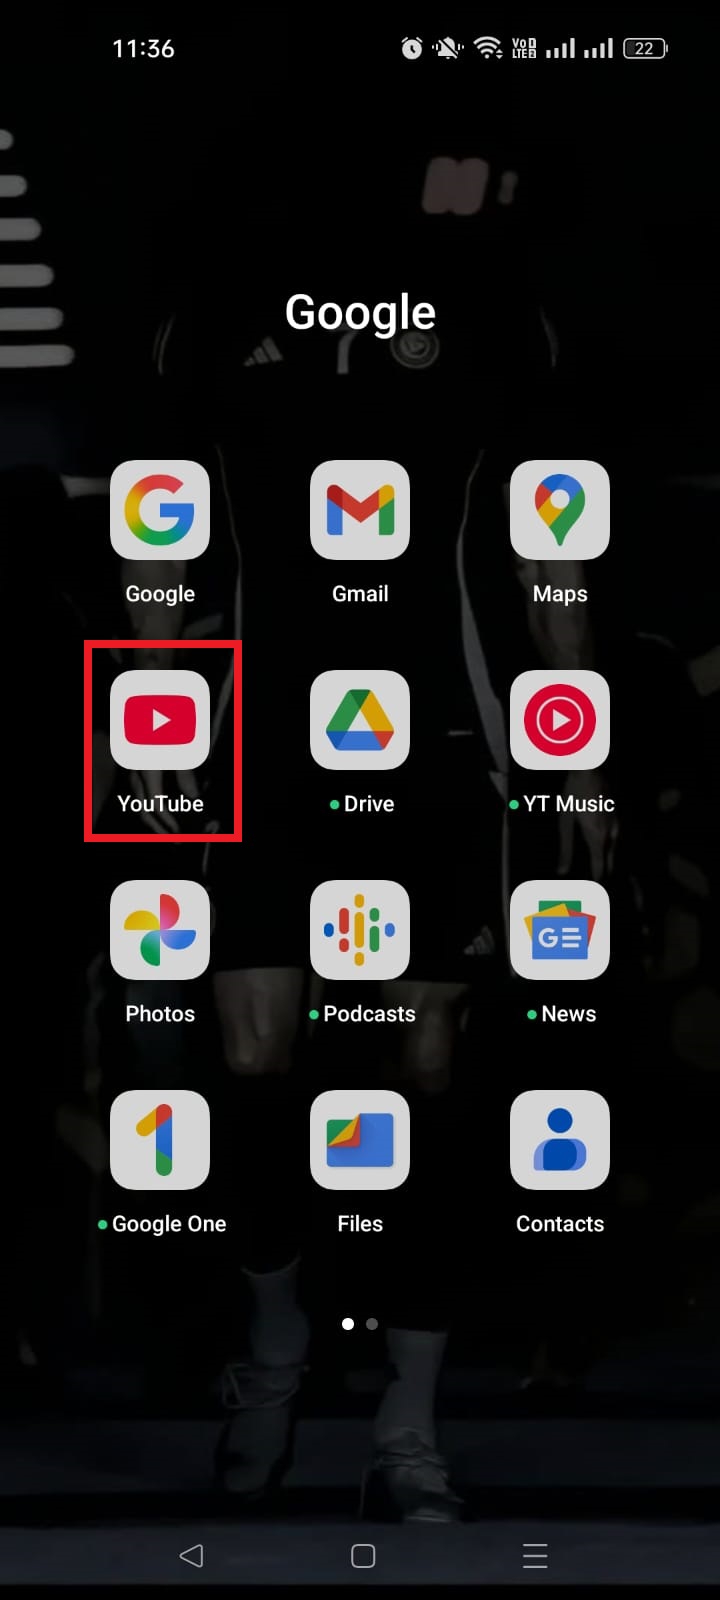
1. Open the YouTube app on your phone and sign in to your account.
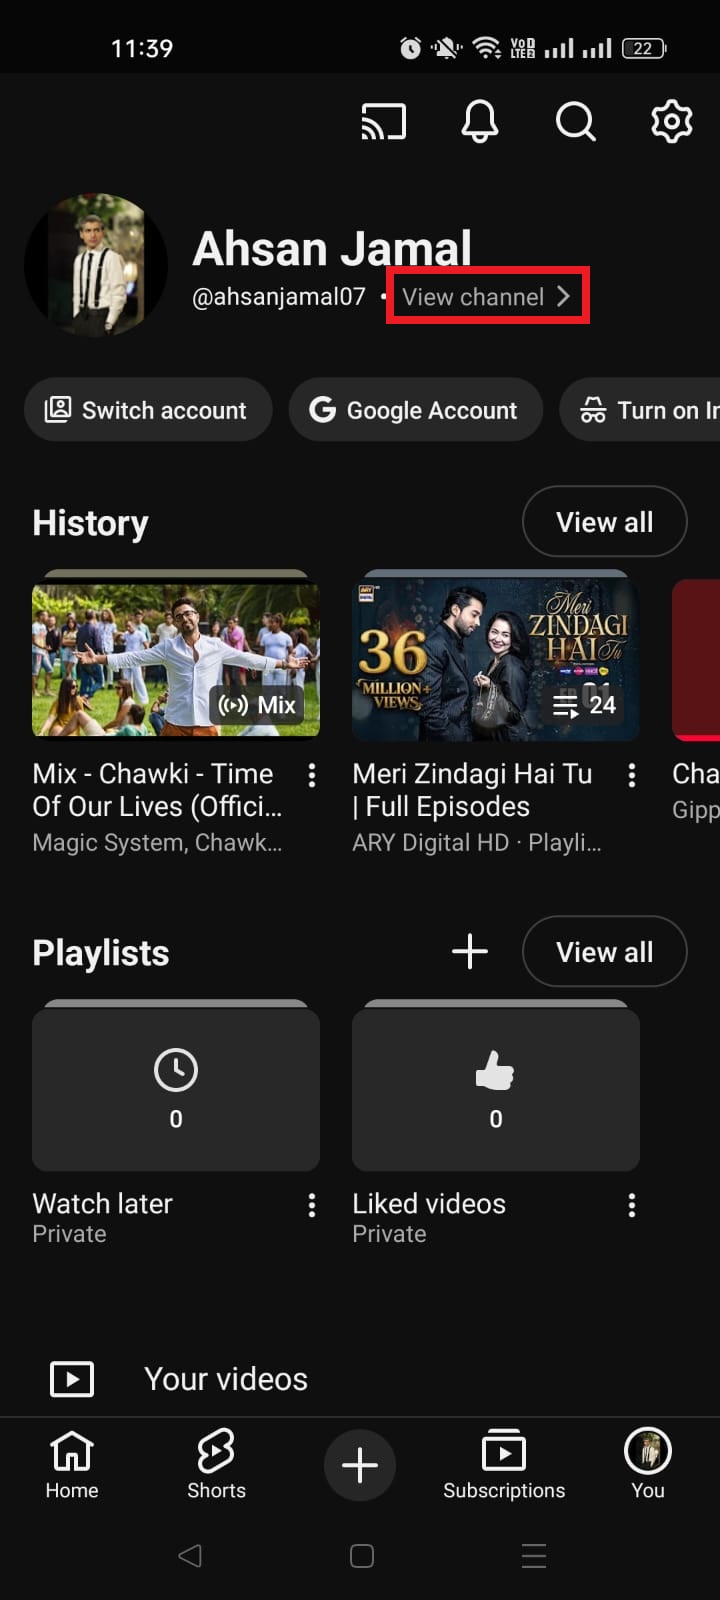
2. Tap your profile photo in the bottom-right corner to open your account menu.
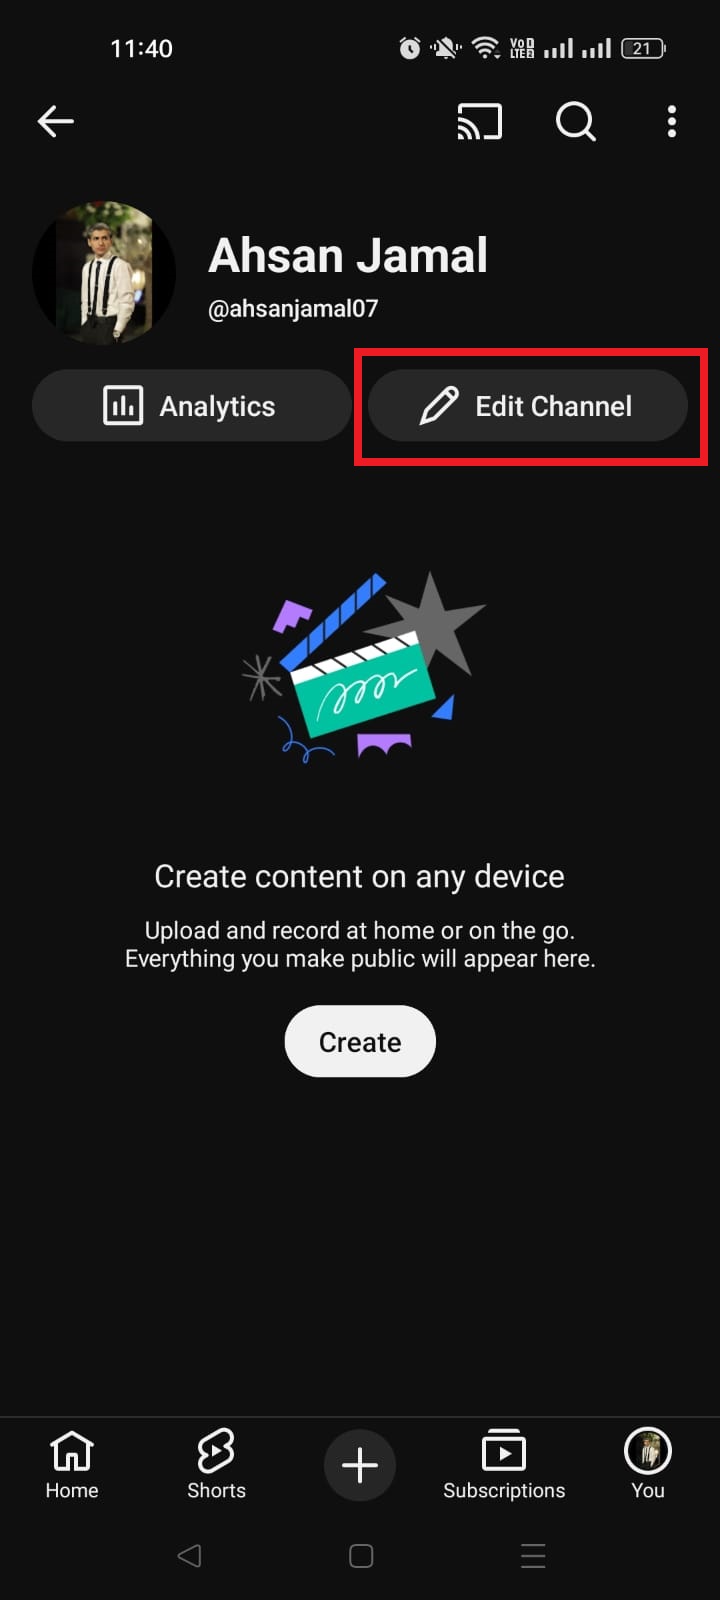
3. Tap View Channel to go to your channel page.
4. Tap the Edit Channel (pencil) button right below your channel name/handle.
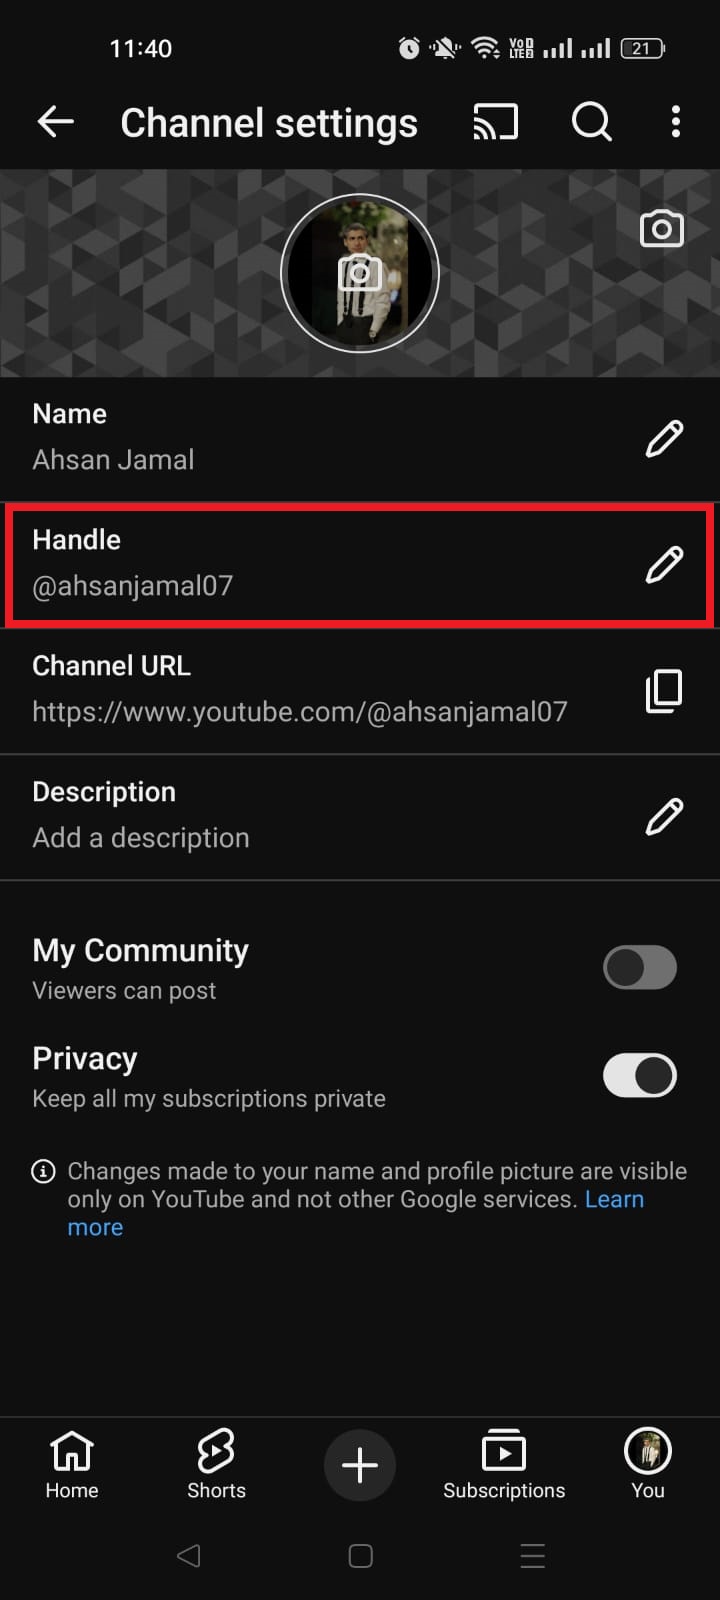
5. Find the Handle field. It shows your current @username. Tap the pencil icon next to it.
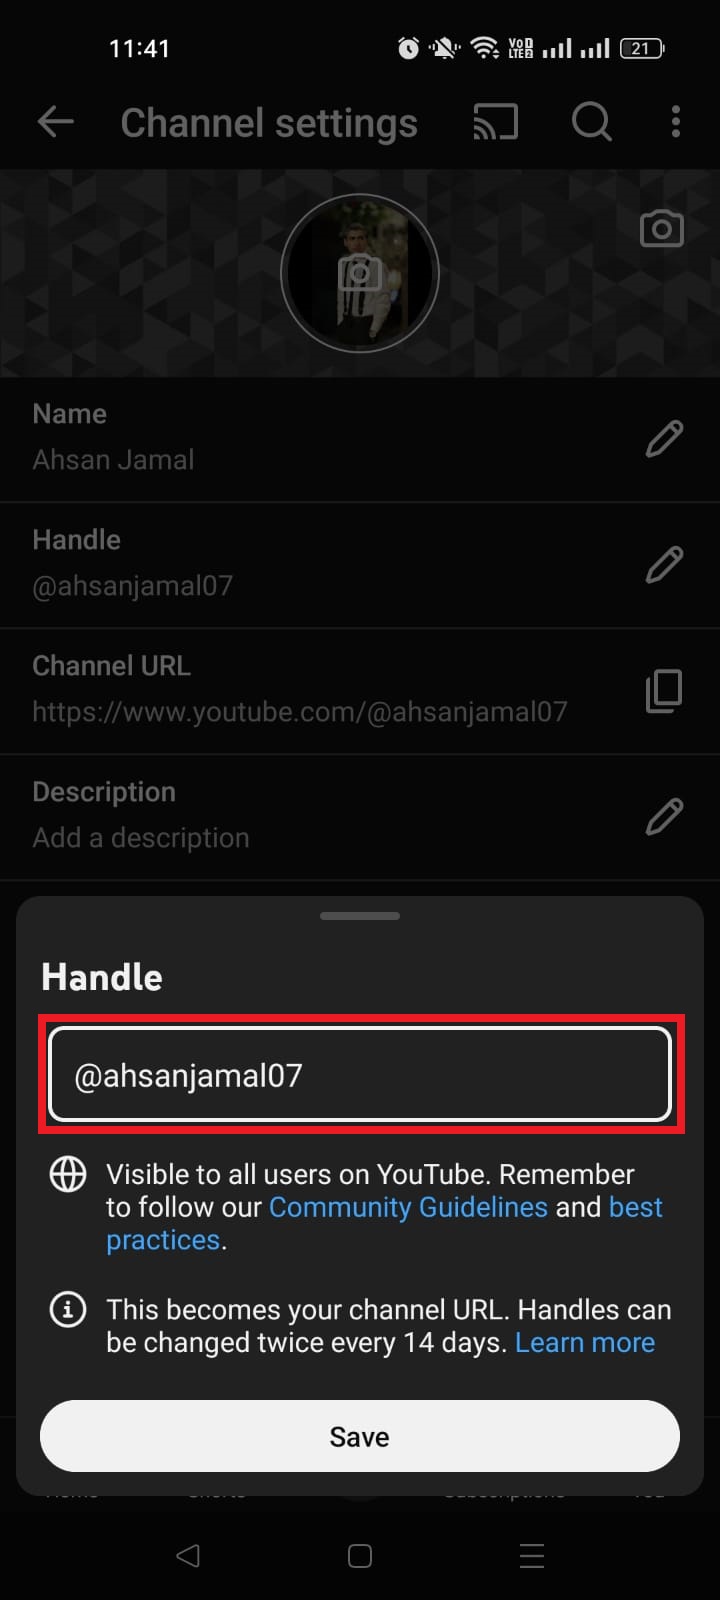
6. Type your new handle. Make sure it’s unique and available.
7. Save your changes by tapping the “Save” button or the check mark.
Once saved, YouTube updates your channel URL to use the new handle instantly!
Changing your name on the YouTube website is quick and simple, and it updates how your profile/channel appears to viewers across YouTube. It’s done through YouTube Studio in your browser.
Here’s how to change it, step-by-step:
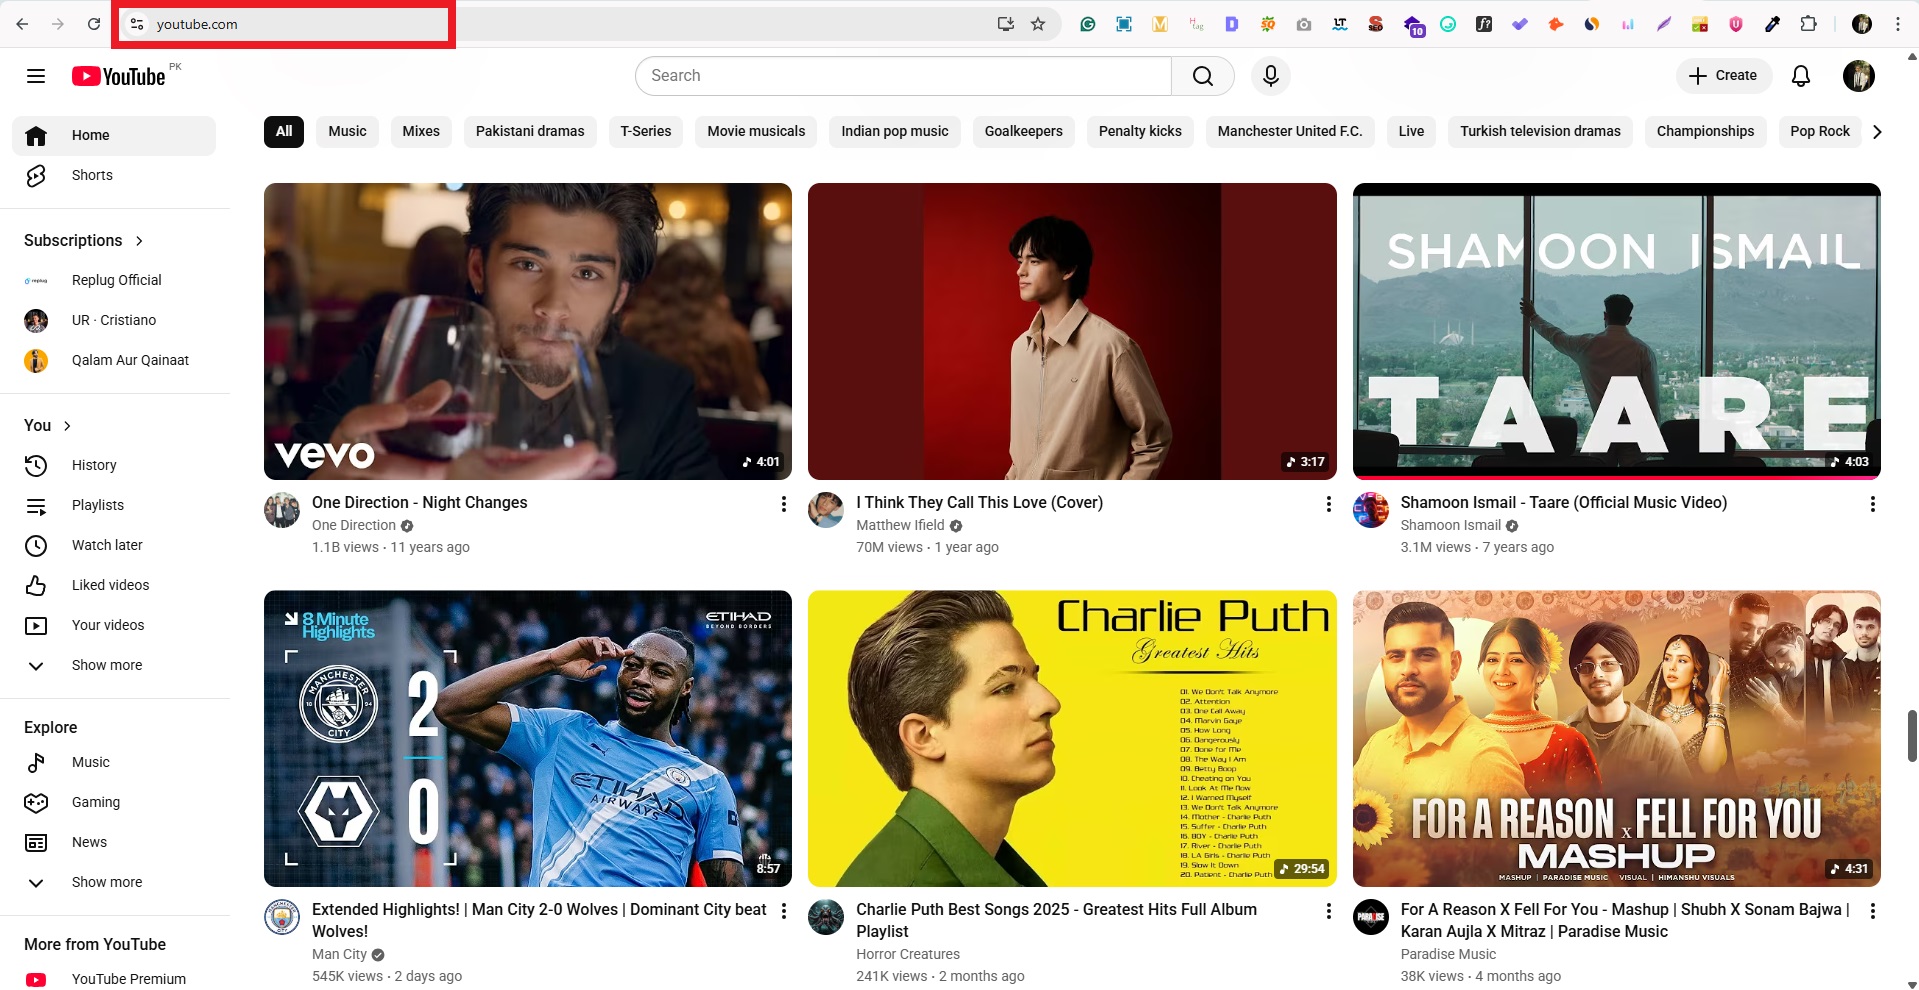
1. Sign in to YouTube: Open your browser, go to youtube.com, and log in to your account.
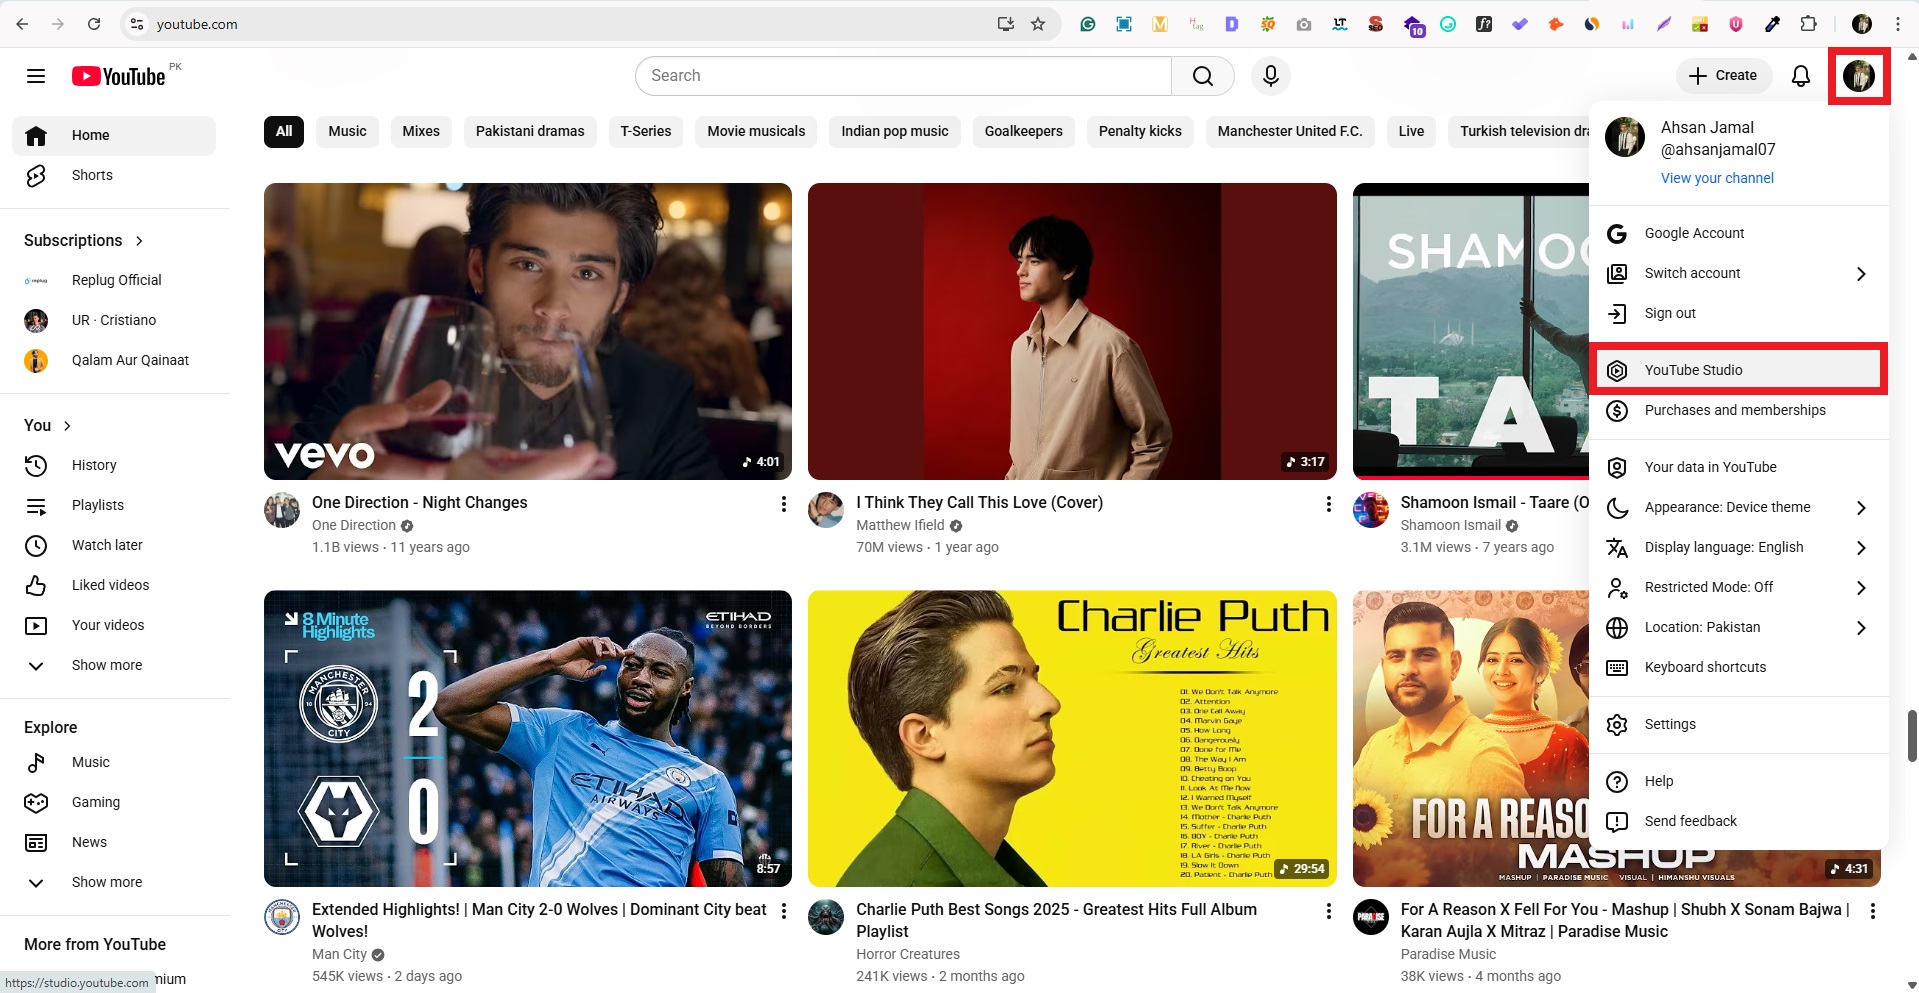
2. Go to YouTube Studio: Click your profile icon in the top-right corner, then select YouTube Studio from the dropdown.
3. Open Customization: In the left sidebar, click“Customization.”
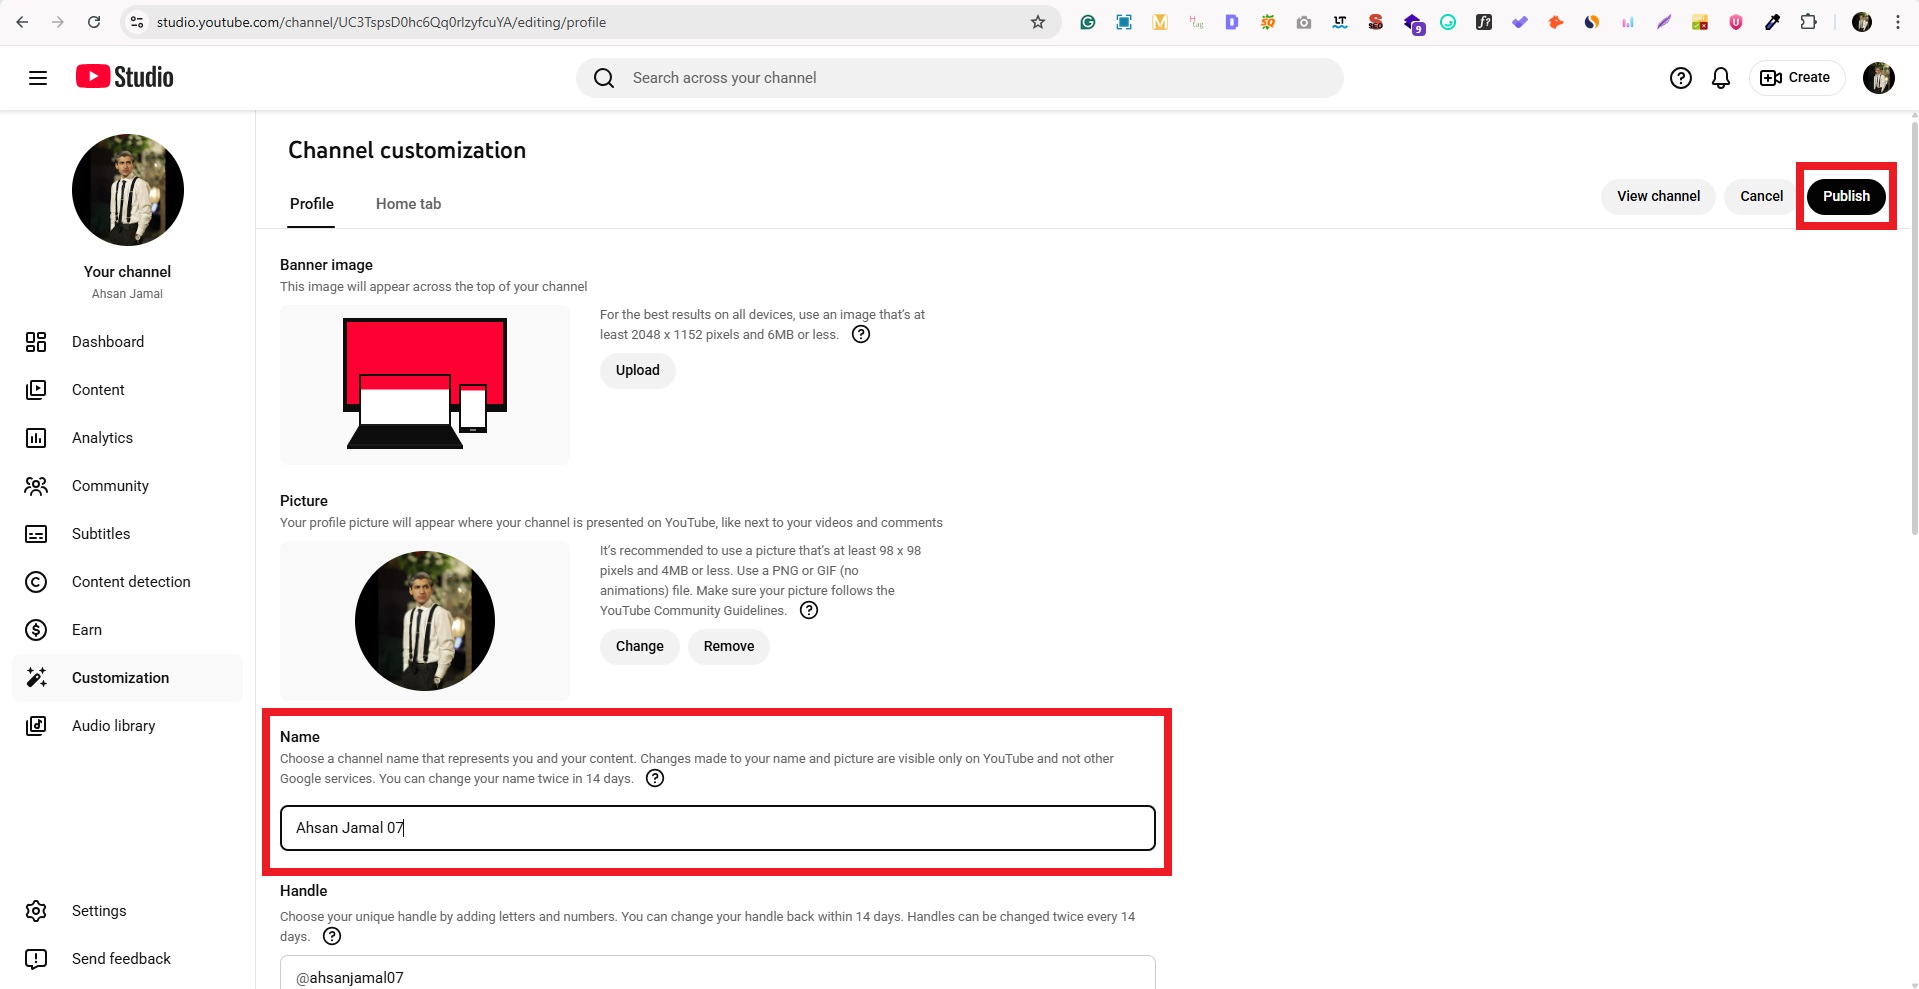
4. Edit your channel name: Click the text box titled “Name,” type your new one, and click the Publish button to save.
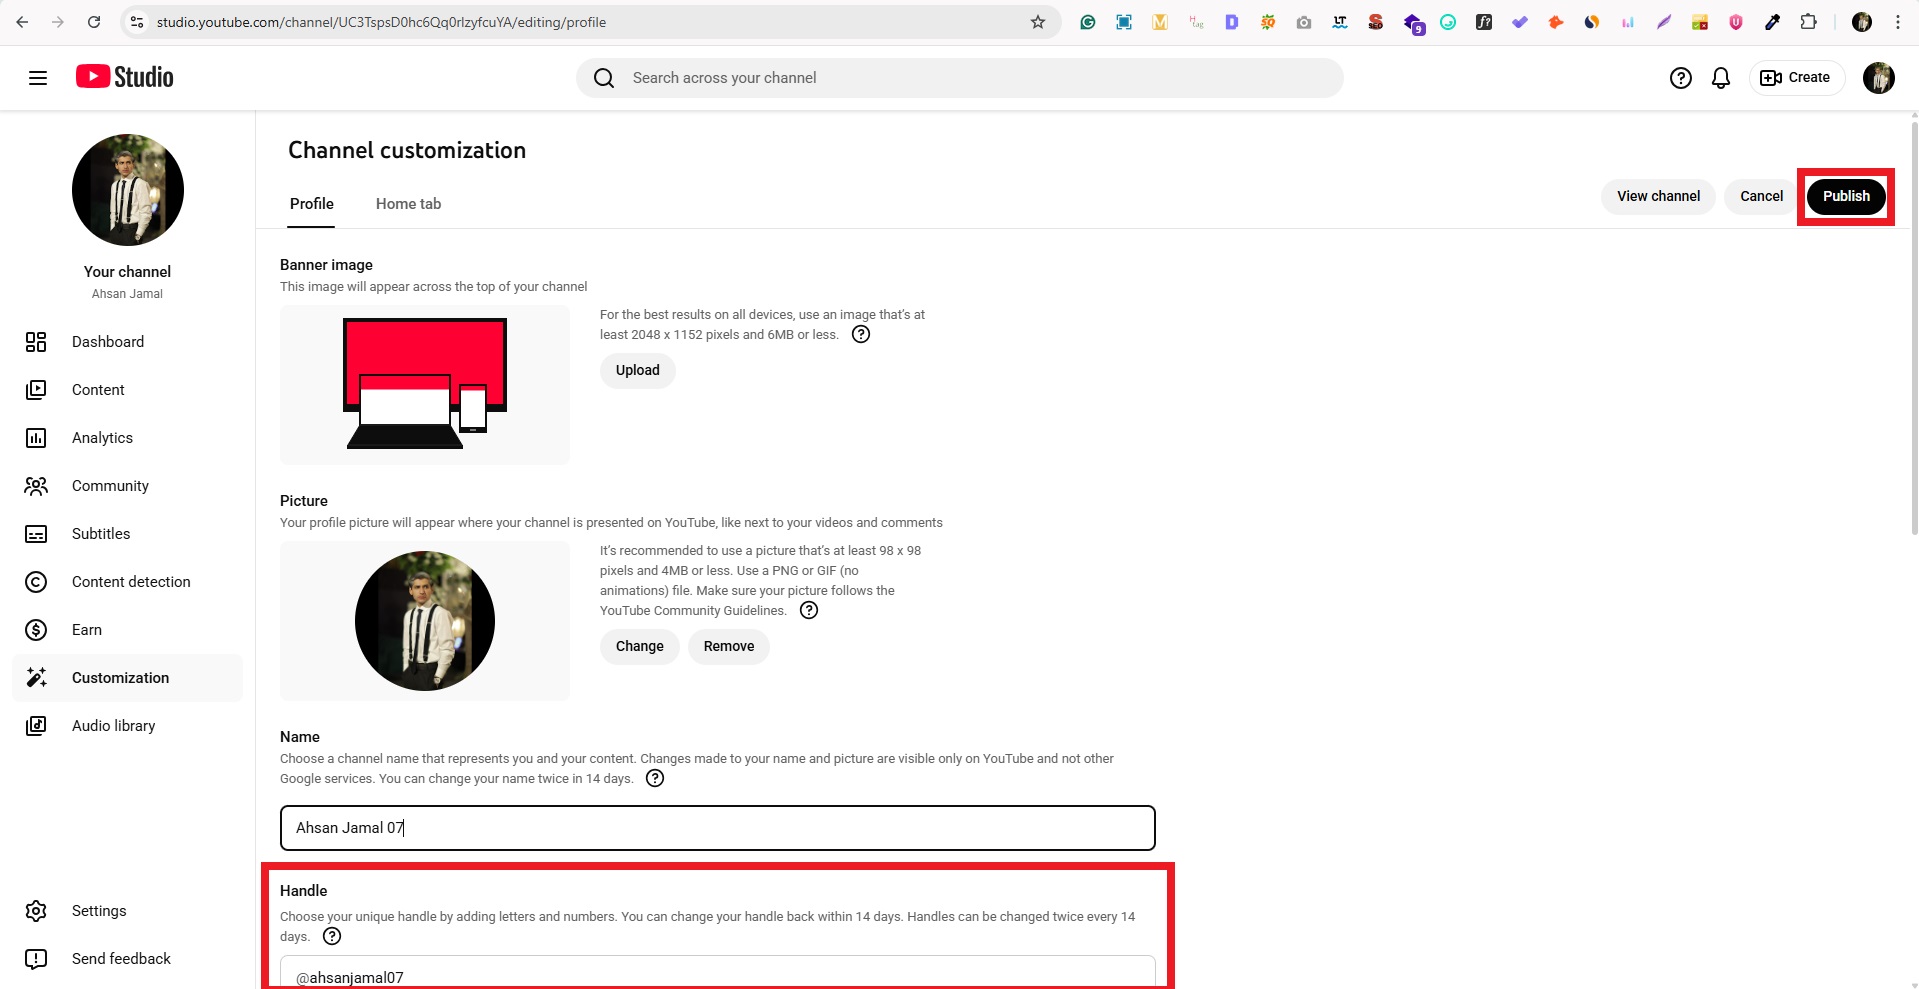
5. Update your handle (optional): If you want your URL to reflect the new name, edit the Handle (@username) field and publish it, as well.
That’s it! Your updated name (and handle, if changed) will go live and show across YouTube soon.
Shorten your YouTube URLs with Replug!
If you’re sharing YouTube content across social media, email, or anywhere online, sometimes those long YouTube links just don’t cut it. That’s where Replug comes in!
It is a brilliant link optimization platform that helps you shorten a link and turn it into something clean, branded, and professional before you share it with your audience.
A complete link management solution
for marketing professionals & agencies.
Try Replug for free
Replug goes beyond just shortening URLs by giving you full control over link tracking, branding, analytics, and more.
Here’s why using Replug for your YouTube URLs is worth it:
🔗 Create short, branded URLs: Transform messy YouTube links into sleek ones that are easier to share and remember.
📊 Track link performance: See clicks, sources, and engagement data to understand what’s working.
👥 Perfect for creators & marketers: Replug helps you boost visibility, improve engagement, and make your URLs look more professional.
Using this trustworthy platform makes your YouTube links more effective and user-friendly, so every share gets noticed!
Wrapping up
All in all, changing your YouTube URL name in 2026 is easier and more effective than ever, not just for branding, but for helping your audience find and remember you.
We walked through what URLs are on YouTube, how to update them via handles on desktop and mobile, and why keeping everything consistent matters.
And if you’re sharing links beyond YouTube, this reliable YouTube link shortener makes any long video or channel URL clean, memorable, and trackable before you post it anywhere.
With tools like this, you’re in control of how your content looks and performs across platforms. A simple change that can make a big difference for your growth.
Feel free to go ahead and apply these steps with confidence!
Frequently asked questions
How do I change my YouTube URL name?
YouTube no longer lets you edit old legacy custom URLs directly. Instead, YouTube uses handles (your @name) as part of your public URL (like youtube.com/@yourhandle).
Here’s how to change your YouTube URL name:
Go to YouTube Studio → Customization → Basic Info → Handle. Once you pick, edit, and publish a new handle, your channel URL will update to youtube.com/@newhandle.
How do I change my @name in YouTube?
Here’s how to change it:
1. Open YouTube Studio(on a browser or app). 2. Go to Customization → Basic Info. 3. Under Handle (@name), click the text box to edit. 4. Type your new @name and Publish/Save.
Your handle will update your public URL too! Remember, you can change your handle up to 2 times in 14 days.
How to change YouTube URL on phone (Android)?
You can’t change the URL directly from the main YouTube app. But you can change your handle (which updates your URL):
– Open the YouTube app → Your profile → Your channel → Edit channel → Handle (if shown). – If not visible in the YouTube app, open the YouTube Studio app, go to Customization → Basic Info, then edit your Handle and save.
Once changed, your URL becomes youtube.com/@newhandle.
How to change YouTube URL on iPhone?
Use the YouTube Studio app (best method) → Customization → Basic Info → Edit Handle → Publish. If trying the YouTube app directly, look under Your channel → Edit channel for Handle options. Changing the handle updates your URL automatically.
How to change URL on YouTube channel?
Today, YouTube channels use handles instead of old custom URLs. So to change your channel’s URL, you must update your handle in YouTube Studio. Once saved, your new channel URL will reflect that handle (like youtube.com/@yourhandle).
How do I edit a YouTube URL?
You can’t edit an old custom URL if you already set one. YouTube doesn’t let you change it anymore. Instead, you can change your YouTube handle (your @name), which will update the link people share (like youtube.com/@yourhandle).
How do I rename the URL link?
You rename your link by changing your handle. Go to YouTube Studio → Customization → Basic Info → Handle, type your new handle, and save. That new handle becomes your new visible URL (like youtube.com/@newhandle).
How to create a YouTube URL link?
Any channel always has a unique URL. Right now, if you want a clean, easy-to-remember URL, you pick a handle. YouTube then makes your link like youtube.com/@yourhandle. Default links like youtube.com/channel/UC… still work too.
Can the URL of YouTube app be changed?
You can’t change the raw app’s link that shows in the browser bar while watching videos. But you can change your channel’s public URL (handle link) through YouTube Studio, and that works on both phone and desktop.
If you’re active on both Instagram and TikTok, and let’s be real, who isn’t these days, you already know the struggle of sending followers from one platform to the other.
TikTok now has nearly 2 billion monthly active users worldwide, and its engagement rate sits at 3.70%, almost eight times higher than Instagram’s. That’s a massive, highly engaged audience you could be funneling straight to your Instagram page.
No matter if you’re a content creator, a small business, or just someone building a personal brand, connecting these two platforms is a no-brainer move. But how exactly do you do it?
Let’s start with the most common question people ask first: Is it even possible to add an Instagram link to your TikTok profile?
Is it possible to add an Instagram link to TikTok?
Yes, absolutely!
TikTok lets you link your Instagram account directly from your profile. You just head to “Edit Profile,” and tap “Add Instagram” under the “Social” section. Follow the prompts, and once connected, a clickable Instagram icon shows up right on your TikTok profile page.
Pretty neat, right?
Now, there’s one small catch. You can link social platforms like Instagram without needing to hit any follower threshold, unlike website links, which require at least 1,000 followers for personal accounts.
So whether you’re just starting out or already growing, this feature is available to you!
How to link Instagram to TikTok account
Linking your Instagram to TikTok is honestly super simple and takes less than two minutes. There are two ways to do it:
The direct method (recommended) through TikTok’s built-in social linking feature, or
An alternative manual method using Instagram’s “Share Profile” option.
Let’s walk through both!
Here’s how to add Instagram link to TikTok profile, step-by-step:
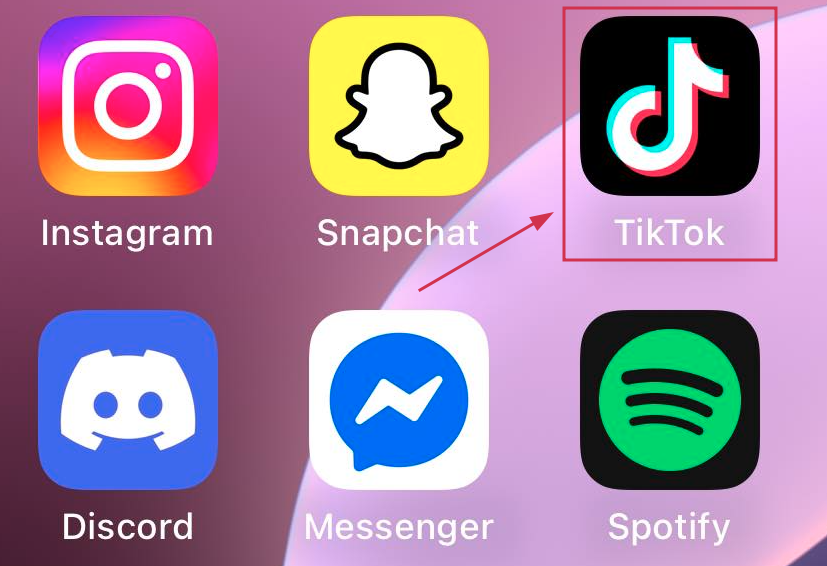
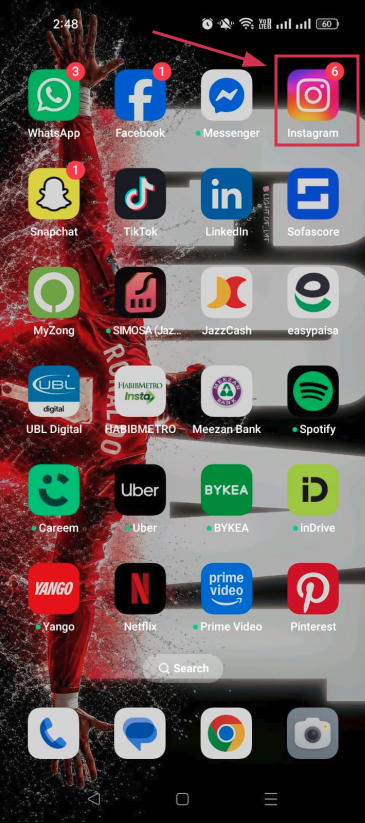
Step #01: Open the TikTok app
Grab your smartphone and launch the TikTok app. Make sure you’re logged into the account you want to link your Instagram to.
Step #02: Go to your profile
Tap the profile icon at the bottom right corner of your screen to open your TikTok profile page.
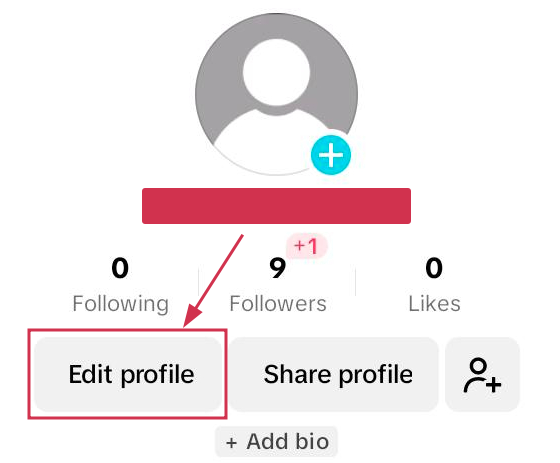
Step #03: Tap the “Edit profile” button
You’ll see the “Edit profile” button right next to your TikTok handle or just below your bio. Go ahead and tap it!
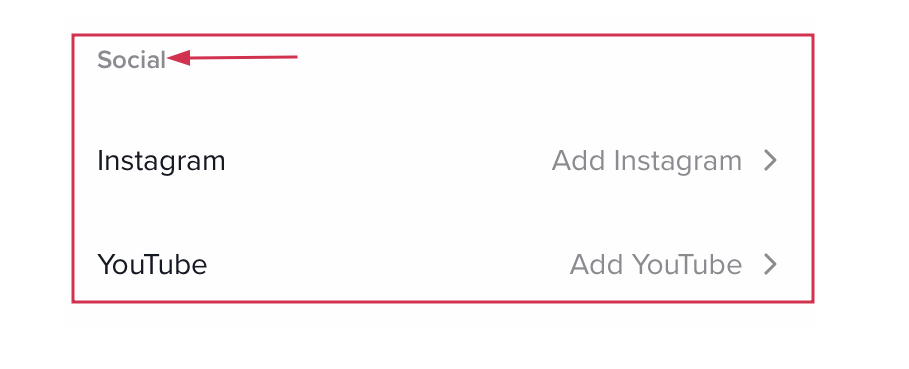
Step #04: Scroll down to the “Social” section
Once you’re inside the “Edit profile” screen, scroll down a little until you spot the “Social” section. That’s where all the magic happens.
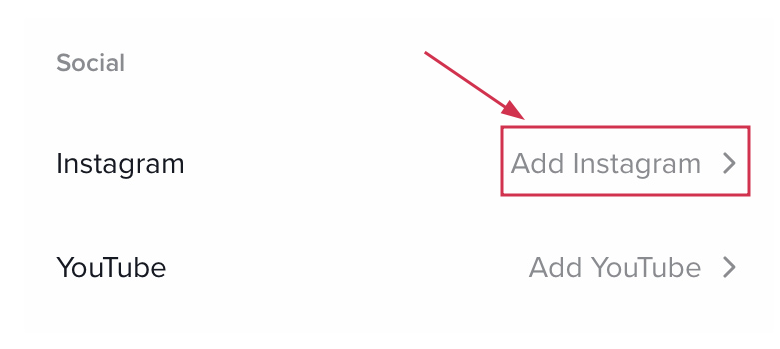
Step #05: Select “Add Instagram”
Tap on “Add Instagram,” and TikTok will prompt you to connect your account. You can choose from available platforms, including Instagram, YouTube, or Lemon8.
Step #06: Follow the login prompts
Simply log into your Instagram account when asked, hit “Authorize,” and you’re done!
Once connected, your Instagram icon will appear right beneath your TikTok bio for anyone to tap.
Alternative method:
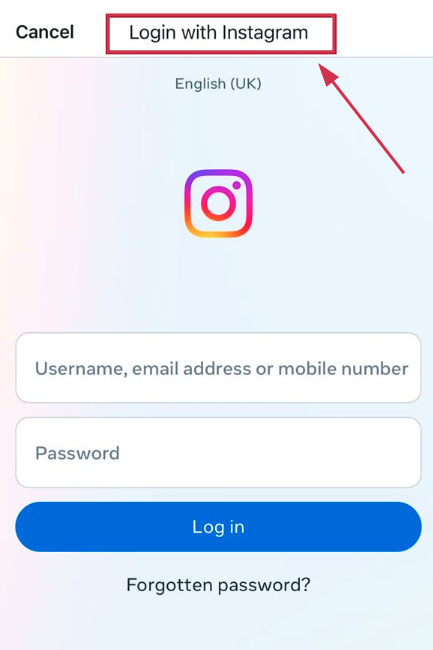
Step #01: Open the Instagram app
Head over to Instagram and make sure you’re logged into the account you want to share.
Step #02: Go to your profile
Tap your profile picture at the bottom right to open your Instagram profile.
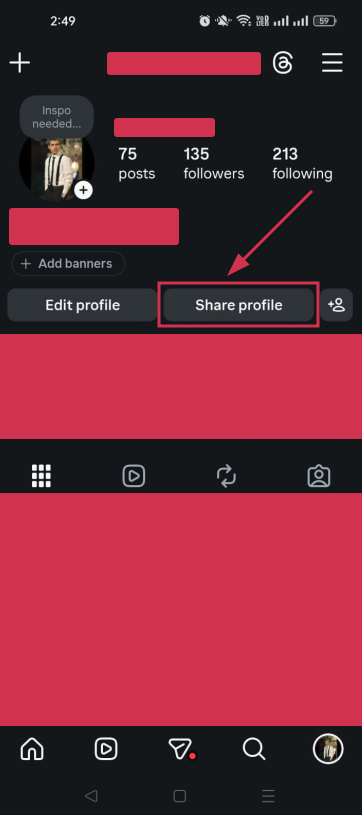
Step #03: Tap on “Share profile”
Hit the “Share profile” option. You’ll usually find it on your profile page, either as a button or through the menu.
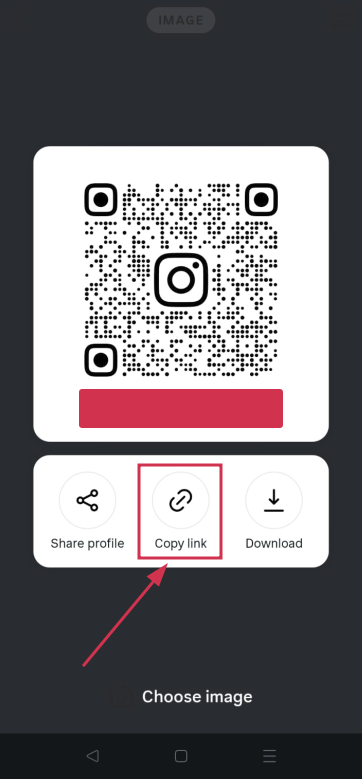
Step #04: Tap on “Copy link”
Once the share options pop up, tap “Copy link” to copy your Instagram profile URL to your clipboard.
Step #05: Go to the TikTok app
Switch over to TikTok. Your copied link is ready to paste.
Step #06: Tap on your profile icon
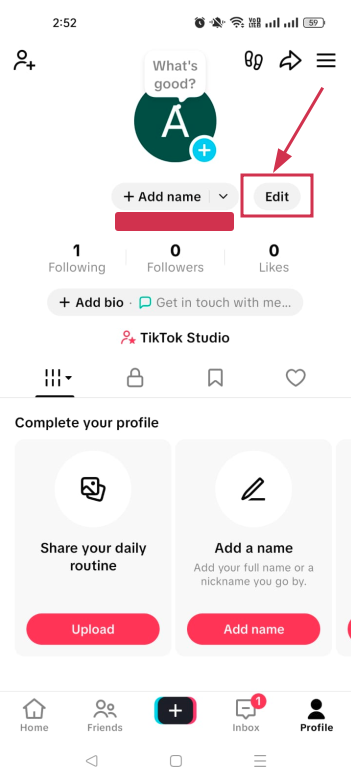
Hit the profile icon at the bottom right corner of TikTok to land on your profile page.
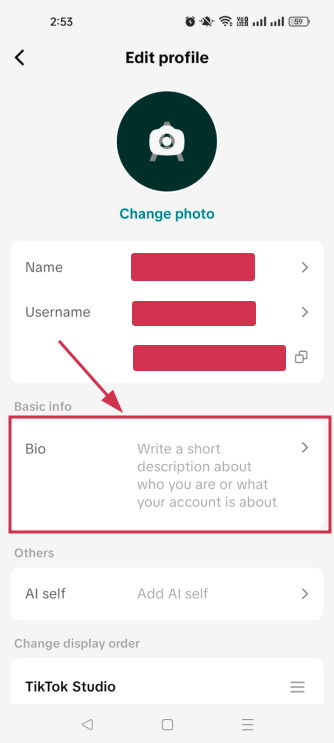
Step #07: Tap “Edit”
Just like before, tap the “Edit” button to open your profile settings.
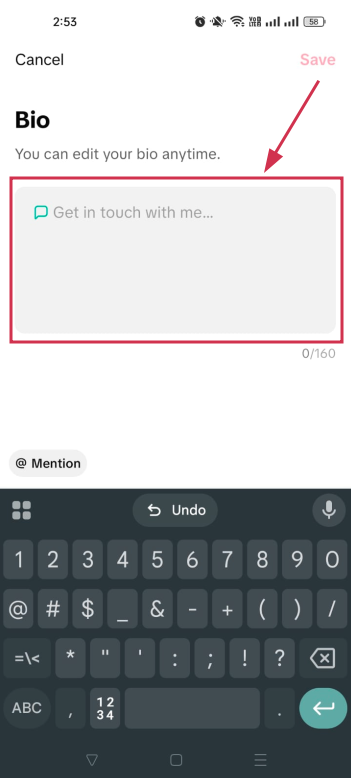
Step #08: Paste the copied link into the “Bio” or “Website” field
Paste your Instagram link into the “Bio” field for a quick and easy fix, and tap the “Save” option. And that’s all there is to it!
👉 Note that the “Website” field is only available for business accounts or personal accounts with at least 1,000 followers, so if you don’t see it, the “Bio” field works just fine as a workaround!
The process for a TikTok Business account is almost identical to what we covered above. You follow the same steps:
Go to your TikTok profile → tap “Edit profile” → scroll to the “Social” section → and connect your Instagram.
The difference is that business accounts unlock the website link field right away (no follower count needed).
Just make sure both apps are fully updated and linked to the same email or phone number to avoid any authentication hiccups.
👉 One trade-off to keep in mind: Business accounts lose access to certain trending sounds and copyrighted music, so factor that in before switching!
Why linking Instagram to TikTok is worth it!
If you’re still uncertain about connecting your accounts, let us give you a few solid reasons to just go for it.
Linking Instagram to TikTok isn’t just a convenience thing at present. It’s actually a smart move for growing your presence and making your content work harder for you across both platforms.
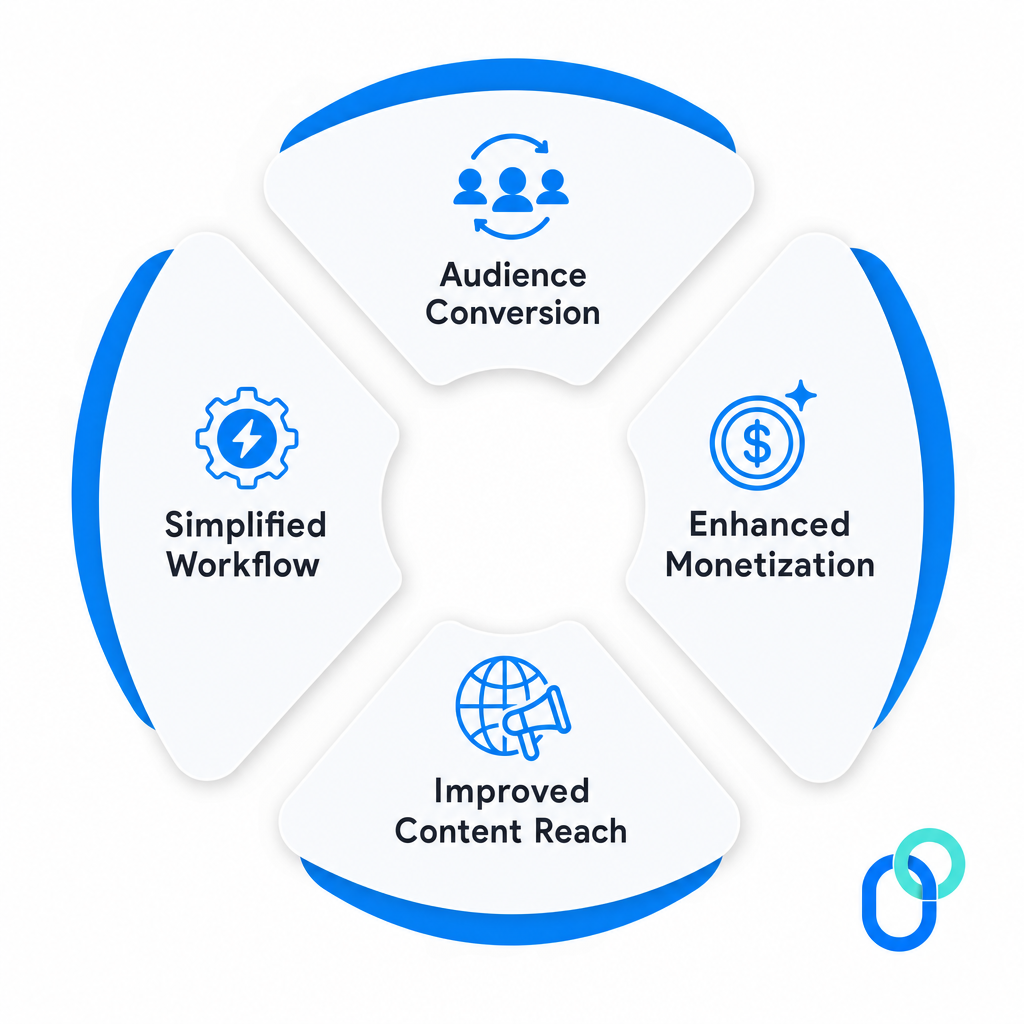
Audience conversion
Think about it: Someone comes across your TikTok, loves your content, and wants to see more of it. If your Instagram is right there on your profile, that curiosity instantly turns into a follow.
TikTok is where your content gets discovered and explodes overnight, while Instagram is your home base for building a more curated brand and nurturing a loyal community. Linking the two makes that journey seamless.
Enhanced monetization
Having a strong presence on both platforms opens up way more doors when it comes to brand deals, sponsorships, and collaborations.
Brands love working with creators who have a cross-platform audience because it means more eyes on their product. The bigger and more connected your following looks across TikTok and Instagram, the more attractive you become to potential partners (and that directly impacts what you can charge).
Improved content reach
Not everyone is present on both platforms, so linking your accounts helps you tap into two completely different audiences at once.
TikTok pulls in over 60% of users aged 16–34 who are chasing trends and rapid discovery. Whereas Instagram reaches an 18–44 age group with higher income brackets who expect more polished, longer-form content.
Bridging the two means your content gets in front of a much wider and more diverse crowd.
Simplified workflow
When your accounts are linked, managing your online presence becomes a whole lot easier. You can repurpose content across both platforms without the hassle of manually directing people from one app to the other.
Cross-posting and repurposing videos becomes easier, and guiding your audience from one platform to the next feels natural, saving you both time and effort in the long run.
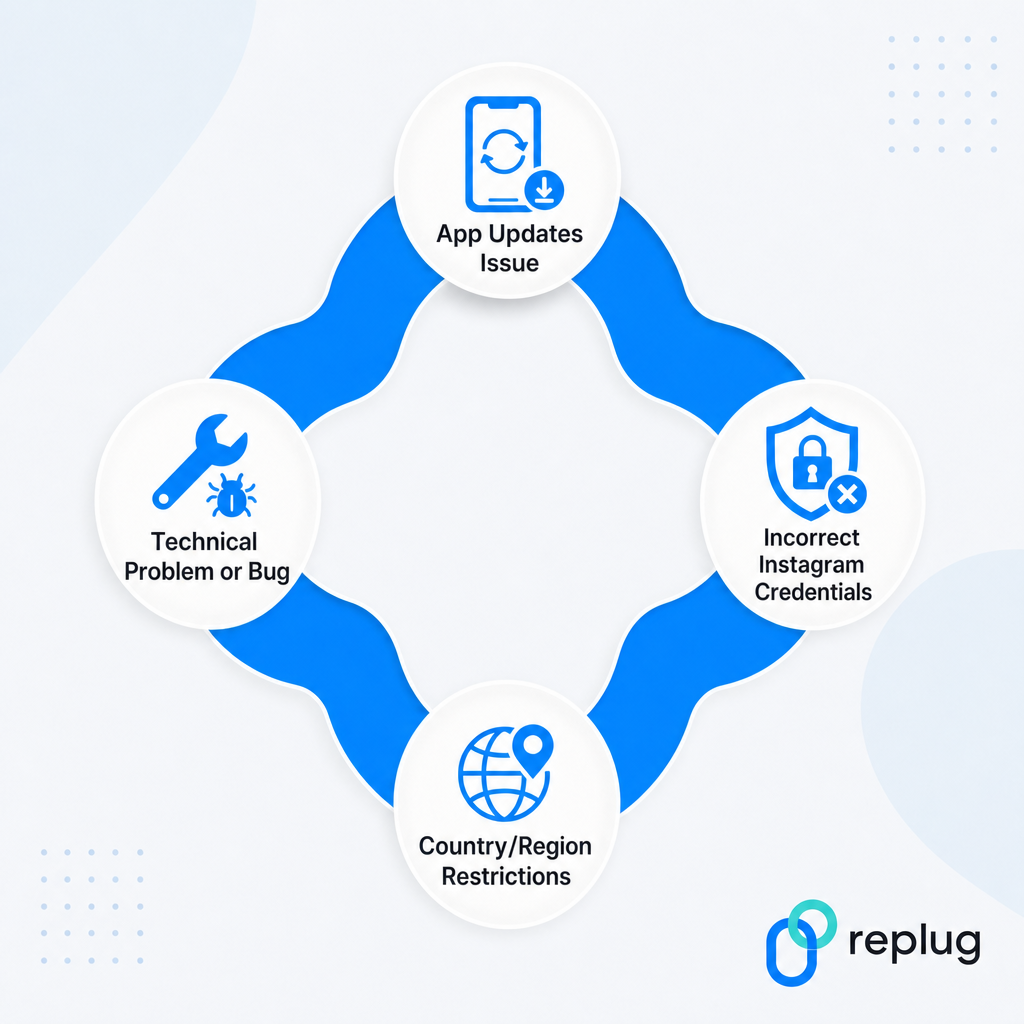
Why won’t TikTok let me link my Instagram?
Running into issues while trying to link your Instagram to TikTok? Don’t worry, you’re not alone; it’s actually pretty common.
Most of the time, it comes down to one of these four reasons, and the good news is they’re all pretty easy to fix.
App updates issue
This one catches a lot of people off guard.
Both apps need to be fully updated to avoid authentication errors during the linking process. If either your TikTok or Instagram app is running on an older version, the connection simply won’t go through.
Head to your app store, check for any pending updates, and try linking again. That usually does the trick.
Incorrect Instagram credentials
If you’re getting an error during the login step, double-check that you’re entering the right Instagram username and password. It sounds obvious, but it’s one of the most common reasons the linking fails.
Also, if you have two-factor authentication enabled on Instagram, it can block TikTok’s linking request. Temporarily disabling 2FA, completing the connection, and then re-enabling it usually fixes this.
Country/region restrictions
This one’s a bit frustrating because it’s out of your hands.
TikTok is rolling out the Instagram linking feature gradually across different countries, with North America, Europe, and parts of Asia typically getting access first, while other regions follow weeks or even months later.
If the “Add Instagram” option simply isn’t showing up on your profile, chances are the feature just hasn’t reached your region yet.
Technical problem or bug
Sometimes it’s not you; it’s just a random glitch. Apps have bugs, and TikTok is no exception.
If you’re facing issues, try updating both apps, double-checking your login credentials, or checking your account type and region settings.
Logging out and back into TikTok, restarting your phone, or even switching from Wi-Fi to mobile data can also clear things up surprisingly fast.
What if my Instagram link isn’t showing on TikTok: Learn the troubleshooting steps!
So you’ve followed all the steps, but your Instagram link still isn’t showing up on TikTok? Super annoying, but totally fixable!
Here’s what you should try:
Update both apps: Make sure TikTok and Instagram are both running on their latest versions before attempting to re-link.
Log out and back in: Sometimes simply signing out of TikTok and logging back in refreshes everything and makes the link appear.
Switch to mobile data: Wi-Fi networks, especially managed or public ones, can block app authentication. Try switching to mobile data and linking again.
Check your account type: If you recently switched to a business account, TikTok may prioritize the website URL field over the Instagram icon. Double-check your profile settings.
Re-link your account: Go back to “Edit Profile,” remove the existing Instagram connection, and add it again.
Restart your phone: Sounds simple, but a quick restart clears out minor bugs that might be causing the display issue.
If none of these work, give it a day or two. It could just be a temporary glitch on TikTok’s end!
Convert Instagram & TikTok traffic into valuable leads with Replug!
Once your Instagram and TikTok are linked up, the next step is making sure that traffic actually works for you, and that’s where Replug comes in.
Whether you’re a solo creator or running a full business account, Replug helps you turn every click into a real opportunity. Worth checking out!
Summing up
And that’s a wrap!
Linking your Instagram to TikTok really is one of the simplest yet smartest moves you can make as a creator or business owner. It takes less than two minutes, helps you grow across both platforms, and makes your overall social media presence feel way more connected and intentional.
No matter if you followed the direct method or the alternative route, the result is the same: more visibility, better audience flow, and more opportunities to grow.
And if you ever run into any problem, you now know exactly how to troubleshoot it. So go ahead, link those accounts, and start making your content work harder for you!
Frequently asked questions
How to link Instagram to TikTok on PC?
Here’s how to link Instagram to TikTok on desktop:
1. Open a web browser like Google Chrome or Microsoft Edge and head to Instagram’s official website. 2. Sign in to your Instagram account and copy the link from the address bar. It’s the link to your Instagram profile. 3. Now, head over to TikTok’s official webpage and log in to your account. 4. Then, click on the “Edit profile” button. 5. After that, paste the copied link inside the “Bio” section and hit the “Save” button.
That’s all!
However, keep in mind that it will be displayed as text and not as a clickable link.
How to link Instagram to TikTok bio?
Here’s how to add Instagram link to TikTok bio, step-by-step:
1. Open the Instagram app and head over to your profile. 2. Tap on the “Share profile” option, followed by tapping on “Copy link”. 3. Now, open the TikTok app and tap the “Profile” option in the bottom right-hand corner. 4. From the opened page, tap on “Edit”. 5. After that, from the “Edit profile” screen, tap on the option labelled “Bio”. 6. Here, paste the copied link and tap the “Save” option.
Congratulations, you have successfully linked your Instagram profile inside the Tiktok bio.
How to link Instagram to TikTok if it is not working?
If the linking isn’t going through, start by updating both apps to their latest versions. Then check that you’re using the correct Instagram login credentials.
If you have two-factor authentication on, temporarily turn it off, complete the linking, then switch it back on.
Still not working? Try switching from Wi-Fi to mobile data, or log out of TikTok and back in. The email or phone number used for both Instagram and TikTok must also match.
If the option isn’t showing up at all, it may not be available in your region yet.
How to unlink Instagram from TikTok?
Pretty straightforward process!
1. Open the TikTok app and go to your profile. 2. Tap “Edit profile” and scroll down to the “Social” section where your Instagram is connected. 3. Tap on your Instagram username and select “Unlink” or “Remove” to confirm your decision.
The Instagram icon will disappear from your TikTok profile instantly. Although keep in mind that some background permissions on Instagram’s end may still need to be manually removed through Instagram’s app settings.
How to link TikTok to Instagram?
Here’s how to add TikTok link to Instagram bio:
1. Copy your TikTok profile URL from the TikTok app (“Share profile” → “Copy link”). 2. Simply go to your Instagram profile, tap “Edit profile,” and select “Add link.” 3. From there, paste your copied TikTok profile URL into the URL field and add a title. 4. Save it by tapping the (✔) icon in the top right-hand corner of the screen.
Your TikTok link will now be visible and clickable on your Instagram profile, making it easy for your Instagram audience to find and follow your TikTok content too.
How to add link to TikTok bio?
Knowing how to add a link to TikTok bio is simple once your account meets the requirements. Personal accounts need at least 1,000 followers to unlock the clickable website field, while business accounts get immediate access.
Once eligible, go to “Edit Profile,” → tap the “Website” field → paste your link → and hit “Save.”
If you’re not eligible yet, you can still paste a plain text URL in your bio description as a temporary workaround.
How to add your TikTok link to Instagram Story?
Here is how to add your TikTok link to an Instagram Story:
Copy your TikTok video or profile link → open the Instagram story composer → tap the sticker icon → select link → and paste the URL.
Your followers can simply tap the sticker to land straight on your TikTok profile. It’s a quick and effective way to drive your Instagram audience over to your TikTok content.
Why is it beneficial to cross-post between TikTok and Instagram?
Cross-posting saves you a ton of time since you’re creating one piece of content and putting it to work on two platforms at once.
It also helps you reach completely different audiences. TikTok skews toward trend-driven users, while Instagram reaches a broader demographic with higher purchasing power.
More reach, more engagement, and more chances to grow your following without doubling your workload. It’s honestly one of the easiest wins in content marketing.
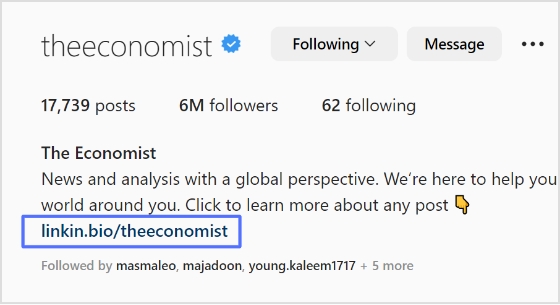
A link in your Instagram bio is a great way to drive traffic to your website and increase engagement with your content. In addition, it allows you to direct potential followers to a landing page, portfolio, or blog post you want to promote.
You can also link to an email sign-up page, product page, or shop. This feature is handy for businesses, brands, and influencers who want to increase their reach and promote their content.
Follow this step-by-step guide to quickly find any profile’s link in the bio on mobile and desktop.
How to get to the link in the bio on Instagram on a mobile device?
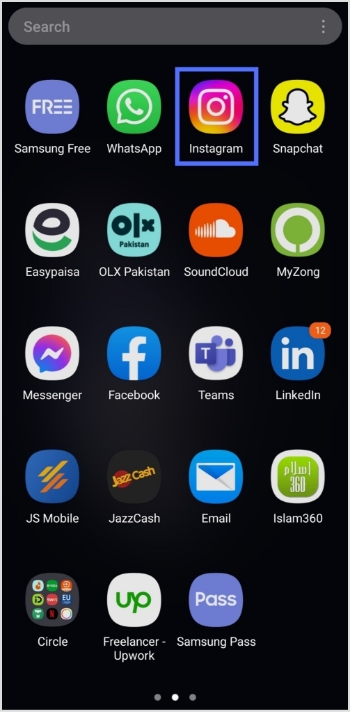
Step 1:Open the Instagram app on your mobile device.
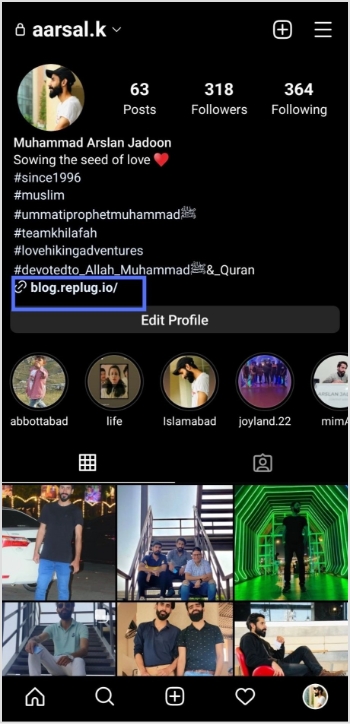
Step 2:Tap on the user’s profile name (username) on whose caption you noticed the Link in Bio.
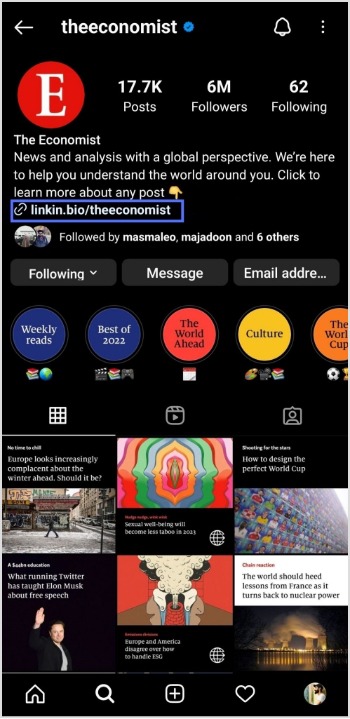
Step 3:You will be taken to the user’s profile screen. Here you will see a website link that’s your “Link in Bio.” Just tap on the link to open it.
How to get to the link in the bio on Instagram on a computer device?
Here are two simple steps to find the Instagram link in the bio on a computer.
Step 1: Click on the profile that says Link in bio in a post.
Step 2:The website link will show up under their bio on their profile screen. Click on it to open the link.
How To Add A Instagram Link In Bio?
Adding an Instagram link in bio helps direct your followers and potential customers to your dedicated page.
As a result, makes it easier for them to find your profile and learn more about your brand. It also encourages followers to engage with your content, which can help drive sales and increase brand awareness.
Here’s how to add an Instagram link in the bio:
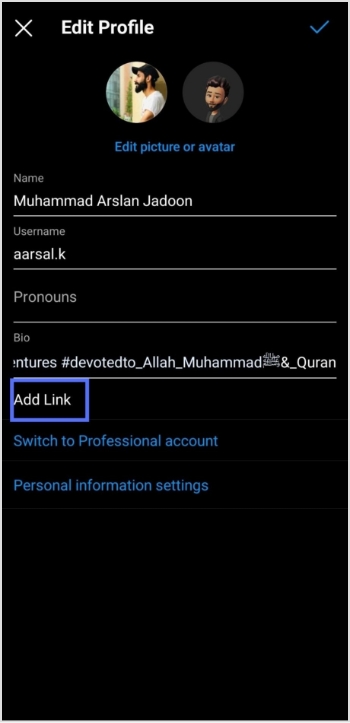
Step 1: Open Instagram on your mobile and tap your profile icon in the bottom right corner.
Step 2: Tap on the edit profile button on your profile page.
Step 3: Now, you will see the add link section on your mobile screen. Tap on it.
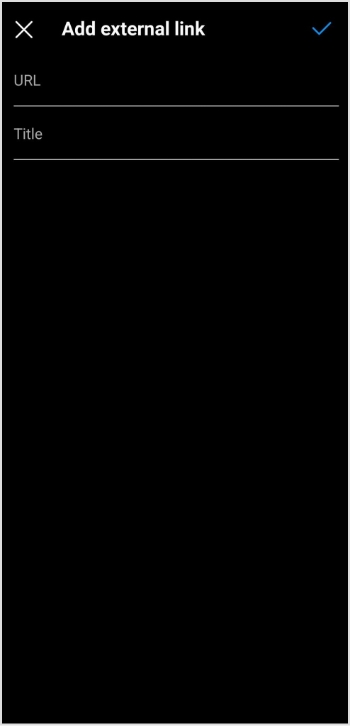
Step 4: Tap the add external link section to add your website address.
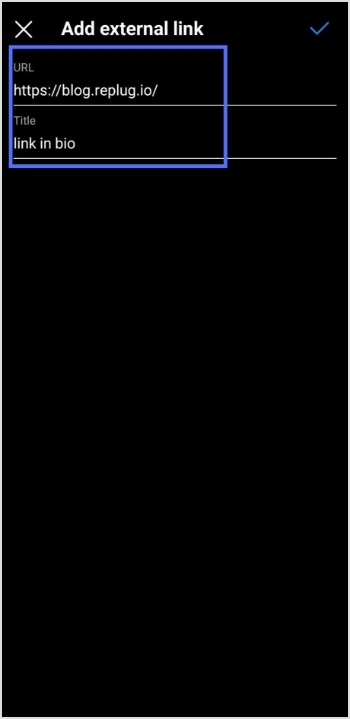
Step 5: Copy and paste the URL in the URL section and add a title in the title section.
Step 6: Your link in the bio will now appear in your profile.
Your Instagram profile now has a link in the bio.
Instagram bio page with multiple bio links – Is it possible?
Adding multiple bio links to your Instagram bio is a great way to drive more traffic to your website and other online resources. By adding links to your Instagram bio, you can easily direct your followers to your website, blog, YouTube channel, and other platforms where they can learn more about you and your business.
Additionally, including multiple bio links allows you to showcase your work, products, or services in an efficient and organized way. You can use a free link shortener to create a single, short URL that links to multiple websites.
Follow these steps to add multiple bio links to your Instagram profile.
Step 1:Sign in to your Replug account or create a new one if you don’t have one.
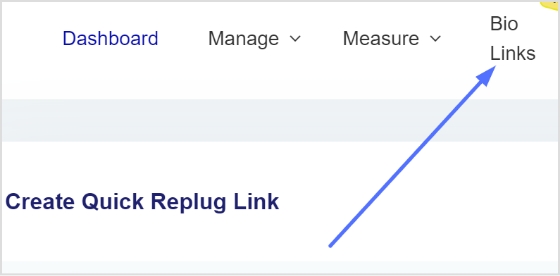
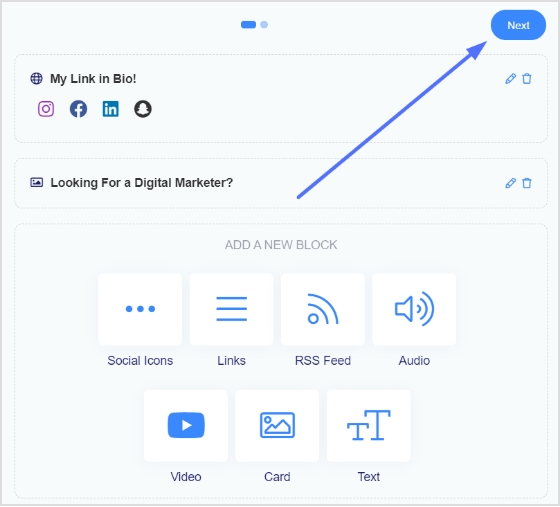
Step 2: You’ll be taken to the main dashboard page. Click on the bio links section from the main dashboard page.
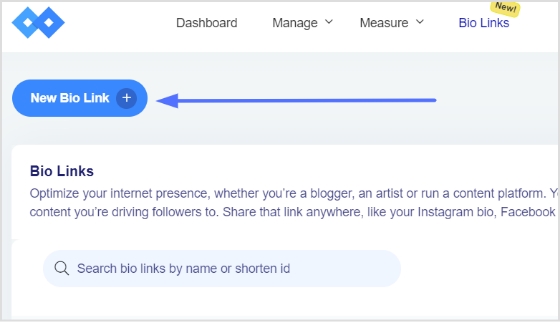
Step 3: Click the new bio link button to create your bio link.
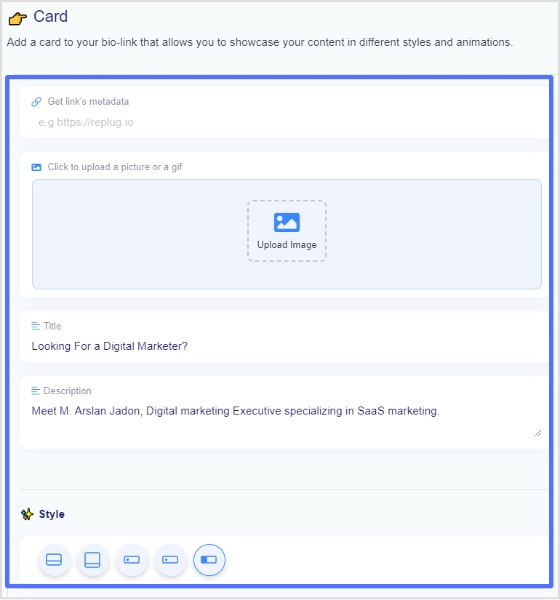
Step 4: Add Social Icons, Links, RSS Feed, Audio, Video, Card, and Text as part of your bio links. Our bio link page, for example, has social icons and a card.
Note: The above image shows you the options (blocks) you can choose for your Instagram bio or landing page.
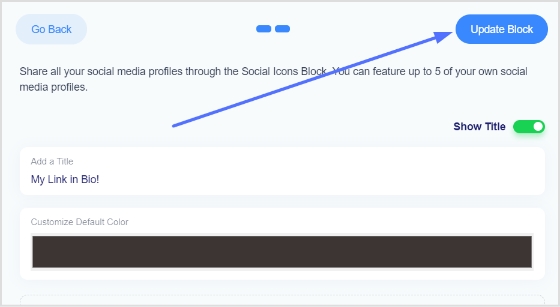
Step 5: Choose social icons and click next. You can choose up to 5 social icons (profiles).
Step 6: Now, add a title to your social links, customize the icon’s color and enter the links or usernames for your social media accounts, as shown in the picture below.
Note: When someone clicks on any of your social icons, they will go to the relevant social media profile.
Step 7: Now, click the update block button to add other blocks, like card, text, video, etc.
Step 8: Now, choose another block, for example, a card.
Step 9: In the card section, add your destination URL add the card image,title, and description. Also, choose the style of the card and click the save block button.
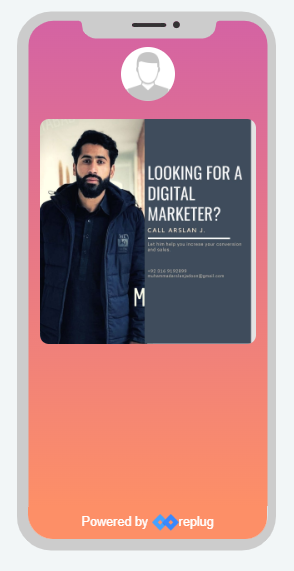
If you want to see how any section or block looks, you can preview it side by side. Here is an example of how the card looks.
Step 8: Once you have added all the necessary blocks, click the next button.
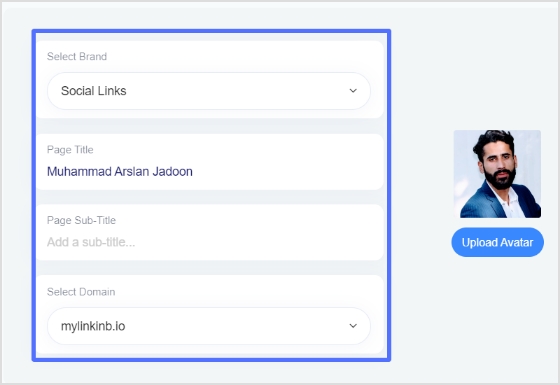
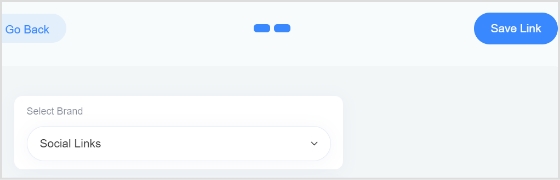
Step 9: You are now on the final page. Upload your avatar, select a brand, add a title and sub-title, and choose a domain.
Note: Replug is an all-in-one link optimization platform that allows you to create a brand with a custom domain in seconds.
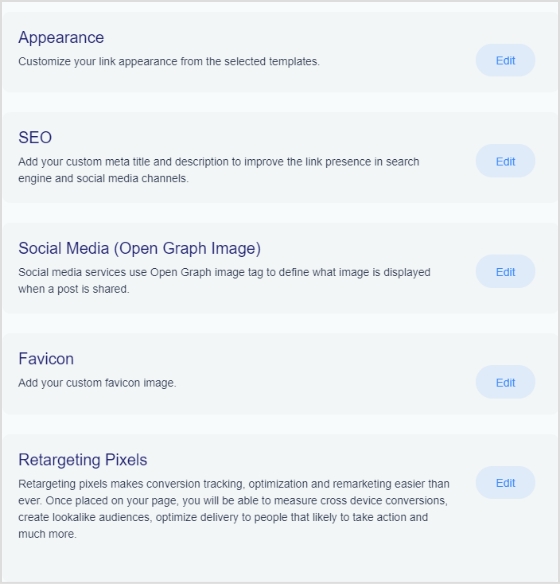
Step 10: As you scroll down, you’ll find other cool features, such as custom appearances,SEO, social media open graph images, favicons, and retargeting pixels. Make your bio link more appealing by adding these features.
Step 11: Once you’re done, click the save link button, and your bio link is ready to share on any social platform.
Frequently asked questions
Can you have more than one link in your bio?
Yes, you can have more than one link in your bio with the help of a free bio link tool like Replug. However, it is important to remember that a bio should be concise, so it is advisable to limit the number of links to two or three.
Can I create a link with multiple links on Instagram?
Yes, you can create a link with multiple links using a top-notch Instagram bio link generator online. Simply create an account and follow the instructions to create a link with multiple links, often called bio links.
Link shortener services can create a more memorable and professional-looking URL for your store. A link shortener tool can help shorten the URL of your store’s home page and also help shorten the URLs of individual product pages, making them easier to remember and share.
A link shortener can help create custom URLs with your domain, making them easier to remember and share. They also provide analytics to track your links’ performance and make your store more secure by hiding the link’s true destination.
Here’s how to change the shopify URL, shorten it, share it with the audience, and track its performance using Replug’s short link generator online.
How to change Shopify URL using a URL shortener
Step 1:Sign in to Replug or create a new account, if you don’t have one.
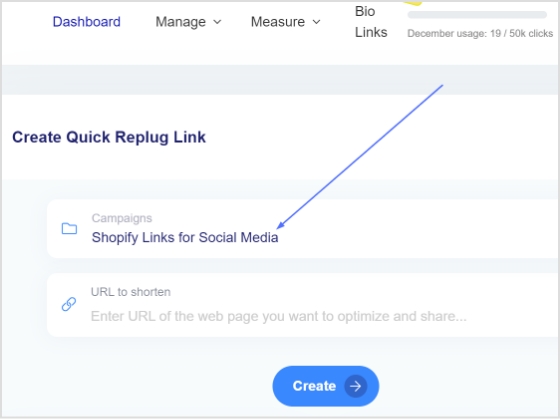
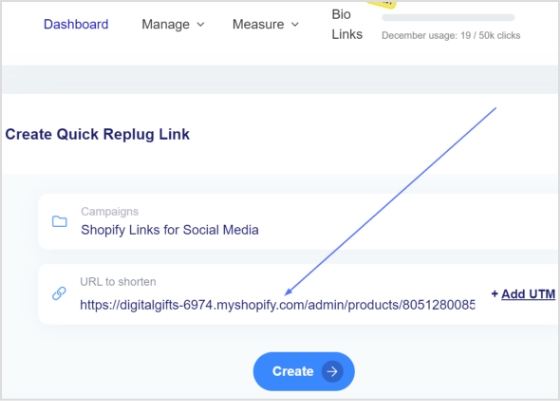
Step 2: Choose a campaign from your dashboard, or create a new one.
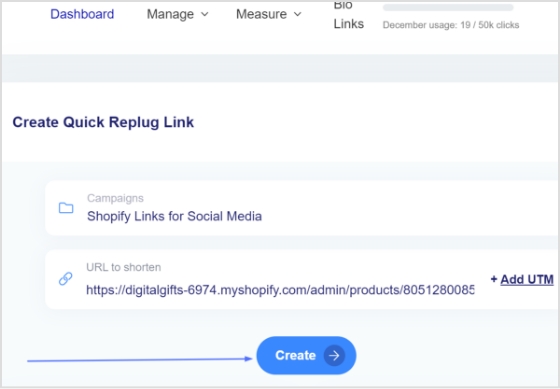
Step 3: Enter your Shopify URL as the destination URL in the “URL to shorten” section below “Select your campaign.”
Step 4: Simply click the create button to create a shortened URL for your Shopify store.
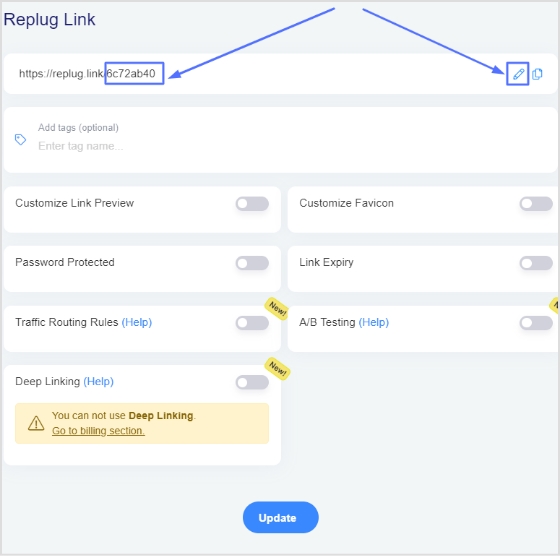
Step 5: Now you have your new URL, which will look like the one below in the picture. You can customize this URL by clicking on the edit icon.
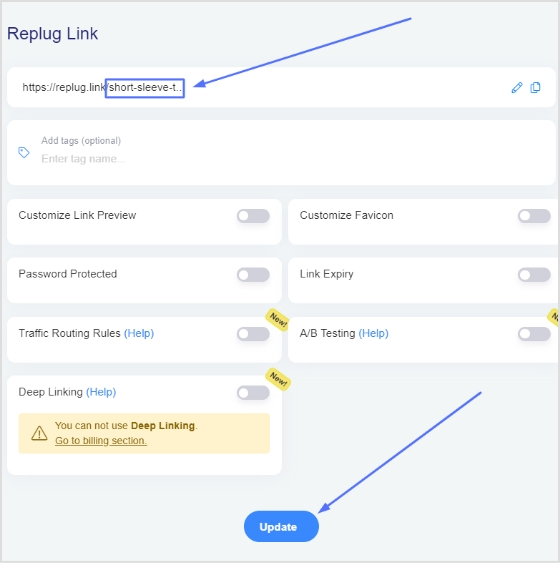
Step 6: Enter the new URL you want to use, and your custom Shopify Store URL is ready for sharing on social media. Click on the update button to save the new URL.
Yes, you can. You must be the store owner to change your Shopify store name. Log in to your Shopify store, go to the Settings page, and click Store Details. You can enter a new store name into the ”Store name” field.
How do I find a Shopify URL?
Log in to your Shopify store admin. The URL will be in the browser address bar. Go to Online Store > Domains in the leading left menu. This will give you an overview of your store domains.
There’s no question that branding is one of the most important elements of any successful business strategy. It’s the first thing customers see and makes them trust you – or not trust you – to do business with you. So it’s important to ensure your branding is consistent across all media platforms, including your website, social media accounts, and marketing materials.
Branded links are one of the most essential pieces of the puzzle regarding building brand consistency. One powerful way to implement this is by using Replug.io, which lets you create, manage, and track your branded links seamlessly. In addition, branded links help achieve brand engagement and traffic.
In this blog post, we’ll outline the benefits of brand consistency and give tips on building it into your business. Navigating the waters of branding can be daunting, but by following these guidelines, you’ll be on your way to a robust and consistent brand identity!
What is brand consistency in marketing?
Creating a solid brand identity is essential for any business. This is especially true for modern businesses that rely on social media and online marketing to reach their target audience. Brand consistency helps to create a unified brand identity that customers can easily recognize. This allows them to form positive customer associations with your brand name, boosting your online presence and attracting new customers. So, keep brand consistency at the top of your mind when planning your marketing strategy. It will help you achieve your marketing goals sooner and with less effort.
Why does consistency matter in marketing?
Building trust and credibility are essential for any business. That’s why consistency is so important in marketing – it helps create a consistent image for your business that customers can trust and rely on. By being consistent, you can decrease the amount of marketing you need to do in the long run – think of it as one significant investment! Plus, a memorable brand experience leads to customer loyalty. When customers re-engage with customers who have drifted away. So, brand consistency is a great way to build a successful business!
What is a branded link?
A branded link is a hyperlink that appears after your company name or website URL in web search engine results pages. In other words, it’s a custom URL slug associated with your brand, feature, or marketing campaign.
How do you achieve brand consistency using branded links?
Building brand consistency is crucial if you want your marketing campaigns to stand out. One way to achieve this is by regularly adding branded links to your content. Branded links help your website look more authoritative and credible and can boost traffic and conversions. To ensure you’re using high-quality anchor texts relevant to your industry and target audience, have a well-organized campaign.
Branded short links create a sense of trust and credibility, which leads to stronger customer relationships and higher loyalty. Additionally, brand consistency can help drive traffic to your website. This, in turn, can increase conversion rates and ROI. So, keep your branding consistent and see its positive impact on your business!
Brand consistency is an essential element of effective online marketing. When you share online links, ensure that your online links are branded. Create a message consistent with your brand so customers can easily understand and trust it.
Benefits of building brand consistency using branded links
Below are several benefits of building brand consistency.
It Builds Trust & Clarity
When your online marketing channels are consistent with each other, it builds trust and familiarity. This increases the chances of conversions as customers feel like they know what to expect from you, and they are not left confused or uncertain about any aspect of your business. This means that having branded URLs can increase your website’s visibility and potential online sales.
Boosts Recognition
Short links are the key for any business that seeks to build brand recognition. You can create a positive brand perception by ensuring that your URLs are not long and random but consistent with your brand. In addition, making it easy for potential customers to understand what you offer helps reduce the chances of them getting confused or frustrated with your product or service.
Valuable for SEO
Vanity links are a valuable tool for SEO efforts. So, be sure to use them wisely! First and foremost, make sure that your branded links are relevant to your business. Secondly, ensure your branding and logo are consistent across all your online platforms. Doing so will help your customers recognize your business when they’re browsing the web and help your internet traffic and SEO rankings grow over time.
Fosters Loyalty
It is essential to have a customer-friendly branding strategy to foster loyalty among your customers. Consistent messaging leads to understanding and acceptance of the message, i.e., necessary for building positive relationships with customers. Branded links help your business stand out from the competition and make customers more loyal.
Including branded short URLs as part of your strategy will help you achieve consistency and trust. In turn, it will result in better web traffic and brand awareness. Creating an image that resonates well with your target market is crucial. Branded links help do that. Thus, establishing credibility and trust among your audience.
Key tips for building brand consistency using branded URLs
Follow these key branding tips, and you’ll be on your way to building a consistent branding strategy that will help your business thrive!
Measure the success of your branded links strategy
Branded links are essential for any online marketing campaign. They help your website or blog rank higher in search engine results pages (SERPs), leading to more website or blog visitors. However, you need to ensure that your links are effective and help you reach your marketing goals. To measure the success of your branded links strategy, look at link analytics. Additionally, keep track of your progress over time to see how you’re doing. If you’re still unsure how to measure your links’ success, don’t worry – many link management tools can help.
Ensure your branded URLs are optimized for SEO
SEO-friendly URLs are an essential part of marketing your business online. They’re significant for businesses that sell products or services. If you’re not optimizing your URLs for SEO, you’re likely missing out on potential customers. Make sure your URLs include the correct keyword and that they’re structured in a way that is easy for search engines to understand.
Use a consistent schedule for your marketing.
It is crucial to have a consistent branding strategy to stay ahead of the competition. This means using the same logo, color scheme, and font throughout all your marketing materials – website, social media platforms, and email newsletters. Make sure that everything you send out has a clear message and purpose – people will be able to understand it if you make it easy for them! By following these simple tips, you’ll be on your way to building an effective brand identity that can help take your business forward.
Note: When sharing, consider using a link shortener, not just to tidy up the URL, but also to reinforce your brand through custom, branded links.
Keep your brand consistent across all channels.
Branding is one of the most important aspects of a successful business. Consistent branding across all channels helps build trust and credibility while creating a sense of community among your customers and followers.
Ensure your branding is visible on all your marketing materials – from website to social media to email campaigns. Use the same fonts, colors, and images to create consistency across all channels. Regularly review your brand messaging for any necessary changes – this will help keep your brand consistent and aligned with what potential customers expect!
Build a cohesive online and offline presence with your brand
Branding your business is essential for success. A good strategy would be consistent across all channels, ensuring the brand image looks great everywhere. This will help build trust and credibility with customers. Additionally, it is important to keep the branding updated to match customer expectations and not look dated or out of place.
When it comes to logo design, use a versatile font combined with well-executed graphics for maximum impact. In copywriting, make sure you strike a balance between personalization and impersonal marketing speak – customers prefer brands they can relate to! Finally, make sure you are using high-quality images that match your brand’s tone and style.
Conclusion
With so many different marketing channels available, your business needs to have consistent branding. This ensures that your target audience can quickly identify your brand and find the right products and services for them. Build brand consistency using branded links and achieve your marketing goals. So, what are you waiting for? Start building consistent branding today!
Frequently Asked Questions
What are the key steps to create branded links on my website?
There are three simple steps you can take to create branded links on your website: 1. Use a URL shortener when creating branded links, making them easier to remember and type. 2. Ensure that the branded link slug is correct to increase brand consistency across your website. Incorrect slugs can make your branding look suspicious and spammy. 3. Always check the link before clicking it to ensure it looks correct and is not sending users to an unknown or untrustworthy page.
What are the 4 elements of branding?
Logo, name, mission, and values. A well-branded company has a good logo that represents the company’s ethos and suits any industry or product. The logo should be catchy and easy to remember, so customers can easily find it when looking for your brand. A name that is catchy and easy to remember also helps in boosting brand recognition. The mission of the company should be crystal clear for customers to understand; values are what tie everything together and make the brand unique. Sticking to a consistent branding strategy will help you build an emotional connection with your customers and improve your online visibility.
Does brand consistency actually work, or does it just sound good?
Brand consistency is a strategy that can help you establish trust and credibility with your customers. It shows them that you value their time and money and are invested in ensuring they have the best experience with your brand. In addition, consistent branding can reduce customer churn rates by creating loyal followers who will stick around even when things get tough. To make the most out of brand consistency, ensure to keep your branding consistent across all channels. i.e., website design, social media profiles, ads… everything! This way, you’ll be able to consistently communicate the same message to your audience and build credibility.
Which is better: strategic or tactical branding decisions?
Both strategic and tactical brand decisions are important when creating a coherent and consistent brand identity for your business. A strategic decision is made when you have a longer-term vision for your brand, which will help you achieve long-term success. On the other hand, a tactical decision is made when you need to take into account the present situation. This means you decide how to move forward based on the current situation. However, both actions are necessary when building a brand because it helps to create consistency and flow throughout all marketing efforts.
One way to increase sales on Shopify is to use apps that allow you to sell on other platforms. This can be a great way to reach more customers. Here are some great apps for Shopify that can help increase sales.
1. Replug
If you are looking for a tool that can help you with both branding and tracking your audience, to serve them better, then Replug.io is for you.
What’s Replug?
It’s the best link management platform to create shorten links and govern them hassle-free. It also includes rich features, such as retargeting pixels, A/B testing, tracking analytics and much more, as explained below.
Branded Links
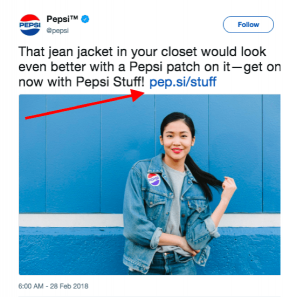
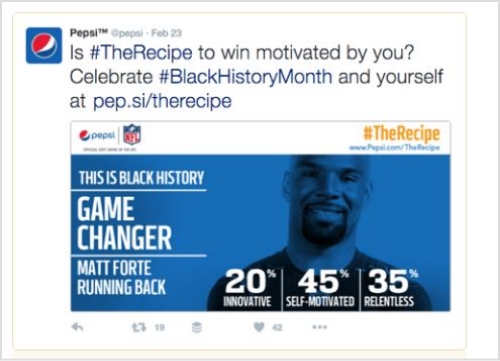
Branded links have become a necessity for online branding and marketing. Usually when we create social campaigns, branded short links look friendlier to eyes and remember compared to any random long URL with multiple characters and numbers. Here is an example of Pepsi brand using a branded URL given in the image below.
Adding to the benefits of branded URLs, they are also easy to share, specially where there are character limits (e.g. Twitter only gives you a limit of 280 characters for the Tweets).
Maximize marketing ROI
by transforming ordinary URLs into branded short links that convert.
Try Replug for free
Retargeting Pixels
Retarget your Shopify audience on other platforms, such as retargeting your Shopify audience on Facebook using Replug retargeting pixels.
For example,create a retargeting campaign in Replug, and connect your Meta pixel with the campaign created. Any one that clicks on your shortened Shopify URL will be tracked, and you can retarget them on Facebook using Retargeting Ads.
Test your webpages, content or campaigns using Replug’s A/B Testing. Compare up to 10 versions of a single URL, and choose the one that gets most traction. A/B testing is a handy feature for e-commerce owners, who can use it when running a special campaign or testing a product/landing page etc.
Call To Action
Create catchy call to actions buttons with CTA phrases that create a sense of urgency to and turn clicks to conversions. Set different types of CTA’s i.e.
Exit Intent
Social
Bridge Page
Pop up
Scroll Box
Bio Links
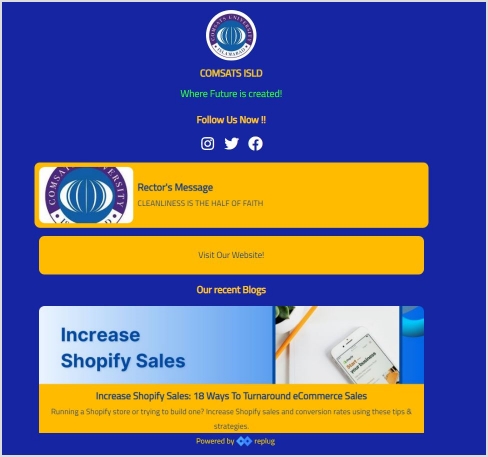
Create one awesome bio link for all social platforms. Using Replug bio links, you can direct your social media audience to your e-commerce store by designing a custom bio link webpage. No technicalities required, just simple drag and drop functions. Easily place your links, social icons, image, videos, text, and much more to design an appealing bio link webpage.
Here’s an example of bio link webpage.
What else?
A link shortener tool gives you the control of shortening, customizing, analyzing and managing branded links.
That’s not just it. There’s more….
Replug has some other cool features that you can check out and make most of your online marketing across the web and social channels.
Another great option is the Shopify Sales Booster app, which helps increase sales by offering discounts and coupons to customers who purchase through your shop. This app is also free and a great way to boost sales on any platform.
Multi-orders
Multi-orders is one of the most popular Shopify apps that allows you to manage and fulfill orders from multiple sales channels in one place. It integrates with popular marketplaces such as Amazon, eBay, and Etsy, as well as with Shopify POS. With Multiorders, you can save time through automation.
3. One Click Checkout & Stickybar
One click checkout & stickybar is a great app if you want to increase sales on e-commerce platforms. The app allows customers to checkout with multiple payment methods and shipping methods. The app also allows customers to track their order status and view their order history.
ContentStudio is the best social media management tool out there that lets you post and schedule content, track your analytics, and engage with your audience – all from one platform.
Shopify integration with ContentStudio makes sharing products easier from your e-commerce stores across all social channels.
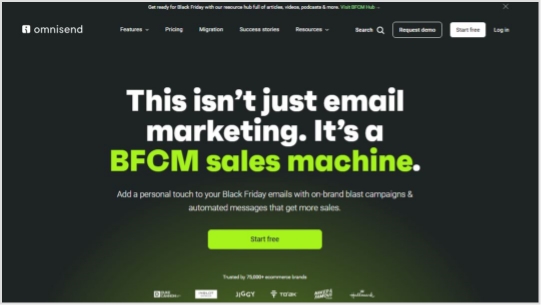
5. Omnisend
Omnisend is an excellent email marketing app for Shopify. By adding Omnisend to your store, you can increase the number of emails collected from visitors, cultivate leads with email campaigns, and improve sales and marketing. This app is designed to help you quickly build an email list, grow your Shopify store with email, SMS and push marketing, or drive more sales with email automation.
Google Shopping Actions is a program that lets shoppers purchase products from your store directly through Google search results and Google Assistant. This app makes it easy to set up and manage your participation in the program.
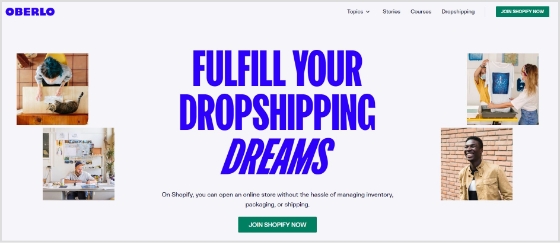
Oberlo is my favorite among the best Shopify apps. It is a drop-shipping service that allows the user to find popular products online and start selling immediately. Get products from various suppliers and add them to your online store. Oberlo is a great tool for entrepreneurs who want to start an eCommerce business without investing in inventory.
8. ReferralCandy
Referral Candy is a Shopify app that allows you to create custom referral programs for your store. If you have customers who are satisfied with your products, they will be more likely to tell other people about them. If you don’t have a referral program, you could be missing out on some potential sales. .ReferralCandy has a wide range of customization options to choose from so you can build a referral program that fits your brand perfectly. It is also a system that automatically delivers rewards to make the referral process easier.
9. Product Reviews by Shopify
Product Reviews is an excellent app that allows customers to write reviews for products they have purchased. Customers can also rate products they have purchased. The app also allows customers to share their reviews with their friends and followers on social media.


![How to change URL name on YouTube: A practical guide for content creators & YouTubers [2026]](https://internal-blog.replug.io/wp-content/uploads/2022/12/How-to-change-URL-name-on-YouTube-A-practical-guide-for-content-creators-YouTubers-2026.png)


![How to link Instagram to TikTok profile in no time: A step-by-step guide [2026]!](https://internal-blog.replug.io/wp-content/uploads/2022/12/How-to-link-Instagram-to-TikTok-profile-in-no-time-A-step-by-step-guide-2026.png)