You pull out your phone, point it at a QR code, and… nothing. You try again, and still nothing. Frustrating, right?
A blurry or poorly generated QR code isn’t just annoying; it’s costing real opportunities. And given that nearly 99.5 million Americans scanned a QR code in 2025 and QR code usage grew by 323% between 2021 and 2025, this little square has become way too important to get wrong.
No matter if you’re a business owner, a marketer, or just someone who needs a working QR code, a blurry one can make people give up in seconds.
The good news? Fixing it is simpler than you’d think!
But before we jump into solutions, let’s make sure we’re all on the same page. So let’s quickly cover what a QR code actually is and how it works.
What is a QR code?
A QR code(short for “Quick Response code”) is a two-dimensional barcode that stores information like a website URL, contact details, or a payment prompt and can be instantly read by a smartphone camera.
Unlike the old barcodes you see on grocery items, a QR code holds way more data and works in any direction you scan it.
Its main purpose is simple:to bridge the gap between the physical and digital world in the fastest way possible.
How does it work?
When you create a QR code, the information you enter gets encoded into a pattern of black and white squares.
When someone scans it, their phone’s camera reads that pattern and decodes it back into the original information (opening a link, displaying text, or triggering an action).
Think of it like a secret visual language your phone can instantly translate. The whole thing happens in under a second, which is exactly why QR codes have become so popular.
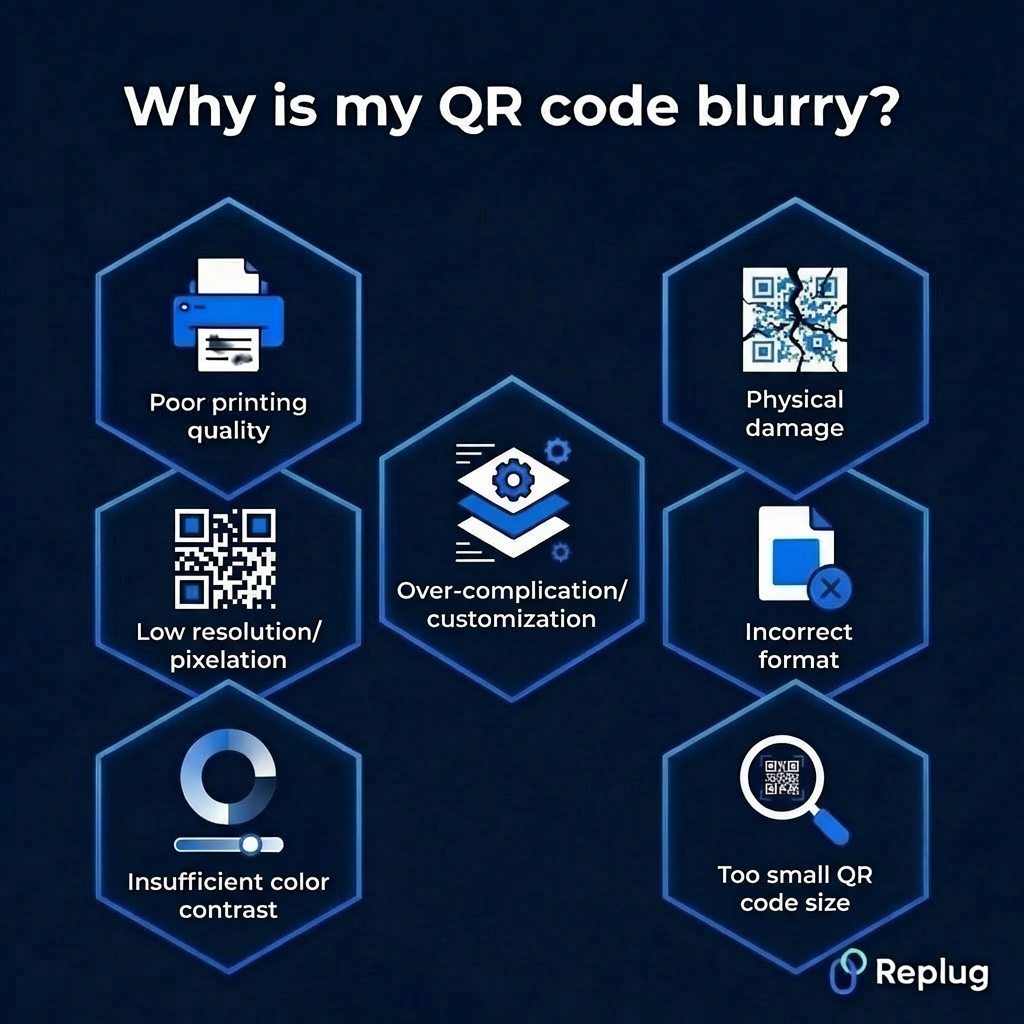
Why is my QR code blurry?
Before you can fix a blurry QR code, it helps to know what’s causing it in the first place. There are actually quite a few reasons a QR code can become unscannable, and most of them are pretty easy to avoid once you know what to look out for.
Low resolution/pixelation
This is probably the most common culprit. When a QR code is created at a low resolution and then stretched or scaled up, the edges get pixelated, and the scanner simply can’t read it cleanly. Always generate your QR code at the highest resolution available.
Poor printing quality
Even a perfectly designed QR code can go bad in print. If your printer is low on ink, using poor-quality paper, or set to a low print quality mode, the fine details of the code get lost. This makes it blurry or patchy and hard to scan.
Insufficient color contrast
QR codes rely on a clear contrast between the dark modules and the light background to be readable. Using similar shades (like a dark grey code on a black background) confuses the scanner and makes the code practically useless.
Over-complication/customization
Adding too many design elements, heavy colors, or large logos right in the center of your QR code can interfere with the data embedded in it. A little customization is fine, but overdoing it often pushes the code past the point where it can still be scanned reliably.
Physical damage
A QR code on a printed flyer, product label, or sticker is vulnerable to real-world wear and tear. Scratches, moisture, fading, or even a bad fold across the code can damage enough of the pattern to make it unreadable.
Incorrect format
Saving or exporting your QR code in the wrong file format can seriously hurt its quality. Formats like JPEG compress image data and can introduce blurriness, while vector formats like SVG or high-resolution PNGs keep the code sharp and crisp at any size.
Too small QR code size
There’s a minimum size a QR code needs to be to work properly. If it’s printed or displayed too small, the individual squares within the code become too tiny for a camera to distinguish. This ultimately makes scanning nearly impossible, especially from any reasonable distance.
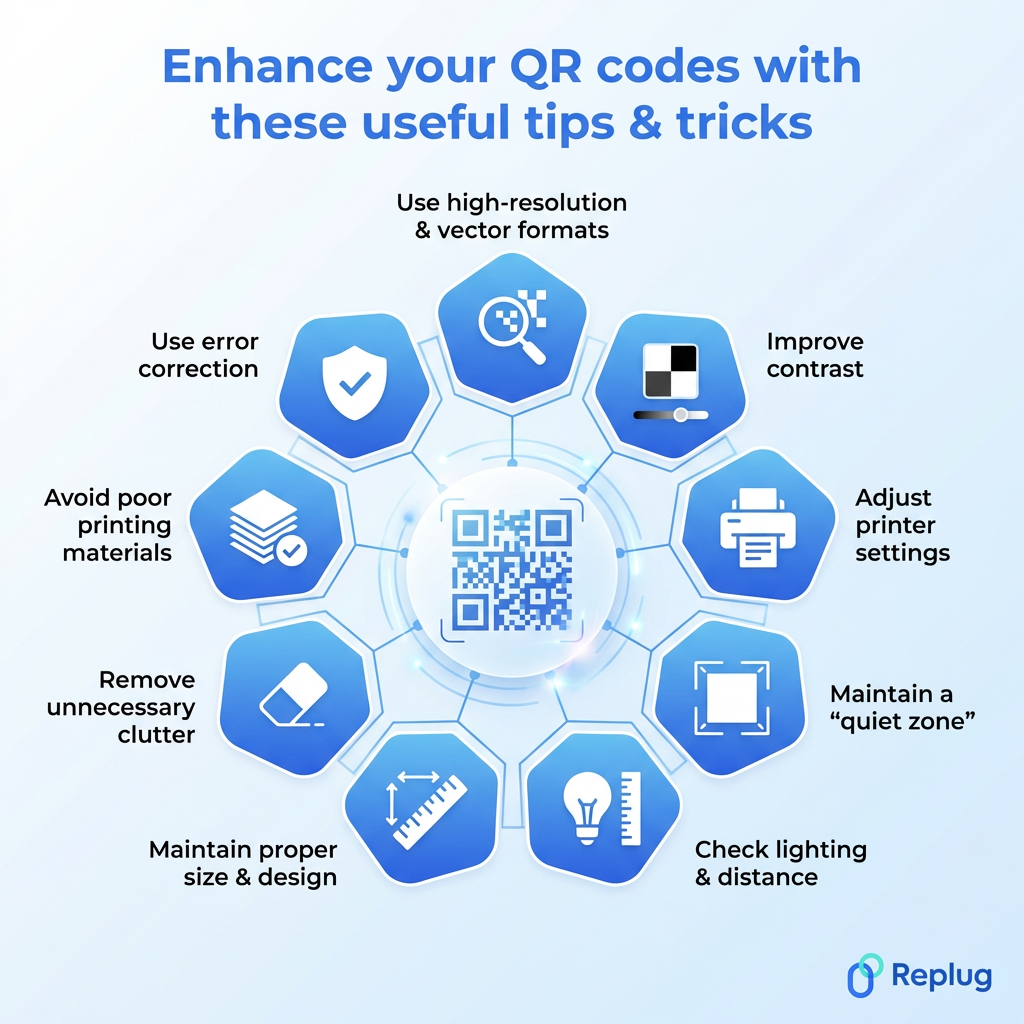
Enhance your QR codes with these useful tips & tricks
Now that you know what’s causing the blur, let’s talk about how to actually fix it. These tips are straightforward, practical, and easy to apply, whether you’re designing a QR code from scratch or trying to rescue an existing one.
Tip #01: Use high-resolution & vector formats
Always export your QR code as an SVG or high-resolution PNG rather than a JPEG. Vector formats scale to any size without losing sharpness, so your code stays crisp no matter if it’s on a business card or a billboard. This single change alone can make a huge difference.
Tip #02: Improve contrast
Stick to the classic dark module on a light background combo. It’s the most reliable for scanning. If you want to use custom colors, make sure there’s a strong enough contrast between the two. When in doubt, test your QR code on multiple devices before publishing it.
Tip #03: Adjust printer settings
Before hitting print, optimize your printer settings to the highest quality mode available. Also, make sure your ink levels are good. A half-empty cartridge often produces faded or uneven prints that can make a QR code blurry and completely unscannable.
Tip #04: Maintain a “quiet zone”
A quiet zone is the blank white border surrounding your QR code, and it’s not just for looks; it’s actually essential. Without enough white space around the edges, scanners struggle to identify where the code begins and ends. A quiet zone of at least four modules wide is generally recommended.
Tip #05: Check lighting & distance
Sometimes the issue isn’t the code itself, it’s the scanning conditions. Make sure the QR code is well-lit and that you’re holding your phone at a comfortable distance, not too close and not too far. Glare from glossy surfaces can also interfere, so consider a matte finish for printed codes.
Tip #06: Maintain proper size & design
As a general rule, your QR code size should be at least 2 x 2 cm for close-range scanning, and bigger if it’s meant to be scanned from a distance. Keep the design clean and avoid distorting the shape of the code. Even minor stretching can cast off the scanner.
Tip #07: Remove unnecessary clutter
Less is actually more when it comes to QR code design. Overlapping text, excessive design elements, or a logo that’s too large can all interfere with the embedded data. If you want to add a logo, keep it small and centered, and make sure it doesn’t cover more than 30% of the code.
Tip #08: Avoid poor printing materials
The surface you print on matters more than people realize. Thin or low-quality paper can cause ink to bleed, and shiny or textured surfaces can distort the pattern. For best results, use a smooth, matte, medium-weight paper or a professional-grade label material.
Tip #09: Use error correction
QR codes come with a built-in error correction feature that allows them to remain scannable even if part of the code is damaged or obscured. Setting your error correction level to “H” (High) means up to 30% of the code can be recovered. A real lifesaver for codes used in physical environments.
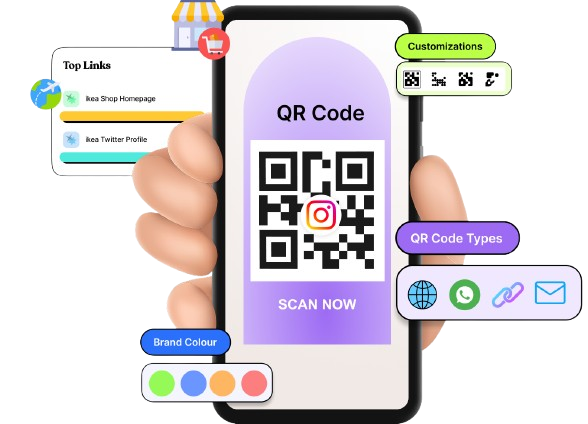
Generate clear, high-quality QR codes using Replug’s custom QR code generator
If you’re looking for a reliable tool to create clean, scannable QR codes without the hassle, Replug.io is worth checking out. It’s a free URL shortener and an all-in-one link management platform that does a whole lot more than just shorten links.
One of its standout features is the custom QR code generator, which lets you generate high-quality, fully customizable, dynamic QR codes in seconds.
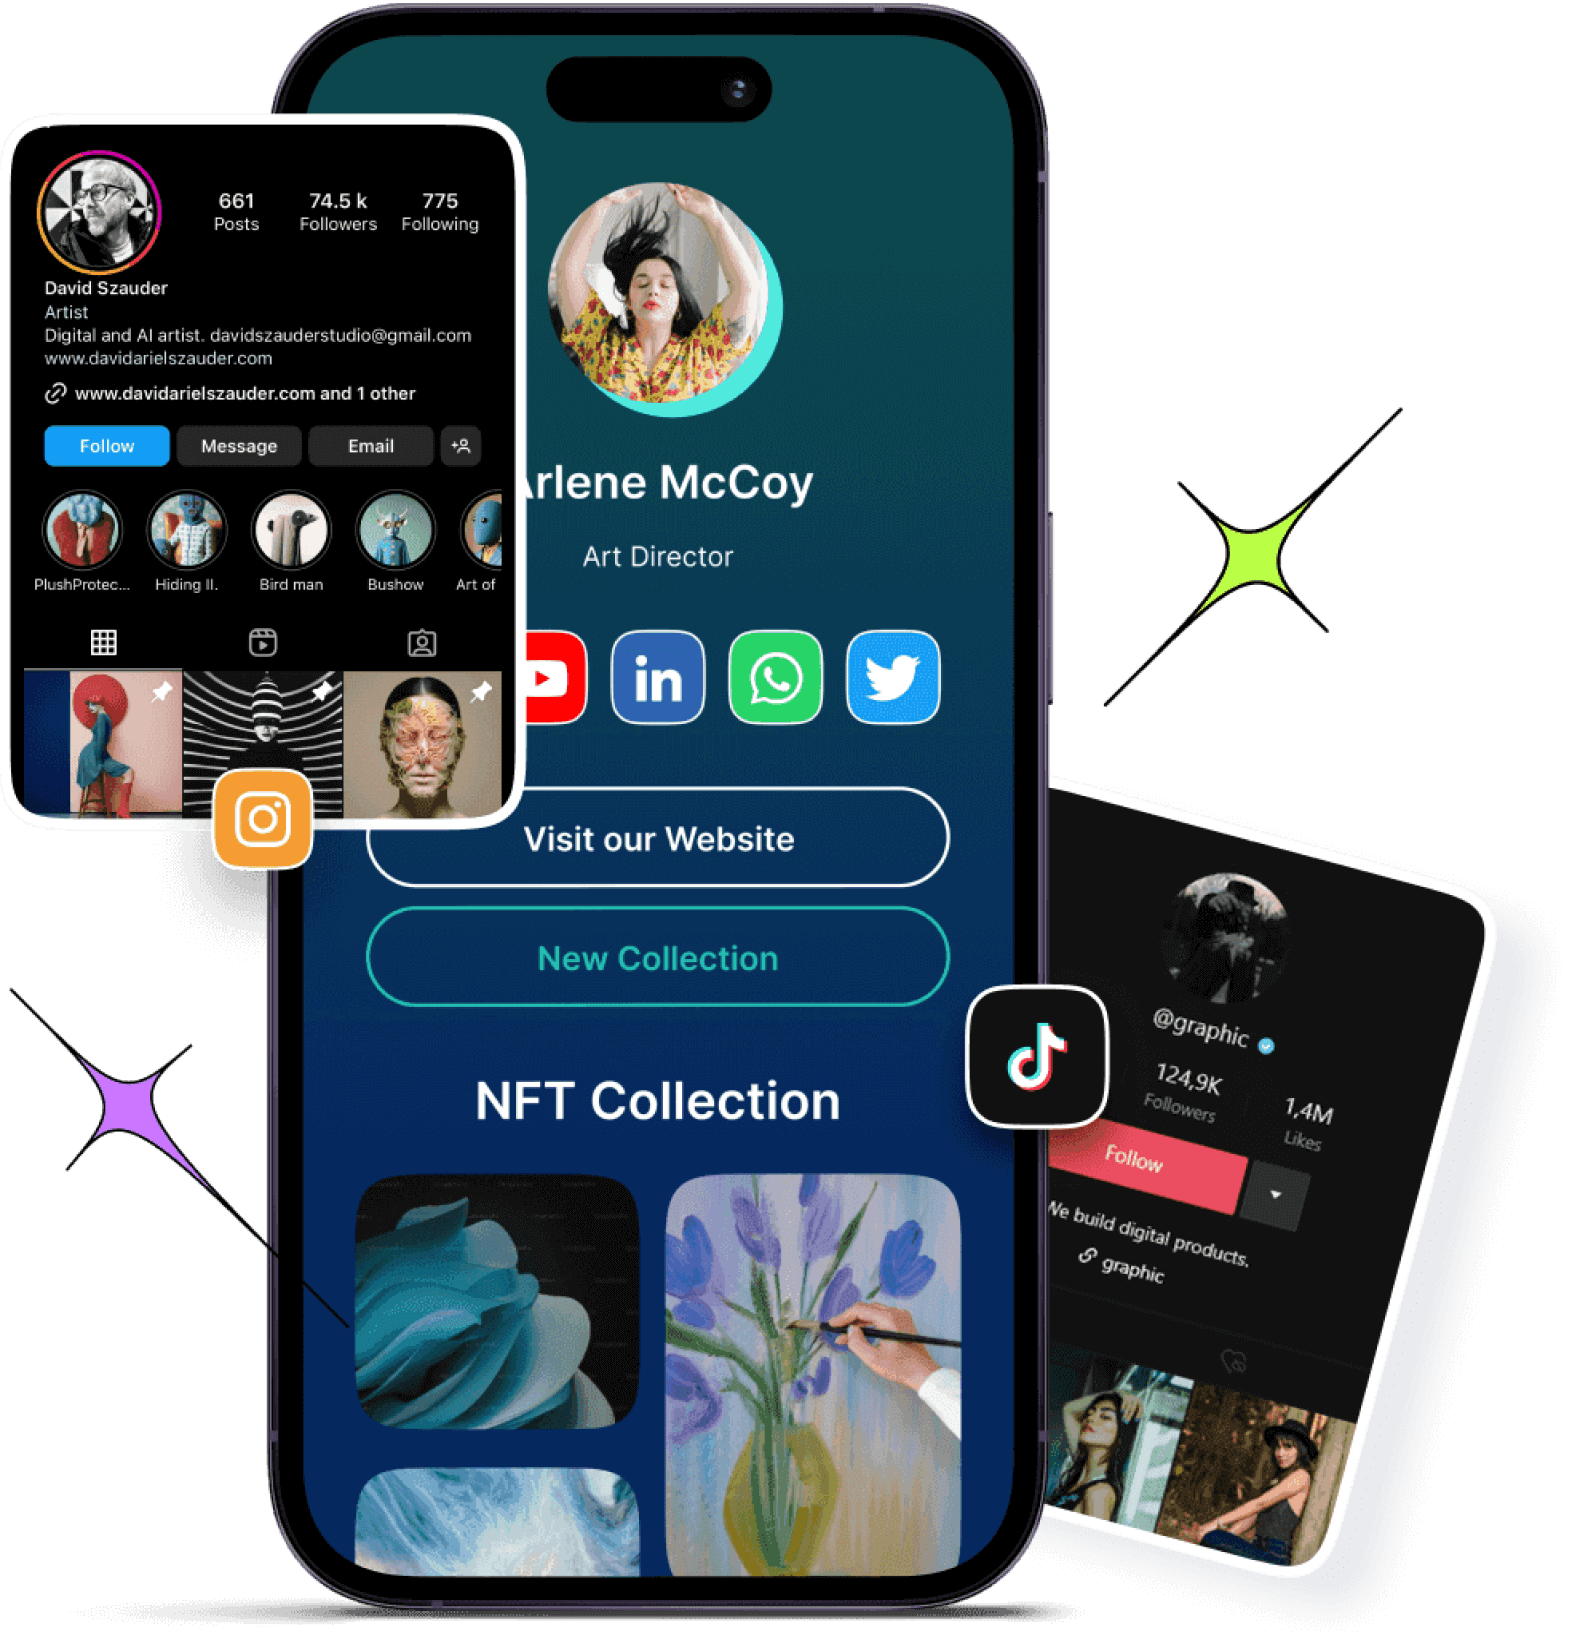
Dynamic QR codes
for modern brands, marketers,
and creators.
You can tweak the colors, add your logo, and adjust the design, all while keeping the code sharp and perfectly scannable.
Whether you’re a marketer, a business owner, or just someone who needs a quick and reliable QR code, Replug makes the whole process effortless and clean from start to finish.
Wrapping up
A blurred QR code is honestly more of a fixable inconvenience than a real problem, and now you have everything you need to sort it out.
From using the right file formats and fixing contrast issues to choosing quality print materials and enabling error correction, the fixes are simple once you know what to look for.
The key is paying attention to the small details that most people overlook. And if you want to skip the guesswork entirely, a tool like Replug makes it easy to generate clean, high-quality QR codes right from the start.
Put these tips into practice, and you’ll never have to deal with an unscannable, blurry QR code again.
Frequently asked questions
What is the best QR code enhancer online?
There are several solid options out there, but the best QR code sharpener is one that lets you export in high-resolution or vector formats like SVG or PNG.
Tools like Replug, QR Code Generator, and QRTiger are popular choices that offer customization, dynamic codes, and clean, scannable outputs without much technical know-how required.
How do you fix a QR code that is too blurry?
Start by regenerating the QR code at a higher resolution instead of trying to fix the existing one. Make sure you’re exporting it as an SVG or high-res PNG, printing on quality material, and keeping enough white space around the edges.
In most cases, simply recreating it from scratch is faster and more reliable than trying to restore a blurry version.
How do I make my QR code clear?
Use a vector-based format, maintain strong color contrast, keep the design simple, and always test it on multiple devices before using it publicly. If you’re printing it, use a high-quality printer with fresh ink and a smooth paper surface.
These small steps go a long way in keeping your QR code consistently clear and scannable.
How to increase the quality of a QR code?
Generate your QR code at the highest resolution possible and export it in SVG or PNG format. Set the error correction level to “H” for maximum durability, avoid over-customizing the design, and make sure it’s sized appropriately for its intended use.
If you’re using any marketing automation software that includes QR code generation, check whether it supports high-resolution exports (not all of them do).
Is it possible to scan a partially blurry QR code?
Yes, sometimes, but it depends on how much of the code is damaged or blurry. QR codes have a built-in error correction feature that can recover up to 30% of the data even if part of the code is obscured or damaged.
So a slightly blurry or partially damaged code might still scan, but a heavily distorted one likely won’t.
Is it possible to edit a blurry QR code to make it scannable?
Not really, no! Once a QR code is blurry or corrupted, editing the image itself won’t restore the lost data.
Even AI productivity software with advanced image enhancement features can improve visual clarity to some extent, but it can’t fully recover a QR code that’s too far gone. Your best bet is always to regenerate the code from the original source.
How to sharpen a blurry QR code?
If the blurriness is minor, you can try running it through an image-sharpening tool to improve the edges slightly. However, for anything beyond a subtle blur, regenerating the QR code at a higher resolution is the most effective solution.
Make sure to export it in the right format, test it before deploying, and you should be good to go.
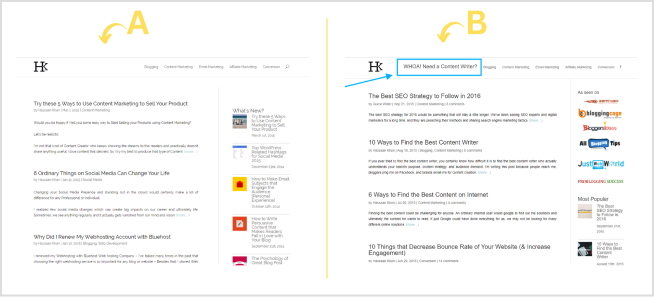
Landing pages work like helipads; they provide a space for visitors to land and allow brands and marketers to drive them in the right direction – that’s an analogy.
By definition, a landing page is a sales or offer page that is designed to engage, attract, or convert a lead into a subscriber or paying customer.
Marketers, bloggers, and SEOs do a lot of testing when they’re running campaigns, promoting offers, and developing new content clusters.
One of the many testing experiments is about landing pages. Let’s explore what it is and how any brand, digital marketer, or agency can benefit from it.
What is landing page testing?
Landing page testing is an A/B testing of two versions of a landing page where the variables, such as design, copy, color scheme, and CTA, are in action and the purpose of landing page testing is to figure out which variant performs better.
Brands, marketers, and agencies A/B test landing pages when they’re running a marketing campaign and want to see which version of the landing page outsmarts the other one.
After the testing is completed, it becomes crystal clear which landing page performs better than the other one. The follow-up process is to deeply analyze the key elements of the winner landing page to elicit its secret sauce and repeat the same results going forward.
On the other hand, it’s also important to closely look at the losing version of the landing page to see what went wrong with it.
Types of landing page testing
Landing page testing is crucial to identifying the flaws and pinpointing the winning elements by putting the landing pages to the test. Generally, marketers and conversion optimization experts use two types of landing page testing methods for testing and improving landing and sales pages. Let’s discuss those:
A/B testing
A/B testing is the widely used landing page testing method that compares two versions of a landing page. These landing page versions contain some differences that signify the purpose of the testing. This testing method helps in determining what elements trigger specific user behaviors and actions. It is an excellent process to refine the landing page and make it more effective with subtle improvements.
Multivariate testing
Multivariate testing (MVT) goes one step further by keeping the true essence of A/B testing intact. It puts more variables to the test as compared to A/B testing. However, it’s vital to comprehend multivariate testing requires a high volume of website traffic to lay the groundwork for the testing. Moreover, this type of landing page testing includes analysis of several elements, such as headlines, copy, images, colors, and more. It somehow speeds up the testing process and helps marketers and brands find the right combination of elements within a short period.
Split URL testing
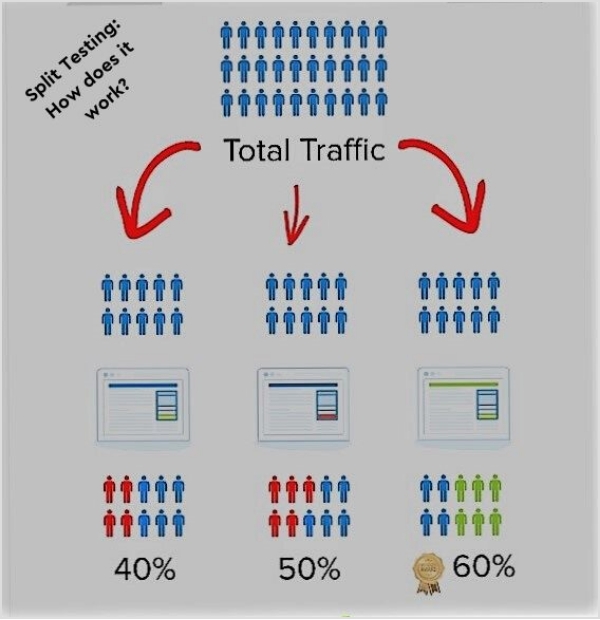
Split testing is a technique used to compare two different versions of a webpage, product, or service to figure out which version is more effective in achieving a specific goal or objective. In other words, the user splits the traffic between the two or more landing page variants to see which one works best. The key difference between A/B testing and split testing is that in split testing, the user equally divides the traffic between both versions. A/B testing with Replug offers the option for testing the URL, which allows users to split-test the links hassle-free.
A complete link management solution
for marketing professionals & agencies.
Try Replug for free
Why test a landing page?
There have to be a bunch of solid reasons for testing a landing page. No wonder top brands test their landing pages, sales pages, and thank you pages all the time. So, let’s dig in and try to understand why the landing page testing is important. Here’s why you should test a landing page:
i. Understand user behavior
User behavior is an important engagement metric in digital marketing. It refers to the actions that take place after they land on the website page no matter the traffic source.
One of the reasons one must be testing a landing page is to understand how visitors are behaving on the page. When the collective user behavior is rather unresponsive, it depicts an issue with the landing page.
ii. Conversion optimization
Conversion optimization is a process of fine-tuning the sales funnel so that it gets easier for prospects to convert into paying customers. Brands optimize their websites, landing pages, social media ads, CTAs, and opt-in forms to improve conversion rates.
Undoubtedly, one of the reasons a marketer or brand might have in mind when testing a landing page is that they would want to optimize the conversion on the landing page. Conversion optimization leads to more sales and profitability.
iii. Increase clickability
Clicks on the CTAs, links, banners, and ads are crucial to any digital marketing campaign regardless of the niche. Since landing pages an essential for marketing real estate, it’s vital to keep track of their clickability.
When testing a landing page using different parameters, make sure to add clickability tracking to it. A lot of marketers use heat map tools to track the clickability on the landing pages. So, one of the reasons to test and optimize a landing page is to increase clickability without breaking the bank.
iv. Analyze landing page copy
Digital marketers keep track of every marketing strategy they apply to compare the outcomes of each strategy. It helps them make informed decisions to meet their marketing goals.
One of the key elements of a marketing strategy is to pay close attention to the website or landing page copy. It has to be compelling, creative, and catchy to attract, engage, and convert the audience.
Therefore, a common reason why marketers and conversion optimization geeks test a landing page is to make sure that they improve their landing page copy.
v. Entice users to take action
Pushing the visitors by force to take a certain action is almost impossible. You must entice the audience with your attractive offer, creative graphics, catchy UI/UX, and compelling copy to take action. This action could be a download, purchase, subscription, lead generation, form submission, etc.
A lot of marketers do split testing with their landing pages because they want to come up with the best one that outperforms every other landing page.
These are some of the points that tell the importance of testing a landing space and uncovering a roadmap for digital marketers to follow and make a difference.
There are numerous elements on a landing page that collectively and individually play a role in making a landing page work. An effective landing page testing may require making several changes and noticing the difference.
Here are some of the key elements of testing a landing page:
i. Layout design
The landing page layout design speaks a lot about the offer behind the wall. Most visitors easily engage with the landing page offer when they find the layout and webpage design appealing and catchy.
Partnering with UX design services can translate research into frictionless layouts that spotlight your offer and lift engagement. Not only does an excellent landing page design increase the time spent on the site, but it also decreases the bounce rate.
When testing a landing page, make sure to test the layout designs so that the user behavior and overall conversion rate are thoroughly tested. Also, note down the characteristics of the winner layout design to apply them in future landing pages.
ii. Call-to-actions
Call-to-actions are crucial to enticing visitors to take action on the landing page offer. The right wording, color, and button size could make a lot of difference no matter what. Undoubtedly, it’s an essential element when testing the effectiveness, quality, and outcome of the landing page.
Marketers and brands spend time, energy, and money on paid ads, influencer marketing, and sponsored content to drive traffic to their offers. A tiny mistake of putting up a less effective CTA button could spoil the whole campaign.
iii. Landing page copy
The website or landing page copy is a vital element when testing the conversion, engagement, and CTR. It’s the part of the landing page that translates the offer for the visitors. The wording must be powerful yet simple to send a clear message over.
A hefty, cluttered, and jam-packed copy isn’t going to cut it. Marketers and brands should ensure that their landing page copy is clear, concise, and consistent. It shouldn’t put readers off and make them go away. Instead, it must keep them engaged until they’re convinced to take action.
iv. Color scheme
The color scheme on the websites makes a huge difference in the conversion rate, engagement rate, and bounce rate. The reason is that the right color combination hits the bullseye when targeting the audience. Brands often test colors for CTAs, banners, and website navigation to see which works best for them.
Try to understand your demographics before deciding the colors for your landing page. Moreover, experiment with color schemes when testing your landing pages. The psychology of colors isn’t just a bookish phenomenon; it does work in the branding and digital marketing areas.
v. Social proof
Social proof is yet another essential element that has become inevitable in modern-day digital marketing. Marketers and brands use social proof as testimonials for their products or services.
Since social proof brings validation to the offer, it gets easier for the audience to make a purchase decision. No wonder it can be an important element when testing landing pages.
These are some of the key elements to remember when testing your landing page.
Tips to do landing page testing the right way
Landing page testing has never been this easy. Once you know the fundamentals of analyzing the landing page, you can successfully test the performance of two or more landing pages. Here are some tips on landing page testing:
i. Set a clear objective of the campaign
The landing page testing doesn’t go well if you have a vague plan. It’ll be wise to set a clear objective for the campaign, meaning you must be crystal clear with your testing. You should be aware of the differences between the two versions, the key elements of both landing pages, and other minor details. So, vividly set the objective of the landing page testing activity.
ii. Test different CTAs to find the best ones
Call-to-actions (CTAs) are a key element of any landing page or website. The reason is that these buttons initiate engagement and navigate users to money pages or sales funnel to complete the action. Similarly, the size, colors, and text on the call-to-action buttons play a vital role in the performance of the CTA.
iii. Make landing pages mobile-friendly
Crafting a perfect landing page layout and putting the work into writing a splendid copy may not be enough unless you make the landing page mobile-friendly. It’s important to understand the fact that a lot of users access websites, social media, and emails on smartphones and tablets. Therefore, it’s necessary to keep our websites, blogs, and landing pages mobile-friendly.
iv. Add visuals or videos to see the difference
We can’t stress enough that media content works like a charm on the landing pages. Add beautifully designed images, icons, videos, and animations where necessary. Marketers and conversion optimization experts can experiment with images/video landing pages versus no-media version landing pages. The split testing will help you determine which version of the landing page does well.
v. Experiment with colors on the landing page
Colors are undoubtedly an important element of a website or landing page. One of the tips anyone can follow on testing the landing pages is to try out different color combinations on the landing page versions and see which color combo fascinates the users. Users can also try out different color schemes for navigation, CTAs, backgrounds, headers, footers, etc.
So, these are some of the useful tips for testing the landing pages for brands, marketers, and conversion optimization experts.
Replug: Link management solution
A complete link management solution
for marketing professionals & agencies.
Try Replug for free
Replug.io is a powerful link management solution that offers various URL management tools and provides a complete toolkit for shortening and tracking URLs.
It’s a handy URL management tool for digital marketers, bloggers, social media influencers, and affiliate marketers who want to shorten URL for free, share links on social media and emails, and track their links.
Replug is an all-in-one link management suite to create, manage, and track short URLs and elevate a brand’s social media engagement to the next level. Moreover, this tool integrates with several social media, email marketing, retargeting, and lead-gen tools. Plus, it has a Chrome extension for managing the short links without logging in to your Replug account.
The Replug Basic plan costs $19 per month and the Professional plan costs $49 per month. While the Agency plan is priced at $79 per month. If you’re ready to test Replug, then start your 14-day free trial!
FAQs
What is landing page testing?
Landing page testing involves experimenting with different elements of a webpage to determine which version performs better in terms of achieving a specific goal, such as increasing conversions or engagement.
How to test landing pages?
You can test landing pages by using A/B testing or multivariate testing methods. A/B testing involves comparing two different versions of a page, while multivariate testing involves testing multiple variations of multiple elements simultaneously.
A/B testing vs. multivariate testing: What’s the difference?
A/B testing compares two different versions of a webpage, typically differing in one variable, to see which performs better. Multivariate testing involves testing multiple variations of multiple elements on a webpage to determine the best combination.
What are common landing page testing mistakes?
Common mistakes include not testing enough variations, ignoring statistical significance, and making changes based on personal preference rather than data.
How long to run a landing page test?
The duration of a landing page test depends on factors such as traffic volume and the desired level of statistical significance. Generally, it’s recommended to run tests for at least one to two weeks to capture different audience behaviors.
In a world where 16 billion passwords and login credentials have already been exposed online, it’s no longer enough to hope your messages are safe (you have to guarantee it).
Between record breakers in data leaks and billions of compromised records floating around the dark web, hackers aren’t just after big corporations. They’re after everyday conversations, shared files, and yes, that link you just sent to a colleague.
Studies show that up to 30% of data breaches are linked to weak or reused passwords and insecure sharing habits, such as via email and SMS. This only makes matters worse!
So if you’re sending something sensitive (legal documents, contracts, personal info), how do you keep it truly private?
Let’s start by understanding what a password-protected link actually is.
What is a password-protected link?
A “password-protected link” is a special kind of URL that won’t open the content you’re sharing until someone enters the correct password first.
Think of it like locking your digital door. Even if someone has the address (the unique URL), they can’t get inside without the key (the password) you set.
It’s a simple but powerful way to control access to sensitive files, private pages, or confidential information you’re sharing online, especially when you don’t want just anyone with the link seeing it.
With password protection, only people who know the right password can pass through the gate and view the destination content.
Why is password protection so important?
Here’s why:
Stops unauthorized access: Without a password, anyone who slips upon or forwards your URL can see your content. Password protection adds a layer of defense against this.
Keeps confidential info safe: Whether it’s financial docs, legal contracts, or personal files, password-protecting the link helps prevent accidental leaks.
Works with tools you already use: You can manage link passwords alongside a password manager to keep all your access keys organized and strong.
Simple yet effective: There’s no need for complex authentication systems. A protected URL with a solid password does the job for most use cases.
Common methods for creating password-protected links
When you want to share sensitive information or material online but still control who can access it, knowing how to set up a password-protected link is super useful.
One of the easiest ways to do this is to use URL shorteners that let you turn regular URLs into secure, password-protected versions before you share them.
Method #01: Link shorteners & managers
The best link shortener tools not only make long URLs cleaner and easier to share, but they also often have built-in password protection features that turn any link into a controlled-access URL.
Below are some of the most reliable tools you can use today and how they handle password-protected links:
Replug
Replug is an efficient link shortener and tracker that also works as a password-protected link generator, letting you set a password for any URL you shorten, hassle-free.
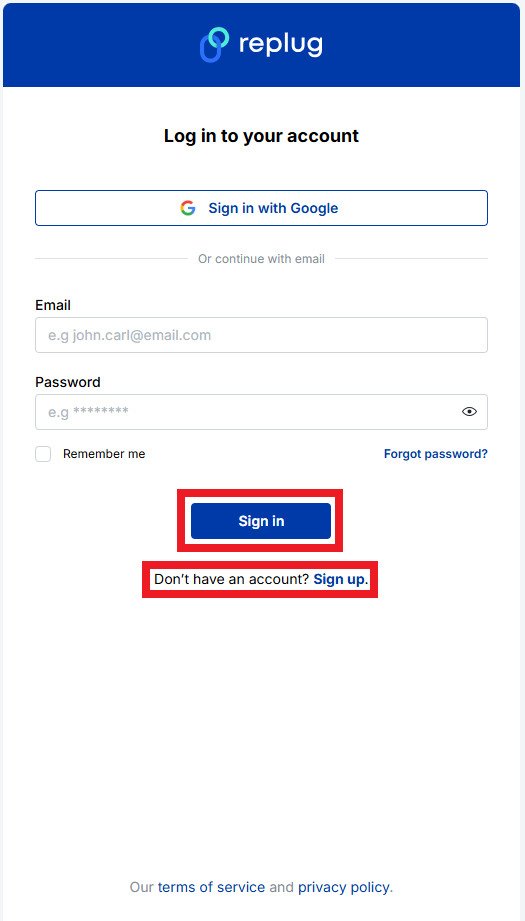
Here’s how to create a password-protected link using Replug (step-by-step):
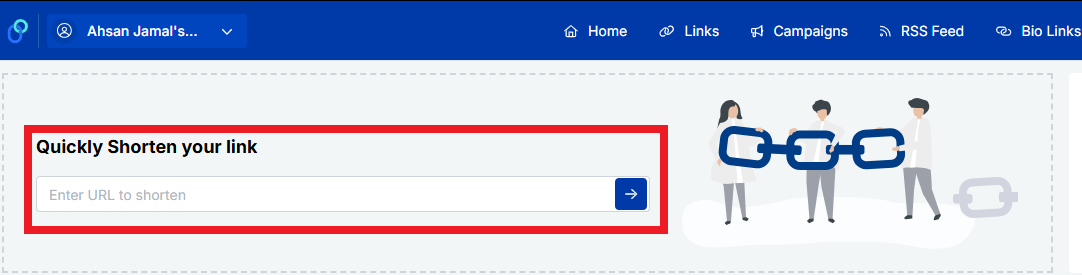
2. Once you’re logged in, go to the Replug links dashboard and click a link of your choice. If you are a new user, look for the “Quickly Shorten your link” option.
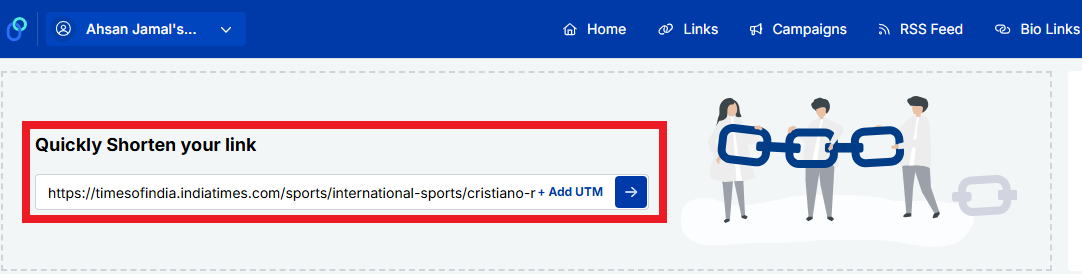
3. Enter the link (or URL) you want to shorten and get password-protected. Then, click the blue right arrow button.
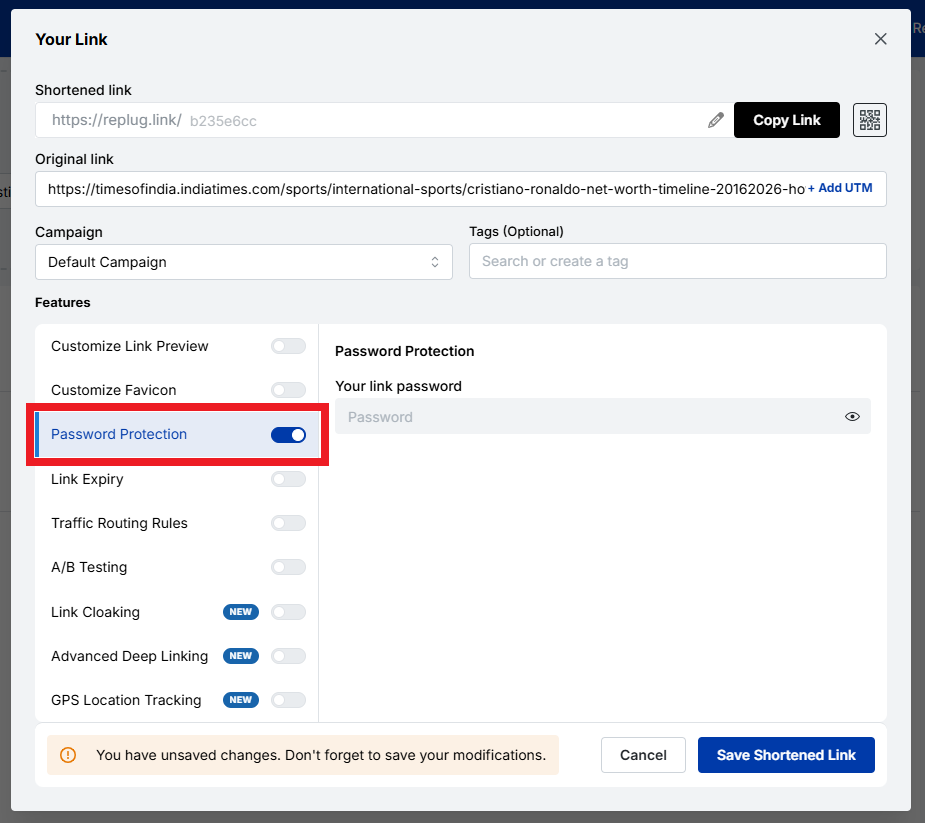
4. You’ll get your shortened URL within seconds. Now, turn on the “Password Protection” toggle button.
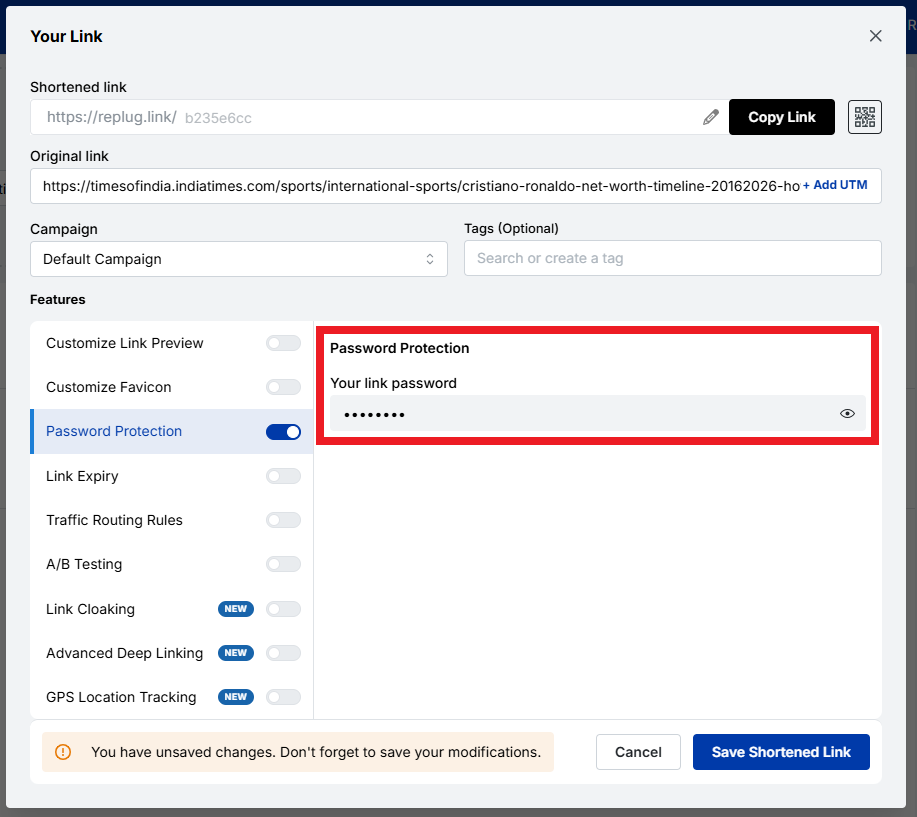
5. Set a strong password under the “Your link password” option.
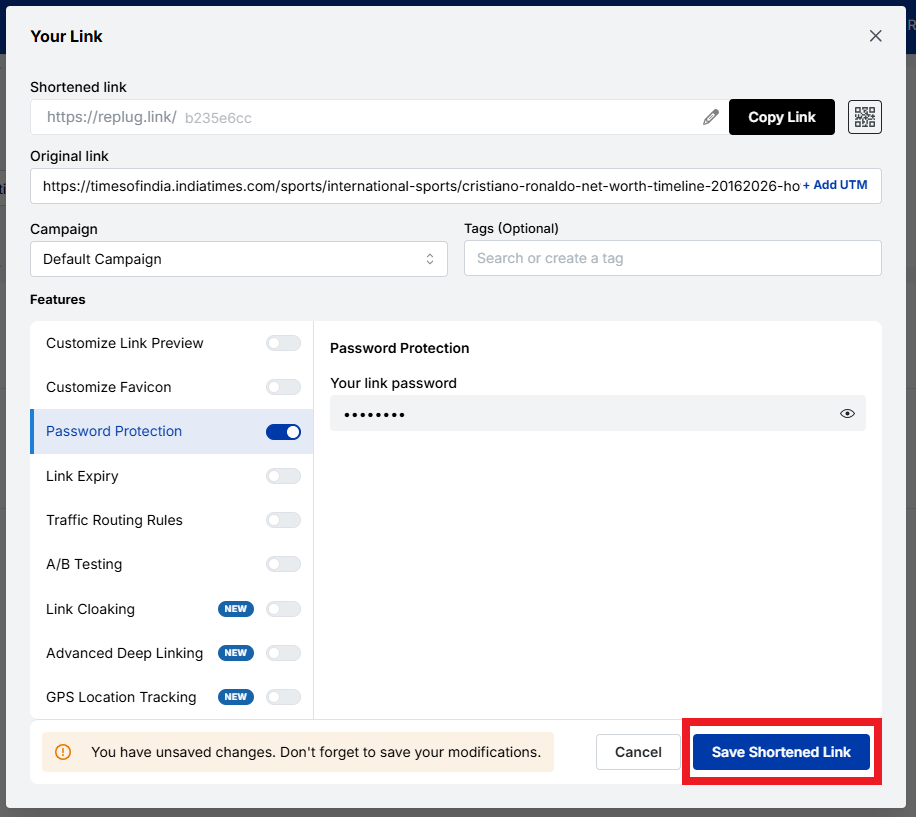
6. Finally, save the link by clicking the “Save Shortened Link” button.
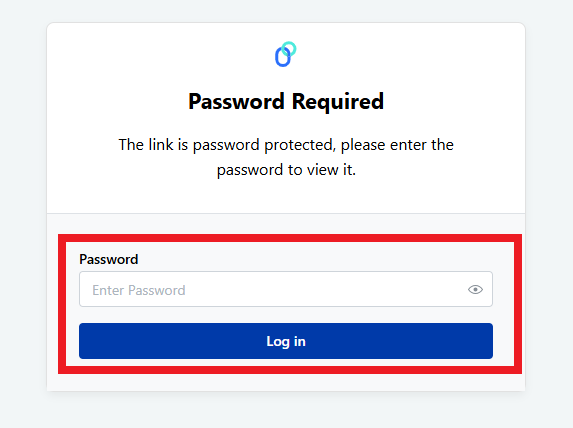
7. Once done, anyone who tries to open the link will be asked for the password you set before they can see the content.
That’s all there is to it!
Note: If you’re just starting out and want a password-protected link for free, Replug offers this feature, along with link tracking and branding tools, at no extra cost.
Short.io
Short.io lets you create short URLs and add password protection, so anyone who clicks your link must enter the correct password first. This feature is part of their password protection settings. When you create or edit a short URL, you can also customize how the password page looks.
Dub
With Dub, you can protect your short links by setting a password during the link creation process. You enter your destination URL and set a password in the password settings, and Dub will prompt visitors to enter it before redirecting them. It’s available on their Pro plans and above!
Nimble Links
Nimble Links makes it easy to shield any link with a password by just pasting your URL, setting a key, and generating a protected link. Visitors trying to open the short URL will first see a password prompt. However, keep in mind this is best for casual sharing or internal use rather than for highly sensitive content.
Method #02: Specialized security tools
Some tools are built specifically for secure information exchange, allowing you to create highly private links that often expire, self-destruct, or require additional safeguards beyond a standard password prompt.
These are great when you want one-off secure links or when you’re sending sensitive info like credentials or agreements.
These tools are also useful for multi-cloud security, keeping sensitive information safe across different platforms.
Password.link
Password.link is a simple service that lets you create secure, one-time links to send or receive confidential information.
It encrypts your content directly in the browser and generates a link that can be configured to expire or be opened only a certain number of times. An ideal option for sharing details that should vanish after use.
You can also request secure data from others through a similar link. Its focus on one-time secure URLs makes it perfect for time-sensitive or highly private exchanges.
Link Lock
Link Lock is a lightweight tool that lets you encrypt any URL with a password so that only people who know it can access the real destination.
Instead of hovering around a standard address, visitors first see a password prompt and only reach the original URL after entering the correct credentials. Everything happens client-side, meaning your passwords and links aren’t stored on external servers.
Method #03: File sharing services
Cloud-based file services often let you not only upload files but also password-protect the shared URLs you generate, adding another layer of safety to your file links.
Proton Drive
Proton Drive is a secure cloud storage service that lets you upload files and then generate shareable links with password protection and optional expiration dates.
The files are end-to-end encrypted before they leave your device, and you can withdraw access whenever you want. Even if someone has the link, they can’t open it without the password you set.
MEGA
MEGA offers encrypted cloud storage and links that can be password-protected at the time of creation. When the link is protected, anyone who clicks it will be prompted to enter the password before access is granted, helping ensure that your shared content stays private.
Password-protected MEGA links often use a unique format that separates the password from the visible part of the URL for added security.
Method #04: Website protection
If you’re sharing content from your own website (not just files), you might want to secure entire URLs or sections of your site so that visitors must enter a password to view confidential content.
SiteGround
With SiteGround hosting, you can password-protect specific URLs or pages through the hosting control panel.
In the site tools area, there’s a section for protected URLs where you can specify which parts of your site require a username and password to access. This adds a gate before the page even loads, helping you control who sees private web-based content.
Here’s a snapshot of real-world password-protected link examples you can use or learn from, whether you’re sharing files, documents, or curated content online.
Each service below highlights how platforms let you restrict access so that only those with the URL can view or download what’s behind it.
Password-protected link Google
Google Drive does not natively support password-protected links for shared files or folders. This means you can share URLs, but the service itself won’t ask for a password before granting access.
Security instead relies on Google account permissions and who you choose to share with. For true password protection, users often turn to third-party tools that wrap Google Drive links with a password layer.
Password-protected link Google Drive
Because Google Drive lacks built-in password prompts on share links, many people use external services (like MultCloud) to generate a link that requires a password to view a Google Drive file.
Password-protected link OneDrive
OneDrive also doesn’t offer straightforward password protection on shared links in most consumer plans. Instead, security relies on sharing only with specific people or using organizational policies.
Enterprise-level Microsoft 365 tenants can apply password protection on links via admin settings, especially for “Anyone with the link” shares.
Password-protected link Dropbox
With Dropbox (on Professional and higher plans), you can add a password directly to a shared link, so recipients must enter it before accessing files or folders. Passwords and link expiration settings are built into the link settings on the Dropbox site or app.
Password-protect link SharePoint
In SharePoint Online, you can create password-protected sharing links for files and folders. But keep in mind, this works with “Anyone with the link” share permissions and is usually managed through the SharePoint Online interface. Recipients must enter the correct password to view the content.
Password-protect link ShareFile
While ShareFile doesn’t let you set a classic password prompt on public links, it does offer very strict access controls. This ensures that only signed-in or specified users can access a share link, effectively controlling access in a way similar to password protection.
Password-protected link Linktree
Linktree lets you lock individual links on your bio page using a “Code Lock.” Visitors must enter a 4-digit code before they can open that specific link. This is great for exclusive content or gated experiences.
Password-protected link Words Puzzle Page
Sites like puzzle pages or member-only content pages often use simple password gates on URLs, so only people with the password can access them.
You set a password and share the link plus the password with your audience. This isn’t built into every platform, but it’s a good example of how password protection can control access to interactive content (think of a custom WordPress page with password protection enabled).
How can you make your links more secure?
Making sure your links are actually safe to share is more than just adding a password. It’s about layering smart practices to reduce the risk of unauthorized access or data leaks.
Here are key ways you can boost the security of your shared URLs:
🔒 Use strong, unique passwords: Don’t fall for simple phrases like “1234” or “password”. Aim for longer, unpredictable passwords with a mix of characters. A password manager can help you generate and store these securely so you don’t have to remember them all.
📤 Share passwords separately: Never send the password in the same message as the link itself. For example, email the link and send the password over text or a secure messenger so someone intercepting one can’t open the content.
⏱️ Set expiration dates: Make links expire after a certain time (like a day or a week) so they don’t stay open forever if someone else missteps on them later.
📈 Limit access & track usage: Where possible, set limits on how many times the link can be used and monitor access attempts. This helps you catch weird activity early.
🍃 Use secure channels & networks: Before sharing anything sensitive, make sure you’re on a trusted, private connection rather than public Wi-Fi, which can be snooped on more easily.
🔐 Combine protections: Password protection is just one part. Combining it with features such as click limits, link expiration, and encryption provides a stronger defense than passwords alone.
Doing these things together keeps your password-protected links truly protective, so only the right people can open them.
Wrapping up
As you’ve seen, sharing sensitive content online doesn’t have to be risky anymore, especially when you use the right tools and practices.
From simple cloud drives to password-protected link shorteners, there are plenty of ways to add an extra layer of security to your shared URLs.
No matter if it’s a private file, an invite-only page, or something you don’t want publicly indexed, protecting your short URL with a strong password and good link hygiene helps prevent unauthorized eyes without slowing you down.
Just remember to share passwords separately, set expiration dates when possible, and choose tools that match how sensitive your content really is. With these steps, your links stay concise, easy to share, and most importantly, secure!
Frequently asked questions
Can I password-protect a link?
Yes, for sure! Many online tools let you add a password to a URL, so anyone trying to open the link must enter your chosen password first. This works by wrapping the destination inside a password gate before redirecting.
Can password-protected links be hacked?
Yes, password-protected links aren’t unbreakable. If someone guesses or brute-forces a weak password or the service storing the link is compromised, the protection can be bypassed. Strong, unique passwords reduce this risk, but nothing is 100% safe.
How do I add a password to a URL?
To add a password to a URL, use a service that generates a protected link. Paste your destination URL → set a URL password (of your choice), and it gives you a new link that prompts for that password before access.
Is a password link trustworthy?
A password link can be trustworthy for casual or temporary sharing, but its safety depends on the service and setup. For sensitive data, a one-time password link or a platform with strong encryption is generally more reliable. This is because simple password gates may be vulnerable if passwords are weak or shared insecurely.
How to disable or turn off password-protected sharing?
In most tools, you can go to the link’s settings or dashboard and remove the password or turn off protection, which restores normal access to the link without a password prompt. The exact steps vary by service.
Is it safe to use password-protected links for sensitive information?
Password-protected links add a layer of security, but they aren’t as strong as full encryption. For very sensitive and confidential information, you should combine password protection with strong encryption or secure file sharing. Plus, avoid sending the link and password in the same message.
What’s the difference between password protection and encrypting files?
Password protection simply requires a correct password to access something. Encrypting files shuffles the file data itself so it’s unreadable without a decryption key. This protects content at rest, not just at access. Encryption is generally stronger and protects the actual data, while a password gate just controls entry.
How to manage users’ access to protected URLs?
To manage access for users on protected URLs, open your link or share settings in whatever service you’re using (like Dropbox or a URL tool). From there, you can change who has the link, update the password, or cancel access entirely. Some tools also let you see who accessed the link and block specific users.
How to change the password for a password-protected URL?
To change the password on an already password-protected URL:
1. Go to your link’s dashboard or settings. 2. Find the link. 3. Choose “Edit”. 4. First, enter the old password, then enter a new one. 5. Save the changes.
After this, only the new password will work!
How to remove password protection from a URL or link?
To remove password protection, edit the protected URL settings and turn the password option off or delete the password. The link will then open normally without anyone needing a password.
How to password-protect a folder or file and access it later?
To password-protect a folder or file, many cloud services let you set a password that must be entered before viewing or downloading. On your own computer or host, you can use built-in features (e.g., encrypt with a password in Office apps) or tools that wrap files/folders with a password prompt. Once set, you’ll need that password every time you access them.
How to send a password-protected link?
To send a password-protected link, first create it using a dedicated password-protected link app by entering your destination URL and setting a password. Once generated, send the protected link to your recipient via a secure service and share the password separately. This keeps the link private and safe until the intended user enters the password.
How to make a password-protected link in HTML?
With plain HTML alone, you can’t reliably secure content, because all HTML and CSS are visible to anyone who inspects the source. What you can do is add a simple form and a bit of JavaScript that asks for a password and then redirects to a URL if the correct password is entered. But this method is not real security. For real protection, you need server-side code or a service that checks the password before showing the link.
How to bypass a password-protected link?
There’s no legitimate password-protected link bypass way without the correct password. That’s the whole point of the protection. Some systems offer authorized access links that work without a password because the unlock token is embedded in the link, but those must be created by the owner and aren’t true bypasses. Trying to break or bypass a password without permission is not appropriate and often illegal.
How to unlock password-protected links without a password?
You normally can’t unlock a password-protected link without the correct password. That’s exactly what the protection is for. The only legitimate ways are to ask the owner for the password or, if you own the link, remove the password from the settings. There isn’t a built-in bypass for security reasons. (General security principle)
A messy link can quietly kill clicks and, more importantly, conversions. One study of 11.8 million Google search results found that shorter, cleaner URLs tend to rank higher, and the first organic result gets about 28 percent of all clicks. That is a lot of traffic mounting on a simple web address.
The problem is that many marketing teams deal with confusing, long URLs full of numbers and symbols. These links are hard to read, hard to trust, and even harder to track. When campaigns span email, social, ads, and QR codes, link chaos grows fast.
This guide breaks down dynamic and static URLs in simple terms, explains when each type helps, and provides useful examples. Next comes the base concept needed for everything else: what a dynamic URL actually is.
Let’s get right to it!
What is a dynamic URL
A dynamic URL is a web address that the server builds in real time when someone requests a page. Instead of pointing straight to a single fixed file or page, it includes instructions, often in the form of URL parameters, that tell the server which content to pull from a database. Changing those parameters changes what the visitor sees, even though the base script stays the same.
Dynamic URLs are common on ecommerce sites, news portals, SaaS dashboards, and anywhere content updates frequently or is personalized.
When someone applies filters, sorts items, or searches on a site, the link that appears in the browser bar is almost always a dynamic URL. This structure makes it easy for developers and marketers to create thousands of pages without creating an abundance of separate files.
Key characteristics of dynamic URLs
Dynamic URLs usually contain a question mark followed by a query string. That query string holds one or more key‑value pairs, which act like small instructions for the server. Keys describe what the parameter means, and values tell the server which record or option to show.
You will often see that dynamic URLs:
Are generated by scripts written in languages such as PHP, ASP, or Node, with file endings like “.php”, “.asp”, or no extension at all.
Contain characters such as “?”, “&”, and “=” instead of looking like a simple folder path.
Use parameters like “product_id=123” to grab the right item from a database without needing a separate HTML file.
Because of this structure, the same base path can return numerous different views. A single dynamic script can display all products, but the parameters determine which category, brand, or sort order is shown. That power makes dynamic URLs very flexible for large sites.
Dynamic URL parameters
Dynamic URL parameters live after the question mark and provide the details a script needs. Each parameter usually has a name on the left and a value on the right, joined by an equal sign. Multiple parameters are joined with ampersands.
Marketing tracking: UTM tags such as utm_source, utm_medium, utm_campaign.
Marketing teams often add tracking parameters, so analytics tools can see which campaign, medium, or ad sent the click.
Note: Parameters can also introduce problems if not handled with care. When different parameter orders or values yield the same content, search engines may see many URLs pointing to the same page. This is where things such as canonical tags, clean parameter design, and smart link management matter.
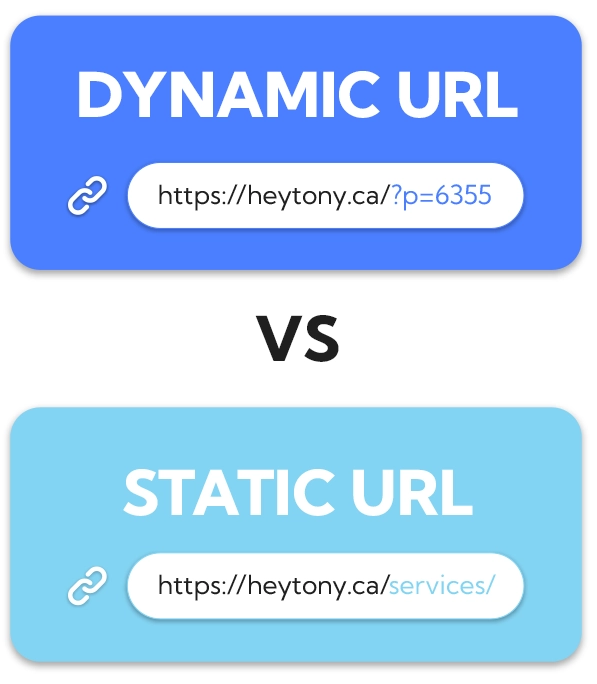
Dynamic URL example
Here is a simple dynamic URL for a store search results page:
The parameter “query=running+shoes” tells the server what the visitor typed.
The parameter “sort=price-asc” controls the sort order by price from low to high.
And, the parameter “page=2” sends the visitor to the second page of results instead of the first one.
Change the search term or the sort setting, and the content changes without needing a new file. The base path stays the same, but the dynamic URL still gives a direct link to a very specific view that someone can share, bookmark, or track in campaigns.
Dynamic URL advantages & disadvantages
Dynamic URLs come with real strengths for growing sites. They let teams generate vast numbers of pages from templates, which is perfect for extensive catalogs, marketplaces, and user accounts. They react to user input, so filters, search, and personalized feeds all become possible. For developers, they keep code and content in sync with a central database.
Key advantages of dynamic URLs:
Scalability: One template can serve thousands of product or article views.
Personalization: Easy to show user‑specific dashboards, recommendations, or saved items.
Interactivity: Filters, sorting, and search results can all be represented by direct links.
Automation: New items added to a database appear automatically without manual URL setup.
Main disadvantages to watch:
Messy appearance: Very long or confusing dynamic URLs can scare visitors away in emails, ads, and social posts.
SEO challenges: Parameters that change order or add no real content change can create many versions of the same page, which can waste crawl budget and split link equity.
Tracking confusion: If each parameter variation collects its own backlinks, signals get spread thin across many URLs.
From a marketing view, ugly dynamic URLs can also look spammy in ads or emails. People feel more comfortable clicking a clear, short, and descriptive link. This is why many teams wrap dynamic destinations in branded short links and use a clean URL slug that actually describes the content.
Dynamic URLs excel at
Dynamic URLs shine when content is large, changes often, or is based on user choices. Common use cases include:
Travel booking engines: Different combinations of dates, locations, and prices from live feeds.
SaaS dashboards & account pages: Each user can see their own reports, settings, and content while the site still runs on shared templates and scripts.
Community forums & news archives: Endless combinations of topics, tags, authors, and time ranges.
For content marketers, dynamic URLs make it easier to write SEO‑friendly URLs or links that include helpful slugs plus tracking parameters. When combined with a top-notch link management platform such as Replug.io, they support testing, segmentation, and personalization without changing the underlying page code.
What is a static URL
A static URL is a web address that points to fixed content. The file or route behind it stays the same unless someone manually edits or replaces it. When visitors load that link, they all see the same page, and the address itself rarely changes.
Static URLs often represent simple HTML pages, markdown files, or saved views inside a content management system. Think about core site pages such as “home”, “about”, “pricing”, or “a standard blog post”. These links tend to be short, readable, and easy to remember, which is why they are often used as the main public‑facing URLs.
Even though the word static suggests nothing can change, content on a static URL can still be updated. The key difference is that the address does not rely on URL parameters to fetch different versions for each visitor. That steady structure has strong benefits for SEO, branding, and user trust.
Key characteristics of static URLs
Static URLs usually look clean and folder‑based, while dynamic ones contain query strings and parameters. Static ones are often made of a domain, optional folders, and a clear slug at the end that describes the content. You might see file endings such as “.html” or clean routes without any extension at all.
They rarely include query strings, and they avoid symbols such as “?” and “&”. Instead of “page.php?id=45”, you will see a path such as “/blog/dynamic-vs-static-urls”. This format is friendly for humans and easy to scan in search results, emails, or social posts.
Because static URLs are stable, they are:
Easy to cache on servers and CDNs.
Easy to link from other sites and internal navigation.
Less likely to break with minor system changes.
For you, that means better consistency for a given page over time, which helps with long‑term SEO performance.
Static URL parameters
Most static URLs do not use parameters in any case, which is part of their charm. The absence of a query string keeps them short and simple. That said, there are cases where a mostly static URL still includes parameters, for example, when you add UTM tags for analytics.
In those cases:
The core URL remains static and represents the main content.
The parameters handle tracking, not content changes.
This is a crucial difference from an actual dynamic URL, where parameters often change what is shown.
Note: From an SEO perspective, you still want one canonical version. So, if you attach tracking tags to a static page, it is good practice to mark the clean URL as “canonical”. This prevents search engines from treating the same static content as multiple pages just because it carries different tracking strings.
Static URL example
A classic static URL on a small business site might be:
“www.localstudio.com/services/web-design”
This link likely points to a single services page that talks about web design. The slug “web-design” clearly states the topic. There are no parameters to sort, filter, or change the view.
Notice that the URL is easy to read, share, or speak aloud. That clarity is why static URLs are widely used for content marketing purposes.
Static URL advantages & disadvantages
Static URLs are great for SEO and user experience because they are clear and predictable. They often include keywords in the URL slug, which helps both users and search engines understand the topic easily. Shorter links also fit better in email, print, and social posts, and they look more trustworthy.
Key advantages of static URLs:
Clarity: Short, descriptive slugs show users what to expect.
SEO value: Easy to include keywords naturally.
Reliability: Less risk of parameter‑based duplicates in the index.
Performance: Easier caching can speed up page loads.
Main disadvantages include:
Less flexible for large catalogs: If every slight content variation required a separate static URL and file, managing large product sets would be pretty hard.
Manual planning: Someone has to choose each slug and map it on purpose.
Limited personalization: Static URLs alone do not handle user‑specific views well.
That is why complex sites mix static and dynamic URLs. Core pages stay static, while heavy data and filters use dynamic structures.
Static URLs excel at
Static URLs are especially suitable for evergreen and marketing‑focused pages. Great fits include:
Homepages and key category hubs.
Product detail pages that do not rely on filters.
About, contact, and FAQ pages.
Main blog articles and resource guides.
These pages benefit from a steady URL that can collect links and be reused across campaigns.
They also work well for landing pages and ads. When you run search or social ads, a short, static‑looking display URL can boost click‑through rates because it feels precise and professional. Many marketers create vanity URLs or branded short links that point to these static‑style pages.
For teams that use link management tools, static URLs pair nicely with branded domains. You can shorten a link for free to a static page into something like “go.brand.com/demo”, which looks sharp in every channel and still gives you full tracking and routing control behind the scenes.
Difference between a dynamic URL and a static URL
When people ask what the actual difference is in terms of URLs, they usually care about structure, SEO, and real use in campaigns. This comparison table sums up the main points for static link vs. dynamic link based on key features.
Feature
Dynamic URL
Static URL
Structure
Built from a base script plus URL parameters in a query string, often using “?”, “&”, and “=”
Fixed path that rarely changes, usually clean folders, and a descriptive slug without a query string
Content
Pulls data from a database in real time, so content can change based on filters, search terms, or user profile
Shows the same core content to every visitor, unless the file or route is updated
SEO/User
Modern search engines can crawl them well when parameters are clean, but long strings can hurt click‑through rates and look messy
Very friendly for users and search engines. Easy to read, share, and include keywords in the slug for an SEO‑friendly URL
Performance
May need more server processing for each request, and can be harder to cache fully if the content changes often
Easier to cache on servers and content delivery networks, which can help pages load faster
Use case
Best for search results, filtered listings, user accounts, dashboards, and any view that changes often
Best for core pages, evergreen content, landing pages, and simple posts where you want one stable link
Best for
Large sites with many similar items, personalization, and advanced filters, where each view still needs its own distinct URL
Brand building, link sharing, printed materials, and long‑term SEO, where a stable, clean slug has real value
Dynamic URLs vs Static URLs examples
Sometimes, the easiest way to understand dynamic URLs vs. static URLs is to see realistic examples. Below are simple, practical cases that mirror standard pages marketers work with every day.
Here, the script shows products, and the parameters control category, color, size, and sort order, so each change creates a new view from the same base path.
The page content may be static, but the tracking parameters make this a dynamic URL variation that analytics tools read as a separate traffic source.
5 best examples of a static URL
1. Homepage of a brand
“www.brand.com”
It is the simplest form of a static URL. It never changes, carries the main branding, and appears on business cards, ads, and social bios, which makes it the anchor for all other links.
2. About page for a company
“www.brand.com/about”
This points to information that changes rarely. It is easy to remember, use in press mentions, and link from partner sites, which helps with SEO and trust.
3. Blog post with a descriptive slug
An article on URL best practices might live at:
“www.replug.io/blog/url-best-practices”
The slug clearly states the topic and makes the post easy to find again without needing to remember numbers or parameters.
4. Product detail page without filters
A single flagship product can sit at:
“www.store.com/products/blue-running-shoes”
The slug doubles as anchor text in some cases, and this clear static URL can be used consistently in ads, emails, and offline campaigns.
5. Campaign vanity URL created with a link tool
Using Replug, a marketer might shorten a long landing page link into something like:
“go.brand.com/free-trial”
This is still a static‑style URL on the outside. Behind it, you can route to any static or dynamic destination, while keeping the shareable link short and branded.
How does Replug help with dynamic URLs and static URLs?
Most marketers and business professionals deal with both static and dynamic URLs across email, ads, social posts, and QR codes. Replug sits on top of all that and turns every long URL into a clean, branded, and trackable asset that is easy to manage, no matter how messy the original link looks.
With Replug, you keep your existing site structure while gaining control over how links appear, where they send people, and how each click is tracked.
Maximize marketing ROI
by transforming ordinary URLs into branded short links that convert.
Try Replug for free
Here are key ways this excellent link optimization platform supports both dynamic and static URLs in daily work:
Shorten any URL
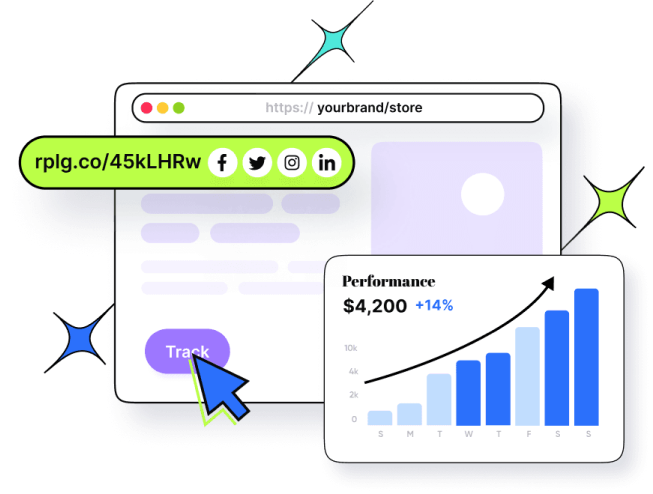
Replug shortens any long URL, including complex dynamic ones filled with parameters, into a simple branded short link on your own domain. This makes links easier to read in social captions, email copy, and ads while maintaining trust, since visitors still see your brand name rather than a random domain.
Custom slugs for clear messaging
The platform lets you customize the URL slug for each short link, creating a clear, SEO‑friendly URL for public use. Even if the destination is a long, dynamic URL, your audience sees a neat slug like “/new-report” or “/summer-sale”, which is far more shareable and easier to remember.
Consistent UTM tagging
Replug adds and manages UTM tags to links, keeping dynamic URL parameters for tracking consistent across campaigns. Instead of hand‑typing UTM codes and risking mistakes, you can standardize names for source, medium, and campaign, which makes analytics in tools such as Google Analytics or your CRM much more straightforward to trust.
Smart routing and link rotation
With dynamic link rotation, a single short link can redirect visitors to different static or dynamic URLs based on rules such as device, country, or time. This helps with personalization and testing without touching the website code, since you only update routing rules inside the Replug’s dedicated dashboard.
Built‑in A/B testing
Replug lets you split traffic from a single branded link across multiple landing pages and see which one converts better. You can split clicks 50/50 between a static page and a more dynamic experience, then shift traffic to the winner based on A/B testing data.
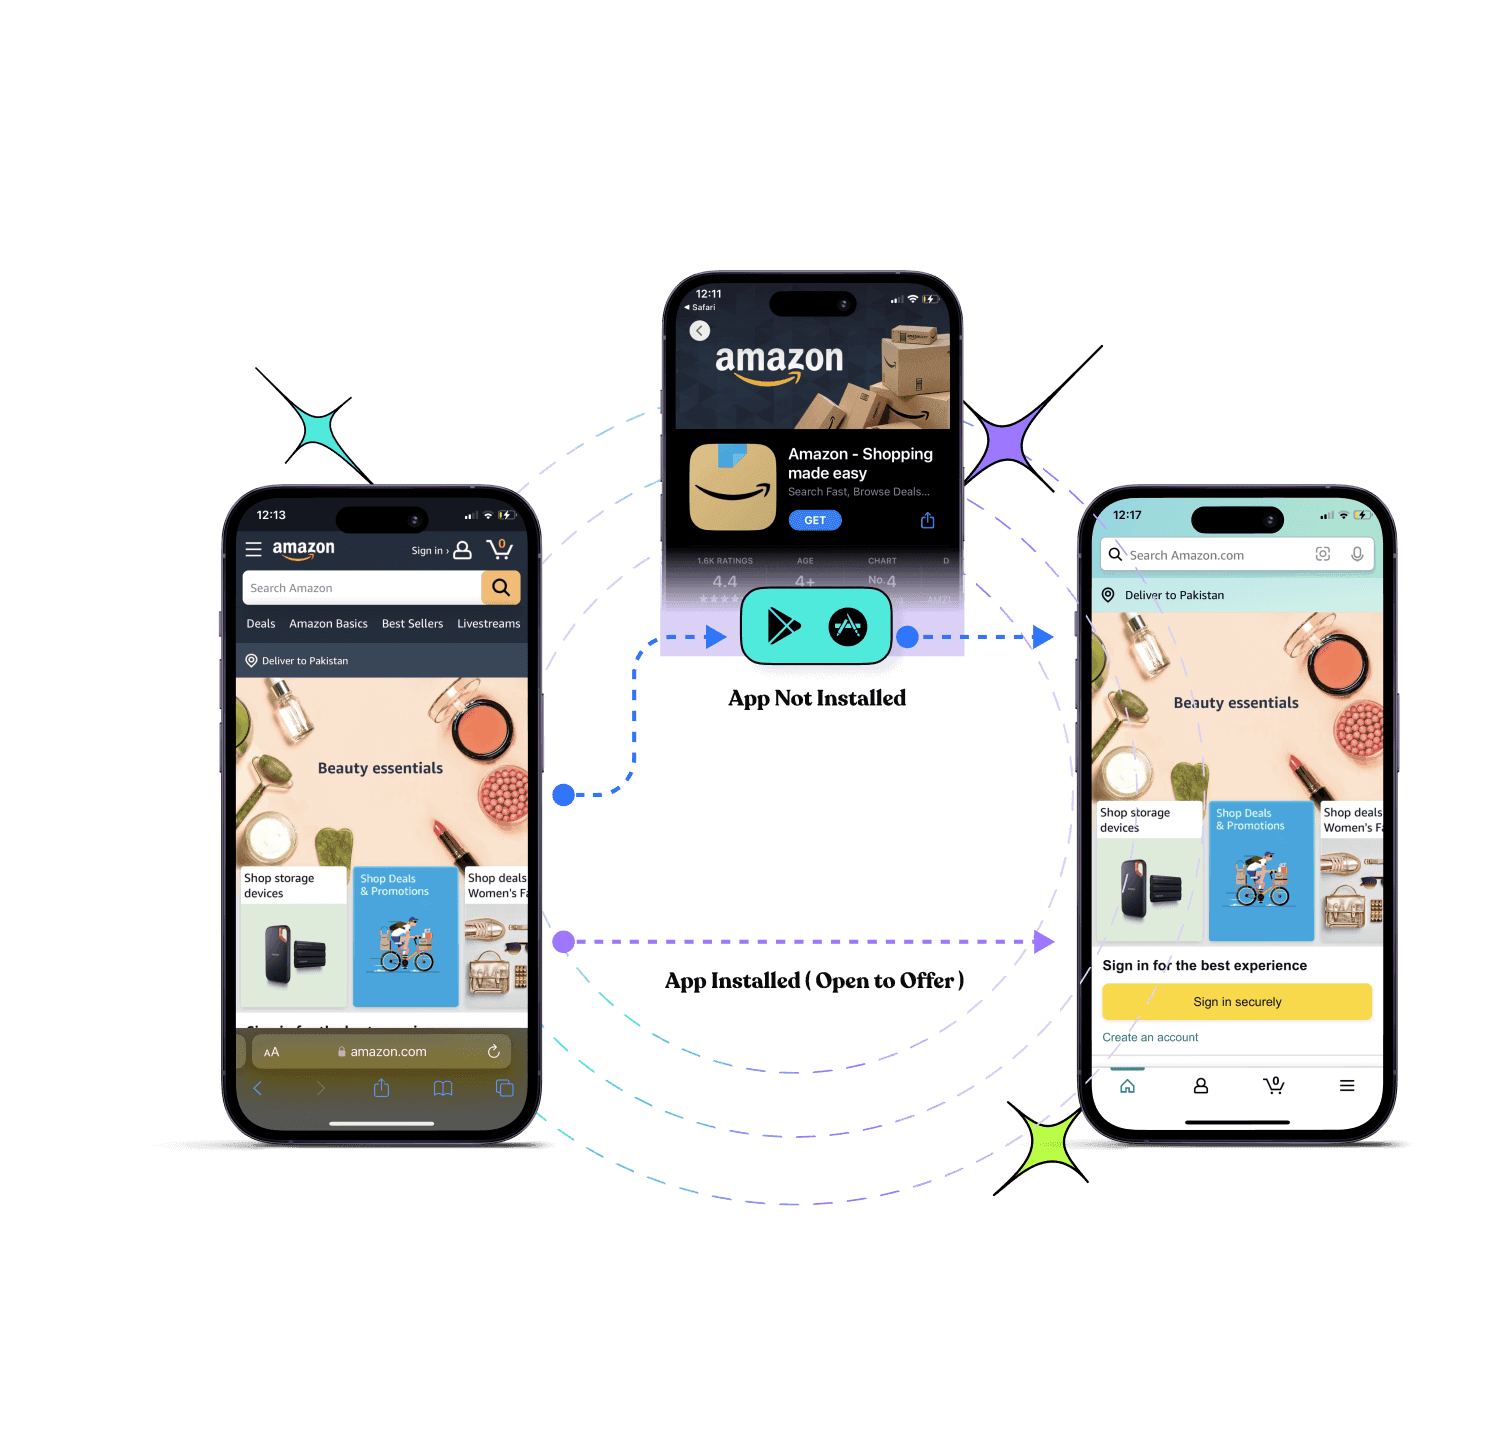
Deep links and dynamic QR codes
Replug supports deep linking and dynamic QR codes that point into apps or changing campaigns while keeping the printed code or base link the same. That means you can run print and offline promotions that still link into clear-cut static or dynamic screens without replacing materials each time.
Analytics for every click
Every Replug link, no matter where it points, comes with detailed click analytics, including location, device, and referrer. This turns each URL into a measurable asset and makes it easier to answer which static link vs. dynamic link performs better for a given audience or channel.
Wrapping up
To be very honest, dynamic URLs and static URLs are not enemies. They are tools that serve different parts of a marketing and product stack.
Static URLs win on clarity, branding, and long‑term SEO, while dynamic URLs power search, filters, dashboards, and personalization. The sweet spot is knowing when to use each and how to keep links short, clear, and trackable.
Replug.io helps by turning any long URL into a branded short link with smart routing, UTM tracking, QR support, and strong analytics.
Want to clean up your links and get more control over every click? Give this all-in-one link management platform a try today!
Frequently asked questions
Which one is better for SEO, static or dynamic URLs?
From a pure SEO and user-trust perspective, static‑style URLs have an edge because they are short, descriptive, and easy to scan. They also make it pretty easy to naturally include keywords in the slug.
How do search engines treat dynamic URLs?
Google and other major search engines now crawl dynamic URLs almost as easily as static ones. Their systems read parameters, figure out which ones matter for content, and ignore many tracking strings. Problems arise when there are endless combinations of parameters that yield the same or very similar pages.
To keep things in good shape, limit parameter use, cut session IDs from indexable links, and use canonical tags so search engines know which version to keep in the index.
How can I tell if a URL is static or dynamic?
A quick way is to look for a question mark in the URL. If there is a query string with parts like “?id=123&sort=name”, it is usually a dynamic URL. On the other hand, if the link is short, has no query string, and looks like a folder path with a slug such as “/blog/url-best-practices”, it is likely static.
Some systems hide file endings, so do not worry if you do not see “.html” or “.php”. The main test is whether the link uses parameters to change what appears on the page.
Which URL structure is the best, dynamic or static?
The best structure depends on the page type and your goals. For content that should rank in search, be easy to share, and stay stable over time, static URLs are a solid choice. Whereas, for content that changes based on filters, user login, or search, dynamic URLs make more sense.
Rather than picking one for the whole site, use static URLs for core pages and dynamic URLs for pages that need live data or support many combinations. Then wrap them in branded short links for public sharing.
How to convert dynamic URLs to static ones?
Turning dynamic URLs into static‑looking ones usually means URL rewriting at the server level and smart redirect planning.
A simple process looks like this:
1. Map each dynamic URL or pattern to a clean static path. 2. Set up permanent redirects so visitors and search engines land on the new address. 3. Update internal links, XML sitemaps, and canonical tags to point to the static version. 4. Monitor Google Search Console for crawl errors and index changes.
Which can Googlebot read better, static or dynamic URLs?
Google has stated that Googlebot can read both static and dynamic URLs well. There is no hard limit on the number of parameters, although shorter and cleaner is still better for many reasons. Static URLs may get a slight advantage in click‑through rates and ease of understanding, but Googlebot does not automatically rate a dynamic URL as worse.
The key is to avoid endless parameter combinations, remove non‑content parameters from indexable links, and use canonical tags when multiple URLs point to the same content.
What are the most common challenges and myths regarding dynamic URLs?
Common myths and issues include:
– Believing dynamic URLs cannot be indexed at all, which is no longer true. – Thinking that you must hide parameters and make every link look static, even when that complicates development. – Creating duplicate content from many parameter combinations that show the same page. – Wasting crawl budget on tiny variations that add little value. – Using very long parameter strings that look confusing or spammy to users.
With clear parameter rules, smart use of canonical tags, and link management tools, dynamic URLs can work very well without causing those problems.
How do static and dynamic URLs affect website loading speed and performance?
The URL type affects performance primarily through caching and server work rather than the text itself.
–Static URLs often map to pages that are easier to cache on servers and content delivery networks, thereby reducing load times. –Dynamic URLs may trigger more database queries and script processing on each request, especially when parameters drive complex filters.
This can slow things down on poorly tuned sites. Good caching strategies, optimized queries, and content delivery networks can make both static and dynamic pages fast enough for real users.
What impact do dynamic vs. static URLs have on user experience and engagement on a site?
From a user’s view, transparent and predictable URLs feel safer and more helpful. Static URLs usually win here because people can guess what is behind “/pricing” or “/guide/url-structure” at a glance. Dynamic URLs with long parameter strings can look confusing or spammy in emails, chat, and social feeds, which may reduce clicks.
At the same time, features powered by dynamic URLs, such as fast search and filters, can raise engagement once people are on the site. Wrapping dynamic destinations in branded short links is a neat way to give users a clean experience on the surface while still using dynamic content underneath.
What effect do dynamic URLs vs static URLs have on link-building and backlink acquisition in SEO?
Static URLs tend to attract more backlinks because they are easier to read, share, and trust. When someone pastes a full URL as anchor text, a static link with keywords acts like natural descriptive text. Dynamic URLs can still earn links, but long parameter strings often look temporary or hard to understand, so people are less likely to share them in full.
A good pattern is to use static URLs as primary link targets and use Replug or similar tools to create branded short links that point to them from campaigns, which keeps all link equity focused on stable addresses.
What is the difference between a static and a dynamic website?
Static and dynamic websites differ in how pages are built and updated behind the scenes. This small comparison helps you see which type fits your project or client work.
Static website:
–What it is: A site made of fixed pages where each URL points to a file or saved view that changes only when edited by hand. –Pros: Simple to host and secure, loads very fast, easy to cache, and great for small sites with limited content updates. –Cons: Hard to manage when there are many pages, limited personalization, and content is less flexible without a content management system or developer help. –When to choose: Best for small business sites, portfolios, simple blogs, and landing pages that do not change content often. –Example: A five‑page site for a local agency with home, about, services, blog, and contact pages.
Dynamic website:
–What it is: A site where pages are built on demand from templates and a database, often using dynamic URLs with parameters. –Pros: Scales well to thousands of pages, supports user accounts, search, filters, and personalized content based on data. –Cons: More complex to build and host, higher risk of slow pages if not optimized, and higher chance of messy URLs without clear rules. –When to choose: Best for ecommerce stores, communities, news sites, SaaS dashboards, and any project with frequent updates or many items. –Example: An online store with product filters, user reviews, wish lists, and personalized recommendations.
Long, messy URLs can be a massive nightmare for marketers. They are hard to share, look unprofessional, and are impossible to track properly. That frustration grows more when you’re trying to manage campaigns and need clear data insights on what’s actually working.
With numerous tools available, determining how to shorten a link without compromising valuable tracking and branding power is a pretty challenging task.
But don’t worry, we’ve got some good news for you!
Here we’ll compare the top 3 URL shorteners, i.e., Replug, Bitly, and TinyURL, to see which one truly fits today’s marketers’ needs.
Let’s break it down, starting with Replug.
Feature / Aspect
Replug
Bitly
TinyURL
Free / Entry Plan
100 short links, 1,000 clicks/month, 3 custom domains, 10 smart QR codes, 2 bio links, 1 campaign
Free plan with limited features (very restricted link count)
Free plan available with basic shortening & limited analytics
Supported (multiple custom domains depending on plan)
Available on paid plans (Growth and up)
Available in Pro / paid plans
Analytics & Reporting
Full analytics, click behavior, and built-in campaign metrics
Real-time click stats, device & geography breakdowns on higher tiers
Detailed analytics in subscription plans (clicks, referrers, geography)
Bulk Link Shortening
Supported in higher plans / Agency levels
Supported in “Growth” and above
Bulk 100K plan allows bulk shortening
Link Destination Redirecting / Editing
Yes, you can change the target URL or rotate links
Some redirect/edit capability
Yes, in paid plans, you can edit link destinations
QR Code Support
Supported (smart QR codes)
Built-in QR code features included
Limited or no advanced QR code design support (basic QR)
White-Label / Agency Features
Offers white-label, team & workspace management in higher tiers
Available in Enterprise / higher tiers with team features
More basic; doesn’t emphasize white-label capabilities
Ease & Speed
Very polished UI and mature product. Generates branded short links in seconds
Slight learning curve for advanced features, but user-friendly for everyday use
Extremely quick for basic link shortening
Replug: Most recommended custom URL shortener
When it comes to shortening links, Replug’s URL shortener goes beyond the basics. Instead of just turning a lengthy, disorganized URL into a short one, it gives marketers the power to brand their links, track performance, and even drive conversions through added features.
No matter if you’re running ad campaigns, sharing links on social media, or managing multiple clients, Replug makes the process smooth and hassle-free. It also ensures that everything aligns with your brand identity in the best possible manner.
Key features
Custom link shortener: Instantly transforms generic links into branded URLs with personalized slugs.
Branded links everywhere: Creates professional-looking links that you can use across all social media marketing channels to strengthen recognition of your brand.
Beyond simple URL shortening: Offers adding custom CTAs, retargeting pixels, third-party widgets, and tracking elements directly to your short links seamlessly.
White-label ready: Agencies and organizations can fully brand the platform, making it look like their own solution.
In-depth analytics in real time: Providestracking link clicks, engagement, and conversions with detailed performance reports.
UTM tracking component: You can easily monitor campaign effectiveness with built-in UTM parameter support.
Fine-tuned link management: Keep all your shortened links organized under one roof for maximum efficiency.
Final thoughts
If you’re very serious and concerned about link management, Replug is hands-down the best choice out there.
From agencies and large enterprises to digital marketers and online businesses, it offers everything you need to create branded links, track results, and promote your campaigns.
It’s not just a link shortener, it’s a complete marketing toolkit built around your URLs.
Maximize marketing ROI
by transforming ordinary URLs into branded short links that convert.
Try Replug for free
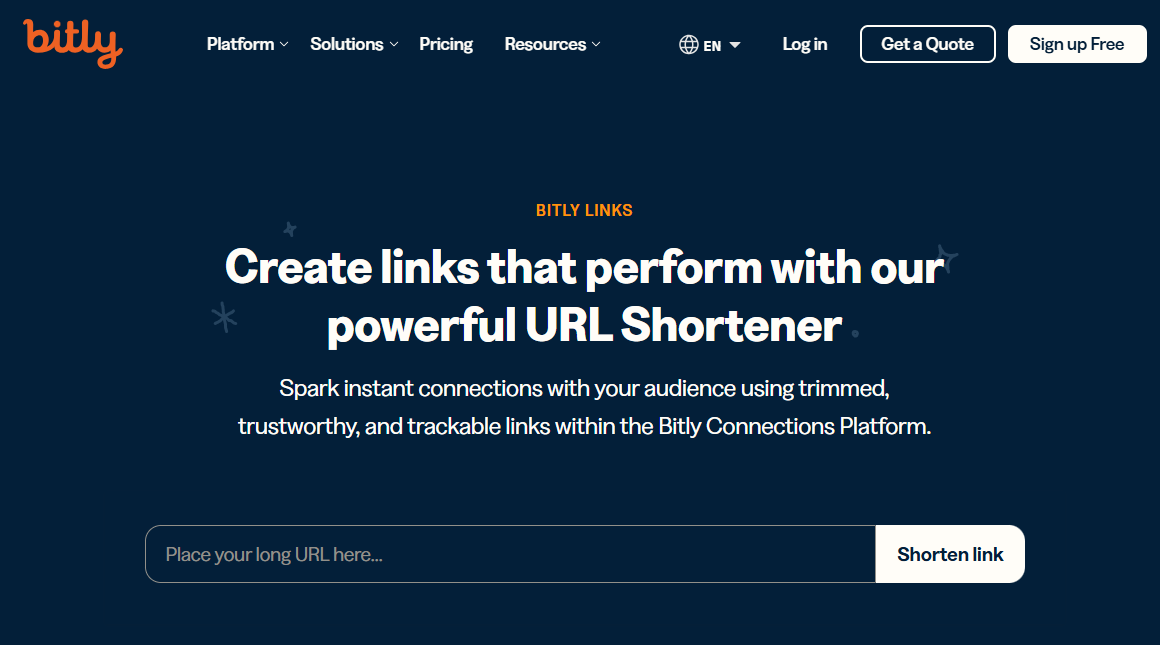
Bitly: A powerful URL shortener for brand strategists
Bitly has been around for years and is still one of the most trusted names in link shortening. It doesn’t just give you a short, neat link, but makes it easy to brand your URLs, track performance, and manage campaigns at scale.
For content marketers and brand strategists, Bitly provides a reliable way to keep links professional and data-driven, while making them easy to share across various platforms.
Key features
Branded short links: Turns long URLs into short, clean, and branded links that build trust.
Top-level domains: Provides custom domains to establish a stronger brand presence for your links.
Clicks & engagement data: Access real-time stats on clicks and audience behavior effortlessly.
Campaign comparison: Easily monitor and measure performance across multiple campaigns.
Flexible link management: Change link destinations at any time without breaking the original link.
Bulk link shortening: Shorten and manage multiple links at once, saving valuable time.
Final thoughts
Bitly is, without a doubt, one of the most reliable URL shorteners, especially for brands and agencies that value trust and data. It packs all the essentials plus advanced features for campaign tracking and branded links.
However, the downside is its pricing plans. It’s a bit on the higher side compared to other tools available online. So, while it’s an excellent choice for businesses that can afford it, smaller teams or startups may want to consider budget-friendly alternatives.
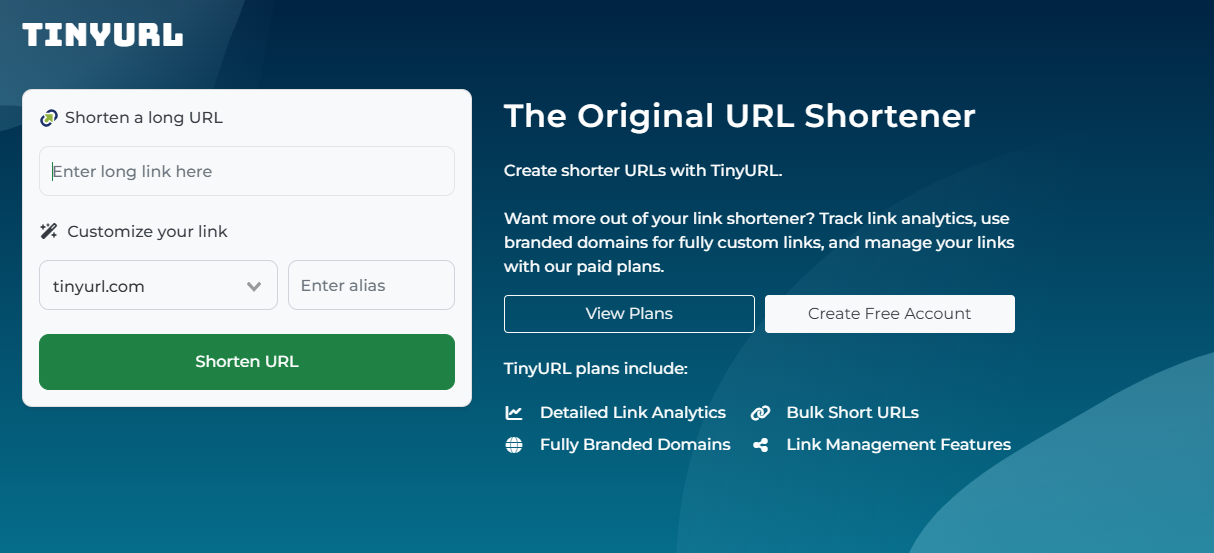
TinyURL is one of the oldest and most recognizable link shorteners on the internet. Over the years, it has evolved from being a simple URL trimming tool to offering more advanced link management features.
For marketing professionals, business owners, or even casual users, TinyURL makes it easy to create shorter, cleaner links. It also provides the option to track performance and manage links in bulk.
Key features
Original URL shortener: Known as one of the pioneers in the space, offering precise and simple link shortening.
Detailed analytics at hand: Get insights into link performance with tracking and reporting tools.
Bulk link shortening: Shorten multiple URLs at once to save time and effort.
Full-scale link management: Access features that help you organize and manage your links effectively.
Final thoughts
TinyURL remains a trustworthy choice for anyone looking for a straightforward link shortener with added analytics and bulk management options.
It does the job well, but there’s a catch! It may take a little longer to generate results, and you’ll need to sign up for an account to access its full features. Still, for those who don’t mind these small trade-offs, TinyURL is a solid option worth considering.
Selecting the right URL shortener ultimately depends on your specific needs as a marketer. If you’re looking for something simple and straightforward for basic link shortening, TinyURL still does the job with minimal fuss.
Bitly, on the other hand, offers a more powerful feature set for general analytics and branding. This makes it a solid choice for businesses that want a balance of usability and insight without going too deep into customization or advanced marketing features.
However, if you’re aiming to go beyond just shortening links and want to fully optimize your marketing campaigns, Replug delivers a more comprehensive toolset. Its ability to add retargeting pixels, create branded links, use bio link pages, and even display call-to-actions on shared content gives marketers an edge in tracking, conversion, and engagement.
While all three tools serve the core purpose of link shortening, Replug stands out for those who want to integrate their links more strategically into their broader marketing funnel.
Significant benefits of URL shorteners
URL shorteners aren’t just about snipping down long links. They bring a bunch of practical advantages for marketers, businesses, and even typical users.
Let’s take a quick look at why they’re so handy:
Saves character space: Short links are ideal for social media platforms like X (Twitter), where every character counts.
Improves aesthetics and readability: Clean, simple URLs look much more professional than messy, string-filled ones.
Offers tracking & analytics: Get valuable insights into clicks, traffic sources, and audience behavior.
Enables branding and customization: Turn generic links into branded ones that boost recognition and trust.
Centralized link management: Keep all your links organized in one place for easy access and control.
Easier to share and remember: Shorter URLs are far simpler to recall and share with others, compared to longer ones.
SEO benefits: Branded, keyword-rich links can give your campaigns a slight edge in search visibility.
Easy link redirection: Update or change your destination link without creating a brand-new one.
QR code generation: Many shorteners now create dynamic QR codes for quick offline-to-online access.
How to pick the right URL shortener
With so many top-rated and best URL shorteners out there, choosing the right one really comes down to what you need for your business or campaigns.
Here are a few essential factors worth keeping in mind before making your decision:
Customization needs: If branding is important, go for a link shortener that lets you create custom domains and unique slugs.
Analytics & reporting: Look for detailed tracking features so you can measure clicks, conversions, and audience engagement without any hassle.
Scalability: Make sure the tool can handle your growth, whether you’re running a small campaign today or managing thousands of links later.
Cost & budget: Pricing varies a lot, so weigh the features against what you’re willing to spend.
Integrations: Check if the URL shortener works smoothly with your existing tools, like CRMs, ad platforms, or email marketing software.
At the end of the day, URL shorteners are more than just tools to shrink links. They’re powerful assets for branding, tracking, and managing campaigns.
We compared Replug, Bitly, and TinyURL, and while each has its own strengths, Replug clearly stands out with its customization, analytics, and all-in-one link management features.
If you want to boost clicks and build stronger brand visibility, give Replug a try today. You won’t be disappointed!
Frequently asked questions
Which is the best URL shortener?
There’s no one-size-fits-all answer. It depends on your priorities (branding, analytics, budget, ease of use, etc.). But overall, tools like Replug tend to lead for marketers and agencies. Thanks to their balance of customization, tracking, and reliability.
What is the most trusted URL shortener?
Bitly remains a go-to trusted option in many industries. Years of uptime, brand recognition, and integrations help it rank high in credibility.
Is there a free URL shortener?
Yes, many services offer free plans, but with limited features. You can shorten links for free, though advanced features usually require a subscription to the paid plans.
Are shortened URLs bad for SEO?
Not necessarily! If the URL shortener uses proper redirects (like 301) and a reputable provider, you won’t lose SEO value.
Is Google shutting down URL shortener?
Yes, Google’s old “goo.gl shortener” is being phased out. Links showing warning messages or inactivity will stop working, though active ones may still be preserved.
Link management has been around for a while now. A powerful link management strategy that every marketer should know about is deep links.
All businesses and marketers know how important it is to drive the audience to the appropriate destination.
That’s why many professionals choose Replug, i.e., a robust link-management platform that simplifies deep links, app links and web redirects under one roof.
If you’re a tad bit curious about deep and universal links, then you’re at the right place. We’ll help you understand the difference so that you can use them for your maximum benefit.
Let’s get right into it!
What is deep linking?
Deep linking is a strategy that takes users directly to specific content within a website or mobile app.
It offers a more direct and efficient navigation experience. It speeds up the communication, data accessibility, and connectivity. Thus, it provides value to the end user.
For example, you receive a recommendation from an online store. You share the link with your friend that takes them directly to the product’s page. Instead of navigating through the app’s main menu or search function, they land on what you recommend.
Basic deep linking is a fundamental technique that directs users to specific pages or content within a mobile app. It improves in-app navigation by allowing users to bypass the app’s homepage and land directly on the intended content. This type of deep link is commonly used to streamline the user experience and guide users to targeted information or features within the app.
Deferred deep links:
Embracing flexibility, deferred deep links bridge the gap even if the app is missing. Clicking such a link first prompts the app download, then seamlessly launches the app and whisks the user to the intended destination upon installation. This smooth transition eliminates user friction and encourages app adoption.
Universal links (iOS):
Designed specifically for iOS, universal links seamlessly blend the web and app experience. These links work regardless of whether the app is installed, leading users to app content via the web browser. Upon downloading the app, future clicks automatically open the link within the app, creating a streamlined journey.
App links (Android):
For Android users, app links mirror their iOS counterparts, facilitating smooth transitions between web and app content on Android devices. In instances where the app is installed, the link seamlessly opens the desired content within the app. Conversely, if the app is absent, the link gracefully reverts to the web content, eliminating the requirement for redirection to the Play Store. This methodology is tailored to ensure a cohesive and trouble-free user experience on Android platforms.
A complete link management solution
for marketing professionals & agencies.
Try Replug for free
Basic deep links vs deferred deep links vs universal links vs app links?
Undoubtedly, deep links are a smart tech innovation that helps brands, organizations, bloggers, and influencers establish a strong connection with the end users. It’s vital to understand different types of deep links for more clarity.
The reason is that there are several types and each of them works differently, for instance, the traditional deep link would take the user to the specific section in the mobile app, but won’t work if the app isn’t installed.
On the other hand, the deferred deep link would take the user to the App Store and recommend the user install the respective mobile app. After the installation, it will still take the user to the intended content within the app.
While traditional and deferred deep links are more general terms, app links and universal links are platform-specific concepts tailored for Android and iOS, respectively, with a focus on providing a seamless transition between web and app content.
Comparison Table
You can see the difference in the table below:
Type
Deep Links
Deferred Deep Links
iOS Links (Universal Links)
Android Links (App Links)
Basic Functionality
Directs to specific app content.
Opens specific content on the mobile web, even if the app is installed later.
Seamlessly switches between web and app content, providing a smooth user experience.
Seamlessly switches between web and app content, providing a smooth user experience.
Fallback Behavior
May result in an error or prompt to install the app if not present.
Redirects to the app store if the app is not installed, then opens the content after installation.
Falls back to web content if the app is not installed, enhancing user experience.
Falls back to web content if the app is not installed, enhancing user experience.
User Scenario
Used for enhancing in-app navigation.
Useful for user on-boarding and re-engagement, allowing users to access specific content after app installation.
Provides seamless transition between web and app content, improving user experience.
Provides seamless transition between web and app content, improving user experience.
Now that the comparative differences are clear between deep links vs universal links and other links. If you haven’t had a chance to understand the benefits, let us elaborate on why you need to use deep links:
i. Enhance user experience:
User experience is an essential aspect of the customer acquisition journey and plays a key role in convincing prospects to convert into customers. Deep links boost user experience as they direct users to specific in-app content, minimizing navigation steps, and providing a smoother, more enjoyable experience for the end users.
ii. Streamline user on-boarding:
No one wants a complicated sign-up process that takes up so much time. Smart digital marketing experts and consultants use deep linking for a seamless on-boarding process and guide users directly to the specific in-app location or personalized content, ensuring a pleasant experience for the user.
iii. Optimize conversion rates:
Conversion rate optimization is crucial to every digital marketing campaign whether it’s based on organic growth or paid ads. Since deep links drive users to targeted pages, they increase the likelihood of conversions by eliminating unnecessary steps.
iv. Boost user engagement:
User engagement leads to generating more leads, downloads, or purchases – whatever the KPI is set for the campaign. Leveraging deep links enables precise targeting of content to cater to the audience, which fosters effective user engagement by delivering relevant information without wasting time.
v. Facilitate quick customer communication:
It’s clear that deep links provide a direct pathway for sharing specific content or updates, enabling quick communication with customers and prospects, and resulting in effective customer support.
Explore how LINE Music improved conversion rates with deep links
Objective: Boost subscriptions to the music streaming app.
Target audience: The focus was set on non-subscribers, aiming to convert casual listeners into dedicated music enthusiasts.
Creative strategy: Users encountered an ad designed to navigate them seamlessly to the subscription page, the virtual gateway facilitated by the strategic integration of deep linking.
Outcome: The outcome revealed a substantial uplift in conversion rates, with a remarkable increase of 63% for Android users and an impressive surge of 99% for iOS users. The strategic implementation of deep linking proved instrumental in optimizing the user journey, resulting in a significant boost in subscriptions to LINE Music.
Drive more clicks, conversions, and app installations by deep linking
to your favorite platforms.
Try deep links for free
Use cases & popular examples of deep link
i. Duolingo takes the students back to the lesson
It’s an interactive, educational platform for learning new languages. Duolingo is available on both iOS and Android platforms. It also has a web version.
Duolingo platform uses deep linking to seamlessly bring users back to the stage where they left off or reached the last session.
When a user clicks a CTA link in an email, they can resume their progress from where they left off.
If you are their app user, then it will take the user to their app. Otherwise, the user is redirected to their website. Thus, this language learning platform is a great example of deep links.
ii. Netflix allows users to go to the title directly from the email newsletter
Netflix is one of the most successful online streaming services in the world and continues to innovate its marketing and engagement strategies.
Besides targeting prospects through social media engagement, this streaming service pays close attention to retaining and warming up the current user base through email marketing.
Moreover, Netflix uses deep links in their email newsletters, which allows them to bring users instantly back to their mobile app.
All you need is to click on the “play” CTA button in their email newsletter, and the title will instantly play in your Netflix app.
So, Netflix is a great deep linking use case and example for marketers to learn from, especially when establishing a consumer engagement strategy.
Let’s conclude: How deep linking helps in marketing
Deep links are a massively popular link management strategy for organizations, digital marketers, and SAAS businesses. They assist marketers in smoothing the user journey by providing quick, fast links for swift accessibility, reporting, and analysis.
Moreover, deep linking is crucial to improving the mobile app user experience as it improves the basic app accessibility and provides a long-lasting experience. Utilize a reliable deep link generator to reach more users and convert more.
And don’t forget that with Replug’s URL shortener, you can generate clean, branded links that work seamlessly across devices, whether you’re using deep links, universal links, or app links.
FAQs about deep linking
Let’s take a look at some of the questions to follow up on:
What is the difference between a link and a deep link?
A link is any URL that points the visitors to a specific page on the web server. However, the deep link is a special link that directs the visitors to a specific location on the mobile app. Deep links are used by SAAS tools, affiliate networks, and app-based startups to quickly take visitors from a URL to the in-app content.
What is an example of a universal link?
Here’s an example: go to Google and search for “iMovie” or simply open this link on your iPhone. It’s a link to the iMovie app for iPhone and iPad. The above-mentioned link will directly take you to the App Store to install the iMovie app.
However, if you try to access the link on an Android device, it won’t take you to the App Store app as there won’t be one to open on an Android device. It may open the URL in the mobile web browser. That’s an example of a universal link.
What is deep linking in iOS universal links?
Universal links are deep links for the iOS/Apple ecosystem. They are used to link directly to specific content within an iOS app, rather than just launching the app’s home screen. Universal links are a default deep linking solution from Apple and allow developers to associate web URLs with their iOS apps, enabling a seamless transition between web content and app content.
Why is deep linking good?
There are various reasons why brands and SAAS companies use deep linking, and some of these reasons are quick accessibility of content, faster engagement, easy delivery of information, and seamless transition. Undoubtedly, deep linking is good for content marketing and customer engagement.
Deep link vs. Hyperlink: Which one is better?
A deep link drives the visitor to the specific in-app location or a certain product page on the web, allowing easier and quicker engagement with a seamless transition. However, a hyperlink is just a regular URL pointing to a website page or web address.
How does deep linking affect SEO?
If deep linking is improving engagement, skyrocketing the CTR, and bringing more eyeballs around, then it’s worth a try. No wonder deep linking could increase content discoverability, making it convenient for search engine bots to discover, analyze, and index content for search traffic.
If you’ve ever tried to promote multiple things on social media, you already know the struggle. Most platforms give you just one link in your bio. That single link has to handle everything: your website, latest content, store, newsletter, and more, and the stakes are high.
Studies show that about 78% of business Instagram profiles link to an external website in their bio, making it one of the main ways brands drive traffic off the platform.
Meanwhile, around 70 million creators worldwide now use dedicated link in bio tools to organize and share multiple links from a single page.
That’s exactly why these tools have become essential for influencers and brands alike. But with dozens of options available, which ones are actually worth using in 2026?
Before we step into the 10 best link in bio tools, let’s quickly understand what a link in bio tool actually is and how it works.
What is a link in bio tool?
First of all, let’s have a look at the link in bio meaning. A link in bio refers to the clickable URL placed in the bio section of a social media profile (like Instagram, TikTok, or X).
Since most platforms don’t allow clickable links inside posts or captions, creators often ask followers to “check the link in bio” to access more information, products, or content.
Link in bio example: an Instagram fitness coach uses one bio link that opens a page with buttons for workout plans, YouTube videos, a coaching signup form, and a supplement store.
A link in bio tool solves the “one-link” limitation. It lets you create a simple landing page that holds multiple links, such as your website, online store, latest video, newsletter, or portfolio, all accessible through that single bio link.
How it works: You create a page inside the tool, add all your important links, copy the generated URL, and place it in your social media bio. When someone clicks it, they see a neatly organized list of everything you want to promote.
Top link in bio tools you must try in 2026
With dozens of link in bio tools available today, choosing the right one can feel a bit challenging. Fortunately, some platforms clearly stand out; thanks to their features, pricing, customization options, and analytics.
To make things easier, we’ve compared the 10 best link in bio tools for influencers and brands in 2026. Take a closer look at the comparison table below to quickly see how these tools stack up in terms of features and overall value.
Tool name
Key strength
Starting price
Customization level
Analytics depth
Replug
Advanced bio link pages with branded links and campaign tracking
~$9/month
High
Advanced
Linktree
Simple and widely used multi-link bio hub
~$6/month
Medium
Moderate
Beacons AI
Creator-focused bio page with monetization and store features
~$8.33/month
High
Advanced
Lnk.Bio
Lightweight and budget-friendly multi-link bio page
~$0.99/month
Low–Medium
Basic
Linkin.bio (Later)
Clickable Instagram feed linked to bio page
~$18.75/month
Medium
Advanced
Taplink
Mini landing page style bio link builder
~$3/month
Medium
Moderate
Milkshake
Swipeable mobile bio site built directly from phone
~$2.99/month
Medium
Basic
QuitURL
Bio page combined with campaign link tracking
~$3.33/month
Medium
Moderate
Shorby
Conversion-focused bio page with messenger integrations
~$12/month
High
Advanced
Pallyy
Bio link page integrated with social media planning
~$15/month
Medium
Moderate
1. Replug
Replug is a powerful link optimization platform designed to help marketers, influencers, and businesses manage, track, and improve their links. Along with branded URL shortening, it also offers a free bio link maker that lets you create a mini landing page containing multiple links for your social media profiles.
Go beyond generic link pages!
Create custom bio links that truly fit your brand
With Replug, you can create bio links that are unique, engaging, and built to convert.
Combines link shortening, tracking, and bio links in one tool
Strong analytics and marketing features
Supports branded domains for better credibility
Cons:
The dashboard can feel slightly complex for beginners
Best for:
Digital marketers, influencers, agencies, and businesses that want a complete, all-in-one solution with advanced tracking and a built-in bio links option.
2. Linktree
Ever wondered why so many creators simply say “check the link in bio” and send you to a single page with everything they offer? There’s a good chance that page is powered by Linktree. It’s one of the most widely used link in bio tools that helps influencers, brands, and businesses place multiple links behind a single URL for their social media profiles.
Key features:
Create a customizable link in bio page with unlimited links
Add videos, social icons, and embedded content
Built-in analytics to track clicks and audience activity
Sell digital products, courses, or promote affiliate links
Email collection and integrations with marketing tools
Pricing plans:
Free plan ($0/month)
Starter: about $6–$8/month
Pro: about $12–$15/month
Premium: about $30–$35/month
Pros:
Extremely easy to set up and use
Generous free plan with unlimited links
Strong monetization and analytics features
Cons:
Many customization options are locked behind paid plans
Branding removal requires a higher-tier plan
Advanced analytics only available in paid tiers
Best for:
Content creators, influencers, musicians, and small brands that want a simple and reliable link in bio tool to organize and share multiple links from one place.
3. Beacons AI
What if your link in bio could do more than just hold links? That’s exactly what Beacons AI tries to solve. It’s an all-in-one creator platform that lets influencers build a customizable link in bio page while also managing things like digital products, email lists, and brand partnerships from a single dashboard.
Key features:
Customizable link in bio page with unlimited links
Built-in store to sell digital products, courses, or memberships
AI tools for generating content and optimizing your page
Email marketing and subscriber list building
Media kit and analytics to track audience engagement
Pricing plans:
Free plan ($0/month)
Creator: about $8.33–$10/month
Creator Plus: about $25–$30/month
Creator Max: about $75–$90/month
Pros:
Combines multiple creator tools in one platform
Powerful monetization options for selling products
AI features for faster page creation
Cons:
Some advanced features are locked behind paid plans
Slight learning curve for beginners
Best for:
Content creators, influencers, and digital entrepreneurs who want a top-notch platform with built-in monetization and AI-powered creator tools.
4. Lnk.Bio
Sometimes the best tools are the simplest ones. Lnk.Bio focuses on doing one thing really well, i.e., helping creators build a clean link in bio page that holds multiple links behind a single URL for social media profiles. It’s widely used by creators who want a quick, no-fuss solution to organize their content, promotions, and social platforms in one place.
Key features:
Create a customizable link in bio page with unlimited links
Add thumbnails, videos, music, and social profile links
Link scheduling and activation controls for campaigns
Built-in analytics to track clicks and traffic
Link grouping, password-protected links, and monetization options
Pricing plans:
Free plan ($0)
Mini: about $0.99/month
Unique: about $24.99 one-time lifetime plan
Ultra: about $89.99/year
Pros:
Extremely affordable compared to many competitors
Unlimited links even on the free plan
Simple and quick setup
Cons:
Design customization is somewhat limited
Interface feels basic compared to newer tools
Best for:
Instagram and TikTok influencers, small creators, and freelancers who want a budget-friendly and straightforward link in bio tool without complex features.
5. Linkin.bio by Later
Unlike most link in bio tools that simply list links, Linkin.bio by Later recreates your Instagram or TikTok feed as a clickable landing page. Each post can be linked to products, blog articles, or other pages, making it easier for followers to explore your content directly from your bio. It’s especially popular with creators and brands that rely on visual platforms.
Key features:
Turn Instagram and TikTok posts into clickable links
Unlimited buttons linking to external pages
Customizable link in bio page with themes, fonts, and colors
Analytics to track clicks and traffic sources
Integration with tools like Google Analytics, Mailchimp, and Shopify
Pricing plans:
Starter: around $18.75–$25/month
Growth: around $37.50–$50/month
Scale: around $82.50–$110/month
Pros:
Visual, shoppable feed layout
Powerful integrations and analytics
Works seamlessly with Later’s social scheduling tools
Cons:
No free plan available
The best experience requires using the Later platform
Advanced analytics and features require paid plans
Best for:
Instagram creators, e-commerce brands, and social media managers who want a visual tool connected to their social media scheduling workflow.
6. Taplink
What if your single bio link could act like a mini-website? That’s essentially what Taplink offers. Instead of just stacking links, Taplink lets you build a small landing page packed with content, contact options, and even payment features. This makes it a popular choice for creators and online businesses using Instagram or TikTok on a daily basis.
Key features:
Create a customizable link in bio page with unlimited links
Add images, videos, music, and rich content blocks
Smart contact buttons for messaging apps and social platforms
Built-in forms to collect leads and customer inquiries
Ability to sell digital products and accept payments directly
Pricing plans:
Basic: Free
Pro: around $3–$6/month
Business: around $6–$12/month
Pros:
Affordable compared to many competitors
Supports payments, forms, and CRM features
Highly customizable with templates and design blocks
Cons:
Some advanced marketing features require paid plans
Interface may feel slightly complex for beginners
Limited overall features stack
Best for:
Influencers, small businesses, and entrepreneurs who need a feature-rich link in bio tool that works like a mini landing page.
7. Milkshake
Milkshake is a mobile-first link in bio tool that lets creators build a simple, swipeable mini-website directly from their smartphone. It’s particularly popular among Instagram and social media creators who want to showcase multiple links, content, and promotions through a single bio link without needing design or coding skills.
Key features:
Card-based mini-website builder (swipeable pages)
Add links, images, videos, text, and contact buttons
Customizable templates, fonts, and colors
Built-in analytics for clicks and views
Mobile-only editor for quick updates on the go
Pricing plans:
Free: $0/month
Lite: around $2.99/month
Pro: around $5.00–$6.99/month
Pro+: around $8.33–$10.00/month
Pros:
Very easy to set up and mobile-friendly
Visually appealing card-style layouts
Affordable paid plans
Cons:
Mobile-only (no desktop version)
Limited customization and integrations
No built-in monetization tools
Best for:
Content creators, influencers, and small brands who want a quick, visually engaging link in bio page without a complex setup.
8. QuitURL
QuitURL is a versatile platform that combines URL shortening, analytics, and link in bio page creation in one dashboard. Rather than acting as just another “link list,” this tool lets you build a customizable link in bio page while also generating QR codes and tracking engagement. It’s designed to help creators and businesses manage multiple campaigns and links through a single branded URL.
Key features:
Customizable bio pages to host multiple links
Branded short links using custom domains
Detailed analytics (clicks, device, location)
Built-in QR code generator for campaigns
Smart targeting and campaign tracking tools
Pricing plans:
Starter: $3.33/month
Growth: $11.11/month
Pro: $22.22/month
Business: $77.77/month
Pros:
Combines link-in-bio, URL shortening, and analytics
Supports branded domains for professional links
Affordable entry-level plans
Cons:
The interface may feel complex for beginners
Some advanced features locked behind higher plans
Smaller ecosystem compared to big competitors
Best for:
Digital marketers, agencies, and creators who want an all-in-one link management and link in bio solution rather than a basic bio link page.
9. Shorby
Shorby is a powerful link in bio tool designed mainly for Instagram, YouTube, and social media marketers. It allows users to build customizable micro-landing pages that combine links, social profiles, and messaging apps in one place.
Key features:
Smart pages to organize multiple links
Messenger buttons (WhatsApp, Telegram, Messenger)
Customizable landing pages and branded URLs
Click tracking and analytics
Retargeting pixels for marketing campaigns
Pricing plans:
Rocket: around $12–$15/month
Pro: around $24–$29/month
Agency: around $82–$99/month
Pros:
Strong analytics and marketing integrations
Supports messenger apps for direct engagement
Highly customizable bio pages
Cons:
No free plan available
Pricing is a bit higher than some competitors
Advanced features limited to higher tiers
Best for:
Influencers, affiliate marketers, and businesses that want a conversion-focused link in bio page with analytics and marketing integrations.
10. Pallyy
What if your link in bio page could do more than just host links, like helping you plan and manage your entire social media strategy? That’s the main idea behind Pallyy. It combines a customizable link in bio builder with social media scheduling, analytics, and collaboration tools, making it a powerful option for creators who want both link management and content planning in one platform.
Key features:
Custom bio link landing page with buttons and links
Instagram grid integration for linking posts
Pre-designed themes and customization
Social media scheduling and calendar
Analytics and content management tools
Pricing plans:
Starter: $15/month
Pro: $25/month
Agency: $99/month
Scale: $199/month
Pros:
Combines link in bio with social media management
Affordable plans with a free trial
Useful analytics and scheduling tools
Cons:
Some posting and feature limits on lower tiers
Advanced collaboration tools are only available in higher plans
Best for:
Social media managers, agencies, and creators who want a link in bio tool integrated with social media scheduling and analytics.
Choose the right link in bio tool for your business: Key features to look for!
Before picking a link in bio tool, it’s important to know what actually makes one useful for your business. The right tool should not only display your links but also help you brand your page, track performance, and drive real conversions from your social media traffic.
Visual customization & branding
Your link in bio page should reflect your brand. Look for tools that allow you to customize colors, fonts, themes, backgrounds, and buttons so your page matches your brand identity. Many tools also allow custom domains and branded URLs, which make your page look more professional and trustworthy to visitors.
Analytics & tracking
Analytics help you understand how people interact with your links. A good tool should show click counts, page views, user behavior, and traffic sources so you know which links or campaigns are performing well. These insights make it easier to improve your marketing strategy over time.
E-commerce & monetization
If you plan to sell products or services, choose a tool that supports payment integrations, product links, or shoppable galleries. Some platforms allow you to sell digital products, collect payments, or link directly to your online store from your bio page.
Link management & performance
A good link in bio tool should make it easy to add, organize, schedule, or update links whenever needed. Some tools also let you prioritize certain links, shorten URLs, or track individual link performance to see what drives the most traffic.
Social integration & advanced functionality
Finally, make sure the tool integrates smoothly with platforms like Instagram, TikTok, YouTube, and other social networks. Some advanced tools also support email sign-ups, content embeds, automation, and marketing integrations, helping you turn your bio link into a complete growth hub.
If you focus on these key attributes, it becomes much easier to select a link in bio tool that actually supports your business goals instead of just listing links.
Are link in bio tools still worth it in 2026?
Yes, link in bio tools are still useful in 2026, especially for content creators, marketers, and businesses that rely on social media traffic.
Even though some platforms now allow more than one link in a profile, most still limit how links can be shared in posts or captions. That’s why many people still use a single bio link to organize everything in one place.
Why they still matter:
One central hub for everything: A single bio link can direct users to websites, products, blogs, newsletters, and social profiles from multiple platforms.
Works across platforms: Many networks still restrict links in posts, so the bio link remains the easiest way to send traffic elsewhere.
Better organization: Instead of updating multiple links everywhere, you can manage everything from one page.
Useful analytics: Most tools show clicks and traffic sources, helping you understand what content works best.
Supports monetization: Modern bio pages can sell products, collect emails, or promote offers like a mini-website.
In short, link in bio tools are still relevant. They’ve simply evolved from simple link lists into small marketing hubs.
Final verdict
To wrap things up, link in bio tools are still a smart way to turn social media traffic into real results.
Instead of constantly changing your profile link, you can share multiple pages, products, and resources through one simple hub. They also help you track clicks, organize campaigns, and guide followers toward the content or offers that matter most.
There are plenty of great tools out there, but the right one depends on your goals, features, and ease of use.
That said, if you want an all-in-one solution with strong link management, analytics, and branding options,Replug stands out as the overall best choice. It gives you more control over your links while helping you make the most of every click from your social media audience.
The most popular link in bio tool is Replug. It’s widely used by creators, influencers, and brands because it’s simple to set up and offers a free plan with basic features. Replug also supports analytics, integrations with many apps, and customization options. With millions of users worldwide, it remains one of the most recognized tools in this category.
What’s the best link in the bio app?
The “best” link in bio app depends on your needs, but tools like Replug, Linktree, Beacons, and Taplink are commonly recommended. They offer features like analytics, link tracking, customization, and monetization options.
If you want a complete link management and marketing solution, Replug stands out for its analytics and branding features, while Linktree and Beacons are great for beginners and creators.
What is the best link in bio tool for TikTok?
For TikTok creators, tools likeReplug’s Tiktok link in bio tool, Beacons, Stan Store, and Linktree work very well. These platforms allow creators to add product links, digital downloads, and monetization features directly from their bio page. Some tools even support direct purchases or email collection, which is helpful for turning TikTok traffic into sales.
What are the best link in bio tools for Instagram in 2026?
Some of the best link in bio tools for Instagram in 2026 include Replug’s Instagram bio link tool,Linktree, Taplink, Campsite.bio, and Pallyy. These tools offer customizable bio pages, analytics, and integrations that help creators drive traffic to websites, stores, and content from their Instagram profile.
What are the best link in bio tools for Reddit?
Reddit creators usually prefer simple and flexible tools that don’t look overly promotional. Good options include Linktree, Carrd, Beacons, and Campsite.bio because they allow clean landing pages, easy link organization, and analytics to track clicks. These tools help Reddit users share multiple resources without constantly editing their profile links.
What are the best link in bio tools for musicians?
Musicians often use tools like Replug, Linktree, Beacons, and Hoo.be because they support music streaming links, merch stores, and tour announcements. These tools let artists share Spotify, Apple Music, YouTube, and ticket links all in one place, making it easier for fans to access their music and updates.
What are the best link in bio tools for affiliate marketing online?
For affiliate marketing, tools like Beacons, Linktree, Taplink, and Replug work well. They allow marketers to organize multiple affiliate links, track clicks, and sometimes even collect email leads. This helps affiliates send traffic from platforms like TikTok, Instagram, or YouTube to multiple offers from a single bio link.
One urgent email or one simple click, and a whole marketing campaign can go off the rails. URL phishing thrives on that split second when someone taps a link without thinking.
Research shows that billions of spam emails are sent every day, and phishing links sit behind most data breaches reported by companies worldwide.
For teams who are pretty passionate about links, those everyday URLs can turn into silent entry points for attackers. Stolen logins, drained ad accounts, fake checkout pages, and damaged brand trust are all very real, possible outcomes.
The good news is that this threat is fairly predictable once you understand how it works. This guide breaks down what URL phishing is, how attackers design their tricks, real-life examples, and clear steps to stop them.
Let’s start with a quick overview of what this digital world attack actually means!
What is URL phishing: A brief overview
URL phishing is a type of phishing attack that uses a “deceptive link” as its primary weapon.
Attackers send emails, texts, social posts, or ads that point to URLs they control, but dress them up to look safe and familiar. The victim lands on a fake page that copies a real site, such as a bank, ecommerce store, ad platform, or company login portal.
The primary goal is simple, i.e., to get the person to enter something of significant value. That might be usernames and passwords, card numbers, one‑time codes, or even full identity details. Sometimes the fake page also drops malware or steals active browser sessions in the background.
What makes URL phishing so dangerous is that a single convincing link can bypass firewalls and security tools, because the victim opens the door by clicking it.
Why is URL phishing important?
URL phishing matters because it is one of the most common starting points for data breaches and account takeovers.
Platforms increasingly rely on technologies such as Sift account takeover protection to detect suspicious login patterns and stop compromised accounts early.
Studies have shown that phishing plays a key role in the majority of reported infringements, and the number of phishing sites has grown several times over in just the last few years.
Setting up a fake website and buying a domain is cheap, so attackers can easily send millions of messages at a very low cost.
For marketing teams, agencies, and online businesses, this attack hits right where work happens: email campaigns, social posts, ads, and landing pages filled with links.
Note: One successful phishing URL can compromise brand accounts, ad platforms, payment systems, or CRM tools in minutes. Understanding the URL phishing meaning, how it works, and where it shows up is now basic security knowledge, not just an everyday IT problem.
How does URL phishing work?
At a high level, URL phishing follows the same script. An attacker sends a message with a crafted link, stirs up urgency or curiosity, and funnels the victim onto a fake page.
That page collects data, then often bounces or redirects the user to the real site, so nothing feels wrong. Under the hood, though, there are several specific tricks you will see again and again.
URL phishing with masked links
Masked links hide the real destination behind friendly text. On an email or web page, the visible part might say “https://yourbank.com” or “View invoice”, while the underlying URL points to a completely different location. Since most people click the blue text without checking the status bar, attackers count on this gap.
Note: Masked links show up in email campaigns, PDF invoices, and social posts, and they are a core building block of many URL phishing types or schemes.
URL phishing with open redirect
Some trusted sites use redirect parameters, such as “?redirect=” or “?url=”, to send visitors to another page after login or tracking.
If these redirects are not locked down, attackers can seamlessly plug a malicious address into that parameter. The phishing link then starts with a real domain, but ends on the attacker’s page. This makes the URL look safe at a glance and helps it slip past filters.
Note: Open-redirect abuse is common in phishing emails that claim to come from well‑known brands.
URL phishing via similar-looking domains
Another typical URL-phishing style relies on domains that look almost identical to legitimate ones.
Scammers register addresses with minor spelling changes, extra words, or swapped characters. For example, “paypaI.com” with a capital “I,” or “secure‑yourbank‑login.com”.
Some even use characters from other alphabets that look like normal letters, which is where “IDN homograph tricks” come in. To a busy reader on a phone, these fake domains can pass as the real thing.
Types of URL phishing
URL phishing is not a single trick; it is a family of methods focused on altering or hiding how a URL looks. Most real attacks combine two or three of these styles at once.
Knowing the main URL phishing types makes it much easier to explain risks to your team and to spot red flags in daily work, efficiently.
Link masking
Masked links appear to point to one thing but send you to another. The clickable text, button label, or even preview image suggests a trusted destination, but the “href” or underlying address points somewhere else.
Marketers use safe link masking to create clean, trackable, and SEO-friendly URLs, yet attackers mimic the same approach to hide phishing pages behind “reset password” buttons or fake unsubscribe links.
Note: Hovering over the link on desktop is often enough to reveal the mismatch.
Open redirects
With open redirects, the first part of the link uses a well‑known domain, which builds quick trust. Buried after a parameter, though, is the actual malicious URL that the redirect will send you to. Email filters and users may focus only on the front of the link and miss the rest.
Note: Because open redirects target real websites rather than just fake ones, they can be harder to block without smart URL filtering and scanning.
Typosquatting
Typosquatting, sometimes called “URL hijacking”, uses domains that look like common typing mistakes. An attacker might buy “goggle.com” or “facebokk.com” and fill them with phishing pages or ad traps.
Users might land there by typing the address wrong, or by clicking a link in a message where the typo is easy to miss.
Note: This method works exceptionally well on smartphones, where small screens make subtle spelling changes hard to see.
IDN homograph attack
IDN homograph attacks use characters from other writing systems that look like regular Latin letters. For example, a Cyrillic “ä” can look the same as an English “a”.
Spammers combine these characters to build domains that appear identical to real ones when pasted into a message.
Note: To the human eye, “ɢoogle.com” or “payάbill.com” looks normal, but the browser treats them as separate domains controlled by the spammer.
Doppelgänger domains
Doppelgänger domains remove or rearrange dots in ways that trick people and, sometimes, internal tools. Instead of “mail.company.com”, the attacker might register “mailcompany.com”. In a long email header or auto‑generated link, that missing dot can be tough to notice.
Note: These domains are often used for internal phishing, targeting staff who expect messages from systems such as HR, payroll, or CRM tools.
HTTP/HTTPS phishing & spoofing
Many people see a padlock icon in the URL address bar and feel safe. Attackers take advantage of that habit in two ways:
Some phishing sites still use plain HTTP, hoping rushed users will not notice the missing padlock at all.
Others get a valid TLS certificate, so the fake site shows HTTPS and a padlock just like the original.
In simple words, HTTPS only tells you the connection is encrypted, not that the site itself is honest, so you still need to read the domain name carefully.
Common URL phishing methods
Once cybercriminals have a deceptive link, they still need to deliver it and dodge basic filters. Here are some of the most typical methods they use to make URL phishing harder to spot in real inboxes and feeds.
Mixing legitimate links with malicious links
Instead of sending a message with one shady link, attackers blend a bad URL into a message full of normal ones. For instance, an email might include real links to a privacy policy, a help center, and social profiles, plus a single phishing URL on a “verify now” button.
Basic scanners that only flag messages full of flawed links may let this pass. To a human reader, the mix of known and unknown links can also feel more trustworthy.
Abusing/exploiting URL redirects
Intruders often chain redirects together so that the first few steps look normal. A phishing link might go from:
A URL shortener → to a tracking domain → to an abused open redirect on a real site → and finally to the fake page.
Each step makes it harder for simple tools to see the end destination. Shortened links are especially popular here, since they hide the full path.
This is the main reason why any short URL generator used in campaigns should be tied to a transparent review process, and destinations should be checked for phishing behavior before links go live.
Hiding malware inside image files
Some campaigns do much more than steal passwords. They also aim to drop malware, like info‑stealing trojans or remote access tools. One trick is to hide harmful code inside image files or to make the entire email or message a single clickable image.
Filters that look mostly at text might miss it. When the victim clicks the image, they may download a file or open a page that abuses a browser flaw. From a user’s point of view, it just looked like a harmless graphic or banner.
Major signs of a URL phishing attack
The good news is that URL phishing leaves clues behind. When people know how to identify suspicious or malicious attempts, those attempts become apparent. They no longer hide among the noise, even when there is a lot going on.
Camouflaged URLs
If the visible link text or button label does not match the address shown in the status bar when you hover, that is a strong warning sign. Another clue is when a PDF or image has clickable areas that jump to unrelated domains.
Note: Any mismatch between what a link claims and where it goes deserves a slow, careful look.
Urgent/threatening SMS notification
Phishing texts often claim that an account will close, a package will be returned, or a fine will be added unless the person clicks right away. They may use generic names like “Bank Support” or “Delivery Team” and link to shortened URLs.
Real companies rarely threaten customers in this way over SMS, so urgency plus a link from an unknown number should raise suspicion.
Subdomain-spoofed URL
Attackers love domains where the real brand name sits on the left, not at the end. Think “paypal.security‑alert.com” instead of “paypal.com”. Many people scan only the first part and ignore the actual registered domain on the right.
Note: When reviewing links, the part directly before “.com”, “.net”, or another main ending (i.e., TLD) is what really counts.
Unknown / Red-flag senders
If the sender address appears random or misspelled, or does not match the name shown in the display field, be careful.
Even if the name says “Support”, the real email or text might come from a throwaway domain with a long string of numbers.
Note: Combine that with an unexpectedly long URL, and you’ll have a strong hint of URL phishing at work.
Extra characters or symbols in links
Phishing URLs or links often use extra dashes, numbers, or words like “verify,” “secure,” or “update” glued next to brand names. For example, “secure‑yourbank‑login‑247.com”.
While some companies use long tracking URLs, an overload of symbols around a brand name, especially in a message you did not request, should make you pause and think for a while.
Misspelled web addresses
Simple spelling errors in the domain, like “faceboook”, “linkedln”, or “goggle”, remain very common. On mobile devices, these mistakes are easy to miss.
Note: Any time a link to a well‑known site looks slightly off, type the address manually in the browser instead of tapping the link.
To recap the main signs, you can think in terms of this quick reference:
Sign
What to look for
Mismatched link text
Button or text says one thing, but the status bar shows another domain
Extreme urgency
Threats or time pressure, plus a link from an unknown sender
Odd subdomains
Brand name at the start, not near the end of the domain
Strange sender address
Display name vs. real email does not align
Extra symbols/keywords
Many dashes, numbers, or “secure/verify/update” keywords around a brand
Spelling mistakes
Minor typos in famous domains
How to identify a URL phishing attack
Spotting URL phishing is mostly about slowing down and checking a few details more critically and thoroughly. A quick, repeatable routine can block most attacks before they go anywhere near your credentials.
Double-check the URL
Before clicking, hover over the link on desktop or press‑and‑hold on mobile (without opening) to see the full address. If it seems off, copy and paste it into a plain text editor to read it clearly and carefully.
When in doubt, skip the link and go directly to the site by typing the address yourself or using a saved bookmark.
Inspect the domain name spelling
Focus on the part of the URL right before the main ending, i.e., the top-level domain such as “.com” or “.org”. Look for:
swapped letters,
extra words,
or numbers added to a brand name.
Compare it to how the real site is spelled or previous emails you trust.
Carefully review all the content
Phishing pages and emails often reuse logos and colors but may miss details in wording and layout. Watch for:
These small slips, paired with a link that asks for sensitive data, are a strong signal of trouble.
Tools like TruthScan help users detect suspicious emails by analyzing sender patterns, embedded links, and scam indicators before any interaction occurs, adding an extra layer of protection against phishing attempts.
Verify the connection protocol (HTTPS)
Check for “https://” and a padlock in the browser, but treat it as just one check, not a final verdict. Click the padlock to see who the certificate was issued to and whether it matches the brand you expect.
If the page asks for passwords or payment data over plain “http://” with no padlock, close it right away.
Real-world examples of URL phishing
Real attacks tend to follow familiar storylines, and reviewing URL phishing examples can help teams recognize these patterns quickly. Walking through a few common ones makes it easier to brief your team and spot similar patterns in inboxes and chats.
Suspicious-login / Account-breach phishing alert
A message arrives in your inbox claiming there was a “suspicious login” to your email, ad account, or social profile. The email uses your logo, includes rough location details, and pushes a “Review activity” button.
That button leads to a fake login page with a URL that looks similar but not exact. Once you enter your credentials, the attacker can log into the real account, change settings, and lock you out.
Fake e-commerce scam
Someone searching for a popular product finds a top‑ranked ad or link with a slightly misspelled brand domain. The site looks like a real store, complete with realistic product photos and reviews.
At checkout, the page asks for full card details and sometimes extra personal data “for verification”. The victim might never receive a product, but their payment details are now in criminal hands.
Donation-scam alert
During a natural disaster or viral news event, emails and social posts appear asking for urgent donations. They copy the name and logo of a well‑known charity, but the links lead to look‑alike domains that accept card payments or crypto transfers.
In some cases, the page also prompts visitors to log in to their email or payment account via a fake portal, capturing even more sensitive data.
FedEx delivery phishing scam
A text or email claims a FedEx package cannot be delivered due to an address problem or an unpaid customs fee. A short link promises a quick way to “reschedule delivery” or “pay a small charge”.
The link goes to a fake shipping page where victims enter card information or login details for a delivery account. Spammers then use that data for fraudulent purchases or to target other services that reuse the same password.
Best practices for preventing URL phishing
Intercepting or blocking URL phishing takes more than one tool or tip. The strongest defenses combine technology, smart habits, and clear processes that fit how teams already work.
Here’s how you can protect yourself from URL phishing:
URL filtering
URL filtering compares web addresses against lists of known bad sites and policy rules before allowing access. They can block entire categories, such as phishing, malware, or newly registered domains.
In a business network, this acts like a safety net under your users, catching many dangerous clicks before a page even loads.
Link protection
Modern email and collaboration tools can rewrite links so that every click first passes through a scanning service. These systems scan URL phishing patterns in real time, follow redirects, and block access if the final destination looks suspicious.
For marketing and agency work, this adds a background guardrail around campaign links and inbound messages.
Security hygiene
Basic habits go a long way:
Multi‑factor authentication for important accounts
Strong, unique passwords stored in a password manager
Regular software and browser updates
Limited use of admin accounts for daily work
These steps reduce damage even if a phishing URL steals a single password, and they close many holes that malware tries to exploit after a bad click.
AI-based protection
Many security platforms now use machine learning to spot previously unseen URL-based phishing. Instead of waiting for a domain to appear on a blocklist, they look for patterns in the URL, page content, hosting setup, and behavior.
An AI‑driven URL phishing detection system can flag suspicious sites seconds after they appear, even in fast‑moving campaigns.
Cybersecurity & security awareness training
People remain the last line of defense, so training should be part of everyday work, not a one‑time event.
Short sessions and phishing simulations teach staff what a phishing URL example looks like, how attackers push emotional buttons, and how to report concerns.
Over time, this builds a shared habit of pausing before clicking any link that seems out of place.
Check the domain’s reputation
Before trusting a link, especially one used in paid campaigns or newsletters, check the domain with:
reliable reputation services,
browser safety checks,
or built‑in security tools from your email provider.
These checks can reveal if a domain is very new, tied to prior abuse, or listed in threat feeds. For brand protection, monitoring for look‑alike domains related to your name also helps spot problems early.
Warnings for suspicious domains
Modern browsers and security products often display full‑screen warnings when a site is known to be phishing or malicious. Teach teams never to click past those alerts just to “get work done faster”.
If a warning appears on a link used in a campaign, stop and review where that URL came from before doing anything else.
Use a URL phishing scanner
Dedicated tools can scan URLs for phishing signs before anyone visits them. These scanners follow redirects, check SSL, compare against threat intelligence, and sometimes even analyze page content in a sandbox.
Note: Building a quick “scan URLs for phishing, then share” step into content and campaign workflows sharply reduces the odds that a bad link ever reaches your audience.
How does Replug help businesses defend against URL phishing attacks?
For marketers, agencies, and online businesses, links are vital daily, and that makes them a favorite target for attackers.
Replug is built as a short URL generator and an all-in-one link management platform that keeps those links organized while still giving teams the tracking and branding they need.
Instead of dealing with risky redirects or generic shorteners, you manage every link from a single, hassle-free central dashboard.
A complete link management solution
for marketing professionals & agencies.
Try Replug for free
Here is how Replug fits into a safer link strategy:
Centralized link control
When you create or edit a link in Replug, you do so from a single dashboard rather than across multiple tools. This makes it easier to review destinations before sharing them, retire old or suspicious URLs, and keep a clean inventory of links used across email, ads, and social posts.
Custom domains & branded links
With these, Replug turns long, messy addresses into clean URLs that clearly belong to your brand. Audiences learn to recognize your branded links and can spot impostors that try to copy them.
Note: This simple visual cue makes it harder for attackers to use random short links or look‑alike domains to impersonate you.
HTTPS & controlled redirects
Replug serves short links over HTTPS by default. Because every redirect runs through your chosen domain, your team can standardize how links are created and reviewed, rather than relying on unknown public shorteners. This reduces the risk of hidden redirects sneaking into your campaigns.
Link rules & campaign structure
Teams can agree on internal rules (e.g., which domains are allowed in campaigns, or which roles are allowed to publish new links), then apply those rules inside Replug workspaces. Consistent naming, tags, and UTM parameters also make it easier to spot any URL that does not look like it belongs.
Analytics & anomaly spotting
Replug’s click and traffic reports show where visitors come from, which devices they use, and how often they click. Sudden spikes, traffic from unexpected regions, or unusual referrers can act as early warning signs that a link is being abused or that someone has copied a campaign URL for phishing.
Agency & multi-brand support
For agencies and partners, Replug’s workspace structure and branding options keep everything organized under your own domain while still centralizing link management. You can run many client workspaces, apply consistent link practices across all of them, and quickly adjust or disable URLs if something suspicious appears.
QR codes & cross-channel links
Replug can easily generate QR codes that point to your branded short URLs, so the same review and tracking process you use for links extends to printed material and events. If you need to update a destination due to a phishing concern, you can change the target behind the short link without reprinting the QR code.
Used this way, Replug becomes a controlled hub for your marketing URLs. It does not replace dedicated security products, but it makes it far easier for teams to share clear, branded, and trackable links while keeping a close eye on how those links are used.
Summing up
URL phishing is not some rare, advanced hack; it is a daily threat built around simple tricks with links. Attackers twist URLs through masking, typos, redirects, and fake HTTPS to pull people onto convincing copycat sites and steal whatever they can.
By watching for some unique signs in links, building habits like double‑checking domains, and using tools that scan URLs for phishing, teams can cut this risk to a much lower level.
If your work depends on sharing links with customers or followers, using a carefully managed short URL generator should be part of that plan.
Replug.io gives you branded and trackable links, centralized link control, and HTTPS by default, so every click feels safer for both your team and your audience. It is well worth giving Replug a try!
Frequently asked questions
How to report URL phishing?
First, report the phishing message to your internal IT or security team so they can warn others and block related URLs. For a more detailed scrutiny, you can also forward full phishing emails, including headers, to national bodies such as the U.S. Cybersecurity and Infrastructure Security Agency, and use in‑product report buttons in mail or browser apps.
What is an example of URL phishing?
A common phishing URL example is an email that appears to come from your bank and says, “Confirm your account”. The button text shows the bank name, but the real URL is something like “https://secure‑yourbank‑login‑help.com”, which is not the bank’s domain. The fake page then collects your username, password, and sometimes one‑time codes.
How to detect URL phishing using machine learning?
Machine learning models analyze many features at once, such as domain age, URL length, character patterns, hosting data, and page content. A URL phishing detection system can learn from past attacks and flag new URLs that look or behave like known phishing sites, even before they appear on public blocklists.
How do attackers deliver URL phishing attacks?
Attackers send phishing URLs via email, SMS, messaging apps, social DMs, fake ads, and even via QR codes on printed materials. They often spoof trusted brands, fake order updates, or support tickets, and they use urgent language to push quick clicks before people stop to inspect the link.
How to spot a phishing URL?
Look closely at the domain name, especially the part right before “.com” or similar endings, and watch for spelling errors or extra words. Check whether the message was expected, review the page design and wording, and be cautious if the site asks for passwords or payment data after you followed a link instead of typing the address yourself.
What to do if you clicked a suspicious or phishing URL?
If you clicked but did not enter any data, close the tab and run a quick antivirus scan to be safe. However, if you entered your credentials, change those passwords right away, turn on multi‑factor authentication, and tell your IT or security team so they can watch for suspicious activity and reset any affected sessions.
Provide a sample phishing URL for testing purposes?
Do not use live malicious URLs for training or tests. Instead, work with your security team to set up safe demo domains in a controlled lab, or use documentation domains such as “example.com” while you explain how typos, extra words, or strange websites or subdomains might look in a real attack. This keeps practice safe while still teaching people what to watch for.
Instagram isn’t just a photo-sharing app anymore; it’s a full-blown marketplace!
Over 200 million users tap on a shopping post or business profile every single day, and Instagram commerce generated around $37.2 billion in revenue in 2024 alone.
Whether you’re a small business owner, a creator, or someone just getting started, the opportunity here is massive. And the best part? You don’t need a big budget to get in on it.
Plenty of brands are figuring out how to sell on Instagram for free and are actually making it work. This guide breaks down everything step-by-step, from setting up your storefront to closing real sales.
But before we get into strategies, let’s start with the foundation: What exactly is Instagram Shopping?
What is Instagram Shopping?
Instagram Shopping is a built-in feature that lets businesses and creators tag products directly in their posts, Reels, and Stories, turning regular content into a mini storefront.
Instead of telling your followers to “check the link in bio,” they can tap on a product, see the details, and buy it right then and there.
The whole point is to make the buying experience as smooth and seamless as possible, without ever leaving the app. Think of it as your online shop, but living right inside Instagram.
How to sell products on Instagram (step-by-step)
Selling on Instagram sounds exciting, but jumping in without a full-fledged plan can cost you time and results. Here’s a clear, step-by-step breakdown to get your Instagram store set up properly and actually start making sales.
Step #01: Comply with Instagram selling policies
Before anything else, make sure your business actually qualifies to sell on Instagram. To sell through Instagram Shop, you need to meet Meta’s commerce eligibility requirements.
That includes:
complying with their policies,
representing your business and domain accurately,
being in a supported country, and
having a professional Instagram account.
On the product side, Instagram Shopping is designed for physical goods (think apparel, beauty products, home goods, and electronics). Digital products, services, subscriptions, and regulated items like weapons or adult products are not allowed.
It’s worth reading through Meta’s Commerce Policies before you get started, because violations can result in your shopping access being permanently removed. Not the most fun step, but skipping it can cost you everything later.
Step #02: Set up your account
Once you’re clear on eligibility, the next thing to do is switch your Instagram account to a “Business or Creator” account.
Here’s how to create an Instagram business account:
1. Open the Instagram app and go to your profile.
2. Here, tap the menu icon (≡) in the top right-hand corner.
3. From the list of options, tap on “Account type and tools”.
4. Now, tap on “Switch to professional account”.
5. Pick a category that best describes your business (e.g., Clothing Brand, Restaurant, Digital Creator).
6. Finally, tap on the “Switch to professional account” button.
Note: All your photos, videos, and followers stay exactly the same after the switch. You won’t lose anything you’ve built.
After that, it’s time to optimize your Instagram bio. Your profile is often the first touchpoint for potential customers, so getting it right is critical.
Use a high-quality, recognizable profile photo like your logo, and add a website link or landing page to direct traffic and drive conversions.
Keep your bio tight and benefit-focused. Tell people what you do and why they should care, and always include a clear call to action phrase like “Shop Now” or “Check the link below”.
If you’re not sure how to craft the perfect bio, an Instagram bio generator can be a handy tool to help you put together something clean and compelling without spending too much time on it. Just make sure you personalize whatever it spits out. Your bio should sound like you, not a template.
To unlock Instagram Shopping features, you need to connect your Instagram account to a Facebook Page.
Here’s how to do it:
1. Open the Instagram app on your smartphone.
2. Tap on your profile icon in the bottom right-hand corner.
3. Tap the “Edit profile” button located right under your bio.
4. Scroll down to the “Public Business Information” section and tap “Page”.
5. Tap “Connect” or “Create” and then continue.
6. Tap “Log in to Facebook” and follow the prompts to sign in.
7. Finally, select the specific Facebook Page you want to connect.
Note: Make sure the Facebook Page is published and publicly visible, and that it matches your Instagram business branding (same name, same look).
Your catalog is essentially where all your product information lives. Connect your Instagram Business account to a catalog to enable tagging products in your posts. You can do this through Meta’s Commerce Manager.
If you’re on Shopify, WooCommerce, or BigCommerce, even better. You can install the Facebook and Instagram Sales Channel on your platform, which gives you one shared product catalog for Facebook Shop, Instagram Shopping, and Facebook Marketing. This way, your products sync automatically, and you manage everything from one place.
Step #04: Set up Instagram Shopping
Once your catalog is ready and your pages are connected, it’s time to turn on Instagram Shopping.
1. Head to your Instagram “Settings”.
2. Tap “Business”.
3. Then select “Shopping” and choose your catalog.
4. After selecting your catalog, submit your account for review.
Once your shop is submitted, Meta will review your account before enabling product tagging and shopping features. Meta’s review process can take anywhere from a few hours to a few days, so don’t panic if it doesn’t go live immediately.
Once you’re approved, you’ll be able to tag products directly in your content, and a “Shopping” tab will appear on your profile.
One important update to know: As of September 2025, Shops on Facebook and Instagram now use website checkout, so customers are redirected to your website to complete their purchase rather than buying inside the app. Make sure your website checkout is fully functional before you go live.
Step #05: Create shoppable content
This is where things get really fun. Once your shop is approved, you can start tagging products directly in your posts.
For a single-image post, tag the obvious hero product. Don’t clutter the image with every possible item in frame; keep it focused on what the post is actually about.
For carousels, you can tag different products across slides, which works especially well for fashion, beauty, and home décor brands.
Stories use interactive sticker-based tagging (up to 5 per Story), perfect for flash sales, new arrivals, and behind-the-scenes product reveals.
The 24-hour lifespan creates urgency, since users know the content will disappear, which psychologically accelerates purchase decisions. Just keep stickers neatly placed; don’t cover the product itself.
Reels with product tags convert 61% better than untagged ones, and product tags in Reels generate 37% more clicks to product pages than the same tags placed on static feed posts.
One important heads-up: In many regions, you can’t add product tags to a Reel after it’s already published, so always tag before you hit share.
Step #06: Link to your official website
Instagram only gives you one clickable link in your bio, so use it well. Point it to your website, a specific product page, or a landing page that drives conversions.
Since over a quarter of social users turn to Instagram to find their next purchase, having a smooth path from your profile to your website makes a real difference.
If you want to share multiple links (like a new collection, a blog post, and a contact page), tools like Replugor Linktree let you create a simple landing page with multiple destinations.
Also, since mid-2025, public posts from professional accounts can appear in Google search results, so a well-linked, keyword-rich profile now helps you get discovered beyond the app, too.
Step #07: Build an engaged audience & following
Having a shop on Instagram means nothing if no one’s watching. Building a real, engaged audience is what actually moves the needle.
Start with consistency! Accounts that post 3 to 5 times per week grow followers twice as fast and see 12% more reach per post, according to Buffer’s State of Social Engagement report.
Beyond posting regularly, focus on actually engaging.
Reply to comments,
Respond to DMs, and
Jump into conversations in your niche.
Replying to comments alone boosts engagement by 21%, which signals to the algorithm that your content is worth pushing further.
And skip the shortcuts: Buying followers or using follow-unfollow tactics attracts low-quality accounts that never buy anything, and Instagram may flag the behavior altogether.
Step #08: Promote your products directly on Instagram
Organic reach is great, but combining it with paid promotion can really speed things up. You can run several types of Instagram ads through Meta Ads Manager (feed ads, Story ads, Explore ads, and Reels ads).
Reels ads are the most popular, with more than half of 2025 Instagram ads running as Reels. If you have a post that’s already performing well organically, boosting it is a quick and affordable way to get it in front of more people.
You can also use Meta’s targeting options to reach people by interest, age, location, and behavior, or even build lookalike audiences based on your existing customers.
Note: Meta suggests starting with a minimum of $5 and running your campaign for at least 6 days to see the best results.
Step #09: Drive traffic & engage
Random posting won’t get you far. Clear content pillars help you stay consistent without guessing what to post.
Pick three to five themes that support your brand (think education, storytelling, behind-the-scenes, testimonials, or product highlights), then brainstorm content ideas under each one. This keeps your feed focused and makes content planning a lot less stressful.
Driving traffic isn’t just about posting more; it’s about sparking real conversation. Use polls, question boxes, and countdowns in Stories to get people interacting.
Spend 10 to 15 minutes a day engaging with your ideal customers, commenting thoughtfully, responding to Stories, and nurturing real conversations.
The more people interact with your content, the more Instagram pushes it to new audiences, which means more eyes on your products.
Step #10: Measure outcomes
If you’re not tracking what’s working, you’re just mere guessing. Instagram’s built-in analytics, available on every Professional account, give you a clear picture of how your content and shop are performing.
Focus on engagement metrics like:
Shares and saves, which are better indicators of value than likes.
Reach and impressions, which show how far your content travels.
Reel analytics, like watch time and retention rates, to refine your editing.
For a deeper look, Meta Business Suite and third-party tools like ContentStudio or Iconosquare can give you more granular data. Review your numbers at least once a week, spot the patterns, and double down on what’s actually converting.
How to sell on Instagram marketplace: Vital tips to follow!
Setting up your shop is just the first part. What actually drives consistent sales is how you show up every day (your profile, your content, your conversations, and your strategy).
Here are ten practical tips to help you sell better on Instagram:
Tip #01: Optimize your profile for sales
Think of your profile as your storefront; if it looks messy or unclear, people bounce.
First, switch to a “Professional” or “Business” account to unlock analytics, ads, and shopping tools.
Then craft a benefit-driven bio that leads with what you do and why it matters to your buyer.
Finally, make your one clickable bio link count. Send people to a product page, a landing page, or a link-in-bio tool with multiple destinations.
Tip #02: Leverage Instagram shopping & product tags
Setting up an Instagram Shop is completely free; there’s no fee to get started. Once your shop is live, tag products directly in your posts, Reels, and Stories so people can tap and shop without extra friction.
Keep in mind that as of mid-2025, Meta dismissed native in-app checkout for most businesses. Purchases now complete on your own website, so make sure your checkout page is clean and fully functional.
Tip #03: Sell directly through direct messages (DMs)
DMs are one of the most underrated sales channels on Instagram. Use them to answer product questions, share links, and close sales in a real conversation.
You can automate responses to common questions using tools like ManyChat, so no lead falls through the cracks while you’re busy. But don’t let automation do all the work; jump in personally when someone’s genuinely interested.
Always remember, real conversations build trust, and trust is what gets people to actually buy.
Tip #04: Create high-converting content
Reels with product tags convert 61% better than untagged ones, so:
lead with your product early,
keep it under 30 seconds for quick hits, and
always tag before you post
For Stories, use “Highlights” to keep your best-converting content alive beyond 24 hours. Organize them by product category, FAQs, or customer reviews so new visitors can find everything they need without having to dig deep.
Tip #05: Show your followers you care
People don’t buy from brands they feel ignored by. Reply to comments, respond to DMs, acknowledge people who tag you in their posts, and genuinely engage with your community.
Simply replying to comments boosts engagement by 21%, which tells the algorithm your content is worth showing to more people. Small gestures like a thoughtful reply or a quick “thank you” go a long way in building loyalty that actually translates into repeat purchases.
Tip #06: Establish partnerships with Instagram influencers
Keep in mind, you don’t need to go after mega-influencers with massive followings. Micro- and nano-influencers deliver higher engagement because of their niche, closely connected audiences.
Find creators whose followers match your ideal customer, and collaborate on content that feels natural, not scripted. A genuine product recommendation from a trusted voice in your niche will almost always outperform a polished ad from a brand nobody’s heard of.
Tip #07: Offer Instagram-exclusive offers & run giveaways
Give people a solid reason to follow you and actually buy. Limited-time discount codes, flash sales, or “Instagram-only” offers create urgency and reward your most engaged followers.
Giveaways are also a great way to grow your audience fast. Ask people to follow, like, and tag a friend to enter. Just make sure to add a compliance note like “This giveaway is not endorsed by Instagram” to keep things above board.
Tip #08: Sell through IGTV & Instagram Reels
Longer-form IGTV content is great for detailed product demos, tutorials, or behind-the-scenes looks that build purchase confidence.
Reels, on the other hand, are your ultimate reach engine. They reach twice as many non-followers as static posts, making them perfect for product discovery.
Note: Use Reels to grab attention and IGTV to go deeper. Together, they cover both ends of the buyer journey, i.e., awareness and consideration.
Tip #09: Curate UGC & use Instagram SEO
User-generated content (photos and videos from real customers using your products) builds trust faster than any advertisement. Repost it, feature it in your Stories, and encourage it by creating a branded hashtag.
On the SEO side, since mid-2025, public posts from professional Instagram accounts can appear in Google search results, so treat your captions like searchable content. Use relevant keywords naturally, add descriptive alt text to your images, and write captions that actually say what the post is about.
Note: If writing winning captions feels like a challenge, let a top-tier Instagram caption generator do the hard work for you, coming up with engaging, keyword-rich copy tailored for maximum impact.
Tip #10: Join the Instagram creator marketplace
If you’re a creator or influencer, the “Instagram Creator Marketplace” connects you directly with brands looking for partnerships.
Through Meta’s affiliate commerce infrastructure, eligible creators can tag products from a brand’s verified Meta Commerce catalog directly within Reels, earning commissions when those tags lead to purchases.
It’s a solid way to monetize your audience without having to build and manage your own product catalog. You just create content you’d make anyway and earn from the sales you drive.
Why sell on Instagram in 2026?
Honestly, the numbers speak for themselves!
Instagram now has 3 billion monthly active users, and social commerce sales on the platform totaled $42.8 billion in 2025.
Roughly 200 million users tap on a shopping post or business profile every single day, and 81% of Instagram users use the app to research new products or brands. This means your potential customers are already on here, actively looking for things to buy.
US social commerce sales are expected to reach $100 billion in 2026, and Instagram sits right at the center of that growth. Add to that the fact that it’s completely free to set up a shop, and there’s really no reason not to be selling here.
No matter if you’re a solo creator or a small business owner, Instagram gives you a massive, ready-to-buy audience without the high cost of traditional retail.
Benefits of selling products on Instagram
Selling on Instagram isn’t just a trend anymore. It comes with some real, tangible advantages that most other platforms simply can’t match.
Here’s a quick look at what you’re actually getting when you set up shop here:
Massive global reach
With 3 billion monthly active users, Instagram gives you access to an audience that almost no other platform can offer. Whether you’re a local business or a brand trying to go global, your products can reach people across countries and time zones without spending a dime on traditional advertising.
Enhanced brand visibility
90% of Instagram users follow at least one business account, which means people are genuinely open to discovering and engaging with brands here. Consistent posting keeps you top of mind, and a well-optimized profile with a clear bio, quality visuals, and even a branded short URL in your bio link helps turn casual visitors into actual customers.
Visual storytelling & appeal
Instagram was built for visuals, which makes it the perfect place to show off your products in a way that plain text or listings simply can’t. A well-shot photo, a quick Reel, or a Story can communicate your product’s value far more effectively than a product description ever could.
Hyper-targeted advertising
Instagram’s ad platform (powered by Meta) lets you get incredibly specific about who sees your products. You can target by age, location, interests, behaviors, and even build lookalike audiences based on your existing customers, which means your ad budget goes toward the people most likely to actually buy.
Direct customer engagement
Instagram makes it easy to talk to your customers in real time through comments, DMs, Stories replies, and polls. That kind of direct back-and-forth builds trust, helps you understand what your audience wants, and turns one-time buyers into loyal, repeat customers.
Creator & influencer collaborations
Instagram’s creator ecosystem is massive, and partnering with the right influencer can put your product in front of a highly engaged, niche audience overnight. Micro- and nano-influencers especially tend to drive strong results because their followers trust their recommendations more than traditional ads.
Frictionless purchasing
Instagram Shopping lets users tap on a product tag and move toward purchase without ever leaving the app. That shorter path from discovery to checkout reduces drop-off and makes impulse buying a lot easier, which is exactly what you want when someone stumbles across your product mid-scroll.
E-commerce integration
Instagram connects seamlessly with major e-commerce platforms like Shopify, WooCommerce, and BigCommerce, so your product catalog syncs automatically and you manage everything from one place. Your Instagram shop essentially becomes an extension of your existing store; no need to rebuild anything from scratch.
Wrapping up
Selling on Instagram in 2026 is one of the smartest moves you can make for your business, and hopefully this guide has shown you exactly how to do it.
From setting up your shop and creating shoppable content to building a loyal audience and running targeted promotions, every step we’ve covered is designed to help you turn your Instagram presence into a real revenue stream.
The platform has billions of active users, the tools are mostly free, and the opportunity is genuinely massive. So stop waiting for the “perfect moment” and start taking action today.
Set up your profile, tag your products, and let Instagram do what it does best, i.e., connect the right people with the right products.
Frequently asked questions
Is it free to sell things on Instagram?
Yes, completely! There’s no fee to set up an Instagram Shop or tag products in your posts, Reels, and Stories. You can start selling without spending anything; though if you want to speed up your growth, you can invest in paid ads. But the core selling features? Totally free!
Can I sell directly on Instagram?
Yes, you can! Instagram Shopping lets you tag products in your content so people can tap and view product details right away. However, as of September 2025, Meta moved away from in-app checkout for most businesses. So, the actual purchase is completed on your own website rather than inside the app.
Is it legal to sell on Instagram?
Absolutely, as long as you follow Meta’s Commerce Policies and sell eligible products. Physical goods like clothing, beauty products, and home décor are fair game. What’s not allowed includes digital products, services, weapons, and adult content. Stick to the guidelines, and you’re completely within the rules.
Do you need a business license to sell on Instagram?
Instagram itself doesn’t require a business license to set up a shop. However, depending on your country or state, local laws may require you to have one to legally operate a business and collect taxes. It’s always a good idea to check your local regulations before you start selling.
How to sell on Instagram without a website?
Here’s how to sell things on Instagram without a website (you have a few options here):
You can take orders directly through DMs, use a free link-in-bio tool like Replug to point followers to a third-party store like Etsy or Gumroad, or use Meta Commerce Manager to set up a shop manually. It’s not the smoothest experience without a website, but it’s definitely doable.
How to sell on Instagram shop?
Start by switching to a professional account, then connect your Instagram to a Facebook Page and set up a product catalog in Meta Commerce Manager.
Once your catalog is ready, go to Settings → tap Business → then Shopping → select your catalog, and submit for review. After approval (which can take a few days), you can start tagging products in your posts, Reels, and Stories.
How to use Instagram for business in 2026?
Here’s how:
– Switch to a Business or Creator account to unlock analytics, ads, and shopping tools. – Optimize your bio with a clear value proposition and a strong call to action. – Post consistently across Reels, Stories, and feed posts. – Focus on engagement over vanity metrics. – Use Instagram Shopping to turn your content into a storefront. – Run targeted ads when you’re ready to scale, and track your performance through Instagram Insights to keep refining your approach.
Reinforce brand awareness and encourage social media engagement.
6.
Conversion Retargeting
Focuses on users who have completed specific actions on your website, such as making a purchase or signing up.
User’s past conversions.
Tracks completed actions and leverages user behavior.
Encourage further conversions or upsells to engaged users.
7.
Email Retargeting
Involves sending follow-up emails to users who have abandoned specific actions on your website, such as incomplete purchases or registrations.
User’s past email interactions and abandonment.
Targets users through email campaigns.
Re-engage users and reduce abandonment rates, driving conversions.
8.
List-Based Retargeting
Customizes ads for users based on specific lists or databases, such as email subscriber lists or customer databases.
User’s past interactions and segmentation.
Utilizes existing customer lists and segmentation data.
Personalize content for existing contacts and nurture relationships.
9.
Cross-Channel Retargeting
Re-engages users who have interacted with your brand across multiple marketing channels and platforms.
User’s multi-channel behavior and interactions.
Combines data from various platforms to create a unified strategy.
Deliver a cohesive and personalized user experience across channels.
Most small and mid-sized businesses spend tens of thousands of dollars each year on advertising mediums, such as social media ads, influencer marketing, retargeting ads and search ads.
A large portion of their ad spend goes into retargeting.
We all see some ads pop up more than usual on social media. The reason is that those brands have a retargeting ad strategy in place that keeps showing you their ads.
Ready to explore what retargeting is and how you can develop a retargeting strategy for your business?
Let’s start with the basics.
What’s a retargeting strategy?
A retargeting strategy refers to the tactic a brand or individual uses to re-engage the website visitor who has shown interest in the product or service and hasn’t converted just yet.
Well, to put it simply: retargeting is remarketing.
A prospect clicks on the product and goes through the details, but leaves the page without making a buying decision.
Now the brand pursues that visitor through different retargeting strategies to bring him back and motivate him to take that plunge.
Remember the ultimate goal of the retargeting campaign is the conversion.
How does retargeting work?
Retargeting allows brands and marketers to remarket the product or service to the audience that has already visited your website.
The way retargeting works is quite interesting. Digital marketers place a short piece of code called a “Pixel” in the website code, which helps social media platforms identify the same visitor to showcase ads.
Digital marketers and advertisers retarget both website visitors who have previously purchased the product and who haven’t completed the transaction.
The core purpose of a retargeting campaign is to push the buyers who are on the fence or abandoned the shopping cart for some reason.
Retargeting isn’t rocket science. Every brand or business that wants to convert visitors into paying customers has to run a retargeting campaign at some point.
What are pixels for retargeting?
A pixel is a piece of code that is embedded in a website, mobile app, or email. The goal of adding a pixel to a website or other online property is to track a user’s activities. The pixel monitors user behavior and reports it to the primary source.
As a result, it opens the door for digital marketers, online enterprises, and e-commerce stores to reach out to the same audience through e-commerce sales retargeting.
The pixel is the backbone of a retargeting campaign. If it wasn’t for the pixel, the retargeting wouldn’t have been possible.
The pixel function is typically available on all major social media sites that include ad features for advertisers.
I hope that helps.
Now let’s head over to the cream of this article.
9 types of retargeting strategies
It’s important to shed some light on different types of retargeting strategies that are being used by marketers and brands.
1. Contextual retargeting: Increase user engagement through content relevance
Contextual retargeting involves displaying ads on websites or platforms that are contextually related to the content users have previously engaged with. By aligning ad placement with users’ existing interests and behaviors, this strategy aims to prompt users to return and convert based on their contextual inclinations.
In other words, it leverages the power of context to re-engage users, offering them content or products that are closely aligned with their demonstrated preferences. This approach enhances the overall user experience and encourages higher conversion rates by delivering precisely what users are interested in within the context of their online journey.
2. Onsite retargeting: Enhancing user engagement on your website
Onsite retargeting is a powerful strategy for bloggers that involves targeting users while they are actively engaged on your website. This approach goes beyond conventional retargeting by displaying contextually relevant content or ads to users based on their on-site behavior and interactions. By tailoring the on-site experience, you can guide visitors toward desired actions, boost engagement, and ultimately enhance their overall sales.
3. Site retargeting: Nurturing your digital footprint
Site retargeting, often referred to as standard retargeting, is like leaving a friendly breadcrumb trail for users who’ve ventured onto your website but didn’t complete the journey. This strategy re-engages these visitors by presenting tailored ads as they continue their online travels.
The main goal here is to ensure your brand stays fresh in their memory and guide them back to your website to take those actions you desire, whether it’s making a purchase, signing up, or simply exploring more.
4. Search retargeting: Tailoring ads to search behavior for precise engagement
A lot of websites put up cookie notices on their websites. Companies, SAAS businesses, and blogs collect users’ data to send them personalized offers or retarget them via different channels. Search retargeting helps advertisers target users based on their interests and search behavior.
Search retargeting targets users based on their search queries and the keywords they’ve used in search engines. This strategy allows you to reach users with specific interests related to their search behavior, and tailoring ads specifically to their interests and needs.
5. Social retargeting: Boosting brand buzz & engagement on social media
Social retargeting is a social media tactic to push the social media users who liked or engaged with your content on or off the social platform. This method is useful for staying in touch with users who have left your site and keeping your brand in their minds.
It capitalizes on the extensive user base and engagement opportunities on social media platforms like Facebook, Instagram, and Twitter.
Social retargeting involves displaying ads on social media platforms to users who have previously interacted with your brand. The goal is to reinforce brand awareness, encourage social media engagement, and drive conversions by reaching users in the social environment they frequent.
6. Email retargeting: Rekindling interest with follow-up emails
Think of email retargeting as a friendly reminder to users who got close to completing an action on your website but didn’t quite finish the job, like leaving items in a cart or abandoning a registration.
The main goal? Revive their interest. We send them a gentle nudge via email, reminding them about their incomplete task and perhaps sweetening the deal with incentives or useful information.
The goal is to encourage them to return and complete the desired action.
7. List-based retargeting: Personalizing content for your most engaged audience
List-based retargeting is a savvy marketing strategy that centers around specific lists or databases, like your email subscriber list or customer database. This tactic empowers you to deliver meticulously personalized and precisely targeted ads to your existing contacts and customers, all while nurturing relationships with your loyal audience.
The beauty of list-based retargeting lies in its ability to ensure that your marketing messages are finely tuned to the preferences and behaviors of those who are already well-acquainted with your brand and offerings. It’s a powerful tool in your marketing arsenal for maintaining and enhancing engagement with your established customer base.
8. Conversion retargeting: Revive your prospects
Conversion retargeting refers to targeting the audience who has taken an interest in your product or service and is probably on the fence to make the purchase. This strategy is effective for companies and entrepreneurs with longer sales cycles because it allows them to target customers who are familiar with your brand and are more likely to make a purchase.
9. Cross-channel retargeting: Win with the omni approach
Cross-channel retargeting is a form of retargeting that involves targeting the audience on another platform using the data. Advertisers use targeting data from several sources, which allows them to reach their target audience no matter what device they’re using.
For B2B campaigns, fresh job postings data can also help identify companies that are actively hiring, expanding teams, or showing new demand signals.
Moreover, it helps them reach the audience that visits their website or shows interest in the products.
Note: There are several retargeting strategies that digital marketers implement over time, but all of them aren’t necessarily used at once.
How does Replug help with retargeting?
One of the key features of this top-notch link optimization platform is “Link Retargeting Pixel”. You just need to copy your pixel code from your favorite social platform to Replug’s link retargeting tool.
Shorten a link for free, and with each click on the short link, you will add those visitors to your custom ad audience. Thus, helping you reduce ad costs and build custom audiences through social and cross-channel retargeting.
How to create a perfect retargeting strategy?
Retargeting ad campaigns require a strategic approach and discipline to run them successfully, which is why many growing SaaS brands prefer working with an experienced SaaS marketing agency to plan, execute, and optimize high-converting retargeting strategies. To reap the benefits of retargeting, it’s necessary to design a strong strategy.
We have researched and combined a number of factors that should be considered when you are in the planning phase.
Let’s go over these key factors.
1. Capitalize on the existing customers
Existing customers are a great asset to any business. Remarketing to existing customers is an excellent approach to get repeat business.
Customers who have previously purchased from you can be shown personalized adverts, such as offering them a discount on their next purchase or displaying them relevant products they might be interested in.
This technique works well because it focuses on those who are already familiar with your brand and are more likely to convert. It can also help boost customer lifetime value and promote customer loyalty.
2. Target specific website URL visitors
Most conversion optimization experts closely track their website visitors’ behavior. Visitors who have visited specific pages on your website are targeted with this retargeting tactic.
For example, if someone visits your website but does not buy anything, you can retarget them with advertising relating to the product they looked at.
The reason it works is that it targets those who have expressed an interest in a certain product or service on your website. It can also assist you in determining which pages on your website are most efficient at converting visitors.
Boost ROI with branded URLs!
Enhance your marketing campaigns by creating shareable, trackable, and fully multi-purpose
customizable branded URLs.
Understanding the audience is a digital marketer’s superpower. The better you understand your website visitors, the higher the conversion – no doubt about it.
Categorizing your retargeting audience into multiple categories based on their website behavior and creating personalized offers could make an impact.
For instance, a digital marketer can separate site visitors who added the products to their cart but did not check out from those who visited your website but did not add anything to their cart.
It gives the digital marketer a chance to send a follow-up email to these potential customers that are more likely to result in conversions.
4. Try an action-based targeting strategy
Since you already know that understanding your audience is the key to improving your conversion rate, the action-based targeting strategy will take your campaign to the next level.
Experiment with an action-based targeting technique, which entails targeting people based on their behaviors on your website. For instance, you can retarget people who have downloaded a checklist or ebook through your opt-in bribe.
It’s an effective retargeting strategy as it focuses on people who have expressed an interest in your product or brand.
5. Improve on-page visitors’ engagement
This strategy revolves around improving the user experience on your website in order to attract users to interact with your business.
Brands, affiliate marketers, and digital marketers use opt-in forms to encourage people to sign up for their email newsletter, invite them to receive push notifications to the website visitors, and engage on social media to drive traffic to their website.
Website visitors’ engagement has never been this easy. Now businesses can incorporate AI chatbots into their website to answer prospects’ queries.
It surely increases on-page visitor engagement and boosts the likelihood of visitors converting into subscribers or paying customers.
6. Reach out to a custom audience
Custom audience isn’t an alien concept for digital marketers, especially Google and Facebook ad experts. This retargeting strategy involves developing a specific audience based on your existing consumer data.
Identifying the audience who has already purchased from you and targeting them with personalized ads could be a game-changer. The custom audience plays a vital role in running ads to a specific audience instead of a wider audience.
Most social media and advertising networks allow you to create or use your custom audience for campaign targeting.
Brands and entrepreneurs try to make the most of their ad spend. Therefore, they try out different ways to advertise as well as find a more niche audience.
One of the best ways to target a custom audience is to advertise to relevant email newsletter readers.
7. A/B test your retargeting ad strategy
A/B testing refers to the comparison of two versions to find out which outperforms the other. The A/B testing technique is used in link management, social media image ads, blog featured images, YouTube thumbnails, and several other places.
It involves testing different versions of your retargeting ads to see which ones perform better. For instance, digital marketers test different ad copy, images, or calls to action to find out which one results in more clicks, engagement, or conversions.
When it comes to benefits of A/B testing your retargeting strategy, you can easily comprehend which elements are most effective at driving conversions or getting more engagement.
8 ways to make your retargeting strategy stand out
Developing a retargeting strategy involves a lot of brainstorming before you move forward. It’s necessary that you’re sure and confident about the route you’re taking to pull this off.
To help you make better decisions regarding establishing and implementing a retargeting strategy, here are some tips in this regard:
1. Retarget the audience with a discount:
Discounts attract both prospects and existing customers. Create a discount offer and retarget the audience that has shown interest in your products.
2. Target people opening your emails:
The email newsletter data is crucial to your digital marketing success. Use your email newsletter statistics to drive interested readers to your offers. It could move the sales graph upward within a few days.
3. Remind checkout abandoning visitors what they’re missing out on:
When you have insights into your shopping cart abandonment, go find the email addresses of the visitors who left the checkout process and went ahead with the purchase. Reach out to them via email or social media ad and tell them what they have been missing out.
4. Exclude converted visitors:
Retargeting doesn’t necessarily mean retargeting everyone. Don’t bother the already converted audience right away. Instead, give it some time before you reach out to the same audience who has just bought your product or service. You won’t want to irritate your paying customers.
5. Use influencers’ testimonials:
Influencer marketing is an underpriced marketing strategy. A lot of brands use social media influencers to attract, engage, and convert like-minded audiences into paying customers. Furthermore, influencers’ testimonials about your brand could be used to remarket your product.
6. Upsell to existing customers:
Retargeting the existing audience could turn out to be a useful hack. Upselling means offering a product to the customer who is buying your product or has already bought one. Since these customers already trust you, they might as well pay attention to your offer.
7. Retarget based on events:
One of the retargeting strategies brands and entrepreneurs could try out is to remarket to the audience that has initiated a talk or participated in the event. For instance, if you host a free webinar on Facebook ads and a group of people sign up and show up webinar. You could later reach out to them via email or connect with them via a meeting scheduling tool and offering them your paid training on Google ads
8. Exclude visitors spending less time on the website:
Site engagement is a huge conversion factor. If your website has a high bounce rate, then it may have low visitor engagement. A retargeting campaign could also revolve around the visitors who spend more time on your website. All you need is to exclude the visitors who land on your website and leave within ten seconds or so.
What are the KPIs for retargeting ads?
Retargeting is an ad strategy in which advertisers target the audience who have previously interacted with a website. The purpose of a retargeting campaign is to reach out to the segment of the audience that is more likely to convert into paying customers.
Advertisers use key performance indicators (KPIs) to assess the efficiency of retargeting campaigns. Here are some of the key performance indicators for retargeting ads:
1. Cost per click (CPC):
It’s an ad metric used to measure the cost of each click on an ad. Advertisers use CPC ads across different ad platforms.
2. Cost per acquisition (CPA):
It’s an advertising metric advertisers use to measure the cost of acquiring a new customer through ads.
3. Click-through rate (CTR):
Click-through rate is an engagement metric that measures the percentage of users who click on the ad after seeing it. CTR is used in email marketing, direct ads, PPC, and affiliate marketing – almost everyone in online marketing where clickability is a factor.
4. Return on investment (ROI):
ROI is a metric that calculates the revenue generated by a marketing or advertising campaign compared to the cost involved in it. ROI plays a vital role in setting the direction of the retargeting ads campaigns.
5. Lead generation:
Lead generation is a process in which a website visitor completes the action and it gets recorded as an event. For instance, a PDF ebook is downloaded by a visitor and offered as an opt-in bribe for an email newsletter. Retargeting ads could be intended to generate leads for a business.
6. Abandon cart rate:
It’s a metric that measures the number of website visitors who abandon their shopping carts after visiting the sales page and starting the buying process.
7. Conversion rate:
It’s one of the discussed sales metrics in the digital marketing world. The conversion rate measures the percentage of website visitors who take the desired action and complete the transaction. It could be a sign-up to a newsletter, buying a product, or downloading a file.
These are some of the most commonly used key performance indicators in digital marketing. Therefore, these KPIs have a significant role in making a retargeting ad campaign a success.
What are the pros and cons of retargeting?
Retargeting advertising strategy has been around for a while. No wonder more and more advertisers are adopting this ad strategy, which makes it worth paying attention to for everyone learning digital marketing.
Let’s discuss the pros and cons of retargeting:
Pros of retargeting
1. Better conversion rate:
Targeting website visitors who have shown some interest in your products takes you one step further. The reason is that the chances of conversion increase as they have already interacted with the brand. Most brands are likely to see a better conversion rate when retargeting to an existing audience.
2. Brand positioning:
Brand positioning means how a brand positions itself in the customers’ minds. Advertising to potential customers who have seen your products before creates brand recognition. A lot of customers take action when they see an offer multiple times, especially when there is an urgency involved in the offering.
3. Sifting the audience:
When a brand retargets to a specific audience, it sifts through a large portion of the population and focuses on the segment of the audience that is more likely to convert. No doubt that retargeting reduces ad wastage on audiences that may take any action on your offer.
4. Increase the ROI:
One of the perks of a retargeting campaign is that it double-downs on a specific audience, which leads to higher returns on investment. Such an outcome may not be possible with broad audience targeting.
5. Personalized offering:
Tailoring the offer for a specific audience leads to more attention through clickability, engagement, and conversion. One of the benefits of retargeting is to tailor ads based on users’ past interactions. It helps advertisers provide a relevant offer that resonates with the audience.
Cons of retargeting
1. Learning curve:
One of the biggest disadvantages of retargeting is that it has a steep learning curve. A beginner advertiser can’t start a retargeting campaign out of the blue. It does take time for a newbie to learn this advertising technique before this person finally hits the bullseye.
2. Limited ad reach:
Since retargeting is all about focusing on a specific group of audience, it could potentially decrease the overall ad reach. In some cases, retargeting could significantly decrease the revenue if the offer isn’t ideal or the retargeting campaign settings aren’t spot on.
3. Dependency factor:
Retargeting can surely turn things around if done right. However, it’s dependent on external forces, for instance, user behavior is a huge factor that sets the direction for a retargeting campaign. So retargeting campaign’s effectiveness relies on how users take action or behave on a specific platform, which might be an issue for some people.
4. Potential ads overexposure:
One of the cons of retargeting ads is that they’re shown to the audience over and over again. The chances are, that some of them get annoyed by the ads and decide not to see that ad again. It could potentially affect the reach of your retargeting ad campaign.
FAQs about retargeting
Let me answer some of the popular questions about retargeting:
Is retargeting cheaper than advertising?
The likelihood of a retargeting campaign being cheaper than normal advertising is high because a normal ad campaign is broader in targeting as compared to focused targeting in a retargeting campaign.
What are the channels for retargeting?
There are various channels for retargeting, such as:
A retargeting campaign is intended for the audience that has already visited our website but never converted just yet.
What is a good CTR for retargeting ads?
A good CTR varies from industry to industry. However, it’s been seen that a good CTR for online ad campaigns is between 1% to 3%.
What is negative retargeting?
A negative remarketing campaign means excluding a segment of the audience from the retargeting campaign or creating an ad in the campaign that won’t be displayed to some of the members of the campaign.
Is retargeting inbound or outbound?
Any form of online advertising is basically an inbound campaign. Since retargeting is running ads to a specific audience, it’s safe to say that retargeting is inbound.