Author: Muhammad Ahsan Jamal

  • ERR_SSL_PROTOCOL_ERROR: Potential causes + common troubleshooting methods

    ERR_SSL_PROTOCOL_ERROR: Potential causes + common troubleshooting methods

    You’re trying to visit a website, and instead of the page loading successfully, Chrome or Edge throws a cold, unhelpful error at you: ERR_SSL_PROTOCOL_ERROR.

    Frustrating, right? You’re definitely not alone!

    SSL is now the backbone of the modern web. 92.6% of the top 100,000 websites use HTTPS by default as of January 2026, and 99% of browsing time on Google Chrome now happens on HTTPS websites. That’s how standard secure connections have become. 

    So when something breaks that handshake between your browser and a server, it can stop you dead in your tracks, whether you’re a regular user trying to access a site or a website owner watching your visitors bounce.

    The good news? 

    This error is almost always fixable. But first, you need to understand what’s actually going wrong. 

    Let’s start with the basics: what does ERR_SSL_PROTOCOL_ERROR mean exactly?

    What is ERR_SSL_PROTOCOL_ERROR?

    In simple terms, the ERR_SSL_PROTOCOL_ERROR meaning comes down to this: your browser tried to establish a secure, encrypted connection with a website, but something went wrong during that process, so it gave up.

    When you visit a website or URL, your browser and the site’s server go through a quick “handshake” to verify security credentials. If that handshake fails for any reason, the browser blocks access entirely and displays “ERR_SSL_PROTOCOL_ERROR: This site can’t provide a secure connection.”

    Think of it like showing up to a secure building without the right access card. The door doesn’t let you in (no negotiation). The error itself isn’t always the website’s fault, though. It could be coming from your browser, your device, or even your network. That’s exactly what we’re going to unwrap next.

    Why ERR_SSL_PROTOCOL_ERROR occurs: Major reasons behind this error

    This error doesn’t just pop up for one reason. There’s actually a handful of things that can trigger it, from something as simple as a wrong date on your device to a misconfigured server.

    Let’s break down the most common culprits so you know exactly what you’re dealing with.

    Why ERR_SSL_PROTOCOL_ERROR occurs

    Expired or invalid SSL certificate

    Every SSL certificate comes with an expiration date, and when it lapses, browsers like Chrome instantly block access to the site. This is one of the most common server-side triggers.

    If the certificate is expired, self-signed, or issued by an untrusted authority, your browser won’t complete the handshake, and you’ll land right on that error (ERR_SSL_PROTOCOL_ERROR) page.

    Incorrect system date & time

    This one surprises a lot of people. If your device’s date or time is off (even by a day), your browser might read a perfectly valid SSL certificate as expired or not yet active. 

    SSL certificates are time-sensitive by design, so a simple clock mismatch can throw the whole verification process out of sync.

    Outdated browser or OS

    Older browsers and operating systems sometimes lack support for newer security protocols like TLS 1.3. When a website requires an updated protocol that your browser or OS can’t handle, the connection fails. 

    Keeping your browser and system updated isn’t just about new features; it directly affects whether secure connections work properly.

    Antivirus/firewall interference

    Some antivirus programs and firewalls perform SSL scanning, essentially intercepting your connection to inspect it for threats. While well-intentioned, this process can sometimes disrupt the SSL handshake and trigger the ‘ERR_SSL_PROTOCOL_ERROR’ error. 

    If you’ve recently installed new security software or updated it, that’s worth checking first.

    Corrupted browser cache/cookies

    Your browser stores cached data to speed things up, but over time, that data can become outdated or corrupted. Old SSL state data, cached certificates, or stale cookies can conflict with a site’s current security setup, causing the connection to fail.

    Clearing your cache and cookies often resolves this faster than you’d expect.

    Server-side issues

    Sometimes the problem has nothing to do with you at all. Misconfigurations on the server, like incorrect SSL/TLS settings, missing intermediate certificates, or protocol mismatches, can cause this error for every visitor calling on that site. 

    If the error appears across multiple browsers and devices, there’s a good chance the issue lives on the server end.

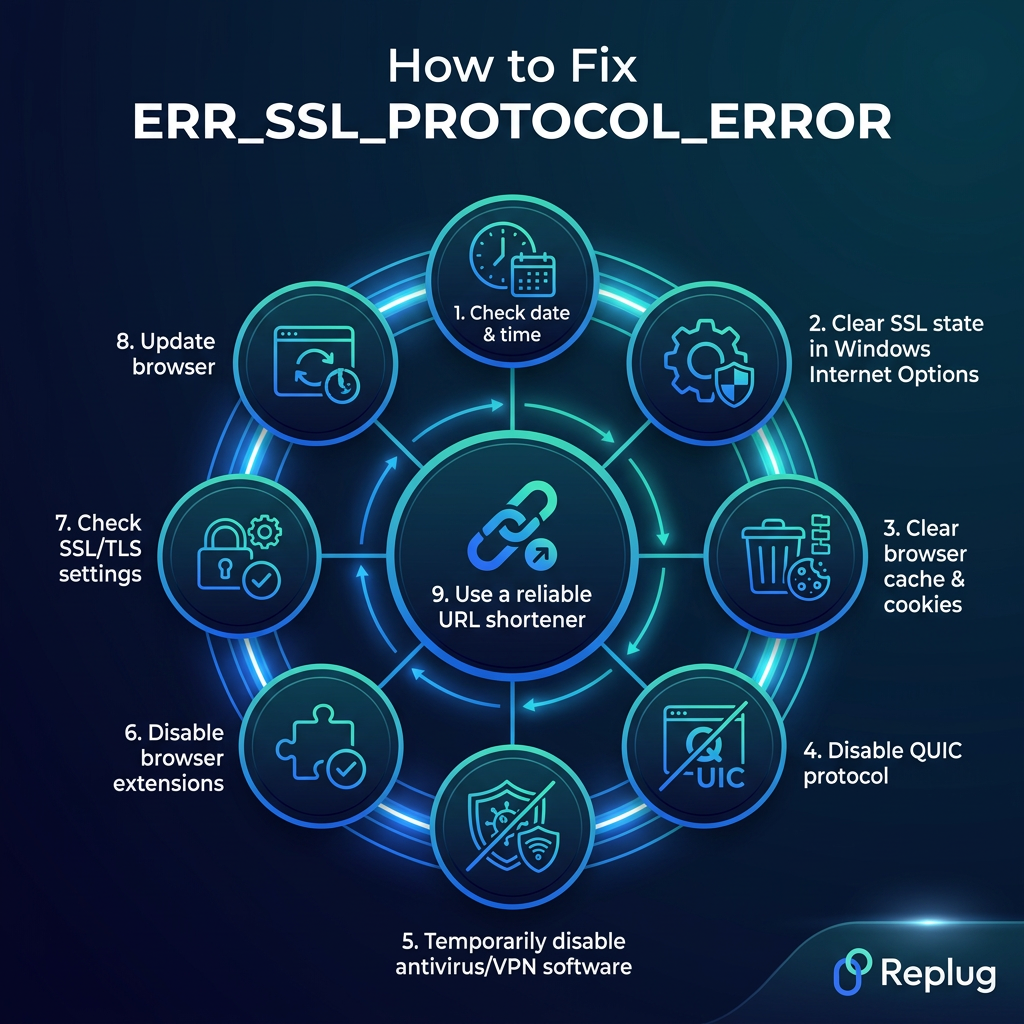
    How to fix ‘ERR_SSL_PROTOCOL_ERROR’: Common troubleshooting steps

    Finding the right ERR_SSL_PROTOCOL_ERROR fix isn’t always a one-size-fits-all situation. What works for one person might not work for another. 

    The good news is that most of these solutions are quick, straightforward, and don’t require any technical expertise. Work through these steps one by one, and you’ll likely resolve it faster than you think.

    How to fix ‘ERR_SSL_PROTOCOL_ERROR’

    Check date & time

    This is always the first thing to check because it’s the easiest to fix and more impactful than most people realize. 

    Go to your device’s date and time settings and make sure everything is accurate.

    • On Windows, right-click the clock in the taskbar and select “Adjust date/time.” 
    • On Mac, head to System Settings → General → Date & Time. Enable the “Set time and date automatically” option, so your device always syncs with an internet time server.

    Once corrected, restart your browser and try loading the site again.

    Clear SSL state in Windows Internet Options

    Windows stores SSL certificate data locally, and sometimes that cached data becomes outdated or conflicts with a site’s current certificate. 

    To clear it, open the “Control Panel” and search for “Internet Options.” Head to the “Content” tab and click the “Clear SSL State” button under the “Certificates” section. You’ll get a confirmation message once it’s done. 

    This doesn’t affect your browsing history or saved passwords. It simply flushes the old SSL handshake data so your browser can start fresh with the site.

    Clear browser cache & cookies

    Out-of-date cached data is one of the sneakiest causes of this error because everything on your end looks fine, but old stored data is quietly causing conflicts behind the scenes.

    • In Chrome, click the three-dot menu () in the top-right corner → select “Delete browsing data,” → choose a time range, → check “Cookies and other site data” and “Cached images and files,” → then click the “Delete data” button, and relaunch your browser.
    • In Microsoft Edge, press Ctrl+Shift+Delete. Select “Cookies and other site data” and “Cached images and files,” set the time range to “All time,” and click “Clear now.”

    It takes less than a minute and often resolves the issue right away.

    Disable QUIC protocol

    QUIC is an experimental network protocol built into Chrome that can sometimes interfere with SSL connections. 

    To disable it, type chrome://flags in your address bar and search for “Experimental QUIC protocol.” Set it to “Disabled” from the dropdown and relaunch Chrome. 

    This is a lesser-known fix, but it’s surprisingly effective, especially if you’ve already tried the more obvious solutions and are still facing the same error.

    Temporarily disable antivirus/VPN software

    Antivirus programs and VPNs sometimes intercept SSL traffic as part of their security scanning, and that interception can break the connection. Try temporarily disabling your antivirus or VPN and then reloading the page. 

    If the error disappears, your security software is likely the culprit. From there, you can look into adjusting its SSL scanning settings rather than keeping it fully disabled. You want security, just without the interference.

    Disable browser extensions

    Extensions can quietly barge in with how your browser handles connections, especially ad blockers, privacy tools, or proxy-related extensions. 

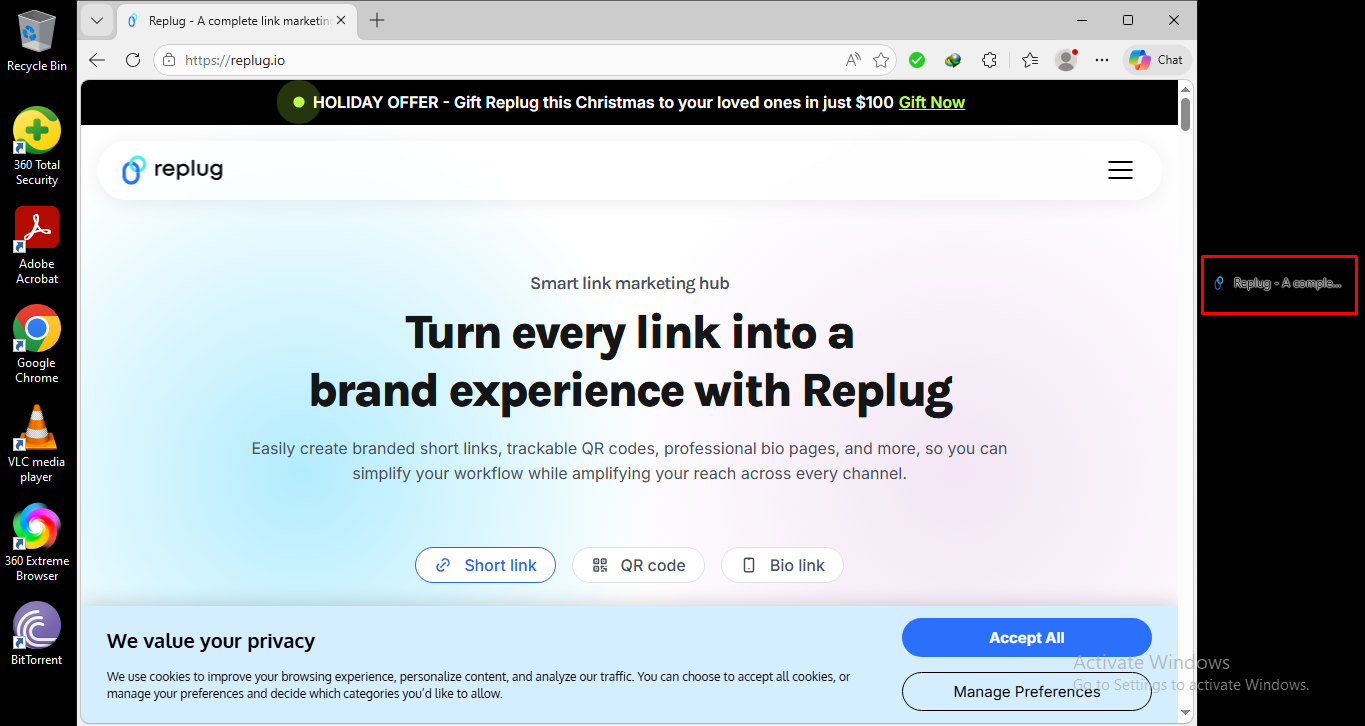
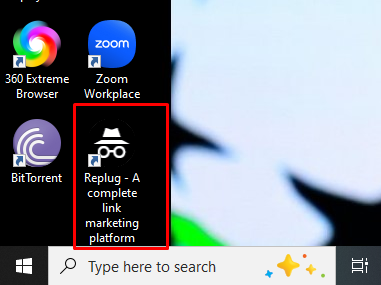
    To test this, open Chrome in Incognito mode, since most extensions are disabled there by default. If the site loads fine in Incognito, an extension is almost certainly causing the problem.

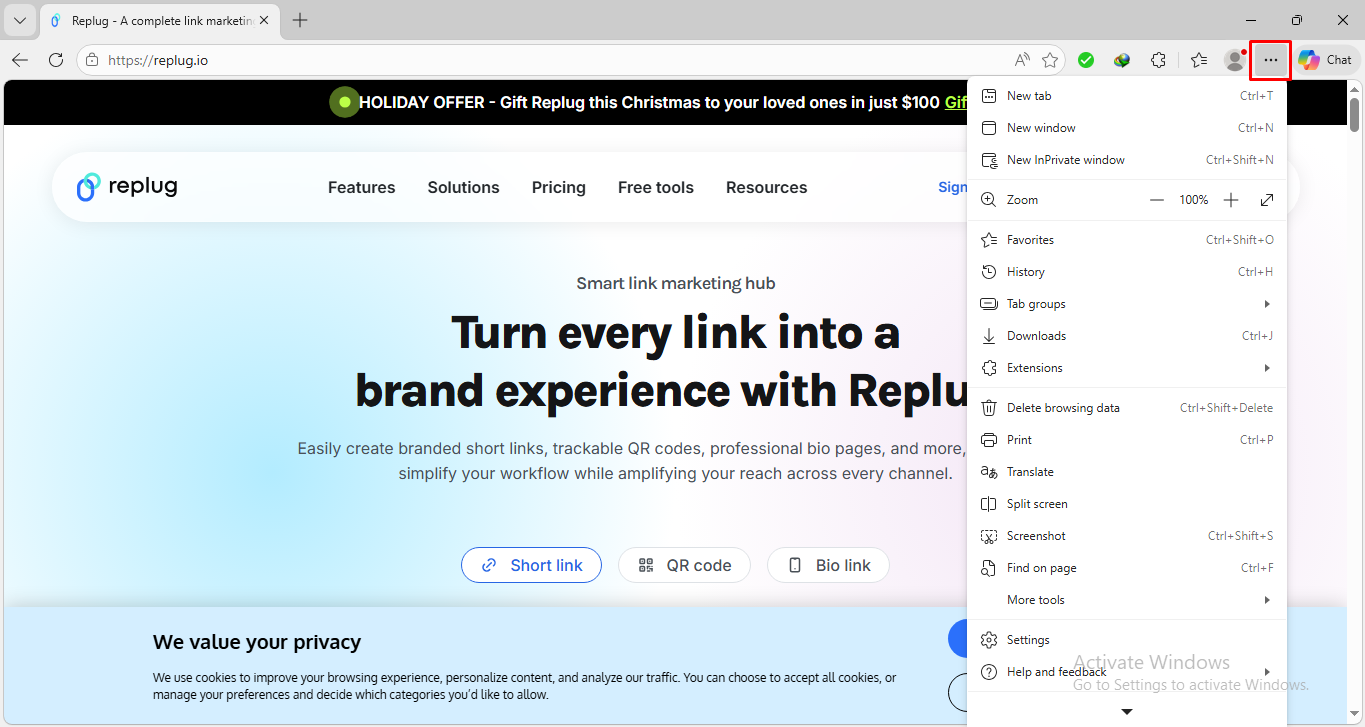
    Head to chrome://extensions, toggle them off one by one, and reload the page each time to identify the specific offender. If you are using another browser, like Microsoft Edge, here is how to disable extensions: Click the three dots → Extensions → Manage Extensions → Toggle off.

    Check SSL/TLS settings

    Your browser or operating system might be configured to use older, deprecated SSL/TLS protocol versions that modern websites no longer support.

    • In Chrome, you can check this via chrome://settings/security under “Advanced.” 
    • On Windows, go to Internet Options → Advanced tab and scroll to the “Security” section.

    Make sure TLS 1.2 and TLS 1.3 are enabled, and that older protocols like SSL 3.0 are unchecked. Aligning your settings with current standards often resolves compatibility-related SSL errors.

    Update browser

    Running an outdated browser is like trying to use an old key on a new lock (it just won’t work). Newer websites are built around modern security protocols, and older browser versions simply can’t keep up.

    • In Chrome, click the three-dot menu in the top right, go to Help → About Google Chrome, and it’ll automatically check for and install any available updates. Restart/relaunch once it’s done.
    • In Microsoft Edge, click the three-dot menu in the top-right corner, select Help and feedback → About Microsoft Edge. Edge will automatically check for updates and install them. Click Restart if prompted to complete the update.

    It’s a simple step that’s easy to overlook but genuinely makes a difference.

    Use a reliable URL shortener

    Sometimes the issue isn’t your browser or device; it could be the link itself. Broken, malformed, or insecure URLs can trigger SSL errors before a page even has a chance to load. 

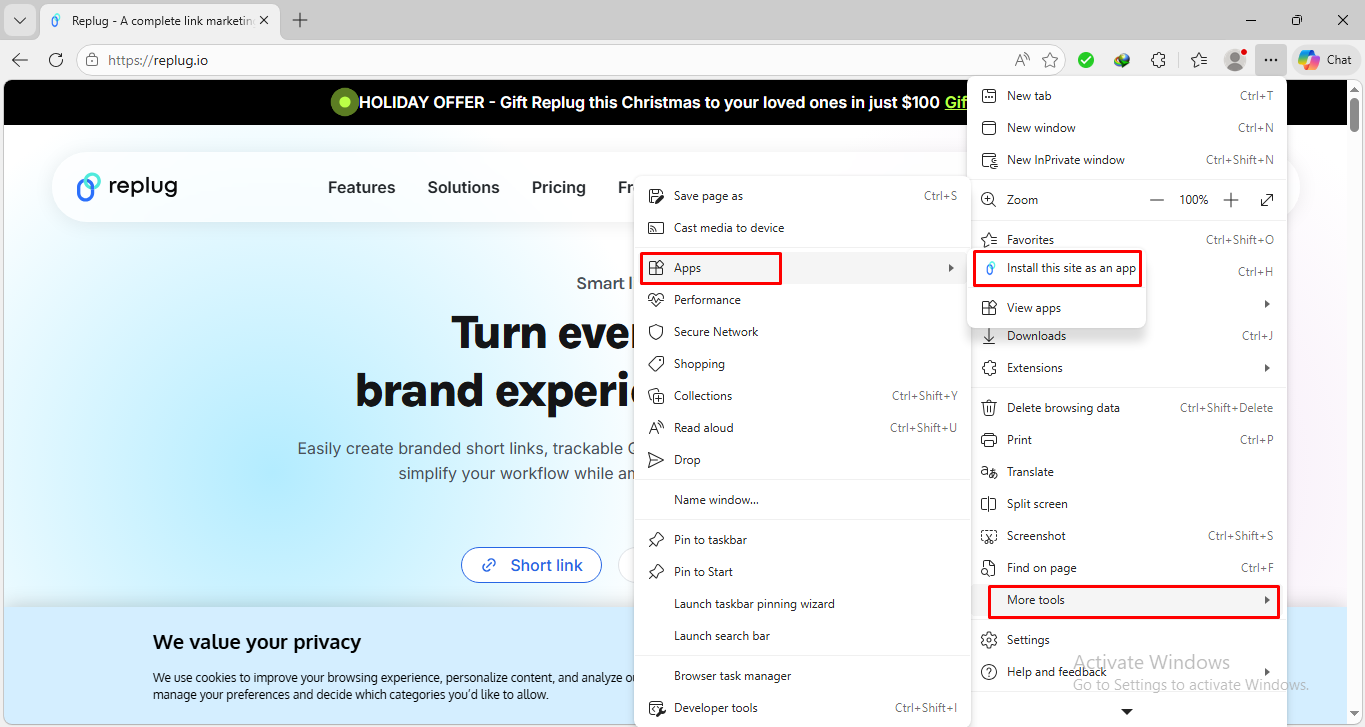
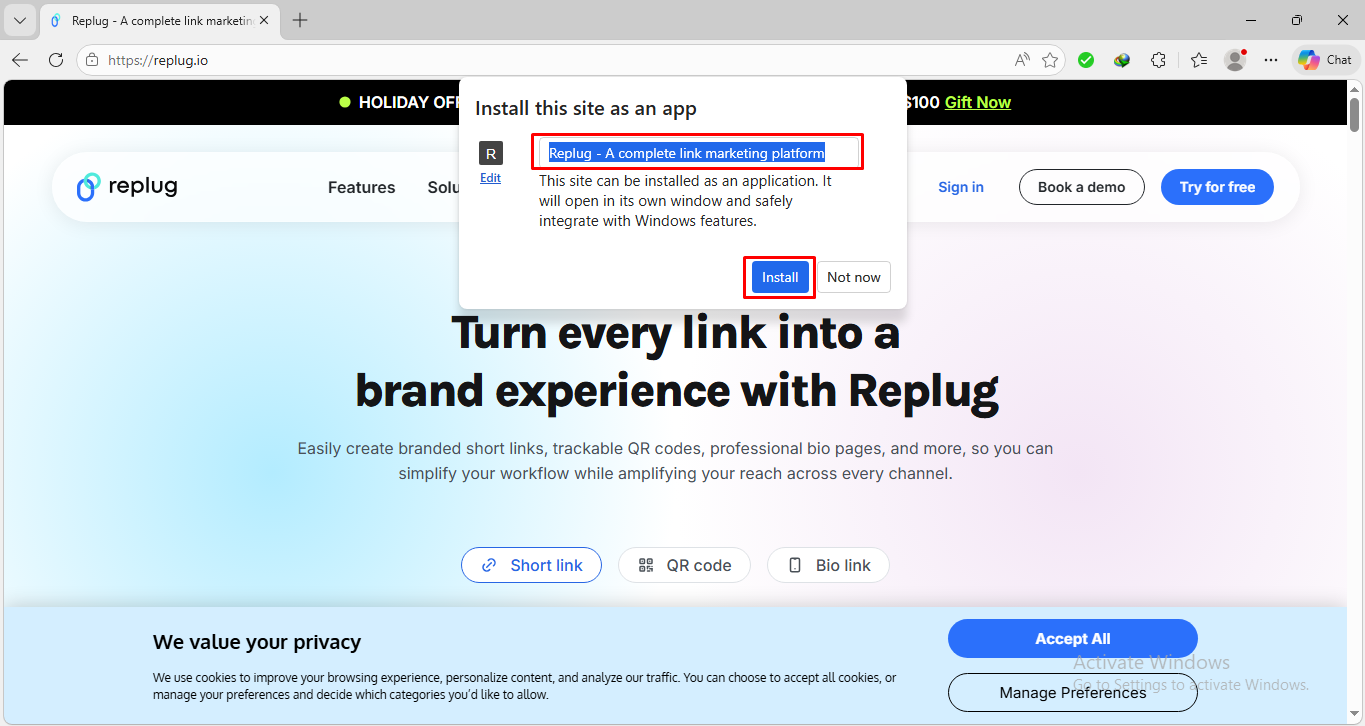
    If you’re sharing or managing links regularly, using a link optimization platform like Replug is a smart move. You can create short links that are clean, trackable, and redirect through secure connections.

    Replug Branded Short Links CTA
    Maximize marketing ROI
    by transforming ordinary URLs into
    branded short links that convert.
    Try Replug for free

    Replug also offers free domains to get you started, so your links always look professional and load without any security hiccups.

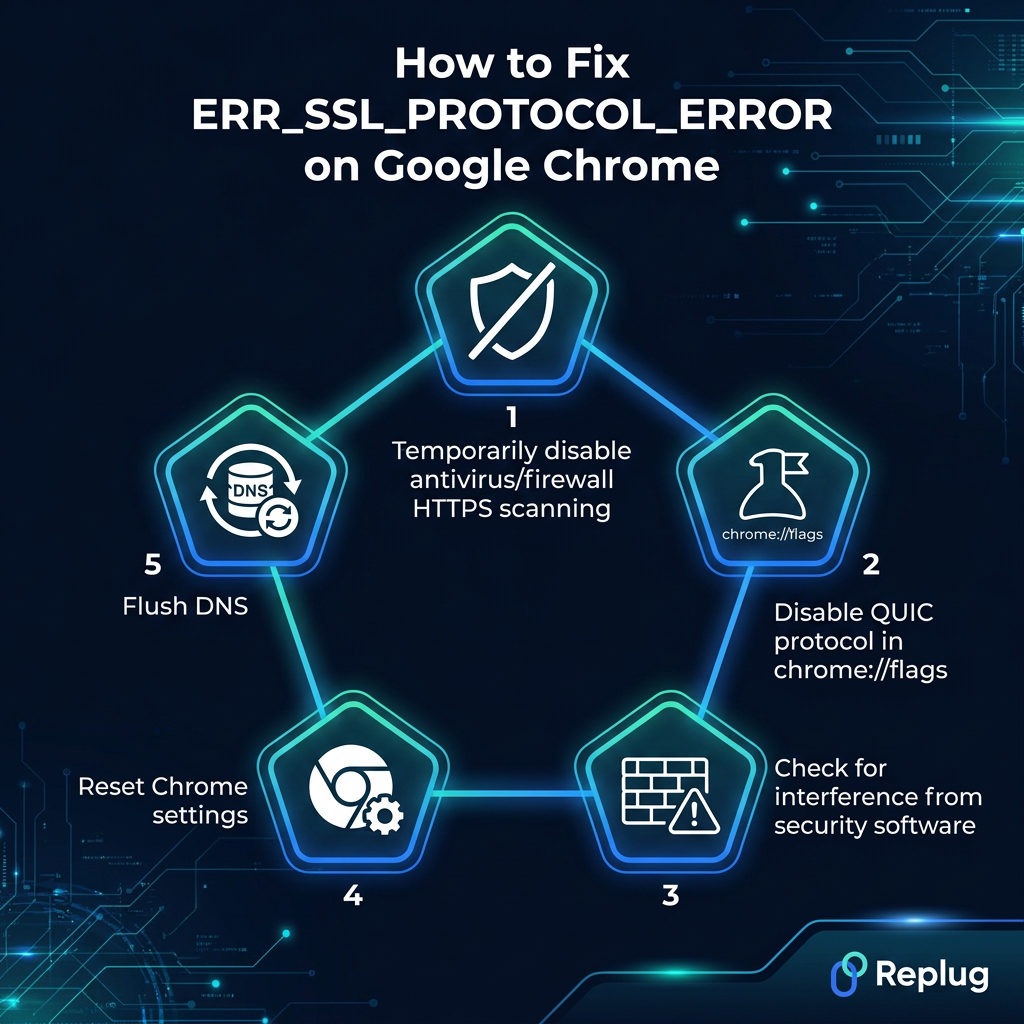
    How to fix ERR_SSL_PROTOCOL_ERROR on Google Chrome

    While the fixes mentioned in the previous section work across most browsers, ERR_SSL_PROTOCOL_ERROR Chrome cases sometimes need a bit more targeted troubleshooting. 

    Chrome has its own settings, flags, and configurations that can specifically contribute to this error. So here’s what to look at if you’re running into it on Chrome in particular.

    How to fix ERR_SSL_PROTOCOL_ERROR on Google Chrome

    Temporarily disable antivirus/firewall HTTPS scanning

    Many antivirus programs have a feature that scans HTTPS traffic to check for threats, which sounds helpful, but it can actually disrupt Chrome’s SSL handshake in the process. 

    Go into your antivirus settings and look for anything labeled “HTTPS scanning,” “SSL inspection,” or “Web Shield.” Temporarily turn it off and reload the page in Chrome. If it loads fine, you’ve found your culprit. 

    Most antivirus tools let you whitelist specific sites rather than disabling the feature entirely, which is the smarter long-term fix.

    Disable QUIC protocol in chrome://flags

    Chrome’s built-in QUIC protocol is designed to speed up connections, but it doesn’t always play nicely with SSL, especially on certain networks or server configurations. 

    To turn it off, type chrome://flags in Chrome’s address bar and press Enter. Use the search bar to find “Experimental QUIC protocol” and switch it from “Default” to “Disabled.” Click the “Relaunch” button that appears at the bottom. 

    It’s a small tweak, but it removes one potential layer of interference that Chrome adds on top of standard SSL connections.

    Check for interference from security software

    Beyond just antivirus, other security tools such as VPNs, firewalls, parental control software, or corporate network filters can all interfere with how Chrome handles SSL connections. Try disabling them one at a time and testing the page after each. 

    If you’re on a work or school network, a firewall rule set by your IT team might be blocking the connection entirely, and that’s something you’d need to flag with them directly. 

    Identifying the specific software causing the conflict is the key step here.

    Flush DNS

    Your device stores a local DNS cache to speed up how it connects to websites. But if that cache holds outdated or corrupted records for a site, it can cause connection issues, including SSL errors. Flushing it forces your device to fetch fresh DNS information.

    • On Windows, open Command Prompt as “Administrator” and type ipconfig /flushdns, then press the Enter key.
    • On Mac, open Terminal and run sudo dscacheutil -flushcache; sudo killall -HUP mDNSResponder.

    Restart Chrome afterward and try the site again. This fix is quick and often more effective than people expect.

    Reset Chrome settings

    If you’ve tried everything and Chrome is still throwing the error, a settings reset is worth doing. Over time, Chrome’s configuration can accumulate changes from extensions, experiments, or manual tweaks that quietly break things.

    To reset, go to chrome://settings/reset and click “Restore settings to their original defaults.” Confirm the reset by clicking the “Reset settings” button.

    This won’t delete your bookmarks, history, or saved passwords, but it will clear your startup page, pinned tabs, and extension settings. Think of it as giving Chrome a clean slate without a full reinstall.

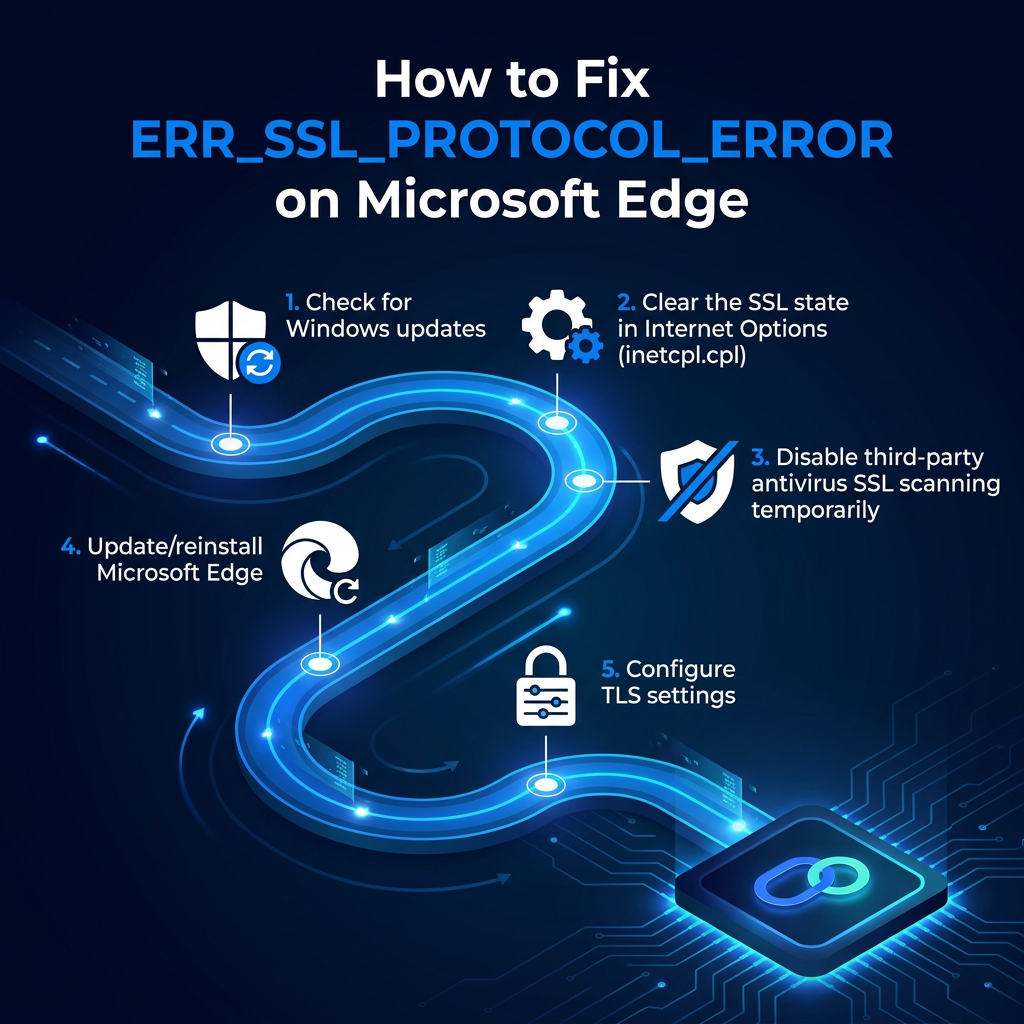
    How to fix ERR_SSL_PROTOCOL_ERROR on Microsoft Edge

    If you’re hitting ERR_SSL_PROTOCOL_ERROR Edge specifically, it’s worth knowing that Edge has some unique ties to Windows system settings that other browsers don’t share. This means the fixes here are a little different from what you’d do in Chrome. 

    These steps are tailored to Edge’s architecture and should help you get back on track quickly.

    How to fix ERR_SSL_PROTOCOL_ERROR on Microsoft Edge

    Check for Windows updates

    Edge is deeply integrated with Windows, so outdated system files can directly affect how Edge handles SSL connections. 

    Open Settings → Windows Update and check if any updates are pending by clicking “Check for updates.” This includes both major Windows updates and smaller cumulative patches (both matter).

    Microsoft regularly pushes security and protocol-related fixes through these updates, and skipping them can leave Edge unable to properly negotiate connections with modern, secure websites. Install any available updates, restart your device, and test the page again in Edge.

    Clear the SSL state in Internet Options (inetcpl.cpl)

    Because Edge is built on Windows infrastructure, it shares the SSL cache stored in Internet Options, and clearing it can resolve certificate conflicts that Edge runs into. 

    Press Windows + R, type inetcpl.cpl, and hit Enter. In the Internet Properties window, go to the Content tab and click “Clear SSL State.” You’ll see a confirmation pop-up once it’s cleared. 

    This wipes out any stored SSL session data that might be outdated or mismatched with a site’s current certificate, letting Edge establish a fresh connection on your next visit.

    Disable third-party antivirus SSL scanning temporarily

    Just like with Chrome, third-party antivirus software can intercept Edge’s SSL connections while scanning for threats, and that interception sometimes breaks the handshake entirely. 

    Go into your antivirus settings and look for SSL inspection, HTTPS filtering, or Web Shield options and turn them off temporarily. Reload the page in Edge and see if the error clears. 

    If it does, consider adding the affected site to your antivirus whitelist rather than leaving the scanning feature fully disabled. Your security software’s support documentation can guide you through that process.

    Update/reinstall Microsoft Edge

    An outdated version of Edge can lack support for the security protocols that modern websites require. Click the three-dot menu in Edge, go to Help and feedback → About Microsoft Edge, and let it check for updates automatically. 

    If updating doesn’t help and the error persists across multiple sites, a full reinstall might be the better move.

    Download the latest version directly from Microsoft’s official site, uninstall your current version through Windows Settings → Apps → Installed apps, and do a clean reinstall. It’s a bit more involved, but it rules out any deeper installation issues.

    Configure TLS settings

    Edge relies on Windows’ TLS (Transport Layer Security) configuration, so if the wrong protocol versions are enabled or disabled, SSL connections can fail. 

    Press Windows + R, type inetcpl.cpl, and open the “Advanced” tab. Scroll down to the “Security” section and make sure TLS 1.2 and TLS 1.3 are checked. 

    Older protocols like SSL 2.0 and SSL 3.0 should be unchecked. They’re condemned and can actually cause conflicts with modern sites. Click “Apply” and “OK,” then restart Edge.

    This small configuration adjustment can make a noticeable difference, especially on sites that strictly enforce modern TLS standards.

    You may also like: How to find the IP address of a website: Step-by-step guide

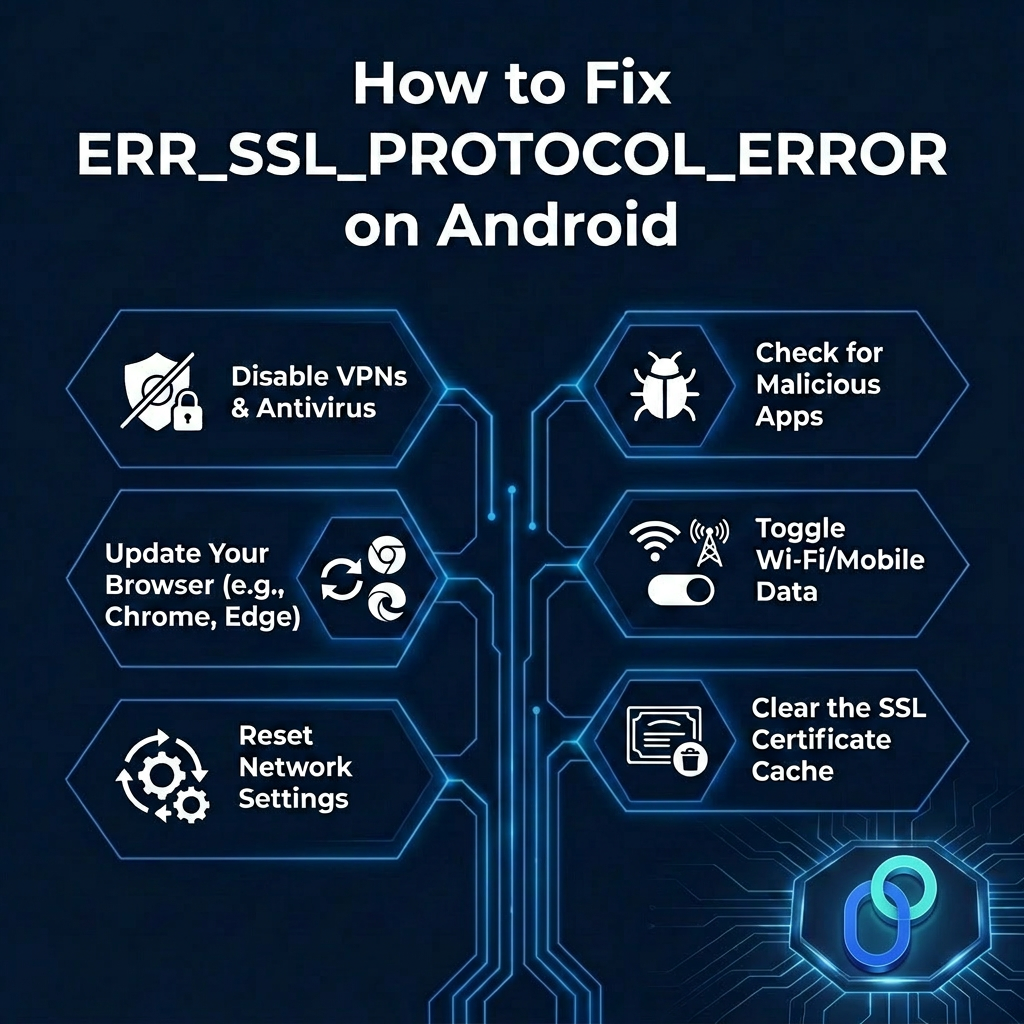
    How to fix ERR_SSL_PROTOCOL_ERROR on Android

    Getting this error on an Android device adds a few extra variables to the mix. Your network connection, installed apps, and device-level settings all come into play in ways they don’t on a desktop. 

    The good news is that Android gives you several straightforward options to work through, and most of them take just a minute or two to try.

    How to fix ERR_SSL_PROTOCOL_ERROR on Android

    Disable VPNs & antivirus

    VPNs and antivirus apps on Android can reroute or inspect your traffic in ways that interfere with SSL connections. 

    If you have a VPN running, switch it off and try reloading the page. The same goes for any mobile antivirus apps that have web protection or HTTPS scanning features enabled. You can usually find these toggles directly inside the app’s settings. 

    If the error disappears after disabling one of them, you’ve identified the source. You can then look into configuring that app to allow secure connections without blocking them.

    Check for malicious apps

    A less obvious but real cause of SSL errors on Android is malicious or poorly built apps that interfere with your device’s network traffic. 

    Go to Settings → Apps and review any recently installed apps that you don’t fully recognize or trust. Some shady apps install rogue certificates or mess with network configurations in the background.

    Run a scan using Google Play Protect. Open the Play Store → tap your profile icon → and select “Play Protect.” Scan and remove anything flagged or suspicious, restart your device, and check if the error persists.

    Update your browser (e.g., Chrome, Edge)

    An outdated mobile browser is one of the simplest reasons the “ERR SSL PROTOCOL ERROR” error appears on Android. 

    Older versions may not support the TLS protocols that current websites require, causing the SSL handshake to fail before it even gets started. 

    Open the Google Play Store → search for your browser, no matter if that’s Chrome, Edge, or another → and tap the “Update” button if one is available. It takes just a few seconds and can instantly resolve compatibility issues. 

    And, while you’re at it, check if your Android OS itself has any pending updates under Settings → Software Update.

    Toggle Wi-Fi/mobile data

    Sometimes the issue is as simple as a temporary network glitch that’s disrupting the SSL handshake. In that case, try switching from Wi-Fi to mobile data, or vice versa, and reload the page. 

    If you’re on Wi-Fi, toggle it off and back on, or forget the network entirely and reconnect. Public or shared Wi-Fi networks are particularly prone to SSL interference due to network-level filters or proxies.

    Switching networks entirely is a quick way to rule out whether the problem is tied to your current connection rather than your device or browser settings.

    Reset network settings

    If toggling your connection doesn’t help, a full network settings reset is the next step. This clears all saved Wi-Fi networks, Bluetooth pairings, and mobile data configurations, essentially giving your device a clean networking slate. 

    On most Android devices, go to Settings → System → Reset options → Reset network settings (or search “Reset” in Settings). You’ll need to reconnect to your Wi-Fi networks afterward, so keep your passwords handy. 

    This fix is particularly useful when SSL errors are happening across multiple sites and browsers, as it points to a deeper network configuration issue on the device itself.

    Clear the SSL certificate cache

    Android stores SSL certificate data to speed up future connections, but that cached data can sometimes become outdated or corrupted. This causes errors even when a site’s certificate is perfectly valid.

    To clear it, go to Settings → Apps → your browser → Storage, and clear cached data. After clearing, restart your browser and try the site again.

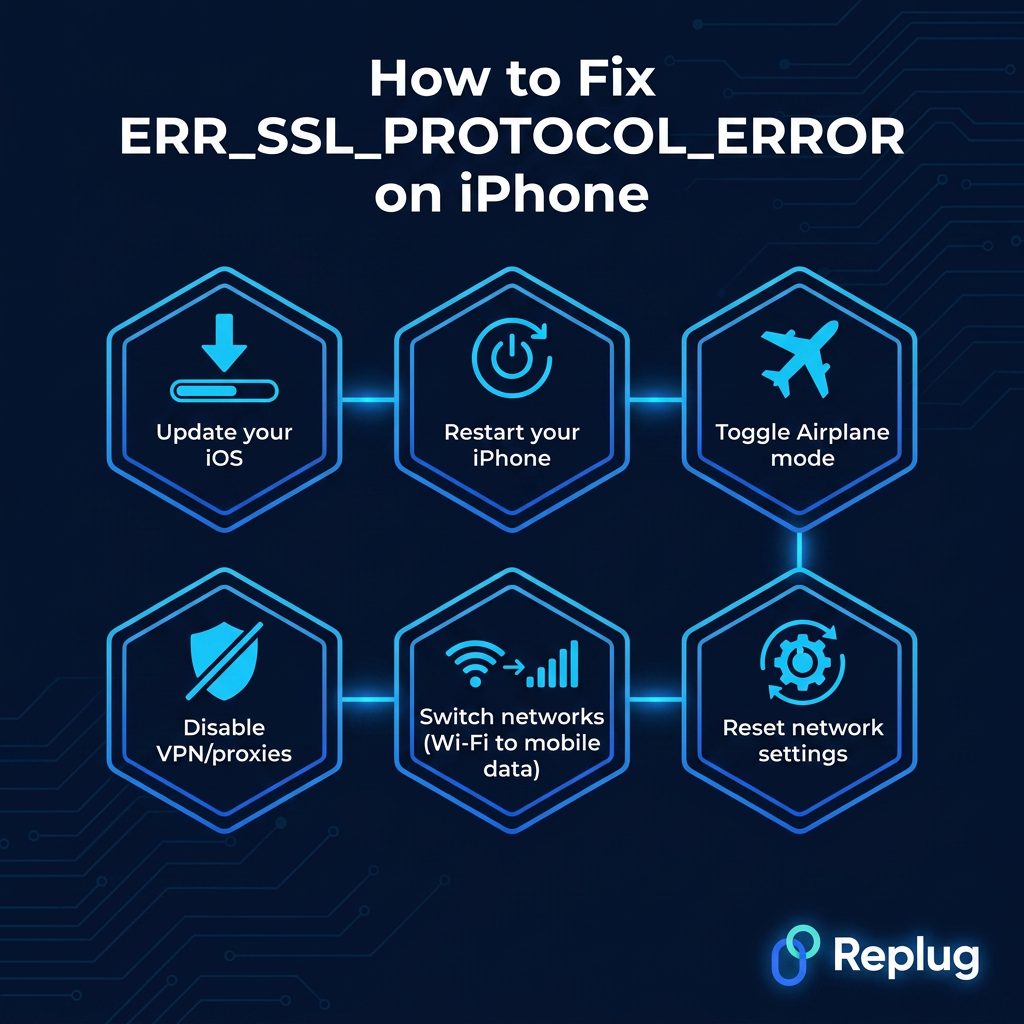
    How to fix ERR_SSL_PROTOCOL_ERROR on iPhone

    While iPhones are generally well-optimized for secure browsing, they’re not immune to SSL errors. 

    The fixes on iOS are a bit more streamlined compared to Android since Apple keeps most network and security settings centralized, which actually makes troubleshooting a little easier.

    Here’s what to work through if you’re seeing ERR_SSL_PROTOCOL_ERROR on your iPhone.

    How to fix ERR_SSL_PROTOCOL_ERROR on iPhone

    Update your iOS

    Apple regularly pushes iOS updates that include security patches, protocol upgrades, and bug fixes, all of which directly affect how your iPhone handles SSL connections. 

    If you’re running an outdated version, your device might simply lack support for the security standards a website requires. Go to Settings → General → Software Update and install anything that’s pending. 

    It’s one of those fixes that people put off but genuinely makes a huge difference, not just for SSL errors, but for your device’s overall security and performance.

    Restart your iPhone

    It sounds almost too simple, but a restart clears temporary system glitches, refreshes network connections, and resets background processes that might be interfering with SSL handshakes. 

    If you haven’t restarted your iPhone in a while, there’s a real chance that’s all it takes. Hold the side button and a volume button together, slide to power off, wait about 30 seconds, and turn it back on. 

    Try loading the site again once it’s fully restarted. This is always worth doing before moving on to more involved fixes.

    Toggle Airplane mode

    Toggling Airplane mode off and on is essentially a quick reset for all of your iPhone’s wireless connections (cellular, Wi-Fi, and Bluetooth). 

    It forces your device to re-establish a fresh network connection, which can clear temporary glitches in how SSL handshakes are being negotiated. 

    Swipe into Control Center and tap the Airplane mode icon to enable it. Now, wait about 10–15 seconds, then tap it again to disable it. Once your connection is restored, reload the page. 

    It’s a 20-second fix that’s surprisingly effective for connection-related SSL errors.

    Disable VPN/proxies

    VPNs and proxy configurations on iPhone can reroute your traffic through servers that interfere with SSL verification. This is especially true if the VPN server itself has connection issues or uses outdated security protocols.

    • For VPN, go to Settings → General → VPN & Device Management and toggle off any active VPN. 
    • For proxies, go to Settings → Wi-Fi, tap the ‘i’ icon, select “Configure Proxy,” and set it to “Off.”

    Once disabled, reload the page and see if the error clears. If it does, the VPN or proxy configuration was the issue, and you may need to switch providers or adjust settings.

    Switch networks (Wi-Fi to mobile data)

    The network you’re connected to can be a direct cause of SSL errors, particularly on public Wi-Fi networks that use captive portals, content filters, or proxies that intercept HTTPS traffic. 

    Try switching from Wi-Fi to your mobile data connection and reloading the page. If it loads fine on mobile data, the problem is tied to that specific Wi-Fi network rather than your device. 

    You can also try forgetting the Wi-Fi network entirely under Settings → Wi-Fi, then reconnecting fresh. Sometimes, a corrupted network session is all that’s standing between you and a working connection.

    Reset network settings

    If nothing else has worked for you, resetting your network settings is the most thorough fix available on iPhone short of a full device restore. 

    It clears all saved Wi-Fi passwords, VPN configurations, APN settings, and network-related preferences, giving your iPhone a completely fresh networking foundation.

    Go to Settings → General → Transfer or Reset iPhone → Reset → Reset Network Settings. You’ll need to re-enter your Wi-Fi passwords afterward, so note them down beforehand. 

    This fix is especially worth trying when SSL errors are appearing across multiple sites and browsers, since that pattern strongly suggests a device-level network configuration issue.

    Also check out: What is a URL blacklist: Easy guide for fixing a URL blacklist in 2026!

    Wrapping up

    SSL errors can feel intimidating at first glance, but as you’ve seen throughout this guide, they’re almost always fixable with the right approach. 

    No matter if the culprit was an outdated browser, a misconfigured antivirus, a wrong date setting, or a network glitch, there’s a clear path to resolving it. 

    Rather than looking for an ERR_SSL_PROTOCOL_ERROR bypass that skips security altogether, working through these proper fixes ensures your connection is genuinely secure, not just superficially unblocked. 

    Start with the simplest solutions first, work your way down the list, and you’ll likely have things running smoothly in no time. Secure browsing isn’t complicated; it just needs a little attention sometimes.

    Frequently asked questions

    What is net::ERR_SSL_PROTOCOL_ERROR?

    It’s the technical version of the same error. “net” simply refers to the network stack reporting it. When your browser can’t complete a secure SSL/TLS handshake with a website’s server, it logs it as net::ERR_SSL_PROTOCOL_ERROR. The cause and fixes are identical to the standard ERR_SSL_PROTOCOL_ERROR you see displayed on screen.

    Why am I seeing ERR_SSL_PROTOCOL_ERROR on Microsoft Edge?

    Most commonly, it comes down to outdated Windows settings, incorrect TLS configurations, or third-party antivirus software interfering with Edge’s SSL connections. 

    Since Edge is tightly integrated with Windows, system-level issues affect it more directly than other browsers. Checking Windows updates, clearing the SSL state via inetcpl.cpl, and reviewing your TLS settings usually resolves it.

    Could antivirus software cause ERR_SSL_PROTOCOL_ERROR?

    Absolutely! Many antivirus programs include HTTPS or SSL scanning features that intercept your browser’s connection to inspect traffic for threats. While that’s useful in theory, it can disrupt the SSL handshake and trigger this error. Temporarily disabling the HTTPS scanning feature (not the entire antivirus) is the quickest way to test if it’s the cause.

    Is ERR_SSL_PROTOCOL_ERROR always server-related?

    No, and that’s a common misconception. While server-side misconfigurations like expired certificates or incorrect TLS settings can cause it, the error just as often originates on the user’s end.

    An incorrect system clock, an outdated browser, a corrupted cache, or interfering security software are all client-side causes that have nothing to do with the server.

    Is it safe to proceed past the warning ‘ERR_SSL_PROTOCOL_ERROR’?

    Generally, no! Unlike some browser warnings that offer a “proceed anyway” option, ERR_SSL_PROTOCOL_ERROR typically blocks access entirely for good reason. The secure connection couldn’t be verified. 

    Bypassing SSL warnings can expose your data to interception. It’s always better to resolve the underlying issue rather than forcing your way through a failed secure connection.

    What is the difference between ERR_SSL_PROTOCOL_ERROR and ERR_SSL_VERSION_OR_CIPHER_MISMATCH?

    They’re related but distinct! 

    ERR_SSL_PROTOCOL_ERROR means the SSL/TLS handshake failed broadly. It could be caused by many things (as already mentioned above).
    ERR_SSL_VERSION_OR_CIPHER_MISMATCH is more specific. It means your browser and the server couldn’t agree on a compatible TLS version or encryption cipher. 

    The second error points more directly to a protocol version incompatibility between the two sides.

    Can a firewall or browser extension cause ERR_SSL_PROTOCOL_ERROR?

    Yes, both can! 

    Firewalls that inspect HTTPS traffic can interrupt the SSL handshake, while certain browser extensions (especially ad blockers, privacy tools, or proxy extensions) can interfere with how your browser establishes secure connections.

    Testing in Incognito mode (where most extensions are disabled) and temporarily turning off your firewall are quick ways to check.

    Is ERR_SSL_PROTOCOL_ERROR dangerous or not?

    The error itself isn’t dangerous. It’s actually your browser protecting you by refusing an insecure connection. 

    What it signals, however, is that something is wrong with the SSL handshake, which could mean the site has a genuine security issue. The risk comes from trying to force access past it rather than fixing the root cause properly.

    How to fix ERR_SSL_PROTOCOL_ERROR on Mac?

    Start by checking your Mac’s date and time under System Settings → General → Date & Time and enable “Set automatically.” 

    Then clear your browser cache, disable any VPN or antivirus HTTPS scanning, and make sure your browser is fully updated. 

    If the issue persists, check Keychain Access for any expired or untrusted certificates that might be conflicting with the connection.

    Why is Chrome giving ERR_SSL_PROTOCOL_ERROR when running a local web server on http://localhost:4200?

    This usually happens because Chrome expects HTTPS for secure connections, but your local server is running on plain HTTP. Chrome’s security policies flag this as an SSL issue. 

    The fix is to either configure your local server to use a self-signed SSL certificate or go to chrome://flags and enable “Allow invalid certificates for resources loaded from localhost.”

    What is a secure connection?

    A secure connection is an encrypted communication channel between your browser and a website’s server, established using SSL/TLS protocols. It ensures that any data you send or receive, like passwords or payment details, can’t be intercepted or tampered with by third parties. You can spot it by the padlock icon and “https” at the start of a website’s URL.

    How to fix SSL error in Google Chrome?

    Start with the basics: check your system date and time, clear Chrome’s cache and cookies, and make sure Chrome is updated. Then disable any antivirus HTTPS scanning and turn off extensions to rule out interference.

    If those don’t work, try clearing the SSL state, disabling the QUIC protocol in chrome://flags, or resetting Chrome settings entirely via chrome://settings/reset.

    How do I clear my SSL?

    On Windows, press Windows + R, type inetcpl.cpl, go to the Content tab, and click “Clear SSL State.” 
    On Chrome, you can clear cached SSL data by going to Settings → Privacy and Security → Clear Browsing Data. 
    On Mac, you can manage SSL certificates through Keychain Access. 

    Clearing your SSL state removes outdated handshake data so fresh connections can be established hassle-free.

    What is an SSL/TLS handshake, and why does it fail?

    The SSL/TLS handshake is the process where your browser and a website’s server verify each other’s identity and agree on encryption settings before any data is exchanged. It typically takes milliseconds. 

    It fails when there’s a mismatch like incompatible protocol versions, an expired certificate, an incorrect system clock, or interference from security software breaking the negotiation process mid-way.

  • How to bookmark a webpage in any browser & on any device in 2026!

    How to bookmark a webpage in any browser & on any device in 2026!

    Ever fallen down a tab-hoarding rabbit hole only to realize you can’t find that one article you swore you’d read later? You’re not alone!

    With nearly 5.84 billion people browsing the web every day and Chrome alone accounting for about 69% of global web traffic in 2025, the internet is bigger and busier than ever.

    That’s why something as simple as bookmarking feels genuinely essential… until your bookmarks become a cluttered maze of forgotten links and duplicate entries. It’s frustrating, time-wasting, and honestly, a productivity killer.

    But what if bookmarking was quick, organized, and truly device-agnostic, no matter if you’re on a phone, laptop, or tablet?

    In this guide, we’ll start at the beginning: what it actually means to bookmark a URL, and why learning it matters in 2026.

    So, let’s get started!

    What does it mean to bookmark a link or URL?

    When you bookmark a link or URL, you’re basically telling your browser, “Hey, save this so I can get back to it later without hunting for it again.” 

    In tech terms, a “bookmark” is just the web address of a page that your browser stores in a list for quick access sometime down the road (kind of like putting a sticky note on a page you want to revisit).

    Bookmark a URL

    The main objective is simple: save time and avoid frustration.

    Instead of typing a long URL, searching through your history, or trying to remember where you saw something, you just click your saved bookmark and boom! You’re right back where you need to be.

    Bookmarks matter because they help you organize your online life. You can group related pages into folders, revisit favorite sites instantly, and even sync those bookmarks across devices so your saved links follow you everywhere, seamlessly.

    How to bookmark a webpage in Chrome (Desktop/Laptop)

    Bookmarking in Chrome is super simple and only takes a few clicks. Think of it as making a shortcut to your favorite pages so you don’t have to chase them later.

    1. Open Google Chrome: Launch Chrome on your computer. This works on both Windows and Mac.
    2. Go to the page you want to save: Navigate to the exact webpage you wish to bookmark.
    3. Click the star icon in the address bar: You’ll see a little star (⭐) on the right side of the URL bar. Click it!
    4. Confirm and save the bookmark: A small pop-up will appear. Here you can:
    • Rename the bookmark (helpful if the page title is long or confusing)
    • Choose a folder to save it (like Bookmarks Bar or another folder)

    When you’re done, click “Done.”

    🖥️ Quick tip: Instead of clicking the star, you can press Ctrl + D (Windows) or ⌘ + D (Mac) to open that same bookmark dialog instantly.

    Now your page is successfully saved! You can open it anytime from the Bookmarks Bar(if saved there), the Bookmarks menu, or the Bookmark Manager. Perfect for keeping your browsing organized.

    How to bookmark a webpage in Chrome (Android)

    Bookmarking a page in Chrome on your Android phone or tablet is quick and super handy, especially when you want to save something for later without having to scroll through your history.

    1. Open the Chrome app: Tap the Chrome icon on your Android device to launch the browser.
    2. Go to the page you want to save: Type or search for the site you want to bookmark, then wait for it to fully load.
    3. Tap the three-dots menu: Look for the three vertical dots (⋮) in the top-right corner of the screen and tap them to open the menu.
    4. Tap “Add to bookmarks”: From the menu list, choose Bookmarks (you might see a star ⭐ icon). Chrome will save the page to your bookmarks.

    That’s it! You’ll see a tiny confirmation that the page is saved. 

    Note: To find your bookmarks later, just open the three-dots menu again and tap “Bookmarks.” All your saved pages will be listed there.

    How to bookmark a URL on Chrome (iPhone)

    Saving a page in Chrome on your iPhone is quick and helpful, particularly when you want to come back to something later without searching for it again. 

    Here’s how:

    1. Open the Chrome app on your iPhone: Just tap the Chrome icon like you would with any app.
    2. Navigate to the webpage you want to bookmark: Type the web address or search for the page you want to save.
    3. Tap the three dots menu: Look for the three horizontal dots (⋯) in the bottom-right corner of the screen, then tap them. Then, click the “Share” button inside the gray address bar.
    4. Select “Add to Bookmarks”: In the menu that pops up, scroll down if needed, then tap Bookmarks. Chrome will automatically save the page to your bookmarks.

    You’re done! To visit it later, just open Chrome’s menu again and tap “Bookmarks.”

    💡 Pro tip: If you often save pages, try organizing them into folders once you’re in the Bookmarks view. It makes finding stuff later a lot easier.

    How to bookmark a webpage in Safari (Desktop/Laptop)

    Bookmarking in Safari on your Mac is quick and makes it way easier to return to your favorite sites anytime.

    Here’s how you do it:

    1. Open Safari: First, launch the Safari app on your Mac, whether it’s a MacBook, iMac, or any other macOS device.
    2. Go to the webpage you want to save: Type the address or search for the page you want to bookmark and wait for it to load completely.
    3. Click the “Share” button in the toolbar: Look for the “Share” icon (it’s usually a square with an arrow pointing up) at the top of the window and click it.
    4. Choose “Add Bookmark”: In the menu that opens, tap Add Bookmark. A small prompt will appear asking where you want to save it.
    5. Name and pick a location: You can change the name if you want, and select a folder like Favorites, or save it in a different bookmarks folder. When you’re satisfied, click Add.

    Now your page is successfully saved!

    How to bookmark a URL in Safari (iPhone)

    Bookmarking a webpage in Safari on your iPhone is one of those small but super useful tricks that saves you time, no typing or searching around later.

    Here’s how to do it step-by-step:

    1. Open the Safari app: Tap the Safari icon on your iPhone to open the browser.
    2. Go to the page you want to save: Type in the website’s address or search for the page you want to bookmark. Let it finish loading.
    3. Tap the “Share” button: At the bottom of the Safari screen, you’ll see a square with an arrow pointing up. That’s the Share button. Tap it!
    4. Select “Add Bookmark”: In the menu that pops up, scroll if needed, and then tap Add Bookmark.
    5. Edit and save: A screen will appear where you can rename the bookmark if you want and choose where it gets saved (like in your main Bookmarks or a folder). Once you’re happy, just tap Save in the top right corner of your iPhone screen.

    That’s it! Your page is now bookmarked. 

    Note: You can also press and hold the “open book” icon for saving a page as a bookmark. Plus, you can access your saved pages anytime by tapping this icon in Safari and selecting your preferred bookmark.

    How to bookmark a webpage in Microsoft Edge (Desktop/Laptop)

    Bookmarking a webpage in Microsoft Edge is really simple and feels a lot like saving a favorite in other browsers. In Edge, bookmarks are called “Favorites,” but they work just the same.

    1. Open Microsoft Edge: Launch Edge on your Windows PC or Mac. This works in the latest version of the browser.
    2. Go to the page you want to save: Type the website address or search for the page you want to bookmark, and let it load fully.
    3. Click the star icon in the address bar: Look for the small star on the right side of the address bar. That’s the button to add the current page to your favorites. Click it!
    4. Name your bookmark and pick a folder: A little pop-up will appear. You can:
    • Rename the bookmark: Useful if the page title is too long or not clear.
    • Choose where to save it: Like the “Favorites bar” or another folder you’ve made.

      5. Click “Done” to save it: Once you’re content with the name and location, hit “Done” and your bookmark will be saved.

      💡 Quick keyboard tip: You can also press Ctrl + D (Windows) or Cmd + D (Mac) to open the bookmark box fast (just like in other browsers).

      Now your favorite page is stored! You can access it anytime from the Favorites menu or from the Favorites bar if you saved it there.

      How to bookmark a webpage in Microsoft Edge (Android)

      Bookmarking a webpage in Edge on your Android phone lets you save links you want to revisit later (no typing or searching again).

      Here’s the guide to do it:

      1. Open the Edge app: Launch Microsoft Edge on your Android device.
      2. Go to the page you want to save: Type the web address or find the site you want to bookmark and let it load fully.
      3. Tap the three-dots menu: At the bottom (or sometimes top) of the screen, tap the three vertical dots (…) to open Edge’s menu.
      4. Tap “Add to Favorites”: Look for Add to Favorites in the menu and tap it. This saves the page as a bookmark. You might see a little message saying “Added to Favorites” once it’s done.

      That’s it! Your bookmarked page is now saved in Edge’s Favorites. 

      Note: To visit it later, open the three-dots menu again and tap “Favorites” to see all the links you’ve saved. Besides, Edge keeps your “Favorites” organized and even syncs them across devices if you sign in with your Microsoft account.

      How to bookmark a URL in Microsoft Edge (iPhone)

      Bookmarking a webpage in Microsoft Edge on your iPhone lets you save sites you want to revisit later without searching for them again. 

      It’s quick to add bookmarks in Edge. Take a look!

      1. Open the Edge app: Tap the Microsoft Edge icon on your iPhone to launch the browser.
      2. Go to the page you want to bookmark: Type the web address or search for the page you want to save, and let it load.
      3. Tap the menu button: At the bottom of the screen, tap the three horizontal dots (⋯). This opens Edge’s main menu.
      4. Tap “Add to Favorites”: In that menu, find and tap ⭐ Add to Favorites (this is Edge’s way of bookmarking the page). You should see a brief message confirming it’s been added.

      That’s it! Your page is now saved in the “Favorites” list.

      How to bookmark a webpage in Firefox (Desktop/Laptop)

      Bookmarking a page in Firefox on your computer is super simple, and it only takes a few seconds. Think of it like saving a shortcut to a site you like so you can open it again later without typing the address. 

      Here’s how you do it step-by-step:

      1. Open Firefox and go to the page you want to save: Just browse like you usually do and stop on the page you want to bookmark.
      2. Look for the star icon in the address bar: It’s right next to the web address at the top of the window.
      3. Click the star icon: When you click it, the star will turn blue. That means the page is now bookmarked! A little window will also pop up so you can edit details.
      4. Change the name (optional): In the pop-up, you’ll see the page’s name. You can edit it to something you’ll remember more easily.
      5. Choose where to save it (optional): You can save your bookmark in different places, such as the Bookmarks Toolbar or the Other Bookmarks folder. This makes it easier to find later.
      6. Click “Done”: Once you’re satisfied with the name and folder, click Done, and you’re finished. The bookmark will stay there until you delete it.

      Note: If you’re the kind of person who loves shortcuts, you can press Ctrl + D (on Windows/Linux) or Cmd + D (on Mac). That opens the bookmark dialog right away!

      How to bookmark a webpage in Firefox (Android)

      Bookmarking a webpage on your Android phone or tablet in Firefox is quick and easy. It’s a handy way to save a website you like so you can open it later, hassle-free. 

      Here’s how to do it, in a friendly and straightforward way:

      1. Open Firefox on your Android device: Just tap the Firefox app to launch it.
      2. Go to the page you want to bookmark: Navigate to any website you plan to save for later.
      3. Tap the menu button (three vertical dots): It’s usually in the top-right corner of the screen (⋮).
      4. Tap the ★ icon or “Bookmarks”: In the menu that pops up, look for the icon next to “Bookmarks” and tap it. That tells Firefox to save this page as a bookmark.

      Done! The page is now bookmarked. 

      Firefox will save the bookmark for you. You don’t need to do anything else unless you want to edit or organize it later.

      Note: After saving a bookmark, you can press and hold it in your bookmarks list, then choose “Add to Home Screen” to create a shortcut icon right on your Android device home screen.

      How to bookmark a URL in Firefox (iPhone)

      Saving a webpage you like in Firefox on your iPhone is quick and handy. Once you bookmark it, you can jump right back to that site anytime without typing the address again.

      Here’s a simple walkthrough to help you do it easily:

      1. Open Firefox on your iPhone: Just tap the Firefox app to launch it.
      2. Go to the webpage you want to save: Use the address bar to navigate to the site you wish to bookmark.
      3. Tap the menu button (three horizontal dots): You’ll find this near the bottom or top right of the screen, depending on your app version.
      4. Tap the ⭐ star icon: In the menu that opens, tap Bookmark This Page”. Firefox will save that page as a bookmark right away.

      That’s it! You’ll see the star filled in or highlighted. That’s Firefox’s way of saying the bookmark is active.

      How to bookmark a webpage in Internet Explorer (Desktop/Laptop)

      Even though Internet Explorer (IE) is an older browser that is no longer supported, many people still use it on older Windows computers.

      In IE, bookmarks are called “Favorites”. Saving a favorite means you can open a website again later anytime, super handy! 

      Here’s how to do it:

      1. Open Internet Explorer on your computer: Find it from your start menu or taskbar and click to launch the browser.
      2. Go to the webpage you want to bookmark: Type the web address in the address bar and wait for the page to load.
      3. Click the ⭐ icon at the top-right corner: This opens your “Favorites” panel (that’s the list of all the pages you’ve saved before).
      4. Click “Add to Favorites”: In the little menu that pops up, you’ll see an option that says Add to Favorites. Click that!
      5. Give your bookmark a name (optional): IE will fill in the page’s name for you, but you can change it to something easier to remember.
      6. Pick where to save it (optional): You can save the favorite in the main Favorites list or put it in a folder if you’ve made some already.
      7. Click “Add” to finish: Once you click Add, IE saves the page as a favorite.

      You’re done!

      How to bookmark a webpage in Opera (Desktop/Laptop)

      Bookmarking a page in Opera on your desktop or laptop is straightforward and useful. In Opera these are simply called “Bookmarks,” and you can add them in just a couple of clicks. 

      Here’s a friendly, step-by-step guide to get it done:

      1. Open the Opera browser on your computer: Launch Opera from your desktop or start menu like you normally do.
      2. Go to the page you want to save: Type the site’s address into the address bar and wait for the page to load.
      3. Click the ❤️ heart icon in the address bar: Look over to the right side of the combined address and search bar. You’ll see a little heart icon. Click it to bookmark the page.
      4. Choose a name and folder (optional): A small box will pop up asking what you want to name the bookmark and where you want to save it. You can keep the default name or type your own. You can also pick a folder (like the Bookmarks Bar or Speed Dial).
      5. Click “Done” or “Save”: Once you’re happy with the name and location, click Done. Your bookmark is saved!

      Note: You can open your bookmarks anytime from the heart icon on the sidebar, or by hitting Ctrl + Shift + B on your keyboard to open the full “Bookmark Manager”. This lets you edit, delete, or organize your saved pages.

      How to bookmark a webpage on an Android device

      Bookmarking a webpage on your Android phone or tablet is super easy. It works in most browsers (like Chrome or Firefox), and the steps are pretty similar.

      1. Open the browser app on your Android device: Just tap the browser icon, as you usually do, to browse the web.
      2. Go to the page you want to bookmark: Type the address in the bar and load the site you want to save.
      3. Tap the three-dot menu (⋮): You’ll see this in the top-right corner of the screen (in most cases).
      4. Tap “Add to bookmarks” (or the ⭐ star): In the menu that opens, look for Add to bookmarks or the star icon and tap it. The browser will save that page to your bookmarks.

      Your page is bookmarked successfully! It is automatically added to your “Mobile bookmarks” folder, so you can open it anytime from there.

      Note: Whether you’re saving news, recipes, or anything else online, bookmarks make it much easier to get back to the good stuff without hunting for the link again.

      How to bookmark a webpage on iPhone

      The most common way to bookmark a URL on your iPhone is in Safari, Apple’s default browser, and it works in just a few taps. 

      Here’s a step-by-step guide to walk you through it:

      1. Open Safari on your iPhone: Just tap the Safari app icon on your home screen.
      2. Go to the webpage you want to bookmark: Type the site’s address in the address bar and wait for the page to load.
      3. Tap the “Share” icon: You’ll see this at the bottom of the screen. It looks like a square with an arrow pointing up.
      4. Tap “Add Bookmark” in the menu: If you don’t see it right away, scroll through the options, then tap Add Bookmark.
      5. Edit the name and location (optional): Safari will suggest a name and place to save it. You can keep the default ones or change them to something you’ll remember better.
      6. Tap “Save”: Finally, tap the text labeled “Save”.

      That’s it! Safari has now saved your bookmark.

      How to bookmark a webpage on a MacBook

      Bookmarking a webpage on your MacBook is one of the easiest ways to save sites you often visit so you can open them again with just one click. 

      No matter if you’re using Safari (the built-in Mac browser) or another browser like Chrome or Firefox, the process is quick and friendly. 

      Bookmarking in Safari (Mac’s default browser):

      1. Open Safari on your MacBook: Just click the Safari icon in your Dock or Launchpad.
      2. Go to the webpage you want to save: Type the address in the address bar and wait for it to load.
      3. Click the “Share” button in the toolbar: It looks like a square with an arrow pointing up, usually right next to the address bar.
      4. Choose “Add Bookmark” from the menu: This tells Safari you want to save the current page.
      5. Pick a name and location (optional): You’ll see a small box where you can rename the bookmark and pick where to save it, like in Favorites or another folder.
      6. Click “Add” to save it: Do this, and the page will now be bookmarked and easy to open anytime from your bookmarks list.

      💡 Shortcut tip: If you prefer keyboards, press Command (⌘) + D while you’re on the page. Safari opens the same bookmark box so that you can save it even faster.

      Bookmarking in other browsers on MacBook:

      If you use Chrome or Firefox instead of Safari, bookmarking works very similarly:

      In Google Chrome:

      1. Go to the page.
      2. Click the ⭐ star icon in the address bar.
      3. Choose a name and folder, then click Done.

      Shortcut: Command + D opens the same bookmark box fast.

      In Mozilla Firefox:

      1. Visit the page you want to save.
      2. Click the ⭐ star icon in the address bar.
      3. The star turns solid (blue), the page is bookmarked!
      4. Click it again to rename or move it to a specific folder.

      Shortcut: Command + D works here too!

      How to bookmark a webpage on iPad

      Bookmarking a webpage on your iPad is really simple and only takes a couple of seconds. This guide walks you through the steps in an easy-to-follow way.

      Here’s how to do it:

      1. Open Safari on your iPad: Just tap the Safari app icon to launch it.
      2. Go to the page you want to bookmark: Type the website address in the address bar and wait for it to load.
      3. Tap the “Share” button: This is the square icon with an arrow pointing up, and is usually near the top (or bottom) of the screen.
      4. Tap “Add Bookmark”: In the menu that pops up, scroll (if needed) and tap “Add Bookmark”.
      5. Edit name and location (optional): You’ll see a small window where you can change the bookmark’s name or choose a folder (like Favorites or Bookmarks) if you want it in a specific place.
      6. Tap “Save”: Once you’re satisfied, tap Save.

      Your iPad now stores that webpage as a bookmark!

      Read also: How to block a URL in Chrome: 8 effective & proven methods [tried & tested]

      Summing up

      Wrapping things up, bookmarking a webpage is one of those small habits that can save you a lot of time every day. 

      Whether you’re using Chrome, Safari, Firefox, Edge, Opera, or even an older browser like Internet Explorer, the idea stays the same: save a link once and come back to it anytime without the hassle

      We’ve walked through how bookmarking works across desktops/laptops, Android phones, iPhones, iPads, and MacBooks, so no matter what device you’re on, you’re covered. 

      Once you get used to it, bookmarking becomes second nature and makes browsing way smoother.

      And, before you go, if you regularly share or manage links, give Replug.io a try today! 

      It’s a trustworthy custom URL shortener and an all-in-one link management platform that helps you create branded short links in seconds and keep all your links organized in one place. Definitely worth checking out!

      Replug Branded Short Links CTA
      Maximize marketing ROI
      by transforming ordinary URLs into
      branded short links that convert.
      Try Replug for free

      Frequently asked questions

      How do I bookmark links?

      To bookmark a link, open it in your browser first. Then click the star icon in the address bar (or use a shortcut like Ctrl + D on Windows or ⌘ + D on Mac) and choose where to save it. This saves the page URL so you can open it later without having to search again.

      How do I bookmark a URL that redirects?

      Even if a URL redirects (i.e., takes you to another address), you bookmark whatever page you actually see after the redirect finishes loading. Just wait for the final page to open, then bookmark it like normal (with the star or shortcut). Redirects don’t stop the bookmark from being saved.

      How to show bookmarks bar in Chrome on top?

      To show the bookmarks bar in Chrome:

      1. Open Chrome.
      2. Click the three dots menu in the top-right corner.
      3. Go to Bookmarks → Show bookmarks bar.

      You’ll now see your bookmarks just under the address bar. You can also press Ctrl + Shift + B (Windows) or ⌘ + Shift + B (Mac) to toggle it quickly.

      How to bookmark a link found on a webpage using only one click?

      Most browsers require that you open the link first before bookmarking it (so they save the correct page). However, on a desktop, you can drag the link itself up to the bookmarks bar. That effectively adds it as a bookmark with a single gesture (no need to fully open the page first).

      Is there a way to bookmark a link/webpage without the need to open it?

      In most modern browsers (Chrome, Edge, Safari), you can’t bookmark a link without opening it at least in some form. You typically have to open the page first, so the browser knows what to save. 

      Some extensions or bookmarklets can help streamline saving URLs from a list, but the built-in browser tools generally require the page to load first.

      How do I add bookmarks to my Google homepage?

      You can’t natively add bookmarks directly to the google.com homepage itself in Chrome or other browsers. That page is basically just a search page and doesn’t include bookmark slots by default. 

      If you want quick access to bookmarks from your new tabs or “homepage,”:

      – You can use the built-in Chrome Bookmarks Bar (just show it and put your essential links there), or 
      – Install a new tab/ bookmark extension that replaces the default new tab with your bookmarks on a custom homepage.

      How do I turn a link into a bookmark?

      To turn any link into a bookmark, first open it in your browser. Then click the star icon (⭐) in the address bar (or use Ctrl + D on Windows / ⌘ + D on Mac). 

      You can rename it and choose where to save it. That link is now saved as a bookmark you can open later without searching for it again.

      How to add a URL to a bookmark?

      Adding a URL to your bookmarks is the same as bookmarking a page:

      1. Go to the page you want to save.
      2. Click the star (⭐) icon in the address bar.
      3. In the pop-up, change the name or folder if you wish to, then hit Done.

      That’s all! The exact webpage URL is now saved in your bookmarks.

      How to make a new bookmark with a URL?

      If you already have a URL and want to bookmark it:

      1. Paste the URL into your browser’s address bar and press “Enter” to load the page.
      2. Click the star icon present at the right of the address bar.
      3. Rename and pick a folder if needed, then click Done.

      Now you’ve successfully created a new bookmark for that URL.

      How to edit or delete a saved bookmark?


      – To edit a bookmark (change its name, URL, or folder): Open your bookmarks (via the star icon menu or Bookmarks Manager), then right-click the bookmark, choose “Edit”, make changes, and save.
      – To delete a bookmark: Right-click it and select “Delete” or click the trash can icon in the edit menu.

      On mobile Chrome, tap the three dots next to a bookmark, then pick Edit or Delete.

      How to find and sort your bookmarked webpages?

      On most browsers, you can open the Bookmark Manager to see all your saved pages in one place. From there, you can search, sort by name, drag to rearrange, or open folders to find what you need. 

      You can also use the bookmarks or sidebar view to scroll through them visually and click whichever one you want.

      How to create a new bookmark folder easily?

      In desktop browsers like Chrome or Edge, open your bookmarks menu or manager, then choose “Add new folder” or “New folder.” Give it a name and click save. Now you can drop bookmarks into it. 

      In Safari on iPhone, open “Bookmarks”, tap the options, choose “New Folder”, name it, and save.

      What to do if I want to move my saved bookmarks?

      Just open your bookmarks or favorites view, then drag and drop the bookmark into another folder (on the desktop). In Safari, touch and hold a bookmark, tap Edit, choose Location, pick the folder, then save.

      How can I view and organize my bookmarks in Safari?


      – On Safari for Mac, open the Bookmarks menu or sidebar to see all bookmarks and folders. You can drag to rearrange, right-click to rename, or use Edit Bookmarks to move them around. 
      – On Safari for iPhone, tap the book icon to open bookmarks, where you can scroll through, edit, delete, or move them to folders.

      How to see your Mac bookmarks on iPhone?

      Make sure you’re signed in with the same Apple ID on both devices, then turn on Safari in iCloud settings (Settings → your name → iCloud → Safari). Your bookmarks from your Mac will automatically sync to your iPhone’s Safari app.

    • A complete guide to building a brand marketing strategy

      A complete guide to building a brand marketing strategy

      Brand marketing and online branding have become critical elements for conquering the digital landscape.

      Designing a strategic marketing road map has become necessary to understand the fundamental idea of branding.

      Multiple brands have successfully demonstrated effective brand building and brand marketing strategies.

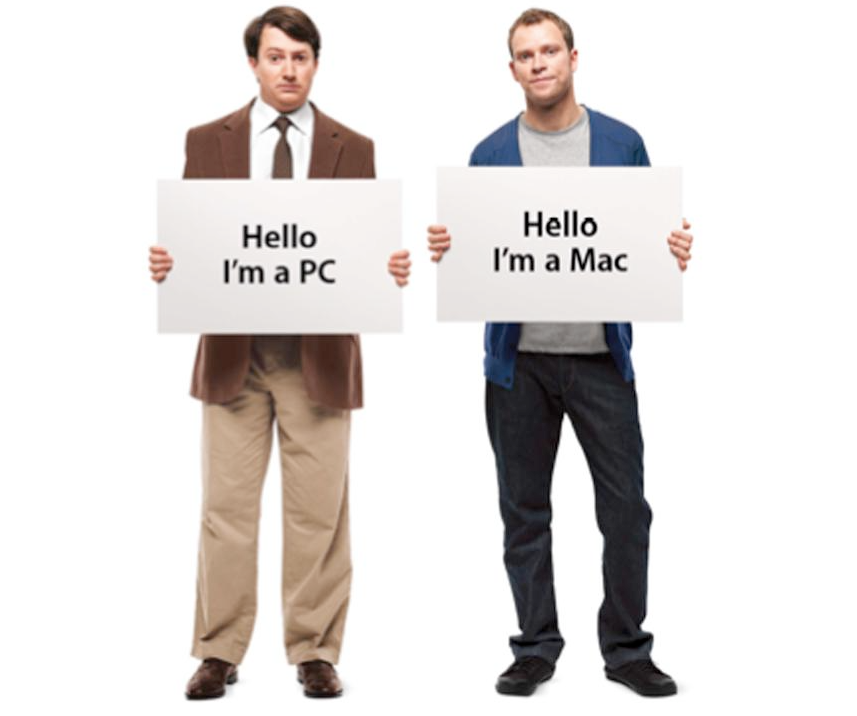
      apple-branding

      Apple stands out with its sleek design, innovative products, and consistent messaging that evokes sophistication and forward-thinking.

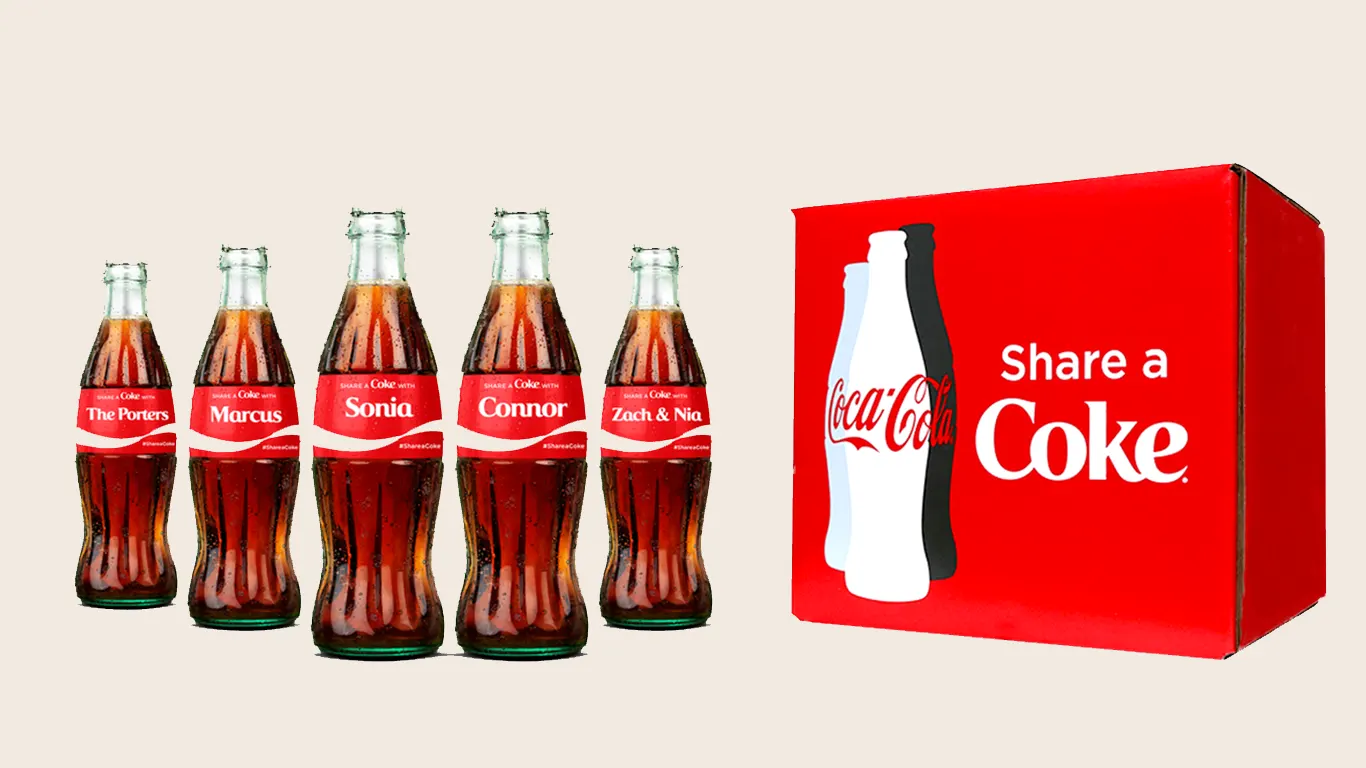
      Coke_branding

      Coca-Cola’s timeless branding focuses on fostering emotional connections and spreading happiness through their refreshing beverages.

      One excellent tool to help execute and manage branding efforts is Replug, which allows marketers to create and distribute branded links across multiple channels.

      Let’s elaborate on the basic concepts and then we’ll move forward to the details.

      What is a brand?

       Brand Marketing Concept

      A brand is a business or company that sells a product or service and has positioned itself into a well-reputed business in the niche or market segment.

      Plus, the brand identity and positioning in the users’ minds play a vital role in the establishment of any brand.

      Brand Attributes

      Brand attributes are the traits that reassure the brand values by implementing the core values of the brand.

      Here are the most common brand attributes that shape brands’ perceptions:

      • Relevancy: Brand relevancy means how relevant a brand’s approach is toward prospective customers. The target audience is key to getting noticed by the market segment.
      • Consistency: Stick with your publishing or marketing regime, especially if it’s working out for you because consistency takes you ahead of your competition.
      • Credibility: Credibility revolves around how a brand is perceived by people. Brands put a lot of effort into building brand reputation because being in the audience’s good books is essential for repeat clients.
      • Positioning: Brand positioning is an attribute that showcases how a brand shapes its image in the customers’ and prospects’ minds.

      Types of Brand Attributes

      Brand attributes can be divided into two types:

      i. Hard brand attributes: These are the properties involving visual appearance and tangible qualities. It includes logos, brand names, slogans, sign boards, mascots, etc.

      ii. Soft brand attributes: These are the characteristic values of a brand in the customers’ minds. It includes uniqueness, trustworthiness, innovation, convenience, etc.

      What is branding and why is it important?

      What is branding?

      Branding is a marketing buzzword widely used in the sales, marketing, and public relations departments.

      Branding is a strategy to build a company’s identity and carve out an image in the end-users’ minds.

      The purpose of branding is to create awareness and spread the word about the brand.

      For instance, Nike is an American brand known for manufacturing athletic shoes, apparel, and sports equipment. Plus, they sponsor sports celebs and sporting events across the globe.

      The reason we all recognize the “Nike” logo is that they have spent billions of dollars over the years on building their brand’s identity.

      Branding encapsulates everything from creating the identity of a brand to shaping the perception through several tactics, such as:

      • Choosing a brand name
      • Creating a logo
      • Making the branded stationery
      • Designing the official merchandise
      • Putting up the sign boards
      • Printing the pamphlets

      Benefits of branding

      Here are some key benefits of branding to remember:

      • Builds trustworthiness: Branding is crucial to building trust between a brand and the consumer base. A brand’s logo, name, slogan, and colors help develop recognition among the masses.
      • Establishes brand positioning: Brand positioning is the image of a brand in the customers’ minds. Often brands’ are known for their high-quality products or low prices and such perks help shape their position in the end-users’ minds.
      • Infuses brand loyalty: Branding sparks brand association that pulls the loyal customers and fan base toward their favorite brands. Brands understand the psychology of brand loyalty so they use branding to leverage that brand association in their marketing campaigns.
      • Helps customer acquisition: Branding works as a channel to communicate, attract, and engage both existing and potential customers. Companies use all sorts of channels to promote their branding, for instance, giveaways, charity events, sponsorship, etc.
      • Inspires purchase decisions: Since branding is all about creating awareness about a brand with direct and indirect brand promotion, it excites potential buyers and loyal fans to make a decision who are on the fence.

      What is brand marketing?

      Brand marketing is a process of establishing a connection between a brand and its users.

      Brand marketing focuses on highlighting the effectiveness of a brand and how the entirety of the brand is important to the customers’ survival in the market.

      Brand marketing doesn’t emphasize selling the product or service directly. Instead, it paves the way for building and growing a strong relationship with the end users.

      Most brands opt for the traditional route and use digital marketing mediums like ads, email, and social media for product marketing. As a result, their goal gets tied with the transactional part of the communication.

      pepsi branded link

      Pepsi’s brand marketing strategy revolves around capturing the spirit of youth and pop culture. Pepsi’s online brand marketing efforts are a testament to their ability to connect with consumers in the digital sphere.

      Pepsi employs branded URLs strategy to reinforce brand recognition and simplify online experiences. For this, they use a reliable URL shortener, which helps convert long campaign links into clean, memorable, and trackable branded links.

      By using customized short links featuring their brand name, Pepsi ensures consistent branding across digital channels.

      What’s the difference between branding and marketing, and which comes first?

      The main difference between branding and marketing is that branding brings recognition, identity, and positioning. Whereas, marketing gets brand attention, eyeballs, and engagement.

      The branding vs. marketing debate isn’t worth it because both are essential from publicity and sales standpoints.

      However, if you’re wondering which one comes first, it’s pretty clear that branding comes first.

      For instance, if you launch an SEO agency, you’d start with a brand name, logo, domain, and website instead of hopping on Facebook to run Facebook ads.

      What are the types of brand marketing?

      There are several types of brand marketing, the below-mentioned three are the popular types of brand marketing:

      i. Corporate brand marketing: It revolves around companies’ strategies to develop their reputation and build a connection with the audience through different means. These corporations often communicate their brand values through a mission statement, promotional offers, and press releases.

      ii. Personal brand marketing: Personal brands are individuals who have managed to hone in on certain areas and dominate a small segment of the market. Social media influencers cash in on their personal brands. They use content distribution by leveraging social media platforms and amassing an audience which wants to listen to them.

      iii. Product brand marketing: Product brand marketing is a process of branding a specific product by pouring all energies into it. In product brand marketing, brands often pick their best-performing product and try to put it on a pedestal to win the attention of the end users.

      4 things to keep in mind when developing a brand marketing strategy

      A branding marketing strategy doesn’t build on a whim – it always takes some time to put together a strong brand marketing plan.

      Here are a few key elements to consider when developing a brand marketing strategy:

      1. Brand marketing is a long-term strategy. Don’t rush it. Otherwise, you might end up frustrated within a few weeks. It’s about building a brand’s identity based on the available resources, relationships, and communications.
      2. It takes time to reap the fruit. It’s not a short-term marketing strategy like an ads campaign that shows results at the end of the week, month or quarter.
      3. It is ongoing and can take many forms. It doesn’t only revolve around choosing a brand name, opting for a nice logo, and designing the brand’s stationery. In fact, brand marketing encompasses everything you do to establish your brand’s identity through collaborations, partnerships, sponsorship, giveaways, etc.
      4. The overarching goal of brand marketing is to grow the business, whether it’s done through building relationships with new prospects, attending seminars or industry meetups, or launching a content marketing plan to attract, engage, and convert the audience.
      5. An effective brand marketing strategy involves understanding different market attributes, including brand positioning, which is a critical aspect that helps shape how a brand is recognized. In Cincinnati, diverse techniques are blended to leverage brand presence and reach an amplified audience base. This modern approach includes collaboration with a leading Cincinnati marketing agency that inspires local and international brands by marrying traditional concepts with contemporary technology and creative executions.

      How to build a strong brand marketing strategy?

      Brands with strong business positioning in their industry often are the ones that build a branding strategy and follow it. Remember, it’s not a get-rich-quick scheme; branding is a real deal.

      Here are 9 tips that can help you can build a strong brand marketing strategy:

      1. Identify your brand marketing goals and vision

      The first and foremost thing to do when building a strong brand marketing strategy is to identify the brand’s marketing goals. Every brand sets eyes on certain targets to achieve.

      In order to build a powerful brand marketing strategy, start by envisioning the future. It doesn’t matter whether it’s gaining a significant market share or entering into a monopolistic market. Collaborating with a specialized marketing agency can provide valuable insights and expertise in reaching your branding goals.

      Once the brand marketing goals have been set, it gets easier for the team to execute marketing and branding plans.

      2. Develop your brand identity

      The brand identity means what this brand stands for or is known for. These brands try to develop their brand identity to attract potential customers and social media audiences.

      Interesting read: 8 Best Retargeting Platforms To Retarget Your Potential Audience

      3. Raise brand awareness

      Brand Awareness - replug

      When brands educate the audience about their belief system, they basically share what they believe in to spread brand awareness. Many organizations use digital sign software to display these messages consistently across offices, stores, and public spaces. Almost every brand tries to position itself as culturally diverse, with no tolerance for racism, and gender equality.

      4. Build brand loyalty

      To create a strong brand marketing structure, it’s vital to have brand loyalty on the customers’ part. Brands pay close attention to the ideas that help them earn brand loyalty from customers.

      Once these things sort out, building a brand identity seems like a piece of cake.

      5. Research target market

      Understanding the target market and the challenges that might arise is crucial to establishing a solid brand marketing strategy.

      Researching the target market means analyzing the market segment you’re about to enter to help bring clarity to the process.

      Brands often turn a blind eye to the competition, which is a big mistake. There may have been a couple of reasons: the first is that they overrate themselves right at the beginning of the journey and the second is that they think competitors won’t notice them, so they don’t consider their competitors a threat just yet. Understanding your target market also helps shape your content, SEO, and advertising strategies to match customer expectations. For businesses looking to scale without building an in-house team, partnering with the best white label SEO service can streamline audience targeting and ensure consistent, high-quality search visibility.

      There are two factors to consider when considering research on the target market for building a brand marketing plan:

      • Narrow in on the target audience: Zooming in on the right segment of the audience would take you closer to the target audience. This is exactly what every brand dreams of when entering the market.
      • Know your competition: Every brand that excels on social media or in SEO is always aware of its competition. They closely follow their content strategy, social media content distribution, SEO tactics, and more. To make this process more efficient, many teams automate data collection using proxy scraper tools, which help track competitor site activity and gather structured insights at scale.

      The target market research would take you ahead of many competitors who don’t care much about understanding the competition or haven’t had a chance to learn more on this topic.

      6. Determine your brand marketing tactics

      One of the important steps when building a brand marketing strategy is to determine what route to take to get to the destination. The decisions such as color schemes, blog content style, social media content strategies, and other strategies fall into this category.

      Clarifying the brand marketing tactics would provide the team with a roadmap to follow and help develop a system to save time in the future. Using Gantt chart software can make planning and visualizing these tactics easier, ensuring tasks are organized and deadlines are met.

      However, there are always some inside secrets that only team members know and these secrets aren’t supposed to get out. The reason is that competitors spy on you the way you keep an eye on them.

      The keys to remember when determining the brand marketing tactics are:

      • Develop brand marketing collateral: Branding marketing requires a set of tools and resources. Developing an arsenal whether it’s a PDF outline or a list of online tool subscriptions – this would come in handy for the team.
      • Outline a messaging strategy: The message-driven content always does better than vague and pointless content. Make sure that the content is sending out a clear, concise message to the chosen audience.
      • Define messaging and positioning: It’s necessary to communicate to see that everyone is on the same page. The team must be crystal clear about the brand position. Don’t shy away from explaining the brand message to the team to ensure that every individual team member knows about it.

      7. Rollout a timeline

      Rolling out a timeline means allocating a time window to a specific project or campaign. Brands always set a timeline whether they’re hiring a new freelancer or opting for a new URL shortener.

      It’s best to set a timeline for a campaign to analyze its performance and effectiveness at the end. Brands usually choose monthly, quarterly, biannual, and annual timelines for their campaigns.

      When you’re building a brand marketing strategy, don’t hesitate to choose a time frame for the strategy. The reason why it matters is that it helps brands measure the performance of the campaign afterward.

      8. Create a consistent brand image

      One of the goals of establishing a strong brand marketing strategy is to come up with a consistent brand image. A brand image means building a positive brand reputation among customers.

      brand reputation risks

      Burger King UK faced backlash for tweeting ‘Women belong in the kitchen’ on International Women’s Day. The tweet was criticized for its insensitive and derogatory language, which undermined the significance of the day and perpetuated harmful stereotypes about women. Many people expressed their disappointment and called out the fast-food chain for the inappropriate message. Burger King later issued an apology and acknowledged the need to deliver a more respectful and inclusive message.

      This example shows why it is crucial for companies to recognize the importance of fostering an inclusive and supportive environment both online and offline. Small gestures, like providing personalized office items such as custom paperweights, can also contribute to creating a more welcoming and cohesive workspace.

      brand user experience

      The brand position or image doesn’t establish overnight; it takes forever to establish a brand in the eyes of the audience. It requires continuous effort and a dedicated plan to pull this off.

      Brands that successfully establish their reputation and goodwill try to continue that momentum and live up to the customers’ expectations. No wonder they build this brand position and image over the course of several years.

      Therefore, it’s vital to make efforts to create a consistent brand image through actions, offerings, customer support, high-quality products/services, and pricing to build and maintain a strong brand reputation.

      9. Measure the success of your brand

      social media meme

      No one wants their successful strategies to go unnoticed because otherwise they wouldn’t realize what worked for them and might as well try something new.

      Therefore, the success measurement of the brand marketing campaign is crucial to the whole process.

      In order to get disciplined about measuring the success of the branding strategies, keep the following tactics in mind:

      • Create brand guidelines: Don’t sleep on setting the ground rules for everyone to follow. It could be anything from choosing the best time to post on TikTok to using a specific font for social media image copies.
      • Make sure your product delivers on your promise: The product or service has to be top-notch to fulfill the promise. Otherwise, your marketing tactics would fall flat.

      The question you might ask is how someone could measure the success of their brand marketing strategy.

      Well, there are several indicators that might give you an idea of how well or badly your brand marketing campaign has performed over the course of the campaign, such as:

      • The number of email inquiries received
      • The number of social media followers increased
      • The percentage of social media engagement increased
      • The percentage of website bounce rate decreased
      • The change in the digital marketing ROI

      These indicators may vary from brand to brand. I won’t be surprised if some brand would go further down the rabbit hole and analyze numerous other factors to measure the success of their branding campaign.

      Interesting read: 15 proven Facebook SEO techniques to try in 2026

      How to use social media to market your brand successfully?

      social media meme

      Social media has become an important part of the marketing arsenal. No individual or brand could think of marketing a brand without using social media.

      The reason why social media is inevitable in marketing is because it has the attention of the masses. Now social media platforms have over 1 billion monthly active users.

      So, you might wonder how you can use social media to market your brand without breaking the bank. Well, I have a handful of tips that would help you cash in on the social media real estate:

      • Create a community of like-minded people: Don’t shy away from starting something from scratch. Build a community of true fans or like-minded people using a Facebook group discord channel or any other similar tool.
      • Put out compelling, helpful content: Publishing high-quality, effective, and useful content is your ticket to engagement, attention, and eyeballs. Social media ads won’t cut it for most people, so use content marketing as a great alternative to advertising.
      • Build a strong relationship with the audience: Building a healthy, strong relationship with your audience means you care what they want to know or learn. Provide them with efficient customer support and help them out by going out of the way – it will make a difference in the long term.
      • Show up consistently on social media platforms: One of the best strategies to market a brand on social media is to consistently show up on social media platforms. You could always use a social media scheduling tool like ContentStudio to schedule your posts for the future.
      • Use promotional strategies to spice things up: Most brands only focus on once-a-year discounts. However, if you’re a B2C company, then use giveaways, discounts, and promotional offers throughout the year to strengthen the relationship with the audience. Don’t shy away from giving away free brand merch or arranging meet-ups with customers or fans.

      Frequently asked questions

      Let’s answer some of the burning questions about brand marketing:

      What is the marketing of a brand?

      Marketing a brand means putting the brand in front of the prospective audience and establishing an image of the brand.

      What are the four branding strategies?

      Here are four of the essential branding strategies to follow”

      1) Start with finding your brand’s mission.
      2) Identify the target market to enter.
      3) Build your brand’s image.
      4) Measure the outcome of the branding campaign.

      What are the benefits of using a marketing strategy for a brand?

      – Provides clear direction
      – Targets the audience
      – Increases brand awareness
      – Establishes brand recognition
      – Defines a unique brand identity
      – Engages and fosters customer loyalty
      – Maximizes ROI
      – Drives business growth

      Which is better: marketing or advertising for brands?

      There is no right or wrong answer for this one. It depends on the industry, company’s type, growth hacks being followed, and tactics that have worked – most brands tend to use both and put more energy into whatever works for them.

      When is brand marketing most successful?

      Brand marketing is most successful when it effectively communicates a compelling brand story, resonates with the target audience, and drives positive brand perception, loyalty, and engagement.

      What should be included in a good marketing plan for my brand?

      The common tactics for establishing a solid marketing plan must include clarity of the brand’s offering, effective communication, and a powerful analytical mechanism to measure the outcome.

      You may also like:

      Unique URLs: What they are and how to use them?

      Top 29 personal branding tools to upscale your marketing efforts

    • How to save a URL to desktop: Step-by-step guide to make a desktop shortcut for a website

      How to save a URL to desktop: Step-by-step guide to make a desktop shortcut for a website

      We’ve all been there; juggling a dozen tabs just to visit the same website over and over. 

      With more than 5.4 billion people browsing the web daily, and desktop users often sinking deeper into content than mobile visitors, quick access matters more than ever.

      Constantly typing or searching for your go-to websites or URLs eats up precious time.

      In a world where half of users abandon slow or hard-to-find content in under three seconds, wasting clicks on simple tasks can feel downright frustrating.

      That’s exactly why knowing how to save a link to desktop or how to save a webpage to desktop can be a game-changer. One click and you’re there!

      Ready to cut the clutter and boost your efficiency?

      Let’s step into the practical ways to make a desktop shortcut for a website!

      How to make a desktop shortcut for a website: Quick & effective methods mentioned!

      Wondering “how to save a URL link to desktop”? Creating a desktop shortcut for a website is simple and only takes a minute or two.

      You can either drag and drop the site’s address from your browser straight onto the desktop, or manually create a shortcut using Windows’ “New Shortcut” feature. 

      Both methods work great and don’t require any special tools or software!

      Method #01: Drag & drop (easiest way)

      This is the quickest and most straightforward method. It’s perfect if you want a shortcut without extra steps.

      1. Open your web browser (like Chrome, Edge, or Firefox) and go to the website you want a shortcut for.

      2. Resize the browser window so you can see both the browser and your desktop at the same time.

      3. Look on the left side of the address bar. You’ll see a small icon (often a padlock 🔒 or a globe 🌐).

      4. Click and hold that icon, then drag it onto your desktop.

      5. Release the mouse button, and boom! 

      A shortcut to the website now sits on your desktop.

      Note: Just double-click that icon anytime you want to open the site!

      Method #02: Right-click & create shortcut

      If you prefer a more traditional way, or your browser doesn’t let you drag the icon (at times), this manual method works everywhere on Windows.

      1. First, copy the website’s URL from the address bar at the top of your browser.

      2. Then, go to your desktop and right-click on any empty space.

      3. From the menu that appears, click New and then Shortcut.

      4. In the box that pops up, paste the URL you copied, then click Next.

      5. Type a name for your shortcut (like “My Favorite Site”), and click Finish.

      Done! You’ll now see a shortcut icon with the name you chose, and double-clicking it opens the website right away.

      Note: If you want, you can also rename the shortcut later or even change its icon by right-clicking it and selecting Rename or Properties.

      How to create a desktop shortcut to a website in Chrome

      When you make a desktop shortcut for a website in Chrome, you’ll get an icon on your desktop that opens that site directly in Chrome. No need to open the browser and type the address or a messy, long URL first. 

      Let’s walk through “How to save a URL to desktop using Chrome” in easy steps!

      1. Open Google Chrome on your computer: Start Chrome like you usually do. Make sure it’s up-to-date so all the settings are where they should be.

      Open Google Chrome on your computer

      2. Go to the website you want to make a shortcut for: Just type the URL in the address bar and hit Enter so the site loads fully.

      URL address bar

      3. Click the three dots menu (⋮) in the top-right corner: That’s Chrome’s main menu button. You’ll find it on the right side of the toolbar.

      Three dots menu Google Chrome

      4. Choose “Cast, save and share,” then click “Create shortcut…”: In some Chrome versions, the “Create shortcut…” option might be right under “More tools,” or inside a submenu called “Save and share.” Either way, just look for Create shortcut… and click it.

      Create shortcut option Google Chrome

      5. Name the shortcut: A small box will pop up. You’ll see a field where you can enter a name for your shortcut (something like the site’s name so you recognize it easily).

      Name the shortcut Google Chrome

      6. Click “Create”: Once you’ve named it, press Create, and Chrome will put the shortcut on your desktop.

      Create shortcut Google Chrome

      That’s it! 🎉

      You will now see a new icon on your desktop that opens the website you chose whenever you double-click it. This shortcut will open the page straight in Chrome, even if Chrome isn’t your default browser.

      Replug website shortcut desktop

      Note: If you ever want to remove the shortcut, just right-click it and select Delete. Super easy!

      Read also: How to block a URL in Chrome: 8 effective & proven methods [tried & tested]

      How to make a website shortcut on desktop using Microsoft Edge

      If there’s a site you visit a lot, you don’t have to open Edge and type the address every time. You can put a shortcut for it right on your desktop so it opens with just a single double-click.

      Below are the easiest ways to do it:

      Drag & drop from the address bar (quickest way)

      This is the simplest method if you wish to save a website shortcut to your desktop using Edge.

      1. Open Microsoft Edge and go to the website you want.

      Microsoft Edge Replug website

      2. Resize the Edge window so you can see your desktop behind it.

      Resize the Edge window

      3. Look at the left side of the address bar. There, you’ll see a small icon (like a padlock or globe).

      Padlock icon Microsoft Edge

      4. Click and hold that icon, then drag it onto your desktop and release.

      Click and hold padlock icon and drag it to desktop

      5. A shortcut will appear on your desktop that opens the site.

      Desktop shortcut Replug

      That’s it!

      Use Edge’s “Install as App” option (nice & clean)

      This method makes the shortcut feel a bit more like an app, and opens the site in a neat window without all the browser extra fuss.

      1. Open Edge and go to your chosen website.

      Replug.io Microsoft Edge

      2. Click the three dots (…) in the top right corner of Edge.

      Three dots menu Microsoft Edge

      3. Hover over More toolsApps and then click “Install this site as an app”.

      Install this site as an app option in Microsoft Edge

      4. Type a name for the site and click Install.

      Install this site as an app pop-up Microsoft Edge

      That’s all there is to it! Edge will now create a desktop shortcut automatically.

      Note: This is great for things like email, chat portals, or tools you use all the time.

      Create a shortcut using Windows’ New Shortcut option

      If you want full control, this manual method works pretty well too:

      1. Right-click on your desktop in an empty space.

      Right-click on desktop

      2. Choose New → Shortcut.

      New Shortcut option

      3. In the box that appears, type or paste the website’s URL (like https://replug.io/).

      Paste website URL for creating shortcut

      4. Click Next, give it a name (like “My Site”), and click Finish.

      Next button when creating shortcut
      Setting name while creating shortcut

      A shortcut will appear instantly!

      Webpage shortcut on desktop

      Note: If Edge isn’t your default browser, it might open in a different browser, but you can tweak the shortcut so it opens in Edge specifically if you want.

      You now have a quick way to open your favorite sites right from your desktop using Microsoft Edge.

      How to save a link to desktop on Windows 11

      Saving a website link to your desktop in Windows 11 is actually pretty simple. 

      You can do it either by dragging the link from your browser onto the desktop or by manually creating a shortcut that points to the website’s URL. 

      Both ways work well; choose whichever feels easier to you!

      How to save a link to desktop on Windows 11

      Here is how to add a website to desktop on Windows 11:

      • Method #01: Drag & drop the website link (already discussed above)
      • Method #02: Create a shortcut manually (already discussed above)

      These ways make getting to your favorite sites much quicker and more convenient.

      How to save a URL to desktop on Mac

      Saving a website link to your desktop on a Mac is easy and only takes a couple of minutes. When you do this, macOS creates a small file (a .webloc file) on your desktop that opens the site in your browser with a double-click.

      Here’s how to save a link to desktop on a MacBook:

      1. Open your web browser: Open Safari, Chrome, or any browser you like on your Mac.

      2. Go to the website you want to save: Type the site address in the address bar and press Enter so the page loads fully.

      3. Resize the browser window: Make sure part of your desktop is visible behind the browser. This makes it easier to drag the link.

      4. Click the URL in the address bar: Click once to highlight the whole web address at the top of the browser.

      5. Drag the URL to your desktop: While still holding the mouse or trackpad button, drag the highlighted web address and drop it on your desktop.

      6. Check the newly created shortcut: You’ll see a file on your desktop with the website’s name and a .webloc extension.

      Webloc extension file on Mac

      That’s all!

      Also read: How to bookmark a webpage in any browser & on any device in 2026!

      Wrapping up

      In the end, all the methods we covered, from quick drag-and-drop tricks to browser-specific ways of making shortcuts in Chrome and Microsoft Edge, as well as saving links on Windows 11 and on a Mac, are here to make your life easier.

      Whether you want one-click access to your favorite sites or prefer to organize links right on your desktop, these steps are simple to follow and work reliably for everyday use.

      Now that you’re managing website shortcuts like a pro, why not take your link game even further? Give Replug a try today! 

      It’s a top-notch short URL generator that helps you generate branded short URLs in no time, track link analytics and performance, and share clean, trustworthy links wherever you want on the go!

      Replug Branded Short Links CTA
      Maximize marketing ROI
      by transforming ordinary URLs into
      branded short links that convert.
      Try Replug for free

      Frequently asked questions

      How to save a URL to desktop on a laptop?

      On most laptops (Windows or Mac), you can save a website link by dragging the URL from the browser’s address bar onto your desktop. Simply click the padlock or site icon to the left of the URL, drag it down, and drop it on your desktop. You’ll see a clickable shortcut there.

      How to save a link to desktop from an email?

      If you want a website link you received in an email on your desktop, first open the email and copy the URL (right-click link → Copy link). Then, on your desktop, right-click → New → Shortcut (Windows), or drag a web link to the desktop (Mac). Paste the copied URL when prompted.

      How to save a hyperlink to desktop?

      A “hyperlink” is just a clickable web link. To save it to your desktop, copy the hyperlink URL from wherever you see it (email, document, webpage). Then, create a desktop shortcut and paste that URL into it (Windows), or drag the link from your browser address bar to the desktop (Mac).

      How to save a URL shortcut to desktop easily?

      The easiest way is to drag the URL (or the small icon next to it) directly from your browser’s address bar onto your desktop. This instantly creates a shortcut you can double-click to open the site at any time.

      How to save a website to desktop on an iPhone?

      You can’t save a website to the desktop on an iPhone like you do on a computer, but you can add it to your Home Screen so it works like a shortcut.

      1. Open “Safari” and go to the website you want.
      2. Tap the Share icon (square with an arrow up).
      3. Scroll and tap Add to Home Screen.
      4. Give it a name and tap Add.

      An icon will appear on your iPhone’s home screen that opens that site.

      How to save a website link to desktop on a PC?

      On a Windows PC, open your browser (Chrome/Edge/Firefox), go to the site you want, then click and drag the icon from the address bar (the small padlock or globe) onto your desktop. A shortcut will be created that you can double-click to open the link at any time.

      How do I save a URL to my home screen?

      On most smartphones, open the website in your browser (Safari on iPhone, Chrome on Android), tap the Share or Menu button, and then hit Add to Home Screen. This creates an icon on your home screen that opens the URL with just one tap.

      How to pin a website to your taskbar?

      On Windows, open the website in Microsoft Edge. Then click the three dots (⋯) in the top right, go to More tools, and choose Pin to taskbar. The site’s icon will now appear on your taskbar for quick access.

    • What is an RSS feed URL & how to find it for any website

      What is an RSS feed URL & how to find it for any website

      Are you tired of managing bookmarks, refreshing dozens of websites, or missing out on updates because you simply forgot to check? That’s the core problem!

      It’s really frustrating, especially when you know the content you care about could land in your inbox the moment it’s published. 

      But, here’s the good news, guys…

      A vast number of sites still publish through RSS, and over 100 million websites are identified as using this technology in the tail-end of 2025.

      By learning the right “RSS feed URL”, you can get those updates delivered automatically, without doing the hard work yourself; no more manual checking or refreshing.

      Ready to step in? Let’s start with a quick overview: what exactly is an RSS feed URL, and why it matters.

      RSS feed URL meaning

      An “RSS feed URL” is simply the web address (URL) that points to a site’s feed, a kind of machine-readable summary of everything new on that website. 

      The feed (often in XML format) lists the latest posts, news, articles, or media, letting you know when new content is published.

      RSS feed URL meaning

      The primary objective of that URL is to give you a single, reliable link that any “RSS reader” (also called a feed reader or aggregator) can visit regularly to check for new content. 

      Instead of you opening dozens of websites manually, the reader fetches updates automatically and compiles them into one stream, easy to browse and always up to date.

      Why does this matter?

      Because with an RSS feed URL, you can:

      • Save time, no need to manually revisit each site.
      • Get content delivered as soon as it’s published. Nothing gets missed!
      • Avoid algorithmic filters or noise that you usually get on social media. You only see what you subscribe to.

      In short, grabbing a site’s RSS feed URL gives you a direct, streamlined line to all its latest content; neat, efficient, and under your control.

      RSS feed URL structure

      When you get hold of an RSS feed URL, it helps to know that there are some common patterns or “formats” that many websites follow. This makes it pretty easy to guess or locate the feed if it’s not obvious.

      Common RSS feed URL formats

      Many sites use simple, predictable URL patterns for their feeds. Some of the most common are:

      • https://example.com/feed/ (a generic feed link).
      • https://example.com/rss/ (another frequent pattern).
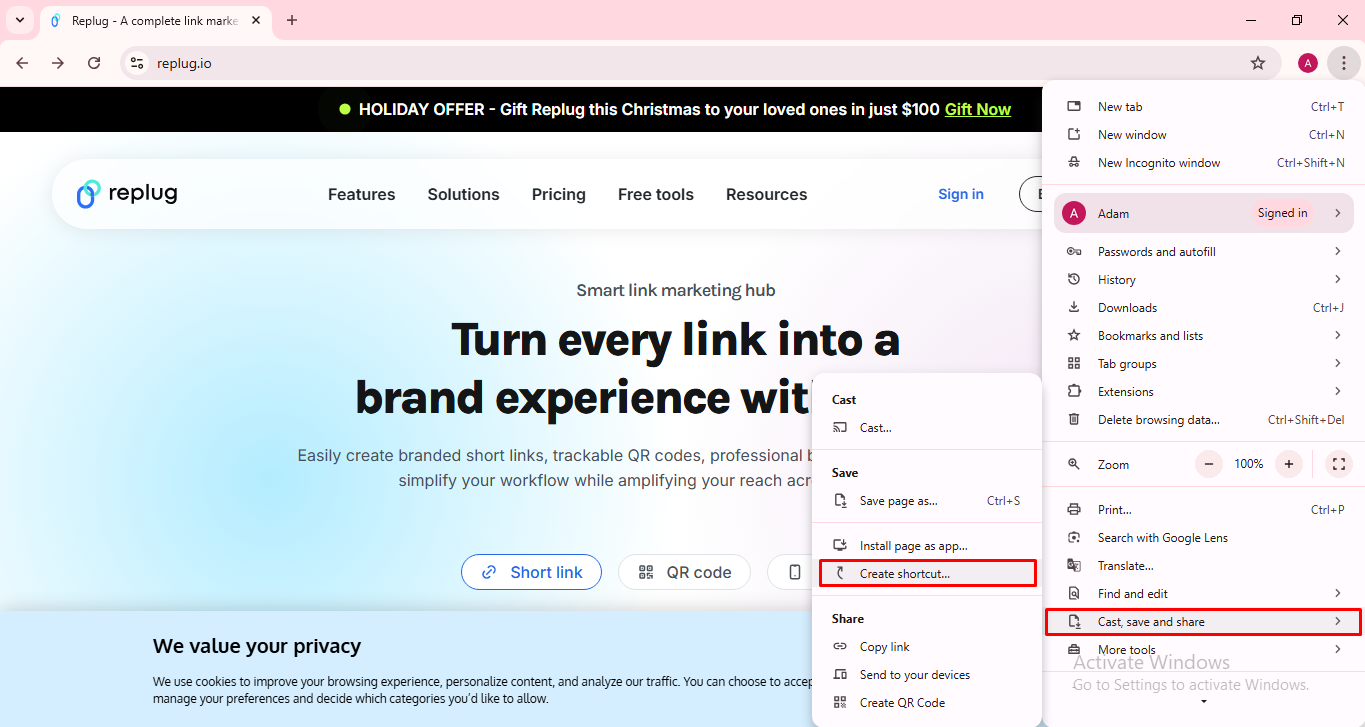
      • https://example.com/rss.xml or https://example.com/feed.xml (especially when the feed is provided as an XML file).
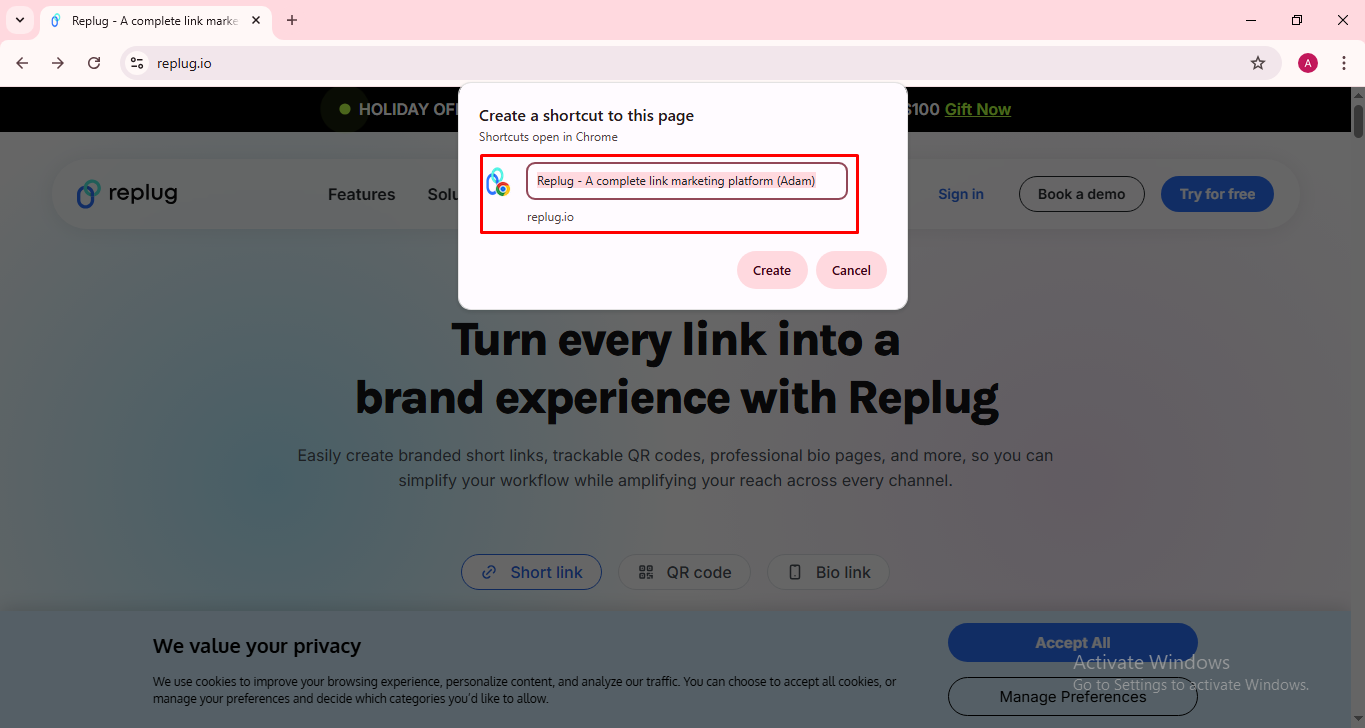
      • For some websites structured with subfolders or sections, you might see variants like https://example.com/blog/feed/ or https://example.com/blog/rss/.

      Note: These patterns aren’t universal. Some sites hide their RSS feeds, give them custom URLs, or even omit them altogether. But starting with these standard formats is often the quickest way to find a feed, especially if the site is built on a common platform (like those that auto-generate feeds).

      RSS feed URL examples

      Here are a few concrete examples to give you a clearer idea:

      • If a blog lives at https://myblog.com, its feed might be https://myblog.com/feed/
      • Another site might offer its feed at https://news.example.com/rss.xml
      • A blog’s older implementation could use https://example.com/blog/rss/ or https://example.com/blog/feed.xml

      When you paste one of these into an RSS reader (or simply your browser), you’ll often see a basic XML file: with <rss> at the top, a <channel> describing the feed, and multiple <item> entries, each representing a post or article.

      How to find an RSS feed URL

      When you want to subscribe to a website via RSS, the tricky part is often just finding the correct link, i.e., the actual RSS feed URL. Below are four friendly, reliable ways to track it down hassle-free!

      How to find an RSS feed URL

      Method #01: Look for the RSS logo

      Many websites still show the classic orange RSS icon (or a similar feed icon) somewhere on their pages, often in the header, footer, or sidebar. If you spot it, click on it. That almost always leads you directly to the RSS feed URL.

      Method #02: Check the page source

      If there’s no visible icon, you can look under the hood. Right-click on the page, choose “View page source” or “Inspect”. Then search with “Ctrl + F” or “Cmd + F” for keywords like “RSS” or “feed”. If a feed exists, you’ll likely find a <link rel=”alternate” type=”application/rss+xml” tag; the “href=” value is the feed’s URL.

      Method #03: Guess common suffixes

      A lot of sites, especially blogs and those built on popular platforms, use simple, predictable endings for their feed URLs. Common guesses: adding /feed, /rss, /feed.xml, or /rss.xml to the site’s base address (e.g., https://example.com/feed/). 

      Note: You can also try /blog/feed/ or /blog/rss/ if there’s a blog section. It doesn’t always work, but when the site follows conventions, this method often hits the mark.

      Method #04: Use platform-specific methods

      Depending on the platform the website runs on (e.g., WordPress, Blogger, or others), shortcuts are available. 

      For instance, many WordPress-powered sites make their feed available at /feed/. However, if the site is newer or uses a custom CMS, you may need a browser extension (or an RSS feed URL finder) that scans page metadata or the site’s structure to detect a feed automatically.

      Using these methods, from obvious to more technical, you can usually uncover a website’s RSS feed URL within a minute or two.

      How to find the RSS feed URL for the most popular websites

      Now, if you are someone who wants to follow big sites, blogs, or social platforms via RSS feed URLs, it helps to know their typical feed-URL formats.

      How to find the RSS feed URL for the most popular websites

      Mentioned next are many of the most popular websites, along with how you can find or build their RSS feed URL so you can subscribe easily.

      YouTube RSS feed URL

      For YouTube channels or users, the feed URL often uses this format:

      https://www.youtube.com/feeds/videos.xml?channel_id={CHANNEL_ID}

      You just need the channel’s unique ID (or username in some cases) and place it in the URL. A similar feed URL format also works for playlists.

      Reddit RSS feed URL

      On Reddit, you can get feeds for the whole site or specific sub-sections. For example:

      • Front page: https://www.reddit.com/.rss
      • Subreddit: https://www.reddit.com/r/{subreddit-name}/.rss
      • User feed: https://www.reddit.com/user/{user-name}/.rss

      These links will deliver the latest posts (or comments, depending on the URL) for the chosen Subreddit or user.

      Medium RSS feed URL

      For Medium content (either for a user, a publication, or a custom domain), the feed URL usually goes like:

      https://medium.com/feed/{username-or-publication-name}

      If it’s a custom domain, it might simply be /feed appended to the base URL.

      Tumblr RSS feed URL

      For a blog on Tumblr, just add /rss to the blog’s URL. For example:

      https://yourblog.tumblr.com/rss

      That’ll work for default blogs. If it’s on a custom domain, the same rule often applies.

      Blogger RSS feed URL

      For blogs on Blogger (also known as Blogspot), the feed URL often uses this pattern:

      https://{blogname}.blogspot.com/feeds/posts/default

      This gives you a feed of all blog posts published on that Blogger site.

      Wix RSS feed URL

      If a site is built with Wix, some of them expose feeds via a “blog-feed.xml” file. So you might try a URL like:

      https://www.example-wix-site.com/blog/blog-feed.xml

      Note: It’s not guaranteed, because Wix sites vary, but this is a typical pattern.

      CNN RSS feed URL

      CNN offers RSS feeds for different news categories. One common feed URL is:

      http://rss.cnn.com/rss/cnn_topstories.rss

      You can subscribe to this (or other category-specific feeds) to get the latest headlines directly via RSS.

      RSS feed URL Spotify

      For platforms like Spotify, especially if you follow artists/playlists/podcasts, there are services/tools (e.g., online RSS feed URL generators) that can convert your Spotify content into an RSS feed URL in no time at all.

      RSS feed URL ESPNcricinfo

      If you want updates from ESPNcricinfo, i.e., one of the top cricket news websites, there are official RSS feeds for news, live match updates, player news, series, teams, etc. Their “Cricket RSS feed URL” collection includes global news, live matches, and more.

      • Global news feed: https://www.espncricinfo.com/ci/content/rss/news_1.xml, this is their main “all-news” feed.
      • Live scores feed: https://www.espncricinfo.com/ci/engine/match/scores/rss.xml (or similar, check their RSS feed index page)

      By knowing these standard feed-URL patterns, you can quickly subscribe to many big websites and stay updated without manually checking them.

      How to get RSS feed URL for news

      Suppose you want to stay updated with the latest news, whether world headlines, tech articles, or niche updates like sports, having the right RSS feed URL makes all the difference.

      How to get RSS feed URL for news

      Here’s how you can easily grab feed URLs for different kinds of news.

      General news RSS feed URL

      Many major news sites openly provide an RSS feed for their general or “top stories”. 

      For example, CNN makes its feed available at: http://rss.cnn.com/rss/cnn_topstories.rss.

      Similarly, BBC News offers a world news feed at: https://feeds.bbci.co.uk/news/world/rss.xml.

      By subscribing to such general news RSS feed URLs, you can get updates covering all major topics (headlines, international affairs, breaking stories, etc.) in one go.

      Cricket news RSS feed URL

      If you follow sports, say cricket, you can look for news sites or sections that support RSS and target cricket or sports in general. 

      For example, if a major news publisher has a “sports” or “cricket” section, check if they publish an RSS feed for that section. 

      Using the term “RSS feed URL cricket news” in your search (site name + “cricket feed”) can help you locate those niche feeds more easily.

      RSS feed URL for Google News

      Even though platforms like Google News don’t always display a visible RSS button, you can generate a feed from a Google News search or topic page. 

      Tools such as feed generators let you paste the Google News page URL to produce a valid RSS feed that tracks that topic or query. This is handy if you want aggregated news across publishers, filtered by your interests.

      RSS feed URL for technology news

      Tech-news publishers often provide dedicated RSS feeds for their technology sections. 

      For instance, BBC’s technology feed is available at: https://feeds.bbci.co.uk/news/technology/rss.xml.

      You can also subscribe to feeds from specialized tech platforms (blogs, gadget-review sites, IT-news outlets), usually by using standard feed URL formats or a dedicated “feed” link.

      💡 Pro tip: You can also check out this RSS feed URL list if you want a quick way to subscribe to all major updates in one go!

      Create & shorten your own RSS feed URL with Replug!

      If you want to build a clean, easy-to-share RSS feed link, maybe for your blog, newsletter, or curated content, Replug makes it pretty simple. 

      With this efficient URL shortener, you can plug in an existing feed or use a feed you already have, and get a simplified, “nice and neat” version of the RSS link within seconds.

      That means you get an RSS feed URL free that’s shorter, uncluttered, and often better for sharing on social media or embedding in other platforms.

      Here’s how it works:

      1. You sign in, head to Replug’s “RSS Feed” section, and enter your original feed link.
      2. Replug then converts all the messy, long URLs inside the feed into compact, branded short links.
      3. After that, you receive a fresh, shareable RSS feed URL, ideal if you want to distribute content without overloading readers with cluttered links or disorganized URLs.

      Note: This is especially handy if you run a blog, curatorial site, or content aggregator, or just want a simple, clean feed URL to give others. With a quick setup, you get a user-friendly RSS link that’s easy to share and manage.

      Replug Branded Short Links CTA
      Maximize marketing ROI
      by transforming ordinary URLs into
      branded short links that convert.
      Try Replug for free

      Summing up

      All in all, finding an RSS feed URL isn’t as complicated as it seems. Once you know the common formats, where to look, and how different platforms handle feeds, staying updated becomes a whole lot easier. 

      No matter if it’s news, blogs, videos, or niche content, RSS gives you a simple way to pull everything into one place without chasing multiple sites every day. 

      And if you ever want to clean up, organize, or shorten your feed links, Replug makes the process quick and stress-free.

      Give it a try now, and you might be surprised how much simpler your content routine becomes!

      Frequently asked questions

      What is an RSS feed, and how do I use it?

      An RSS feed is a standardized file (usually in XML) that a website offers to share all its recent updates, like blog posts, news articles, or podcast episodes, in one place. 

      To use it, you need to copy the feed’s URL and add it to an “RSS reader”. That reader keeps checking the feed and shows you new items automatically, so you don’t have to visit each website manually.

      How to add RSS feed URL?

      Once you have an RSS feed URL, open an RSS reader (web-based or app) and use the “Add feed” or “Subscribe” option. 

      Paste the URL there and confirm. Then the reader will start pulling updates from that feed regularly. If the site offers multiple feeds (for posts, comments, categories, etc.), you can add each URL you want to follow.

      Where can I find the feed URL?

      You’ll often find a website’s RSS link via:

      – A visible RSS icon or link on the site (often in header, footer, or sidebar).
      – Guessing standard URL endings like /feed/, /rss.xml, /rss/, etc.
      – Checking the site’s source code. Searching for <link rel=”alternate” type=”application/rss+xml”>, to discover the feed URL, even if it’s hidden visually.

      How to get the RSS feed URL for a podcast?

      Podcasts generally publish an RSS feed that lists episodes (with titles, descriptions, media files, etc.). If the podcast is on a hosting platform, look for a “Share,” “Subscribe,” or “RSS” link. This will usually reveal its feed URL. 

      Once you copy that URL into your RSS reader or podcast app, you’ll get updates whenever a new episode drops.

      How to get the RSS feed URL for WordPress?

      If a website runs on WordPress, you can usually get its feed by simply adding /feed/ to the end of its main URL, e.g., https://example.com/feed/. That’s the default!

      However, WordPress sites often provide additional feeds too for comments, categories, tags, or authors. For instance: https://example.com/category/technology/feed/ or https://example.com/tag/health/feed/.

      How to find an RSS feed URL of a website from its source code?

      If the feed isn’t obvious on the page, open the page source (right-click → “View source” or “Inspect”), and search for terms like rss, feed, or application/rss+xml

      If the site supports RSS, you’ll usually find a <link> tag with the feed URL there. That URL is what you copy into the RSS reader.

      How to find an RSS feed in your RSS reader?

      Most RSS readers list all the feeds you’ve subscribed to, often in a sidebar or under a “Subscriptions/Feeds” menu. There you’ll see the feed names (or your custom labels). 

      If you want the original URL, some readers let you view feed details or feed settings that show the actual URL. Otherwise, you can right-click or view feed properties to copy it.

      Are RSS feeds still relevant in 2026?

      Yes, RSS feeds remain useful in 2026. Even though social media and algorithm-driven platforms dominate, RSS offers a clean, chronological, ad-free (or low-noise) stream of content from multiple sources. 

      It still lets you follow blogs, news sites, podcasts, or niche websites without being filtered by algorithms. It’s one of the most privacy-friendly and efficient ways to stay updated.

      Provide an example of a category RSS URL and a tag RSS URL?

      Using WordPress as an example:

      Category RSS URL: If your site has a category “technology”, the feed could be https://example.com/category/technology/feed/
      Tag RSS URL: If you have a tag “health”, the feed could be https://example.com/tag/health/feed/

      These links pull only posts from that specific category or tag. Pretty useful when you only care about a subset of content.

      Which is the best RSS feed URL extension or RSS feed URL app out there?

      There’s no one-size-fits-all “best”, but what matters is a reader or tool that’s simple, reliable, and lets you manage multiple feeds easily. Good RSS readers that support standard feeds and let you organize subscriptions tend to work best. 

      Another helpful option: if you want custom, clean, or shareable feeds, consider a feed builder or feed shortener, especially when the original feed URL is messy or quite complicated to share.

    • How to add a clickable link in YouTube description (2026 update)

      How to add a clickable link in YouTube description (2026 update)

      Want more clicks, more traffic, and maybe even more sales from your YouTube videos? It all starts with one simple thing: a clickable link in your description.

      With over 2.7 billion monthly active users on YouTube and more than 1 billion hours of video watched every day, even a small tweak like adding the right link can make a huge difference.

      But here’s the catch: many creators still get it wrong or miss out on easy opportunities. In this guide, we’ll show you exactly how to do it the right way in 2026, step by step.

      First, let’s quickly understand the basics, starting with what a YouTube video description actually is.

      What is a YouTube video description?

      A YouTube video description is the text section you see right below a video. It explains what the video is about, gives extra context, and helps both viewers and YouTube understand your content. In simple terms, it’s like a mini guide for your video.

      Its main purpose is twofold: to help people quickly decide if your video is worth watching and to help YouTube rank your video in search results. When written properly, it can improve discoverability, boost clicks, and even drive traffic to your links.

      Core elements of a YouTube video description

      Here are the key elements:

      • The hook (an engaging, keyword-rich opening line): The first 1–2 lines grab attention and include your main keyword since this part is visible before clicking “show more.”
      • Detailed description/summary of the content: A clear, simple summary that tells viewers exactly what they’ll learn or get from the video.
      • Clickable timestamps/chapters for navigation: Time-based links that let viewers jump to specific parts of the video easily.
      • A clear call to action (CTA): A direct prompt telling viewers what to do next, like subscribe, click a link, or watch another video.
      • Relevant links & resources: Useful URLs (website, products, references) that add extra value beyond the video.
      • Social media handles & hashtags: Your social links and hashtags help people connect with you and improve content reach.
      • Channel bio/disclaimer: A short intro about your channel or any necessary disclaimer (like affiliate links or sponsorships).

      How to add a clickable link in YouTube video description (step by step)

      Adding a clickable link in your YouTube description is actually very simple. You just need to paste the right type of URL in the right place. 

      Once done correctly, YouTube automatically turns it into a clickable link that viewers can tap or click, hassle-free.

      Let’s break it down step by step for both phone and desktop so you can follow along easily 👇

      How to add a clickable link in YouTube description on phone

      Here’s how to do it on mobile:

      1. Open the YouTube Studio app.

      YouTube Studio mobile app

      2. Select the video you want to edit.

      Select a video inside YouTube Studio app

      3. Tap the pencil (edit) icon at the top of the screen.

      Pencil (edit) icon inside YouTube Studio app

      4. Tap on the Description section.

      Video description section inside YouTube Studio app

      5. In the description box, paste your link (make sure it starts with https://).

      Clickable link inside the video description section on YouTube Studio app

      6. Tap Save.

      Save button inside the YouTube Studio app

      That’s it! YouTube will automatically make the link clickable once the video is updated.

      How to add a clickable link in YouTube description on desktop

      Here’s how to do it on PC:

      1. Go to YouTube Studio and log in.

      YouTube Studio web app

      2. Click on Content from the left menu.

      Content option inside YouTube Studio web app

      3. Find your video and click the edit (pencil) icon.

      Edit (pencil) icon inside YouTube Studio web app

      4. Scroll to the Description field, and paste your link with https:// at the start.

      Clickable link inside the video description section on YouTube Studio web app

      5. Click the Save button.

      Save button inside the YouTube Studio web app

      Once saved, your link becomes clickable in the description.

      💡 Quick tip: If your link isn’t clickable, it’s usually because it doesn’t include “https://”, so always double-check that part.

      How to add a clickable link in YouTube Shorts description

      Before you jump in, here’s something important to know 👇

      YouTube works a bit differently for Shorts. In most cases, links placed directly in Shorts descriptions are NOT clickable. They show as plain text to reduce spam and scams.

      So while you can add a link in the description, it won’t behave like regular video links. Instead, YouTube gives you a few alternative ways to share clickable links (like related videos or other features).

      Step-by-step guide:

      1. Open YouTube Studio (app or desktop).

      2. Go to Content and select your Short.

      3. Click the edit (pencil) icon.

      4. In the description box, paste your link (make sure it includes https://).

      5. Click Save.

      Your link will appear in the description, but keep in mind, viewers won’t be able to click it directly.

      💡 Better (working) ways to add clickable links in Shorts

      Since description links aren’t clickable, here are smarter options you should use:

      • Add a “Related Video” link: You can link your Short to one of your long videos, which viewers can easily click.
      • Use channel profile links: Add your website or important links in your channel bio. These are clickable.
      • Mention links in comments or CTA: Guide viewers to your bio or a full video where clickable links are available.

      In short, you can add links in Shorts descriptions, but for optimized results, use YouTube’s built-in linking features instead.

      How to add a clickable link in the YouTube channel description

      Adding links to your YouTube channel description (the “About” section) is a great way to guide viewers to your website or social profiles. To make links clickable on your channel, you need to use YouTube’s channel profile links (banner links) feature.

      Step-by-step guide:

      1. Go to YouTube Studio and log in to your account.

      2. From the left menu, click on Customization.

      3. Open the Basic Info or Profile tab.

      4. Scroll down to the Links section.

      5. Click + Add Link.

      6. Enter your link title (e.g., “My Website” or “Instagram”).

      7. Paste your full URL (make sure it starts with https://).

      8. Click Publish in the top right-hand corner.

      Once saved, these links (up to the first 14) will show up on your channel banner and are fully clickable for viewers.

      Why add a clickable link in the YouTube video description

      Adding a clickable link isn’t just a small detail; it’s one of the easiest ways to turn viewers into action-takers. Whether you want traffic, sales, or engagement, that single link can make a real difference.

      • Monetization & marketing: You can promote products, services, or affiliate offers, directly turning views into real income opportunities.
      • Engagement & traffic: Links help drive viewers to your website or other content, increasing traffic and interaction beyond YouTube.
      • Improved user experience: You give viewers quick access to helpful resources, making your content more useful and easy to explore.
      • SEO boost: Descriptions help YouTube understand your content better, improving visibility in search and recommendations.
      • Lead generation: A well-placed link can capture leads by directing viewers to sign-up pages, offers, or landing pages.

      Importance of a good YouTube video description in 2026

      At present, a YouTube description is more than just a summary. It’s a key part of how your video gets discovered and how viewers interact with it. A well-written description helps both the algorithm and your audience understand your content better.

      • Boosts searchability: Using the right keywords helps YouTube understand your video and improves its chances of showing up in search results.
      • Enhances viewer experience: A clear description, links, and timestamps make it easier for viewers to navigate and get value quickly.
      • Increases engagement: When viewers know what to expect, they’re more likely to watch longer, click links, and interact.
      • Builds loyalty & revenue: Good descriptions guide users to subscribe, explore more content, or check out your offers.
      • Strategic optimization: Descriptions are a core part of YouTube SEO along with titles and tags, helping your content perform better.
      • Context for AI: With AI-driven search growing, descriptions help systems understand and recommend your content accurately.

      Create short clickable links for your YouTube description with Replug!

      If you’ve ever pasted a long, messy URL in your YouTube description, you already know that it doesn’t look great. That’s where Replug comes in!

      It’s a powerful link shortener that helps you turn long, cluttered links into clean, professional, and clickable ones. Plus, it does a lot more than just shortening links.

      Replug Branded Short Links CTA
      Maximize marketing ROI
      by transforming ordinary URLs into
      branded short links that convert.
      Try Replug for free

      Replug is an all-in-one link optimization platform that lets you brand and track your links, so you can see how they perform and improve your results over time.

      Here’s why it’s worth using for YouTube:

      • Clean & short links: Turn long URLs into simple, easy-to-click links that look better in descriptions.
      • Branded links: Use your own custom domain to make links look more trustworthy and professional.
      • Click tracking & analytics: See how many people are clicking your links and where they’re coming from.
      • Add call-to-actions (CTAs): You can attach small messages or buttons to boost clicks and conversions.
      • Campaign optimization: Test and improve your links using A/B testing and smart routing features.

      In short, Replug doesn’t just shorten your links; it helps you turn every link into a small marketing tool.

      Summing up

      To wrap things up, adding clickable links to your YouTube description might seem like a small step, but it can seriously level up your results. 

      From driving traffic and boosting engagement to helping with SEO and lead generation, it all adds up. 

      And the best part? It only takes a few seconds. Just paste your link with “https://,” and you’re good to go. 

      If you really want to take things further, tools like Replug can help you create clean, trackable links that actually convert.

      👉 Before you go, give Replug’s free YouTube title generator a try as well. It’s a quick, efficient way to make your videos stand out even more!

      Frequently asked questions

      How do I put a clickable link in a YouTube description?

      Just paste your full URL (with https://) into the description box while editing your video, and YouTube will automatically turn it into a clickable link.

      Should you put links in a YouTube description in 2026?

      Yes, absolutely! Links help drive traffic, promote products, and improve engagement. Still a key strategy for content creators in 2026.

      Where is the link in the description on YouTube?

      It appears just below the video. On mobile, it’s under “Show more,” and on desktop, it’s visible directly under the title (or after expanding).

      Why is my link not clickable in the YouTube description?

      The most common reason for this is that the link doesn’t start with https://. Without it, YouTube won’t recognize it as clickable.

      How to add social media links in YouTube description?

      Simply copy your Instagram, Facebook, or other profile link and paste it into the description with https://, and it will become clickable instantly.

      How to put links in YouTube description without verification?

      You can still paste links without advanced verification, but some features (like external linking tools) may require channel verification. You must include the full URL starting with https://

      Can you hyperlink text in YouTube description?

      No, YouTube doesn’t support custom anchor text. You must paste the full URL; no “click here” style hyperlinks.

      How to add a hyperlink to the YouTube description?

      Same process: paste the full https:// link inside the description box. YouTube automatically converts it into a clickable hyperlink.

      How do I add a link to a YouTube description on my iPhone?

      Open the YouTube app → tap on your profile icon → go to your desired video → tap Edit → paste your link in the description box → save.

      How to add a clickable link in the YouTube video comments section?

      Paste your full URL in the comment. In regular videos, it becomes clickable, but avoid spammy posting to stay within YouTube rules.

      How to add a clickable Instagram link in the YouTube description?

      Copy your Instagram profile link (e.g., https://instagram.com/username) and paste it in the description box. It will be clickable like any other link.

      How to add a clickable link to a YouTube video using end screen & card?

      Go to YouTube Studio → Content → select video → Cards or End Screen → Add link → Save. These appear during or at the end of the video and are fully clickable.

      1. Most strange websites on the internet in 2026: Weird websites to visit when bored!

        Most strange websites on the internet in 2026: Weird websites to visit when bored!

        Ever fallen down a Google rabbit hole only to end up bored out of your mind? You’re not alone!

        With over 1.2 billion websites online in 2026 and counting, it’s wild how hard it can be to find fun content worth your time.

        The major problem?

        Most of us stick to the same top 10 sites every day, leaving millions of odd, quirky corners of the web unexplored, and honestly, half of the internet feels forgotten or weirdly mysterious. 

        That means you’re missing out on digital oddities and hilarious gems that make scrolling actually fun.

        Lucky for you, we’ve combed through the strange, the silly, and the downright bizarre websites worth your next bored afternoon.

        So… what exactly makes a website strange anyway? 

        Let’s break it down next!

        What is a strange website?

        When we talk about a “strange website,” we’re really talking about any URL that doesn’t behave or look the way you expect a normal site to. 

        Unlike typical websites (such as news sites, social platforms, or stores), these odd corners of the web often defy logic, purpose, and standard design.

        Here’s what usually makes a site weird or weirdly fun:

        • Interactivity: Sites that respond in unexpected ways when you click, drag, or move your cursor around (like bouncing cats or endless animations).
        • Minimalism: Some strange sites are super simple, with almost nothing on the page except an odd message or function that feels weirdly satisfying.
        • Artistic expression: Some are basically web art (abstract, symbolic, and more like a digital art piece than a traditional site).
        • A sense of humor: Humor (sometimes absurd or ironic) is a big part of weird website links that make you laugh or scratch your head.
        • Unique content: Content you won’t find anywhere else, like bizarre animations, strange games, or totally random ideas.
        • Niche appeal: Sites that seem built for a tiny group of people or a very specific interest.
        • Quirky web design: Unusual layouts, odd navigation, or visual chaos that feels intentional.
        • Distinctive purpose/functionality: Some strange URLs literally do nothing useful, and that’s the key point.
        • Odd interactive elements: Weird effects, unpredictable responses, or just things that make you go “huh?” when you interact.

        Note: Weird sites embrace creativity over clarity, and that’s what makes browsing them so worthwhile!

        A quick note before you start clicking

        Most of the sites on this list are completely harmless, but a few things are worth keeping in mind before you go down the rabbit hole.

        • Watch out for flashing visuals. A handful of sites like Staggering Beauty and Strobe Illusion contain rapid flashing effects that are not suitable for people with photosensitive epilepsy. We have flagged these where possible, but always keep your volume low and proceed carefully on unfamiliar sites.
        • Do not download anything. None of the sites on this list require you to download files or install software. If a site prompts you to download something, close it immediately.
        • Never enter real passwords or payment info. Sites like Passweird and Try PaP are password-themed but treat them as entertainment only. Never type your actual credentials into any site you do not fully trust.
        • Use a private window if you are clicking through lots of unknown links. It keeps your browsing history clean and adds a small layer of separation between you and anything unexpected.
        • Some links may change over time. The internet is unpredictable and sites go down, move, or change hands. If something is not loading, try searching the name directly or checking a cached version on the Wayback Machine at archive.org.

        List of 120+ weird websites that will blow your mind, for sure!

        From utterly useless pages to interactive oddities you’ll lose time playing with, these weird websites are perfect for killing boredom, laughing out loud, or simply wondering, “What did I just find?”

        Below is the ultimate list, starting with one of the most classic oddballs online…

        1. Zoomquilt

        Zoomquilt

        Zoomquilt is a collaborative piece of digital art that feels like an endless journey. It’s an interactive, infinitely zooming painting that takes you deeper into surreal scenes the more you explore. It was created back in 2004 and has stuck around as a mesmerizing web oddity.

        2. THIS IS SAND

        THIS IS SAND

        This Is Sand is a free interactive digital sandbox where you pour virtual sand onto your screen to create layered landscapes, gradients, and abstract pieces with just clicks and drags. It started as a simple web art project in 2008 and later became a popular app too.

        3. WindowSwap

        WindowSwap

        WindowSwap is a simple yet magical virtual travel site that lets you open a random video from someone else’s real window, anywhere in the world. Each clip (usually about ten minutes long) shows what a person sees outside their window, from city streets to quiet countryside, complete with natural sounds.

        4. Staggering Beauty

        Staggering Beauty

        Staggering Beauty is a quirky interactive web toy featuring a black, worm-like creature that follows your mouse movements playfully on your screen. As you move the cursor, it wiggles and reacts, and if you shake it fast enough, the site explodes into flashy colors and loud sounds, entirely different from anything you’d expect from a regular webpage.

        5. Hacker Typer

        Hacker Typer

        Hacker Typer is a fun little website that makes it look like you’re typing real code just by striking your keyboard keys. It is especially designed for pretending to hack, as you see in movies. It’s strange because the code that appears doesn’t actually do anything or make any sense, and you don’t need to know programming at all, yet it still looks dramatic and impressive.

        6. The Useless Web

        The Useless Web

        The Useless Web is a playful website that shows one big button saying “TAKE ME TO A USELESS WEBSITE (PLEASE)”. When you click it, it instantly sends you to a random, quirky page somewhere else on the internet.

        7. Cat Bounce!

        Cat Bounce!

        Cat Bounce! is a whimsical interactive site where adorable cartoon cats bounce around your screen when you click and drag them, using simple physics that let you make them fly higher the harder you interact.

        8. Eel slap!

        Eel slap!

        Eel slap! is a ridiculously simple and funny little website where you use your mouse or finger on mobile to swing a giant animated eel and slap a guy in the face just for laughs.

        9. Endless Horse

        Endless Horse

        Endless Horse is a quirky, one-page website that shows you a giant ASCII-art horse whose legs stretch down the page forever as you scroll.

        10. Pointer Pointer

        Pointer Pointer

        Pointer Pointer is a fun little site that plays a simple trick: wherever you move your mouse cursor, it finds a photo of someone pointing right at that exact spot on the screen.

        11. Heaven’s Gate

        Heaven’s Gate

        Heaven’s Gate is the old official website of the Heaven’s Gate religious group, a UFO-focused cult most famous for the mass suicide of 39 members in 1997 after believing a comet signaled their “ascension.” 

        12. Ever Dream This Man?

        Ever Dream This Man

        Ever Dream This Man? is a strange internet page built around a simple idea. It shows a sketch of a man that, according to the story, thousands of people around the world have allegedly seen in their dreams, even though no one has ever met him in real life.

        13. The Nicest Place on the Internet

        The Nicest Place on the Internet

        The Nicest Place on the Internet is a feel-good website where strangers from around the world send you free, virtual video hugs set to gentle music to make you smile.

        14. ZOMBO

        ZOMBO

        ZOMBO is one of the internet’s classic single-serving joke sites, dating back to 1999. It opens with a looping message and animation where a voice keeps welcoming you and saying, “Welcome to Zombo com, This is Zombo com,” yet nothing useful ever happens.

        15. The Long Doge Challenge

        The Long Doge Challenge

        The Long Doge Challenge is a playful, meme-based web page built around the beloved Doge internet meme. You just scroll down forever to make a big ASCII Doge image stretch and collect “wows” as you go. It’s basically a scrolling challenge that turns a silly dog meme into an endless, absurd experience.

        16. Paper Toilet

        Paper Toilet

        Paper Toilet is a tiny, playful art website where all you do is scroll down to unroll a giant virtual toilet paper roll until it runs out, and then you can click to reset it and do it again. It was created as one of those simple, useless internet gems, meant for fun, not for any real purpose.

        17. Find the Invisible Cow

        Find the Invisible Cow

        Find the Invisible Cow is a simple, funny browser game where you try to find a hidden cow somewhere on a blank screen by moving your mouse and listening for audio clues. The louder the cow-shouting gets, the closer you are to finding one!

        18. A Soft Murmur

        A Soft Murmur

        A Soft Murmur is a simple online sound mixer that lets you blend relaxing background noises like rain, thunder, waves, birds, coffee shop buzz, and more to create a calm, custom soundscape for focus, sleep, or chill time. 

        19. Is it Christmas Today?

        Is it Christmas Today

        Is it Christmas Today? is a super simple website that tells you right away whether today is Christmas or not. Usually, it just says “NO!” unless it’s December 25. It’s weird because that’s literally all it does: no menus, no games, no countdowns, just the answer to one very specific question.

        20. RRR GGG BBB

        RRR GGG BBB

        RRR GGG BBB is a weird little site that basically shows huge letters “R”, “G”, and “B” in bold red, green, and blue blocks. It doesn’t do much more than present these big colorful blocks on a blank page, and when you hover your mouse on a particular letter, the background turns to that color instantly.

        21. Patatap

        Patatap

        Patatap is a playful, interactive sound-and-animation site that turns your browser into a creative audio-visual playground. Press any key from A to Z and watch colorful shapes dance across the screen as unique sounds play. It’s basically a portable animation and sound kit right in your web browser.

        22. Koalas to the Max dot Com

        Koalas to the Max dot Com

        Koalas to the Max dot Com is a simple but fascinating interactive web experience. It starts with one large, colored circle, and as you hover over and click, each circle splits into smaller ones that eventually reveal a detailed image made of tiny dots. It was originally created as a fun, interactive art piece by Vadim Ogievetsky.

        23. Bury Me With My Money

        Bury Me With My Money

        Bury Me With My Money is one of those surreal, single-page internet masterpieces that doesn’t try to be deep or useful. It just shows a looping animation inspired by the old arcade game “Sunset Riders,” where a character falls with cash, and the phrase “Bury me with my money” plays on repeat.

        24. He-Man Sings – What’s Going On?

        He-Man Sings - What’s Going On

        He-Man Sings – “What’s Going On?” is a random little web page that plays the infamous “HEYYEYAAEYAAAEYAEYAA” video. It is a viral clip in which He-Man from the old cartoon weirdly sings a remix of the song “What’s Up” by 4 Non Blondes. This mashup first popped up online in the mid-2000s and quickly became a classic meme and internet oddity.

        25. SCREAM INTO THE VOID

        SCREAM INTO THE VOID

        SCREAM INTO THE VOID is a simple but uniquely expressive online page that invites you to type whatever you’re feeling and scream it into the internet. There’s no menu, no ads, just a space to let out thoughts, frustrations, or random words and hit the “SCREAM” button to send them off into nowhere.

        26. Shady URL

        Shady URL

        Shady URL is a playful little web tool that takes any normal link you give it and turns it into a super-suspicious-looking URL that still points to the same place. The catch is that the new link looks sketchy on purpose. It uses a real shortening service but adds weird, edgy words so the link appears ominous or shady to anyone who sees it.

        27. Nooooooooooooooooooooooooo!

        Nooooooooooooooooooooooooo!

        Nooooooooooooooooooooooooo! is a classic meme-style novelty site that gives you a single big blue button inspired by Darth Vader’s dramatic scream from “Star Wars: Episode III – Revenge of the Sith”. When you click it, a loud and stretched-out “Nooooooooooooooooooooooooo!” sound blasts, and that’s literally the whole point.

        28. Trashloop

        Trashloop

        Trashloop is a crazy little interactive art site where you click and drag a crumpled piece of paper around the screen and drop it into a trash can. However, no matter how many times you throw it away, it keeps popping back up again, creating a strange loop of pointless action.

        29. The Boohbah Zone

        The Boohbah Zone

        The Boohbah Zone is a throwback interactive Flash experience based on the early-2000s preschool series “Boohbah.” It is where you click around a colorful world of fuzzy, round characters and explore simple mini-activities, sounds, and animations. It was originally a playful Flash site filled with quirky screens and little games tied to the show’s characters and environment.

        30. Falling Falling

        Falling Falling

        Falling Falling is a minimalist digital art experience created by artist “Rafaël Rozendaal” that fills your screen with endlessly cascading colored rectangles set to calming ambient sound. Think of it as a visual meditation you watch rather than scroll or click.

        31. Electric Boogie-Woogie

        Electric Boogie-Woogie

        What it is (an overview):

        Electric Boogie-Woogie is a quirky, conservative web art piece by “Rafaël Rozendaal” that plays with animated shapes and colors reminiscent of Mondrian’s Broadway Boogie Woogie, turning simple lines into a looping visual rhythm.

        32. That’s The Finger

        That’s The Finger

        That’s The Finger is one of those super simple, pointless internet sites that just shows a big pixel-style middle finger on your screen, basically “The finger, deal with it.”

        33. You Should Have Seen This

        You Should Have Seen This

        YouShouldHaveSeenThis.com is a simple, old-school internet site that’s basically Greg Rutter’s definitive list of the “99 Things You Should Have Already Experienced on the Internet.” It is a collection of classic websites, viral videos, and quirky links the creator thinks everyone should’ve seen at least once.

        34. Please Like

        Please Like

        Please Like is a super compact, offbeat internet art page by artist “Rafaël Rozendaal” that just shows a tiny Facebook-style “Like” button in the middle of an otherwise blank web page. There’s nothing else going on.

        35. The Pug In A Rug

        The Pug In A Rug

        The Pug In A Rug is one of those delightfully pointless little web experiences that just shows a pug chilling in a rug and a timer that tracks how long you’ve been honoring it. There’s no big menu, no shopping, just that useless, funny idea.

        36. Patience is a virtue

        Patience is a virtue

        Patience is a virtue is an old-school minimal website that basically makes you wait all day long. All it shows is a loading spinner and forces you to sit there without explanation, so you literally experience the phrase “patience-is-a-virtue” by waiting for nothing.

        37. Binary Music Player

        Binary Music Player

        Binary Music Player is a fun little web toy that turns binary code into music. It counts up in binary (0s and 1s) and plays a note whenever there’s a “1,” creating a looping melody right in your browser.

        38. Can’t Not Tweet This

        Can’t Not Tweet This

        Can’t Not Tweet This is a silly little web page that plays on the idea of you literally can’t avoid tweeting it. As you move your mouse around, a button follows you that tries to make you post a tweet linking back to the site.

        39. Procatinator

        Procatinator

        Procatinator is a fun, no-stress website that shows you random full-screen animated cat GIFs set to a cool music track every time you visit or click for another cat. It’s basically a mix of silly cat visuals and sound that plays right in your browser, with no sign-up or buttons to fuss with besides a single click.

        40. NYAN.CAT!

        NYAN.CAT!

        NYAN.CAT! is the official website for the famous Nyan Cat internet meme. It is that flying cartoon cat with a Pop-Tarts body, trailing a rainbow and catchy music that went viral online. It basically plays the Nyan Cat animation and tracks how long you’ve nyaned.

        41. BEES BEES BEES BEES

        BEES BEES BEES BEES

        Bees Bees Bees Bees is a hilariously pointless little website that shows a looping GIF of Oprah Winfrey shouting “Bees!!!” with bees flying around, and that’s basically it. It’s strange because it has no buttons, no info, and no real purpose besides showing this crazy clip on repeat, which makes it feel like one of those classic, useless internet oddities.

        42. Bored Button

        Bored Button

        Bored Button is a playful website built to cure boredom with just one click. When you press its big red button, it randomly takes you to a fun game, quirky activity, weird website, or surprising little online thing to explore. What’s best is that no sign-ups or downloads are needed!

        43. The quiet place project

        The quiet place project

        The quiet place project is a simple, calming website that invites you to take a short break from all the noise of apps, notifications, and social media and just relax for a moment. It shows gentle text, peaceful music, and asks you to breathe and clear your mind for about 90 seconds without distractions, almost like a tiny online meditation session.

        44. Passweird

        Passweird

        Passweird is a playful online tool that generates quirky, ultra-weird passwords by mixing letters, numbers, and symbols. It does so in ways that are meant to be so odd and gross that no one, not even hackers or curious partners, would want to steal or guess them.

        45. Click Click Click

        Click Click Click

        Click Click Click is a wild interactive browser project that starts with a plain white page and a single green “Button,” but the fun begins when you click this button. The site tracks your every move in real time and writes humorous, judgmental remarks about your behavior, while a voice sometimes narrates what you’re doing.

        46. Bacon Ipsum

        Bacon Ipsum

        Bacon Ipsum is a fun twist on the classic lorem ipsum placeholder text used by designers and developers. But, instead of random Latin, it uses meaty, bacon-and-other-meat words to make the filler text sound way more playful.

        47. ALL GLORY TO THE HYPNOTOAD!

        ALL GLORY TO THE HYPNOTOAD!

        ALL GLORY TO THE HYPNOTOAD! is a super simple, nostalgia-style internet page that just displays the phrase “ALL GLORY TO THE HYPNOTOAD!”. It is a reference to the hypnotic toad character from the animated show Futurama, beloved by fans for its funny, trance-like scenes.

        48. FFFFidget

        FFFFidget

        FFFFidget is a simple, playful website that gives you a virtual fidget spinner right in your browser. You click or drag to spin it around, just like the real toy that was once a massive trend.

        49. Mondrian And Me

        Mondrian And Me

        Mondrian And Me is a creative, playful, art-inspired website that lets you make your own compositions in the style of Dutch abstract painter named “Piet Mondrian,” using simple geometric shapes and primary colors right in your browser.

        50. Try PaP

        Try PaP

        Try PaP (short for Passive Aggressive Passwords) is a fun online tool that asks you to enter a password and then gives unusual comments with a humorous, passive-aggressive twist, rather than simply agreeing with you. It turns the otherwise dull task of creating a password into something a bit cheeky and memorable.

        51. Into Time

        Into Time

        Into Time is one of many single-serving web artworks by digital artist “Rafaël Rozendaal.” It is a simple but visually intriguing page that fills your browser with an abstract, browser-based composition that feels more like a living painting than a normal website. It was originally created around 2011 as part of Rozendaal’s early internet art projects.

        52. Strobe Illusion

        Strobe Illusion

        Strobe Illusion is a trippy optical illusion site that shows you a stroboscopic animation, i.e., a pattern of flashing shapes you stare at for about 30 seconds. Then, when you look away, your vision seems to warp, bend, or twist as if the world is melting or moving oddly.

        53. Sneeze the dragon

        Sneeze the dragon

        Sneeze the Dragon is a fun 3D interactive web experience where you’re greeted by a cute dragon. You can rotate this dragon with your mouse and make it sneeze by clicking or holding down the mouse button. The longer you click, the bigger and more dramatic the sneeze becomes, complete with fire and smoke effects.

        54. OMFGDOGS

        OMFGDOGS

        OMFGDOGS is a playful and chaotic internet anomaly that greets you with rainbow-background pixel art of dogs running endlessly across the screen while quirky chiptune music plays in a loop. Think of it as a dog-themed cousin to cult classics like Nyan Cat.

        55. Make Everything OK

        Make Everything OK

        Make Everything OK is a simple, one-page website built around a big magic button that claims to make everything in your life “OK” when you click it. When you press the button, a message pops up saying “Making everything OK is in progress” and then “Everything is OK now”, even if nothing in your real life has changed.

        56. Smash The Walls

        Smash The Walls

        Smash The Walls is a simple, strangely satisfying click-based website where all you do is smash down a virtual wall with each click (no menus, no scroll, nothing else but that satisfying action). It’s become popular as a classic, useless but fun corner of the internet, with over 500 million walls reportedly broken by visitors.

        57. The Zen Zone

        The Zen Zone

        The Zen Zone is a minimalistic online space designed to help you chill out and feel calm through simple visuals and mellow interactions that create a peaceful browsing vibe. It’s more about feeling a mood than reading text or clicking menus. Think of it as a tiny digital break that nudges your brain toward relaxation.

        58. Neonflames

        Neonflames

        Neonflames is a generative art web experiment that lets you draw your own glowing nebula-like designs right in your browser using particle effects and vibrant color choices. Instead of text or pages to click through, you simply pick a color and drag your mouse to create swirling, space-like visuals, almost like painting with digital fire and cosmic dust.

        Mini games and browser challenges

        • Quick, Draw: A Google AI game that tries to guess what you are doodling within 20 seconds, getting smarter with every drawing you contribute.
        • The Wiki Game: A race where you start on one Wikipedia page and must reach another using only internal links, as fast as possible.
        • GeoGuessr: A geography game that drops you into a random Google Street View location anywhere on Earth and challenges you to guess exactly where you are.
        • Akinator: A genie that guesses any real or fictional character you are thinking of by asking a series of surprisingly accurate yes or no questions.
        • The Password Game: A password field that keeps adding increasingly absurd and impossible rules the longer you try to comply, turning a mundane task into a full boss fight.
        • Draw a Perfect Circle: A deceptively simple challenge that scores how close your freehand circle is to a perfect one, and it is much harder than it sounds.
        • Checkbox Olympics: A series of absurd Olympic-style events played entirely through browser checkboxes, including hurdles, shot put, and more.
        • Little Alchemy 2: A browser game where you combine basic elements like fire, water, and earth to discover over 700 new items, some of which get genuinely philosophical.
        • Spend Bill Gates Money: A clicking game that lets you spend Bill Gates’ entire fortune on real items, and the sheer scale of the wealth becomes genuinely unsettling.

        Random launchers and internet rabbit holes

        • Neal.fun: A homepage full of polished, weird, and surprisingly deep browser experiments covering everything from space to mortality to world spending.
        • MapCrunch: Drops you into a random Google Street View location anywhere on Earth with no coordinates, turning aimless virtual exploration into a strangely addictive game.
        • Wiki Roulette: Sends you to a completely random Wikipedia article every click, making it one of the most reliable rabbit holes on the internet.
        • The Secret Door: Click a mysterious door and get teleported to a random beautiful or bizarre location somewhere in the world via Street View.
        • Neave Interactive: A classic collection of web toys and interactive experiments that has been delighting bored internet users since the early 2000s.
        • Feeling Unlucky: The opposite of Google’s “I’m Feeling Lucky,” this tool shows you the very last search result for any query you type instead of the first.

        Existential and mind-bending sites

        • The Scale of the Universe: An interactive zoom that takes you from the smallest known particles all the way to the observable universe, making you feel appropriately tiny.
        • Neal.fun Deep Sea: A scrolling dive into the ocean that reveals increasingly strange creatures the deeper you go, with accurate depth markers that genuinely get unsettling.
        • Neal.fun Life Stats: Enter your birthday and watch the site calculate how many times your heart has beaten, how far Earth has traveled since you were born, and other existential statistics.
        • The True Size Of: A map tool that lets you drag countries around the globe to compare their real sizes, revealing how distorted our standard world maps actually are.
        • FutureMe: A site that lets you write an email to your future self and choose a date in the future for it to be delivered, which sounds simple until you actually try it.
        • Death Date: A morbidly playful site that uses your birthday and basic stats to estimate your death date, presented in a surprisingly calm and matter-of-fact way.
        • How Many People Are In Space Right Now: A single-purpose page that tells you exactly how many humans are currently off Earth, updated in real time.

        Weird but oddly useful

        • Hemingway Editor: A writing tool that brutally highlights every sentence that is too long, too passive, or too complicated, making it the most honest editor you will ever use.
        • The Most Dangerous Writing App: A writing app that deletes everything you have typed if you stop writing for more than five seconds, forcing you to keep going no matter what.
        • Random.org: A site that generates truly random numbers using atmospheric noise rather than computer algorithms, which sounds unnecessary until you realize how useful it actually is.
        • Zoom Earth: A real-time satellite view of Earth showing live weather, storms, and wildfires that makes your browser feel like mission control at NASA.
        • Every Time Zone: A beautifully simple visual chart of every time zone in the world that somehow makes scheduling across continents feel almost pleasant.
        • Radio Garden: A spinning interactive globe that lets you click on any city in the world and instantly tune into a live local radio station from that exact location.
        • Stellarium Web: A fully interactive star map of the night sky that shows you exactly what is above you right now, down to individual stars, planets, and constellations.

        Pure internet chaos

        • Cornify: A bookmarklet that floods any webpage you are currently on with rainbows and unicorns, turning even the most serious website into pure visual chaos.
        • Heeeeeeeey: A website that is nothing but an endlessly repeated greeting, stretched across the entire page with no further explanation or purpose.
        • Zombo.com: The original 1999 internet absurdity, a site that promises you can do anything here while an audio loop repeats this claim to infinity without ever delivering anything.
        • Don’t Even Reply: An archive of deliberately absurd and provocative replies to Craigslist ads that escalate into some of the funniest and most unhinged email exchanges ever documented.
        • One Million Checkboxes: A page containing exactly one million checkboxes that are shared live with every other visitor, so checking or unchecking any box affects what everyone else sees in real time.
        • The Million Dollar Homepage: A frozen relic from 2005 where a student sold every single pixel of a webpage for one dollar each, creating a bizarre mosaic of old ads and dead links still visible today.

        SCP and internet mythology

        • SCP Foundation: A massive collaborative fiction wiki written as if it were the classified database of a secret organization that captures and contains supernatural anomalies.
        • The Library of Babel: A digital recreation of Borges’ fictional infinite library containing every possible combination of letters, meaning every book ever written and every book that could ever exist is technically already here.
        • The SCP Foundation Explained: A companion guide to the SCP universe that breaks down the lore, the anomalies, and the mythology of one of the internet’s most elaborate fictional worlds.

        Wholesome oddities

        • The Nicest Place on the Internet: Strangers from around the world offer you a virtual hug through short video clips set to gentle music, which feels strangely moving every single time.
        • Pixel Thoughts: A 60-second meditation where you type something that is stressing you out, watch it shrink into a tiny star, and feel surprisingly better by the end of it.
        • The Wilderness Downtown: An interactive music video experience by Arcade Fire that uses Google Maps to generate a personalized film set on the streets where you grew up.
        • Weave Silk: A mesmerizing drawing tool that mirrors every brush stroke into symmetrical silk-like patterns, making anyone feel like a surprisingly talented digital artist.
        • Draw a Stickman: An interactive storytelling adventure that starts with you drawing a stickman and then takes your character through a series of puzzles you solve by drawing objects.

        Bizarre data and weird knowledge

        • Internet Artifacts: An interactive museum of early internet history featuring real artifacts like the first website, the first tweet, and original viral content from the web’s earliest days.
        • Not Always Right: A community archive of real customer service stories submitted by retail and hospitality workers that range from hilarious to genuinely hard to believe.
        • Wait But Why: A blog of extraordinarily deep and funny long-form articles about everything from artificial intelligence to procrastination, illustrated entirely with stick figures.
        • The Pudding: A publication that turns complex cultural data into stunning visual essays, making topics like music trends and pop culture feel like interactive art installations.
        • Information Is Beautiful: A data visualization site that turns statistics and research into gorgeous, explorable graphics covering topics from nutrition to misinformation.
        • The Internet Archive: A nonprofit digital library preserving billions of web pages, books, films, and audio recordings, including a full Wayback Machine that lets you revisit any website as it looked in the past.
        • Null Island: Not a real island but a famous imaginary point at 0 degrees latitude and 0 degrees longitude where millions of incorrectly geocoded data points accidentally end up on maps.

        Strangely specific single-purpose sites

        • Is It Friday Yet? A website with one job: telling you whether it is Friday. It is not Friday most of the time, which somehow never makes it less satisfying to check.
        • Make It Rain: A single button that makes it rain dollar bills across your screen with sound effects, serving absolutely no purpose and feeling completely worth it.
        • Headspin: A site that spins a photo of Nicolas Cage’s head in increasingly dramatic ways the longer you stay on the page, for reasons that are never explained.
        • The Quiet Place: A simple dark page that plays gentle ambient sound and asks you to just sit quietly for a moment, with no scrolling, no clicking, and no notifications.
        • Corndog: A website where you press and hold a button to build up a corndog, and absolutely nothing else happens beyond that single satisfying interaction.
        • Scream Into The Void: You type your frustrations, hit scream, and are told “glad nobody read that,” which is oddly more comforting than it has any right to be.
        • Long Doge Challenge: An endlessly scrolling page built around the Doge meme that stretches the dog image further and further with every scroll.
        • Sad Trombone: A single button that plays the classic comedic sad trombone sound effect, ready for deployment whenever life needs a soundtrack.
        • Incredibox: A browser music app where you drag sound icons onto animated characters to build layered beatbox tracks, with surprisingly professional results every time.
        • Cross Divisions: A digital art piece by Rafaël Rozendaal that fills your screen with hypnotic tunneling gradient shapes that shift and change color every time you click.
        • Music Map: Type any artist and watch a live constellation of similar artists appear and rearrange around them, making music discovery feel like exploring a galaxy.

        Amazing tips for finding more top strange websites

        If you’re hungry for even more weird, random, and mind-bending corners of the web, there are some easy and fun ways to uncover them beyond just Googling.

        Here’s how you can dig up more gems like the ones on this list:

        Tip #01: Use website aggregators & generators

        There are curated lists and random site generators that point you straight to odd corners of the internet, from simple directories of weird sites to click-to-surprise tools that take you somewhere new with each visit. These are great starting points when you’re bored and want something unexpected, without having to search for hours.

        Tip #02: Explore communities & forums

        Online communities love sharing strange finds. Subreddits like r/OldWebsites, r/ForgottenWebsites, or r/InternetIsBeautiful are full of people posting obscure, quirky, or nostalgic sites they’ve stumbled onto, and you can ask for recommendations too.

        Tip #03: Use advanced search techniques

        Instead of broad searches, try using advanced operators like site:, keyword combos, or even niche terms like “interactive art web experiment” or “odd internet projects.” These help filter out the usual results and surface smaller, stranger pages most people miss.

        Tip #04: Visit web archives

        Web archives like the “Wayback Machine” let you explore old or dead websites; sometimes the weirdest stuff that no longer lives but is preserved in history. Just type in a URL or keyword and scroll back in time to see sites from years past.

        Tip #05: Ask your friends

        Never underestimate word of mouth! Friends who love internet oddities can point you to weird URLs they’ve saved or stumbled on. Sharing discoveries is half the fun and often leads to even stranger finds.

        Wrapping up

        As we’ve seen from what strange websites are, what makes them weird, and a massive list of jaw-dropping odd sites, the internet still has plenty of surprising corners that break the usual mold. 

        In 2026, these quirky pages remain popular because they’re fun, unexpected, and give us a break from the usual algorithm-driven feed. 

        While Google keeps pushing quality content, weird sites that engage real people will continue popping up, shared by communities and explorers who love the unusual. 

        And if you ever get stuck trying to collect or share these bizarre URLs, give Replug.io a try. It’s a top-notch link management platform and branded URL shortener that helps you generate clean, memorable short links in no time.

        Replug Branded Short Links CTA
        A complete link management solution
        for marketing professionals & agencies.
        Try Replug for free

        Go ahead and explore more weird web gems!

      2. How to unblock websites & access restricted content in 2026: 22 proven methods discussed!

        How to unblock websites & access restricted content in 2026: 22 proven methods discussed!

        Have you ever tried clicking a link only to get hit with the “This site is not available in your region” message? 

        Frustrating, right? You’re not alone, not even close.

        Internet shutdowns and systemic censorship affected 4.6 billion people in 2025, which is more than half the world’s population. And roughly 80% of global internet users live in countries that practice some form of online censorship or surveillance.

        Whether it’s a government firewall, a workplace filter, school restrictions, or plain old geo-blocking, chances are you’ve knocked into a digital wall at some point.

        The good news?

        Those walls aren’t as solid as they look. There are dozens of reliable ways to get around them, some technical, some surprisingly simple. 

        In this post, we’re breaking down 22 proven methods to unblock websites and access restricted content in 2026.

        But first, let’s get clear on the basics: What exactly is a blocked website, and why does it happen?

        What is a blocked website?

        A blocked website is any site you can’t access because someone (a government, your ISP, your school, or your employer) has deliberately restricted it. 

        Think of it like a locked door. The website exists, it’s running fine, but you’re simply not being allowed in based on your location, network, or device.

        The goal behind blocking varies:

        • Governments do it to control information. 
        • Schools and workplaces do it to limit distractions. 
        • Streaming platforms do it to enforce licensing deals.

        Whatever the reason, the result is the same: you hit a wall!

        Why are websites blocked/banned?

        Websites get blocked for all kinds of reasons, and it’s not always a government pulling the strings. From your office Wi-Fi to your internet provider, restrictions can come from multiple directions.

        Why are websites blocked or banned

        Here’s a breakdown of the most common culprits:

        School & work policies

        Schools and workplaces block sites like social media, gaming platforms, or streaming services to keep students and employees focused. These restrictions are applied at the network level, so even if a site is perfectly legal, it’s off-limits on their Wi-Fi.

        Geo-restrictions (regional blocks)

        Ever seen “this content is not available in your country”? That’s geo-blocking. Platforms like Netflix, Hulu, or BBC iPlayer license their content by region, so they restrict access based on your IP address and location.

        Censorship

        Some governments block websites to control what their citizens can see or read online. Social media platforms, news outlets, and even messaging apps get restricted this way (China’s Great Firewall being the most well-known example).

        Technical problems/Website server issues

        Sometimes a site isn’t blocked on purpose; it’s just down. Server crashes, maintenance, or technical glitches can make a website temporarily inaccessible, and it can look a lot like a deliberate block from the user’s end.

        Network-level blocking/Network administrator policies

        Network admins (the people managing a Wi-Fi network) are privileged to block specific websites or entire categories of content for everyone connected. This is common in offices, hospitals, universities, and public hotspots.

        Security threats (firewalls & antivirus)

        Firewalls and antivirus software sometimes block websites they flag as dangerous (malware-infected pages, phishing sites, or suspicious domains). This type of block is actually protective, even if it occasionally catches harmless sites by mistake.

        Browser security measures

        Browsers like Chrome or Firefox have built-in safety features that warn you or block access to sites flagged for phishing, malware, or deceptive content. It’s your browser looking out for you, though it can sometimes be overly cautious.

        ISP-level restrictions

        Your Internet Service Provider can block or throttle access to certain websites, either by government mandate or their own policies. In many countries, ISPs are legally required to block specific categories of content, like piracy sites or adult (18+) platforms.

        Is it legal to unblock websites?

        Honestly, it depends on where you live.

        In most Western countries, like the US, UK, Canada, and Australia, using tools like VPNs or proxies to access blocked content is completely legal. You might break a platform’s terms of service, but that’s not the same as breaking the law.

        However, in countries like China, Russia, Iran, and North Korea, bypassing internet restrictions can land you in serious legal trouble. The rules vary wildly from one place to another. 

        So before you try any method to unblock a website, it’s worth doing a quick check on the laws in your specific country. When in doubt, err on the side of caution.

        Top methods to unblock websites easily

        There’s no single “one size fits all” solution when it comes to unblocking websites. Different situations call for different tools. 

        Below, we’ve rounded up the most effective ways people actually use, starting with the most powerful and effective one.

        Top methods to unblock websites easily

        Method #01: Use a VPN service (best security)

        A VPN (Virtual Private Network) is hands down the most popular and reliable way to unblock websites. 

        It works by routing your internet traffic through a server in another country, masking your real IP address and making it look like you’re browsing from somewhere else entirely.

        The biggest benefits? 

        You get access to geo-blocked content, your traffic is encrypted, and your online activity stays private, all at the same time. It’s a clean, all-in-one solution.

        That said, not all VPNs are created equal. A reputable VPN service will offer strong encryption, a strict no-logs policy, and fast server speeds; things that budget or free VPNs often cut corners on. 

        Watch out for VPNs that cap your bandwidth, log your data, or lack basic security features. For best results, always go with a paid, well-reviewed provider.

        Method #02: Use free web proxies (fast & easy)

        A web proxy acts as a middleman between you and the website you’re trying to reach. 

        You type the blocked URL into the proxy site, it fetches the page on your behalf, and boom, you’re in, without changing any settings on your device.

        The biggest appeal here is convenience. No downloads, no sign-ups, no configuration. Just open your browser, find a proxy site, and you’re good to go in seconds. It’s a solid quick fix when you need access fast.

        However, there are a few things to keep in mind. Free proxies are generally slower than VPNs, don’t encrypt your traffic, and some of them can be outright shady (logging your data or serving you ads laced with malware).

        Users looking for more reliable performance often turn to a US proxy because they offer a balance between speed, stability, and lower detection rates during long browsing sessions.

        Also, always verify that the proxy you’re using is actually working and safe. Tools like a free online proxy checker can help you confirm this before you commit.

        For finding reliable and tested proxy options, resources like ProxyCoupons can point you toward trustworthy choices without the guesswork.

        Method #03: Use the Tor browser (high anonymity)

        If privacy is your top concern, Tor is about as anonymous as it gets. 

        The Tor browser routes your traffic through multiple encrypted layers across a network of volunteer-run servers called “nodes” before it reaches its destination. This makes it extremely difficult for anyone to trace your activity back to you.

        It’s completely free, requires no account, and works right out of the box. Journalists, activists, and whistleblowers in heavily censored countries rely on it regularly for unblocking certain websites.

        The main downside, however, is speed. Because your traffic is bouncing through several relays around the world, browsing can feel noticeably slow. It’s not ideal for streaming or downloading large files. 

        Some websites also block Tor exit nodes entirely, so you might still hit walls on certain platforms. Another thing worth noting is that Tor keeps you anonymous, but it doesn’t make you invincible.

        Avoid logging into personal accounts or sharing sensitive information while using it, as that can quickly undo the anonymity it provides.

        Method #04: Change DNS server to Cloudflare’s 1.1.1.1 or Google’s 8.8.8.8

        When you type a website address or a URL into your browser, your DNS server is what translates it into an actual IP address. 

        By default, your ISP assigns you its own DNS, and that’s often where the blocking happens. Switching to a public DNS like Cloudflare’s 1.1.1.1 or Google’s 8.8.8.8 can bypass those restrictions pretty effectively.

        The best part?

        It’s free, takes just a few minutes to set up, and noticeably improves your browsing speed in many cases. No extra software needed, just a small tweak in your network settings.

        That said, this method only works against DNS-level blocking. If a website is blocked through IP blocking or deep packet inspection, changing your DNS won’t help. 

        It also doesn’t encrypt your traffic or hide your activity as a VPN does, so your ISP can still see what sites you’re visiting, just not block them through DNS filtering.

        Overall, it’s a great lightweight option for mild restrictions, but not a complete privacy solution on its own.

        Method #05: Check for “error 1020” or similar warnings

        Before trying any technical workaround, it’s worth pausing and reading the error message on your screen. 

        Error codes like “Error 1020” (Cloudflare access denied), “Error 403” (forbidden), or “Error 404” (not found) each tell a different story. Knowing which one you’re dealing with saves you a lot of wasted effort.

        For example, Error 1020 usually means the website’s firewall is blocking your IP address specifically, not a government or ISP restriction. 

        In that case, simply clearing your cookies, switching browsers, or using a different network might fix it instantly without needing a VPN or proxy at all.

        The benefit here is simple: diagnose first, act second. Jumping straight into complex solutions when a basic fix would do is just unnecessary hassle.

        The thing to watch out for is misreading the error. Not every blocked page looks the same, and some sites show generic error pages that don’t reveal the real cause. 

        If the error message is vague, a quick Google search of the exact code will usually tell you exactly what you’re dealing with.

        Method #06: Use incognito mode

        Incognito mode (or “private browsing”) is probably the quickest thing you can try when a website isn’t loading. 

        It opens a fresh session with no cookies, cached data, or browser extensions running in the background. Sometimes that’s all it takes to get a blocked or misbehaving site to load normally.

        This works particularly well when a site is blocked due to cookies tracking your location or login history, or when a browser extension like an AD Blocker is accidentally interfering with the page.

        The benefits are pretty obvious. It’s instant, built into every major browser, and requires zero technical knowledge. Just press Ctrl+Shift+N (or Cmd+Shift+N on Mac), and you’re in.

        However, don’t mistake incognito for a real privacy or unblocking tool. It doesn’t hide your IP address, bypass network-level restrictions, or fool your ISP in any way. 

        If a website is blocked by your school, workplace, or government, incognito mode won’t make a difference. Think of it as a first quick check rather than a proper solution.

        Method #07: Use Google Translate

        This method surprises a lot of people, but it actually works!

        Google Translate can function as a makeshift proxy. Simply paste the blocked website’s URL into the translation box, set it to translate from any language into English, and click the link in the output. 

        Google fetches the page on your behalf, and you end up viewing it through Google’s servers rather than accessing it directly.

        It’s completely free, requires no downloads or setup, and since the traffic appears to come from Google’s IP address, basic network filters often don’t catch it. Pretty clever for something that wasn’t designed for this purpose at all.

        That said, it does have real limitations. The formatting of the page often looks broken or messy through the translation interface. Dynamic features, videos, and login-based content frequently don’t work properly. It also won’t bypass heavy government-level censorship or sophisticated firewalls.

        Think of it as a handy little trick for occasional use. Great option for quickly reading a blocked article, but not something you’d want to rely on for regular browsing.

        Method #08: Use mobile data or mobile hotspot

        Sometimes the simplest fix is just switching networks entirely. 

        If a website is blocked on your school, office, or home Wi-Fi, it might load just fine on your mobile data. This is because your cellular network operates independently from whoever is managing that Wi-Fi.

        You can either browse directly on your phone or turn on a mobile hotspot and connect your laptop to it.

        The beauty of this method is how effortless it is. No settings to change, no apps to install; just toggle off Wi-Fi and switch to mobile data. It bypasses network-level and administrator-level blocks almost instantly.

        The main thing to watch out for is your data usage. Streaming videos or downloading files over mobile data can eat up your plan surprisingly fast. 

        It’s also worth remembering that if a website is blocked at the ISP level or by government mandate in your country, your mobile carrier (being another ISP) may enforce the exact same restrictions. 

        So this method works brilliantly for workplace and school blocks, but won’t necessarily help with broader regional or government-imposed restrictions.

        Method #09: Use a reliable URL shortener

        Here’s a lesser-known trick that can work surprisingly well in certain situations. 

        When a specific URL is blacklisted by a network filter, the block is often tied to that exact web address. Running it through a URL shortener generates a brand new link pointing to the same destination, and many basic filters simply don’t recognize it as blocked content.

        Replug Branded Short Links CTA
        Maximize marketing ROI
        by transforming ordinary URLs into
        branded short links that convert.
        Try Replug for free

        Tools like Replug.io go beyond just shortening links. They come packed with features like click tracking, branded links, and even A/B testing for different URLs. This makes them genuinely useful for marketers and everyday users alike, not just people trying to bypass restrictions.

        The setup is dead simple. Paste your blocked URL, generate a shortened version, and try accessing it through that new link.

        That said, this method only works against unsophisticated, URL-based filters. More advanced network systems that inspect traffic by destination IP address or domain won’t be fooled by a shortened link. 

        It’s also worth noting that some network filters have caught on to popular shortener domains and block those, too. Use it as a quick first attempt, but don’t rely on it as a permanent solution.

        Method #10: Clear DNS cache

        Your device stores a local record of previously visited websites called a DNS cache to speed up future visits. 

        However, sometimes this cache holds outdated or corrupted information, which can make a perfectly accessible website appear blocked or simply refuse to load.

        Clearing your DNS cache forces your device to fetch fresh DNS information, which can instantly resolve access issues that have nothing to do with actual blocking. 

        It’s one of those fixes that takes under a minute but gets overlooked surprisingly often.

        • On Windows, it’s as simple as opening Command Prompt and running this command as administrator: ipconfig /flushdns
        • On Mac, a quick Terminal command sudo killall -HUP mDNSResponder does the job, and 
        • On mobile devices, toggling airplane mode or a simple restart usually clears it automatically.

        The main thing to keep in mind is that this method only fixes locally stored DNS issues. It won’t help if a website is genuinely blocked by your ISP, network administrator, or government. 

        Think of it more as a housekeeping step than a full unblocking solution. Try it early in your troubleshooting process before jumping to more complex methods. You might be surprised how often it works.

        Method #11: Install an “unblock websites” browser extension

        Browser extensions designed to unblock websites are essentially lightweight VPNs or proxies that work directly inside your browser. 

        Popular options like Windscribe, Hola, or Browsec can be installed in just a couple of clicks from your browser’s extension store and start working almost immediately. No separate app or complicated setup required.

        The appeal is obvious. They’re quick to install, beginner-friendly, and many offer a decent free tier that’s good enough for casual unblocking.

        If you just need to access a blocked site occasionally without committing to a full VPN subscription, an extension is a pretty convenient middle ground.

        That said, there are some real limitations. Browser extensions only route your browser traffic, not your entire device’s connection. So other apps remain unaffected. 

        Free extensions in particular can be hit or miss on privacy, with some known to log browsing data or inject ads into pages.

        Before installing anything, check the reviews carefully and stick to well-known, reputable extensions. Avoid random ones with little to no user feedback.

        The browser extension store, unfortunately, has its fair share of shady options dressed up to look legitimate.

        Method #12: Contact your network administrator or ISP

        Sometimes the most straightforward solution is just asking. 

        If a website you genuinely need access to is blocked on your work or school network, reaching out to your network administrator and explaining why you need it unblocked can actually work.

        The same goes for your ISP. If a site appears to be incorrectly blocked, a simple support call or ticket can get it resolved faster than you’d expect.

        This approach is especially useful in professional settings where you need access to a specific tool or platform for legitimate work purposes. A reasonable request with a clear explanation often gets approved without much pushback.

        The thing to keep in mind is that this only works when the block is unintentional or when you have a valid, justifiable reason. 

        Don’t expect a school IT department to unblock social media just because you asked nicely. Timing and context matter too.

        Framing your request around productivity or work necessity goes a long way compared to a vague “can you just unblock this?”

        It won’t always work, but when it does, it’s the cleanest and most hassle-free solution on this entire list.

        Method #13: Modify the hosts file (advanced)

        Every computer has a hosts file, a small but powerful local text file that maps domain names to IP addresses before your DNS server even gets involved. 

        By editing this file, you can manually redirect a blocked domain to its correct IP address, effectively bypassing DNS-level blocks on your device.

        It’s a genuinely effective method for technically savvy users, and since it works locally on your machine, it doesn’t rely on any third-party tools or services. No subscriptions, no extensions, no extra software needed.

        However, this one comes with a clear warning: it’s not for beginners. Editing the hosts file incorrectly can break your internet connection or stop certain websites from loading altogether.

        • On Windows, you’ll find it at C:\Windows\System32\drivers\etc\hosts, and 
        • On Mac or Linux, it sits at /etc/hosts.

        You’ll need administrator privileges to make any changes!

        It’s also worth noting that this method only bypasses DNS-based blocking. If the website is blocked through IP filtering or deep packet inspection, modifying the hosts file won’t help.

        Always back up the original file before making any edits. That way, you can easily restore it if something goes wrong.

        Method #14: Check your antivirus or security software

        If a website suddenly stops loading and you can’t figure out why, your antivirus or security software might quietly be the culprit. 

        Many security tools come with built-in web filtering features that automatically block sites they flag as suspicious. And sometimes they get it wrong, flagging perfectly safe websites as threats.

        The fix is usually straightforward. Open your antivirus dashboard, look for web protection or URL filtering settings, and check if the site in question has been added to a blocklist. 

        Most programs let you whitelist specific websites, which tells the software to stop interfering with them (in the future).

        The benefit of catching this early is that it saves you from going down a rabbit hole of VPNs and proxies when the real issue is sitting right on your own device.

        That said, be cautious about what you whitelist. Your antivirus flagged that site for a reason, and while false positives do happen regularly, it’s worth doing a quick check on the website’s credibility before overriding the block. 

        Tools like Google’s Safe Browsing checker or VirusTotal can help you verify if a site is genuinely safe before you grant it unrestricted access.

        Method #15: Check your router & browser’s settings/permissions

        Before assuming a website is blocked externally, it’s worth checking closer to home. 

        Many routers come with built-in parental controls or content filtering features that can block specific websites or entire categories of content. And, these settings sometimes get enabled without everyone in the household even knowing about it.

        Log in to your router’s admin panel (usually accessible by typing 192.168.1.1 or 192.168.0.1 into your browser). Then navigate to the content filtering or parental controls section, and check if the site you’re trying to reach has been restricted there.

        On the other side, certain browser permissions and settings, like strict safe browsing modes or content restrictions, can also prevent specific pages from loading correctly.

        The benefit of checking here first is that it’s a quick, free fix that requires no extra tools. If something was accidentally misconfigured, you can sort it out in minutes.

        Just be mindful that if you’re on someone else’s network (a family member’s or roommate’s), changing router settings without permission isn’t great etiquette. Have a conversation first, rather than quietly modifying settings that affect everyone connected to that network.

        Method #16: Disable parental controls

        Parental controls are one of the most overlooked reasons why a website might be blocked, especially on home networks and family devices. 

        These controls can be set up at multiple levels:

        • on the router, 
        • directly on your device, 
        • through your ISP, or 
        • even within specific apps and browsers

        If you’re scratching your head, wondering why a completely harmless site won’t load, parental controls might be quietly doing their job in the background.

        Disabling or adjusting them is usually simple once you locate where they’ve been set up.

        • On Windows, check Family Safety settings. 
        • On Mac, look under Screen Time.

        Router-level controls are accessible through the admin panel, as covered in the previous method.

        The obvious benefit is that once removed, your access is restored instantly (no third-party tools required).

        That said, this one comes with a common-sense reminder. If the parental controls were set up by a parent or guardian for a minor, disabling them without permission isn’t appropriate. 

        This method is really aimed at adults who’ve inherited restricted settings on a device or network, or situations where controls were set up and simply forgotten about over time.

        How to unblock websites without a VPN

        Not everyone wants to pay for a VPN or go through the hassle of setting one up, and that’s completely fair. The good news is that there are several solid ways to access blocked content without one.

        How to unblock websites without a VPN

        Here are some of the best alternatives worth trying:

        Method #17: Use the Google cache

        Google regularly saves snapshots of web pages every time it crawls them. By accessing the cached version, you’re essentially viewing a saved copy stored on Google’s servers rather than the live site itself, bypassing the block entirely. 

        Just type cache:websiteurl.com directly into Google’s search bar to access it.

        It’s free, instant, and requires nothing extra. The downside is that cached pages can be outdated, and interactive or login-based content won’t work.

        Method #18: Use a web archive

        Web archives like the Wayback Machine (web.archive.org) store historical snapshots of websites going back years. If a site is blocked, you can often access a saved version simply by entering the URL into the archive’s search bar.

        It’s completely free and requires no setup whatsoever. Great for accessing blocked articles, research pages, or reference content.

        The catch is that archived versions are static snapshots, so dynamic content, videos, and anything requiring a login won’t function. It’s best suited for reading text-based content rather than interactive browsing.

        Method #19: Use an IP address instead of a URL

        Most website blocks target domain names rather than the actual IP address sitting behind them. So instead of typing www.website.com, try entering the site’s direct IP address into your browser. 

        You can find a website’s IP by running a simple nslookup <domain> or ping <domain> command in your device’s terminal or command prompt.

        It’s free, instant, and requires no extra tools. However, this only works if the block is purely DNS-based. If the IP address itself is blocked, or the site uses shared hosting with multiple sites on one IP, this method won’t get you through.

        Method #20: Switch between HTTP & HTTPS

        Some network filters block either the HTTP or HTTPS version of a website, but not both. So if http://website.com isn’t loading, try https://website.com instead, or vice versa. 

        It sounds almost too simple, but it genuinely works in certain situations. No tools, no setup, completely free. Just manually edit the URL in your address bar and hit “Enter.”

        The limitation is obvious. This only works when the block is version-specific and inconsistent. Against properly configured filters that block both versions simultaneously, simply switching protocols won’t make any difference.

        Method #21: Disable screen time limits

        Screen time features on iOS, Android, macOS, and Windows allow users to restrict access to specific websites or apps during set hours. 

        If a site suddenly becomes inaccessible at certain times of the day, screen time limits could be the reason rather than an external block. Check your device’s screen time or digital wellbeing settings and adjust or disable the restrictions as needed.

        It’s a quick, free fix requiring no extra tools. Just keep in mind that on family-shared devices, these settings may be password-protected by a parent or guardian, so bypassing them without permission isn’t appropriate.

        Method #22: Use an HTML to PDF converter

        Online HTML to PDF converters like PDFcrowd or Web2PDF fetch a webpage on your behalf and convert it into a downloadable PDF file, similar to how a proxy works. Since the request comes from the converter’s servers rather than your device, basic network filters often don’t catch it.

        It’s free, requires no installation, and works directly in your browser. Perfect for accessing blocked articles or text-heavy pages.

        The downside is that it only works for reading static content. Videos, interactive elements, and login-required pages simply won’t convert properly.

        How to unblock websites in specific environments

        The right unblocking method often depends on where you are and what device you’re using. A fix that works perfectly at home might be completely useless at school or work. Here’s a quick environment-by-environment breakdown to point you in the right direction.

        How to unblock websites in specific environments

        Unblock websites at home

        At home, you have the most control.

        • Start by checking your router’s content filtering settings and disabling any parental controls that might be active. 
        • Switching your DNS to Cloudflare’s 1.1.1.1 or Google’s 8.8.8.8 is another easy win. 
        • If your ISP is the one doing the blocking, a VPN is your best bet.

        Since it’s your own network, you have full freedom to adjust settings without needing anyone’s permission, making your home the easiest environment to unblock websites in.

        Unblock websites at school

        School networks are typically locked down pretty tightly by IT administrators. Your best options here are:

        • Using mobile data instead of the school Wi-Fi, or installing a browser extension with built-in proxy or VPN functionality. 
        • Google Translate and web proxies can also work against basic filters.

        Just be aware that many schools actively monitor network activity, so it’s worth understanding your school’s policy before attempting any workaround. This is because some can get you in genuine trouble if caught.

        Unblock websites at work

        Workplace restrictions are similar to school blocks but often more sophisticated.

        • A reputable VPN app installed on your personal device is the cleanest solution, especially if you’re using your own laptop.
        • If you’re on a company-managed device, be cautious. IT departments can often see exactly what’s running on those machines. Using mobile data for personal browsing is a safer, less risky approach.
        • For work-related sites that are unnecessarily blocked, simply contacting your IT department with a clear business reason is always worth trying first.

        Unblock websites on phone

        To unblock websites on iPhone:

        1. Start by checking screen time settings under Settings → Screen Time → Content & Privacy Restrictions → Content Restrictions → Web Content. 

        2. Select “Unrestricted Access” to allow all websites, or remove specific sites from the “Never Allow” list. 

        3. A screen time passcode is required if one was set.

        To unblock websites on an Android smartphone:

        • Use a VPN, 
        • Change your Private DNS to 1dns.cloudflare.net in settings, or 
        • Use a proxy site.

        If your Wi-Fi network is the issue, switching to mobile data usually bypasses it instantly. 

        For broader restrictions, installing a VPN app from the App Store is the most reliable fix. 

        iOS/Android also supports manual DNS changes under Wi-Fi settings, so swapping to a public DNS like 1.1.1.1 is another quick option worth trying.

        Unblock websites on Google Chrome browser

        Chrome has several built-in tools worth checking first.

        • Make sure Safe Browsing settings aren’t overly aggressive, and check that no extensions are interfering with site access. 
        • Trying the site in an Incognito window rules out cookie or cache-related issues. 
        • If the block is network-based, installing a Chrome VPN or proxy extension directly from the Chrome Web Store is the most straightforward browser-level fix. 
        • Switching Chrome’s DNS settings to a public DNS server under Settings → Privacy and Security → Security is another solid option.

        Unblock websites on School Chromebook

        School-issued Chromebooks are among the toughest to work around because they’re typically enrolled in Google Admin, giving IT full control over what’s accessible. Most VPN extensions get blocked at the admin level before you can even use them.

        • Your most practical option is switching to mobile data via a hotspot rather than the school’s network entirely. 
        • Alternatively, accessing cached versions or web archives of blocked content can work for reading purposes. 
        • You can use proxy websites, browser-based proxies (“browser in a browser”), or translation services to bypass firewalls.
        • Specific unblocker platforms like Space Unblocker or Red Exploit Center can often be your friend.
        • For legitimate access needs, speaking directly to your teacher or IT administrator is genuinely the most effective route.

        Unblock websites from different regions

        Geo-blocked content (like streaming libraries, news sites, or regional platforms) requires tools that can mask or change your apparent location.

        • A VPN with servers in the target country is the most reliable and widely used solution here.
        • Proxy servers set to the relevant region work too, though with less security. 
        • Smart DNS services are another popular option specifically for streaming, as they unblock geo-restricted content without slowing down your connection the way some VPNs can.

        What is the best way to access a blocked website in 2026?

        Honestly, it depends on your situation, but if we had to pick one method that works reliably across the board, a secure VPN is still the winner in 2026. 

        It handles geo-blocks, network restrictions, and ISP-level blocks all at once, while keeping your connection encrypted and your activity private. Nothing else on this list does all three simultaneously.

        That said, if a VPN feels like too much for what you need, switching your DNS or using a web proxy gets the job done for lighter restrictions without any fuss.

        The smartest approach is matching the method to the problem. For regional access testing, residential proxies can help simulate normal browsing from specific locations more naturally than basic proxy servers.

        Always identify why a site is blocked first, then pick the tool that fits in the best. Don’t use a sledgehammer when a simple fix will do the job!

        Wrapping up

        And there you have it!

        22 proven ways to unblock websites and take back control of your browsing experience. As internet restrictions continue to tighten globally, knowing your options isn’t just handy, it’s becoming essential. 

        No matter if you go with a full VPN setup, a quick DNS switch, or a simple Google Cache workaround, there’s genuinely something on this list for every situation and skill level.

        The key takeaway is simple: no single method works for everything, so understanding why a site is blocked gets you halfway to fixing it. 

        Stay curious, browse smart, and always make sure whatever method you choose is legal and appropriate in your region.

        Happy browsing!

        Frequently asked questions

        How do I unblock a website at school?

        Your quickest options are:

        – switching to mobile data, 
        – using a web proxy, or 
        – installing a browser extension with built-in VPN functionality

        Google Translate and cached versions also work against basic filters. If it’s a site you genuinely need for academic purposes, asking your IT administrator directly is always worth trying first.

        How do I unblock a website in Safari?

        Here’s how to do it:

        – Start by clearing Safari’s cache and cookies, then check Screen Time restrictions under your device settings. 
        – Switching your DNS to 1.1.1.1 or 8.8.8.8 in your Wi-Fi settings can help bypass DNS-level blocks. 
        – For stronger restrictions, installing a VPN app on your iPhone or Mac and running it alongside Safari is the most reliable fix.

        How do I disable blocked sites?

        It depends on where the block is coming from. Check your router’s admin panel, antivirus settings, parental controls, and browser extensions (any of these could be the source). Identify which one is doing the blocking first, then disable or whitelist the site from within that specific setting.

        How to unblock websites on computer?

        Here are the possible options:

        – Try switching your DNS to Google’s 8.8.8.8 or Cloudflare’s 1.1.1.1, clearing your DNS cache, or checking your antivirus and firewall settings.
        – If the block is network-based, a VPN is your most reliable option.
        – For locally stored blocks, checking your hosts file and browser settings can also quickly resolve the issue.

        How do I remove certain websites from being blocked?

        Locate where the block originates (your router, antivirus, parental controls, browser, or hosts file) and whitelist or remove the site from that specific blocklist. Each platform handles this differently, but most have a straightforward whitelist or “allowed sites” section within their settings where you can add exceptions easily.

        How to unblock websites on school computer without VPN?

        Here’s how to do it:

        – Use mobile data via a hotspot to bypass the school network entirely. 
        – Alternatively, try web proxies, Tor browser, Google Translate, Google Cache, or the Wayback Machine for accessing blocked content. 
        – Switching between HTTP and HTTPS versions of the URL occasionally works, too, against basic filters.

        How to unblock websites on school Wi-Fi without VPN?

        Here’s how to do it:

        – Switch to your phone’s mobile hotspot instead of the school Wi-Fi. This instantly bypasses network-level restrictions. 
        Web proxies, browser extensions with built-in proxy features, URL shorteners, and Google Translate are also solid alternatives.
        – For reading blocked articles specifically, Google Cache and web archives like the Wayback Machine are quick and easy options.

        How to unblock a website blocked by administrator?

        If it’s a legitimate access need, contact the administrator directly and explain your reason. This is genuinely the cleanest solution. 

        Otherwise, using mobile data bypasses administrator-level network blocks entirely. A VPN installed on a personal device also works, though on managed devices, IT may be able to detect and restrict it.

        How to unblock websites on School Chromebook when blocked by an administrator?

        This is tricky since School Chromebooks are enrolled in Google Admin, giving IT deep control. Your best practical option is connecting to a mobile hotspot instead of the school network.

        Accessing cached or archived versions of blocked pages works for reading content. For anything beyond that, speaking to your teacher or administrator remains the most straightforward legitimate route.

        What are the key features to look for when choosing a VPN to unblock websites?

        Must look for:

        – Strong encryption (AES-256), 
        – A strict no-logs policy, 
        – A wide server network across multiple countries, 
        – Fast connection speeds, and 
        – A reliable kill switch

        Split tunneling is a handy bonus. Always choose a paid, well-reviewed provider. Free VPNs frequently compromise on privacy and performance in ways that matter.

      3. A practical guide to YouTube custom URLs: How to get a custom YouTube URL in 2026!

        A practical guide to YouTube custom URLs: How to get a custom YouTube URL in 2026!

        YouTube isn’t just the world’s biggest video platform; it’s huge!

        As of 2026, more than 2.5 billion people log in every month to watch, share, and engage with content from tens of millions of creators around the world. 

        But ask most new content creators what the one thing is that makes their channel look more professional and memorable, and you’ll hear one answer again and again: having a clean, custom URL.

        Instead of a random string of characters, a custom YouTube URL (like youtube.com/YourName) gives you something easy to share, brandable, and instantly recognizable to your audience.

        In this guide, we’ll break down exactly how to create, get, change, or delete a YouTube custom URL, starting with a clear answer to the question: what a YouTube custom URL actually is!

        What is a YouTube custom URL: A brief overview

        A “YouTube custom URL” is simply a personalized web address for your channel that replaces the auto-generated, long link YouTube gives you by default with something memorable, like youtube.com/c/YourBrandName.

        What is a YouTube custom URL

        Instead of a jumble of letters and numbers, a custom URL lets viewers remember and type your channel link easily, boosting your visibility and professionalism online. 

        The main goal of such URLs is to make it simple for fans to find and share your content, helping your brand or name stick in people’s minds and across social platforms.

        YouTube custom URL eligibility criteria/requirements

        Before you can grab a custom web address for your channel, you’ve got to meet YouTube’s basic YouTube custom URL requirements.

        Think of these as the platform’s way of making sure you’re serious about your channel before handing you a memorable URL that’s easy to share. 

        Once these are in place, YouTube will let you claim a custom link that’s cleaner and more professional than a string of random characters.

        Here’s what you need:

        • Have 100 or more subscribers on your channel.
        • Your channel must be at least 30 days old.
        • Upload a profile picture.
        • Upload a banner image (channel art).

        Once you’ve ticked all these boxes, YouTube will usually show the option to set your custom URL in YouTube Studio.

        How to create a YouTube custom URL?

        Creating a custom URL for your channel is all about giving your viewers a clean, branded link that’s easier to remember and share. Think youtube.com/c/YourName or youtube.com/@YourHandle

        Once your channel meets the eligibility criteria, YouTube makes it pretty straightforward to set one up right from your dashboard.

        How to create a YouTube custom URL

        Here’s a simple step-by-step guide:

        1. Sign in to YouTube with the Google account tied to your channel.

        2. Click your profile picture at the top right and go to “YouTube Studio.”

        3. From the left menu, select “Customization” → “Basic info.”

        4. Scroll down to the “Channel URL” section and click “Set a custom URL for your channel” (this appears once you’re eligible).

          5. You’ll see suggested URLs based on your channel name. You can tweak them if allowed, then click “Publish” and “Confirm.”

          Once confirmed, your new custom URL goes live, making your channel link way more unique!

          Read also: How to shorten a YouTube URL?

          How to get a YouTube custom URL?

          Getting a custom URL (like youtube.com/c/YourName) is all about turning your channel’s messy default URL into something easy to remember and share. 

          YouTube only lets channels that qualify claim one, and the platform will either offer you a suggested URL or let you pick from options once you’re eligible.

          How to get a YouTube custom URL

          Here’s a friendly step-by-step guide to help you claim it:

          1. Sign in to YouTube with the Google account that manages your channel.

          2. Click your profile picture and go to “YouTube Studio.”

          3. From the left menu, click “Customization,” then “Basic info.”

          4. Scroll down to the “Channel URL” section. If you’re eligible, you’ll see an option like “Set a custom URL for your channel.”

          5. Copy or edit the suggested custom URL that YouTube provides.

            6. Click “Publish” and “Confirm” to lock it in.

            After that, your channel link becomes way easier to promote and remember. A small upgrade that really helps with branding and sharing online!

            Can you change a YouTube custom URL?

            Yes, but with some limits!

            YouTube does let you do a YouTube custom URL change, yet it isn’t as simple as typing a new one whenever you feel like it.

            Once you’ve claimed a custom URL, YouTube generally doesn’t let you edit it directly. Instead, you need to remove the old one and then claim a new one if eligible. 

            You can change your URL by updating your YouTube handle, which creates a new youtube.com/@handle URL. The old custom URL will redirect to the new handle URL.

            Here’s how it works:

            • You can’t edit an existing custom URL in place.
            • To change it, you must remove/delete your current custom URL from your channel and update the handle.

            Note: You can only remove and reclaim a custom URL a limited number of times per year, so choose carefully. The handle can be changed/updated up to three times per year!

            How to change a YouTube custom URL?

            If you’re wondering how to change the custom URL on YouTube, there is a way, but it’s not a simple “edit” like changing your display name. 

            YouTube doesn’t let you rename your existing custom URL directly. Instead, you must now update your channel handle at youtube.com/handle or in YouTube Studio.

            How to change a YouTube custom URL

            Here’s a friendly step-by-step guide:

            1. Sign in to YouTube Studio with the channel you want to change.

            2. From the left menu, click “Customization,” then “Basic info.”

            3. Scroll to the “Handle” section. Change your current handle to your desired new URL.

            4. Now, check if the handle is available.

              5. If available, click “Publish” in the top right corner to save the changes.

              👉 Keep in mind, on YouTube, you can change/update your handle twice every 14 days!

              Why is YouTube’s custom URL not showing?

              Sometimes, even when it looks like you should see the option for a custom URL in your YouTube Studio, it just doesn’t appear. 

              This can be confusing, but there are a few common reasons the option to claim or set a custom URL on YouTube might not show up yet, even if you think you’ve done everything right.

              Here’s what might be going on:

              • 📊 Eligibility isn’t actually processed yet: YouTube can take time to recognize your channel meets all requirements (100+ subs, 30+ days old, profile & banner added).
              • 📨 YouTube hasn’t offered the custom URL yet: Even eligible accounts sometimes must wait for YouTube to make the option available (probably around 2 weeks).
              • ⚙️ Temporary glitches or UI update delays: Platform updates or bugs can hide the option temporarily. Clearing the cache or checking later can help.
              • 📍 Feature rollout changes: YouTube has been shifting toward handles (@YourHandle) as the main way channels get easy-to-share URLs, which may affect how and where custom URL options appear.

              Note: If you’re sure you meet the official requirements and still don’t see anything, give it a few days. YouTube sometimes takes time to update eligibility on all accounts.

              Why is YouTube’s custom URL not changing?

              If you’ve tried updating your channel link and it just won’t change, don’t worry. This happens for a few solid reasons that are tied to how YouTube currently handles URLs. 

              YouTube’s system has changed over the years, and legacy custom URLs (the old youtube.com/c/YourName style) behave differently today than they did before.

              Here’s why it might not be changing:

              • You can’t directly edit an existing custom URL anymore: Once set, legacy custom URLs generally stay as they are, and YouTube doesn’t offer a direct change function.
              • 🔁 YouTube now uses handles instead: The current way to get a custom-looking URL is by setting or changing your handle, not the legacy custom URL itself.
              • 🔄 If the old URL was created under the old system, YouTube may keep it locked to maintain backward compatibility and avoid breaking existing links.
              • 📅 Rate limits or system updates can also block changes temporarily, especially as YouTube transitions features.

              In short, YouTube doesn’t let you freely edit the old custom URLs anymore. Updating your handle is the modern way to refresh your channel’s public link. Make sure your desired handle isn’t taken, so you can use it hassle-free!

              How to delete a YouTube custom URL?

              Sometimes you want to get rid of your current custom URL, maybe because you rebranded or want a fresh new link. 

              YouTube lets you delete your custom URL so that it no longer directs viewers to your channel, and then you can claim a new one if you’re still eligible.

              How to delete a YouTube custom URL

              Here’s a clear step-by-step guide you can follow:

              1. Sign in to YouTube Studio with the channel that has the custom URL you want to remove.

              2. Go to “Customization” → “Basic info.”

              3. Under “Channel URL,” you’ll see your current custom URL. Click “DELETE.”

                4. Confirm the action by clicking “Remove”(in the pop-up window) again when prompted.

                Once deleted, the URL will stop directing people to your channel (this can take a couple of days).

                After that, if you still meet the eligibility requirements (like having 100+ subscribers and the channel being at least 30 days old), you can go ahead and claim a new custom URL.

                Note: If you cannot delete a YouTube custom URL, you may need to delete your YouTube channel permanently to remove it, or wait for the system to allow changes.

                Benefits of a YouTube custom URL

                A YouTube custom URL makes your channel’s web address clean, easy to remember, and aligned with your brand instead of a long string of random letters and numbers.

                It helps your channel look more professional and makes it easier for people to find and share you online.

                Benefits of a YouTube custom URL

                Enhanced branding & professionalism

                Having a custom URL puts your channel name or brand right in the link, instead of a messy default one. This makes your channel feel more polished and established, which is great for building a serious image. People are more likely to trust a channel that looks professional at first glance.

                Improved memorability & sharing

                Custom URLs are short and simple, so they’re way easier for people to remember than long auto-generated ones. That means if someone wants to tell a friend about your channel, they can just say your URL without fumbling through random characters. That’s a big win when you’re trying to grow your audience.

                Boosted SEO & visibility

                While a custom URL won’t magically make you rank at the top of search results, having relevant words in your link can make it easier for search engines and YouTube to understand what your channel is about. This can help your channel appear more naturally in search results.

                Increased trust & click-through rates (CTR)

                People are more likely to click links that look clean and trustworthy. Custom URLs that clearly display your channel name signal legitimacy and can drive more clicks when you share links on social media or elsewhere.

                Simplified navigation

                A custom URL basically becomes your channel’s shortcut address. Instead of copying a long link every time, you’ve got a simple one to type, share, print on business cards, or post everywhere. That makes it easier for fans, old and new, to reach you quickly and effortlessly.

                How to maximize the impact of a YouTube custom URL: 8 useful tips to follow!

                Making the most of your YouTube custom URL is more than just claiming it. It’s about using it in smart ways so your channel gets more visibility, looks stronger, and drives real growth.

                8 useful tips to follow

                Here are a few friendly, practical tips you can start using right away:

                Tip #01: Make sure it is short & memorable

                Keep your custom URL as short and simple as possible so people can remember it easily and type it without thinking. A short URL also looks cleaner and feels more personal, which makes it way easier to share in conversations, emails, or on social media.

                Tip #02: Ensure it is consistent with your brand across all platforms

                Try matching your YouTube URL to your name or brand on Instagram, TikTok, and other sites so people instantly recognize you. This consistency helps reinforce your brand identity wherever you show up or appear online.

                Tip #03: Strategic promotion

                Don’t just set the URL and forget it! Use it in video descriptions, on your “About” page, in email signatures, and in all your social bios. The more places you show it, the more likely people are to click and remember it.

                Tip #04: Boost subscriptions automatically

                A clear, branded custom URL makes your channel look professional and trustworthy, so people are more likely to click and subscribe when they land on your page. While a custom URL alone won’t compel subscribers, it definitely makes subscribing feel simple and natural.

                Tip #05: Use in collaborations

                When you work with other creators, share your custom URL with them so they can link directly to your channel in their video descriptions or promotions. This makes it super easy for both audiences to find each other’s content and boosts visibility on both sides. 

                Collaborations like this naturally grow your reach because viewers are more likely to check out a partnership they trust.

                Tip #06: Drive traffic with incentives

                You can encourage people to click your custom URL by offering something valuable, like bonus content, a downloadable guide, or a contest entry, when they visit your channel. 

                Incentives give people a clear reason to follow your link instead of scrolling past it. Small rewards or exclusive perks make your URL feel worth clicking and help bring in more engaged viewers.

                Tip #07: SEO integration

                Even though the custom URL itself doesn’t directly boost rankings, using it alongside good SEO practices, like including keywords in video titles, descriptions, and tags, helps both YouTube and search engines understand what your channel is about. This means your channel is more likely to show up when people search for topics you cover. 

                Placing your custom URL in places such as online profiles, blog posts, or embeds also strengthens your overall online visibility.

                Tip #08: Track performance

                Add tracking tags (like UTM parameters) to your custom URL when you share it across different platforms so you can see which posts or platforms are driving the most clicks. 

                Tools like Google Analytics or Usermaven then show you where your traffic came from and which efforts are working best. This makes it easier to adjust your strategy and focus on the promotion spots that actually drive viewership.

                Get your shortened YouTube custom URL with Replug!

                If you want a clean, branded version of your long YouTube links, you can use Replug today!

                It is a solid YouTube link shortener and an all-in-one link management platform that does more than just shorten links.

                Replug Branded Short Links CTA
                A complete link management solution
                for marketing professionals & agencies.
                Try Replug for free

                It helps you create branded short URLs, bio links, QR codes, track clicks, run A/B tests, and get useful analytics all from one place, so sharing and promoting your content feels smooth and professional.

                Here’s a simple step-by-step guide to get your shortened YouTube custom URL with Replug within seconds:

                1. Sign up or log in to Replug: First, create your account on Replug. If you already have one, sign in.

                2. Go for shortening link: In your Replug dashboard, find the section for creating short links. This is usually on the main page under something like “Quickly Shorten your link.”

                3. Paste your YouTube link: Copy the long YouTube URL you want to clean up, and paste it into the field.

                4. Generate the short link: Hit the blue arrow button to shorten it! Replug will create a short, easy-to-remember URL that you can tailor with a branded slug if you want.

                5. Customize your new URL (optional but useful): Once the short link is created, you can edit settings like the link text (called the slug), add UTM tracking, set an expiration, or even protect it with a password.

                6. Optional advanced features: Replug also lets you add link previews, run A/B tests to see which links perform better, and attach retargeting pixels to learn more about who clicks your links.

                  7. Copy & start sharing: After you’re happy with your new short URL, copy it and use it wherever you want (social bios, email, video descriptions, or messages) to make your YouTube connections easy to click and remember.

                  Over time, check Replug’s analytics dashboard to see how your shortened YouTube links are performing. How many clicks they get, where the traffic comes from, and what’s working best!

                  Also read: How to get YouTube URL link: A detailed guide for everyday YouTubers [2026]

                  Wrapping up!

                  To sum up, having a YouTube custom URL makes your channel easier to find, share, and remember. 

                  And you now know everything from eligibility and how to create or change it, to what to do when it doesn’t show up, even how to delete it if needed.

                  You also learned why it matters, how to make the most of it, and how tools like Replug’s short URL generator can help you shorten, customize, and track your links with ease.

                  Replug Branded Short Links CTA
                  Maximize marketing ROI
                  by transforming ordinary URLs into
                  branded short links that convert.
                  Try Replug for free

                  No matter if you’re just starting out or looking to grow your audience, using a custom URL and smart link tools together is a simple way to look more professional and get more eyes on your content.

                  Frequently asked questions

                  Can I customize my YouTube URL?

                  Yes, once your channel meets YouTube’s eligibility requirements, you can replace the long default link with a custom URL that’s easier to remember and looks cleaner. YouTube offers this option in YouTube Studio under Customization > Basic info when you’re eligible.

                  How to create a URL link for YouTube?

                  Every YouTube channel automatically gets a default URL when it’s created, something like https://www.youtube.com/channel/UCxxxxxxx. You can copy this anytime from your channel page or from YouTube Studio and share it directly with viewers.

                  How do you rename a YouTube link?

                  You can’t literally “rename” the default YouTube link itself, but you can create a custom URL that replaces the long default address with a simpler version once you meet the eligibility criteria. Otherwise, the best way to make a link look nicer is to use a link shortener or a branded link/URL.

                  How can I create a custom URL?

                  If you’re eligible (100+ subscribers, channel at least 30 days old, profile picture and banner uploaded):

                  Go to YouTube StudioCustomization → Basic info and look for “Set a custom URL for your channel.”

                  Pick the suggested option or tweak it slightly if available, then confirm to create it.

                  How to set and get a custom URL for your YouTube channel?

                  To set a YouTube custom URL channel name, make sure your channel meets YouTube’s requirements (100+ subs, 30+ days old, profile pic and banner uploaded)

                  Then open YouTube Studio, go to Customization → Basic info, and click Set a custom URL. You’ll see options based on the channel name you can choose or adjust before publishing.

                  How to customize your YouTube channel URL?

                  You can customize your YouTube channel’s web link by setting a handle (starts with @) in YouTube Studio under Customization → Basic info. Once you pick a handle that fits your channel and meets YouTube’s rules, your new URL (like youtube.com/@YourHandle) will go live right away.

                  What are the standard YouTube handle naming guidelines?

                  Your YouTube handle must be 3–30 characters long and can include letters, numbers, underscores, hyphens, periods, and certain language scripts. You can’t mix left-to-right and right-to-left scripts in a single handle except under specific conditions, and it must follow YouTube’s community rules to be accepted.

                  What is the best YouTube custom URL generator online?

                  YouTube itself provides official URLs based on handles or past custom options. However, third-party tools and link shorteners (such as Replug, Bitly, or TinyURL) are great for creating simple, branded short links for sharing. Select one that lets you customize endings, track clicks, and works well with your promotion strategy.

                  How to get the YouTube custom URL from the app?

                  Here’s how to do it:

                  1. Open the YouTube app.
                  2. Tap your profile icon. 
                  3. Go to YouTube Studio → Customization → Basic info.
                  4. Then look for the handle or custom URL section.
                  5. From there, you can pick or edit your handle, and YouTube will automatically update your link.

                  What are the different types of YouTube channel URLs?

                  There are a few YouTube channel link formats you might see:

                  Channel URL (ID-based): The default long link using your channel’s unique ID.
                  Handle URL: The new youtube.com/@YourHandle format, tied to your chosen handle.
                  Custom URL: Older customizable version like /c/YourName (still works if you had it before).
                  Legacy username URL: Older formats like /user/Name from back in the day that still redirect to your channel.

                1. Getting Started with Meta Pixel: The Key to Successful Retargeting

                  Getting Started with Meta Pixel: The Key to Successful Retargeting

                  What is a Meta Pixel?

                  Meta Pixel, previously known as Facebook Pixel, is a small piece of code that can be added to the back-end of a website, mobile app, or partner application to track user’s footprints, making it easier for advertisers to retarget them on Facebook.
                  Moreover, the Meta Pixel assists brands, organizations, entrepreneurs, and marketers with Facebook pages in determining and enhancing their return on investment from the largest social network in the world.

                  While e-commerce has never been this popular, social media platforms are adapting to the latest technologies and advancements.

                  Since Facebook is the number one social media platform with over one billion monthly active users, digital marketers and online advertisers need to tighten their grip on every aspect of Facebook ads.

                  In a world full of AI tools and chatbots, it’s crucial to figure out the basic online marketing techniques that could give you a slight edge over the competition.

                  Let’s dive deep into Meta Pixel and understand more about it.

                  Why is the Meta Pixel called “Pixel”?

                  Since Meta Pixel is a powerful analytical tool that tracks website visitors’ activities. The way it works is that it uses a short code that leaves a cookie on each website visitor and helps advertisers track them via Facebook ads.

                  Pixel is the industry-standard name for retargeting code that sits on the advertiser’s website or app and provides them with insights into consumer behaviors, actions, and choices.

                  Meta Pixel helps identify Facebook advertisers and how users are interacting with the content or products on their website.

                  Installing a pixel, whether you’re running Quora ads or Facebook ads, is vital to remarketing the previous website’s visitors and understanding the audience’s behavior toward your ad.

                  What are the benefits of installing the Meta Pixel?

                  Digital marketing gurus and online advertising experts rave about retargeting and often consider it one of the most important aspects of e-commerce sales growth.

                  Installing the Meta Pixel in your website or app can provide various benefits that can help improve your Facebook advertising efforts – no question about it.

                  So let me shed some light on the capabilities and benefits of installing or using the Meta Pixel:

                  Essential for Facebook remarketing:

                  Retargeting or remarketing is the core reason why meta-pixel is a thing now. With the help of the Meta Pixel, you can track the behavior of users who have visited your website or app, and target them with specific ads to encourage them to return to your site or complete a desired action.

                  Track and improve conversions:

                  Advertisers can track user behavior on their websites or apps and analyze the effectiveness of their advertising campaigns. The data can help them identify areas where they need to improve their campaigns and optimize their ads to increase conversions.

                  Helps build custom audiences:

                  Marketers and advertisers could create custom audiences based on the actions users take on their website or app. This can help them create targeted ads for specific groups of users and improve the relevance of their advertising campaigns.

                  Assists in building lookalike audiences:

                  By analyzing the behavior of users who have interacted with your website or app, the Meta Pixel can help advertisers identify similar audiences that are likely to be interested in their products or services. It can easily expand the reach of the advertising campaigns and help target new potential customers.

                  Measures the results of your ad campaigns:

                  The Meta Pixel provides advertisers with detailed data about the performance of your advertising campaigns. They can track the number of clicks, conversions, and other metrics that help them understand the effectiveness of their ads.

                  Enables advertisers to show ads to the right audience:

                  It gets easier to track user behavior with such a facility. Therefore, the advertisers could create targeted ads that are shown to the right people at the right time. It can significantly improve the relevance of their advertising campaigns and increase the chances of users taking action.

                  How does the Meta Pixel work?

                  meta-pixel

                  The Meta Pixel works by inserting a one-time code into your website or app source so that it could track the users and allows you to remarket them using Facebook retargeting ads.

                  To use the Meta pixel effectively, you must first install it on the website or app – wherever you’re trying to capture the audience footprints for Facebook retargeting.

                  The retargeting pixel goes into the header section of the website or the source code of your app and helps you monitor, analyze, and track the audience visiting the pages/sections with the code on it.

                  For example, an author is selling an ebook through a website and has already set up a landing page, a checkout page, and a thank you page for the campaign. The Meta Pixel would be installed on all three pages to record the buyer’s journey.

                  In most content management systems (CMS), the header and footer are common on all pages. Therefore, adding any piece of code into the header or footer section means it’s been added to all pages eventually.

                  What does Meta Pixel collect?

                  Facebook-ads

                  The Meta Pixel is a powerful tool that enables advertisers to collect valuable data that can be used to improve the effectiveness of your Facebook ad campaigns.

                  The data collection using Meta Pixel begins by installing the Meta Pixel on the back end of your website or app. Once it’s added, you can monitor and track conversions on the website/app.

                  This valuable data can be used to optimize your ad campaigns, ensuring that they are delivering the best possible results.

                  The reason why advertisers collect data is because of its ability to facilitate remarketing to people who have already taken some kind of action on your website.

                  By tracking the actions of visitors, such as adding items to a cart or completing a purchase, the Meta pixel can help facilitate the delivery of targeted ads to those individuals.

                  Furthermore, one of the benefits of using the Meta pixel is that it allows you to build targeted audiences for future ads. As visitors interact with your website, their actions are recorded and analyzed by the Meta pixel.

                  This empowers you (or the advertiser) to create audience segments based on specific behaviors or interests, which can then be used to target future ads. This process is called retargeting or remarketing.

                  So the Meta Pixel collects valuable information about the website visitors so that the advertiser could design or create a relevant ad campaign to target the right audience.

                  What are Meta Pixel Events?

                  Meta has provided several “Events” for conversion optimization. If you’re new to Facebook advertising jargon, then let me make it easier for you.

                  Events are defined as any type of action that takes place on your website after the visitor lands on the website as a result of the ad.

                  There are several “Standard events” which are predefined by Meta and advertisers could use them to log user activities, conversion analysis, and build an audience.

                  Besides the “Standard events,” there are “Object properties” that are also predefined by Meta and can be included with “Standard events” based on compatibility. For more clarification on Meta Pixel or to access the event codes, check out this page.

                  How to setup Meta Pixel?

                  Setting up the Meta Pixel is not a complex process unless you haven’t done any Facebook ad campaigns before or you never edited even a simple HTML code.

                  I’ll try to break down the process into brief sections so that it gets easier for an average Joe to digest, comprehend, and implement it.

                  Before I head over to the next part, just remember that Meta Pixel is a code that works as a cookie and helps advertisers target the website audience on Facebook.

                  Since you have already learned about the Meta Pixel by now, it’s important to know how you can create it. It’s not a complex process so no need to panic.

                  Here are the steps involved in creating a meta pixel:

                  Step 1: Access the ads manager

                  Ads Manager is a platform provided by Facebook that allows you to manage and create advertisements for your business.

                  To create a meta pixel, you need to first access the Ads Manager by logging in to your Facebook account and clicking on the “Ads Manager” button in the top left corner of the screen.

                  Step 2: Go to the events manager

                  Once you are in the Ads Manager, you need to navigate to the Events Manager section. This can be done by clicking on the “Events Manager” button in the left-hand menu.

                  Step 3 Connect a data source:

                  Connect-Data-Source

                  After accessing the Events Manager, you need to connect a data source. A data source can be any platform that you use to collect data related to your websites or apps, such as Google Analytics or Shopify.

                  By connecting a data source, you can collect information about user behavior on your website or app and use it to create targeted ads.

                  Step 4: Choose the data source

                  Choose-data-source

                  Lastly, you need to choose the data source that you want to use for creating your meta pixel. This can be done by clicking on the “Connect Data Sources” button in the Events Manager. In most cases, the data source is the website, so you’ll need to provide the URL of your website.

                  Step 5: Select connection methods

                  Select-connection-method

                  You can either connect through the Conversion API method or Facebook Pixel method. For the said case we have selected the Facebook Pixel method.

                  Step 6: Connect website activity using Facebook Pixel

                  Connect-Website-Activity-using-Facebook-Pixel

                  Once you have chosen the data source and followed the on-screen instructions to complete the process of creating a meta pixel, you’ll be able to generate your meta pixel for installation on your website or landing page.

                  How to install the Meta Pixel on your website?

                  Connect-website-Activity-using-pixel

                  There are two basic ways of installing the meta pixel on your website.

                  i. Insert Meta Pixel code manually

                  The simple yet basic method of inserting the meta pixel code into your website is by accessing the source code of the website and putting the code into it. It’s usually done by editing the HTML or PHP file using a code editor and pasting the code into it.

                  Make sure to add it to the pages that need the most or else you won’t be able to track the conversion. If your website is built with PHP, you might have a header.php file, just insert the code into it and it’ll be available/accessible on every page of the website.

                  Below are the steps to follow to install the Meta Pixel code manually.

                  1.Naviagte to the Events Manager in your FB Business Suite and click the Data Sources.

                  2. Select the Meta Pixel you want to setup, and click Continue Pixel setup.

                  3. Select Meta Pixel and click Connect.

                  Connect-website-Activity-using-pixel

                  4. Select Install code manually

                  5. Copy the pixel base code.

                  copy the pixel code
                  -put-Meta-Pixel-code-on-website-header-


                  6. Paste the pixel code at the bottom of the header section above the closing header tag in your CMS or web platform.

                  Note: Ensure to toggle on Automatic Advanced Matching 

                  ii. Add Meta Pixel code via Partner Integration

                  The second method is more convenient than the previous one. It will work only if you’re using a CMS like WordPress, Drupal, or Shopify. All you need is to edit the source file and insert the meta pixel into your website’s code.

                  Most people use WordPress for building their websites, blogs, and landing pages. So you could use any code insertion WordPress plugin for that matter. All you have to do is to install such a plugin and paste the code into it. The plugin would do the rest of the process of code placement on the website.

                  Here are some of the popular code insertion plugins:
                  ⦁ WPCode
                  ⦁ Woody code snippets
                  ⦁ Header Footer Code Manager

                  Below video by digital marketer Jacob Lee explains the steps to add Meta Pixel code via WordPress partner integration.

                  How to find the Meta Pixel ID?

                  install-code-header
                  Facebook-Pixel-Id-

                  Locating the meta pixel ID might be difficult for beginners, but it’s quite simple. If you have created your meta pixel ID, then it won’t be difficult for you to find and access it.

                  However, if you’re new to Facebook ads, then it might seem intimidating at first. Don’t worry because I’ve got your back.

                  To find the Meta Pixel in the Facebook Ads Manager, you can follow these steps:

                  i. Log in to your Facebook account and go to the Ads Manager.
                  ii. Click on the hamburger menu icon (three horizontal lines) in the top left corner of the screen.
                  iii. Select the “Events Manager” option from the list of available options.
                  iv. In the Events Manager section, click on the “Data sources” tab in the left-hand menu.
                  v. Once you click on the data source button, you will be taken to your pixel page. Here, you can see the pixel ID, view the pixel code, and make any necessary changes to the pixel settings.
                  vi. If you want to use the pixel to track specific events on your website or app, you can click on the “Settings” button next to the top menu and access the specific option. This is the area that will give you access to the cookies set, event setup, and conversion API.

                  That’s pretty much it!

                  Now you have successfully found your Meta Pixel in the Facebook Ads Manager and can now use it to track user behavior on your website or app and create targeted ads.

                  How to setup Events using the Event setup tool?


                  Setting up Events is an essential step in optimizing and improving the ad campaign as it directly influences the customer base targeting. Since retargeting is all about reaching out to the audience that has shown some interest in your website, setting up the right event helps identify the intent of the website visitors.

                  To start using Events, you first need to set them up. Facebook has a dedicated section for Events setup, and it’s called Event Setup Tool.

                  Step 1: Go to the Ads Manager
                  The first step in setting up events using the Event Setup Tool is to log in to the Ads Manager. If you don’t have an account, you can create one for free by going to the Facebook Ads Manager.

                  events-manager

                  Step 2: Open the Events Manager
                  Once you have logged in to the Ads Manager, you will need to navigate to the Events Manager. You can do this by clicking on the hamburger icon in the top left corner of the screen and selecting “Events Manager” from the menu that appears.

                  connect-data-sources

                  Step 3: Access the Data Sources
                  Once you have opened the Events Manager, you will see a menu on the left side of the screen. From here, click on “Data Sources,” which will take you to a page where you can manage your data sources, such as your website, app, or offline events.

                  settings-data-sources

                  Step 4: Go to the Settings Section
                  After accessing the Data Sources page, you will see a list of your data sources. Select the data source you want to set up events for and click on its name. This will take you to the Settings section for that particular data source.

                  event-setup
                  setup-events-popup-window

                  Step 5: Open the Events Setup Tool
                  Within the Settings section, scroll down until you see the “Events” section. Here, you will find the option to open the Events Setup Tool.

                  Once you click on this button, you will be taken to a page where you can create and manage the events that you want to track on your website.

                  How to confirm that the Meta Pixel is working using the Meta Pixel Helper?

                  Facebook-Pixel-Helper-Extension
                  Pixel-Helper-

                  The Meta Pixel Helper is a convenient Chrome browser extension that can be used to check for the presence of Meta Pixel code on websites without any hassle.

                  This browser extension operates in the background and doesn’t bother the script or performance of the website. Plus, it is quite easy to install even for newbies.

                  After installation, an icon resembling </> – the Pixel Helper icon – will appear in the upper right corner of the browser alongside the address bar.

                  When a website has a Meta Pixel installed, the Pixel Helper icon will change color from grey to blue, and a badge will appear showing the number of Pixels found on the page.

                  If the icon does not turn blue, it means that there are no Meta Pixels installed on that particular webpage. To access the Pixel Helper, click on the Pixel Helper icon and a small popup will appear containing information that can be used to verify, troubleshoot, and improve the Pixel.

                  Therefore, the Pixel Helper is a helpful tool for confirming the installation or existence of the Meta Pixel on the website. To download this Chrome extension, visit this page.

                  How to use Meta Pixel with Replug?

                  Replug is a powerful URL shortener that offers several features such as URL shortening, branded short URLs, retargeting, deep links, and bio links.

                  You already know by now that Meta Pixel is used for retargeting people through Facebook ads. Since Replug also provides a link retargeting tool, it’s time to figure out how this deadly combo plays out.

                  You can use the short links created with Replug’s custom link maker to reach out and retarget the users that click on your short URLs through Facebook ads.

                  Here are the steps involved in using Meta Pixel with Replug:

                  i. Grab the Pixel ID from Facebook

                  Facebook-Pixel-Id-

                  You’d surely know by now where to get the pixel ID from your Facebook account. Here’s a quick guide if it all seems intimidating or too much to digest:

                  • Go to the Ads Manager section and click on the Events Manager button from the options.
                  • Then, go to the Data Sources from the left menu and you’ll see the Facebook pixel.
                  • Open the settings area of your pixel and copy the pixel ID from there.

                  ii. Login to your Replug Account

                  add-retargeting-pixel

                  Now go to the Replug website and log in to your Replug account.

                  In case, you haven’t signed up for a Replug account, I highly recommend doing it now. Replug has a 14-day free trial. Try Now!

                  iii. Add a Retargeting Pixel in Replug

                  add-retargeting-pixel
                  Click-Add-Pixel
                  add-retargeting-pixel

                  Once you’re in, access the profile settings from the top-right corner. Just click on your profile icon to do so.

                  A drop-down menu would appear; click on the Retargeting Pixels.

                  You’ll land on the Retargeting Pixels page. Now click on the “Add Pixel” button.

                  Once you click the Add Pixel button, a popup window would appear. Choose Facebook, provide your pixel name, and paste your Facebook pixel ID.

                  Once it’s done, click on the “Add” button to proceed.

                  iv. Create a retargeting campaign

                  Create-Retargeting-Pixel-Campaign
                  select-brand-for-retargeting-campaign

                  The next up is creating a new campaign for retargeting the Replug audience, meaning the visitors who click through your short links, so you could start retargeting them through Facebook ads.

                  To do this, go to your Replug dashboard and access the Campaign section.

                  Click on the “New Campaign” button to create a new campaign for this purpose.

                  Select the appropriate brand or create a new one for this campaign.

                  Add-retargeting-codes-for-campaign-

                  Name this campaign and select the campaign type. You must check the “retargeting” option at this stage to let Replug know that it’s a retargeting campaign.

                  Choose the retargeting script afterwards.

                  In this case, it’ll be the one associated with Facebook. Choose the Facebook pixel you created earlier in your Replug account.

                  Now save the campaign and you’re done with creating a new campaign using Replug.

                  How to change the Meta Pixel’s name?

                  Changing the meta pixel’s name might not be on your mind, but you should know whether or not you can do it, just in case.

                  It’s possible to change the meta pixel’s name. All you have to do is to follow a few simple steps to do this:

                  i. Go to your Ads Manager account after logging in to your Facebook account.
                  ii. Access the Events Manager section from the Ads Manager.
                  iii. Open the Data Sources to access your already created meta pixel. (Remember that you could create only one meta pixel per account).
                  iv. Now click on the edit button next to your meta pixel’s name. This is where you could change the meta pixel’s name.

                  That’s it.

                  Easy-peasy!

                  FAQs about Meta Pixel

                  Is meta pixel a cookie?

                  The Meta Pixel is a pixel code that helps advertisers target the audience who have visited their websites through Facebook ads. A cookie also does the user-tracking on the websites, but may not be directly influencing the retargeting like the meta pixel.

                  How do I create the Meta Pixel?

                  Log in to your Facebook account, go to the Ads Manager, access the Events Manager, and click on the Data Sources. You’ll see the option to create your meta pixel.

                  Is the Meta pixel different from than Facebook pixel?

                  No. The Meta Pixel and the Facebook Pixel are the same. The Meta Pixel was formerly known as the Facebook Pixel.

                  What is Meta pixel in Facebook ads?

                  It’s a pixel code that helps advertisers track the website visitors and empowers them to advertise to those visitors using Facebook ads by retargeting them.

                  What is a Facebook Pixel notice?

                  This is by no means legal advice, but a lot of countries require websites to display the cookie consent notification which tells the website visitors that this website is using cookies to track visitors.

                  When a website is using Meta Pixel or any other user tracking tool to track website visitors’ activity, performance, and behavior, they must notify the website visitors about this.

                  Have you ever seen a cookie consent notification on websites, especially when you visit it for the first time?

                  The website is trying to tell you that they’re using some tracking tools or softwares to track the visitors’ activities and behaviors – it’s a very common website management practice.

                  I’m no expert on GDPR or CCPA, so you should consult your lawyer for more clarity. However, I simply use a cookie consent WordPress plugin on my website that displays a cookie consent notification on the website.

                  Some several tools and plugins automatically add cookies consent notices to the websites, but here are some of the popular website plugins for this purpose:

                  ⦁ Cookie Notice & Compliance for GDPR / CCPA
                  ⦁ Cookies and Content Security Policy
                  ⦁ Cookie Script