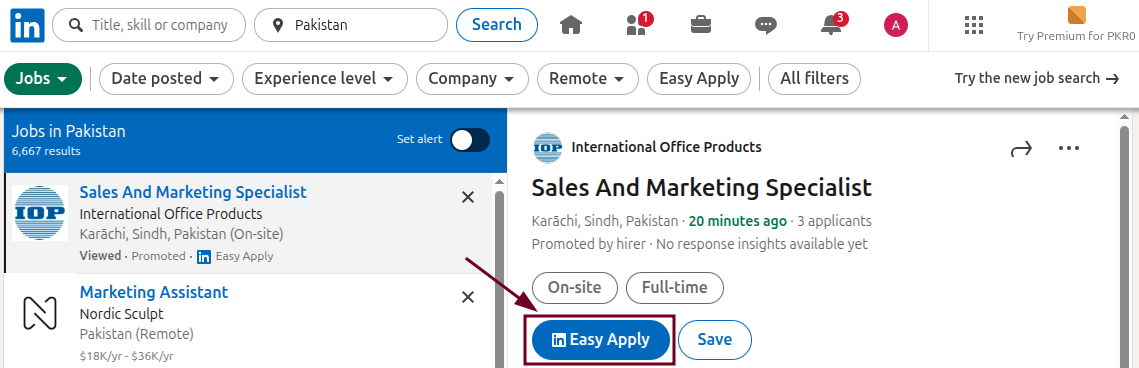
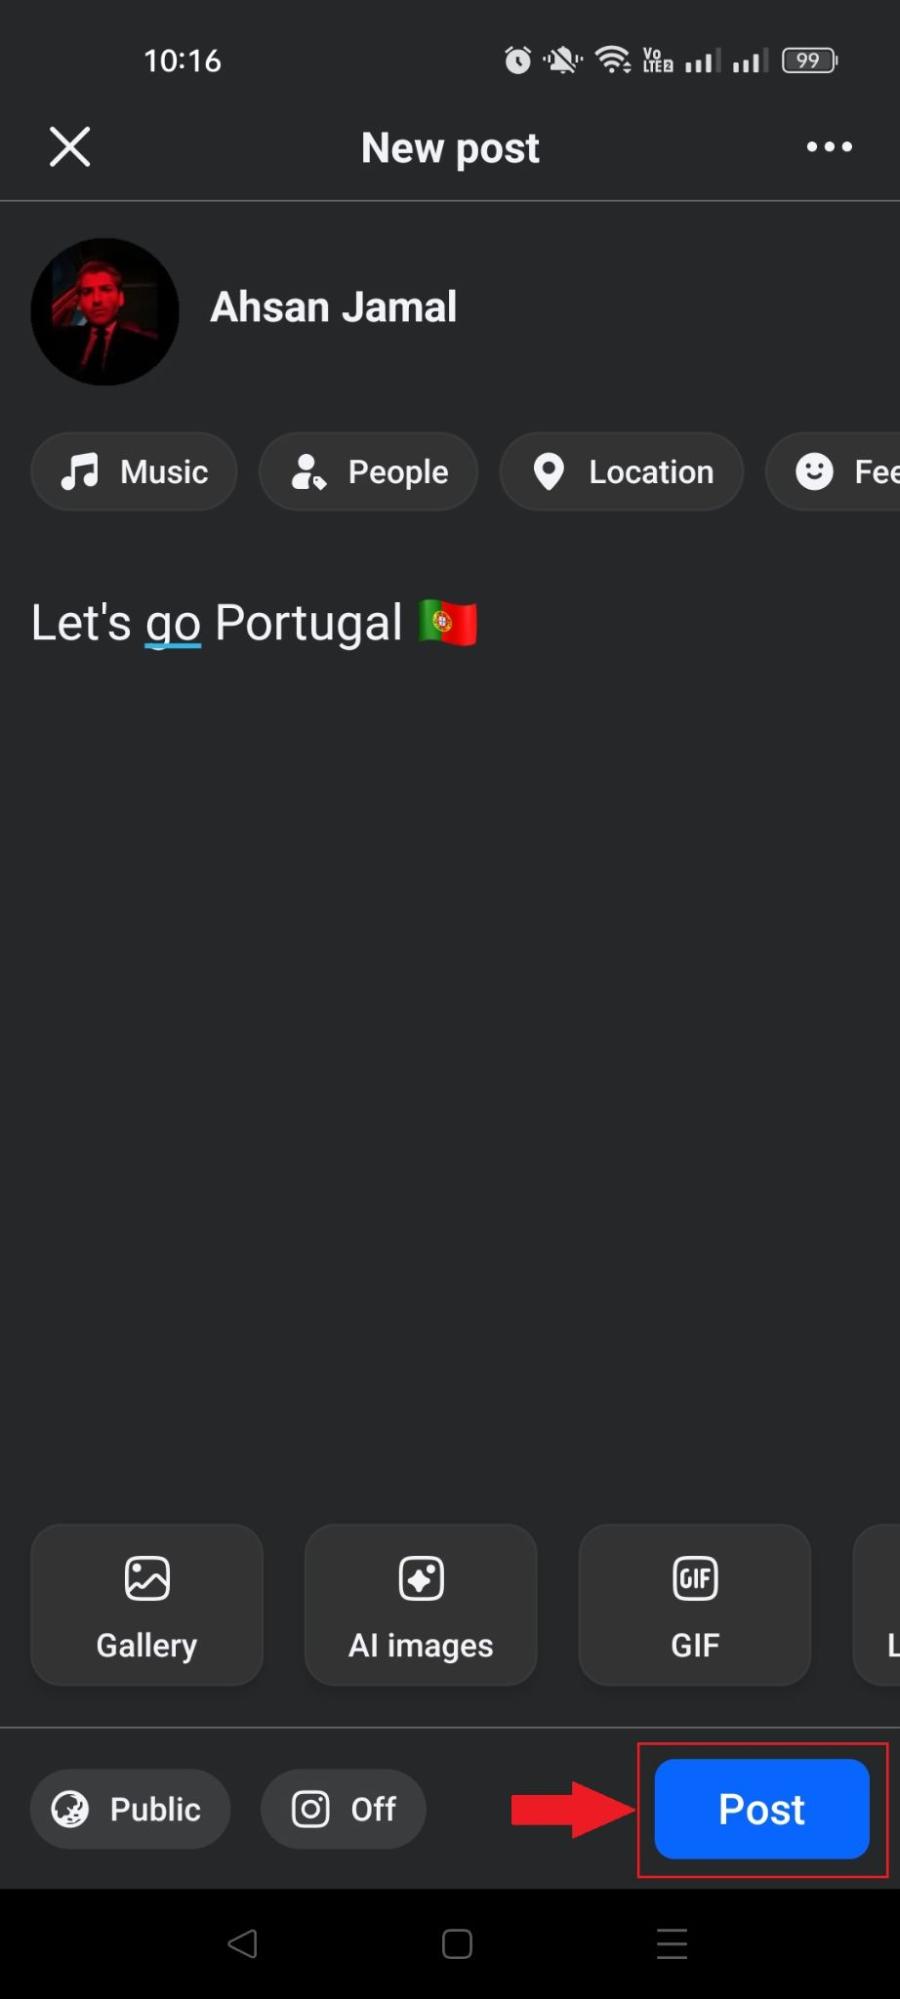
Let’s be honest, email isn’t the shiny new thing anymore, but it quietly outperforms almost everything else.
For every $1 you spend, email marketing returns an average of $36 to $42, leaving paid search and social ads in the dust. And with more than 4.6 billion people checking their inboxes worldwide, that’s a staggering number of potential customers within reach.
But here’s the catch: even the smartest email marketing strategy falls flat without the right software behind it. The tool you choose shapes everything: your deliverability, automation, design, and results.
That’s exactly why we tested and compared the best options for 2026. Before we jump into the list, let’s quickly cover what email marketing tools actually are.
What are email marketing tools?
Think of email marketing tools as the behind-the-scenes helpers that make reaching your audience way easier. In simple terms, they’re email marketing software and platforms that let you design, send, and track emails to your subscribers, all from one place.
Instead of manually emailing people one by one (who has time for that?), these tools handle the heavy lifting like building campaigns, automating follow-ups, and managing your contact lists.
The main goal of email marketing here is pretty straightforward: connect with your audience, nurture those relationships, and turn casual readers into loyal, paying customers.
How we selected the best email marketing automation tools
We didn’t just pick names out of a hat. We put dozens of platforms through their paces, judging each one against five core things that actually matter when you’re running real campaigns.
1. Automation & workflow depth
This is the heart of any good tool. We looked at how easily you can set up automated sequences (welcome emails, follow-ups, abandoned cart reminders) without needing a tech degree. The deeper and more flexible the workflows, the more time you save.
2. User experience (UX) & interface
A powerful tool is useless if it feels like a headache to use. We checked:
how clean and intuitive each dashboard was,
how simple the drag-and-drop editors felt, and
whether a beginner could jump in without spending hours watching tutorials.
3. Deliverability & analytics
What good is a great email if it lands in spam?
We focused on how reliably each platform gets your emails into the inbox, plus the quality of their reporting (open rates, clicks, and the kind of data that helps you follow email marketing best practices and keep improving).
4. Integration ecosystem
Your email marketing tool shouldn’t work in a silo. We examined how well each one connects with the apps you already rely on (your CRM, e-commerce store, landing page builders, and more), so everything talks to each other smoothly.
5. Pricing & scalability
Finally, we weighed the cost against the value. We looked at whether the pricing makes sense for small businesses just starting, and whether the plans can grow alongside you as your list and needs get bigger.
Top email marketing tools list
Alright, this is the part you’ve been waiting for. Below are some of the most popular email marketing tools out there right now, each with its own personality, strengths, and ideal user.
Let’s break them down one by one so you can see which one actually fits your business!
Tool name
Best for
Standout feature
Use cases
MailerLite
Creators & small businesses on a budget
Clean, beginner-friendly interface
Newsletters, simple automations, selling digital products
Mailjet
EU teams needing transactional emails
Real-time team collaboration on templates
GDPR-compliant campaigns, transactional emails, team workflows
If you’re after something clean, affordable, and genuinely easy to use, MailerLite is hard to beat. It’s a favorite among creators, bloggers, and small businesses who want powerful features without a steep learning curve or a scary price tag.
Key features:
Drag-and-drop email editor with a clean, beginner-friendly interface
Automation builder for welcome sequences, follow-ups, and more
Landing pages, signup forms, and pop-ups included
Website builder and the ability to sell digital products
AI writing assistant to speed up content creation
Pros:
One of the most affordable tools for small lists
Refreshingly simple to learn and navigate
Only charges you for active subscribers (no paying for dead weight)
Cons:
Advanced features stay fairly basic compared to bigger platforms
Costs can climb noticeably as your list grows
Pricing plans:
Free: Up to 250 subscribers and 2,500 emails per month
Comfort: Starts around $10.80/month with the full toolset
Power: Higher self-serve tier with advanced features at $22.50/month
Enterprise: Custom pricing for businesses with 200,000+ subscribers
2. Mailjet
Mailjet is a solid pick if you need both marketing and transactional emails in one place. Based in the EU and built with collaboration in mind, it’s especially handy for teams that want to work on email templates together in real time.
Key features:
Drag-and-drop editor with real-time team collaboration
Both marketing campaigns and transactional (API/SMTP) sending
Segmentation and personalization tools
Marketing automation and A/B testing (on higher tiers)
Email validation to keep your list clean
Pros:
Unlimited contacts on paid plans. You pay by email volume, not list size!
Strong choice for EU businesses needing GDPR compliance
Genuinely affordable across the board
Cons:
Deliverability can be inconsistent on shared IPs
Automation is locked behind the Premium plan
Pricing plans:
Free: $0/month, 200 emails/day, up to 6,000 per month
Starter: $9/month for 8,000 emails and 2,000 contacts
Essential: $17/month for 15,000 emails and unlimited contacts
Premium: $27/month, adds A/B testing and automation
Custom: Tailored enterprise pricing
3. Mailchimp
The household name! Mailchimp has been around forever and packs a huge ecosystem (email, automation, landing pages, even ads and a website builder). It’s beginner-friendly, though it does get pricey as you scale.
Key features:
Easy-to-use email builder with 100+ templates
Multi-step automation and customer journeys (Standard plan and up)
Predictive segmentation and send-time optimization
Built-in reporting, A/B testing, and AI assistant
Wide range of integrations and add-ons
Pros:
Familiar, polished interface that’s great for beginners
All-in-one marketing toolkit beyond just email
Massive library of integrations
Cons:
Gets expensive fast as your contact list grows
Counts unsubscribed contacts toward your limit unless you archive them
Pricing plans:
Free: From $0/month, under 250 contacts
Essentials: From $13/month for 10X contacts
Standard: From $20/month, unlocks multi-step automation
Premium: From $350/month for larger teams and 15X contacts
4. Mailtrap
Mailtrap is a bit different from the rest. It’s an email delivery platform built with developers in mind. It shines at testing emails safely before they go live and sending transactional emails reliably, with some bulk and marketing features layered on top.
Key features:
Email Sandbox to safely test emails without hitting real inboxes
Email API/SMTP for production sending
Spam score checks and HTML/CSS validation
Separate transactional and bulk sending streams
Detailed analytics and real-time logs
Pros:
Excellent for catching email issues before customers ever see them
Volume-based pricing is cheaper for big lists with moderate sending
Developer-friendly with tons of SDKs and integrations
Cons:
Testing and sending are separate products, so you may need two subscriptions
Less suited to non-technical marketers than the others on this list
Pricing plans:
Free: $0/month, 500 contacts and 1,500 emails
Essential: $15/month, 10K contacts and 30,000 emails
Pro: $59/month, 25K contacts and 125,000 emails
Custom: Tailored plan for your needs
5. Klaviyo
If you run an online store, Klaviyo is the tool everyone talks about. It’s purpose-built for ecommerce, plugging deep into platforms like Shopify and using customer behavior to drive seriously smart email and SMS campaigns.
Key features:
Deep ecommerce integrations (Shopify, WooCommerce, BigCommerce)
Powerful automated flows like abandoned cart and post-purchase
Predictive analytics, including customer lifetime value
Email and SMS marketing in one platform
Advanced, behavior-based segmentation
Pros:
Best-in-class for ecommerce-focused marketing
Only charges for active profiles, not unsubscribed ones
All core features included on every plan
Cons:
Gets expensive quickly for large contact lists
SMS is a separate add-on with its own credit costs
Pricing plans:
Free: Up to 250 active profiles, 500 emails, and 150 SMS credits/month
Paid: All included from free plan, plus much more
Enterprise: Custom pricing for large organizations
6. ActiveCampaign
If automation is your thing, ActiveCampaign is a powerhouse. It blends email marketing with a built-in CRM and some of the most flexible, detailed automation workflows you’ll find anywhere. Ideal for businesses that want to get seriously hands-on with customer journeys.
Key features:
Visual, drag-and-drop automation builder with deep branching logic
Built-in CRM and sales automation tools
Advanced segmentation and behavioral targeting
Predictive sending and AI-powered features (on higher tiers)
900+ integrations plus SMS and WhatsApp add-ons
Pros:
Best-in-class automation depth and flexibility
CRM and marketing in one connected platform
Scales well from solo users up to large teams
Cons:
No free plan, and pricing climbs quickly with add-ons
The wealth of features can feel overwhelming for beginners
Pricing plans:
Starter: From $15/month for 1,000 contacts
Plus: From $49/month, adds unlimited automation actions and landing pages
Pro: From $79/month, adds predictive AI, plus attribution & conversion tracking
Enterprise: From $145/month, adds custom objects, SSO, and a dedicated account team
7. Constant Contact
A veteran in the email space, Constant Contact is known for being beginner-friendly and rock-solid reliable. It’s especially popular with small businesses, nonprofits, and event-driven organizations. Thanks to its built-in event management and famously good support.
Key features:
Easy drag-and-drop editor with a big template library
Built-in event registration and management tools
Social media posting and ad integration
Automation, A/B testing, and segmentation (Standard and up)
SMS marketing as an add-on
Pros:
Genuinely beginner-friendly with strong customer support
Built-in event tools that competitors often lack
Reliable deliverability track record over 30+ years
Cons:
Gets pricey as your contact list grows
Send limits and overage fees can catch you off guard
Pricing plans:
Lite: From $12/month (ideal for beginners)
Standard: From $35/month (great for most businesses)
Premium: From $80/month (ideal for pros)
Teams: Custom pricing (ideal for teams with multiple locations)
8. GetResponse
GetResponse is a true all-in-one platform. Beyond email, it packs in landing pages, a website builder, webinars, and even course-creation tools. This makes it a great fit for creators, coaches, and small businesses that want everything under one roof.
Key features:
Email marketing with unlimited sends on paid plans
Marketing automation and autoresponders
Landing pages, signup forms, and a website builder
Built-in webinar hosting
Course creation and paid newsletters
Pros:
Unlimited email sends even on the entry-level plan
A lot of tools bundled together for the price
Generous 24/7 support and an AI content assistant
Cons:
Lower tiers cap at limited contacts and one automation workflow
Transactional emails are locked to the Enterprise plan
Pricing plans:
Free: Try free for 14 days. No credit card required.
Starter: From $19/month, unlimited monthly email sends
Marketer: From $59/month, adds advanced audience segmentation
Creator: From $69/month, adds premium newsletter subscriptions
Enterprise: Custom pricing
9. Moosend
Moosend is the budget-friendly underdog that punches well above its weight. It keeps things refreshingly simple with essentially one paid plan that unlocks all the core features. This makes it a fantastic value pick for small businesses and startups.
Key features:
Drag-and-drop editor with an AI Writer
Full marketing automation with 30+ triggers
Unlimited email sends on all paid plans
Landing pages, forms, and segmentation
Website tracking and ecommerce integrations
Pros:
Outstanding value, advanced features at a low price
Generous 30-day free trial with full access, no card needed
Charges per unique contact, not per list
Cons:
No permanent free plan anymore
Transactional email and dedicated IPs require a custom add-on
Pricing plans:
Free trial: 30 days of full pro features, no credit card
Pro: From $9/month for 500 contacts
Moosend+: Custom plan with pick-and-choose add-ons
Enterprise: Custom pricing for high-volume senders
10. HubSpot
HubSpot is the all-in-one giant. Its “Marketing Hub” ties email marketing into a much bigger ecosystem of CRM, sales, and service tools. It’s incredibly powerful and polished, though that power comes with a premium price tag as you scale up.
Key features:
Email marketing built on top of a free, full-featured CRM
Powerful automation workflows
Landing pages, forms, live chat, and ad management
Advanced analytics, reporting, and lead scoring
AI-powered content tools and deep personalization
Pros:
Seamless integration of marketing, sales, and CRM data
Excellent free tools to get started
Robust analytics and enterprise-grade features
Cons:
The jump from Starter to Professional is steep (plus a mandatory onboarding fee)
One of the pricier options if you only need email
Pricing plans:
Free: $0/month (free for up to 2 users)
Starter: From $20/seat/month for 1,000 contacts
Professional: From $890/month for 2,000 contacts
Enterprise: From $3,600/month for 10,000 contacts
11. CleverReach
CleverReach is a German-made email newsletter platform with a strong focus on data privacy and deliverability. If GDPR compliance and EU data residency matter to your business, this is a standout option. It’s trusted by big names like Spotify and DHL.
Key features:
Drag-and-drop editor with responsive templates
THEA automation builder for visual workflows
A/B testing, dynamic content, and RSS campaigns
Segmentation and detailed reporting
Strong GDPR compliance with German data centers
Pros:
Excellent for privacy-conscious European businesses
Reliable deliverability and CSA certification
Flexible billing, including pay-as-you-go options
Cons:
Pricier than competitors as your list grows
Premium support costs extra, and the interface leans German-centric
Pricing plans:
Lite (Free): $0/month, up to 1,000 emails/month
Basic: From $15/month, unlimited emails per month
Pro: From $18/month, adds unlimited email automation
Enterprise: From $499/month, monthly email quota
12. Brevo
Formerly Sendinblue, Brevo is a true all-in-one platform that bundles email, SMS, WhatsApp, chat, and a basic CRM. Its standout feature: it charges by emails sent rather than contacts stored. A big win if you have a large list but send infrequently.
Key features:
Email, SMS, and WhatsApp marketing in one place
Marketing automation and a built-in CRM
AI content generator and advanced segmentation
Landing pages and signup forms (higher tiers)
Transactional email via API or SMTP
Pros:
Volume-based pricing keeps costs low for big, low-frequency lists
Multichannel tools built in, even on lower tiers
Generous free plan with unlimited contact storage
Cons:
The free plan caps you at 300 emails/day
Removing Brevo branding costs extra on the Starter plan
Pricing plans:
Free: $0/month, only 300 emails/day
Starter: From $9/month (5,000 emails per month)
Standard: From $18/month, adds automation, A/B testing, and removes branding
Professional: From $499/month for high-volume, multichannel campaigns
Enterprise: Custom pricing
13. Sender
Sender is the value champion of the bunch, famous for one of the most generous free plans in the entire industry. It pairs email and SMS in a clean, beginner-friendly package. Perfect option for small businesses and nonprofits watching their budget.
Key features:
Drag-and-drop email builder with no-code automation
Email and SMS marketing in one dashboard
Signup forms, popups (including spin-to-win), and landing pages
Segmentation and real-time heatmap reporting
Transactional email included on all plans
Pros:
Exceptionally generous free-forever plan
Among the cheapest paid plans around
24/7 support even for free users
Cons:
Higher tiers hide their pricing behind a wall
Pay-as-you-go credits run on the expensive side
Pricing plans:
Free Forever: $0/month, up to 2500 subscribers and 15000 emails/month
Standard: From $10/month, adds unlimited email & popup templates and removes branding
Professional: From about $20/month, adds priority support and unlimited email editor features
Enterprise: Custom pricing for large organisations and businesses
14. EmailOctopus
EmailOctopus keeps things refreshingly simple and within budget. It strips email marketing down to the essentials: no SMS, no CRM, just clean campaigns and solid deliverability at a fraction of what the big names charge. A top-notch favorite among creators and nonprofits.
Key features:
Simple drag-and-drop and HTML email editors
Basic automation (welcome series, drip campaigns)
Landing pages and signup forms
Segmentation, tagging, and easy-to-read analytics
Optional Amazon SES integration via EmailOctopus Connect
Pros:
One of the most generous free plans for the price point
Transparent, predictable pricing with no feature gates
20% lifetime discount for nonprofits
Cons:
No SMS, ecommerce automations, or advanced CRM features
Automation and reporting are fairly basic
Pricing plans:
Starter (Free): Up to 2,500 subscribers and 10,000 emails/month
Pro: From about $10/month for 500 subscribers, scaling with list size (At 10,000 subscribers, Pro runs roughly $44.50/month. Notably cheaper than most rivals)
15. Omnisend
Omnisend comes to the center stage as a powerful ecommerce-focused platform. Like Klaviyo, it’s built for online stores, combining email, SMS, and push notifications with deep Shopify and WooCommerce integrations. The big plus: almost all features are available even on the free plan.
Deep Shopify, WooCommerce, and BigCommerce integrations
Product recommendations and advanced segmentation
A/B testing and detailed reporting
Pros:
All features unlocked even on the free plan
Purpose-built for ecommerce growth
Only bills for contacts you actually message
Cons:
Costs climb as your contact list grows
SMS is billed separately and can add up fast
Pricing plans:
Free: 250 contacts, 500 emails/month, and all features except advanced reporting
Standard: From $16/month for 500 contacts and 6,000 emails/month, scaling with list size
Pro: From $59/month for 2,500 contacts, with unlimited email sends
Custom: Tailored pricing for high-volume senders
16. Benchmark Email
Benchmark Email has been around for over 20 years and focuses on doing the basics really well. It’s a clean, beginner-friendly platform built around an easy drag-and-drop editor and AI writing tools. Great option for straightforward newsletters and email campaigns.
Key features:
Drag-and-drop editor with a solid template library
AI-powered content and design tools
Contact management with tagging and segmentation
Sign-up forms and basic reporting
Same deliverability infrastructure across free and paid plans
Pros:
Genuinely useful free plan with all core features
Clean, uncluttered interface that’s easy to learn
Nonprofit discounts available
Cons:
Automation and advanced segmentation are limited
Extra users cost $15/month each, which adds up
Pricing plans:
Free: $0/month, up to 500 contacts and 2,500 emails/month
Pro: From around $19/month, scaling with contact count and removing branding
Enterprise: Custom pricing for 100,000+ contacts
17. Kit
Kit is built specifically for creators, bloggers, podcasters, course sellers, and newsletter writers. It pairs clean email tools with built-in monetization features, and it charges by subscriber count rather than emails sent.
Key features:
Visual automation builder and email sequences
Unlimited landing pages and signup forms
Built-in tools to sell digital products and paid newsletters
Tagging and segmentation for creators
100+ integrations on paid plans
Pros:
One of the most generous free plans (up to 10,000 subscribers)
Creator-focused monetization built right in
Unlimited email sends on every plan
Cons:
Paid plans jumped ~35% in late 2025 and are pricier than rivals
A/B testing is locked to the top Creator Pro tier
Pricing plans:
Newsletter (Free): Up to 10,000 email subscribers with core tools
Creator: From $139/month, adds unlimited visual automations & email sequences
Pro: From $189/month, adds advanced engagement analytics and insights dashboard
18. AWeber
A true veteran (it invented the autoresponder back in 1998), AWeber is a reliable, beginner-friendly platform best known for its standout customer support, including phone support on every plan, even the free one.
Key features:
Drag-and-drop builder with 600+ templates and a Smart Designer
AI writing assistant and Canva integration
Automation, landing pages, and signup forms
Ecommerce tools and web push notifications
500+ integrations
Pros:
Excellent 24/7 support (phone, chat, email) on all plans
Generous free plan and free list migration
One of the few platforms that openly allows affiliate marketing
Cons:
Automation is basic compared to ActiveCampaign or GetResponse
A late-2024 price increase removed grandfathered plans
Pricing plans:
Free: Up to 500 subscribers and 3,000 emails/month
Lite: From $15/month, with branding and some caps
Plus: From $30/month, unlimited email lists and automations, branding removed
Done For You: $30/month + $79 setup fee, everything in Plus and much more
19. Beehiiv
Built by former Morning Brew team members, Beehiiv is a newsletter-first platform designed for growth and monetization. It’s a favorite among serious newsletter creators, with built-in ad network, referral, and subscription tools, and it takes 0% of your subscription revenue.
Key features:
Newsletter and website builder with custom domains
Built-in ad network and Boost referral program
Paid subscriptions and digital products (0% take rate)
AI writing tools and advanced analytics
Unlimited email sends on all plans
Pros:
Strong, genuinely useful free plan (up to 2,500 subscribers)
Best-in-class monetization tools with no revenue cut
Unlimited sends even on the free tier
Cons:
The jump from free to paid is steep
More publishing-focused than a general marketing tool (limited automation)
Pricing plans:
Launch (Free): Up to 2,500 subscribers with unlimited sends
Scale: From $49/month, adds email automations, surveys & polls
Max: From $109/month, adds priority support and audio newsletters
Enterprise: Custom pricing for 100,000+ subscribers
20. SendX
SendX rounds out the list as a simple, budget-friendly platform with one standout selling point: unlimited email sends on every plan, with pricing based only on your subscriber count. It’s also welcoming to industries that other platforms often reject.
Key features:
Drag-and-drop editor with AI-assisted content
Visual automation workflows
Landing pages, forms, and popups
Segmentation, A/B testing, and analytics
Deliverability tools like automatic IP warm-up
Pros:
Unlimited email sends on all plans, with predictable pricing
How to find the right email marketing tool for your business: Points to consider!
With so many great options on the table, picking the right one can feel quite challenging. Here’s a simple checklist to help you zero in on the tool that actually fits your business, not just the one with the fanciest homepage.
1.Identify your core goals
Before anything else, get clear on what you actually want to achieve. Are you building a newsletter, running an online store, or nurturing leads? Knowing your goal upfront helps you pick a tool built for your specific needs instead of paying for features you’ll never touch.
2. Evaluate automation & workflows
Good automation saves you hours and keeps your audience engaged on autopilot. Look at how easily you can set up welcome sequences, follow-ups, and triggered emails. The right depth here is what separates a tool you’ll love from one you’ll outgrow fast.
3. Check segmentation & personalization
Sending the same email to everyone is one of the most common email marketing mistakes, and a quick way to lose subscribers. A solid tool lets you group people by behavior or interests and tailor your messages, which makes a real difference in opens and clicks.
4. Assess deliverability rates
A beautiful email is useless if it lands in spam. Check how reliably each platform gets emails into the inbox, and look for features like authentication support and IP warm-up that protect your sender reputation over time.
5. Consider budget & scalability
Don’t just look at today’s price; think about where you’ll be in a year. Many tools charge based on contacts or sends, so costs can climb fast as you grow. Pick something that fits your budget now and won’t punish you for succeeding later.
6. Inspect integration capabilities
Your email tool shouldn’t live on an island. Make sure it connects smoothly with the apps you already use (your store, CRM, landing pages, and more). Good integrations keep your data in sync and save you from tedious manual work.
7. Look for usability & support
Even the most powerful tool is frustrating if it’s a pain to use. Test the interface and see how intuitive it feels. And don’t overlook support; having quick access to help via chat, email, or phone can be a lifesaver when something goes sideways.
8. Read reviews & feedback
Finally, see what real users are saying. Reviews on sites like G2 and Capterra often reveal the stuff marketing pages won’t (deliverability quirks, billing surprises, or clunky features). It’s one of the easiest ways to avoid a costly mistake before you commit.
Partner with Replug to create smarter email marketing campaigns!
By now, you’ve got a solid lineup of tools to power your campaigns, but here’s one more that deserves a spot in your stack.
Replug is an all-in-one link management platform packed with features that make your marketing sharper, from branded links and bio pages to retargeting and deep click analytics.
The real star, though, is its custom link shortener. Instead of sending long, messy URLs that look untrustworthy, Replug’s URL shortener lets you create clean, personalized branded short URLs in seconds.
In your emails, that means more clicks, stronger brand recognition, and clear tracking on exactly what your audience engages with.
A complete link management solution
for marketing professionals & agencies.
Try Replug for free
So as you choose the right email marketing tool from this list, pair it with Replug to tie everything together. The right combo will help you send smarter, track better, and grow faster.
Happy emailing!
Frequently asked questions
Why use an email marketing software?
Because, to be very honest, doing it manually just doesn’t scale. Email marketing software lets you design professional emails, send them to thousands of people at once, automate follow-ups, and track what’s working, all from one dashboard. It also keeps you compliant with anti-spam laws and helps your emails actually land in the inbox. Simply put, it saves you time while helping you build stronger relationships with your audience and drive more sales.
What makes a good email marketing software?
A good tool nails the essentials:
– an easy-to-use editor, – reliable deliverability, – solid automation, and – clear reporting
Beyond that, look for flexible segmentation, helpful integrations with your other apps, responsive customer support, and pricing that grows sensibly with your list. The best fit also depends on your needs. An ecommerce store and a solo blogger will value very different features.
What are some of the best free email marketing tools?
A few stand out for genuinely useful free plans.
Sender offers up to 2,500 subscribers and 15,000 emails a month, while EmailOctopus gives you 2,500 subscribers and 10,000 emails. Kit’s free plan supports up to 10,000 subscribers, and Beehiiv allows 2,500 with unlimited sends. Brevo, Mailchimp, MailerLite, and Omnisend also offer free tiers worth checking out.
Provide a list of some of the best AI email marketing tools at present?
Most major platforms now bake in AI features like content generation, subject line help, and send-time optimization. Some of the strongest right now include Mailchimp, ActiveCampaign, GetResponse, Brevo, Klaviyo, and Moosend.AWeber and Benchmark Email also offer handy AI writing assistants, while Klaviyo and Omnisend lead the pack with AI-powered predictive analytics for ecommerce.
What are the top 10 email marketing tools for small businesses?
For small businesses, these ten offer a great mix of affordability and features:
The best pick depends on your goals. Sender and Moosend win on budget, Constant Contact and AWeber on support, and ActiveCampaign on automation power.
What is the most cost-effective email marketing platform?
It depends on how you send, but a few consistently deliver strong value. Sender and Moosend offer powerful features at rock-bottom prices. EmailOctopus is great for cheap, simple campaigns, and Brevo’s volume-based pricing is ideal if you have a big list but send infrequently. For totally free, Sender’s plan is one of the most generous around.
What limitations do free email marketing services have?
Free plans are great for starting out, but they come with trade-offs. Expect caps on subscribers and monthly sends, plus the provider’s branding on your emails. You’ll often miss out on advanced automation, A/B testing, detailed reporting, and priority support. Some also limit users or daily send volume. They’re perfect for testing the waters, but most growing businesses outgrow them before long.
The digital marketing world isn’t slowing down; not even close. Global digital marketing spend is already expected to top $800 billion in 2026, and businesses of every size are competing to keep up.
But here’s the real challenge: It’s not just about spending more; it’s about spending smart. The right tools make all the difference.
No matter if you’re a solo marketer or part of a full-scale team, knowing your digital marketing tools examples (from SEO platforms to email automation and social scheduling apps) can completely transform how you connect with your audience.
63% of marketers are already increasing their budgets in 2025, with a clear focus on investing in smarter marketing tools.
So, which tools are actually worth your time in 2026? Before we get into that, let’s quickly cover the basics.
What is digital marketing: A brief overview
Simply put, digital marketing is the practice of promoting your products or services through online channels. Think search engines, social media, email, and websites.
The main goal:Reaching the right people, at the right time, with the right message!
Unlike traditional marketing, it gives you real-time data so you can actually see what’s working and what’s not.
Whether you’re a small business owner or a large brand, digital marketing helps you build awareness, drive traffic, and turn visitors into paying customers.
What are digital marketing tools?
Digital marketing tools are software and platforms that help you plan, execute, and measure your marketing efforts online.
Instead of doing everything manually (tracking website traffic, scheduling posts, sending emails, and running ads), these tools handle the hard work for you. They save time, reduce guesswork, and give you clear insights into what’s actually driving results.
Some tools focus on one specific task, like keyword research or social media management, while others do a bit of everything.
Bottom line: They make your marketing smarter, faster, and a whole lot easier to manage.
Best tools for digital marketing by category
Finding the right tools can honestly feel quite challenging, since there are hundreds of options out there. But the good news is, once you know what each tool does and who it’s built for, the decision gets a lot easier.
This best digital marketing tools list breaks everything down by category, so you can quickly find what fits your goals and budget without wasting time sorting through the noise.
Have a look!
Social media marketing tools
Social media marketing tools help you schedule content, manage multiple accounts, track engagement, and understand your target audience, all from one place.
It’s a solid pick for content marketers, agencies, and social media managers who want to track link performance and boost conversions without any technical hassle.
Pricing: Free plan available; Paid plans start at $19/month
Best for: Affiliate & social media marketers, agencies, and SaaS
2. ContentStudio
ContentStudio is an all-in-one social media and content marketing platform. It lets you discover trending content, plan and schedule posts across multiple channels, and collaborate with your team, all under one roof.
Plus, the built-in analytics make it easy to track what’s performing well. It also has an AI writing assistant to speed up content creation.
If you’re managing several social accounts and want a clean, organized workflow, ContentStudio is genuinely worth checking out.
Pricing: Starts at $29/month
Best for: Solo creators, marketing teams, and growing businesses managing multiple platforms
3. Hootsuite
Hootsuite is one of the most well-known social media management tools out there, and for good reason. It supports scheduling, monitoring, and analytics across all major social platforms.
The dashboard gives you a bird’s-eye view of all your accounts, and you can manage team roles and approvals easily.
It also integrates with a wide range of third-party apps; however, it’s a bit pricier than some alternatives, but the depth of features justifies the cost for larger teams.
Pricing: Starts at $99/month
Best for: Mid-sized to large teams and enterprises
4. Sprout Social
Sprout Social is a premium social media management platform focused heavily on analytics and team collaboration. It gives you detailed reports on audience engagement, post performance, and competitor activity.
The “Smart Inbox” feature pulls all your social messages into one place, making it easier to stay on top of conversations. It’s on the pricier side, but if data-driven decision-making is a priority for your team, Sprout Social delivers the best outcomes.
Pricing: Starts at $199/month
Best for: Larger teams and brands that prioritize in-depth analytics
5. Buffer
Buffer is a clean, straightforward social media scheduling tool that’s great if you just want to get posts out without dealing with a complicated dashboard. It supports all major platforms and offers basic analytics to track performance.
There’s also a free plan available, which makes it a go-to option for freelancers and small business owners just getting started. It’s not the most feature-rich tool, but it nails the basics really well.
Pricing: Paid plans start at $6/month per channel
Best for: Freelancers, solopreneurs, and small businesses
6. Loomly
Loomly is a social media calendar and publishing tool that’s particularly great for teams that need a smooth content approval workflow. It gives you post ideas based on trending topics and upcoming events, which is handy when you’re running low on inspiration.
The interface is clean and beginner-friendly. It supports all major platforms and includes basic analytics. If collaboration and content planning are your biggest needs, Loomly fits the bill nicely.
Pricing: Starts at $65/month
Best for: Small to mid-sized teams needing a structured content calendar
7. Audiense
Audiense is a bit different from the rest! It’s primarily an audience intelligence platform rather than a scheduling tool. It helps you deeply understand who your audience is, what they care about, and how to segment them for more targeted campaigns.
It works especially well with X (formerly Twitter) data. If you want to go beyond vanity metrics and actually understand the people following you, Audiense gives you that level of insight.
Pricing: Paid plans start at $62.99/month
Best for: Marketers and researchers focused on audience segmentation and targeting
8. Agorapulse
Agorapulse is a solid social media management tool that covers scheduling, inbox management, reporting, and team collaboration in one place.
What sets it apart is its unified social inbox, which makes managing comments, messages, and mentions across platforms genuinely easy.
The reporting features are detailed without being overconfusing. It’s competitively priced compared to tools like Sprout Social, making it a great middle-ground option for growing teams.
Pricing: Paid plans start at $99/month
Best for: Agencies and mid-sized teams wanting an all-in-one solution
9. Later
Later started as an Instagram scheduling tool but has since expanded to support other major platforms. It’s well-loved for its visual content calendar, which makes drag-and-drop scheduling feel effortless.
The Linkin.bio feature is a big plus for driving traffic from Instagram. It’s especially popular among lifestyle brands, influencers, and e-commerce businesses that rely heavily on visual content.
Pricing: Starts at $25/month
Best for: Visual-first brands, influencers, and e-commerce businesses
10. Emplifi
Emplifi is an enterprise-level social media and customer experience platform. It combines social media management with customer care and analytics tools, giving larger brands a unified view of their audience across channels.
It uses AI to surface insights and optimize content performance. The main point here is that it’s not built for small businesses, but if you’re managing a large brand with complex social needs, Emplifi has the horsepower to handle it hassle-free.
Pricing: Starts at $1,249/month (contact for a custom quote)
Best for: Enterprise brands and large marketing teams
AI tools for digital marketing
AI has completely changed how marketers work, from writing content to automating workflows and analyzing data. These tools help you move faster, work smarter, and get more done without burning out.
Here are the top AI tools for digital marketing worth adding to your stack in 2026:
11. Claude
Claude is an AI assistant built by Anthropic, designed to help with writing, research, analysis, brainstorming, and a whole lot more.It’s known for producing well-structured, natural-sounding content that doesn’t feel robotic.
Marketers use it for drafting blog posts, writing ad copy, summarizing long documents, and even handling customer-facing content.
Claude is also great at following detailed instructions, making it a reliable choice when you need consistent, high-quality output without much back-and-forth.
Pricing: Claude Pro starts at $20/month
Best for: Content marketers, copywriters, and marketing teams needing a reliable AI writing and research assistant.
12. ChatGPT
ChatGPT by OpenAI is arguably the most widely recognized AI tool out there right now. It handles everything from content creation and email drafting to customer support scripts and campaign brainstorming.
The GPT-4o model brings strong reasoning and multimodal capabilities, meaning it can work with text, images, and raw data.
With a massive library of plugins and integrations, it fits into almost any marketing workflow. It’s versatile, fast, and works well for both beginners and experienced marketers.
Pricing: Free plan available; ChatGPT Plus starts at $20/month
Best for: Marketers of all levels looking for a flexible, all-purpose AI assistant
13. Jasper
Jasper is an AI copywriting tool built specifically for marketing teams. It comes with pre-built templates for blog posts, social media captions, email sequences, product descriptions, and more.
What makes it stand out is its “Brand Voice” feature, which lets you train Jasper to write in your brand’s specific tone and style. It also integrates with Surfer SEO for optimized content.
If content production is a big part of your workflow and you need speed without sacrificing quality, Jasper is worth the investment.
Pricing: Pro plan starts at $69month/seat
Best for: Marketing teams and agencies with high content output needs
14. Surfer SEO
Surfer SEO is a content optimization tool that helps you write articles that actually rank on Google. It analyzes top-ranking pages for your target keyword and gives you a real-time content score based on word count, keyword usage, headings, and more.
The Content Editor integrates with Google Docs and WordPress, making it easy to fit into your existing workflow. If SEO-driven content is your thing, Surfer takes the guesswork out of the optimization process.
Pricing: Starts at $99/month
Best for: SEO professionals, bloggers, and content teams focused on organic search rankings
15. Chatbase
Chatbase lets you build custom AI chatbots trained on your own data (think website content, PDFs, or FAQs). Once set up, the chatbot can handle customer queries, qualify leads, and guide visitors through your site automatically.
It’s a practical tool for businesses that want to improve customer experience without hiring extra support staff. The setup is beginner-friendly, and it integrates easily with popular platforms like Slack, WhatsApp, and WordPress.
Pricing: Paid plans start at $40/month
Best for: Small to mid-sized businesses looking to automate customer support and lead generation
16. Zapier
Zapier is an automation tool that connects your apps and moves data between them without any coding. In a marketing context, it can automatically add new leads to your CRM, send follow-up emails, post to social media, update spreadsheets, and much more.
It supports thousands of app integrations, including Gmail, HubSpot, Slack, and Shopify. If you find yourself doing repetitive tasks manually, Zapier is the tool that quietly handles all of that in the background.
Pricing: Paid plans start at $29.99/month
Best for: Marketers and business owners looking to automate repetitive workflows and save time
17. Replo
Replo is a landing page and e-commerce page builder designed specifically for Shopify brands. It lets you create high-converting marketing pages without needing a developer.
The platform offers pre-built templates inspired by top-performing e-commerce brands, and it integrates directly with your Shopify store and analytics tools.
If you’re running paid ads or product campaigns, having fast, well-designed landing pages is crucial, and Replo makes that process a lot quicker.
Pricing: Starts at $119/month
Best for: Shopify brands and e-commerce marketers running paid ad campaigns
18. Google Labs
Google Labs is where Google experiments with and rolls out its latest AI-powered features and tools, including Gemini integrations across Search, Workspace, and more.
For marketers, it’s worth keeping an eye on because many of these experimental tools eventually make their way into everyday products like Google Docs, Ads, and Analytics.
It’s less of a standalone marketing tool and more of a hub for early access to Google’s AI innovations.
Pricing: Free (access varies by product and region)
Best for: Marketers who want early access to Google’s latest AI features and experiments
19. Browse AI
Browse AI is a web scraping and monitoring tool that lets you extract data from any website without writing a single line of code. Marketers use it to track competitor pricing, monitor product listings, scrape leads, and keep tabs on industry trends.
You simply train a robot on the page you want to monitor, and it does the rest on a schedule you set. It’s a huge time-saver for anyone who regularly pulls data from the web manually.
For larger monitoring projects, rotating proxies can help distribute requests across different IPs and reduce the risk of blocks during repeated data collection.
Pricing: Paid plans start at $48/month
Best for: Marketers, researchers, and agencies that need automated data extraction and competitor monitoring
20. Calendly
Calendly is a scheduling automation tool that eliminates the back-and-forth of booking meetings. You share your availability link, and people pick a time that works; as simple as that.
For marketing pros and sales teams, it’s especially useful for booking demos, discovery calls, and consultations directly from landing pages or email campaigns.
Moreover, it integrates with Google Calendar, Zoom, HubSpot, and more, making it a smooth addition to most marketing and sales workflows.
Pricing: Paid plans start at $12/seat/month
Best for: Sales teams and consultants who regularly schedule client calls and demos
SEO tools for digital marketing
Good SEO is what keeps your content visible and your traffic growing over time. But doing it well requires the right set of tools (for keyword research, content optimization, rank tracking, and everything in between).
Here are the top SEO tools that marketers are actually using to get desired results:
21. Contentpen
Contentpen is an AI-powered content writing and SEO tool designed to help marketers produce optimized, publish-ready content faster. It helps with keyword research, content briefs, and generating SEO-friendly drafts that are structured to rank.
Although it’s a relatively newer tool in the space, it has been gaining traction among content teams looking for an all-in-one writing and optimization workflow.
If you want to cut down the time between keyword research and hitting publish, Contentpen is worth exploring.
Pricing: Starts at $39/month
Best for: Content marketers and SEO writers looking for a streamlined writing-to-publishing workflow
22. Writesonic
Writesonic is an AI writing platform with a strong focus on SEO content creation. It offers tools for generating blog posts, landing pages, ad copy, and product descriptions, all with built-in SEO optimization features.
The “Chatsonic” feature works similarly to ChatGPT but with real-time web access, which is handy for staying current.
It also has an AI article writer that can produce long-form, SEO-ready content in minutes, making it a solid pick for teams with heavy content demands.
Pricing: Paid plans start at $99/month
Best for: Content teams and freelancers needing fast, SEO-optimized content at scale
23. Originality AI
Originality AI is a content verification tool built specifically for publishers and SEO teams. It detects AI-generated content and checks for plagiarism, helping you ensure your content meets quality and originality standards before publishing.
As Google continues to crack down on low-quality AI content, having a tool like this in your workflow makes a lot of sense.
It’s straightforward to use. Just paste your content in and get a detailed originality and AI detection report within seconds.
Pricing: Pro plan starts at $14.95/month
Best for: Publishers, SEO agencies, and content managers who regularly review or outsource written content
24. Ahrefs
Ahrefs is one of the most powerful and trusted SEO tools available today. It covers keyword research, backlink analysis, site audits, rank tracking, and competitor research, all with a level of data depth that’s hard to match.
The “Site Explorer” feature alone gives you a detailed breakdown of any website’s organic traffic and backlink profile.
It’s not the cheapest option, but for serious SEO professionals and agencies, it’s often considered an essential part of the toolkit.
Pricing: Starts at $129/month
Best for: SEO professionals, agencies, and businesses serious about organic growth
25. Semrush
Semrush is a comprehensive digital marketing suite that goes well beyond just SEO. It covers keyword research, site audits, PPC analysis, social media tracking, and content marketing tools, all in one platform.
The “Keyword Magic Tool” and “Traffic Analytics” features are particularly popular among marketers. If you want a single platform that handles both SEO and paid search intelligence, Semrush is hard to beat. It’s a go-to for agencies managing multiple clients across different channels.
Pricing: Starts at $139.95/month
Best for: Digital marketing agencies and professionals managing SEO and paid campaigns simultaneously
26. Moz
Moz has been a trusted name in the SEO world for years. It offers keyword research, rank tracking, link building tools, and site audits through its Moz Pro suite.
The “Domain Authority (DA)” metric, which Moz created, is still widely used across the industry as a benchmarking standard.
It’s not as data-heavy as Ahrefs or Semrush, but its clean interface and beginner-friendly approach make it a comfortable starting point for those newer to SEO.
Pricing: Starts at $99/month
Best for: SEO beginners and small businesses looking for a reliable, easy-to-navigate SEO platform
27. Clearscope
Clearscope is a content optimization tool that helps you create content that’s thorough enough to rank well on Google.
It analyzes top-ranking pages for your target keyword and gives you a list of related terms and topics your content should cover.
The grading system makes it easy to see exactly where your content stands and what needs improving. It integrates smoothly with Google Docs and WordPress, fitting naturally into most writing workflows.
Pricing: Starts at $129/month
Best for: Content teams and SEO writers focused on producing comprehensive, high-ranking articles
28. AnswerThePublic
AnswerThePublic is a keyword and content idea tool that visualizes what people are actually searching for around a given topic. It pulls data from search engine autocomplete and organizes questions, comparisons, and prepositions into easy-to-read maps.
It’s incredibly useful for finding long-tail keyword opportunities and understanding what your audience genuinely wants to know.
If you ever sit down to write and have no idea what angle to take, AnswerThePublic almost always solves that problem quickly.
Pricing: Paid plans start at $20/month
Best for: Content strategists, bloggers, and SEO teams looking for fresh content ideas and long-tail keywords
29. Sitechecker
Sitechecker is a user-friendly SEO platform that covers site audits, rank tracking, backlink monitoring, and on-page SEO analysis.
It’s particularly good at catching technical SEO issues (broken links, missing meta tags, slow pages) and presenting them in a way that’s easy to act on, even if you’re not deeply technical.
The real-time website monitoring feature also alerts you when something changes on your site that could affect rankings.
Pricing: Starts at $99/month
Best for: Small to mid-sized businesses and marketers who want actionable technical SEO insights and AI visibility analytics without the complexity
30. SEOBoost
SEOBoost is a content optimization and management platform that helps you create, optimize, and manage SEO content from one place.
It provides content briefs, topic reports, and optimization recommendations based on what’s currently ranking for your target keywords.
It also has a content audit feature that helps you identify existing pages that need updating, an often overlooked but important part of any SEO strategy. It’s straightforward, practical, and priced reasonably for what it offers.
Pricing: Starts at $30/month
Best for: Content managers and SEO teams looking for a structured approach to content planning and optimization
Digital marketing analytics tools
You can’t improve what you don’t measure on a regular basis. Analytics tools give you a clear picture of how your marketing is performing: what’s driving traffic, where visitors are dropping off, and which campaigns are actually delivering results.
Here are the top digital marketing analytics tools worth having in your corner:
31. Usermaven
Usermaven is a privacy-friendly website and product analytics tool that gives marketers clean, easy-to-understand data without the overwhelming complexity of some larger platforms.
It tracks website visitors, user journeys, funnels, and attribution, all without requiring cookie consent banners, since it’s built with privacy compliance in mind.
The AI-powered insights feature surfaces trends automatically, saving you time digging through dashboards. It’s a refreshing alternative for teams that want clear, actionable data without the clutter.
Pricing: Paid plans start at $84/month
Best for: Startups, SaaS companies, and marketers looking for a privacy-first analytics solution
32. Google Analytics 4
Google Analytics 4(GA4) is the industry-standard web analytics platform, and honestly, if you’re not using it, you’re flying blind. It tracks website and app traffic, user behavior, conversion events, and audience demographics, all for free.
GA4 uses an event-based tracking model, which gives you more flexibility than its predecessor. It also integrates seamlessly with Google Ads, Search Console, and Looker Studio.
There’s a learning curve, but the depth of data it provides makes it a non-negotiable for most marketers.
Pricing: Free; GA4 360 (enterprise) starts at $50,000/year
Best for: Businesses of all sizes wanting comprehensive, free website and app analytics
33. Google Search Console
Google Search Console is a free tool from Google that shows you exactly how your website is performing in search results.
You can see which keywords are driving clicks, how your pages are ranking, and whether Google has any issues crawling or indexing your site.
It’s not a full analytics suite, but for SEO specifically, it’s absolutely essential. The Performance report alone gives you insights that most paid tools can’t replicate directly from Google’s own data.
Pricing: Free
Best for: SEO professionals, bloggers, and website owners who want direct insights from Google about their search performance
34. Whatagraph
Whatagraph is a marketing reporting platform that pulls data from multiple channels (social media, SEO, PPC, email) and turns it into clean, visual reports you can share with clients or stakeholders.
It’s built with agencies in mind, making it easy to create white-labeled, automated reports on a schedule.
If you’ve ever spent hours manually pulling data from different platforms to build a client report, Whatagraph basically eliminates that headache entirely.
Pricing: Starts at $286/month
Best for: Marketing agencies managing multiple client accounts and reporting needs
35. Mixpanel
Mixpanel is a product and user analytics platform that focuses on tracking how people actually interact with your website or app. It’s particularly strong for funnel analysis, retention tracking, and understanding user behavior at a granular level.
You can segment users, run A/B test analyses, and track specific events to understand what’s driving conversions or causing drop-offs.
It’s more product-focused than traditional marketing analytics tools, making it a great fit for SaaS and app-based businesses.
Pricing: Custom pricing
Best for: SaaS companies, app developers, and product-led growth teams
36. Matomo
Matomo is an open-source web analytics platform that positions itself as a privacy-respecting alternative to Google Analytics. You can either self-host it, meaning you own 100% of your data, or use its cloud version.
It offers similar features to GA4, including traffic reports, heatmaps, session recordings, and goal tracking.
For businesses in regions with strict data privacy regulations like GDPR, Matomo is a particularly strong choice since it keeps data entirely under your control.
Pricing: Cloud plans start at 22EUR/month
Best for: Privacy-conscious businesses, European companies, and teams that want full ownership of their analytics data
37. AgencyAnalytics
AgencyAnalytics is a reporting and dashboard platform built specifically for marketing agencies. It connects to over 80 marketing platforms, including Google Ads, Facebook, Semrush, and Mailchimp, and pulls all that data into one unified dashboard.
You can build automated, white-labeled reports for each client, saving hours of manual work every month.
The interface is clean and intuitive, and clients can even log in to view their own dashboards in real time.
Pricing: $25 per client/month
Best for: Marketing agencies looking to streamline client reporting and centralize campaign data
38. ClickMeter
ClickMeter is a link tracking and conversion monitoring tool that helps marketers measure the performance of every link they share across campaigns, channels, and platforms.
It lets you create trackable links, monitor clicks in real time, detect fraudulent traffic, and set up conversion tracking without needing to touch any code.
It’s especially useful for affiliate marketers and paid campaign managers who need precise data on where their clicks are coming from and which links are actually converting.
Pricing: Starts at $29/month
Best for: Affiliate marketers, media buyers, and campaign managers focused on link-level tracking and conversion data
39. Social Status
Social Status is a dedicated social media analytics and reporting tool that covers profiles, ads, influencers, and competitors across all major platforms.
Unlike broader marketing suites, it goes deep on social data, giving you detailed breakdowns of reach, engagement, follower growth, and paid social performance.
The automated reporting feature makes it easy to keep clients or teams updated without manually pulling numbers. If social media is a core part of your marketing, Social Status gives you the granular insights most general tools miss.
Pricing: Professional paid plans start at $99/month
Best for: Social media managers, agencies, and brands wanting in-depth social media performance reporting
40. Iconosquare
Iconosquare is a social media analytics and scheduling tool with a particularly strong focus on Instagram and Facebook performance data.
It gives you detailed metrics on follower growth, post engagement, reach, and best times to post, all presented in a clean, visual dashboard.
The competitor tracking feature is a nice bonus, letting you benchmark your performance against others in your space. It’s a good fit for brands and agencies that are heavily invested in visual social platforms.
Pricing: Starts at $39/month
Best for: Brands, influencers, and agencies focused on Instagram and Facebook analytics and scheduling
Email marketing automation tools
Email marketing isn’t going anywhere soon; in fact, it keeps getting better. The right email marketing tool helps you build lists, send targeted campaigns, automate follow-ups, and actually measure what’s working.
Here are ten solid options worth considering:
41. Mailchimp
Mailchimp is one of the most recognized names in email & SMS marketing, and for good reason. It offers an easy drag-and-drop editor, audience segmentation, automated workflows, A/B testing, and built-in analytics.
It also integrates with hundreds of apps, making it a flexible choice for growing businesses. The free plan is genuinely useful for beginners, though advanced features like multivariate testing and custom templates are locked behind paid tiers.
Pricing: Free plan available; paid plans start at $13/month
Best for: Small to mid-sized businesses and beginners getting started with email marketing
42. Twilio
Twilio goes beyond just email. It’s a full customer communications platform covering SMS, WhatsApp, voice, and email through its “SendGrid” product.
It’s developer-friendly by nature, giving teams full control over how messages are sent and delivered at scale. Features include transactional email delivery, marketing campaigns, and detailed deliverability analytics.
If you need reliable high-volume email infrastructure with flexibility to customize, Twilio SendGrid delivers the best solution.
Pricing: Free plan allows sending up to 100 emails/day; paid plans start at $15/month
Best for: Businesses needing scalable, high-volume email delivery
43. Omnisend
Omnisend is built specifically for e-commerce, combining email, SMS, and push notifications in one platform.
It comes with pre-built automation workflows for cart abandonment, welcome series, and post-purchase follow-ups, all ready to use out of the box. The visual automation builder is intuitive, and the segmentation options are solid.
If you’re running an online store and want all your customer messaging in one place, Omnisend makes it pretty seamless.
Pricing: Free plan available; paid plans start at $11.20/month
Best for: E-commerce brands looking to unify email and SMS marketing
44. Moosend
Moosend is a budget-friendly email marketing platform that doesn’t cut corners on features. You get a drag-and-drop editor, marketing automation, landing page builder, and real-time analytics, all in one dashboard.
The automation workflows are easy to set up, and the list segmentation is flexible enough for most use cases.
It’s not the most eye-catching tool out there, but it covers everything a growing business needs without charging a premium for it.
Pricing: Free trial available; paid plans start at $9/month
Best for: Budget-conscious marketers and small businesses wanting solid features at a low cost
45. Klaviyo
Klaviyo is a powerhouse for e-commerce email and SMS marketing. It pulls in deep data from your store (purchase history, browsing behavior, lifetime value) and lets you build highly targeted segments and automations based on it.
The reporting is detailed, the integrations with Shopify and WooCommerce are seamless, and the personalization capabilities are hard to beat.
It’s on the pricier side, but for stores serious about revenue-driven AI email marketing, it pays for itself.
Pricing: Paid plans start at $500/month
Best for: E-commerce businesses focused on data-driven, revenue-generating email campaigns
46. Constant Contact
Constant Contact has been around for a long time, and it’s stayed relevant by keeping things simple and reliable. It offers email templates, list management, event marketing tools, social media scheduling, and basic automation.
The onboarding experience is smooth, and the support is genuinely helpful, which matters a lot for users who aren’t marketing experts.
It may not have the most advanced features, but it gets the job done without a steep learning curve.
Pricing: Starts at $12/month; no permanent free plan
Best for: Small businesses, nonprofits, and beginners who want a simple, dependable email tool
47. Drip
Drip is an email marketing platform designed specifically for e-commerce brands. What sets it apart is its deep behavioral tracking.
It monitors how customers interact with your store and lets you trigger automations based on those actions. The segmentation is highly granular, and the email builder gives you enough flexibility to create polished, on-brand campaigns.
It’s not the cheapest option, but the level of personalization it offers is well worth it for growing stores.
Pricing: Starts at $39/month for up to 2,500 contacts
Best for: B2C businesses, e-commerce brands that want advanced behavioral segmentation and automation
48. Litmus
Litmus is less of a sending platform and more of an email quality assurance tool. It lets you preview how your emails render across 100+ email clients and devices before you hit send (no more broken layouts or clipped subject lines).
It also offers spam testing, link checking, and detailed engagement analytics post-send. If you’re sending high-stakes campaigns and want to make sure every email looks exactly right, Litmus is a must-have layer in your workflow.
Pricing: Need to contact their customer support
Best for: Email marketers and agencies who need thorough testing and quality control before sending
49. ConvertKit
ConvertKit (now rebranded as “Kit”) is a favorite among creators: bloggers, podcasters, course creators, and newsletter writers. It’s built around the idea of growing an audience and monetizing it.
Features include visual automation builders, customizable opt-in forms, a built-in creator network for cross-promotion, and a free newsletter publishing tool.
It’s not loaded with e-commerce features, but for individual creators building a direct relationship with their audience, it’s hard to beat.
Pricing: Free plan up to 1,000 subscribers; paid plans start at $39/month
Best for: Content creators, bloggers, and newsletter writers building and monetizing an audience
50. Getsitecontrol
Getsitecontrol is a lightweight tool focused on on-site widgets and email capture. It lets you create popups, slide-ins, sticky bars, and survey forms to grow your email list and engage visitors at the right moment.
The targeting options based on behavior, scroll depth, exit intent, and more are surprisingly flexible for the price. It integrates with major email platforms, so you can funnel captured leads straight into your existing workflows.
Pricing: Starts at $19/month
Best for: Marketers looking to grow their email list through targeted on-site popups and lead capture forms
Content creation tools
Great content is what drives engagement, but creating it consistently is where most teams struggle. Content creation tools help you design graphics, edit videos, generate visuals, and produce polished material without needing a full creative team.
Here are the top-notch tools that make the process a whole lot easier:
51. Canva
Canva is the go-to design tool for non-designers. It offers thousands of templates for social media posts, presentations, videos, infographics, and more, all drag-and-drop simple.
The “Brand Kit” feature keeps your colors, fonts, and logos consistent across everything you create. Canva also has basic AI features like background remover and “Magic Write” built in.
It’s not a replacement for professional design software, but for quick, good-looking content, it’s hard to beat.
Pricing: Free plan available; Pro starts at ~$5/month
Best for: Marketers, small businesses, and creators who need fast, polished visuals without design experience
52. Adobe Photoshop
Adobe Photoshop remains the industry standard for image editing and graphic design. From photo retouching and compositing to digital illustrations and social assets, it gives you full creative control.
Recent AI-powered additions like “Generative Fill” and “Remove Tool” have made complex edits significantly faster.
The learning curve is real, but for professionals who need precision and depth, no other tool comes close. It’s part of the Adobe Creative Cloud ecosystem, so it plays well with Illustrator, Premiere, and others.
Pricing: Starts at $22.99/month as part of Adobe Creative Cloud
Best for: Professional designers, photographers, and creative teams needing advanced image editing
53. Lenso.ai
Lenso.ai is an AI-powered reverse image search platform that helps users find where images, faces, places, and duplicates appear online. It lets you search by image instead of keywords, making it useful for discovering visual mentions, tracking image use, and finding related content across the web.
For digital marketing, lenso.ai can help with brand monitoring, competitor research, visual content tracking, and copyright protection. Marketers can use it to check where campaign images appear, find websites using branded visuals, discover similar visual trends, or monitor how their visual assets spread online.
If you work with image-heavy campaigns, influencer content, PR, or brand protection, lenso.ai is a practical tool worth adding to your marketing workflow.
Pricing: Free plan available; paid plans start at $19.99/month
Best for: Digital marketers, SEO specialists, content teams, photographers, and brands tracking visual content online
54. Storykit
Storykit is a video creation platform built for teams that need to produce content at scale, without relying on video editors. It turns text, articles, and scripts into branded video content using templates and automation.
It’s especially popular with media companies and marketing teams that publish frequently. You can maintain brand consistency across every video while cutting production time significantly.
If your team publishes a lot of video content but doesn’t have dedicated editors, Storykit fills that gap well.
Pricing: Custom pricing (book a demo or consultation)
Best for: Media companies, publishers, and marketing teams producing high volumes of branded video content
55. TheBrief
TheBrief is an AI-driven ad creation and campaign optimization platform built to help marketing teams produce high-performing creatives at scale.
From static visuals to animated content and UGC-style video ads, it enables brands to generate hundreds of ad variations in minutes instead of days.
By combining AI-powered creative production, publishing, and performance optimization in one unified workflow, TheBrief streamlines the entire advertising process, hassle-free. This helps teams launch faster, maintain consistency, and scale winning campaigns with far less manual effort.
Pricing: Pricing plans start at $39/month
Best for: Content strategists and marketing teams who want smarter, research-backed advertisements.
56. PostNitro
PostNitro is a carousel post creator designed specifically for social media, particularly LinkedIn and Instagram. It lets you turn long-form content, blog posts, or ideas into visually appealing carousel slides in minutes.
The templates are clean, the customization options cover branding needs, and the AI-assisted content generation speeds things up further.
If carousels are part of your social strategy, PostNitro removes most of the friction from creating them consistently.
Pricing: Paid plans start at $15/month
Best for: Social media marketers and creators focused on producing carousel content for LinkedIn and Instagram
57. Loom
Loom makes screen and camera recording incredibly simple. You can record your screen, your face, or both simultaneously, then instantly share a link (no file exporting needed).
It’s widely used for async communication, product walkthroughs, tutorials, and internal team updates. Excellent features include transcript generation, viewer engagement insights, and basic editing tools.
For marketers creating video content without a full production setup, Loom delivers a fast and professional enough result with minimal effort.
Pricing: Free plan available; paid plans start at $18/month per user
Best for: Marketers, educators, and remote teams creating quick video walkthroughs and async communication
58. Wistia
Wistia is a video hosting and marketing platform built specifically for businesses. Unlike YouTube, it keeps viewers on your site, removes distracting recommendations, and gives you detailed viewer analytics, like where people drop off and what they rewatch.
It also includes a video creation suite, channel pages for building a branded content hub, and lead generation tools like email capture within videos.
For brands treating video as a serious marketing channel, Wistia offers far more control than general-purpose platforms.
Pricing: Free plan available; paid plans start at $99/month
Best for: B2B marketers and brands that want full control over their video and webinar hosting and viewer analytics
59. Capcut
CapCut is a free, feature-rich video editing app that’s exploded in popularity, especially among short-form content creators. It offers auto-captions, trending templates, background removal, AI-generated scripts, text-to-speech, and a solid timeline editor.
The mobile and desktop versions are both capable, and the learning curve is minimal. For creators making content for TikTok, Instagram Reels, or YouTube Shorts, CapCut covers almost everything you need without spending a dollar.
Pricing: Free; CapCut Pro starts at $9.99/month
Best for: Short-form content creators, social media managers, and individuals creating video for TikTok and Reels
60. Midjourney
Midjourney is one of the leading AI image generation tools available right now. You describe what you want in a text prompt, and it generates stunning, highly detailed visuals in seconds.
It’s particularly strong at artistic and conceptual imagery, making it popular with marketers, designers, and creatives who need original visuals fast.
It operates through Discord, which feels a little unconventional, but the image quality consistently outperforms most competitors. A web interface is also now available for easier access.
Pricing: Starts at $30/month
Best for: Designers, marketers, and creators who need high-quality AI-generated visuals for campaigns and content
61. Google Veo 3
Google Veo 3 is Google’s latest AI video generation model, and it’s a significant leap forward. It generates high-quality video clips (complete with audio, dialogue, and sound effects) directly from text prompts.
This makes it one of the first tools capable of producing realistic, prompt-driven video with synchronized audio out of the box.
It’s still early days for this technology, but for marketers exploring AI-generated video content, Veo 3 is one of the most capable options available right now.
Pricing: Available via Google DeepMind and Google AI Ultra plan ($249.99/month)
Best for: Forward-thinking marketers and content teams experimenting with AI-generated video production
CRM & lead generation tools
Managing relationships and finding the right leads are two things that can make or break your marketing and sales efforts. CRM and lead generation tools help you track interactions, organize your pipeline, and connect with the right people at the right time.
Here are the top 10 digital marketing tools that do exactly that:
62. HubSpot
HubSpot is one of the most complete CRM platforms out there. It covers contact management, email marketing, live chat, pipeline tracking, and reporting, all under one roof.
The free CRM is genuinely powerful, and as your needs grow, you can add Marketing, Sales, or Service Hubs on top. It’s especially strong for inbound marketing workflows.
The downside? Costs can climb quickly once you start stacking paid features, but the value is hard to argue with for growing teams.
Pricing: Free CRM available; paid plans start at $20/month
Best for: Small to mid-sized businesses looking for an all-in-one CRM and marketing platform
63. Zoho CRM
Zoho CRM is a flexible, affordable CRM packed with amazing features, like lead management, workflow automation, AI-powered sales assistant (Zia), multichannel communication, and detailed analytics.
It integrates seamlessly with the broader Zoho ecosystem, which is a big plus if you’re already using Zoho tools.
The interface takes a bit of getting used to, but once you’re in, the customization options are impressive. For businesses that want enterprise-level features without enterprise-level pricing, Zoho CRM is a strong contender.
Pricing: Paid plans start at $20/user/month
Best for: SMBs and growing teams wanting a customizable, budget-friendly CRM solution
64. Pipedrive
Pipedrive is a sales-focused CRM built around visual pipeline management. The deal board layout makes it easy to see exactly where every lead stands and what action needs to happen next.
It includes email integration, activity reminders, an AI sales assistant, and solid reporting tools.
It’s not the most feature-heavy CRM, but that’s kind of the point. It keeps sales teams focused on closing deals rather than managing software. Simple, clean, and effective!
Pricing: Starts at $19/seat/month
Best for: Sales teams and small businesses that want a simple, pipeline-focused CRM without the clutter
65. Keap
Keap combines CRM, email marketing, and sales automation in one platform aimed at small businesses. It handles lead capture, follow-up automation, appointment scheduling, invoicing, and pipeline management, which is a lot for one tool.
The automation builder is particularly strong, letting you set up detailed sequences based on lead behavior.
It’s not the cheapest option, but for small business owners who want to automate repetitive sales and marketing tasks without juggling multiple tools, Keap delivers real value.
Pricing: Starts at $299/month
Best for: Small business owners who want combined CRM, automation, and sales tools in one place
66. Apollo.io
Apollo.io is a sales intelligence and engagement platform with a massive B2B contact database (over 275 million contacts).
You can search and filter prospects by industry, role, company size, and more, then reach out directly through built-in email sequences and dialer tools. The data enrichment feature also keeps your existing contacts updated automatically.
For outbound sales teams that need both quality prospect data and the tools to act on it, Apollo.io is one of the most complete options available.
Pricing: Paid plans start at $65/seat/month
Best for: Sales teams and B2B marketers focused on outbound prospecting and lead generation
67. Datanyze
Datanyze is a B2B prospecting tool that focuses on finding accurate contact information, specifically emails and direct dials, directly from LinkedIn profiles and company websites via its Chrome extension. It’s not a full CRM, but it integrates well with the ones you’re already using.
The data is pulled in real time, which helps with accuracy. For sales reps who spend time on LinkedIn looking for leads, Datanyze speeds up the process of going from “found them” to “reaching out”.
Pricing: Free trial available; paid plans start at $29/month
Best for: Sales reps and B2B marketers who need quick, accurate contact data while prospecting on LinkedIn
68. EngageBay
EngageBay is an affordable all-in-one platform combining CRM, email marketing, live chat, helpdesk, and marketing automation. It’s built with small businesses in mind and covers a surprising amount of ground for the price.
The free plan is one of the most generous around, including CRM, email broadcasts, and autoresponders.
If you’re a small team that’s tired of paying for five separate tools, EngageBay bundles most of what you need into one reasonably priced platform.
Pricing: Free plan available; paid plans start at $14.99/user/month
Best for: Small businesses and startups wanting an affordable all-in-one CRM and marketing solution
69. LinkedIn Sales Navigator
LinkedIn Sales Navigator is LinkedIn’s premium tool built for serious B2B prospecting. It gives you advanced lead and company search filters, real-time sales updates, CRM integration, and the ability to reach out via InMail to people outside your network.
The lead recommendation engine surfaces relevant prospects based on your preferences and activity.
If your customers are on LinkedIn (and in B2B, they almost always are), Sales Navigator gives you a direct, well-targeted way to find and connect with them.
Pricing: Starts at $99.99/seat/month
Best for: B2B sales professionals and account executives focused on LinkedIn-based prospecting and outreach
70. ZoomInfo
ZoomInfo is a premium B2B intelligence and the #1 GTM platform used by enterprise sales and marketing teams. It offers an enormous database of verified business contacts, intent data, technographic insights, and workflow automation.
You can identify companies actively researching solutions like yours and prioritize outreach accordingly. It also integrates with most major CRMs and marketing platforms, hassle-free.
The pricing reflects its enterprise focus, but for large teams where data quality and lead volume directly impact revenue, ZoomInfo is worth the investment.
Pricing: Custom pricing (typically starts around $15,000/year)
Best for: Enterprise sales and marketing teams that need high-quality B2B data and intent-driven prospecting
71. Tidio
Tidio is a customer communication platform that combines live chat, AI chatbots, and email in one tool. The AI chatbot Lyro can handle a large chunk of customer queries automatically, freeing up your team for more complex conversations.
It integrates with e-commerce platforms like Shopify and WooCommerce, making it particularly useful for online stores.
For businesses that want to capture and convert website visitors in real time without needing a full-time chat team, Tidio is a smart, affordable option.
Pricing: Paid plans start at $29/month
Best for: E-commerce businesses and small teams wanting to automate customer support and capture leads via live chat
Conversion rate optimization tools
Getting traffic to your site is one thing; getting that traffic to actually convert is another. Conversion rate optimization (CRO) tools help you understand how visitors behave, test what works, and make changes that turn more clicks into customers.
Here are five solid tools that help you do exactly that:
72. Unbounce
Unbounce is a landing page builder with CRO baked right in. You can build, test, and optimize landing pages without touching a line of code.
Its “Smart Traffic” feature automatically routes visitors to the page variant most likely to convert, based on their attributes. It also includes popups and sticky bars for capturing leads.
For marketers running paid campaigns, having dedicated, optimized landing pages instead of sending traffic to your homepage makes a measurable difference.
Pricing: Starts at $29/month
Best for: Marketers and growth teams running paid ad campaigns who need high-converting, testable landing pages
73. Optimizely
Optimizely is an enterprise-grade experimentation platform built for teams that take A/B testing seriously. It supports web experimentation, feature flagging, personalization, and full-stack testing across web and mobile.
The data and targeting capabilities are deep, and it integrates with most major analytics and marketing stacks. It’s not built for beginners or small budgets.
However, for larger organizations that want to make data-backed decisions at scale, Optimizely is one of the most robust platforms available.
Pricing: Custom pricing (contact for a quote)
Best for: Enterprise teams and product-led organizations running large-scale experimentation and personalization programs
74. Hotjar
Hotjar helps you see what’s actually happening on your website through heatmaps, session recordings, and user feedback tools.
You can watch real visitor sessions, see where people click and scroll, and set up surveys or feedback widgets to hear directly from users.
It’s one of the fastest ways to spot friction points in your funnel without needing a data analyst. The insights you get are qualitative but incredibly actionable, and the setup takes just a couple of minutes.
Pricing: Free plan available; paid plans start at $49/month
Best for: Marketers, UX designers, and product teams wanting visual insight into how users interact with their site
75. Crazy Egg
Crazy Egg is a CRO tool focused on visual analytics and testing. It offers heatmaps, scrollmaps, click reports, and session recordings to show you exactly how visitors engage with your pages.
On top of that, it has a built-in A/B testing tool and a simple website editor, so you can make changes and test them without needing a dedicated developer.
It covers both the insight and action sides of optimization, making it a practical all-in-one option for smaller teams.
Pricing: Paid plans start at $29/month
Best for: Small to mid-sized businesses that want visual analytics and A/B testing combined in one affordable tool
76. VWO
VWO is a comprehensive CRO platform covering A/B testing, multivariate testing, heatmaps, session recordings, funnel analysis, and personalization.
What makes it stand out is how well it connects behavioral data with testing. You can spot a problem in a heatmap and launch a test to fix it, all within the same platform.
It’s flexible enough for both marketing and product teams, and the support is well-regarded. A solid end-to-end CRO suite for teams ready to get serious about optimization.
Pricing: Custom pricing (Schedule a demo)
Best for: Mid-sized to enterprise teams wanting a full-featured, integrated CRO and experimentation platform
Website creation tools
Your website is often the first impression people get of your brand, so it better be a good one. Website creation tools make it possible to build a professional, functional site without hiring a developer or learning to code.
Here are some of the most popular options, each suited to a slightly different use case:
77. Wix
Wix is one of the most beginner-friendly website builders available. Its drag-and-drop editor gives you full creative freedom over layout and design, and there are hundreds of templates to start from.
It also includes built-in SEO tools, a blogging platform, e-commerce functionality, and an AI site builder that can generate a starter site from a brief description.
It’s not the most powerful option for complex sites, but for getting something great-looking live quickly, Wix is hard to beat.
Pricing: Free plan available; paid plans start at $17/month
Best for: Individuals, freelancers, and small businesses wanting a visually flexible, easy-to-use website builder
78. Shopify e-commerce website builder
Bring your online store to life with Shopify’s website builder. Designed for seamless editing and creative freedom, it lets you showcase your products with sleek, mobile-friendly designs.
From managing inventory and processing payments to handling shipping and taxes, Shopify covers all the essentials so you can focus on growing your business.
With an extensive theme library and thousands of apps to expand functionality, it’s built to support everything from emerging shops to high-volume brands. Selling online has never been this intuitive, or this bold.
Pricing: Paid plans start at $25/month
Best for: E-commerce businesses of all sizes looking for a reliable, scalable online store builder
79. Squarespace
Squarespace is known for its clean, design-forward templates that make almost any site look polished right out of the box.
It covers websites, blogs, portfolios, and online stores, with built-in tools for SEO, email marketing, and analytics. The editor is less free-form than Wix but keeps things looking consistent and professional.
For creatives and small business owners who want a beautiful site without much fuss, Squarespace consistently delivers without needing design skills.
Pricing: Free for 14 days; Paid plans start at $19/month
Best for: Creatives, photographers, and small businesses that prioritize clean design and an easy setup experience
80. WordPress
WordPress powers over 40% of all websites on the internet, and there’s a reason for that. It’s incredibly flexible, with thousands of themes and plugins covering everything from SEO to membership sites to complex e-commerce.
WordPress.org (self-hosted) gives you full control over your site, while WordPress.com offers a more managed, hosted experience.
The learning curve is steeper than drag-and-drop builders, but the customization ceiling is essentially unlimited, making it the preferred choice for serious, long-term web projects.
Pricing: WordPress.com plans start at $9/month
Best for: Bloggers, businesses, and developers who need a highly customizable, scalable website with long-term flexibility
81. Gamma
Gamma is a newer kind of content tool that uses AI to generate polished presentations, documents, and web pages from a simple text prompt.
It blurs the line between website builder and presentation tool. You can create shareable, interactive web pages that look far more engaging than a standard slide deck or static page.
It’s fast, intuitive, and great for landing pages, pitch decks, and visual reports. It’s not a full website builder, but for specific content types, it’s impressively quick.
Pricing: Free plan available; individual paid plan starts at $12/seat/month
Best for: Marketers, founders, and creators who need to quickly produce polished, shareable web pages and presentations
Key role of digital marketing tools in growth for businesses of all sizes
Digital marketing tools aren’t just about convenience; they’re genuine growth drivers. Whether you’re a solo founder or running a large enterprise, the right tools help you compete smarter, move faster, and make better decisions with your marketing budget.
Here’s how they contribute to real, measurable business growth:
Precise audience targeting & global reach
Digital marketing tools let you go beyond broad demographics and target people based on behavior, interests, location, purchase history, and more.
This means your message reaches the right people (not just a lot of people) and that precision works just as well, no matter if your audience is local or spread across continents.
Cost-effective campaigns
Unlike traditional advertising, digital tools let you set your own budget, pause campaigns instantly, and allocate spend toward what’s actually working.
Even small businesses with limited budgets can run highly targeted campaigns that deliver real results. Something that simply wasn’t possible with billboards or print ads.
Real-time analytics
One of the biggest advantages of digital marketing tools is knowing what’s happening right now, not in a monthly report.
You can track clicks, conversions, bounce rates, and engagement as they happen, which means you can catch underperforming campaigns early and double down on the ones driving results.
Automated customer journeys
Marketing automation tools let you map out the entire customer journey, from first touch to purchase, and deliver the right message at each stage without manual effort.
This keeps leads engaged consistently, reduces drop-off, and frees your team to focus on strategy rather than repetitive follow-ups.
Personalized user experiences
Today’s customers expect brands to know what they want without any serious effort. Digital marketing tools use behavioral data and segmentation to deliver personalized emails, recommendations, ads, and content at scale.
This makes each interaction feel relevant rather than generic, which directly improves engagement and conversion rates.
Maximized return on investment
Because digital tools give you detailed data on every campaign, you can continuously refine your targeting, messaging, and spend to get more out of every dollar.
Over time, that constant optimization compounds. This ultimately means your marketing gets more efficient and more effective the longer you use it.
Accelerated revenue generation
When targeting, automation, personalization, and analytics all work together, the result is a shorter path from awareness to purchase.
Digital marketing tools remove friction at every stage of the funnel, helping businesses convert faster, retain customers longer, and ultimately grow revenue more predictably.
Major benefits of using digital marketing tools at present
The marketing landscape has shifted dramatically, and digital tools are at the center of that shift. Businesses that use them well don’t just save time; they gain a real competitive edge by making smarter decisions, reaching the right audiences, and delivering better experiences.
Here’s a look at the key benefits driving that advantage today:
Hyper-targeted audience reach
Gone are the days of casting a wide net and hoping for the best. Digital marketing tools let you get incredibly specific (targeting by age, location, device, online behavior, purchase intent, and more).
This means your budget goes toward people who are genuinely likely to care about what you’re offering, which naturally leads to better engagement and higher conversion rates.
Real-time analytics & trackable ROI
Every click, open, scroll, and conversion is measurable. Digital marketing tools give you a live view of how your campaigns are performing, so you’re never left guessing whether your efforts are paying off.
That visibility also makes it straightforward to tie marketing activity directly to revenue, which is something traditional marketing channels could rarely offer.
Cost-effectiveness & global scale
Digital tools level the playing field in a meaningful way. A small business with a modest budget can run targeted campaigns that reach thousands of the right people (locally or globally) without the massive spend that TV or print advertising would require.
You control where every dollar goes and can scale up or pull back based on real performance data.
AI-driven personalization & automation
Modern digital marketing tools are increasingly powered by AI, which means they can do things at scale that would be impossible manually.
This includes tasks such as personalizing email content for thousands of subscribers, predicting what a customer is likely to buy next, or automatically adjusting ad bids in real time.
This makes your marketing feel more human to the customer while actually requiring less hands-on effort from your team.
Data-driven customer insights
Digital marketing tools don’t just help you run campaigns; they help you understand your audience on a deeper level.
From heatmaps and session recordings to CRM data and purchase patterns, you get a clearer picture of who your customers are, what they want, and where they drop off.
Those insights feed back into better campaigns, better products, and better overall customer experiences.
Useful tips to pick the ideal digital marketing tools for your business
With hundreds of options available, choosing the right ones can feel quite a challenging task. The key is being intentional, i.e., matching tools to your actual needs rather than chasing the most popular or feature-heavy options.
These tips will help you cut through the noise and make choices you won’t regret:
Tip #01: Audit your specific needs
Before you even start browsing tools, get clear on what problems you’re actually trying to solve. Are you struggling with lead generation, content creation, social media consistency, or campaign tracking?
Starting with a clear picture of your gaps ensures you pick tools that address real needs, not ones that just look impressive on a features page.
Tip #02: Evaluate the learning curve
A tool is only useful if your team will actually use it. Consider how technically comfortable your team is and how much time you can realistically dedicate to onboarding.
Some tools are intuitive enough to get going in an afternoon, while others require weeks of training. And, that time investment should factor into your decision just as much as the price tag.
Tip #03: Ensure seamless integration
The best tools work well with what you already have. Check if a new tool integrates with your existing CRM, email platform, analytics setup, or content management system before committing.
Disconnected tools create data silos and extra manual work, which defeats the purpose of using them in the first place.
Tip #04: Leverage free trials & tests
Most reputable digital marketing tools offer a free trial or a freemium plan, so there’s rarely a good reason to buy blind.
Use that trial period to run real tasks, involve your team, and see whether the tool actually fits your workflow. A tool that feels clunky during the trial period will feel even clunkier six months in.
Tip #05: Prioritize essential categories
Not all tool categories carry equal weight for every business, but some are universally foundational.
Analytics, SEO, social media management, and AI assistants tend to deliver the broadest impact across most marketing functions.
If you’re building your stack from scratch, getting solid coverage in these categories first gives you a strong base to build everything else around.
Tip #06: Analyze scalability
The tool that works for you today needs to still work for you when your audience, team, or campaign volume grows.
Check if pricing stays reasonable at higher usage tiers, whether the features expand with your needs, and if the platform has a track record of keeping up with industry changes.
Switching tools every year is costly and disruptive. Investing in something scalable upfront saves you the headache later.
Get started building your digital marketing tool stack
Building the right digital marketing tool stack doesn’t happen overnight, and it doesn’t need to. Start by identifying your biggest gaps, pick tools that solve real problems, and expand from there as your needs grow.
The 75+ tools covered in this guide span every major category, from social media and SEO to CRM, content creation, and conversion optimization, so there’s genuinely something here for every type of business and budget.
The goal was never to use all of them, but to find the ones that fit your strategy and work well together. Start small, stay intentional, and let the results guide what you add next.
Frequently asked questions
What tools are used in digital marketing?
When people ask what are the digital marketing tools commonly used, the list typically includes:
– SEO tools, – Social media schedulers, – Email marketing platforms, – CRM systems, – Analytics tools, – Content creation software, and – Paid ad managers
Each category serves a different function, but together they cover the full scope of running effective marketing campaigns.
What digital marketing tools are recommended in 2026?
In 2026, tools like Replug, HubSpot, Ahrefs, Canva, Claude, Klaviyo, and Google Analytics 4 continue to stand out across categories. AI-powered platforms are becoming increasingly central to most marketing stacks, helping teams work faster and smarter without necessarily growing headcount.
What are some digital marketing tools for beginners?
If you’re just starting out, focus on tools with gentle learning curves. Canva for design, Mailchimp for email, ContentStudio for social media, and Usermaven for tracking are all solid starting points. Many offer digital marketing tools free plans, so you can get hands-on experience without spending anything upfront.
How does digital marketing software help with campaign management?
Digital marketing software brings everything into one place: scheduling, tracking, reporting, and optimization. Instead of juggling spreadsheets and separate platforms, you get a centralized view of what’s running, what’s working, and where to adjust. It saves time, reduces errors, and keeps campaigns consistent across channels.
Are automation tools really effective in digital marketing?
Absolutely! Automation handles repetitive tasks like follow-up emails, social posting, and lead nurturing without constant manual input. The result is more consistent communication and faster response times. Any serious digital marketing company relies on automation to scale campaigns without proportionally scaling their team’s workload.
Which digital marketing tools are right for small businesses?
Small businesses should focus on affordable, multi-functional tools. Replug, EngageBay, Mailchimp, Canva, Buffer, and Google Search Console cover most needs without breaking the budget. Knowing what are the tools of digital marketing that offer free or low-cost tiers makes it much easier to build a solid stack on a tight budget.
What are the top digital marketing competitor analysis tools online?
For competitor analysis, Ahrefs, Semrush, and Moz are the most widely used, covering backlinks, keyword gaps, and organic performance.SimilarWeb is great for traffic insights, while Sprout Social helps benchmark social engagement. These tools give you a clear picture of where competitors are winning and where you can close the gap.
With over 2.7 billion monthly active users and more than 500 hours of video uploaded every single minute, YouTube isn’t just a media platform; it’s basically the internet’s living room. People are on it every day, discovering tutorials, music, vlogs, and everything in between.
But here’s the thing: With that much content flying around, finding your favorite videos again can feel like searching for a needle in a haystack. That’s exactly where playlists come in!
If you’ve ever wondered what is a YouTube playlist and how it can make your experience so much smoother, you’re in the right place.
Let’s start from the very beginning: what is a playlist on YouTube, and why should you care?
What is a playlist on YouTube
Think of a YouTube playlist as your own personal collection of videos, grouped together in one place. Instead of hunting down the same videos over and over again, a playlist lines them up automatically (one after another), so you can just sit back and watch.
You can create playlists for literally anything:workout routines, study music, cooking tutorials, or even a bunch of videos you want to watch later. They’re completely free to create and available on every device.
No matter if you’re organizing your own uploads or saving YouTube videos from other creators, playlists basically make YouTube work for you instead of the other way around.
How to make a playlist on YouTube on phone
Making a playlist on the YouTube mobile app is super easy and takes less than a minute. There are a few different ways to do it depending on where you are in the app, so let’s walk through each method one by one.
Here’s how to make a playlist on YouTube mobile step-by-step using various methods:
Method #01: From the “You” tab (best for starting fresh)
This is the cleanest and most straightforward way to create a brand-new playlist on your phone. Perfect when you want to set one up before adding any videos to it.
Step#01: Open the YouTube app
Grab your phone and tap the YouTube app to open it. Make sure you’re signed into your Google account; otherwise, you won’t be able to create or save playlists.
Step#02: Tap your profile picture (“You”)
Look at the bottom navigation bar and tap the “You” tab in the bottom-right corner. This takes you straight to your channel and account options.
Step#03: Navigate to the “Playlists” section
Scroll down a little, and you’ll see a “Playlists” section showing any playlists you’ve already created. This is your playlist hub!
Step#04: Tap “+” icon
You’ll spot a “+” icon near the Playlists section. Tap it to kick off the playlist creation process.
Step#05: Enter a playlist title & set the visibility
Type in a name for your playlist, then choose who can see it.
Public(anyone), Unlisted(only people with the link), or Private (just you).
Step#06: Tap “Create”
Finally, tap the “Create” button, and you’re done! Your new playlist is ready and waiting for videos to be added.
Method #02: From a video (best for adding as you watch)
This method is ideal for those moments when you’re watching a video and think, “I want to save this!” You can create a brand-new playlist and add the video to it right on the spot.
Step#01: Open the YouTube app
Tap the YouTube app on your phone to open it and make sure you’re logged into your account.
Step#02: Watch a video
Find and open any video you want to save to a new playlist. It can be any video from any channel.
Step#03: Tap “Save”
Below the video, tap the “Save” button (it looks like a small bookmark icon). A pop-up will appear on your screen.
Step#04: Tap “Change” inside the pop-up
Inside the pop-up, you’ll see a default saving option. Tap “Change” to get the option to create or select a different playlist.
Step#05: Tap “+ New playlist”
From the list that appears, tap “+ New Playlist” at the bottom to start creating a fresh playlist right then and there.
Step#06: Set title & visibility
Give your playlist a unique name and choose its visibility (Public, Unlisted, or Private) depending on who you want to see it.
Step#07: Tap “Create”
Tapthe “Create” button, and you’re all set! The video you were watching gets automatically saved into your brand-new playlist.
Method #03: From a YouTube Short
Did you know you can create a YouTube playlist from YT Shorts too? Most people don’t realize this! Here’s how to do it without ever leaving the Shorts feed.
Step#01: Open the YouTube app
Tap the YouTube app on your phone and make sure you’re signed into your Google account.
Step#02: Tap “Shorts”
Tap on the “Shorts” tab from the bottom navigation bar to open the Shorts feed and start scrolling.
Step#03: Tap the three-dot menu (⋮)
On the Short you want to save, tap the (⋮) on the top-right side of the screen to open more options.
Step#04: Select “Save to playlist”
From the menu that pops up, tap “Save to playlist”. This is where you’ll get the option to add it to an existing playlist or create a new one.
Step#05: Tap “+ New playlist”
Tap “+ New playlist” at the bottom of the screen to start setting up a fresh playlist for your saved Short.
Step#06: Set title & visibility
Enter a name for your playlist and choose your preferred visibility setting (Public, Unlisted, or Private).
Step#07: Tap “Create”
Tap “Create” and you’re done! The Short is now saved, and your new playlist is ready to go.
How to make a playlist on YouTube PC
Creating a playlist on YouTube’s desktop version is just as simple as on mobile, maybe even easier. You don’t need any special account or subscription; just a browser, a Google account, and a video you like.
Here’s how to make a playlist on YouTube desktop step-by-step:
Step#01: Go to the YouTube homepage
Open your preferred browser and head over to www.youtube.com. Sign in to your Google account if you aren’t already logged in.
Step#02: Find a video & play it
Search for any video you want to add to your new playlist and click on it to open it up.
Step#03: Click the three-dot menu (⋯)
Just below the video, look for the (⋯) icon sitting next to the like, dislike, share, and download buttons. Click on it to reveal more options.
Step#04: Click “Save”
From the options that appear, click “Save”. A small pop-up window will show up with your existing playlists.
Step#05: Click “+ New playlist”
At the bottom of the pop-up, click “+ New playlist” to start creating a fresh one instead of adding it to an existing playlist.
Step#06: Set title & visibility
Type in a name for your playlist and choose who can see it.
Public, Unlisted, or Private based on your preference.
Step#07: Click “Create”
Click “Create,” and that’s it! Your new playlist is live, and the video is already saved inside it.
How to create a playlist on YouTube on TV
Yes, you can create and manage YouTube playlists directly from your TV (no phone or laptop needed). It works on most smart TVs, Fire Stick, Roku, Apple TV, and gaming consoles that have the YouTube app installed.
Let’s walk through how to make a playlist on YouTube on TV step-by-step using multiple available methods:
Method #01: Creating a playlist while watching TV
This is the most natural way to build a YT playlist on your TV. You come across a video you love and save it into a new playlist right then and there, without switching to another device.
Step#01: Open the YouTube app on your TV
Grab your TV remote and launch the YouTube app from your smart TV’s home screen or app menu.
Step#02: Sign in with your Google account
Make sure you’re signed into your Google account. Without this, the playlist creation option simply won’t show up.
Step#03: Find and open a video
Browse or search for a video you want to save, then open it using your TV remote.
Step#04: Click the three dots (…) or the “Save” button
While the video is playing, navigate to the (…) icon or the “Save” button that appears on screen and select it with your remote.
Step#05: Select “+ New playlist”
From the options that appear, scroll down and select “+ New Playlist” to start building a fresh playlist.
Step#06: Set title & visibility
Use your remote to type in a playlist name and select your visibility (Public, Unlisted, or Private).
Step#07: Select “Create”
Select “Create,” and you’re all done! The video is saved, and your new playlist is ready to enjoy on the big screen.
Method #02: Creating a playlist from “Library” (TV)
This method is great when you want to create a playlist without having a specific video open. You’re basically setting things up in advance so it’s ready whenever you need it.
Step#01: Open the YouTube app
Turn on your TV and launch the YouTube app from your home screen or app menu.
Step#02: Select “You” or your profile image
Using your remote, navigate to the left-side menu and select “You” or your profile image to access your account options.
Step#03: Move to the “Playlists” section
Scroll through your account options until you find the “Playlists” section. This is where all your existing playlists live.
Step#04: Select “+ New playlist”
Highlight and hit “+ New Playlist” to begin creating a brand-new playlist from scratch.
Step#05: Set title & visibility
Use your remote to type in a name for your playlist. Then set the visibility to “Public,” “Unlisted,” or “Private” based on your preference.
Step#06: Select “Create”
Select “Create,” and that’s it! Your playlist is ready and waiting for videos to be added whenever you like.
How to make a playlist on YouTube Music
YouTube Music is a whole separate app from regular YouTube. Think of it as Google’s answer to Spotify. It’s built specifically for music lovers, and yes, you can create your own playlists there too.
Here’s how to do it across different devices:
How to create a playlist (mobile app)
Creating a playlist on the YouTube Music mobile app is quick and straightforward. Whether you want to build a morning commute mix or a late-night chill playlist, here’s how to get it done in seconds.
Here’s how to make a playlist on YouTube Music on phone step-by-step:
Step#01: Open the YouTube Music app
Tap the YouTube Music app on your phone to open it and make sure you’re signed into your Google account.
Step#02: Find a song or album
Browse or search for any song or album you want to add to your new playlist and pull it up on screen.
Step#03: Tap the three vertical dots menu (⋮)
Next to the song or album or in the top right-hand corner, tap the (⋮) icon to open a list of available options for that track.
Step#04: Select “Save to playlist”
From the options menu, tap “Save to playlist”.A new section will pop up showing your existing playlists.
Step#05: Tap “+ New playlist”
Tap “+ New Playlist” at the bottom of the screen to start building a fresh playlist instead of adding to an existing one.
Step#06: Set title, description, & privacy
Give your playlist a name, add an optional description, and set the privacy to Public, Unlisted, or Private depending on who you want to share it with.
Step#07: Tap “Create”
Tap “Create” and you’re all set! Your new YouTube Music playlist is ready, and the song is already saved inside it.
How to create a playlist (desktop/web)
Prefer using YouTube Music on your laptop or desktop browser? No problem! Creating a playlist on the web version is just as smooth.
Here’s how to do it step by step:
Step#01: Go to music.youtube.com
Open your preferred browser and type in music.youtube.com in the address bar to land directly on the YouTube Music web player.
Step#02: Sign in with your Google account
Click “Sign In” in the top-right corner and log in with your Google account. You’ll need this to save and manage playlists.
Step#03: Search for a song, album, or podcast
Use the search bar at the top to find any song, album, or podcast you want to add to your new playlist.
Step#04: Click the three dots (⋮)
Hover over the track or album and click the (⋮) icon that appears next to it to open its options menu.
Step#05: Select “Save to playlist”
From the dropdown menu, click “Save to playlist”. A pop-up will appear showing your existing playlists.
Step#06: Click “+ New playlist”
Click “+ New playlist” inside the pop-up to start creating a fresh playlist from scratch.
Step#07: Enter a title & description
Type in a name for your playlist and add an optional description to help you remember what it’s all about.
Step#08: Set the privacy
Choose your preferred privacy setting (Public, Unlisted, or Private) depending on whether you want others to find and view your playlist.
Step#09: Click “Create”
Click “Create,” and that’s a wrap! Your new YouTube Music playlist is live and ready to be filled up with your favorite tracks.
Useful tips for managing your YouTube playlists efficiently
Creating a playlist is just the first step; managing it well is what makes it truly useful. A well-organized playlist saves you time, keeps your content easy to find, and makes the whole viewing experience way more enjoyable.
Here are some handy tips to help you stay on top of your playlists!
Tip #01: Optimize titles & descriptions
Give your playlists clear, descriptive names that tell you (and others) exactly what’s inside. Something like “Morning Workout Routines” beats “My Playlist 1” any day. Moreover, adding a short description also helps YouTube’s search algorithm surface your playlist to the right audience.
Tip #02: Order by quality/relevance
Don’t just dump videos in randomly. Arrange them in a logical order so the best or most relevant content comes first. You can manually drag and reorder videos inside the playlist settings to control exactly how they flow.
Tip #03: Create specific categories
Instead of one giant playlist for everything, break things down into focused categories like “Cooking Tutorials”, “Travel Vlogs”, or “Study Music”. The more specific your playlists are, the easier it is to find exactly what you’re in the mood for.
Tip #04: Set proper privacy/visibility
Always double-check your visibility settings before sharing a playlist.
Use:
“Public” for playlists you want everyone to discover,
“Unlisted” is for sharing with specific people only, and
“Private” is for content that’s just for your own personal use.
Tip #05: Leverage automated playlists
YouTube automatically generates playlists like “Watch Later” and “Liked Videos” for every account; don’t ignore these! They’re great built-in tools for saving content on the fly without having to create a playlist from scratch every time.
Tip #06: Use collaborative settings
YouTube lets you make playlists collaborative, meaning you can invite others to add videos to it too. It’s a fun feature for building shared playlists with friends, family, or even a community around a topic you all love.
Tip #07: Regularly update
A monotonous playlist full of outdated or irrelevant videos isn’t doing you any favors. Make it a habit to revisit your playlists every now and then. Remove videos that no longer fit and add fresh ones to keep things current and engaging.
Turn every YouTube playlist link into a growth opportunity with Replug!
Once your playlist is ready, why share a long, messy YouTube link when you can do so much better?
Replug is an all-in-one link management platform that helps you shorten, brand, and track every link you share, including your YouTube playlists.
With its custom link shortener, you can create clean, personalized branded short links in seconds that actually look professional and trustworthy. No more ugly, long URLs!
Maximize marketing ROI
by transforming ordinary URLs into branded short links that convert.
Try Replug for free
And if you’re a content creator, don’t miss Replug’s free YouTube title generator. It helps you craft catchy, click-worthy titles effortlessly. With this tool, this tough task feels like a piece of cake.
Give it a try today and see how much easier managing and sharing your content becomes!
Frequently asked questions
Can I create a music playlist on YouTube for free?
Yes, absolutely! Creating a playlist on YouTube is completely free; no subscription or YouTube Premium required. As long as you have a Google account, you can create as many playlists as you want and add unlimited videos to them at no cost whatsoever.
How to make a music playlist on YouTube?
Making a YouTube music playlist is really simple:
Just find a music video you like → play it → tap the “Save” button below the player → select “+ New playlist” → give it a name, set your privacy preference, and tap “Create”.
From there, keep adding songs the same way, and your YouTube music playlist will grow in no time.
How to make a new playlist on YouTube in 2026?
To make a new playlist on YouTube, the quickest method is to find a video you want to include, tap or click the “Save” button, and select “Create new playlist”. You will be prompted to name the playlist, choose its privacy settings (Public, Unlisted, or Private), and hit “Create”. That’s it!
How to create playlist on YouTube Studio?
To create a playlist in YouTube Studio on a PC, click the “Create” button in the top-right corner and select “New playlist”.
Then, enter a title and description, set the visibility (public, private, or unlisted), select the default video order and language. You can also add exixsitng videos by clicking the “Add videos” button. After doing all this, finally click the “Create” button.
That’s all there is to it!
How to make a playlist on YouTube without an account?
Unfortunately, you can’t create or save playlists on YouTube without a Google account. Playlists are tied to your account so YouTube knows where to store and retrieve them. The good news is that creating a Google account is completely free and only takes a couple of minutes.
How to make a playlist on YouTube without signing in?
You can create a “virtual” YouTube playlist without an account by using a custom URL trick. You simply extract the unique video ID from each video you want to include and string them together in a specific web address. However, this method isn’t a permanent solution!
Signing in to your Google account is a must for creating playlists. Without being logged in, YouTube has no way to save your playlist anywhere.
How to make a playlist on YouTube for your channel?
It’s the same process as creating a regular playlist, but make sure you set the visibility to “Public” so your subscribers can find and watch it. Once created, your playlist will automatically appear on your channel page under the “Playlists” tab for everyone to see and enjoy.
How to delete a playlist on YouTube?
Here’s how to delete a YouTube playlist, step-by-step:
Open the YouTube app → go to your profile → scroll to the “Playlists” section → tap “View all” → select the playlist to delete → tap on the three dots icon → select the option “Delete playlist” → confirm “Delete”.
Note: You cannot delete system-generated playlists like “Watch Later” or “Liked Videos,” but you can remove the individual videos inside them.
Are you the one wondering if starting a YouTube channel in 2026 is too late? Think again, please!
YouTube now has over 2.7 billion monthly active users, which is more than a third of the entire planet tuning in every single month.
And here’s the wild part: only about 4.4% of those users actually own or run a channel. That means the audience is massive, but the creator space still has plenty of room for ‘you’.
No matter if you want to share a hobby, build a personal brand, or eventually earn real income from your content, YouTube remains the best long-form video platform on earth to do it. And, the bar to entry is lower than ever.
In this guide, we’ll walk you through every step, from zero to your first published video. But before we get into the setup, let’s make sure we’re on the same page about the basics: what exactly is a YouTube channel, and how does it work?
What is a YouTube channel?
Think of a YouTube channel as your own personal TV station, but on the internet, and completely free to set up.
It’s basically a dedicated space on YouTube where you upload, organize, and share your videos with the world. Anyone with a Google account can create one in just a few minutes.
When someone visits your YT channel, they’ll see everything you’ve posted: your videos, playlists, an About section, and even a banner that represents your brand. Viewers can also hit that “Subscribe” button to stay updated whenever you post something new.
In short, it’s your home on YouTube, and you decide what goes up there!
Important things to know before starting a YouTube channel
Before you hit that “Create a channel” option, there are a few things worth knowing upfront. Starting a YouTube channel is exciting, but going in with the right mindset and realistic expectations will save you a lot of frustration down the road.
Here’s what you should keep in mind:
Consistency is key: Posting regularly tells both YouTube’s algorithm and your audience that you’re serious. Channels that upload consistently tend to grow faster than those that post randomly.
Patience is mandatory: Most successful YouTubers didn’t blow up overnight. Growth takes time, so don’t get discouraged if the first few months feel slow (keep going anyway).
Focus on value over high-end equipment: You don’t need a fancy camera to start. A decent smartphone and good lighting can take you far. What truly matters is whether your content is actually useful or entertaining to your viewers.
Identify a specific niche: Trying to make content about everything usually leads to attracting no one. Pick a focused topic you genuinely enjoy, and build your channel around that.
Prioritize compelling thumbnails & titles: Your thumbnail and title are the first things people see before clicking. If they don’t grab attention, even great videos get ignored. So, spend real time getting these right.
Commit to a regular, sustainable posting schedule: Don’t burn yourself out by over-committing. It’s far better to post once a week consistently than to upload daily for a month and then disappear.
Focus on authentic content: Viewers can spot fakeness pretty quickly. Just be yourself! People connect with real personalities far more than overly polished, scripted ones.
Learn editing & SEO basics: You don’t need to be a pro editor, but knowing how to trim clips, add some music, and optimize your titles and descriptions for search can make a big difference early on.
Create a backlog: Before launching, try to have at least 3–5 videos ready to go. This gives you a buffer and helps you maintain your posting schedule without scrambling for ideas at the last minute.
Embrace imperfection: Your first videos probably won’t be great, and that’s completely fine. Every creator started somewhere. Ship the video, learn from it, and improve as you go.
Be prepared for feedback: Comments won’t always be kind. Develop a thick skin, take constructive criticism on board, and learn to ignore the noise that adds no real value.
Use analytics: YouTube’s built-in analytics show you what’s working and what isn’t, things like watch time, click-through rate, and audience retention. Check them regularly and let the data guide your decisions.
Avoid “shiny object syndrome”: It’s tempting to constantly switch styles, formats, or niches every time you see another creator doing something cool. Stick to your lane, stay focused, and give your strategy enough time to actually work.
Avoid Sub4Sub: Sub4Sub means subscribing to someone’s channel in exchange for them subscribing back. It sounds like a shortcut, but it only inflates your numbers with people who don’t care about your content, which bombs your engagement and hurts your channel long-term.
How to start a YouTube channel: Create a personal YT channel in no time!
Setting up a YouTube channel is honestly simpler than most people think. You don’t need any technical skills, just a Google account and a few minutes of your time. Follow the next steps, and you’ll have your channel up and running before you know it.
Steps on how to start a YouTube channel:
Step #01: Sign in to YouTube
Head over to www.youtube.com and click the “Sign in” button at the top right corner. Use your existing Google account to log in, or create a new one if you don’t have one yet.
Step #02: Create channel
Once you’re signed in, click on your profile icon at the top right, then select “Create a channel” from the dropdown menu.
Step #03: Customize channel name & handle
Choose a channel name that reflects what your content is about and is easy to remember. You’ll also get to set your unique handle (that’s the @username people use to find and tag you on the platform).
Step #04: Customize branding
This is where you give your channel its look and feel. Upload a profile picture to make your channel look professional and recognizable from day one. Then, click on “Create channel”.
Step #05: Verify channel
Head to youtube.com/verify and enter your phone number to verify your account. Then, click on “Next.”
Now, you will receive a 6-digit verification code. Please enter it and click the “Submit” button.
And that’s all there is to it!
How to start a YouTube channel for business
A business YouTube channel works a little differently from a personal one, and setting it up the right way from the start actually matters. The key difference is that you’ll want to create it under a Google Brand Account, so it stays separate from your personal profile and can be managed by multiple people if needed.
Here’s how to do it step-by-step:
Step #01: Create a dedicated Google Brand Account
Go to myaccount.google.com, click on “Create an account,” and select the option to create it for a business or brand. This keeps your business channel completely separate from your personal Google account.
Step #02: Create a brand channel
Sign in to YouTube using your new Google Brand Account, click your profile icon, and select “Create a channel.” This channel will represent your business, which is exactly what you want.
Step #03: Customize channel branding
Upload your business logo as the profile picture and design a clean, on-brand banner that reflects your business identity. First impressions count, so make sure everything looks consistent with your overall brand.
Step #04: Fill out the ‘About’ section
Write a clear, concise description of what your business does and what kind of content viewers can expect. Don’t forget to add your website link, business email, and any relevant social media handles here, too.
Step #05: Verify your channel
Just like with a personal channel, head to youtube.com/verify and complete phone verification. This unlocks custom thumbnails, longer video uploads (more than 15 minutes), and live streaming, all essential features for a business channel.
Step #06: Set up default upload settings
Go to YouTube Studio, navigate to Settings, and configure your default upload preferences – things like default visibility, license type, category, and tags. This saves you time with every upload and keeps your settings consistent across all videos.
How to start a YouTube channel on your phone
Don’t have a laptop or PC at hand? No problem!
You can set up a fully functional YouTube channel right from your smartphone in just a few minutes. The process is super straightforward, and the YouTube app makes it pretty intuitive.
Here’s how to create a YouTube channel in mobile:
Step #01: Open YouTube app
Download the YouTube app from the App Store (iPhone) or Google Play Store (Android) and install it. Then go ahead and open it up.
Step #02: Sign in with a Google account
Tap your profile icon, followed by tapping the “Accounts” button.
Log in with your existing Google account. If you don’t have one, you can create a new Google account right from the app in just a couple of minutes.
Step #03: Tap your profile picture
Once you’re successfully signed in, tap your profile picture or icon again in the bottom right corner of the screen. This opens up your account menu, where all the important options live.
Step #04: Select “Create a channel”
From the opened screen, tap “Create a channel.” This is where YouTube will prompt you to set up your channel if you haven’t already. Just follow the quick on-screen steps to get it created.
Step #05: Customize your channel name, handle, & picture
Now, add your channel name, set your unique handle, and upload a profile picture. Keep it clear and relevant to what your channel is going to be about.
Finally, tap on the “CREATE CHANNEL” button. That’s all!
Step #06: Use the “+” button to create or upload content (additional step)
Tap the “+” icon at the bottom center of the app to start uploading videos, record content directly, or even create a YouTube Short. This is your go-to button for getting content live on your channel.
How to start a YouTube channel for kids
Starting a YouTube channel for kids is a bit different from a regular channel; safety and parental oversight come first, always.
Whether your child wants to share creative videos, gaming content, or just have fun on camera, it’s important to set everything up the right way before posting anything publicly.
Here’s how to create a YouTube channel for a kid properly:
Step #01: Set up account & channel
Since YouTube requires users to be at least 13 years old, a parent or guardian needs to create and own the Google account and YouTube channel. The child can create content, but an adult should always be in control of the account itself.
Step #02: Set safety settings
Go to YouTube Studio and mark the channel as “Made for kids” to filter out inappropriate content. Also, make sure to turn off or carefully manage features like comments, as unmoderated comments on kids’ content can get problematic quickly.
Step #03: Enable supervised mode
YouTube offers a supervised experience through the YouTube Family Center, which lets parents control what their child can watch and do on the platform. It’s a solid extra layer of protection worth setting up.
Step #04: Content creation
Always be involved when your child is filming or editing. Keep videos fun and age-appropriate, and make sure no personally identifiable information (like your home address, school name, or daily routine) ever makes it into the content.
Step #05: Manage privacy
Consider setting videos to “Unlisted” initially so only people with the direct link can view them. If you do go public, make sure to mark your content as “Made for Kids” in YouTube Studio. This is actually a legal requirement under COPPA if your content targets children.
Step #06: Content strategy
Focus on content your child genuinely enjoys, no matter if that’s crafts, storytelling, toys, or educational videos. Keep it consistent, light, and fun rather than chasing trends, and always prioritize your child’s comfort and well-being over views or growth.
How to start a YouTube channel and make money
Making money on YouTube is absolutely possible, but it’s important to understand that it rarely happens overnight.
The good news is that there are multiple ways to monetize your channel, and you don’t even need millions of subscribers to start earning.
Here’s how to create a YouTube channel and make money using these effective ways:
Method #01: YouTube Partner Program (AdSense)
This is YouTube’s official monetization program, where you earn money from ads shown on your videos.
To qualify, you currently need:
at least 1,000 subscribers and 4,000 watch hours in the past 12 months, or
1,000 subscribers and 10 million Shorts views in the last 90 days
Method #02: Alternative monetization (smaller channels)
If you haven’t hit YPP requirements yet, you can still earn through YouTube’s early monetization features like channel memberships and Super Thanks, which are available to smaller creators. These let your audience support you directly without you needing to wait for ad revenue.
Method #03: Affiliate marketing
This involves promoting other companies’ products or services in your videos and dropping your unique affiliate link in the description. Every time someone makes a purchase through your link, you earn a commission, and this method can work even with a relatively small audience.
Method #04: Brand sponsorships
Brands pay creators to feature or review their products within videos, and this can be one of the most profitable income streams on YouTube. You don’t necessarily need a massive channel either. Brands often love working with smaller, highly engaged niche audiences.
Method #05: Sell own products/services
If you have something to sell, whether that’s an online course, merchandise, coaching, or a digital download, your YouTube channel can act as a powerful free marketing tool to drive sales. This method puts the most money in your pocket since there’s no middleman involved.
Tips on how to start a YouTube channel
Setting up a channel is the easy part; growing it is where most beginners struggle. These tips won’t guarantee rapid success, but they will help you avoid the most common mistakes and set your channel up for long-term growth.
Let’s get into it:
Tip #01: Define your specific niche & target audience
Before you record a single video, get crystal clear on what your channel is about and who it’s for. The more specific your niche, the easier it is to attract a loyal, relevant audience rather than random one-time viewers.
Tip #02: Start with what you have in hand
Don’t wait until you can afford better gear. Start with your smartphone and whatever you already own. Waiting for the “perfect setup” is just procrastination in disguise, and your audience cares far more about your content than your camera quality.
Tip #03: Prioritize consistency over perfection
Posting regularly (even if the videos aren’t flawless) will always beat uploading perfect videos once in a blue moon. Consistency builds trust with your audience and signals to YouTube’s algorithm that your channel is active and worth promoting.
Tip #04: Launch with multiple videos
Instead of launching with just one video, try to have at least 3–5 videos ready on day one. This gives new visitors more content to indulge in, which increases watch time and makes your channel look more established right from the start.
Tip #05: Focus on clickable titles & high-quality thumbnails
Your title and thumbnail are basically your video’s billboard. They determine if someone clicks or keeps scrolling. Spend real time crafting curiosity-driven titles and clean, eye-catching thumbnails that actually represent your content honestly.
Tip #06: Focus on storytelling & value
Every video you make should either solve a problem, entertain, or teach something useful. Wrapping that value in a good story keeps viewers watching longer, and watch time is one of the biggest factors YouTube uses to decide how widely to push your content.
Tip #07: Plan your content accordingly
Don’t just act without preparation every time you sit down to record. Have a content calendar or at least a running list of video ideas ready. Planning ahead keeps you consistent, reduces creative burnout, and ensures your content stays aligned with your niche.
Tip #08: Learn the basics of YouTube SEO
Understanding how to use the right keywords in your titles, descriptions, and tags can significantly improve how easily people discover your videos through search. You don’t need to be an SEO expert; just learn the fundamentals and apply them to every upload.
Tip #09: Be patient with results & growth
Most channels take anywhere from 6 to 12 months before they see meaningful growth, and that’s completely normal. Trust the process, keep improving your content, and resist the urge to quit just because the numbers aren’t moving as fast as you’d like.
Tip #10: Adhere to YouTube’s standard policies
Always follow YouTube’s Community Guidelines and Terms of Service. Violating them can get your videos removed, your channel demonetized, or worse, permanently banned. When in doubt, check YouTube’s official policy pages before posting anything that feels borderline.
How to manage a YouTube channel as a beginner
Once your channel is live, managing it well is what separates creators who grow from those who fizzle out. It doesn’t have to be complicated, though a few smart habits and the right tools can keep everything running smoothly.
Here’s what to focus on:
Tip #01: Use YouTube Studio to upload, edit, & analyze content
YouTube Studio is your channel’s control room. It’s where you upload videos, make basic edits,write descriptions, and check how your content is performing. Get comfortable with it early because you’ll be spending a lot of time there.
Tip #02: Ensure consistent branding (banner/logo)
Your channel banner and profile picture should look cohesive and instantly reflect what your channel is about. Consistent branding makes your channel look professional and helps viewers remember you more easily.
Tip #03: Focus on channel customization & verification
Take time to completely fill out your channel layout and verify it. Featured videos, channel trailers, playlists, and sections all make a big difference in how new visitors experience your page. A well-organized, verified channel page encourages people to stick around and explore more.
Tip #04: Activate 2-step verification for security
Your channel is an asset worth protecting, so make sure to enable 2-step verification on your Google account right away. It takes two minutes to set up and significantly reduces the risk of your account getting hacked or compromised.
Tip #05: Engage with viewers through comments
Replying to comments (especially early on) builds a real sense of community and shows your audience that there’s an actual human behind the channel. Even a short, genuine reply goes a long way in building loyalty with your viewers.
Tip #06: Enable “Intermediate Features” for custom thumbnails
Custom thumbnails are one of the most powerful tools for getting clicks, but they’re locked until you enable “Intermediate Features” in YouTube Studio. It usually just requires phone verification, so it’s a quick win.
Tip #07: Set up video defaults for efficiency
In YouTube Studio settings, you can pre-fill default values for things like video descriptions, tags, category, and license type. This saves you a surprising amount of time with every upload and keeps your metadata consistent across all your videos.
Tip #08: Batch produce & set up permissions
Recording and editing multiple videos in one sitting (rather than one at a time) saves a ton of time and keeps your upload schedule on track. If you ever bring on a collaborator or editor, you can also manage their access through YouTube Studio’s permissions settings without sharing your login.
Tip #09: Use Creator Insider & Audio Library
Creator Insider is YouTube’s official channel where they share platform updates, algorithm changes, and feature announcements directly from the YouTube team (well worth following). The YouTube Audio Library, meanwhile, gives you free, copyright-safe music and sound effects to use in your videos without any worries.
Tip #10: Use analytics to track performance
Dig into your YouTube analytics regularly to understand what’s working. Pay close attention to metrics like click-through rate, average view duration, and impressions. These numbers tell you more about your channel’s health than subscriber count alone ever will.
Join hands with Replug and make your YouTube channel stand out in 2026!
Growing a YouTube channel gets a whole lot easier when you have the right tools backing you up.
Replug is an all-in-one link management platform packed with features designed to help creators and businesses manage their online presence more effectively.
Its custom link shortener lets you generate clean, branded short links within seconds. Perfect option for dropping in your YT video descriptions, bio, or anywhere else you share content. No more messy, long URLs!
Maximize marketing ROI
by transforming ordinary URLs into branded short links that convert.
Try Replug for free
And if you ever get stuck on what to title your next video, Replug’s free YouTube title generator has got you covered. It helps you craft catchy, click-worthy titles without the headache.
Give it a try today, you’ll wonder how you managed without it!
Frequently asked questions
How much does it cost to start a YouTube channel?
Creating a YouTube channel is completely free! There are no signup fees, monthly charges, or hidden costs involved. All you need is a Google account and an internet connection.
The only costs you might encounter are optional ones, like investing in a microphone, lighting, or editing software down the line. But those are upgrades, not requirements.
Plenty of successful creators started with nothing more than a smartphone.
How to start a YouTube channel for free?
Learning how to start a YouTube channel with no money is simpler than most people think. Just head to www.youtube.com → create a YouTube account using your existing Google account → fill in your channel name and handle, and you’re good to go.
For content creation, use your smartphone camera, shoot near a window for natural lighting, and use free editing tools like CapCut or DaVinci Resolve. There’s genuinely no need to spend a single penny to get started.
How do I start a YouTube channel and get paid?
To start earning from your channel, you’ll first need to qualify for the YouTube Partner Program (YPP), which requires 1,000 subscribers and 4,000 watch hours within the past 12 months. Once accepted, you’ll earn money through ads running on your YouTube videos.
Beyond AdSense, you can also make money through affiliate marketing, brand sponsorships, channel memberships, and selling your own products or services, even before hitting YPP thresholds.
How to make a YouTube channel with parental controls?
If you’re setting up a channel for a child, a parent or guardian should own and manage the account since YouTube requires users to be at least 13 years old.
Use Google Family Link to enable supervised access, turn on “Restricted Mode” to filter inappropriate content, and disable comments on uploaded videos for safety.
For viewing, the YouTube Kids app offers the most controlled and child-friendly experience overall.
What is a good name for a YouTube channel?
Figuring out what is a good YouTube channel name comes down to a few simple rules:
– Keep it short, easy to spell, and relevant to your content. – Ideally, it should give people an instant idea of what your channel is about while still being memorable. – Avoid using too many numbers or special characters, as these make it harder for people to find you through search. – Try to pick something unique enough that it isn’t already taken across other social platforms, too, so your branding stays consistent everywhere.
How to make a second channel on YouTube on phone?
To create a second YouTube channel on a phone, use a mobile browser (like Safari or Chrome) to navigate to studio.youtube.com, rather than the YouTube app.
Go to Settings → Channel → Advanced Settings → Manage YouTube Account → Add or manage your channels, then click “Create a channel.”
How to make your first YouTube video with no experience?
Here’s how to do it efficiently:
– Start by picking one topic you know well and can talk about comfortably. – Write a loose script or bullet-point outline, so you stay on track while recording. – Film using your smartphone in a quiet, well-lit spot, speak naturally, and don’t stress about getting everything perfect in one take. – Edit using a free tool like CapCut or iMovie, add a simple intro and some background music, and keep the video focused and concise.
Your first video won’t be flawless, but that’s completely okay. Just hit publish and learn as you go.
Provide a list of popular YouTube channel genres in 2026?
Here are some of the most popular and consistently growing YouTube channel genres right now:
Provide top-notch YouTube channel optimization and content strategy tips and tricks?
Here are some of the most effective ones to focus on:
– Optimize your titles with relevant keywords people are actually searching for, but keep them natural and compelling to click on. – Write detailed video descriptions. Include your main keyword in the first couple of lines and add relevant links, timestamps, and a channel CTA. – Use tags wisely. Add a mix of broad and specific tags that relate directly to your video topic. – Design eye-catching thumbnails. Use bold text, bright colors, and clear visuals that stand out in search results and suggested feeds. – Focus on the first 30 seconds of every video. Hook your viewer immediately, or they’ll click away, which hurts your retention rate badly. – Create playlists to group related videos together, which encourages binge-watching and increases overall watch time on your YouTube channel. – Post at consistent times so your subscribers know when to expect new content from you. – Add end screens and cards to keep viewers on your channel longer by directing them to other relevant videos. – Engage in the comments section early after posting. It boosts engagement signals that YouTube’s algorithm loves. – Study your analytics regularly and double down on the content formats and topics that are already performing well.
How to verify your YouTube account?
Verifying your YouTube account is quick and straightforward:
Go to youtube.com/verify while logged in → enter your phone number, and choose whether you’d like your verification code sent via text or call. Enter the 6-digit code once you receive it, and you’re done.
The YouTube channel login stays the same. Verification just unlocks additional features like custom thumbnails, live streaming, and the ability to upload videos longer than 15 minutes, all of which are worth having from day one.
With over 1.3 billion active members, LinkedIn is the world’s largest professional network. Whether you’re job hunting, building your personal brand, or reaching out to potential clients, your profile is your digital handshake.
But here’s a problem many people run into: They have no idea where to find their own LinkedIn URL to share it when it matters most.
Sending someone your profile link shouldn’t feel like solving a puzzle. No matter if you want to add it to your resume, drop it in an email signature, or create a URL that reflects your name professionally, it’s a lot simpler than you think, once you know where to look.
In this guide, we’ll walk you through exactly how to find your LinkedIn URL on both mobile and desktop in just a few clicks.
But first, let’s make sure we’re on the same page, i.e., getting to know what actually is a LinkedIn URL?
What is my LinkedIn URL?
Think of your LinkedIn URL as your profile’s home address on the internet. It’s the unique web link (or URL) that takes anyone directly to your LinkedIn profile; no searching required.
A standard LinkedIn URL looks something like this:
linkedin.com/in/yourname
Its main job is simple: Make it easy for people to find and visit your profile on the go!
Whether you’re adding it to your resume or putting it on a business card, your LinkedIn URL gives others a one-click shortcut straight to your professional story.
How to get LinkedIn URL from app (Android & iOS)
Getting your LinkedIn URL on mobile is super easy and only takes a few minutes.
Here’s how to find LinkedIn URL on iPhone & Android smartphone (mobile app steps):
Step #01: Open the LinkedIn app
Grab your phone and open the LinkedIn app. It works the same way on both Android and iOS.
Step #02: Tap your profile photo
Once you’re on the home feed, tap your profile photo in the top-left corner to open the side menu.
Step #03: Tap view profile (or your name)
In the menu that appears, tap on your name to open your profile page.
Step #04: Tap the three dots (…) icon
On your profile page, look for the three dots (…) icon. You’ll usually find it next to the “Add section” button. Tap on it.
Step #05: Tap “Contact info”
A small menu will pop up. Tap on “Contact info” to open your contact details.
Step #06: Get your LinkedIn URL under “Your profile”
Your LinkedIn URL will be right there under the “Your Profile” section. Tap on it to copy or share it instantly.
👉 Note: These steps apply to a public LinkedIn profile. If your profile is set to private, others won’t be able to access it through the URL.
How to get my LinkedIn URL from desktop
Prefer working on a laptop or PC?
Here’s how to get your LinkedIn URL in just a few clicks (desktop steps):
Step #01: Go to LinkedIn.com
Open your browser (Google Chrome, Edge, or any other of your choice) and head over to linkedin.com. Log in to your account if you aren’t already.
Step #02: Click the “Me” icon
Once you’re on the homepage, look for the “Me” icon at the top-right navigation bar and click on it.
Step #03: Click “View profile”
From the dropdown menu that appears, click “View profile” to land directly on your LinkedIn profile page.
Step #04: Look under “Public profile & URL”
On the right-hand side of your profile, you’ll spot the “Public profile & URL” section. Your LinkedIn URL is right there. Simply copy and use it wherever you need.
👉 Quick tip: The fastest way to grab your LinkedIn URL on desktop is even simpler. Just head over to your LinkedIn profile and copy the web address directly from your browser’s address bar. Done!
And if you ever want to update or personalize your URL, just click the pencil icon right under the “Public profile & URL” section. It lets you edit and change your LinkedIn URL to something cleaner and more on-brand.
Shorten your LinkedIn profile link to make it look more professional with Replug!
So now you have your LinkedIn URL, but let’s be honest, the default link can look a little long and messy, especially when you’re putting it on a resume or business card. That’s where Replug comes in!
It could turn into something like “yourbrand.co/linkedin” instead of a long string of random characters. It’s a small change, but the one that instantly makes your profile link look more polished and trustworthy.
No matter if you’re sharing your profile in an email, a portfolio, or a cold outreach message, a short branded link always makes a stronger first impression than a generic one.
Finding your LinkedIn URL really isn’t as complicated as it might seem. Whether you’re on your phone or sitting at your desktop, it only takes a handful of steps to locate, copy, and share your profile link with the world. And once you have it, don’t just stop there; take it a step further by personalizing it and keeping it neat.
A clean, professional LinkedIn URL is a small detail that can leave a big impression on recruiters, clients, and collaborators alike. So go ahead, grab your link, and if you want to make it look even sharper, give Replug a try today!
Frequently asked questions
What is a URL link?
A URL (Uniform Resource Locator) link is simply the web address that takes you to a specific page on the internet. Think of it as a digital street address; every webpage has its own unique one. For example, your LinkedIn profile URL link leads people directly to your profile page.
Where do I find my LinkedIn URL?
You can find it in two easy ways:
– On desktop, go to your LinkedIn profile and check the right-hand side under “Public profile & URL.” – On mobile, open the app → tap your profile photo → view profile → three dots (…) → Contact info, and your URL will be listed right there under “Your Profile”.
How to get LinkedIn profile link?
Head to your LinkedIn profile, either on the app or desktop.
– On desktop, simply copy the web address directly from your browser’s address bar. – On mobile, it’s tucked under the “Contact info” section.
You can copy it from either place and share it wherever you need.
How do I copy my LinkedIn URL from the mobile app?
Here’s how to copy LinkedIn profile link from the mobile app:
1. Open the LinkedIn app and tap your profile photo in the top-left corner. 2. Tap “View profile,” then hit the three dots (…) icon on your profile page. 3. Select “Contact info” and you’ll see your LinkedIn URL under the “Your Profile” section. 4. Simply tap on it, and you will find the “Copy” option. Tap it, and your URL will be copied to the clipboard.
That’s all there is to it!
How do I find my LinkedIn URL on my iPhone?
Here’s how to do it, step-by-step:
1. Open the LinkedIn app on your iPhone. 2. Tap your profile photo in the top-left corner. 3. Then tap your name or “View profile”. 4. Next, tap the three dots (…) icon on your profile page. 5. After that, select “Contact info,” and you’ll find your LinkedIn URL right there under the “Your Profile” section.
How to get LinkedIn URL for resume?
Here’s how to get LinkedIn URL to add in resume:
First, grab your LinkedIn URL (following the steps already discussed above) by visiting your profile on either desktop or mobile. Once you have it, consider customizing it to something clean like linkedin.com/in/yourname before adding it to your resume. It looks a lot more polished than a default link with random characters.
How to add LinkedIn URL on resume?
Once you have your LinkedIn URL copied, place it in the contact information section at the top of your resume, right alongside your phone number and email address. Keep it as a clean, readable link.
If you’re working on a digital resume, you can also hyperlink it to your name or a short label like “My LinkedIn Profile” so it’s clickable. Just make sure the URL is up to date and your LinkedIn profile is set to public before sending your resume out!
How to get LinkedIn URL for business page?
Go to your LinkedIn Company Page and look at the URL in your browser’s address bar. That’s your business page link. It typically looks like linkedin.com/company/yourbusinessname. You can copy it directly from there and share it anywhere you’d like.
Your LinkedIn headline is doing more work than you might think, but unfortunately, most people are wasting it.
With over 1.3 billion members on LinkedIn and 89% of recruiters actively using the platform to source candidates, the competition for attention is real.
LinkedIn powers six hires every minute, which means opportunities are flying by constantly. And your headline is often the first (and sometimes only) thing a recruiter sees before deciding to click or scroll past.
Accounts with personalized headlines attract up to 30% more profile views, yet most people still default to just their job title. That’s like showing up to a job interview in an invisible suit.
No matter if you’re actively job hunting, building your personal brand, or just want to stop being ignored on LinkedIn, your headline is the place to start.
We’ve pulled together 150+ real examples across industries to help you craft one that actually works. But first, let’s learn what exactly a LinkedIn headline is, and why it carries so much weight.
What is a headline for LinkedIn?
Your LinkedIn headline is the short line of text that appears right below your name on your profile. It’s one of the first things anyone sees, whether they find you through search, a comment, or a connection request.
But it’s more than just a label. Its primary job is to tell people who you are, what you do, and why they should care, all in a single glance. LinkedIn gives you 220 characters for the headline, so make the most of it.
Here’s why it matters so much: LinkedIn’s search algorithm treats your headline as prime real estate. Recruiters searching for candidates will see your headline before almost anything else on your profile. A strong one gets you noticed right away, whereas a weak one gets you skipped.
Key elements that make a LinkedIn headline
Professional title: This is your foundation. Use the title recruiters actually search for, not your company’s internal label.
Relevant keywords: These help LinkedIn’s algorithm surface your profile in the right searches. Think of them as your discoverability tools.
Expertise & key skills: Highlight what you’re genuinely good at. This tells people exactly what you bring to the table.
Unique value proposition: What makes you different from the other candidates with the same job title? This is your chance to answer that.
Target audience: The best headlines speak directly to people. Who are you trying to attract: recruiters, clients, collaborators?
Major achievements: Numbers speak louder than words. A quick win (“grew revenue by 40%”) instantly builds credibility.
Present role & career goals: Give people context about where you are now and where you’re headed. It makes your profile feel current and intentional.
Structure to follow for your LinkedIn headline
Think of this as your go-to formula when you’re not sure where to start.
[Title] | [Key Skills/Industry] | [Value Proposition or Accomplishment]
The first part is your professional title (what you do).
The second is your key skills or the industry you work in (your area of expertise).
The third is where you seal the deal (a result you’ve driven, a problem you solve, or something that makes you stand out).
For example:“Digital Marketing Manager | SEO & Content Strategy | Helped 20+ B2B brands 3x their organic traffic.” Simply clean, clear, and instantly compelling.
That said, this is just one of the most widely used templates. Feel free to tweak it, flip it around, or build something entirely your own. What matters most is that it sounds like “you” and speaks directly to the right people.
A complete catalog of strong LinkedIn headline examples for any industry or role [copy & customize]
No matter where you are in your career, the right headline can open doors you didn’t even know existed. Below is a hand-picked collection of headline examples across different roles and industries. Just find your relevant category, pick what fits, and make it your own.
LinkedIn headline examples for students
Computer Science student at XYZ University | Passionate about web development & problem solving
Mobile Software Engineer | iOS & Android development | Swift & Kotlin | Shipped 10+ apps with 4.8+ star ratings on app stores
Software Engineer | Open Source Contributor | Cloud-native development & system design | Passionate about writing code that actually lasts
LinkedIn headline examples for freelancers
Freelance Copywriter | B2B & SaaS brands | Writing emails, landing pages & ad copy that convert readers into paying customers
Freelance Web Developer | WordPress & Shopify expert | Building fast, mobile-friendly websites for small businesses & startups
Freelance Social Media Manager | Instagram & LinkedIn Growth Strategist | Helping personal brands & SMBs grow without the guesswork
Freelance Video Editor | YouTube, Reels & corporate videos | Turning raw footage into polished content that keeps viewers watching
Freelance SEO Consultant | Technical SEO, link building & content strategy | Helping businesses rank higher & get found by the right target audience
LinkedIn headline examples for entrepreneurs & founders
Founder & CEO at XYZ | Helping e-commerce brands scale past $1M revenue through performance marketing & retention strategies
Serial Entrepreneur | Built & exited 2 SaaS startups | Now investing in & advising early-stage B2B founders
Co-founder at XYZ | Democratizing access to mental health support through affordable & scalable digital therapy solutions
Entrepreneur & Product Builder | Turned a weekend side project into a 10K+ user SaaS tool | Obsessed with solving real-world problems
Startup Founder | EdTech & online learning space | On a mission to make quality education accessible to every corner of the world
LinkedIn headline examples for consultants & coaches
Leadership Coach | Helping mid-level managers step into executive roles with confidence, clarity & a concrete game plan
Business Consultant | Growth strategy, market expansion & operational efficiency | Worked with 50+ SMBs across North America
Career Coach | Resume writing, Interview prep & LinkedIn optimization | Helped 300+ professionals land jobs they actually desired
Marketing Consultant | Go-to-market strategy & Demand generation | Helping B2B startups build pipelines that don’t dry up
Executive Coach | C-suite leadership development & organizational culture | Partnering with leaders who want to lead better, not just harder
LinkedIn headline examples for creatives & designers
Brand Identity Designer | Logo, Typography & Visual Systems | Helping startups & small businesses look established from day one
UX & Product Designer | Figma, User Research & Prototyping | Designing experiences that feel effortless & actually make sense
Motion Graphics Designer | After Effects & Cinema 4D | Bringing brands to life through animation that stops the scroll
Creative Director | Integrated campaigns, art direction & brand strategy | Turning bold ideas into work that wins awards & drives results
Freelance Illustrator & Visual Artist | Editorial, packaging & digital art | Creating distinctive visuals that make brands impossible to forget
Project Manager LinkedIn headline examples
PMP Certified Project Manager | Agile & Waterfall | Successfully delivered 30+ cross-functional projects on time & under budget
Senior IT Project Manager | Digital Transformation & ERP Implementations | Keeping complex projects on track from kickoff to closeout
Construction Project Manager | Commercial & residential builds | Managing multi-million dollar projects with zero compromise on quality
Agile Project Manager | Scrum Master Certified | Helping software teams move faster, collaborate better & ship with confidence
Junior Project Manager | CAPM Certified | Risk Management & Stakeholder Communication | Eager to grow & deliver real impact
Product Manager LinkedIn headline examples
Senior Product Manager | SaaS & Mobile Apps | Leading cross-functional teams to ship products users actually want & keep coming back to
Product Manager | Agile, Roadmapping & User Research | Turned 3 underperforming features into top revenue drivers through data-led decisions
Technical Product Manager | API integrations & Platform Products | Bridging the gap between engineering complexity & business goals
Growth Product Manager | Experimentation, Funnel Optimization & Retention | Helped grow Maus from 50K to 500K in under 18 months
Associate Product Manager | UX-driven & Metrics-Obsessed | Building my product craft one sprint at a time | Open to APM roles
Account Manager LinkedIn headline examples
Senior Account Manager | Enterprise SaaS & Technology | Managing $8M+ book of business while maintaining 96% client retention rate
Account Manager | Digital Advertising & Media | Building long-term client partnerships that deliver measurable ROI, quarter after quarter
Strategic Account Manager | Financial Services & Fintech | Upselling, cross-selling & turning single-product clients into full portfolio partners
Account Manager | E-commerce & retail brands | Balancing relationship building with revenue growth to keep both clients & leadership happy
Junior Account Manager | CRM, Client Onboarding & Renewal Management | Passionate about delivering value & growing accounts from the inside out
Digital Marketing Manager LinkedIn headline examples
Digital Marketing Manager | Paid Search, SEO & Conversion Rate Optimization | Scaled organic traffic by 300% for a Series B SaaS startup
Digital Marketing Manager | E-commerce & DTC brands | Managing $2M+ annual ad spend across Google, Meta & TikTok with consistent ROAS
Digital Marketing Manager | Content Strategy, Marketing Automation & Lead Generation | Helping B2B companies fill their pipelines without burning their budgets
Digital Marketing Manager | Integrated Campaigns & Brand Awareness | Launched 20+ multi-channel campaigns that delivered above-target engagement
Digital Marketing Manager | ContentStudio, Google Analytics & CRO | Turning website visitors into qualified leads through smart strategy & constant testing
Senior Sales Manager LinkedIn headline examples
Senior Sales Manager | Enterprise & Mid-market SaaS | Built & coached a 15-person team that exceeded $12M annual revenue target two years running
Senior Sales Manager | FMCG & Retail Distribution | Opening new markets, growing key accounts & developing sales talent from the ground up
Senior Sales Manager | Cybersecurity & IT Solutions | Consultative selling, deal structuring & closing complex 6-figure contracts with confidence
Senior Sales Manager | Healthcare & Medical Devices | Grew regional revenue by 45% in 2 years by rebuilding territory strategy from scratch
Senior Sales Manager | Financial Products & Wealth Management | Leading high-performance teams to deliver results while keeping clients at the center
Executive Assistant LinkedIn headline examples
Executive Assistant to C-Suite | Calendar Management, Board Coordination & Confidential Correspondence | Keeping executives focused on what matters most
Senior Executive Assistant | Travel Logistics, Budget Oversight & Stakeholder Communication | Supporting Fortune 500 leaders with precision & discretion
Executive Assistant | Project Coordination, Event Planning & Office Operations | Anticipating needs before they become problems
Executive Assistant | Legal & Financial Services | Handling high-stakes schedules, sensitive documents & executive communications with full confidentiality
Standout LinkedIn headline examples that turn your prospects’ heads
Sometimes you don’t just want to be found; you want to be remembered. These headlines go beyond the standard formula and add a little personality, creativity, and punch that make people stop and actually read what you have to say.
I help SaaS founders stop losing customers they worked hard to win | Customer success & retention strategist
Ex-accountant turned Financial Educator | Making money management simple for people who hate spreadsheets
I write emails people actually want to open | Email copywriter for e-commerce brands tired of being ignored in the inbox
Recruiter who’s been on both sides of the table | Helping job seekers land offers without playing the guessing game
I turn complicated tech into plain English | Technical Writer & Content Strategist for SaaS & IT brands
Built a 6-figure freelance business from just a laptop | Now helping other freelancers do the same
I don’t just manage projects, I make sure they actually get done | PMP Certified | Agile & hybrid environments
Your brand’s next marketing hire is probably me | Performance Marketer | $10M+ in revenue generated for DTC brands
People don’t quit companies — they quit bad managers | Leadership coach helping organizations fix that from the top down
I help fresh brands become ones people actually talk about | Brand Strategist & Messaging Consultant for B2B companies
More highly engaging LinkedIn profile headline examples
If you’ve been scrolling through multiple LinkedIn profile examples and still haven’t found a headline that feels quite right, this list is for you.
The best headlines don’t just show what you do, they make people feel something, and that’s where emotional intelligence quietly does its job.
I’ve helped over 500+ professionals rewrite their career story | Career Coach | Resume & LinkedIn profile strategist
Data tells you what happened — I tell you what to do next | Business Intelligence Analyst | SQL, Power BI & Tableau
From $0 to $2M in 18 months | E-commerce Growth Consultant helping online brands scale without the guesswork
I make HR feel less like HR | People & Culture Lead focused on building workplaces where employees actually want to stay
Not your average finance guy | CFO & Financial Strategist helping startups make smarter money decisions before it’s too late
I help overwhelmed small business owners get their time back | Operations Consultant | Systems, Automation & Workflows
Sold 3 companies, learned a lot | Now helping other founders avoid the mistakes I made along the way
I speak both as a developer & human | Product Manager bridging the gap between engineering teams & business stakeholders
My clients don’t just rank higher on Google — they actually get more customers | SEO Strategist for service-based businesses
I train leaders who don’t need a title to lead | Corporate Trainer & Facilitator | Leadership, communication & team dynamics
Proven & effective LinkedIn post headline examples
A lot of people confuse their LinkedIn profile headline with a LinkedIn post headline. They’re actually two different things.
Your post headline is that opening line of your LinkedIn post, the one that either hooks people in or sends them scrolling right past you.
Have a look at some of the examples:
I got rejected by 27 companies before landing my dream job. Here’s what finally changed everything.
We grew our startup from $0 to $1M ARR without spending a single dollar on paid ads. This is exactly how we did it.
I reviewed 200+ LinkedIn profiles this month. These are the 5 mistakes almost everyone is making without realizing it.
Unpopular opinion: Working harder is not the reason successful people get ahead. Here’s what actually is.
I quit my $120K corporate job to freelance full-time. Six months later, here’s the honest truth about how it’s going.
Nobody talks about the mental side of job hunting. After 4 months of searching, I need to share this.
I asked 10 hiring managers what instantly kills a candidate’s chances in an interview. Their answers were eye-opening.
Hot take: Your LinkedIn headline is costing you job opportunities every single day. Here’s how to fix it in 10 minutes.
I went from 0 to 50K followers on LinkedIn in 8 months. No hacks, no tricks! Just one simple strategy repeated consistently.
Three years ago, I was completely broke and unemployed. Today, I run a 7-figure consulting business. Here’s the turning point nobody talks about.
LinkedIn articles are a fantastic way to showcase your expertise and build real credibility in your space. But even the best-written article goes unread if the headline doesn’t give people a good enough reason to click in the first place.
The career advice nobody gave me in my 20s: Why it would have changed everything
Why most marketing strategies fail in the first 90 days & what smart teams do differently
I’ve interviewed over 1,000 candidates in my career: Here’s what separates the good from the truly great
The leadership mistake almost every first-time manager makes & how to avoid it before it’s too late
What 10 years in sales taught me about people, rejection & building relationships that actually last
The real reason your LinkedIn profile isn’t getting any recruiter attention — and it’s not what you think
5 financial decisions I wish I had made in my 30s: An honest reflection for anyone still in that chapter
Why emotional intelligence will matter more than technical skills in the workplace over the next five years
How we rebuilt our company culture from scratch after losing 40% of our team in a single quarter
The uncomfortable truth about work-life balance that most business leaders are still refusing to acknowledge
Different types of LinkedIn headlines
Not every headline needs to follow the same formula. In fact, the best ones usually don’t. Depending on your personality, industry, and goal, there are several different styles you can lean into to make your profile stand out.
Headline type
What it does
Example
The direct headline
Gets straight to the point (no fluff, no clever wordplay). Just clearly states who you are, what you do, and who you help. Works great for people who want to be found fast.
Senior UX Designer | Figma & User Research | Designing digital products that are simple to use & hard to put down
The authentic headline
Feels personal and real. It lets your personality come through and makes you feel like an actual human being rather than a walking job description.
Small-town kid who figured out digital marketing & helped brands grow | Still learning every single day
The humorous headline
Uses a light touch of wit to grab attention and make people smile. Works best in creative, marketing, or personal branding spaces where personality is valued.
Professional overthinker turned UX researcher | Turning “what if” into “what works” for product teams
The benefit-focused headline
Leads with the outcome you deliver rather than your title. Speaks directly to what your target audience actually cares about most.
I help B2B founders generate consistent leads without cold calling or burning out their sales team | Open to work
The “humble brag” headline
Weaves in an impressive achievement or credential naturally without sounding like you’re showing off. Builds instant credibility in a subtle way.
Forbes 30 under 30 | Helping startups build marketing engines that drive revenue while they sleep
How to write a compelling LinkedIn headline that recruiters love
Writing a great LinkedIn headline isn’t about being the most creative person in the room; it’s about being the clearest. These simple but useful tips will help you craft a headline that gets you noticed by the right people at the right time.
Check out the practical tips below for crafting a creative & unique LinkedIn headline:
Tip #01: Prioritize the first 80 characters
LinkedIn truncates your headline on mobile and search results, so make sure your most important information (your title and top skill) appears right at the beginning before anything gets cut off.
Tip #02: Use pipes (|) to separate
Pipes are the cleanest and most widely used way to break up different parts of your headline. They make it easy to scan quickly and give your headline a neat, organized look without taking up extra characters.
Tip #03: Mirror job descriptions
Pay close attention to the exact words used in job postings you’re targeting and fix those same terms into your headline. LinkedIn’s algorithm rewards exact keyword matches, so speaking the same language as recruiters puts you higher in search results.
Tip #04: Think like a recruiter
Ask yourself: If you were hiring for your own role, what would you type into the search bar? Build your headline around that answer, focusing on the title, skills, and industry terms a recruiter would actually search for.
Tip #05: Use the “I help” formula
The “I help [target audience] achieve [specific outcome]” format is one of the most effective ways to communicate your value instantly. It’s simple, human, and tells people exactly what’s in it for them.
Tip #06: Remember “clear > clever”
A witty headline might get a smile, but a clear one gets you hired. Always make sure a stranger can understand exactly what you do within three seconds of reading your headline (clarity wins every single time).
Tip #07: Include measurable results
Numbers instantly make your headline more credible and specific. Instead of saying “experienced sales professional,” try “Sales Manager | Closed $3M+ in Annual Deals.” Concrete results give recruiters a solid reason to click.
Tip #08: Share your ultimate mission & leadership skills
If you’re in a senior or leadership role, give people a glimpse of what drives you beyond the day-to-day. A headline that reflects your bigger mission and leadership approach shows depth and attracts opportunities that align with who you actually are.
Things you should avoid in your LinkedIn headline
Your LinkedIn headline can work really hard for you, but only if you’re not accidentally sabotaging it. Here are some of the most common mistakes people make that quietly hurt their chances of getting noticed by the intended people.
Personal stuff/details
Your LinkedIn profile headline is professional real estate. Keep your personal life, beliefs, or unrelated hobbies out of it. Things like relationship status, political views, or personal quotes take up valuable space that could be used to showcase your actual skills and value.
Vague or passive phrases
Phrases like “passionate professional” or “results-oriented individual” tell recruiters absolutely nothing specific about you. Be direct and concrete! If you can’t picture exactly what someone does from reading your headline, it needs to be rewritten immediately.
Overly unprofessional terms
Words like “ninja,” “guru,” “wizard,” or “rockstar” might feel fun, but most recruiters don’t search for them, and they can actually make your profile look less credible and professional. Stick to real, recognized industry titles that people actually use when hiring.
Too many buzzwords
Stacking your headline with trendy terms like “innovative,” “dynamic,” “synergistic,” or “thought leader” makes it feel hollow and hard to read. Pick words that are specific and meaningful rather than ones that sound impressive but say very little.
Self-deprecating humor
Jokes like “just a humble marketer” or “trying to figure it all out on my own” might seem relatable, but they quietly undermine your credibility. Your headline should build confidence in what you offer, not make people question whether you’re the right person for the job.
Excessive punctuation or emojis
One or two emojis used strategically can add personality, but going overboard makes your headline look cluttered and unprofessional. The same goes for excessive exclamation marks or ellipses. Keep it clean and easy to read at a glance.
Abbreviations or jargon terms
Unless your abbreviation is a universally recognized credential like CPA or PMP, avoid shortening things without context. Industry-specific jargon or internal company terms can confuse recruiters outside your niche and hurt your searchability.
Seeking opportunities
Phrases like “seeking new opportunities” or “looking for my next role” take up precious headline space without adding any real value. Instead, use that space to showcase your skills and let your “Open to Work” setting do the job of signaling your availability.
Optimize your LinkedIn profile using Replug!
Once your headline is sorted, the next step is making sure your overall LinkedIn presence is just as strong. That’s where Replug comes in.
Replug is a powerful link shortener and bio link tool that helps you shorten, manage, and track your branded links from a single dashboard. But what most people don’t know is that it also offers a completely free LinkedIn post generator tool.
Simply tell it what you want to post about, and it comes up with a well-structured, engaging LinkedIn post within seconds. This saves you the time and headache of staring at a blank screen.
Whether you’re building your personal brand, growing your network, or trying to stay consistently active on LinkedIn, Replug makes the whole process a lot smoother and smarter without needing to be a professional writer.
Summing up
Your LinkedIn headline is one of the smallest things on your profile, but it carries some of the biggest weight. It’s:
The first thing recruiters see,
The first impression you make on potential clients, and
The biggest factor in whether someone clicks on your profile or keeps scrolling.
No matter if you’re a student just starting out, a seasoned professional eyeing your next big move, or someone switching careers entirely, the right headline can genuinely change the trajectory of your opportunities.
Use the examples, tips, and templates we’ve covered throughout this post as your starting point, then make it your own.
Always remember, a great LinkedIn headline doesn’t just describe you, it works for you around the clock.
Frequently asked questions
What is a good headline for LinkedIn?
A good LinkedIn headline clearly states who you are, what you do, and the value you bring, all in one quick read. It combines your professional title, a key skill or two, and ideally a result or unique value proposition.
Think less “Marketing Professional” and more “Digital Marketing Manager | SEO & Paid Ads | Helping B2B brands generate consistent leads without blowing their budget.”
How to brainstorm your LinkedIn profile headline?
Start by asking yourself three simple questions:
– What do I do, – Who do I help, and – What result do I deliver?
Then look at job postings in your target field and note the keywords that keep showing up. Check out profiles of people in similar roles for inspiration, jot down a few different versions, and pick the one that feels most like you while still being clear and searchable.
What is the ideal LinkedIn headline length?
LinkedIn gives you 220 characters for your headline, and you should aim to use most of them. Studies show that longer, keyword-rich headlines tend to perform better in search results.
That said, make sure the most important information appears within the first 60-80 characters since that’s what shows up on mobile screens and in search previews before getting cut off.
How do I edit my LinkedIn profile headline?
It’s pretty straightforward:
1. Log in to your LinkedIn account. 2. Go to your profile page. 3. Tap the pencil/edit icon near your profile photo and name. 4. A pop-up window will appear where you’ll see the “Headline” field. Just click on it. 5. Type your new headline, and tap on “Save”.
The changes go live on your profile immediately.
How often should I update my LinkedIn headline?
A good rule of thumb is to revisit your headline every 3-6 months or whenever something significant changes in your career.
If you’ve landed a new role, gained a valuable certification, shifted your career focus, or are actively job hunting, that’s your cue to update it.
Keeping it current ensures your profile always reflects where you are and where you’re headed.
How does LinkedIn’s search algorithm use your profile headline?
LinkedIn’s search algorithm treats your headline as one of the highest-weighted fields when ranking profiles in search results.
When a recruiter or potential client types in a keyword, LinkedIn scans your headline first before looking at other sections of your profile.
This means having the right keywords in your headline directly determines whether your profile shows up in relevant searches or gets buried pages deep, where nobody will ever find it.
Why your LinkedIn headline is much more than a simple job title?
Your job title tells people what you are, whereas your headline tells people why they should care.
It appears in search results, connection requests, comments, and “People Also Viewed” sections across LinkedIn. This means it’s constantly representing you even when you’re not actively on the platform.
A well-crafted headline communicates your value, attracts the right opportunities, and positions you as someone worth clicking on rather than just another name in a long list of results.
What is the best LinkedIn headline generator online?
There are several solid options out there. LinkedRadar is a great starting point. It’s quick, easy to use, and produces clean, professional results.
Other popular tools include Copy.ai, Jasper, and Waalaxy, which can all help you brainstorm and refine headline ideas.
That said, always treat generated headlines as a first draft. Personalize them with your actual skills, results, and personality before putting them on your profile.
Provide a top-notch MBA candidate LinkedIn headline example?
Here are a few strong options depending on where you are in your MBA journey:
– MBA candidate at XYZ University | Concentrating in strategy & finance | Former operations manager, leveling up for leadership roles – MBA student | Entrepreneurship & Marketing focus | Startup enthusiast | Actively seeking summer internship opportunities – Incoming MBA candidate at XYZ business school | Background in investment banking | Passionate about private equity & corporate strategy – Full-time MBA candidate | Specializing in data-driven marketing & consumer behavior | Open to brand management & growth roles – MBA candidate | Ex-software engineer transitioning into product strategy | Bridging technology & business to build products that actually matter
If you’re job hunting in 2026, LinkedIn isn’t an optional choice; it’s essential.
With over 1.2 billion registered users and 310 million actively using the platform every month, it’s where recruiters and hiring managers actually go to find candidates.
And here’s the thing: every minute, six people get hired through LinkedIn. That’s not a small number!
But having a polished profile isn’t always enough. Uploading your resume directly to LinkedIn gives you an extra edge. It makes applying faster, helps recruiters see your full experience at a glance, and keeps everything in one place.
The good news?
It takes less than five minutes, and there are actually four different ways to do it depending on what you need.
Not sure which one to use or where to even start? That’s exactly what we’ll cover. But first, let’s talk about why adding your resume to LinkedIn is worth it in the first place.
Why add your resume to LinkedIn?
Adding your resume to LinkedIn does more than just store your work history in one place. It actively works in your favor behind the scenes.
Whether you’re actively job hunting or just open to opportunities, having your resume on LinkedIn puts you in a stronger position from day one.
Boost visibility to recruiters
LinkedIn’s algorithm surfaces your profile to recruiters based on the skills and experience mentioned in your resume. The more complete your profile, the higher you rank in recruiter searches, which means more eyes on your candidacy without any extra effort from you.
Streamline job applications
Many job listings on LinkedIn let you apply with a single click using your uploaded resume. This cuts out the hassle of digging through folders every time you apply, making the whole process faster, more consistent, and more efficient.
Provide detailed information
Your LinkedIn profile has various character limits and a fixed structure. However, your resume can include specifics (exact metrics, project details, certifications) that give recruiters a fuller picture of what you bring to the table.
Enhanced networking and opportunities
When connections or recruiters visit your profile, having a resume available makes it easy for them to share your details with the right people. It quietly keeps the door open for opportunities even when you’re not actively looking.
Personalized job recommendations
LinkedIn uses the data from your resume to fine-tune the job recommendations it shows you. The more accurate your resume, the more relevant the suggestions will be. This ultimately saves you time and helps you discover roles you might have otherwise missed.
How to upload resume to LinkedIn: Check out the various methods!
There are a few different ways to add your resume to LinkedIn, and the right one depends on how you plan to use it. Some methods are better for job applications, while others make your resume visible directly on your profile.
Let’s walk through each one so you can pick what works best for you.
Method #01: Add a resume to LinkedIn via “Job Application Settings”
Step #01: Go to your LinkedIn profile
Open LinkedIn on your browser or app and log in to your account to land on your homepage.
Step #02: Click the “Jobs” icon
Look at the top navigation bar and click the “Jobs” icon. It looks like a small briefcase. This takes you to LinkedIn’s job search section.
Step #03: Click “Preferences”
From the page opened, find and click on “Preferences”. It is usually located on the left-hand side or near the top of the page. This opens your job-related settings.
Step #04: Click “Resumes and application data”
Inside Preferences, select “Resumes and application data” under the My qualifications section. This is where LinkedIn manages the resume tied to your Easy Apply applications.
Step #05: Click the “Upload resume” button
Hit the “Upload resume” button and select your resume file from your device.
LinkedIn supports PDF and Word formats. PDF is recommended to keep your formatting intact.
Step #06: Click the “Done” button
Once your file uploads successfully, click “Done” to save it. Your resume is now stored and ready to auto-fill your future Easy Apply job applications.
Method #02: Add your resume to LinkedIn via “Easy Apply”
Step #01: Click “Easy Apply” on a job posting
Browse LinkedIn’s job listings and open a role that interests you. If you see an “Easy Apply” button (rather than “Apply”), click it to begin the in-platform application process.
Step #02: Fill in the requested information
A form will pop up asking for basic details like your email address, phone number, and work experience. Fill these in accurately, since this info accompanies your resume when it reaches the recruiter. Then, click on “Next”.
Step #03: Click “Upload resume”
When you reach the resume section, click the “Upload Resume” button and select your file from your device.
Once uploaded, review everything and hit “Submit application” to send it off.
Method #03: Add resume to LinkedIn profile via “Settings & Privacy”
Step #01: Click the “Me” icon
Head to your LinkedIn homepage and click the “Me” icon at the top-right corner of the navigation bar. It’s just below your profile photo. This opens a small dropdown menu.
Step #02: Select “Settings & Privacy”
From the dropdown menu, click on “Settings & Privacy”. This takes you to the central hub where you can manage all your LinkedIn account preferences.
Step #03: Click “Data privacy”
On the left-hand sidebar, locate and click on “Data privacy”. This section controls how your personal data (including your resume) is stored and used on LinkedIn.
Step #04: Click “Resumes and job applications data”
Scroll through the data privacy options and click on “Resumes and job applications data” under Job seeking preferences. This is where LinkedIn keeps the resume linked to your Easy Apply submissions.
Step #05: Click the “Upload resume” button
Click the “Upload resume” button and choose your resume file from your device.
Once it’s uploaded, LinkedIn saves it automatically. No extra steps needed!
Method #04: Add resume to LinkedIn profile page via “Featured” section
Step #01: Go to your profile page
Click on your profile photo or your name anywhere on LinkedIn to navigate directly to your profile page.
Step #02: Click “Add section”
You’ll find the “Add section” button just below your name and headline. Click it to expand a menu with various profile section options.
Step #03: Select “Recommended”
From the pop-up box, click on “Recommended”. This expands a list of suggested sections you can add to strengthen your profile.
Step #04: Click “Add featured”
Inside the Recommended options, select “Add featured”. This creates a Featured section on your profile where you can showcase documents, posts, and links.
Step #05: Click the “+” icon
Now, from the opened page, click the “+” icon at the top right of the Featured section.
Step #06: Click “Add a document”
From the options that appear, select “Add a document”. This is the option that lets you upload a file (in this case, your resume) directly to your profile.
Step #07: Upload your resume
Select your resume file from your device and upload it. You’ll see a preview once it is successfully uploaded.
Step #08: Add details
Give your document a clear title like “My Resume” or “Adam Hill — Resume”, and add a brief description if you’d like. This helps visitors immediately understand what the document is.
Step #09: Click “Save”
Hit the “Save” button to publish it. Your resume will now appear in the Featured section of your profile, visible to anyone who visits your page.
What to include in your resume before adding on LinkedIn
Before you upload your resume to LinkedIn, it’s worth taking a few minutes to make sure it’s actually working in your favor.
A polished, well-structured resume doesn’t just impress recruiters; it also aligns better with LinkedIn’s algorithm and the applicant tracking systems (ATS) many companies use.
Quantifiable achievements
Don’t just list responsibilities, show real results. Use specific numbers wherever possible, like “increased sales by 35%” or “managed a team of 15,” to give recruiters a concrete sense of the impact you’ve made.
Targeted keywords
Review the job descriptions you’re targeting and naturally plug in the relevant skills and terms they use. This helps your resume get past ATS filters and signals to recruiters that you’re a strong match for the role.
Detailed experience
For each role, include your job title, company name, employment dates, and a few bullet points highlighting your key contributions. The more relevant and specific your experience section, the easier it is for recruiters to assess your fit quickly.
Updated education
Make sure your education section reflects your most recent qualifications, including any certifications, online courses, or training you’ve completed recently. Outdated or incomplete education details can leave gaps that work against you.
Single-column layout
Stick to a clean, single-column format for your resume when uploading to LinkedIn. Multi-column resumes often break or become unreadable when parsed by ATS software, which can cause key information to be missed entirely.
Professional summary
Add a2-3 line summary at the top of your resume that captures who you are, what you do, and what you’re looking for. Think of it as your elevator pitch. It sets the tone before a recruiter even reads the rest.
Hyperlinked contact info
Make it easy for recruiters to reach or research you by including a clickable email address, LinkedIn profile URL, and any relevant portfolio or website links. It’s a small touch that makes a noticeable professional impression.
Best practices for uploading your resume on LinkedIn
Uploading your resume is just the first step, but how you upload it matters just as much. Following a few simple key practices ensures your resume reaches the right people, looks professional, and works effectively, no matter if you’re actively applying or just staying open to opportunities.
Use the “Featured” section for high visibility
If you want your resume to be publicly visible to recruiters and profile visitors, LinkedIn’s “Featured” section is your best bet. It puts your resume front and center on your profile, making it easy for anyone to find and download without you having to send it manually.
Use the “Jobs” section for private applications
If you’d rather keep your resume private and only share it when applying, upload it through the “Jobs” section instead. This way, your resume is only seen by recruiters of the specific roles you apply to, giving you more control over who accesses it.
Use PDF format (recommended)
Always upload your resume as a PDF unless a job posting specifically requests a Word document. PDFs preserve your formatting across all devices and software, ensuring your resume looks exactly the way you intended when a recruiter opens it.
Remove personal contact information
Since your LinkedIn profile already has your contact details, there’s no need to include your home address or personal phone number on a publicly visible resume. Removing this information also protects your privacy, especially if your resume is accessible to all profile visitors.
Create tailored versions
Avoid using a one-size-fits-all resume for every application. Keep a few targeted versions on hand (each tweaked to match a specific role or industry) and upload the most relevant one depending on the job you’re applying for.
Use a professional title
Name your resume file clearly and professionally before uploading, something like “Adam_Hill_Marketing_Resume.pdf” rather than “Resume_Final_v3.pdf.” It’s a small detail, but it leaves a tidy, professional impression on anyone who downloads it.
Create a winning post for your resume with Replug’s free LinkedIn post generator
Once your resume is on LinkedIn, why not let people know about it?
Replug is an all-in-one link management platform packed with powerful features, and one of its standout free tools is the LinkedIn Post Generator.
Instead of staring at a blank screen trying to craft the perfect post, Replug’s reliable tool does the job for you. Just enter a few details, and it generates a professional, engaging LinkedIn post within seconds.
Whether you’re announcing a new role, sharing your expertise, or simply putting your resume out there, Replug helps you make a strong first impression (no writing experience needed).
👉 Try Replug’s LinkedIn Post Generator and get your resume the attention it deserves!
Optimize your LinkedIn profile with Replug today!
You’ve successfully uploaded your resume, polished your profile, and crafted the perfect post. Now it’s time to make sure every link you share works harder for you.
Replug’s efficient URL shortener lets you transform long, messy links into clean, branded short links that look professional on your LinkedIn profile.
No matter if it’s a link to your portfolio, personal website, or a specific job application, short links are far more clickable and visually appealing.
Maximize marketing ROI
by transforming ordinary URLs into branded short links that convert.
Try Replug for free
Plus, Replug lets you track clicks and engagement, so you can actually see who’s interacting with your links. It’s a simple but effective way to present yourself more professionally and understand your audience better.
Start using Replug today and give your LinkedIn profile the professional edge it deserves!
Frequently asked questions
How do I get my uploaded resume on LinkedIn?
To find or manage your uploaded resume on LinkedIn, go to the “Jobs” tab, click “Preferences,” and select “Resumes and application data” to view, upload, or download your files.
How do I edit a resume in LinkedIn?
LinkedIn doesn’t have a built-in resume editor. To make changes, update your resume file on your device first, then re-upload it through whichever method you originally used. Your new file will simply replace the old one.
How do I remove my resume from LinkedIn profile?
To remove a resume from your LinkedIn profile, go to the “Jobs” tab and select “Application Settings” in the left sidebar. Then, click the three dots next to the resume you want to remove, and select “Delete”. Alternatively, navigate to Settings & Privacy → Data Privacy → Job Application Settings to manage and delete uploaded resumes.
Why can’t I upload my resume on LinkedIn?
This is usually down to one of three things:
– Your file size exceeds LinkedIn’s 5MB limit, – The file format isn’t supported, or – You’re experiencing a temporary browser glitch
Try converting your resume to PDF, clearing your browser cache, or switching to a different browser and uploading again.
How can I upload my resume to LinkedIn without letting my entire network know?
Upload your resume through “Job Application Settings” or the “Settings & Privacy” route instead of the “Featured” section. These methods store your resume privately, so it’s only shared when you apply for a job. Your network won’t receive any notification about it.
What is the difference between a resume and a LinkedIn profile?
A resume is a tailored, concise document (usually one or two pages) customized for a specific job application. Your LinkedIn profile, on the other hand, is a living, comprehensive snapshot of your entire professional journey, visible to anyone on the platform. Think of your profile as the expanded version and your resume as the focused pitch.
How to attach my resume to a LinkedIn message?
Open a LinkedIn message conversation, click the attachment icon (paperclip) at the bottom of the message box, and select your resume file from your device. Keep in mind this shares the file directly with that person, so make sure your resume is updated before sending.
What is the ideal format to upload a resume on LinkedIn?
PDF is the way to go. It keeps your formatting clean and consistent regardless of what device or software the recruiter uses to open it. Word documents can sometimes shift in layout depending on the version of software being used, so PDF is simply the safer and more professional choice.
How to add resume to LinkedIn profile for recruiters?
The best way to make your resume visible to recruiters is by uploading it to the “Featured” section of your profile. This makes it publicly accessible to anyone who visits your page. Pair this with an optimized profile (strong headline, relevant skills, and a solid summary) to make sure recruiters can actually find you in searches.
How to optimize the visibility and usage of your uploaded resume on LinkedIn?
Start by making sure your resume is keyword-rich and aligned with the roles you’re targeting. Upload it to the “Featured” section for public visibility, keep it updated every few months, and make sure your LinkedIn profile itself complements your resume rather than just repeating it word for word. Also, turn on the “Open to Work” feature to signal recruiters that you’re available. It works hand in hand with having your resume on your profile.
You’ve probably tapped “Share” on a Facebook post, only to realize later that nobody outside your friends could actually see it. Frustrating, right? You’re not alone!
Facebook has over 3 billion monthly active users, and yet so many people still miss out on reach simply because their sharing settings aren’t configured correctly.
Whether you’re promoting a small business, spreading awareness for a cause, or just sharing something your whole neighborhood must see, making your posts publicly shareable is a game-changer. And it literally takes minutes to fix.
The best part? It works the same no matter if you’re on your smartphone or PC.
But before we walk through the steps, it helps to understand why some posts won’t share in the first place, and that comes down to one thing: Facebook’s privacy settings.
Getting a know-how of Facebook’s privacy settings
Before you start changing anything, it’s worth knowing how Facebook’s privacy settings actually work. Think of them as a control panel for who gets to see your stuff.
Every post you make has an audience selector. A little dropdown that lets you choose between:
Public,
Friends,
Friends except…,
Specific friends,
Only me, or
Close friends
If that’s set to anything other than “Public,” people outside your friends list won’t be able to share your post. Simple as that!
Once you know where to look and what to change, the whole thing becomes super easy to manage (on both mobile and desktop).
Facebook’s post shareability cheat sheet
Not every post gets the same reach, and a lot of that comes down to how you set it up in the first place. Here’s a quick cheat sheet to help you get it right every time:
Factor
What works best
Privacy setting
Set to “Public” so anyone can view and share your post beyond just your friends list.
Optimal timing
Post between 12 PM-8 PM on weekdays. Tuesday & Wednesday tend to see the highest engagement.
Visual standards
Use bright, clear images or short videos. Avoid blurry or heavily watermarked visuals.
Content format
Video and image posts get shared far more than plain text. Reels are currently getting the most organic reach.
Content length
Keep captions between 40-80 characters for feed posts. Short and punchy wins over long and wordy.
Engagement triggers
Ask a question, use a clear call-to-action like “Tag someone who needs this,” or tap into trending topics.
Quite simple to follow, right? Now, let’s get into the actual steps to make your posts shareable.
How to make a new Facebook post shareable
When you’re creating a brand new post on Facebook, making it shareable takes just a few quick taps or clicks before you hit publish. Here’s exactly how to do it, whether you’re on your phone or desktop.
On mobile (Android & iOS):
Step #01: Open Facebook and tap “What’s on your mind?”
Tap that status box at the top of your feed. This is where you’ll create your new post.
Step #02: Add your content
Type your caption, upload a photo or video, or add whatever you want to share. Get it looking the way you want before tapping “Done”.
Step #03: Tap the audience selector button
In the bottom left-hand corner, you’ll see a small button that shows your current audience. It might say “Friends,” “Public,” or something else. Tap it!
Step #04: Select the “Public” option
From the page that appears, choose “Public”. This means anyone on or off Facebook can see and share your post. Then, tap on “Done”.
Step #05: Tap the “Post” button
That’s it! Your post is now fully shareable by anyone who comes across it.
On desktop:
Step #01: Click “What’s on your mind?” on your homepage
You’ll find this at the top of your News Feed or on your profile page. Click it to open the post composer.
Step #02: Add your content
Write your caption or drop in your media, whatever your post is about. Take a second to make sure everything looks good.
Step #03: Click the audience selector
Right below your name, there’s a dropdown button showing who can currently see your post. Click on it.
Step #04: Choose the “Public” option
Select “Public” from the list of options. This opens your post up to everyone, not just your Facebook friends. Click on “Done”.
Step #05: Click “Post”
Hit that blue “Post” button, and you’re all set. Your new post is live and fully shareable.
That’s genuinely all it takes! Once it’s set to Public, anyone who sees your post can hit Share and spread it further. No extra steps needed.
How to make an existing Facebook post shareable
Already posted something but forgot to make it shareable?
No worries, you can go back and change the privacy setting on any existing post in just a few taps or clicks. Here’s how to make a Facebook post shareable after posting:
On mobile (Android & iOS):
Step #01: Go to your FB profile and scroll down to the post you want to edit.
Step #02: Tap the three dots (⋯) in the top right corner of the post. This opens a quick options menu for that specific post.
Step #03: Tap “Edit Privacy”. You’ll see this option right there in the menu.
Step #04: Select “Public” and tap on the “Save” button. That’s it, your post is now shareable.
On desktop:
Step #01: Click your name or profile picture to go to your Facebook profile, then scroll to find the post.
Step #02: Click the three dots (⋯) in the top right corner of the post. A small dropdown menu will appear with several options.
Step #03: Click “Edit audience” from the dropdown menu.
Step #04: Pick “Public” from the audience options and click “Done”. Your post is now open for everyone to share.
Quick, easy, and done in under a minute. And what’s the best part? No need to delete and repost anything.
How to make a Facebook post shareable without making it “Public”
Not comfortable making your post fully public? That’s fair.
Facebook actually lets you share posts with a specific group of people without opening them up to the entire internet.
On mobile (Android & iOS):
Step #01: Open Facebook and tap your profile picture to head to your profile.
Step #02: Find the post you want to adjust and tap the three dots (⋯) in the top right corner of it.
Step #03: Tap“Edit Privacy” from the menu that pops up.
Step #04: Choose “Friends”, “Specific friends”, or “Close friends”. This lets your friends’ connections see and share your post, without it being fully public.
Step #05: Tap “Save” to save your changes.
On desktop:
Step #01: Click your profile picture or name to go to your Facebook profile.
Step #02: Locate the post you want to change, then click the three dots (⋯) in the top right corner of the post.
Step #03: Click “Edit audience” from the dropdown menu.
Step #04: Select the option “Friends” or “Custom”. A solid middle ground that expands your reach beyond just your friend list without going fully public.
Step #05: Click “Done” and you’re all set.
It’s not as wide a reach as “Public,” but it’s a great option if you want a bit more control over who’s seeing and sharing your content.
How to make a Facebook post shareable in a private group
If you’re posting inside a private Facebook group, the sharing rules work a little differently. Group admins control whether members can share posts outside the group or not. Here’s how to enable it.
For Group Admins (mobile & desktop):
Step #01: Open Facebook and tap the profile menu icon (≡).
Step #02: Then go to “Groups” → “Your groups” and select the group you manage.
Step #03: Tap the shield icon in the top right-hand corner.
Step #04: Scroll down and find the “Group settings” option under the “Settings” section.
Step #05: Toggle the “Post Sharing” on to allow members to share posts from the group to their own profiles or other places on Facebook.
Step #06: Tap “Save” to confirm your changes.
👉 Keep in mind that if you’re just a member (not an admin), you won’t have the ability to change this setting. You’d need to reach out to the group admin and ask them to enable post sharing for the group.
How to make a post shareable on Facebook Marketplace
Are you the one selling something on Facebook Marketplace?
Making your listing shareable can get it in front of way more potential buyers without spending a single dollar on ads.
Here’s how to do it:
Step #01: Open Facebook and tap the “Marketplace” icon. It looks like a little storefront.
Step #02: Tap “Your Account” or your profile icon, then go to “Your Listings” to find the listing you want to share.
Step #03: Tap on the listing to open it, then tap the “Share” button. It usually appears as an arrow icon at the bottom or top of the listing.
Step #04: Choose “Share to your feed”, “Share to a group”, or “Send in Messenger” to push your listing out to a wider audience.
Step #05: Add a quick caption if you want, then tap “Post” to share it.
How to make a Facebook business page post shareable
If you’re running a Facebook business page, making your posts shareable is a must. It’s one of the easiest ways to grow your reach organically without paying for ads.
Here’s how to set it up:
Step #01: Open Facebook and tap the menu icon, then select your “Business Page” from the “Pages” section.
Step #02: Tap “Page Settings”. You’ll find it by tapping the three dots or the settings icon on your page.
Step #03: Scroll down to “Privacy” settings and make sure your page visibility is set to “Public” so anyone can view and share your posts.
Step #04: Head back to your page, find the post you want to make shareable, and tap the three dots (⋯) in the top right corner of the post.
Step #05: Tap “Edit audience” and set it to “Public,” then tap “Done” to save.
Why is it important to make your Facebook post shareable?
Making your Facebook post shareable isn’t just a nice-to-have. It’s one of the simplest ways to multiply your reach without spending a dime. When people can share your content freely, it works for you around the clock.
Here’s why it really matters:
Massively expanded reach & traffic: Every time someone shares your post, it gets exposed to their entire friend list, people who’ve never even heard of you. That’s free traffic you didn’t have to chase.
Increased engagement & visibility: Shareable posts naturally attract more likes, comments, and reactions. The more engagement your post gets, the more Facebook pushes it in front of even more people.
Builds authority & brand awareness: When your content gets shared repeatedly, people start recognizing your name or brand. Over time, that consistent visibility builds a reputation you can’t easily buy.
Viral potential & growth: One great post shared by the right person can skyrocket into thousands of views overnight. Shareability is basically the foundation of anything going viral on Facebook.
Trust & credibility: People trust content that others willingly share. When your post gets passed around, it acts as a word-of-mouth endorsement, which is far more powerful than any ad.
Algorithm boost & free marketing: Facebook’s algorithm loves content that gets shared. More shares signal that your post is worth showing to more people. This gives you organic reach that would otherwise cost money to achieve.
Key tips for Facebook post shareability
Want more people sharing your posts? These simple but effective tips can make a real difference in how far your content travels on Facebook.
Tip
What to do
Set to public
Always double-check your audience setting before posting. If it’s not set to Public, sharing is either limited or completely blocked.
Create value/utility
Post content that teaches, informs, or solves a problem. People share things that genuinely help them or their loved ones.
Evoke emotion
Content that makes people laugh, feel inspired, or even surprised gets shared far more than flat, emotionless posts.
Use strong headlines
Your first line is the key. Make it catchy, curious, or bold enough to stop someone mid-scroll.
Tell a story
People connect with real stories a lot more than promotional fluff. So, always keep it relatable and genuine.
Keep it short
Don’t make people work to read your post. Get to the point quickly and leave them wanting more.
Ask for shares
Sometimes all it takes is simply saying, “Share this with someone who needs it.” A direct nudge works surprisingly well.
Time it right
Post when your audience is actually online. Weekday mornings and early afternoons tend to get the most traction.
Be responsive
Reply to comments quickly after posting. Early engagement signals to Facebook that your post is worth pushing to more people.
Avoid private groups
Posts inside private groups can’t be shared outside easily, and need admin permissions. If reach is the goal, stick to your public profile or business page.
Troubleshooting common Facebook post sharing problems
Sometimes everything looks fine, but your post still won’t share properly, and that’s more common than you’d think. Before you panic, most sharing issues on Facebook come down to a handful of easy fixes.
Here’s what to check:
Check privacy settings: This is always the first place to look. If your post is set to “Friends” or “Only Me,” sharing will be restricted or blocked entirely. Switch it to “Public,” and that usually solves it instantly.
Fix link previews (debugger): If your shared link is showing a broken or outdated preview, head over to Facebook’s Sharing Debugger tool and paste your URL in. It’ll refresh the preview and pull the correct image and title.
App glitches (Android/iOS): If the share button isn’t responding on your phone, try clearing the Facebook app’s cache first. If that doesn’t work, uninstall and reinstall the app. This fixes most mobile-related sharing bugs quickly.
Desktop/browser issues: Sharing problems on the desktop are often browser-related. Try clearing your cookies and cache, switching to a different browser, or disabling any extensions that might be interfering with Facebook’s functionality.
Reconnect accounts: If you’re trying to share Facebook posts to a linked Instagram or third-party platform and it’s not working, the connection may have dropped. Go to Settings → Accounts Center and reconnect the relevant accounts to get things flowing again.
👉 Unfortunately, still stuck after trying all of the above. Try logging out and back into your Facebook account or reaching out to Facebook Support. This is always worth a shot as a last option.
Generate an engaging Facebook post within minutes with Replug!
If you want to skip the guesswork and create scroll-stopping Facebook posts in seconds, Replug is worth checking out.
A complete link management solution
for marketing professionals & agencies.
Try Replug for free
But one of its most underrated free tools is the Facebook Post Generator, and it’s genuinely a time-saver.
Just plug in your prompt or a few details, and it comes up with a ready-to-post caption that’s engaging, on-point, and share-worthy. No staring at a blank screen, no second-guessing your wording.
No matter if you’re a business owner, content creator, or just someone who wants their posts to actually get noticed, Replug makes the whole process incredibly simple and fast.
Summing up
Making your Facebook posts shareable really isn’t as complicated as it seems, and now you’ve got everything you need to get it done.
Whether you’re tweaking privacy settings on a new post, fixing an existing one, managing a business page, or troubleshooting a sharing issue, it all comes down to a few simple steps.
The bigger picture here is that shareability directly impacts how far your content travels, how many people discover you, and how fast you grow, all without spending a penny.
So go ahead, apply what you’ve learned, and start putting your content in front of the audience it deserves.
The Share button is waiting. Make the most of it!
Frequently asked questions
How to make a Facebook post shareable in a group?
If you’re a group admin, go to group settings and turn on the Post Sharing option under posting permissions. This allows members to share posts outside the group. However, if you’re just a member, you’ll need to ask the admin to enable it. It’s not something regular members can control.
How to make a Facebook post shareable by friends?
When creating or editing a post, tap the audience selector and choose “Friends.” This makes your post visible to your friends, and they’ll have the option to share it further. Just keep in mind that “Custom” gives you a slightly wider sharing reach than “Friends” alone.
How to make a Facebook post shareable on Android and iPhone?
Open the post, tap the three dots (⋯) in the top corner, and select “Edit Privacy” or “Edit audience.” From there, switch the audience to “Public” and save. The steps are pretty much identical on both Android and iOS. Facebook’s mobile app works the same way across both platforms.
How do I allow others to share my Facebook posts?
Here’s how to make a Facebook post shareable by others:
Set your post audience to “Public,” that’s really all it takes. Once a post is public, anyone who sees it will have a Share button available. If this button is missing, it means the post is set to a restricted audience, like “Friends” or “Only Me.”
How to make a memory post shareable on Facebook?
When Facebook surfaces a memory, open it and tap the “Share” option to post it to your feed. Before sharing, tap the audience selector and set it to “Public” if you want others to be able to reshare it. Memory posts follow the same privacy rules as regular posts.
How to make a Facebook post not shareable?
Set your post audience to “Friends” or “Only Me”. This removes the Share button for anyone viewing it. If you’re in a group, admins can turn off post sharing entirely through Group Settings. It’s the simplest and most effective way to keep your content from being passed around.
Why is my post not shareable on Facebook?
The most common reason is that the post is set to a restricted audience, like “Friends” or “Only Me.” Other reasons could include:
– being inside a private group where sharing is disabled, – a temporary app glitch, or – a browser issue on a desktop
Start by checking your privacy settings. That fixes the issue most of the time.
Is it possible to control who shares my Facebook post?
No. Facebook lets you control who can see your post, but you can’t specifically control which individuals can share it. If it’s set to Public, anyone can share it. Your best option for limiting shares is restricting the audience to “Close Friends” or “Only Me.”
Does making a Facebook post shareable increase reach and engagement?
Absolutely! When a post is shareable and people actually share it, it gets exposed to entirely new audiences beyond your own followers. More shares also signal to Facebook’s algorithm that your content is worth promoting. This means even more organic reach without spending anything on ads.
What types of Facebook posts are harder to make shareable on the platform?
Posts inside private or secret groups can’t be shared outside the group unless the admin enables it. Similarly, posts set to “Only Me” have limited or no sharing ability. Facebook Stories also can’t be shared the same way regular feed posts can. They work differently by design.
Is it possible to make certain Facebook posts shareable and others not?
Yes, and it’s actually pretty straightforward. Every post has its own individual privacy setting, so you can set one post to “Public” and another to “Friends” or “Only Me”, all on the same profile. You’re in full control of each post’s shareability separately.
What is the best time to post on Facebook?
Generally, weekdays between 12 PM and 8 PM tend to perform best. Tuesday and Wednesday in particular see strong engagement. That said, the best time really depends on where your audience is located and when they’re most active. Checking your Facebook Page Insights can give you a much more accurate picture of your specific audience.
How to create more shareable content on Facebook?
Focus on content that genuinely helps, entertains, or resonates with people. That’s what gets shared.
– use eye-catching visuals, – write a strong opening line, – keep captions concise, and – don’t be afraid to ask people to share
Relatable, emotional, or surprisingly useful content almost always outperforms purely promotional posts when it comes to shares.
Picture this: a big campaign is due next week, there are ten tabs open with link tools, and the Rebrandly pricing page is right in front of you.
The features sound promising, but the mix of limits, add-ons, and per‑plan perks makes it hard to see what you would really pay as your clicks grow. One wrong call here can squeeze your budget or slow your team’s progress later.
Rebrandly has earned a strong name in branded link management. It offers custom domains, detailed analytics, and enterprise‑grade security, so it often appears on shortlists for marketing teams, agencies, and SaaS companies.
The hard part is not the feature list, though. The real question is how Rebrandly pricing lines up with what a team gets at each tier.
This guide walks through every Rebrandly plan, then weighs the pros and cons in plain language. From there, it compares Rebrandly pricing against Replug, a link management and marketing platform that often delivers more firepower for less spend.
By the end, it should be much easier to decide if Rebrandly is worth the cost for your situation or whether Replug is a better fit.
All Rebrandly pricing plans
Rebrandly uses a five‑tier structure aimed at everyone from solo creators to large enterprises. At the time of writing, the lineup includes Free, Essentials, Professional, Growth, and Enterprise.
All paid plans include a 14‑day free trial with no credit card and an annual billing option that can cut costs by around 18%. When comparing Rebrandly pricing, it helps to see the tiers side by side first.
Plan
Rebrandly pricing per month
Rebrandly pricing annually
Free
$0
$0
Essentials
$14/month
$11/month
Professional
$39/month
$32/month
Growth
$119/month
$99/month
Enterprise
Custom
Custom
Here is what each tier actually includes in practice.
Key features of the Rebrandly Free plan
Up to 10 branded links and 10 QR codes per month
1 free rebrand.ly domain
1 custom .bio domain
Custom back halves
1 link gallery
This tier works as a small test bed or for very light use. With only 10 new links each month and no collaboration, it breaks down fast for active campaigns or busy social feeds.
Key features of the Rebrandly Essentials plan
250 links and 250 QR codes per month
Support for 2 custom domains
10 link destination edits per month
Up to 3 link galleries
Analytics for up to 10,000 clicks each month
Good AI scheduling suggestions
Top-notch branding controls
The Essentials plan is the first paid step and is designed for creators, consultants, and small businesses that need more volume without team access. Rebrandly pricing at this level is still friendly, but collaboration features are not included.
Key features of the Rebrandly Professional plan
1,500 links and QR codes per month
3 custom domains
4 link galleries
Traffic routing rules
50 link destination edits
2 teammates and 2 workspaces
50 password‑protected links and link expiration
Analytics for up to 25,000 clicks per month, plus custom reports
This is the most popular (recommended) tier, and where Rebrandly starts to feel like a true team tool. It is the first real fit for small marketing teams or agencies that need shared workspaces and stronger control over each link.
Key features of the Rebrandly Growth plan
3,500 links and QR codes per month
Up to 10 custom domains
150 destination edits
11 link galleries
Mobile deep linking
Advanced role permissions
150 password-protected links
5 workspaces with 5 teammates
Analytics on up to 150,000 clicks per month
The Growth plan suits scaling businesses that manage many brands or have higher traffic. It adds more link-management power and capacity but comes with a clear jump in Rebrandly pricing.
Key features of the Rebrandly Enterprise plan
Unlimited links, domains, QR codes, workspaces & teammates
Custom deployment options, including dedicated infrastructure
Compliance with HIPAA, GDPR, and SOC II Type 2
Role-based access & workspace-level controls
High‑volume API access and priority support
Dedicated customer success manager
Single Sign‑On (SSO) (SAML)
White glove support
99.99% uptime
The Enterprise tier is fully custom. For Essentials, Professional, and Growth customers, Rebrandly pricing can increase further through add‑ons such as:
Extra custom domains
Additional link edits
More teammates and workspaces
Higher analytics and API data caps
This structure makes it easy to understand where you sit, but it also means costs can rise quickly when you need just one or two features from the next tier.
Rebrandly pricing: Pros, cons, and where it falls short
Once the tiers are clear, the next step is to assess how fair Rebrandly’s pricing feels for what a team actually receives.
What Rebrandly gets right
The Free plan is more generous than many rivals because it allows a custom-branded domain, even if it is a .bio one.
All plans share strong security standards, including HTTPS, two‑factor authentication, and major compliance badges.
The interface is friendly, the learning curve is short, and onboarding new teammates is simple.
Developers often praise the API for its speed and clear documentation.
A 14‑day free trial on paid plans gives teams a low‑risk way to test features before paying.
Where Rebrandly pricing feels limiting
The jump from Essentials at $11 per month to Professional at $32 per month is steep, especially if you only need one or two of the added features.
Ten links per month on Free and 250 on Essentials restrict how far smaller teams can go without upgrading.
Features many businesses view as basic, such as link expiration, password protection, and collaboration, all sit behind the Professional paywall.
There is no usage‑based Rebrandly pricing. If a team slightly exceeds its limits, the only path is an upgrade to the next full tier.
Some users mention gaps in native integrations with common social scheduling or marketing tools, which can push you toward extra middleware costs.
For teams that want marketing‑grade features like retargeting, testing, and custom call‑to‑action experiences, the feature set feels focused more on branding than on performance.
This is where it makes sense to compare Rebrandly with a more marketing‑focused platform like Replug, which bakes those extras into its core plans.
Replug: A smarter, more affordable alternative to Rebrandly
Rebrandly deserves credit for strong branding features and solid security, and for many teams, that may be enough. Still, when you line up Rebrandly pricing against what you get from Replug, a pattern appears.
Replug is built not only for link shortening and branding, but also for turning every click into a measurable marketing opportunity.
Here is a quick look at how plan costs compare:
Plan
Rebrandly pricing
Replug pricing
Free
$0/month
$0/month
Essentials
$14/month
$19/month
Professional/Scale
$39/month
$39/month
Growth/Agency
$119/month
$99/month
How those plans fit different teams:
Replug Essentials: Great for solo marketers and small teams that want branded links, bio pages, analytics, and QR codes in one place.
Replug Scale: Stands out because it offers many agency‑level features for about the same price as Rebrandly’s Professional tier.
Replug Agency: Adds white‑label options for client work while still undercutting high‑end Rebrandly pricing for similar or better volumes.
Where Replug really pulls ahead is in its marketing features. On top of link shortening and branding, Replug includes:
Retargeting pixels for platforms such as Facebook, Twitter, and Quora directly on your links, so every shared article or video helps build warm audiences.
Custom call‑to‑action overlays on any link, sending visitors to an email list, free trial, or store, even when the content lives on someone else’s site.
Built‑in A/B testing that lets you route traffic across up to 10 URLs in a campaign so you can see which content performs best.
Agency‑grade white‑label branding across domain, dashboard, emails, and analytics, so client reporting looks fully on‑brand.
Branded links created through Replug are reported to raise click‑through rates by up to 39% compared with generic links. You still get a 14‑day free trial, so teams can measure these gains before they pay.
To make the feature gap clearer, compare Replug Scale and Rebrandly Professional:
Feature
Replug Scale ($23/month)
Rebrandly Professional ($32/month)
Branded short links
Yes (unlimited)
Yes (1500/month)
Custom domains
Yes (15 in total)
Yes (3 in total)
Retargeting pixels
Yes
No
Custom CTAs
Yes
No
A/B testing
Yes
No
Bio links
Yes (unlimited)
Yes
Link rotation/routing
Yes
Yes
White‑label (agency)
Yes
No
For teams that care about performance marketing as much as they do about clean branding, this balance of features and pricing makes Replug a very strong alternative to Rebrandly. You spend closer to what you would pay for mid‑tier Rebrandly pricing, but gain tools that help you build audiences, test offers, and drive conversions from every click.
Is Rebrandly really worth it? Make the right choice for your money & business
Rebrandly is a capable link management tool, especially for teams that want clean branded links, good analytics, and serious security in one place. Its free tier is handy for testing, and the higher plans serve brands that care a lot about compliance and uptime.
The challenge comes when Rebrandly pricing rises quickly as a team starts to need link controls, collaboration, and more advanced use cases.
A simple way to think about the choice:
Rebrandly is a good fit if you:
Need reliable branded short links and basic analytics
Work in fields where compliance badges and SLAs are non‑negotiable
Do not need retargeting, custom CTAs, or agency‑style features
Replug is a better fit if you:
Want retargeting pixels attached to every shared link
Care about A/B testing and performance‑driven campaigns
Run an agency or manage multiple brands and need white‑label options
Prefer getting more marketing power at a lower or similar price point
If all you need is steady, compliant link shortening, Rebrandly can still be a solid pick. For marketers, agencies, and SaaS teams that also want retargeting, custom CTAs, A/B testing, and white‑label options at a stronger price point, Replug offers more marketing value per dollar.
Start your free 14‑day trial with Replug and see what every link can do when it works harder for your business.
Frequently asked questions
Does Rebrandly offer a free plan?
Yes! Rebrandly has a Free plan that costs nothing and lets you create up to 10 branded links and 10 QR codes each month. You can use one free rebrand.ly domain and one custom .bio domain, and you get a single link gallery page. Click tracking is basic and capped at 100 tracked clicks per month, and your QR codes and link gallery show a Rebrandly watermark. There is no link destination editing, password protection, or team access on this tier, so it works best as a trial or for very light use.
What is the alternative to Rebrandly?
A leading alternative to Rebrandly is Replug. It covers branded links, QR codes, and bio pages, but also adds marketing features such as:
– Retargeting pixels – Call‑to‑action overlays – A/B testing – Link rotation and routing rules
Replug’s pricing is designed to deliver greater marketing power at a lower or comparable cost, especially at the Scale and Agency levels. If you want your link tool to help with growth as well as branding, Replug is a strong option to test.
How long do Rebrandly links last?
By default, Rebrandly links stay active as long as your account and connected domain remain active. On Professional plans and above, you can set an expiration date for a link so it stops working after a campaign ends. Links can also stop working if you delete them, change or remove the domain, or close the account. If no manual expiry is set and your setup stays active, Rebrandly links do not have a built‑in time limit.
Is Rebrandly safe to use?
Rebrandly is generally considered safe to use for link shortening and branding. All links use HTTPS, and the platform offers options such as two‑factor authentication to protect accounts. Across its plans, Rebrandly adheres to major standards such as SOC 2 Type 2, HIPAA, GDPR, and CCPA, which are important for teams in regulated fields. As with any link tool, users should still avoid shortening harmful or suspicious URLs and keep account access limited to trusted teammates.
Most marketing teams carry more subscriptions than they can list off the top of their head. A few dollars here and there for a bio link tool or URL shortener feels harmless, yet it all adds up, especially when the return is not clear. That is where a closer look at Linktree pricing becomes important.
Linktree is one of the best‑known names in the link‑in‑bio space. Many users move from the free tier to a paid one almost on autopilot. The real question is whether the current Linktree pricing model aligns with what marketers and organizations actually need, especially once transaction fees are factored in.
This blog post breaks down every Linktree plan, what each tier delivers, and how the seller fees work. It also looks at where the tool falls short for serious marketing teams and compares it with Replug, a link management platform built for conversion and tracking.
By the end, you will know if Linktree pricing fits your goals or whether a tool like Replug gives you better long‑term value. So, let’s get started!
How the Linktree pricing model is structured
Linktree uses a tiered pricing model with five levels, ranging from casual creators to agencies. You can pay month to month or yearly, and the annual option gives a saving of up to about 20%.
Before judging value, it helps to see the full picture of Linktree pricing in one place.
Plan
Linktree pricing per month
Linktree pricing annually
Free
$0 (Free, forever)
$0 (Free, forever)
Starter
$8 USD/month
$6 USD/month
Pro
$15 USD/month
$12 USD/month
Premium
$35 USD/month
$30 USD/month
Agency/Enterprise
Custom pricing
Custom pricing
The “Free” plan suits simple personal use, while “Starter” and “Pro” add more advanced marketing features without requiring enterprise spend. “Premium” sits at the top of the public Linktree pricing tier and is aimed at brands with significant digital product revenue. Whereas “Agency or Enterprise” plans are custom and are shared only after a sales call.
There is also a seven‑day free trial on the Pro plan, which is handy if you want to test paid features with low risk. However, the right plan depends heavily on whether you need richer analytics, stronger monetization, or team collaboration rather than just a neat profile page.
What you actually get at each Linktree plan level
Linktree offers four main plans (Free, Starter, Pro, and Premium), each designed for different levels of creators, brands, and businesses. As you move up the pricing tiers, you unlock more customization options, advanced analytics, monetization tools, and automation features.
Here’s a breakdown of what you actually get with each plan level.
Linktree Free plan
On the Free plan, you can:
Add unlimited links
See simple analytics
Generate a unique QR code
Get social icons, videos & embeds
Pick from basic, SEO optimized, high-converting themes
You can even sell digital products and courses, but every sale carries a 12% Linktree transaction fee, which cuts deeply into small orders.
Linktree Starter plan
The Starter plan keeps everything from Free and adds:
Custom color palettes and extra themes so your page looks more on-brand
Redirect links to send all traffic to one place during a launch or promo
On‑page collection of email addresses and phone numbers
Auto social media scheduling and publishing of posts
The seller fee drops to 9%, so more revenue stays in your business.
Linktree Pro plan
The Pro plan is the tier Linktree pushes hardest, and it is easy to see why. You can:
Remove Linktree branding and add your own branded logo
Use richer backgrounds so the page feels like part of your site
Showcase what matters most with visually striking featured and animated links
Discover which links perform best and optimize your content strategy for growth
Drive more interaction and sales using automated replies to Instagram comments and messages
Build custom branded short URLs that automatically include UTM tags for better campaign tracking
Connect your Linktree audience to Mailchimp, Kit, Klaviyo, or Google Sheets for automatic syncing
The Linktree transaction fee for digital items stays at 9% here.
Linktree Premium plan
Premium includes everything in Pro but is aimed at heavy sellers and busy brands:
Seller fee drops to 0%, so you keep all earnings from digital products and affiliate deals, aside from normal payment processor charges (100% commission guaranteed)
Social scheduling becomes unlimited across up to three brands
Analytics cover the full lifetime of the account
Concierge onboarding and richer admin controls help larger teams get moving fast
Maximize engagement via unlimited auto-replies with built-in typo detection
Real-time team collaboration with chat and structured approval workflows
Is Linktree really worth the spend in 2026: Where does it fall short?
There is real value in Linktree for the right use case. Setup is fast and needs no coding, so creators can publish a working bio page in minutes.
The Free plan gives non‑profits and small teams a way to centralize links without touching their budget. On Pro, Meta Pixel support and UTM tracking bring real marketing value, and Premium’s 0% seller fee is attractive for businesses selling many digital products through their bio links.
For marketing teams, however, several gaps show up once campaigns become more advanced:
Analytics focus mostly on clicks and views of the bio page, not on deeper behavior or what happens after visitors click through
Meta is the only native retargeting pixel, so there is no direct support for networks such as LinkedIn, TikTok, X, or Google Ads
There is no A/B testing for different link orders or calls to action
You cannot use a branded short domain for cleaner, on‑brand URLs
The page acts as a tidy directory, but there are no lead capture overlays or on‑page widgets that push visitors toward sign‑ups or trials
That idea matters here! Many marketers need more than a simple list of links; they want a measurable path from click to conversion.
That leads to a key idea for anyone reviewing Linktree pricing as of 2026. The product is built first for creators who want a simple link hub, not for performance‑driven marketers. If you are a digital marketer, is a link directory really enough?
Replug: A smarter Linktree alternative for marketers who need more efficient features
Before stepping into features, it helps to see how Replug and Linktree compare at a high-level in terms of focus and pricing. Both tools handle bio links, but only one is built from the ground up for campaigns that live and die by data.
Paid plans with a 14‑day free trial; Scale plan at $23/month with unlimited bio links
Free plan (No credit card required)
14‑day free trial on paid plans
Linktree
Simple link‑in‑bio pages for creators
Free tier, paid plans from $8 to $35/month on public plans
Yes, free forever plan
Pro tier has a seven‑day trial
Linktree pricing makes sense when all you want is a clean page of links, and that is a fair starting point. For more advanced marketing teams, Replug turns that same idea into a full conversion hub that fits neatly into your wider campaigns.
Mix content blocks such as links, video, RSS feeds, text, and social icons
Customize meta titles, descriptions, and favicons
That way, your bio link feels like a real brand asset, not a generic profile.
Replug also includes branded URL shortening and vanity URLs, so every shared link carries your name instead of someone else’s. You can add retargeting pixels for Facebook, Twitter, LinkedIn, Pinterest, TikTok, Quora, Google, and even custom platforms, with no hard cap on how many you use.
On top of that, customizable call‑to‑action widgets and lead-capture overlays turn passive clicks into email sign‑ups, trials, and demos in a way that Linktree cannot match at any price.
Testing and data are also backed by Replug. You can run A/B tests on up to 10 different URLs from a single short link and control how traffic splits between them in real time. Detailed analytics show click‑through rates, locations, devices, behavior, and conversion data, all tied to clear UTM tracking.
This goes far deeper than the click counts and simple charts that underpin most Linktree pricing tiers. It makes Replug stand out strongly among Linktree free alternatives, even though Replug itself uses a trial‑plus‑paid model rather than a permanent free plan.
For marketers who live in their analytics dashboard, the mix of tracking, branding, and conversion tools can make far more sense than stretching Linktree pricing to its top tiers.
Linktree earns its place as a popular bio link tool, but for performance‑minded marketers, though, the picture is different.
As needs grow to include multi‑network retargeting, branded short URLs, A/B testing, and on‑page lead capture, Linktree starts to feel more like a starting point than a long‑term home. The price gap between tiers does not close that feature gap.
If you want your bio link and short URLs to drive real conversions rather than just clicks, Replug is worth a serious look. Try the 14‑day free trial, connect it to your existing campaigns, and see how it compares with your current Linktree pricing in terms of data, branding, and actual results.
Frequently asked questions
Is Linktree totally free?
Linktree offers a Free plan that you can use without any time limit. This tier gives you unlimited links, basic themes, simple analytics, and some light social tools. However, many advanced features, such as deeper customization and better integrations, are available only with paid plans.
If you sell digital products or accept payments through Linktree on the free tier, you also pay a higher seller fee on each transaction. So the platform is free to start, but not every use case stays free.
How much does Linktree cost?
Public Linktree pricing ranges from $0 to $35 per month on standard plans.
– The Free plan costs $0, – The Starter plan costs $8 monthly, – The Pro plan costs $15 monthly, and – The Premium plan costs $35 monthly
If you choose annual billing, those same tiers drop to $6, $12, and $30 per month for Starter, Pro, and Premium.
There are also Agency/Enterprise plans with custom pricing that Linktree shares only after a sales call. Pro includes a short free trial so you can test paid features before you pay.
What is Linktree nonprofit pricing?
As of 2026, Linktree does not clearly list a special nonprofit discount on its main pricing page. Many nonprofits use the Free plan because it gives them a simple way to share key links without adding another bill. Larger organizations that need paid features usually pick from the same Starter, Pro, or Premium tiers as other customers.
From time to time, Linktree may run campaigns or offer custom deals, so it is worth reaching out to their support team if you manage a large nonprofit program. Always check Linktree’s official site for the latest details before you budget.
Why did people stop using Linktree?
Some users move away from Linktree once their needs grow beyond a simple bio page. As campaigns become more advanced, teams often want branded short domains, multi‑network retargeting pixels, deeper analytics, and on‑page lead capture, which Linktree does not fully provide.
Others prefer to keep users on domains they own for brand and tracking reasons. In those cases, they switch to tools that combine bio links, URL shortening, and conversion features in one place.
What’s a free alternative to Linktree?
There are other bio link tools on the market that offer free plans, and a quick search will turn up several options. That said, many of those tools share the same limitations as the Linktree Free tier and primarily focus on listing links.
If you care more about advanced marketing features, Replug is a better fit, even though it does not have a forever‑free plan. Replug gives you a 14‑day free trial so you can test bio links, branded URLs, pixels, and A/B testing before you commit. This makes it a strong option when you want more than a basic free page.
What are the transaction and processing fees on Linktree?
When you sell digital products or accept payments through Linktree, the platform takes a seller fee on top of normal payment processor charges.
On the Free plan, this Linktree transaction fee is 12% of each sale, while Starter and Pro reduce it to 9%. Premium brings the seller fee down to 0%, so your only costs are standard processing fees from providers such as Stripe or PayPal.
Those payment processor fees vary by region but are usually a small percentage plus a fixed amount per transaction. If you expect high sales volume, it is important to factor both Linktree pricing and these fees into your choice of plan.


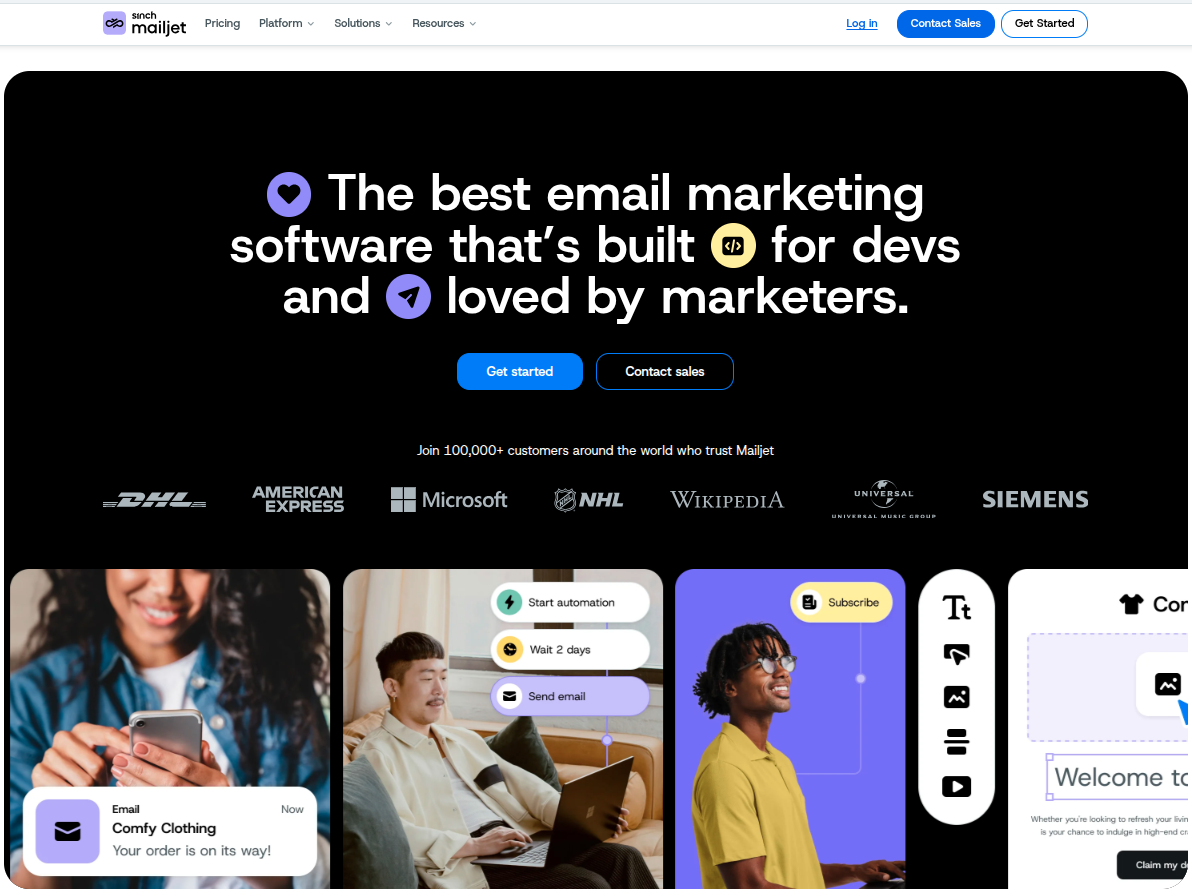
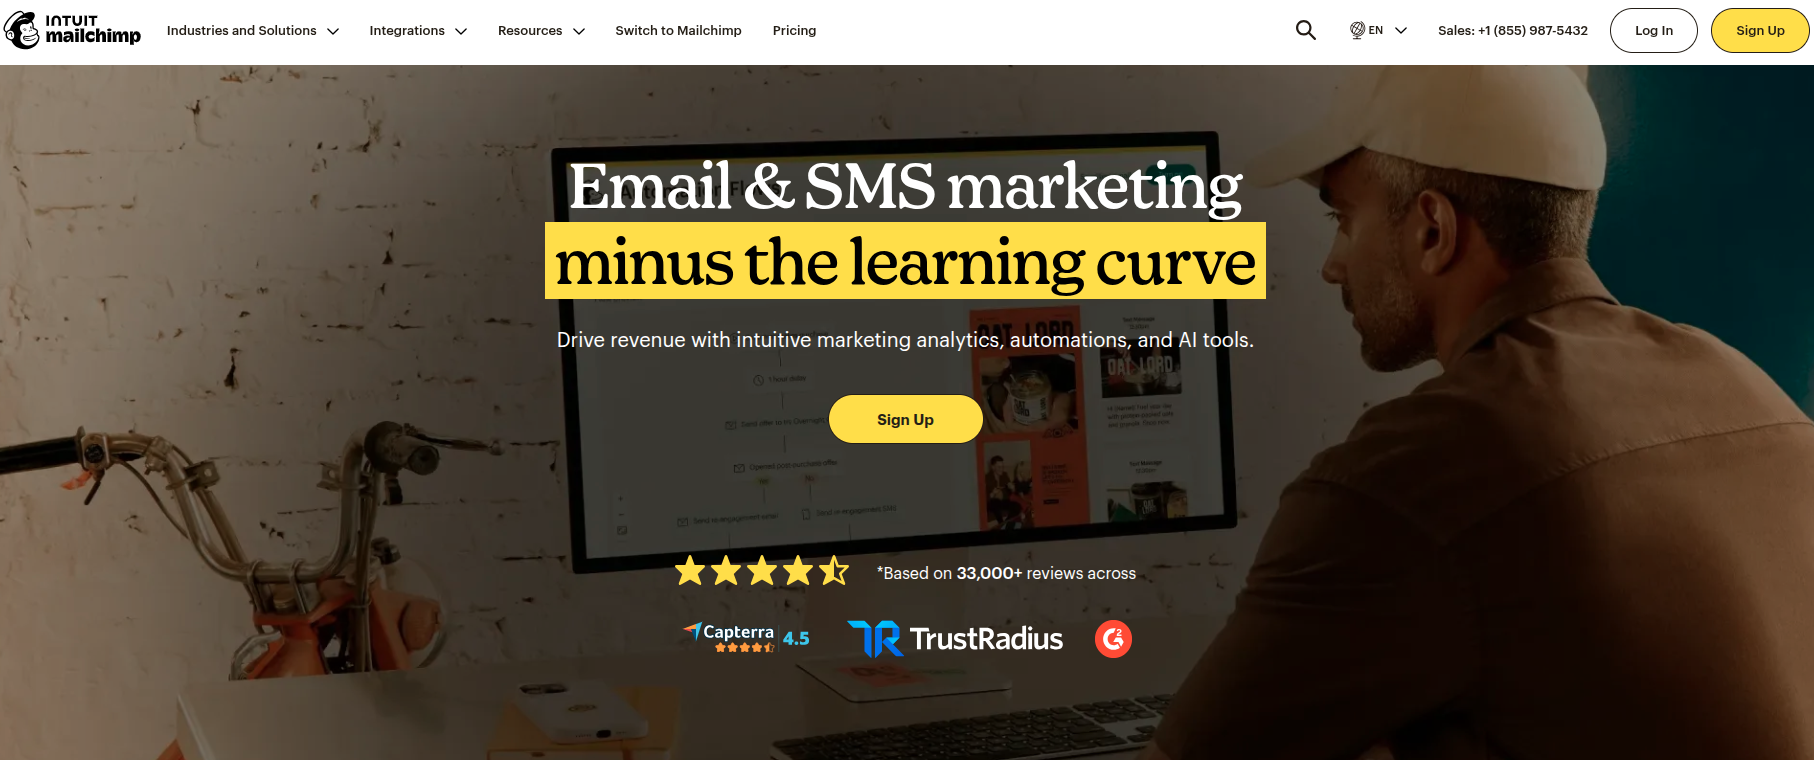
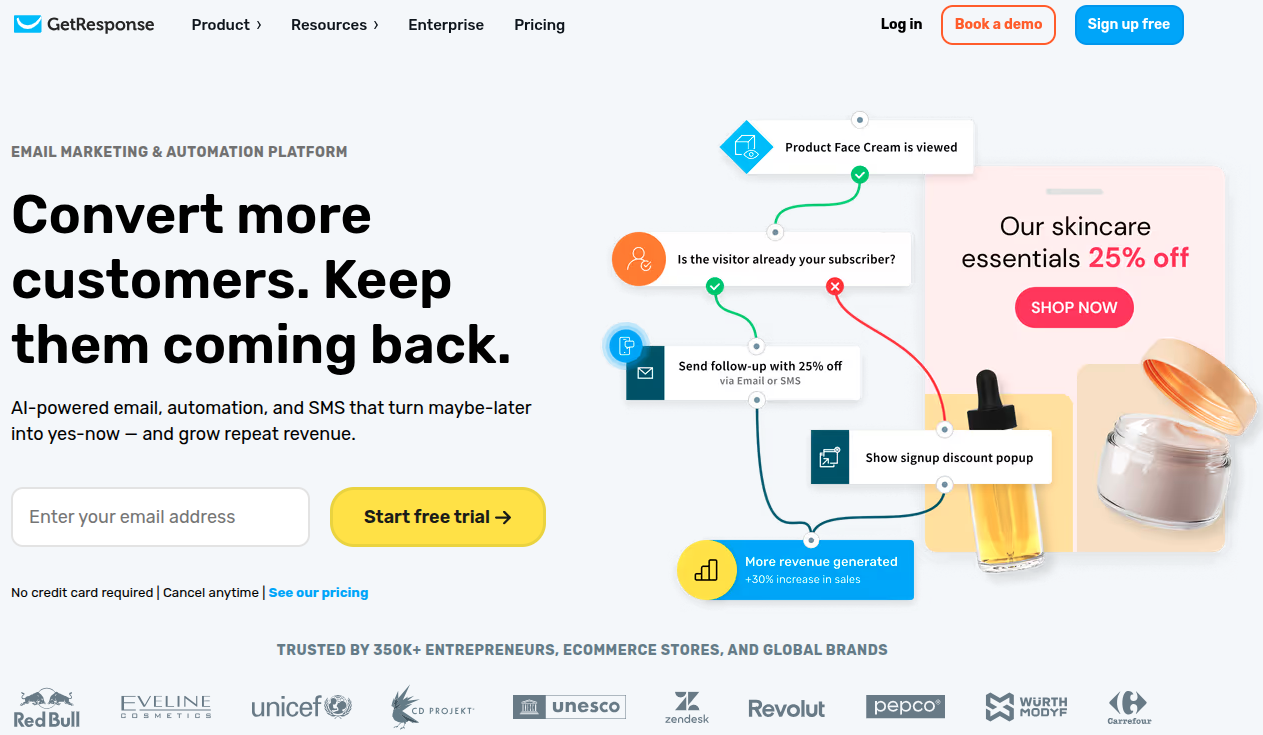
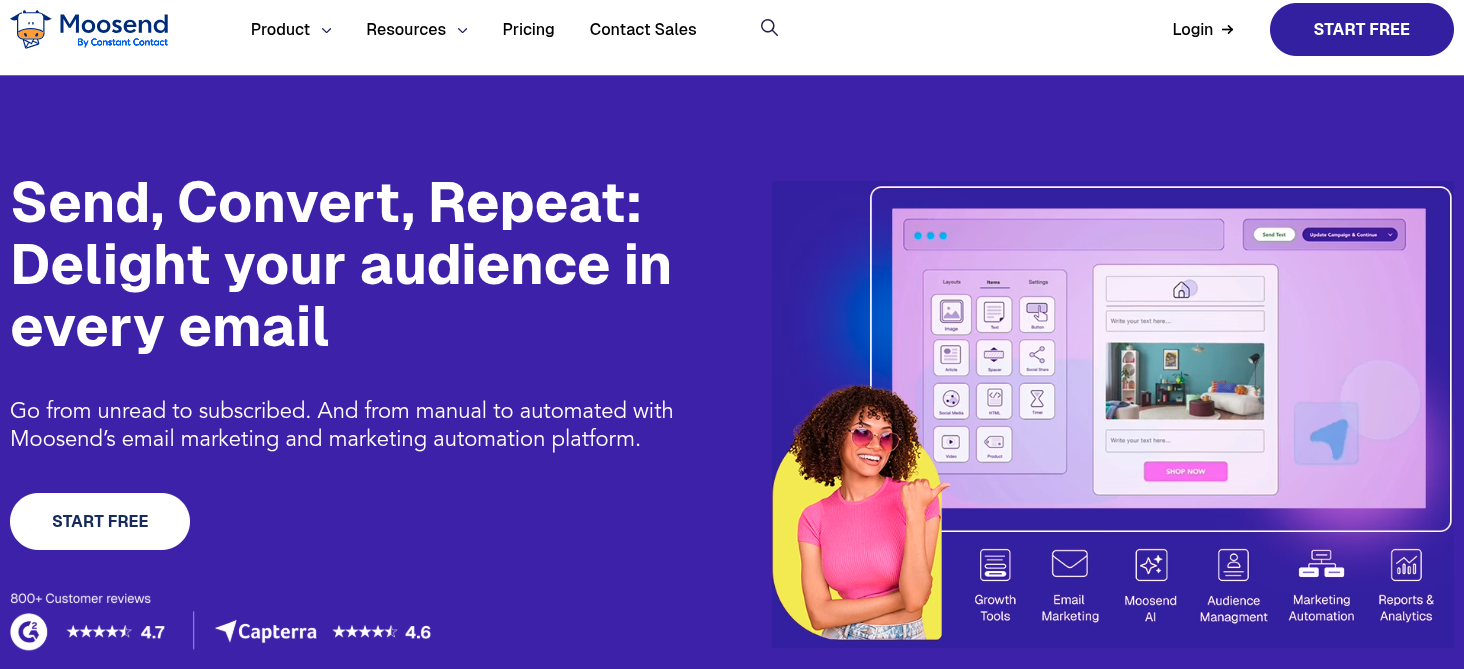
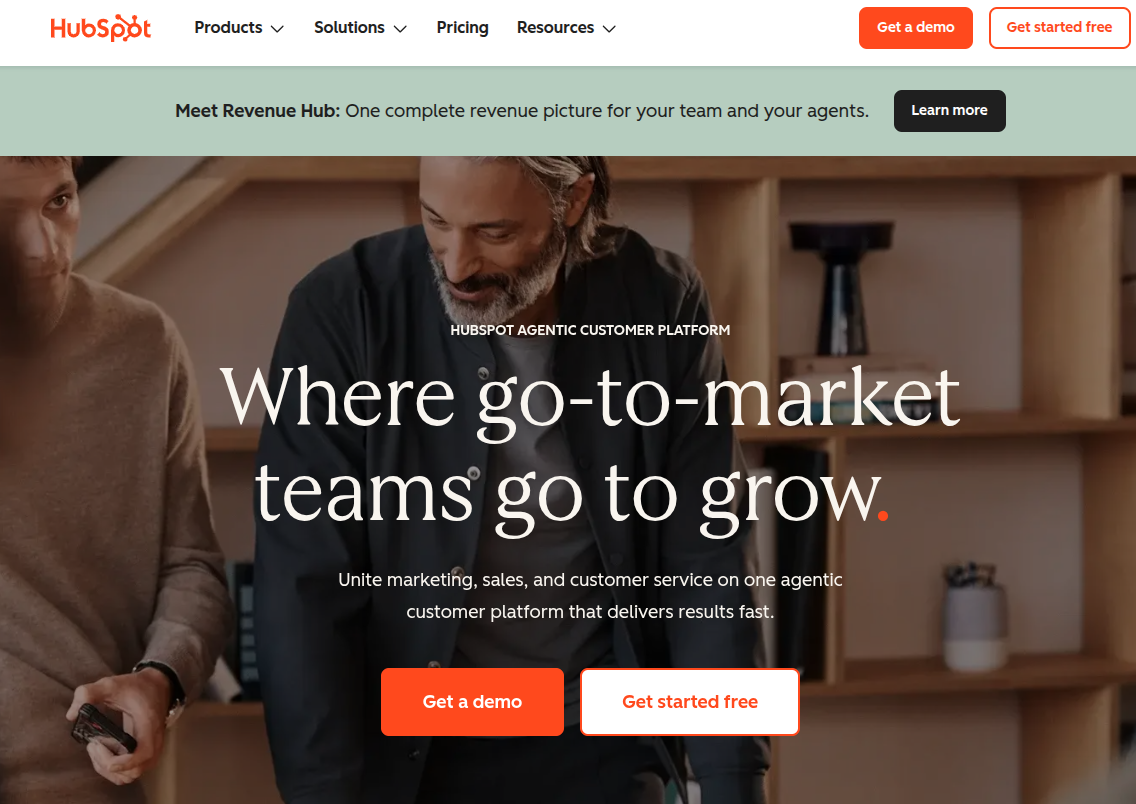
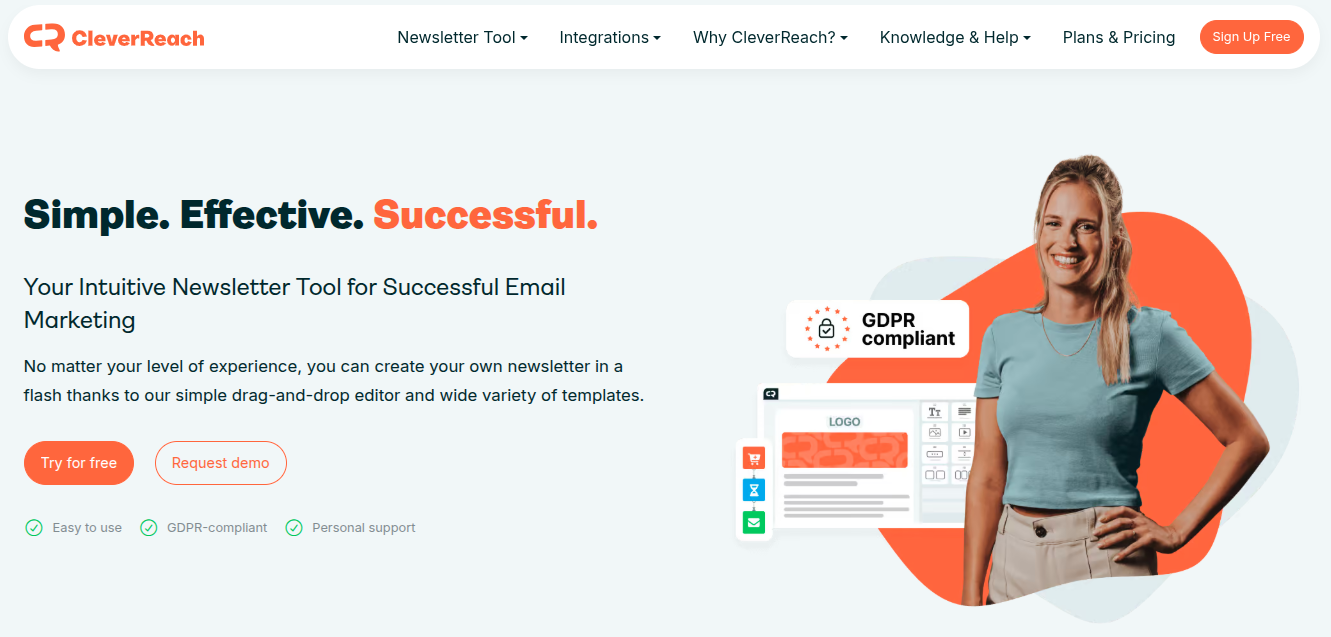
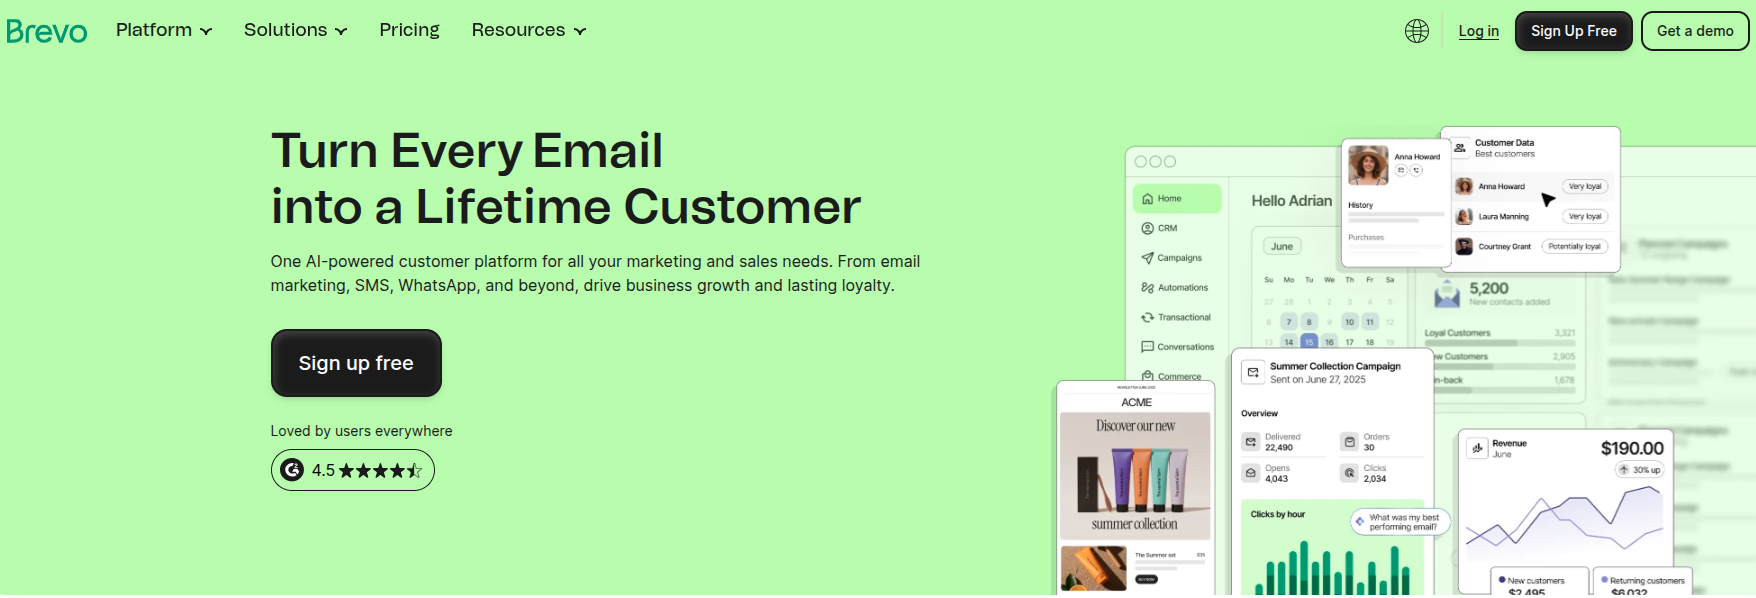
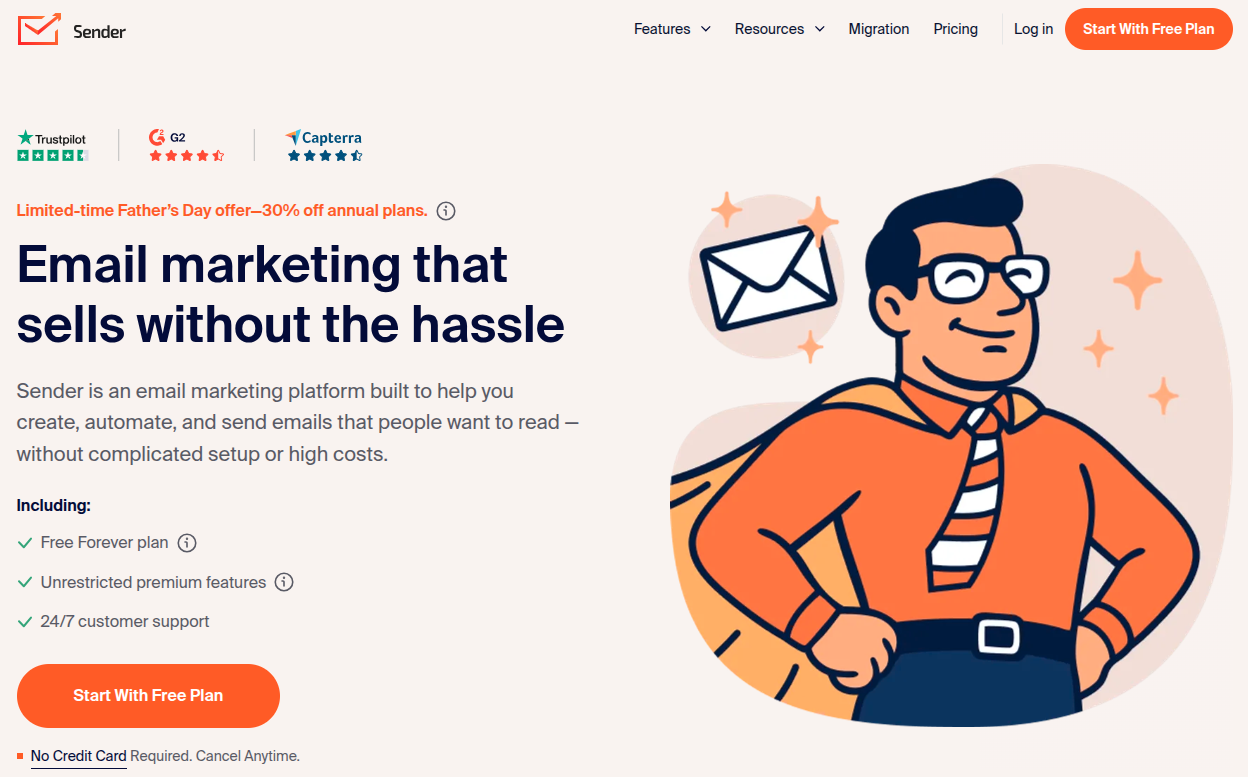
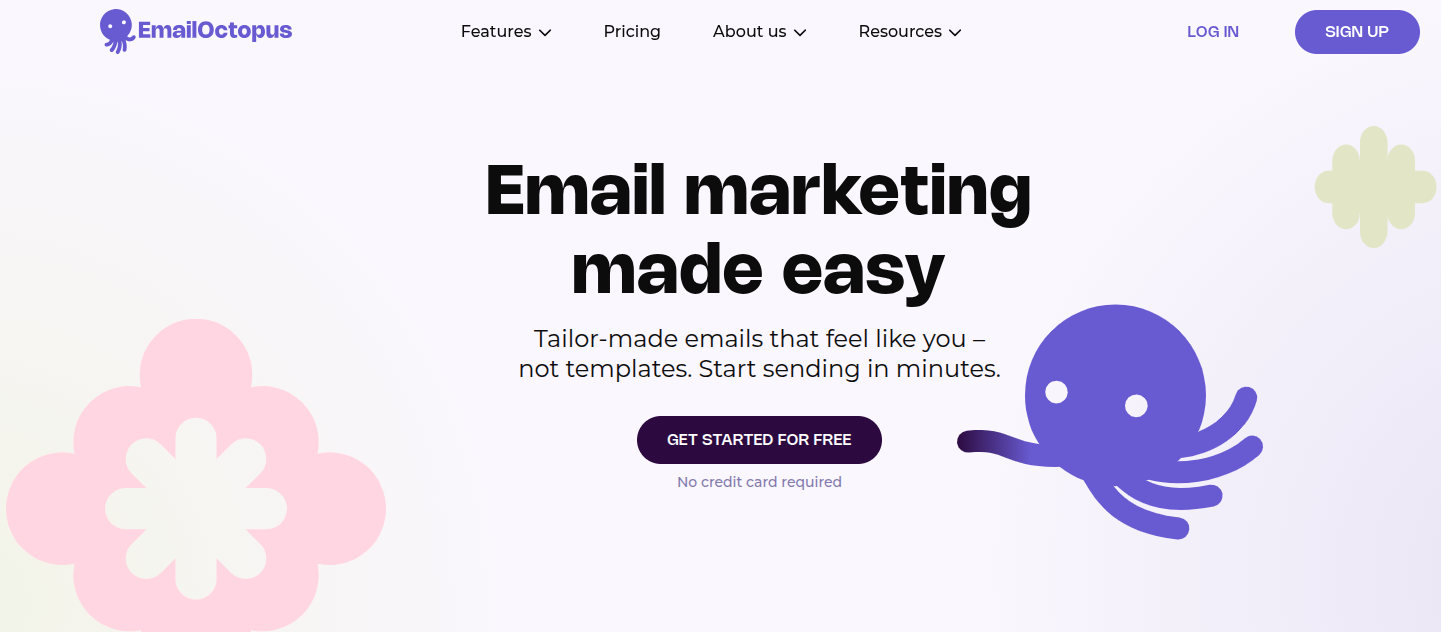
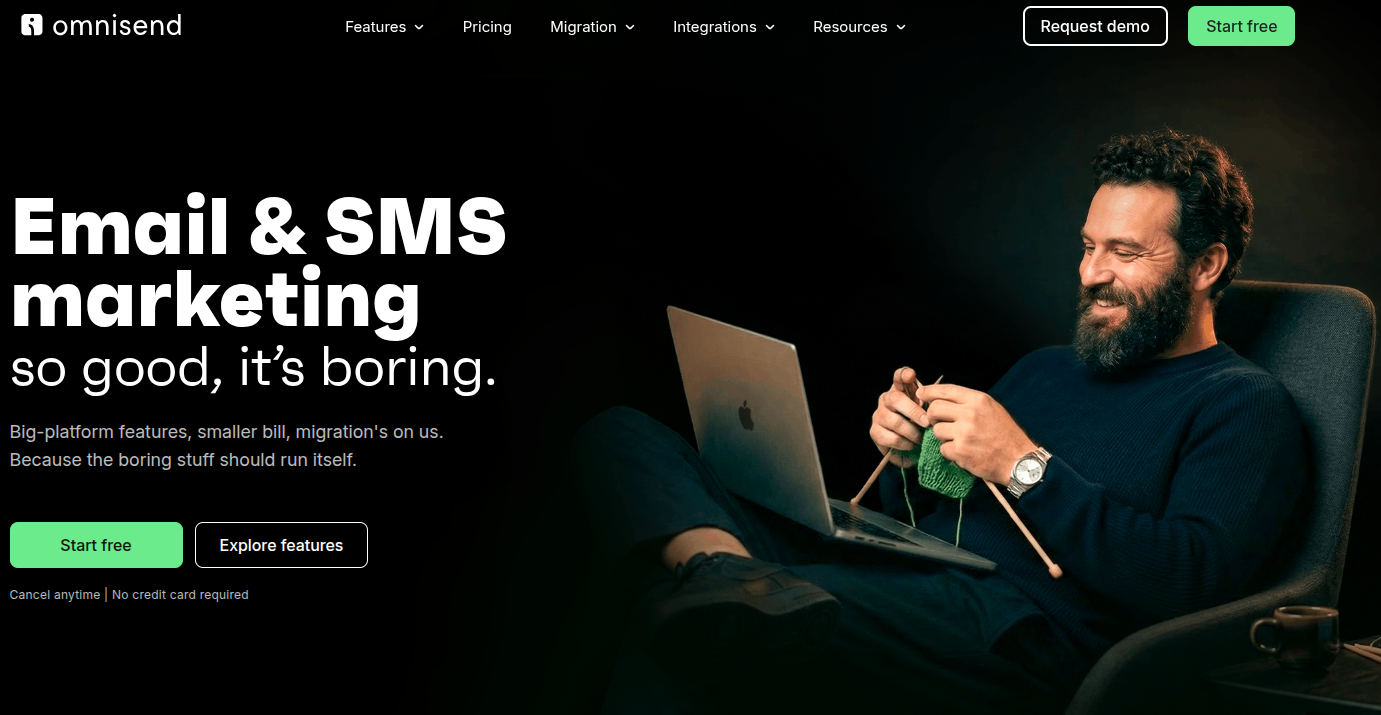
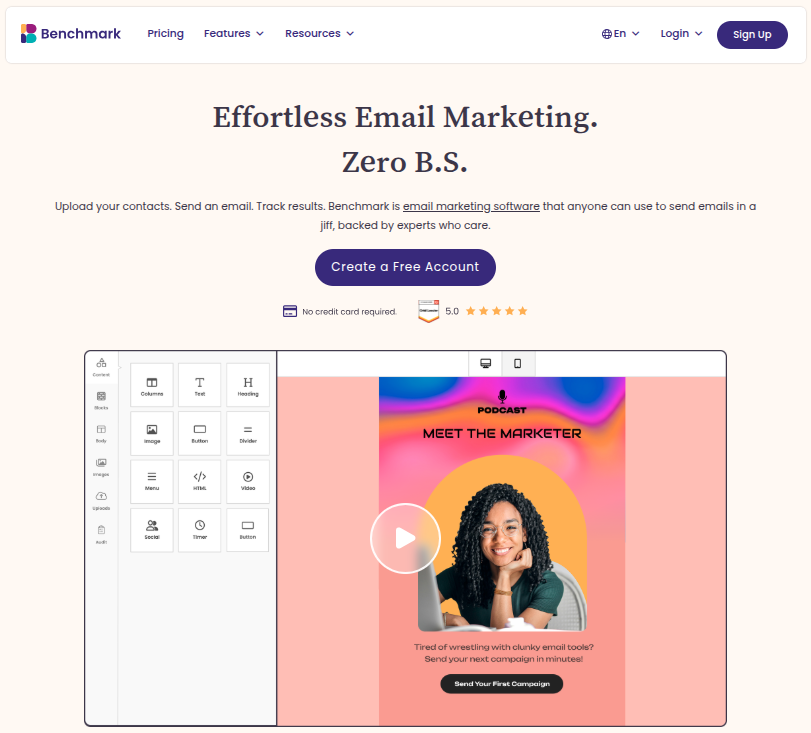

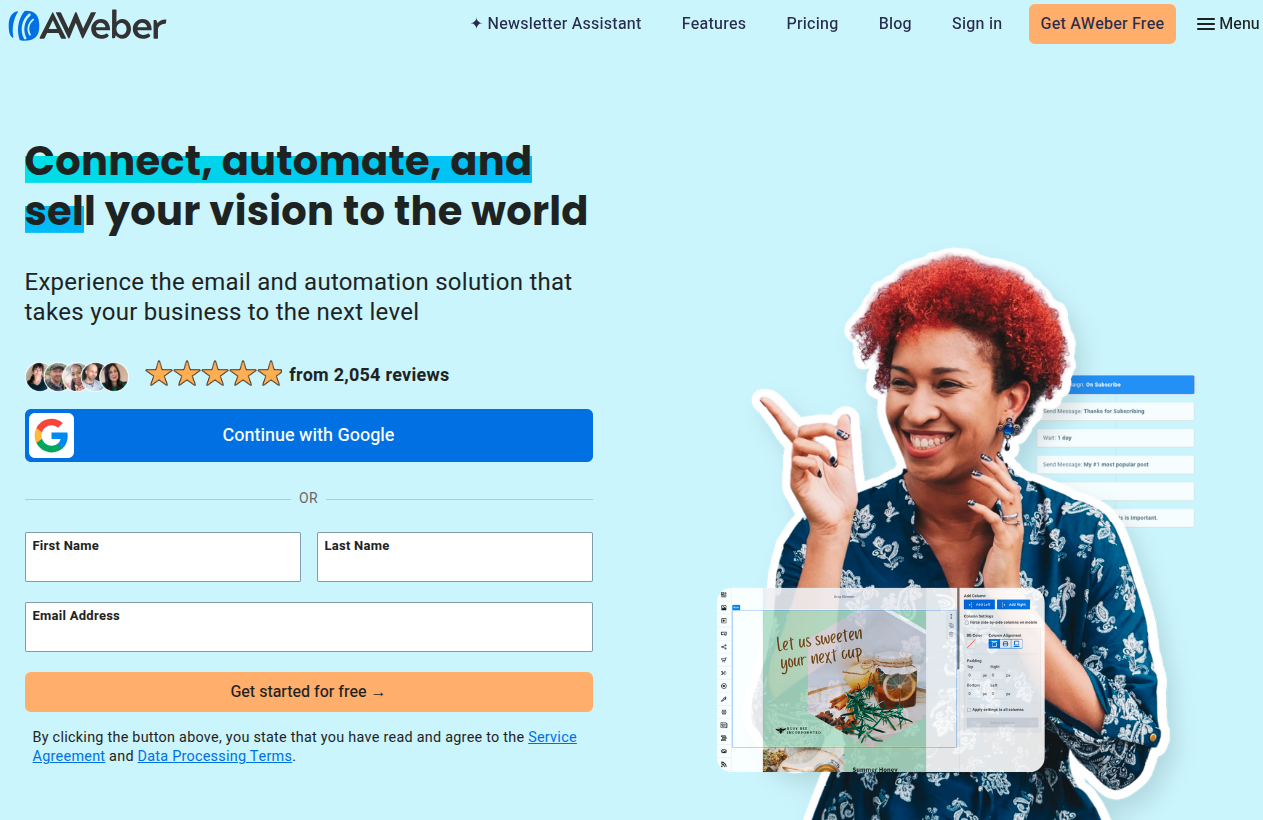
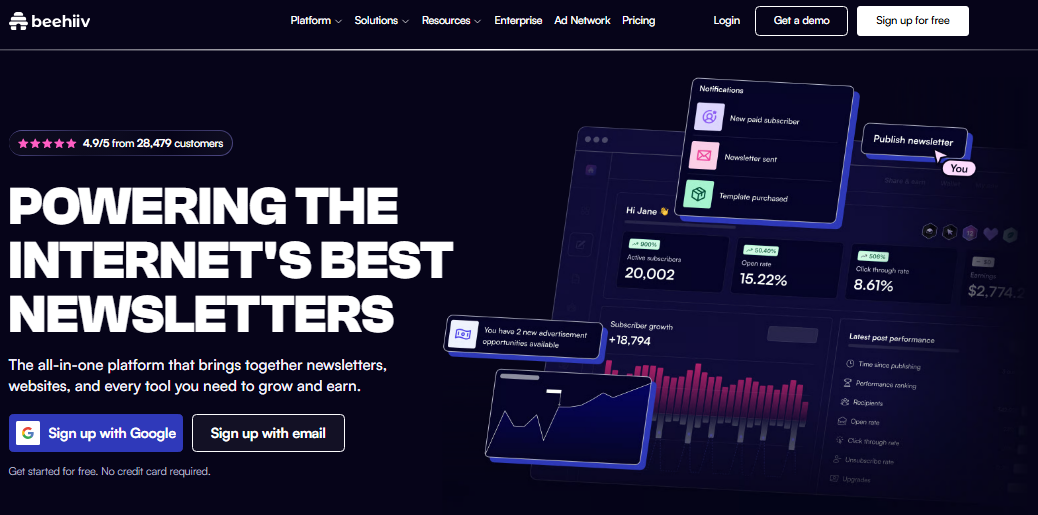
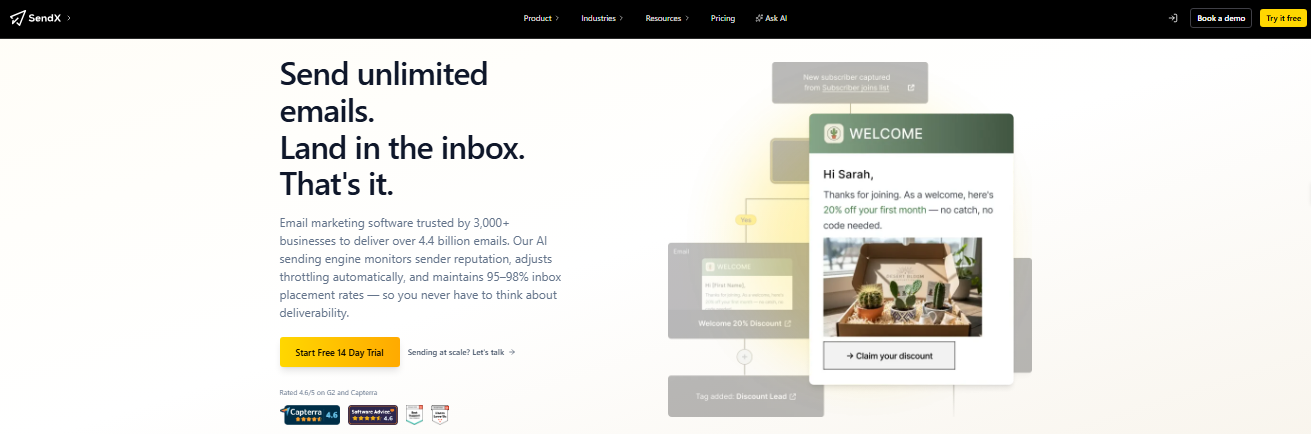


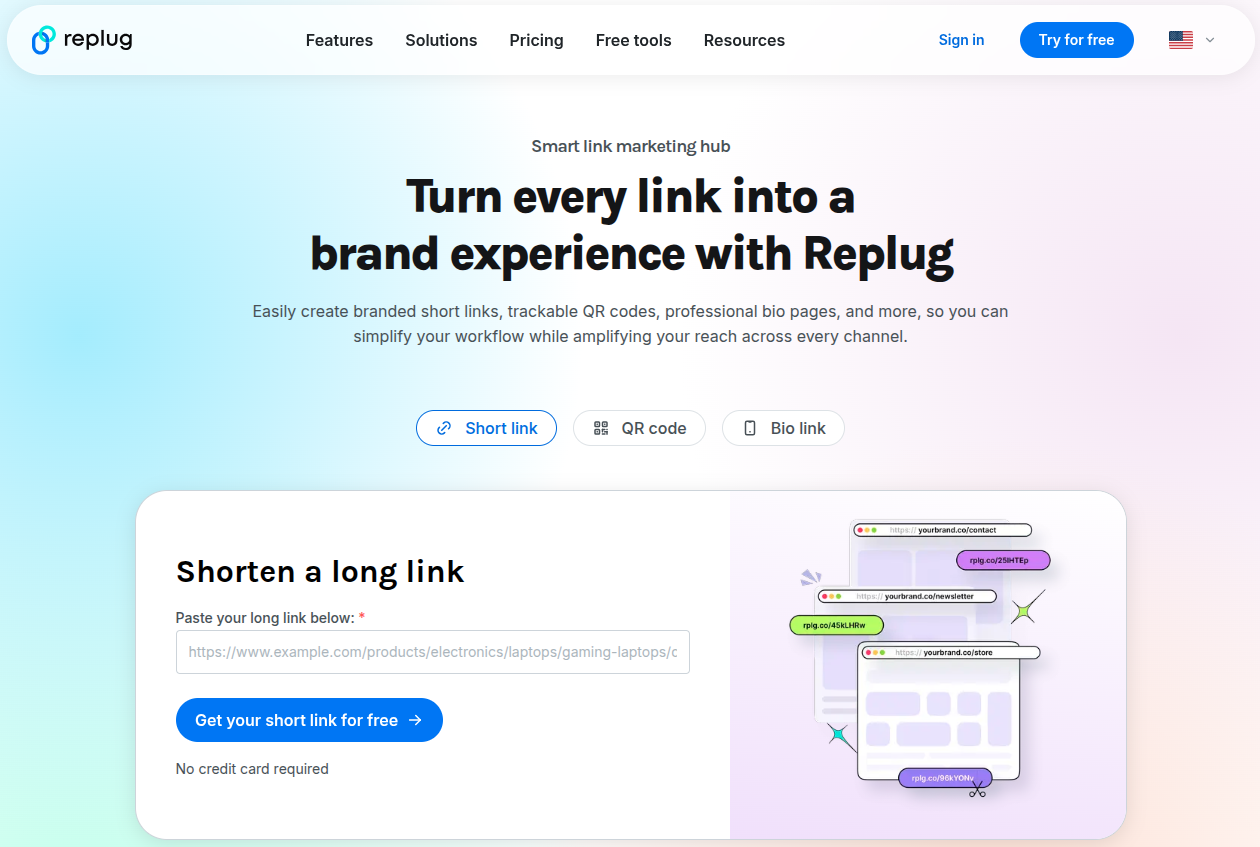
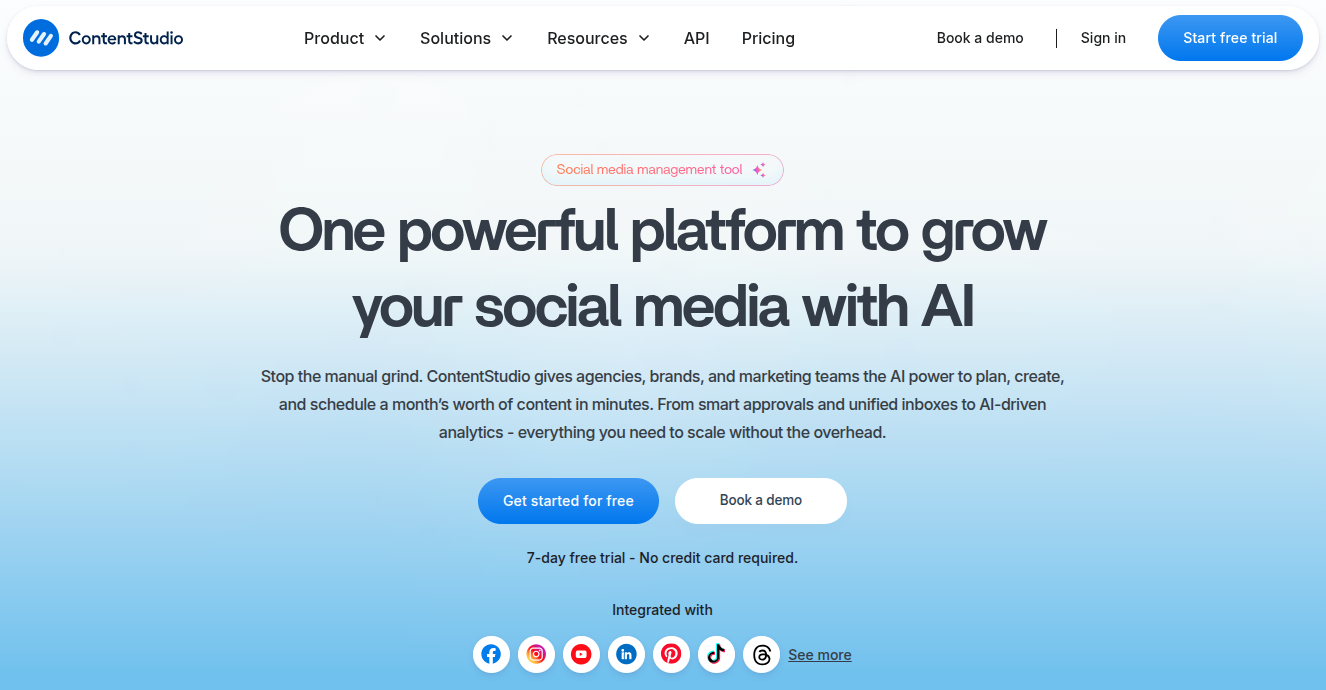
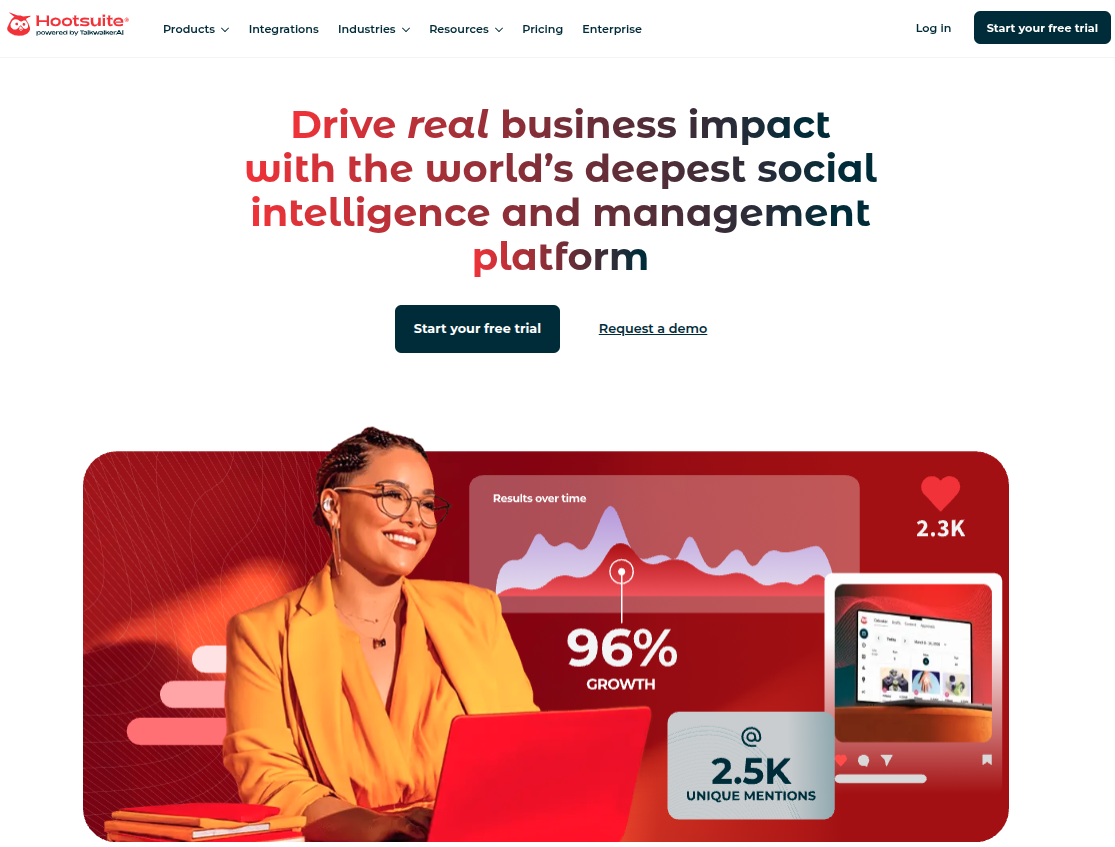
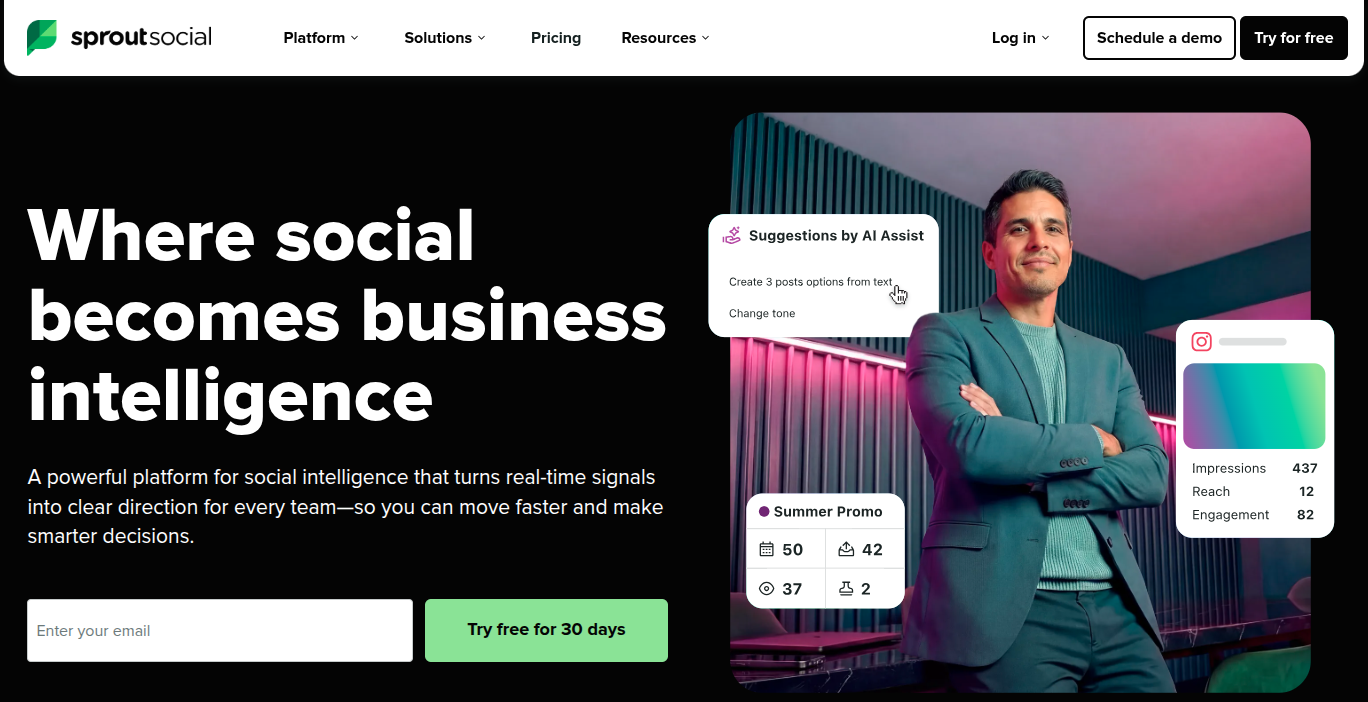
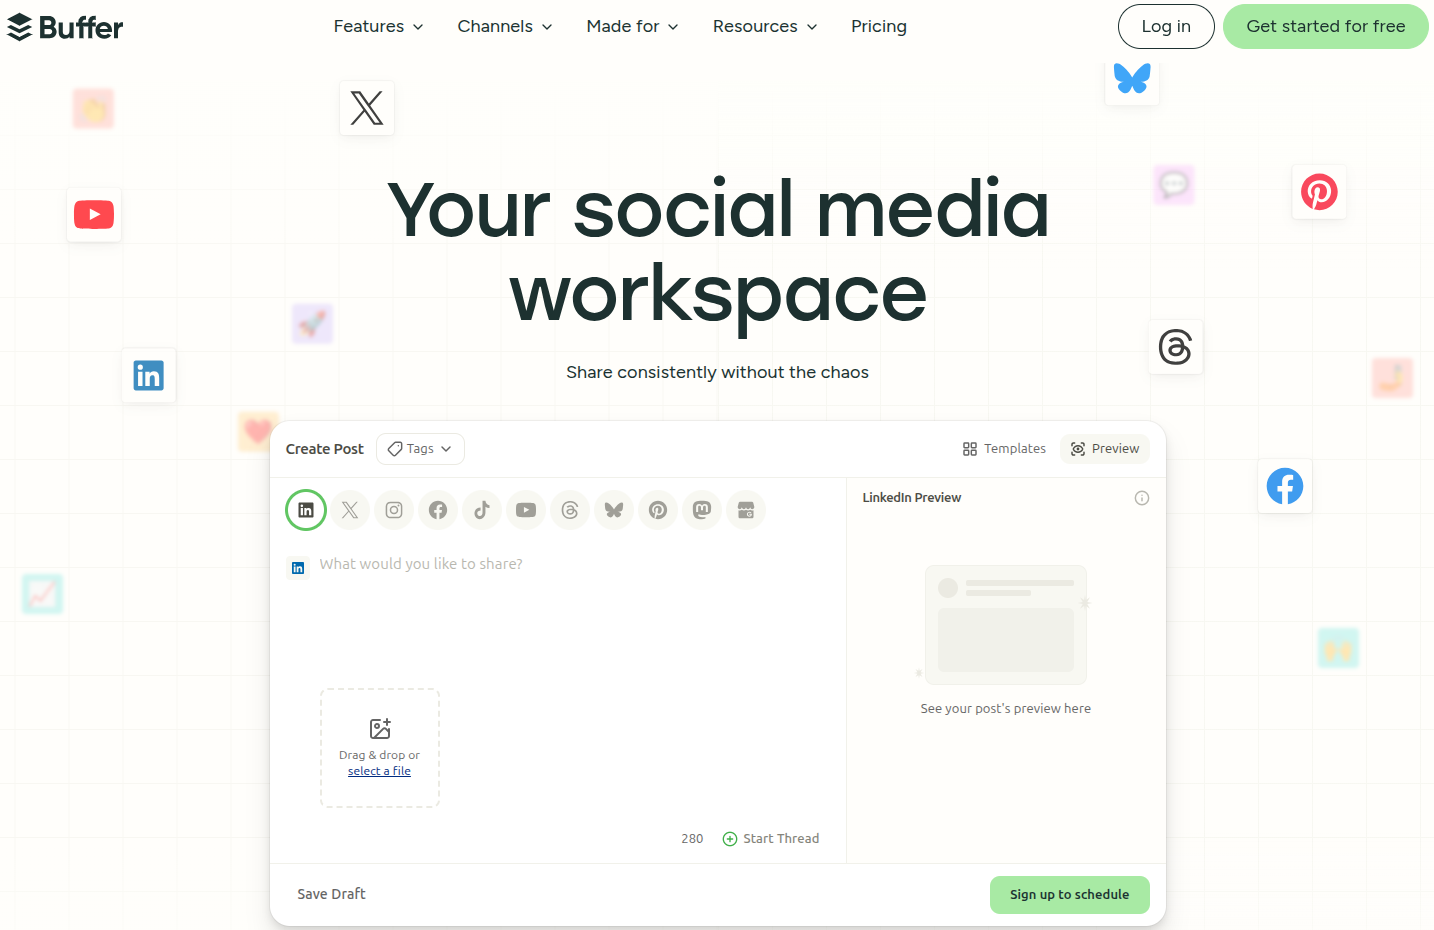
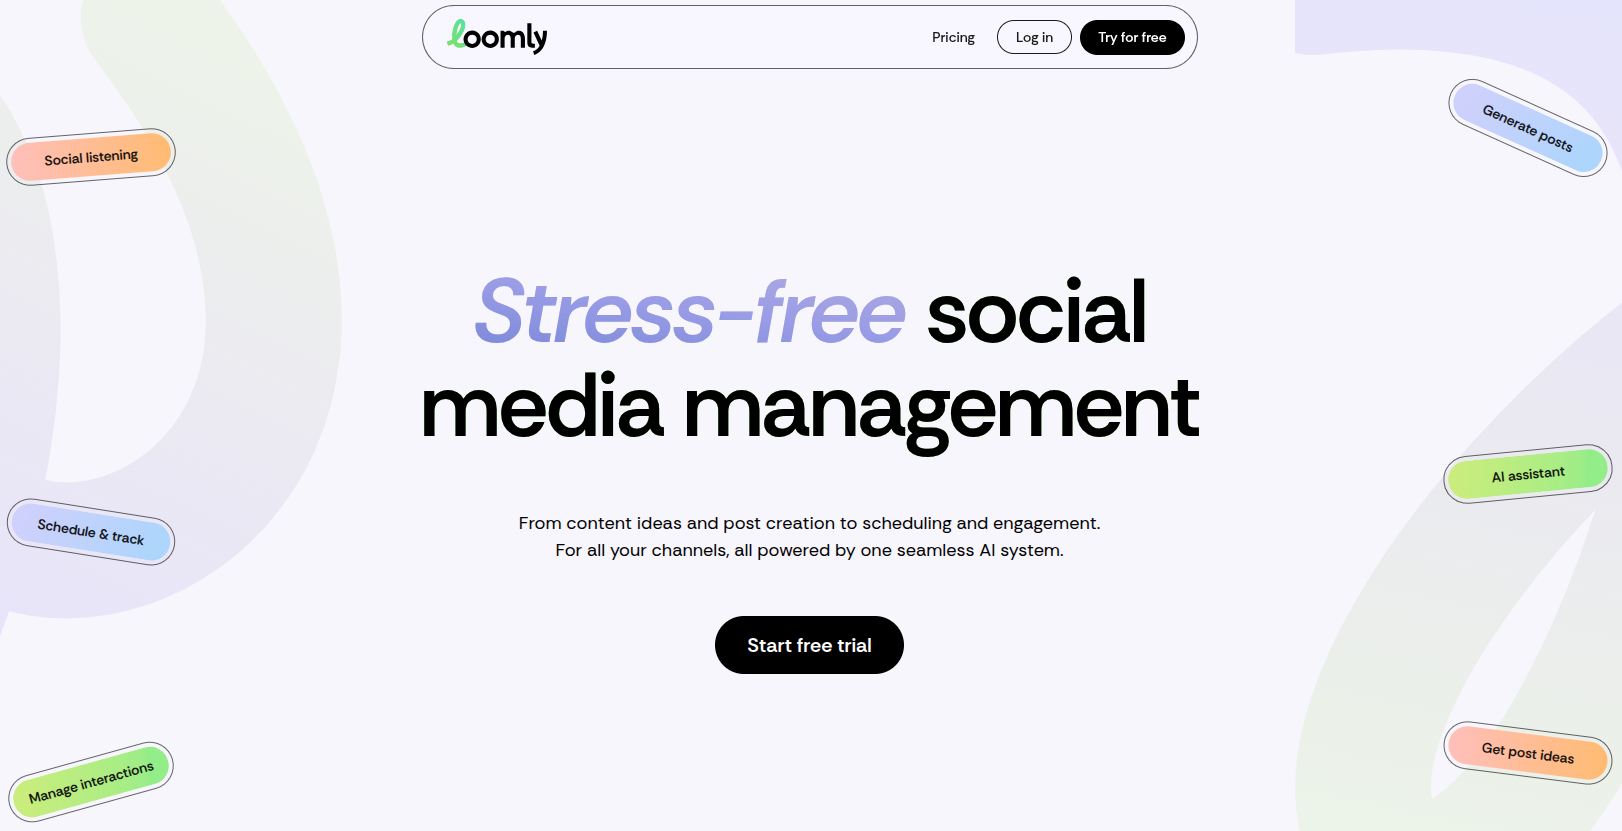
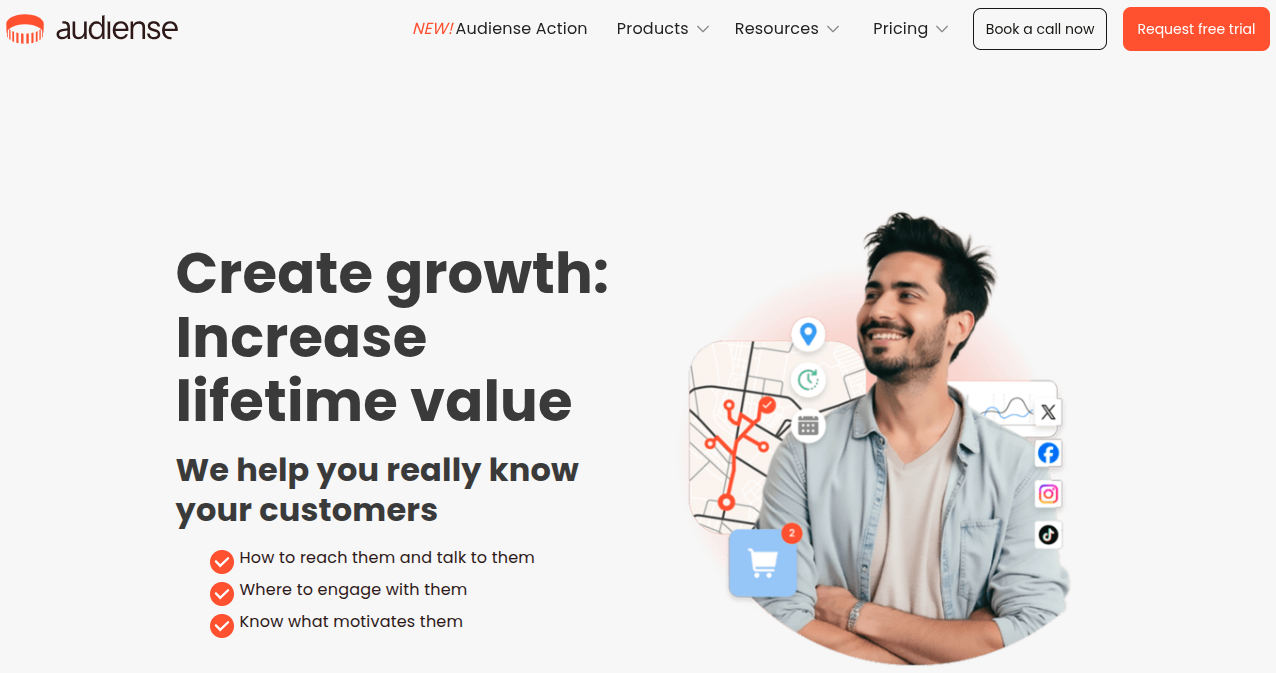
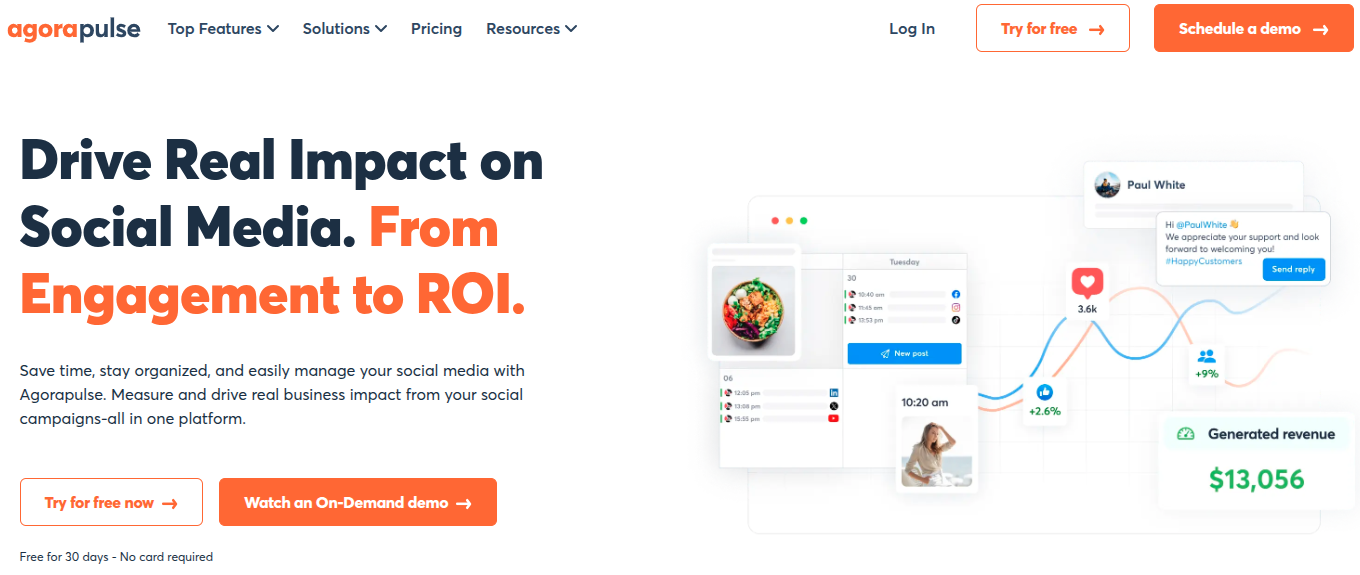
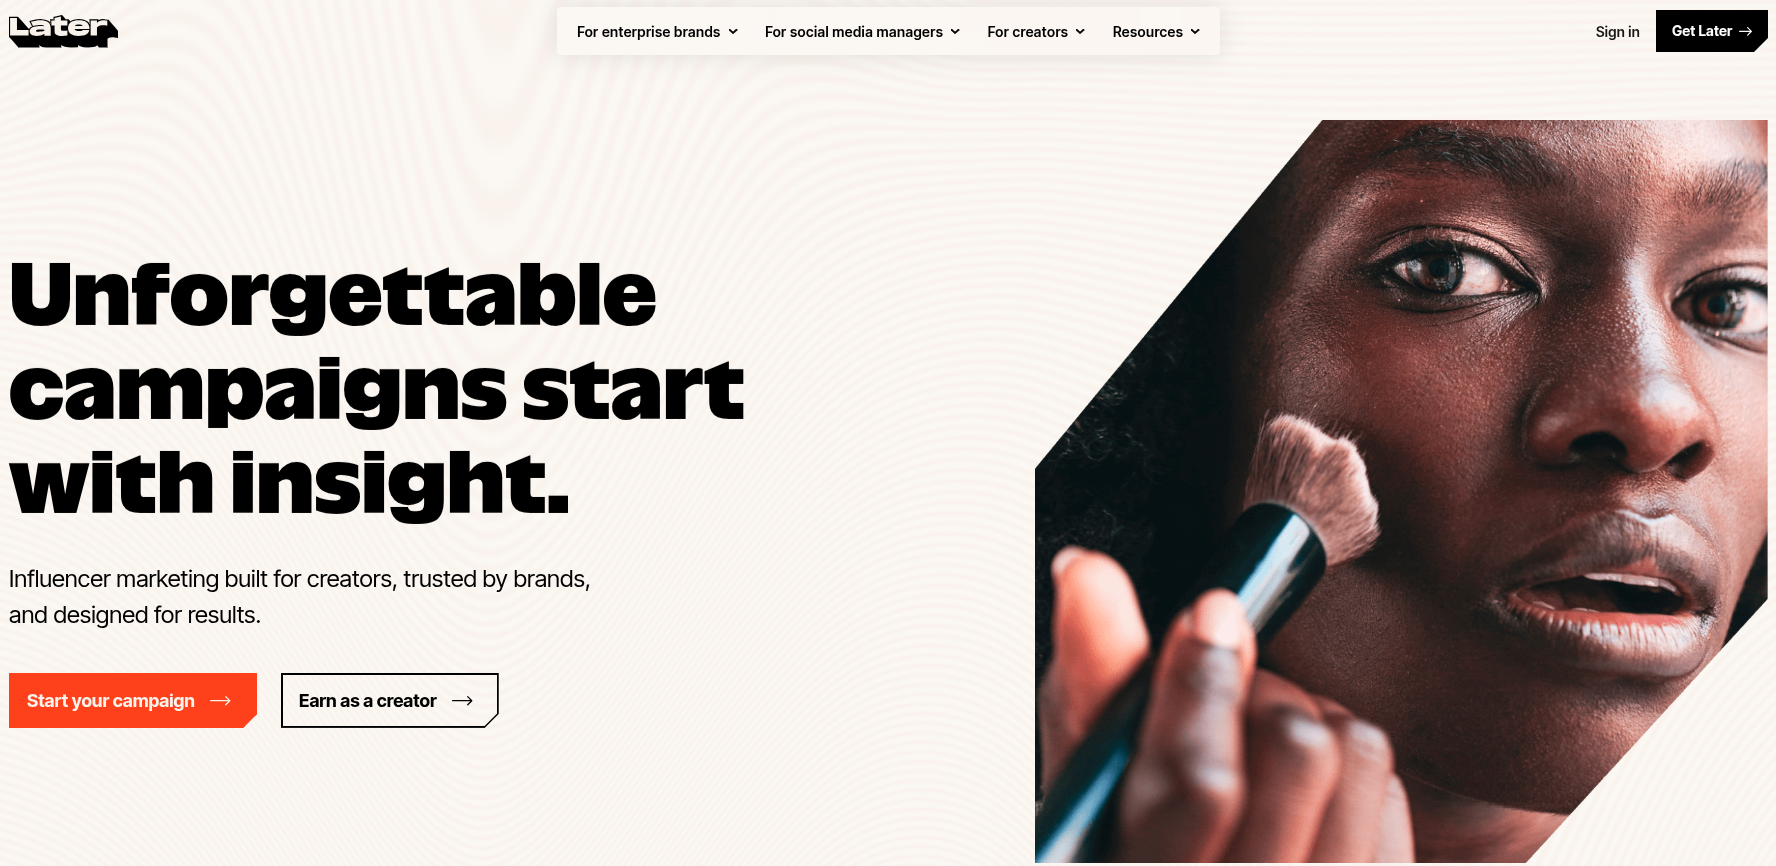
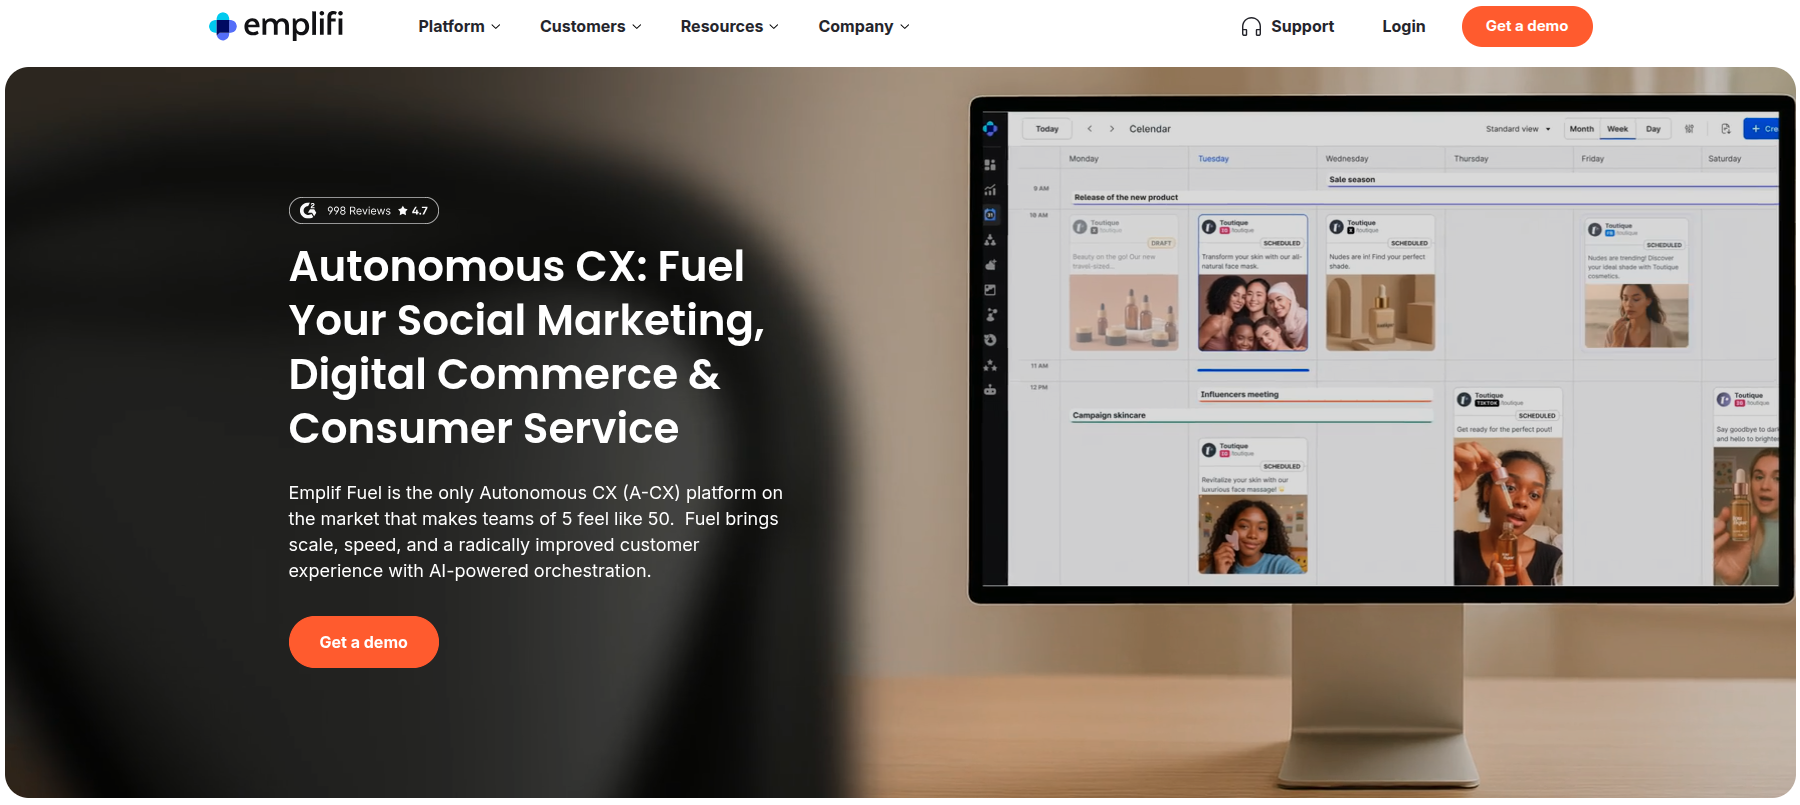
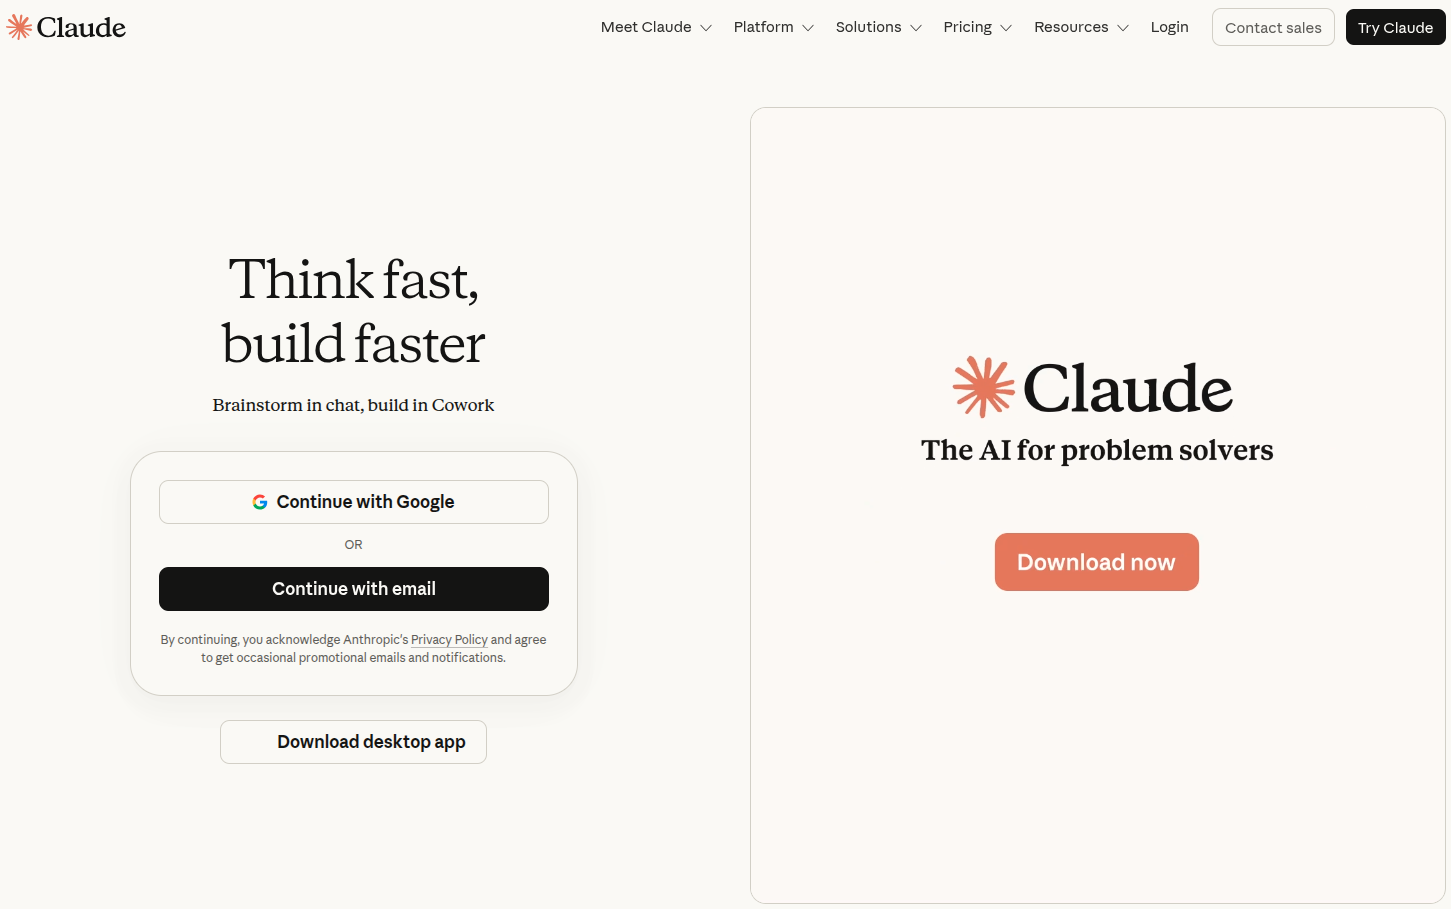

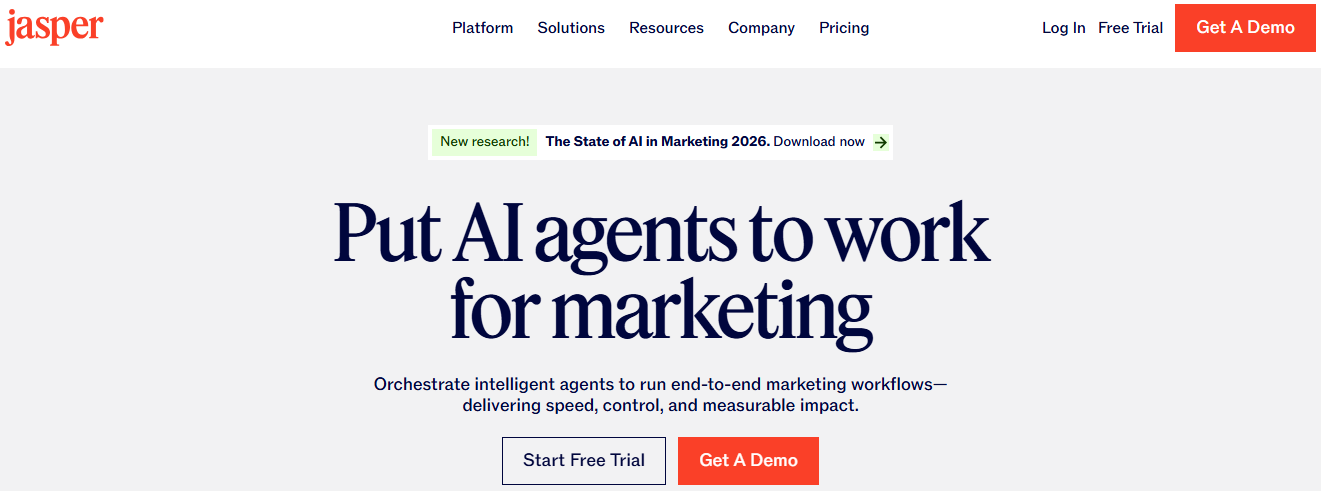


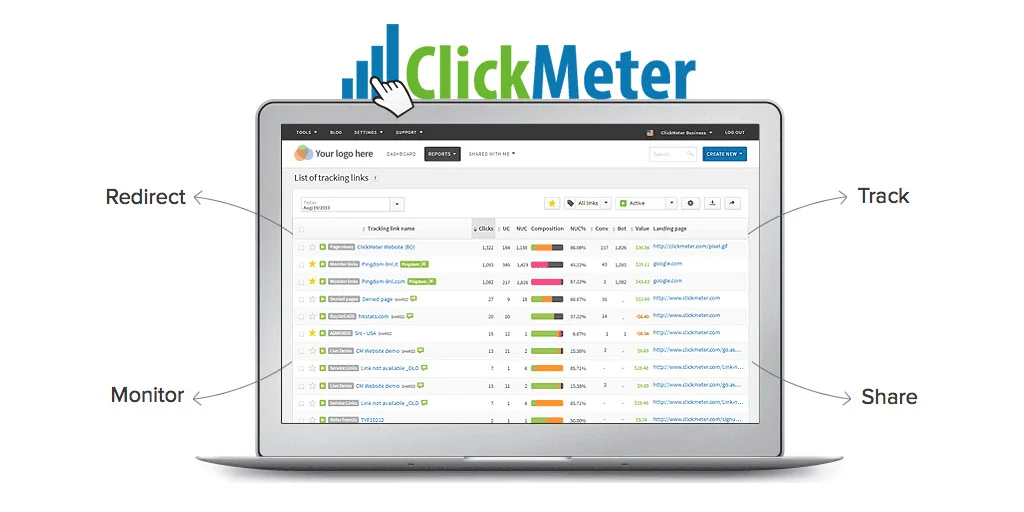
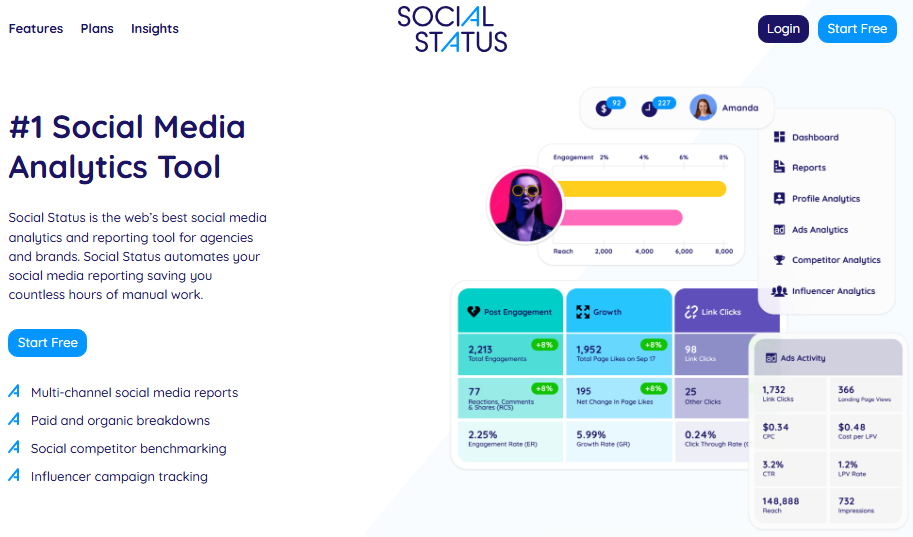
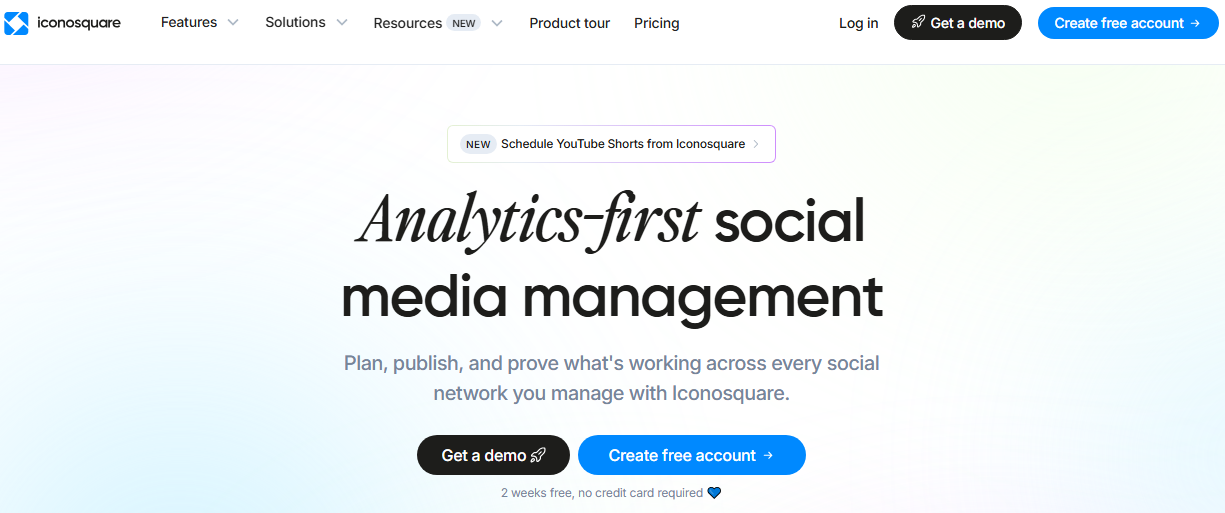
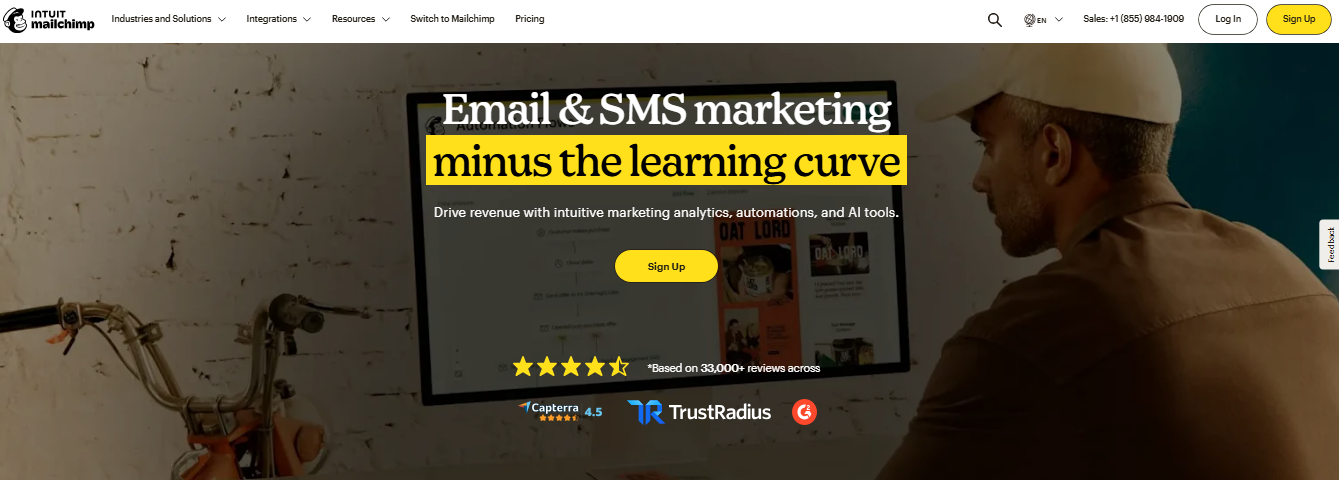
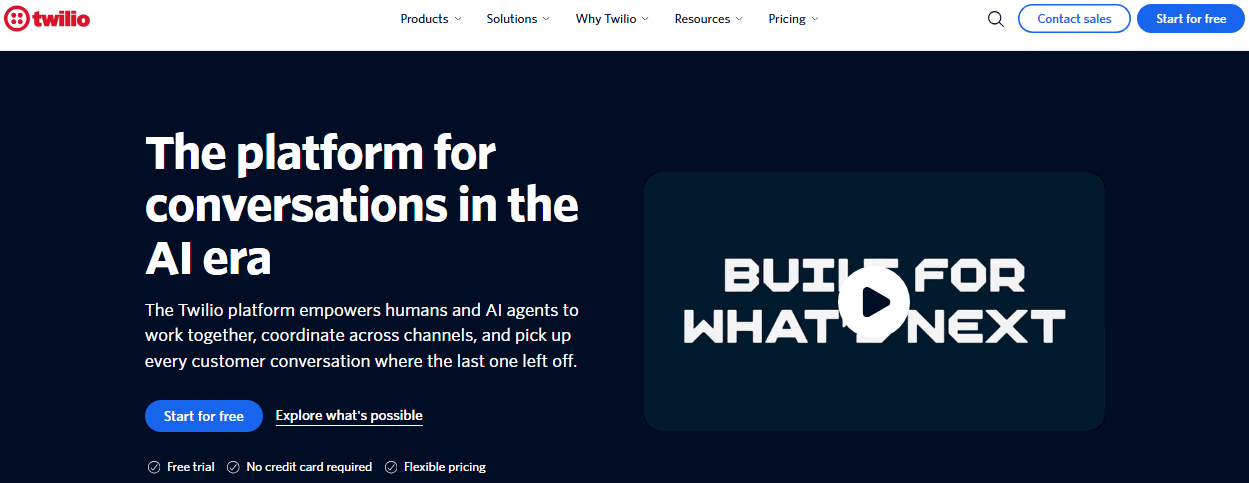

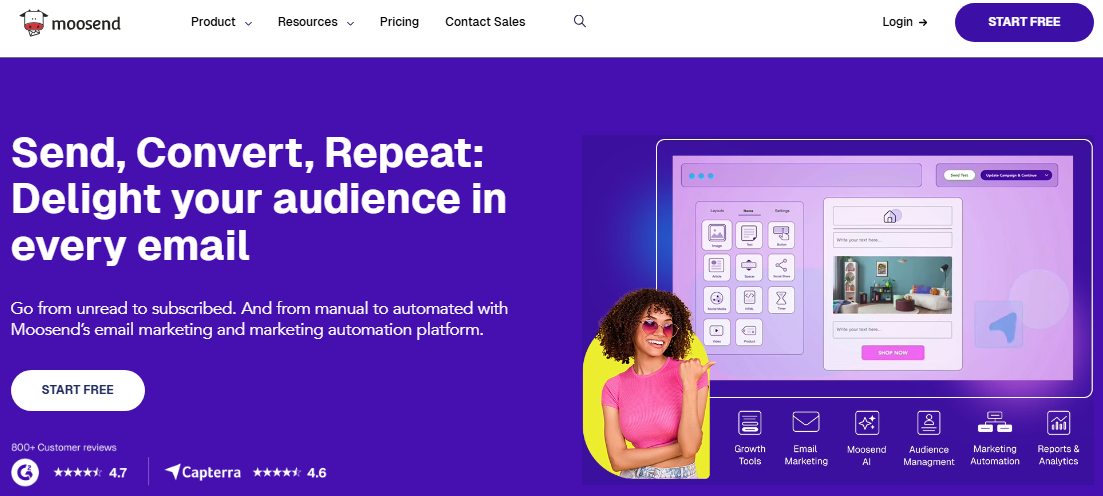
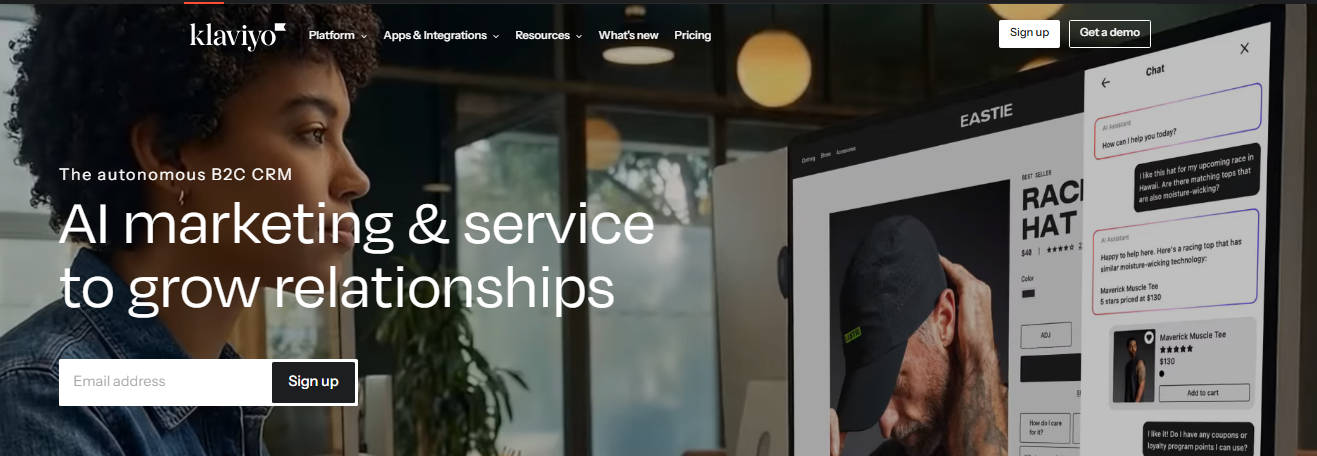
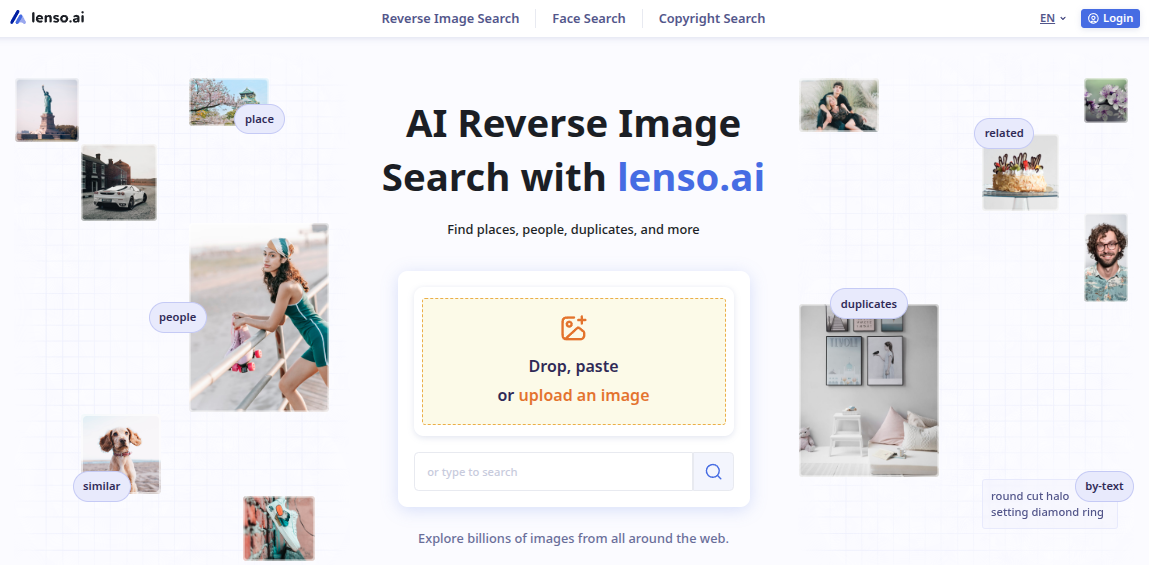
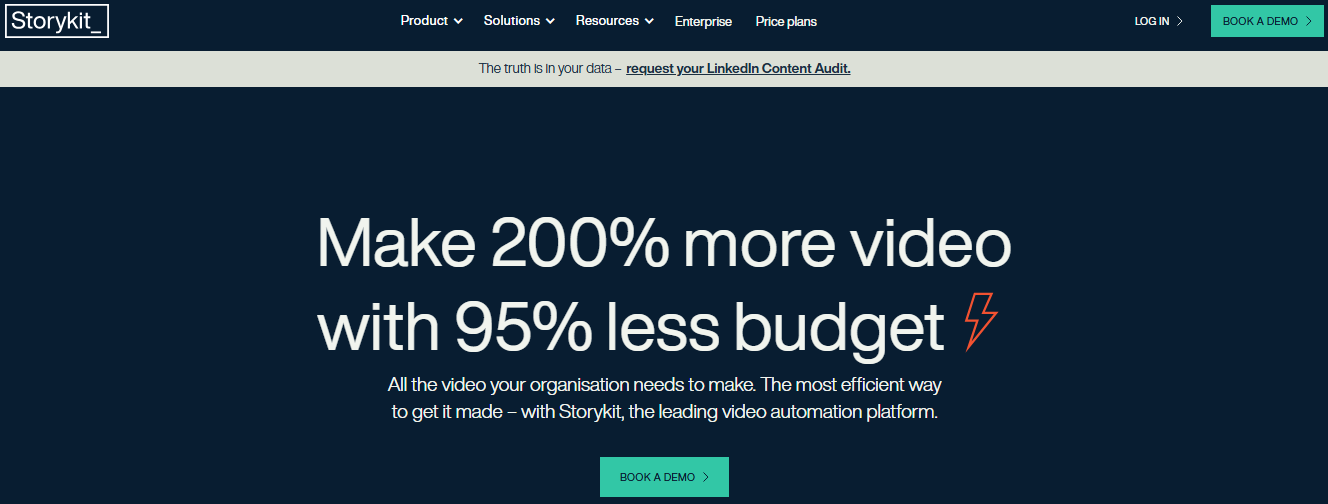
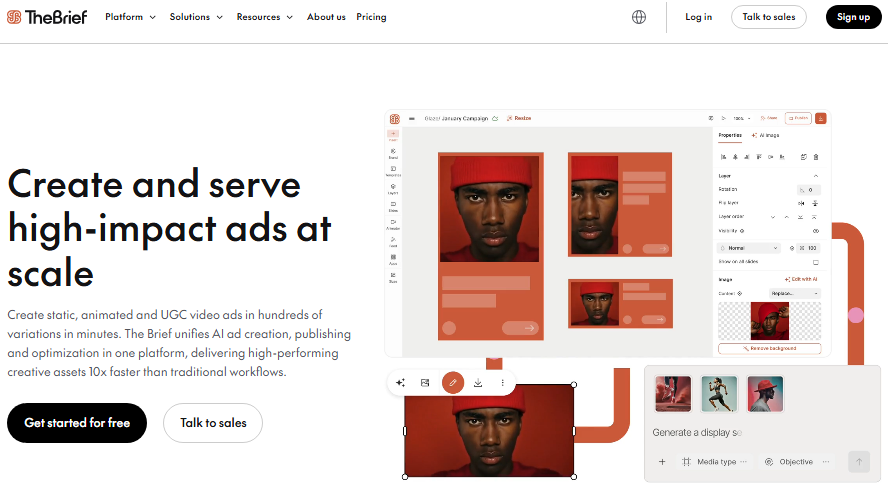
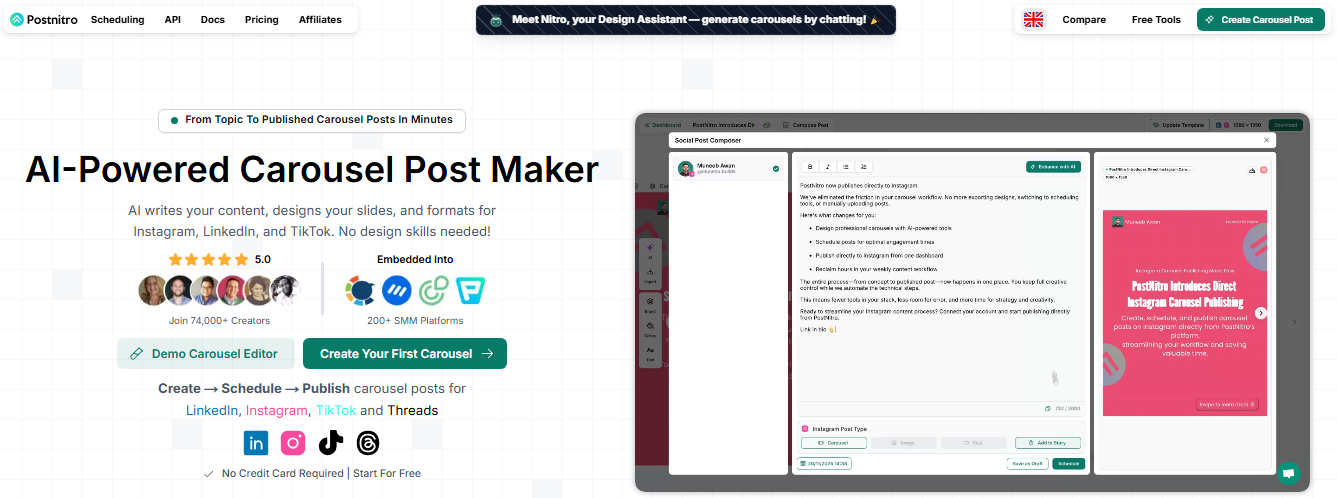
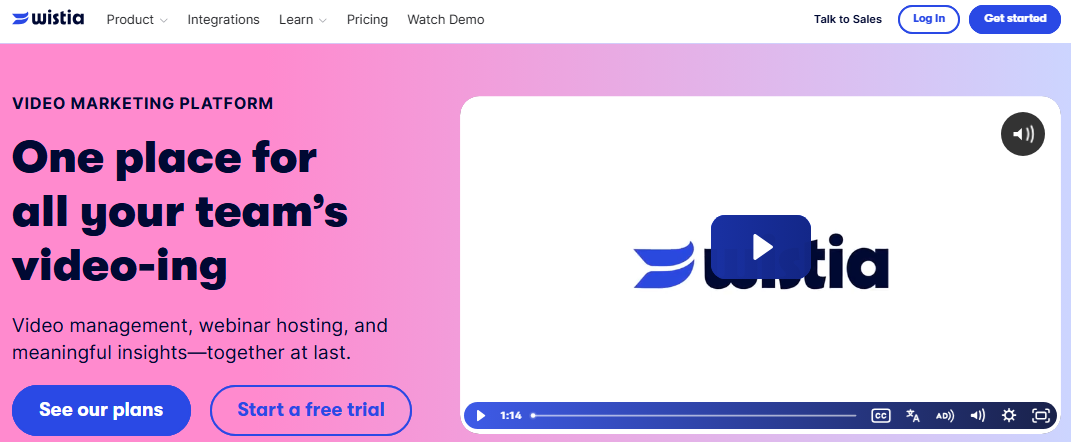
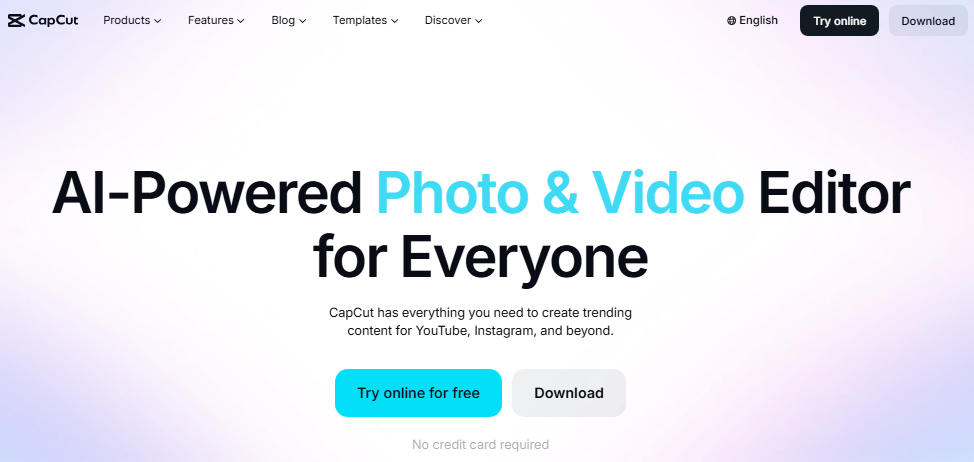


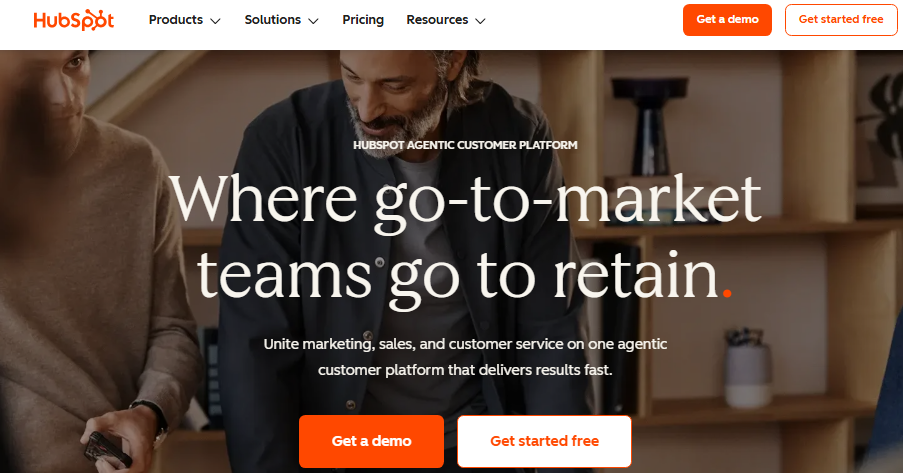
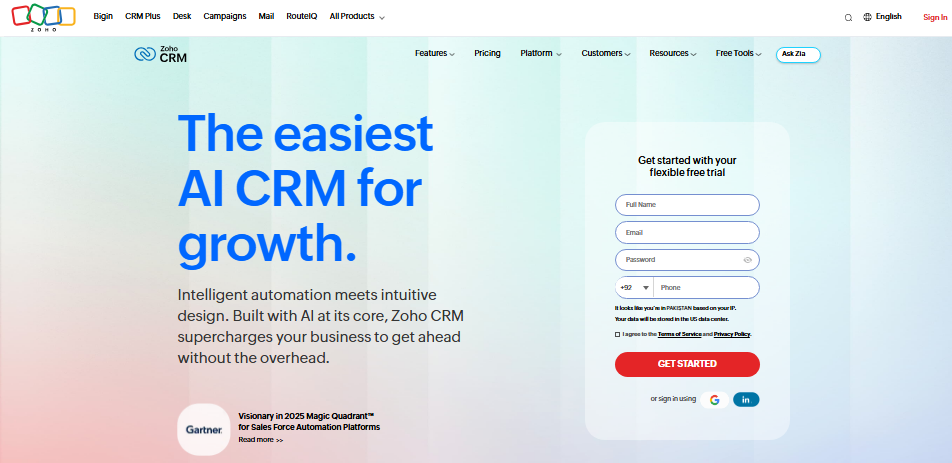
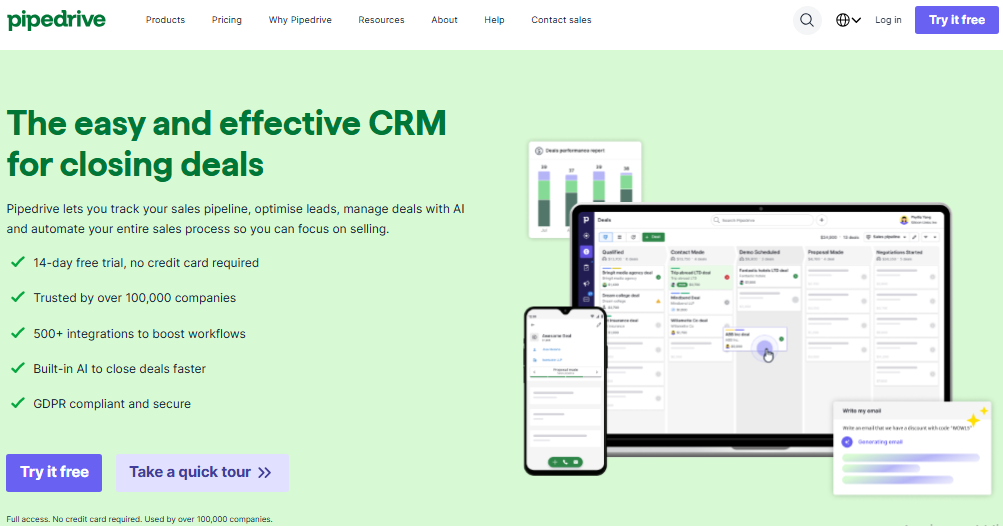


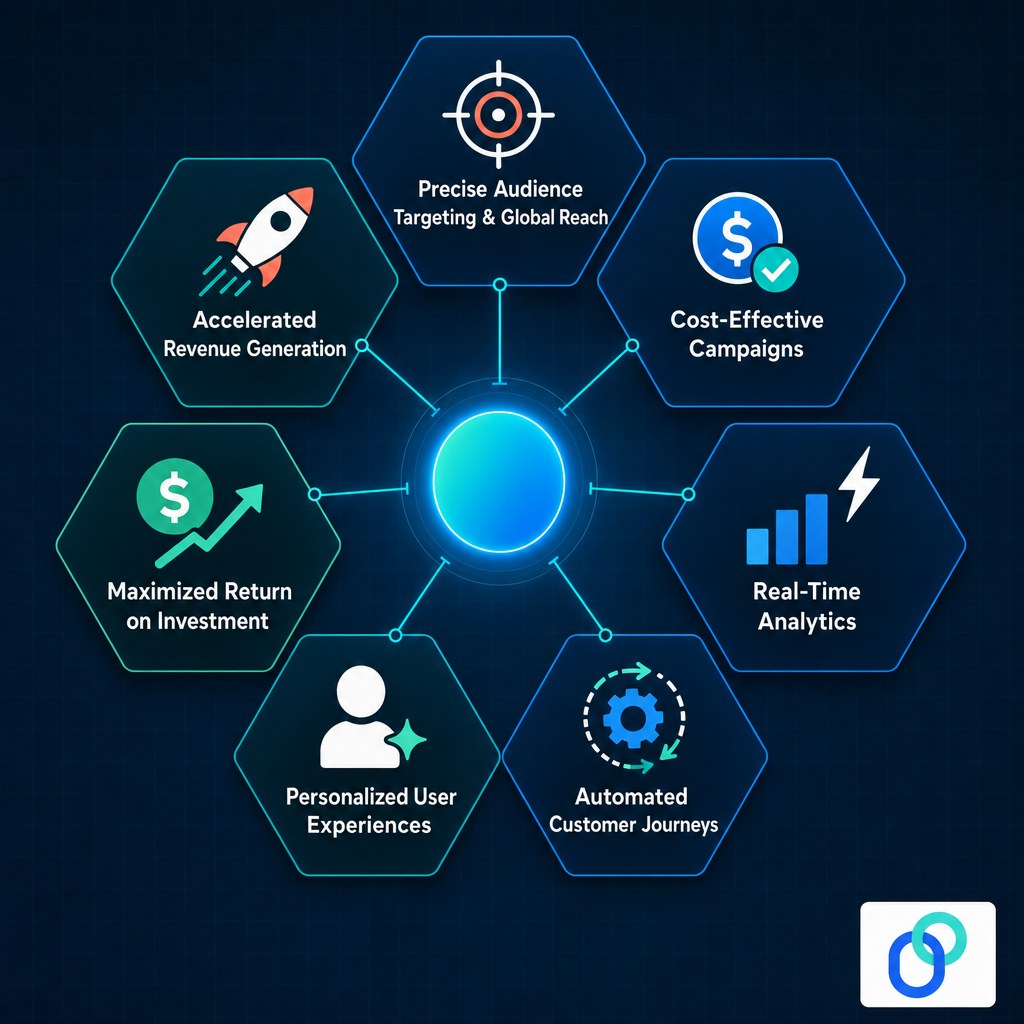
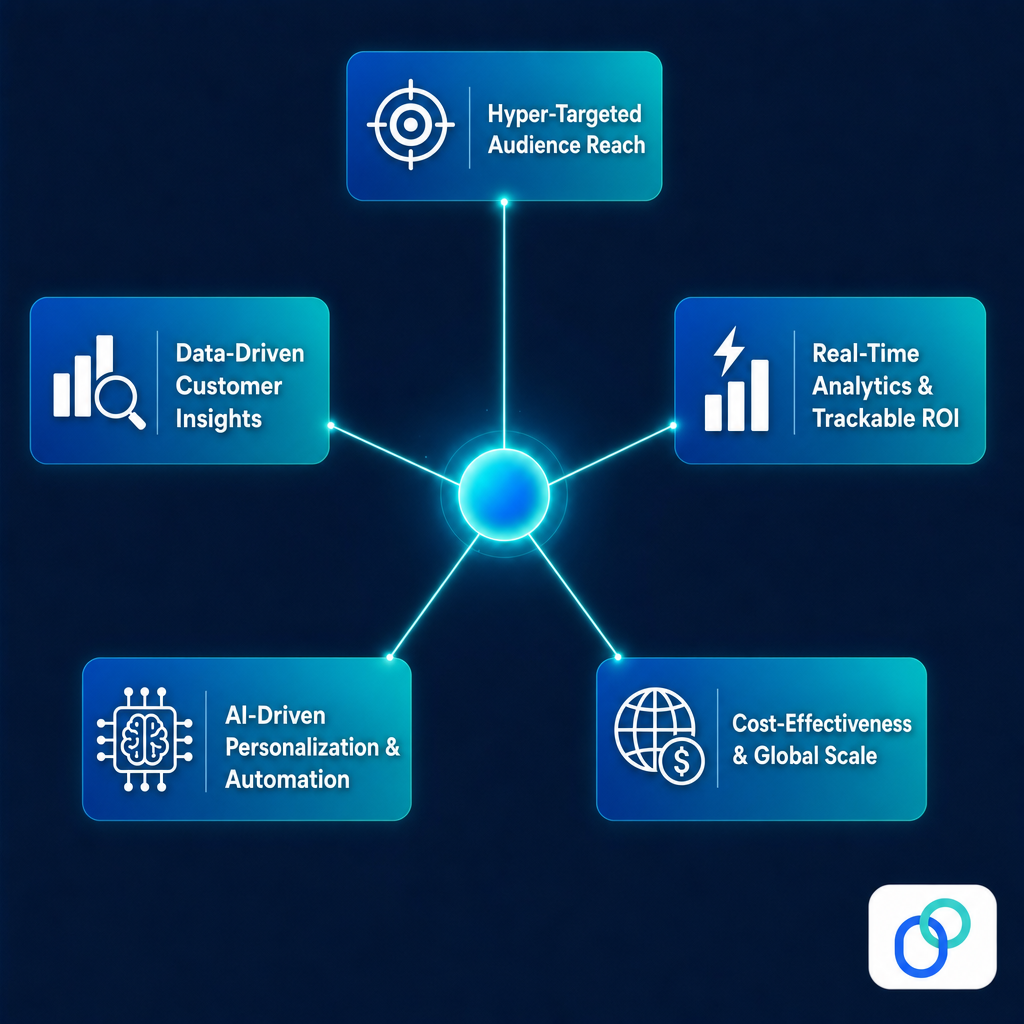
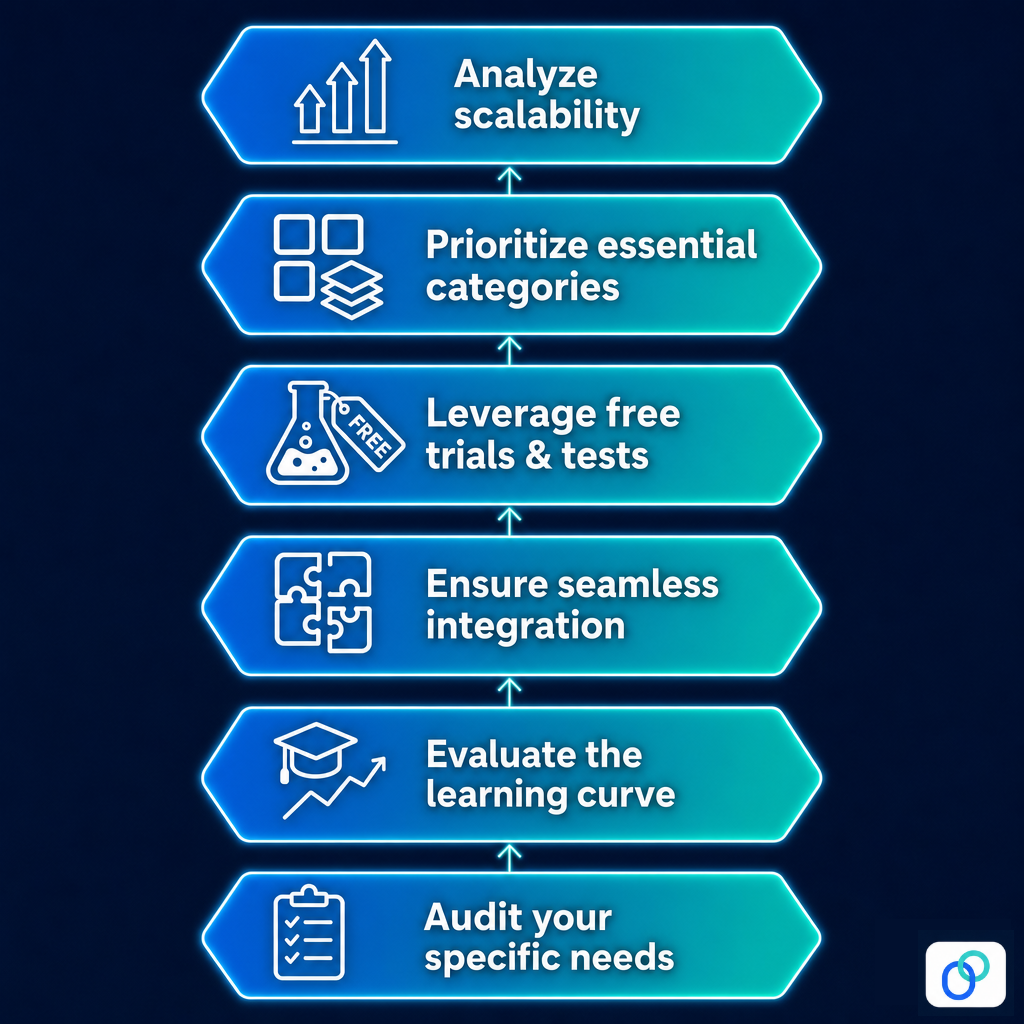
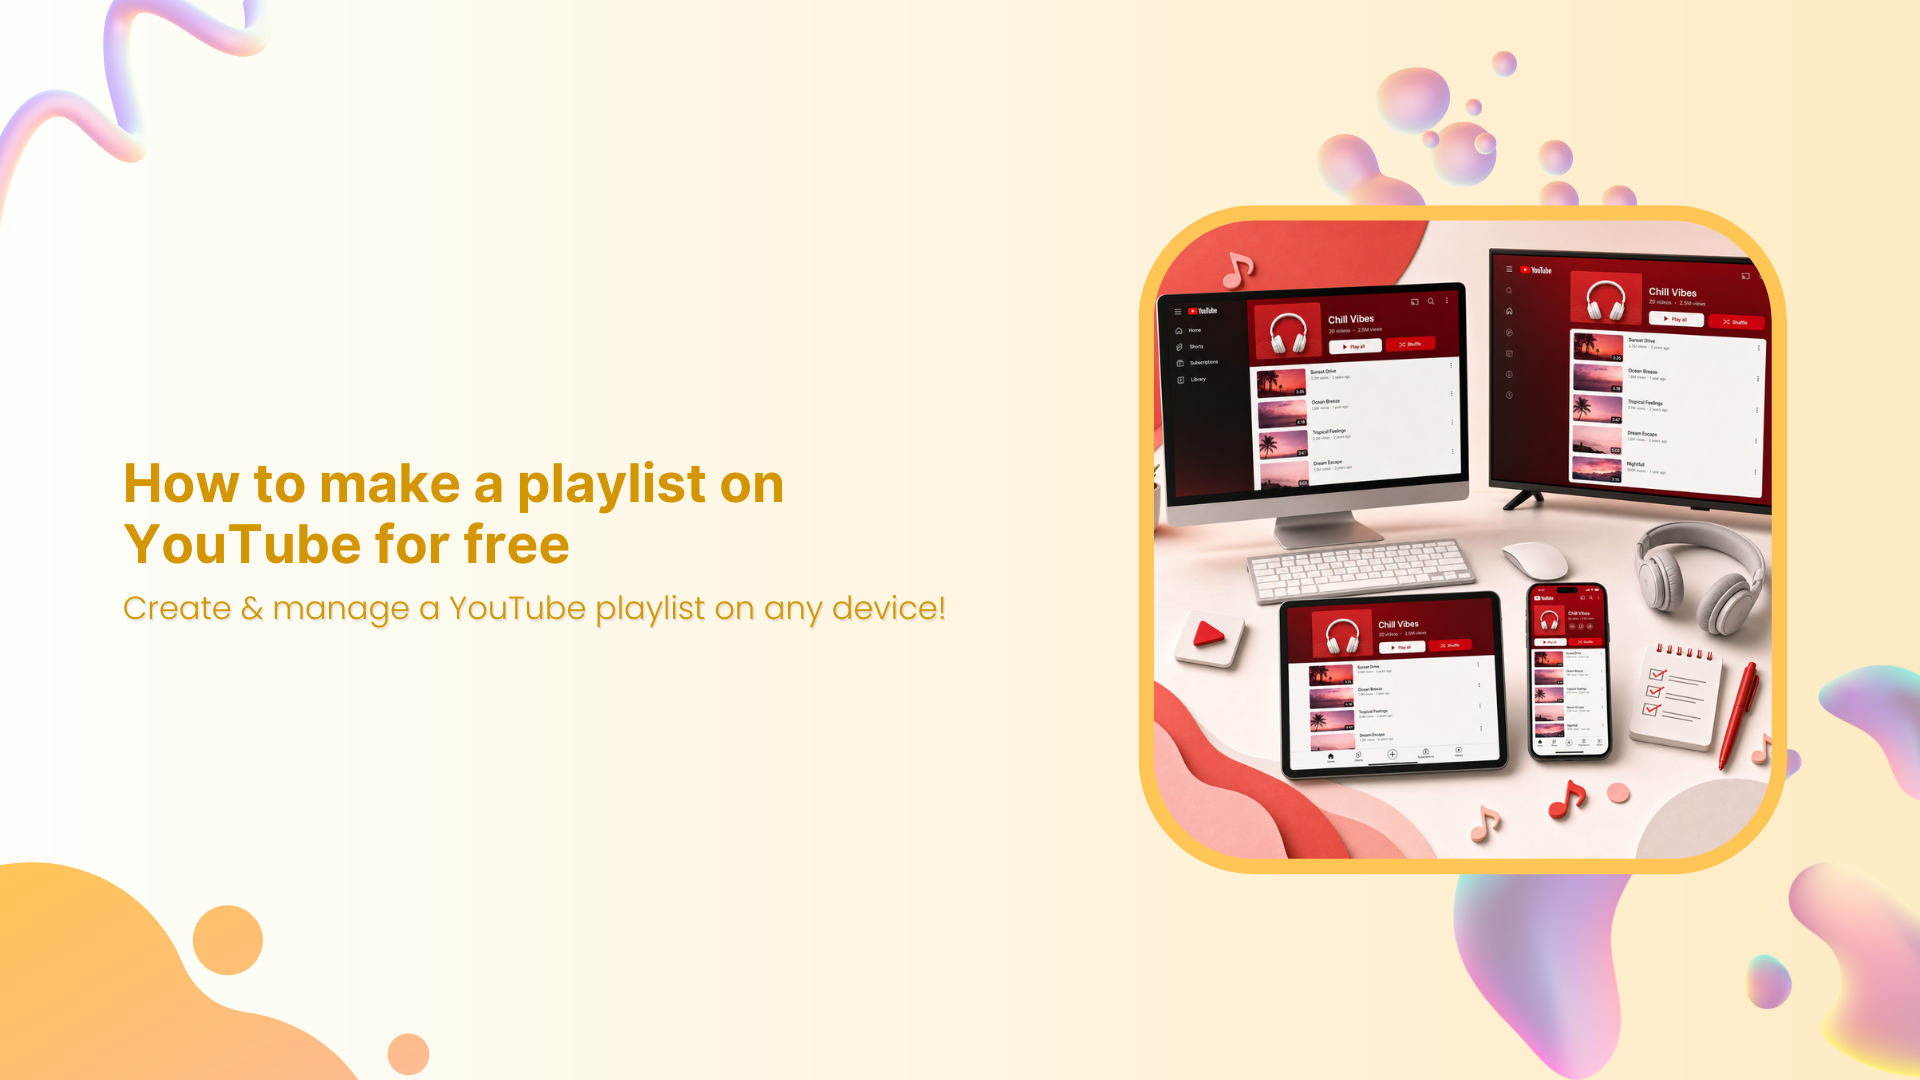


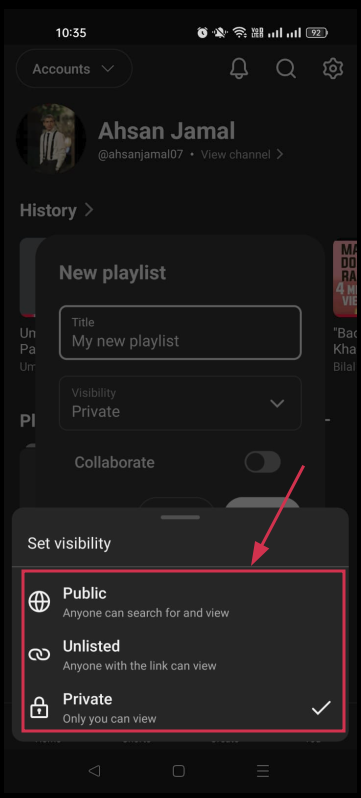
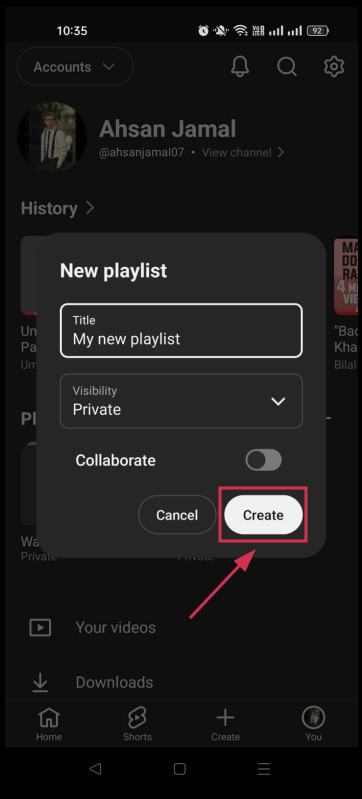
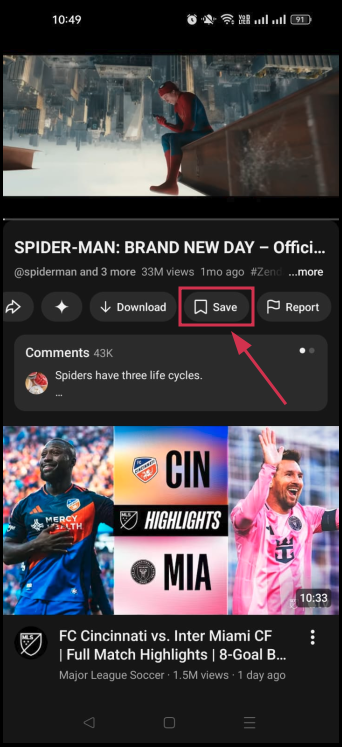
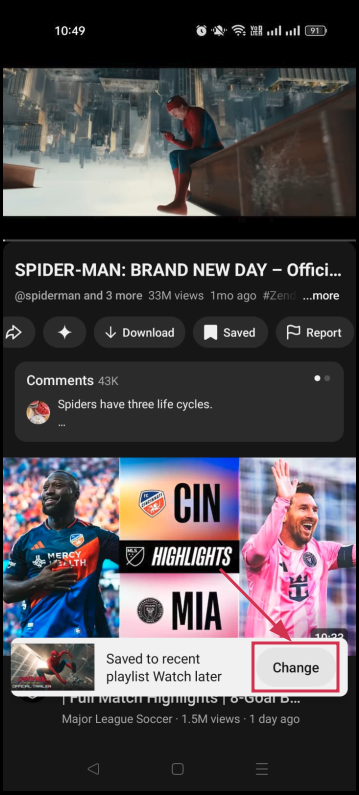
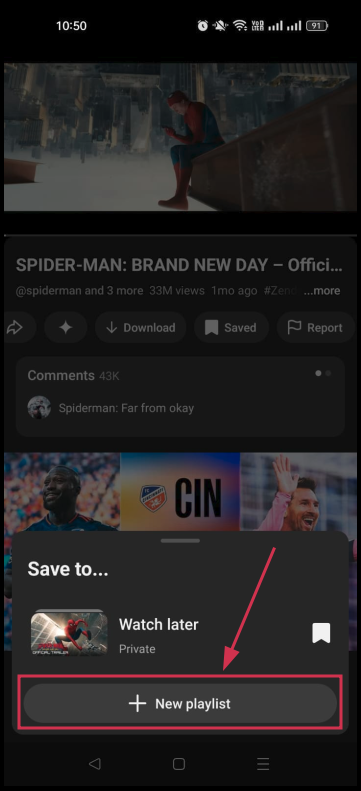

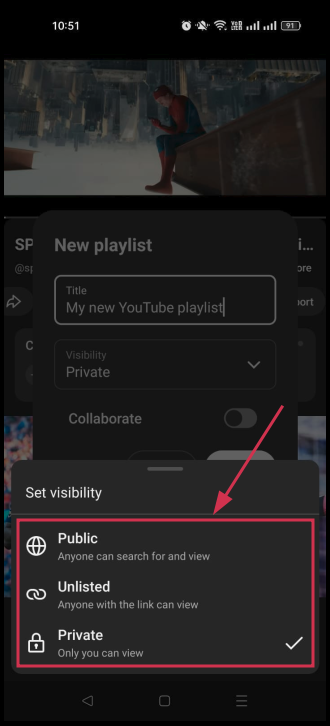
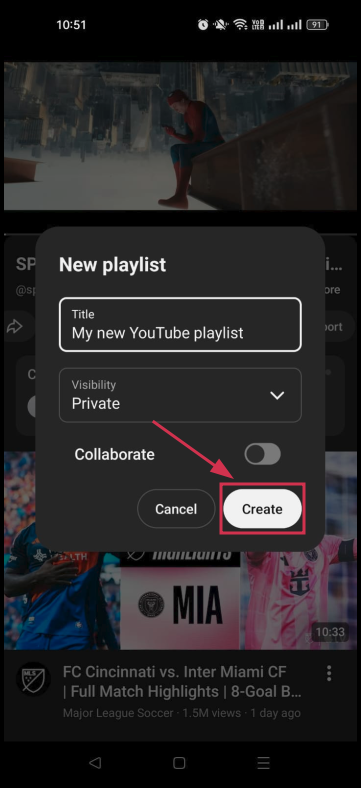

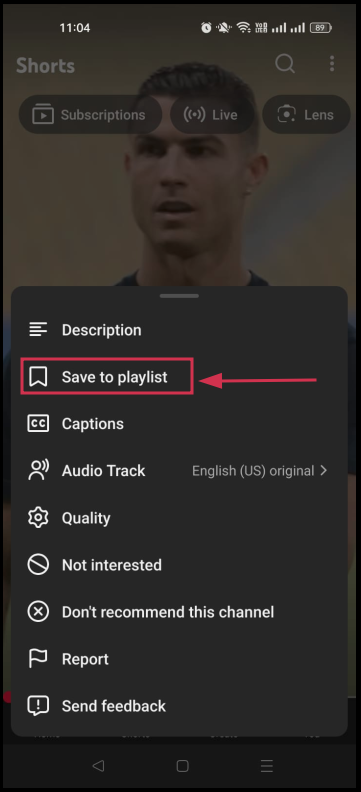
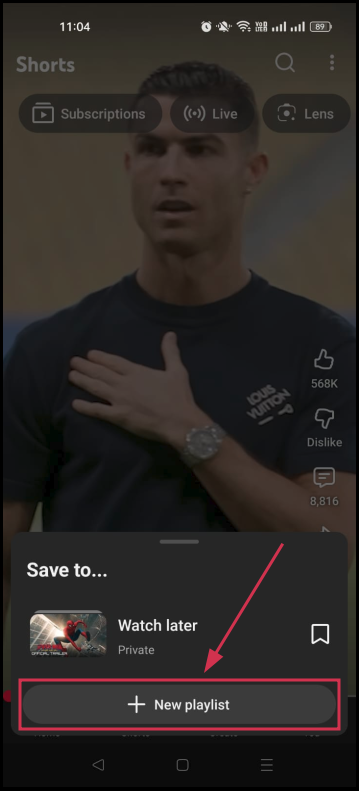
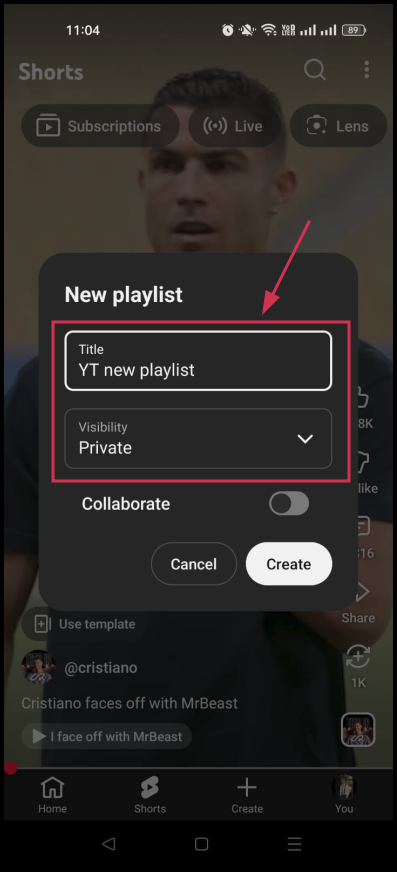
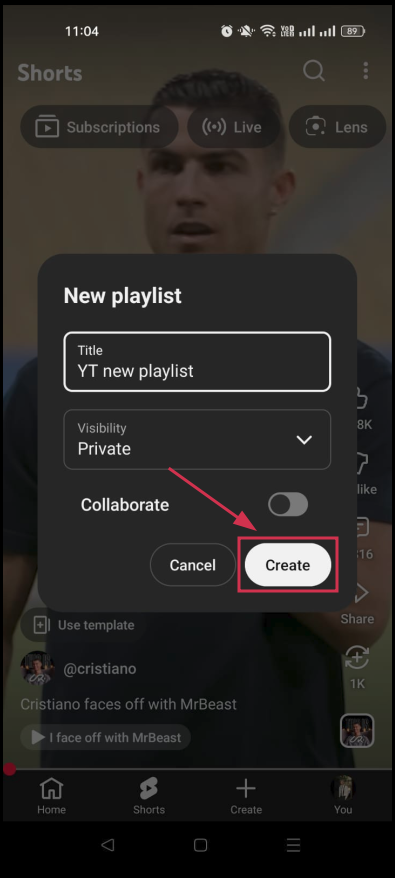
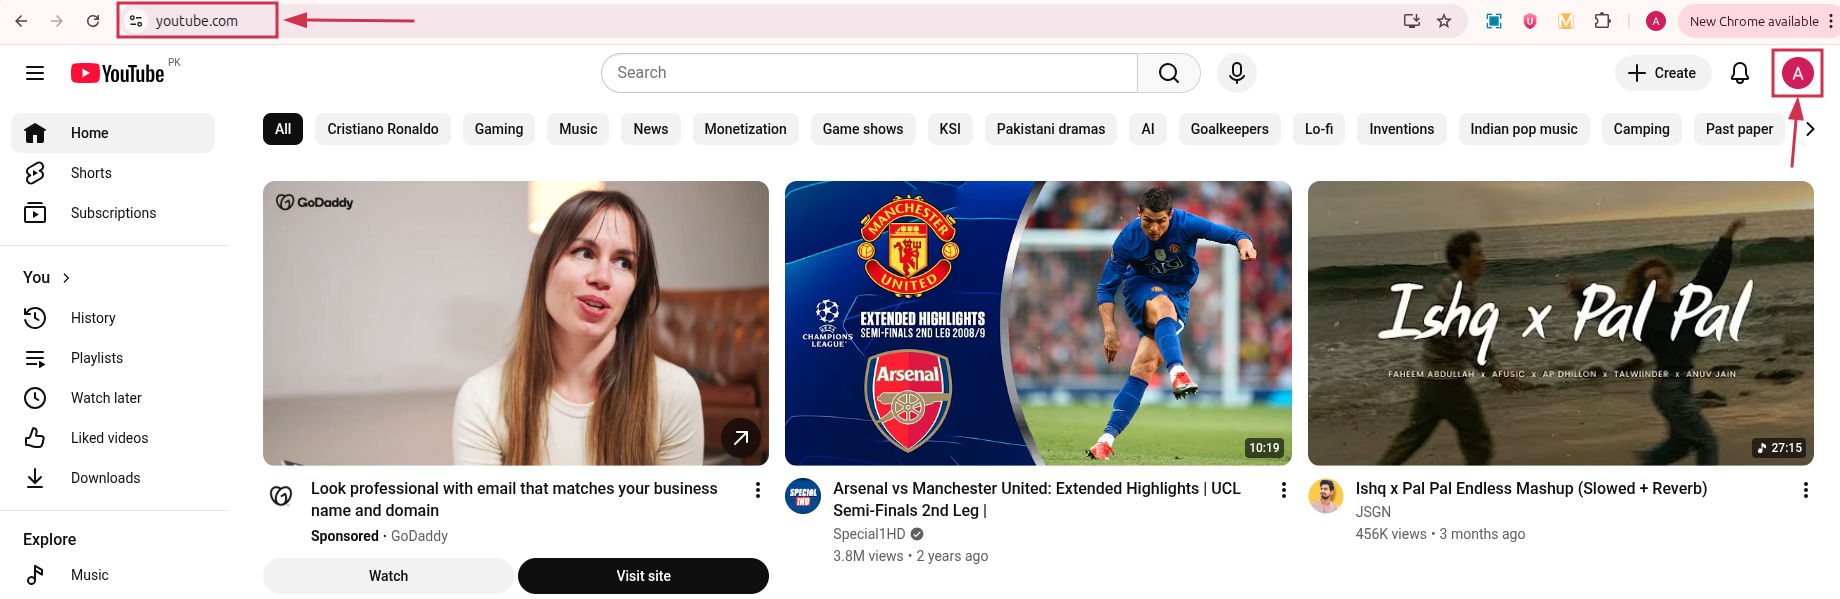
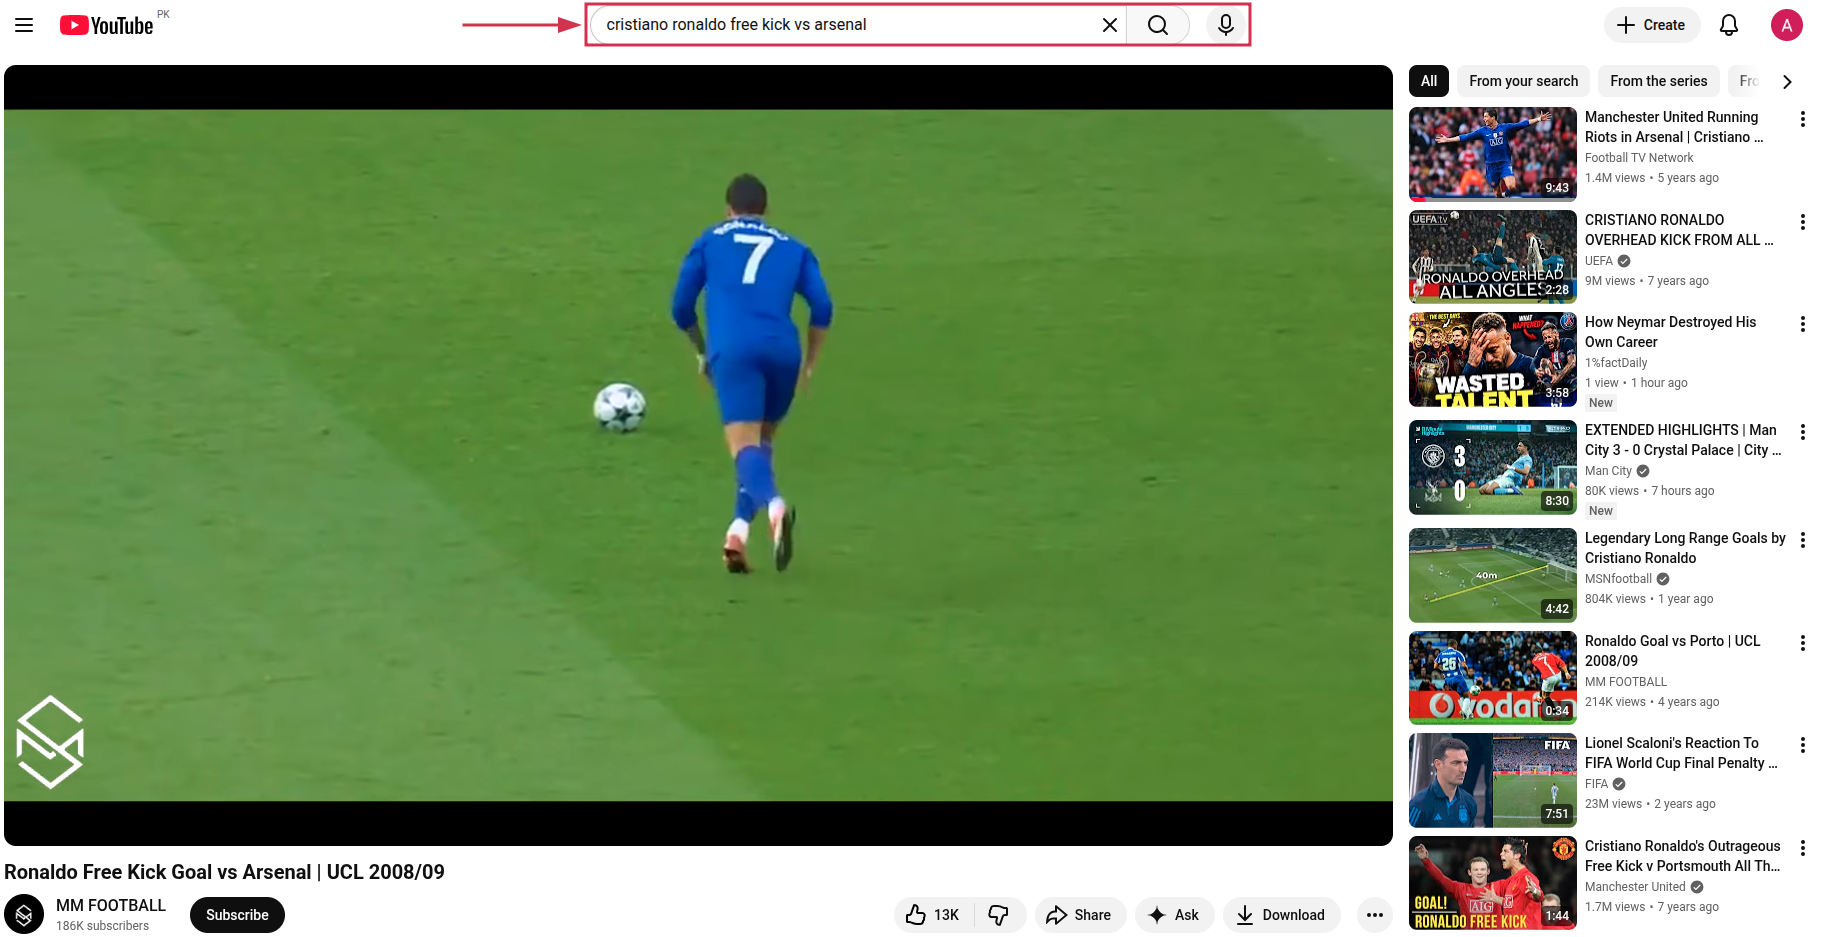


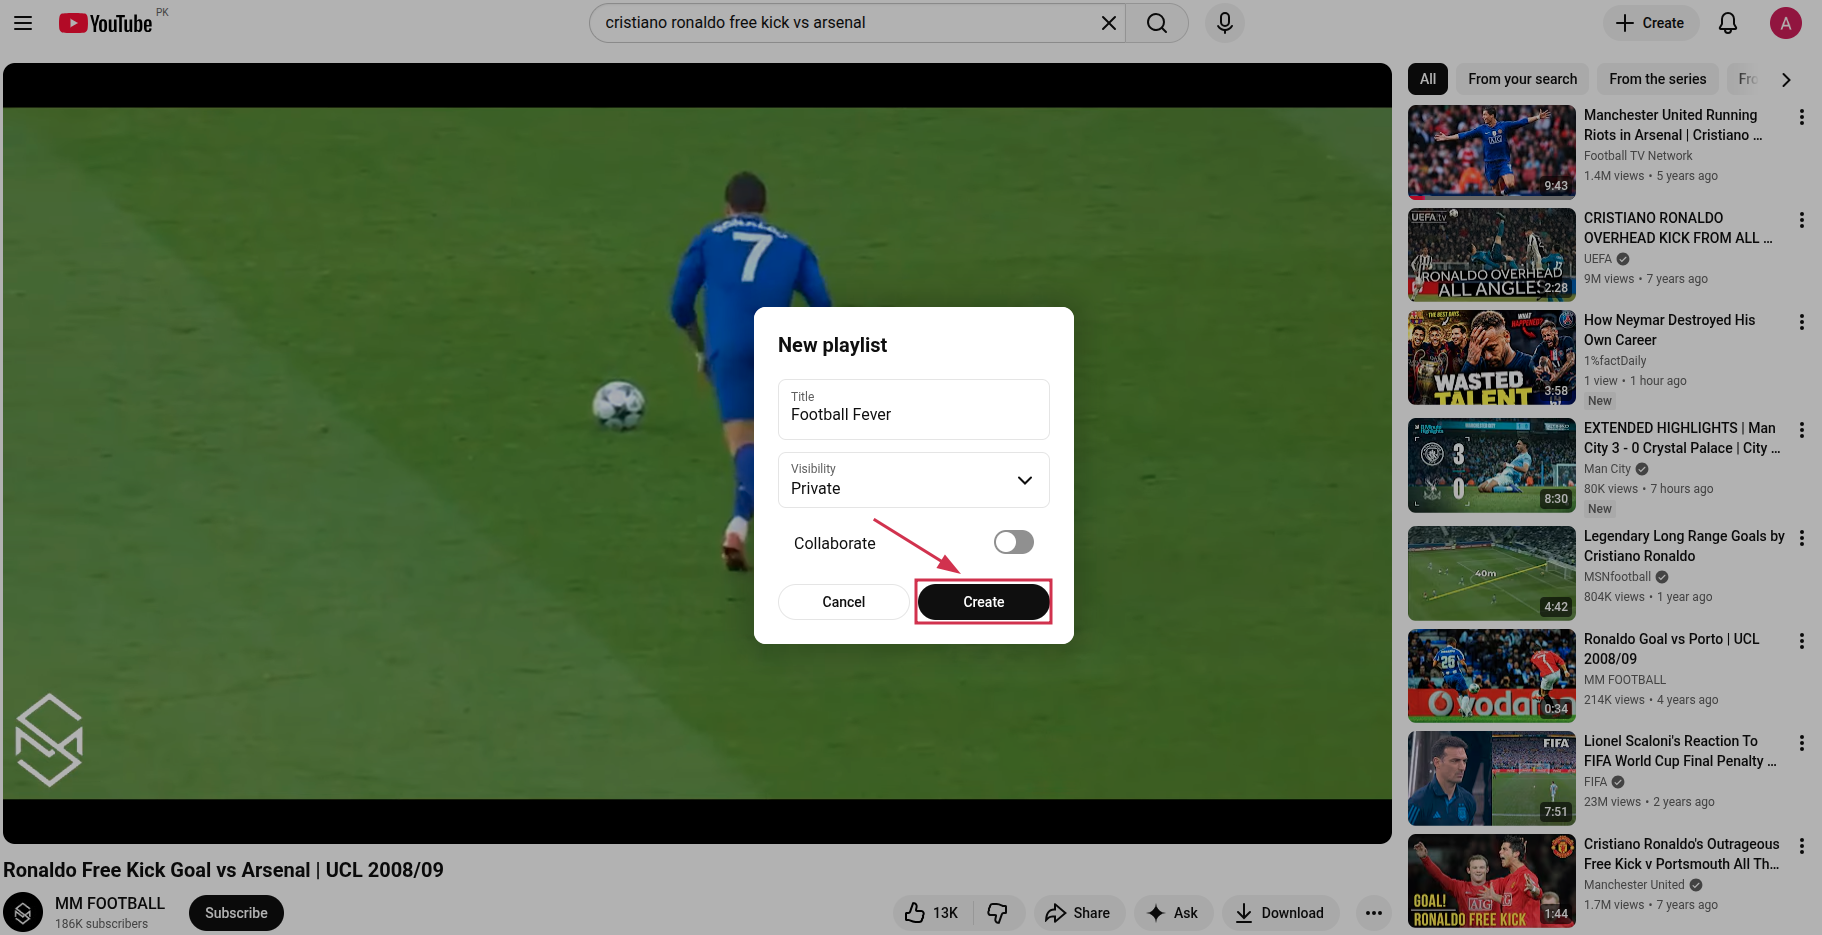

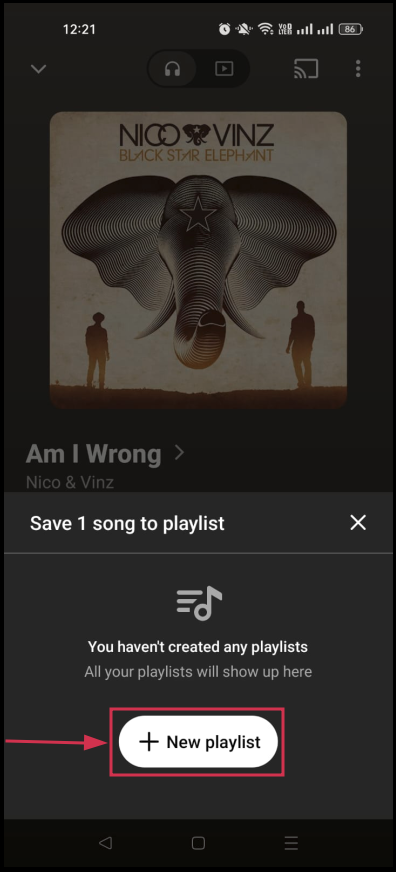
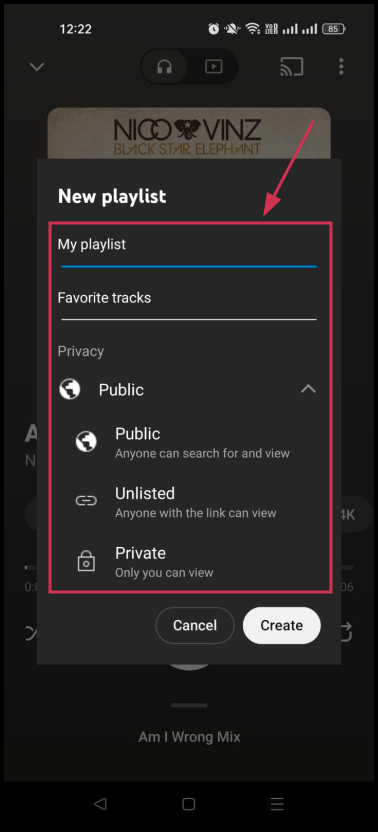
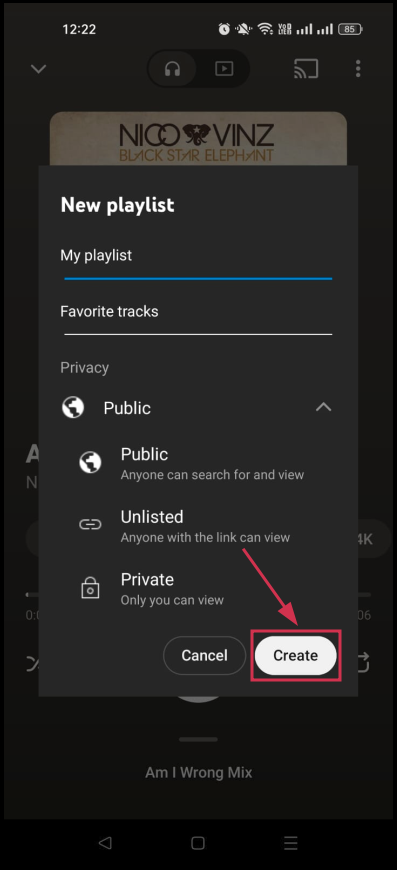
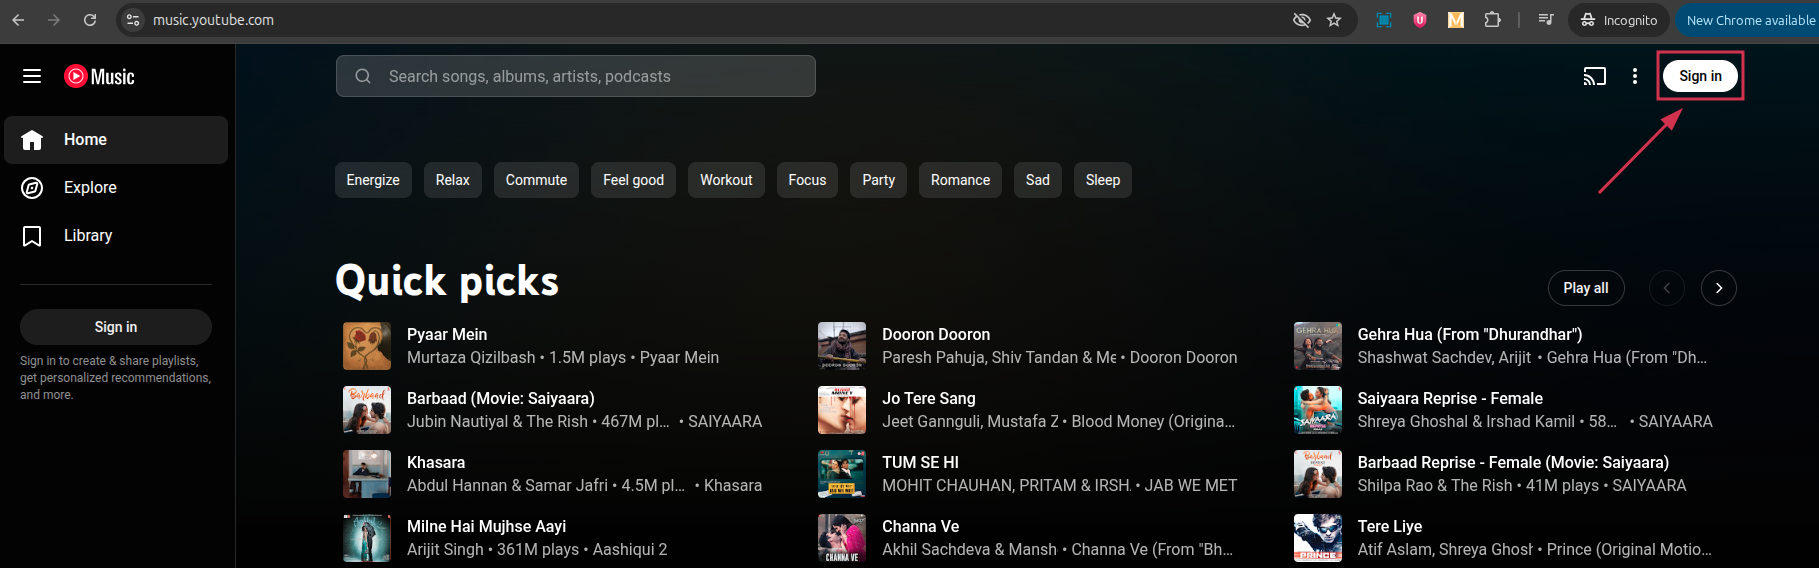

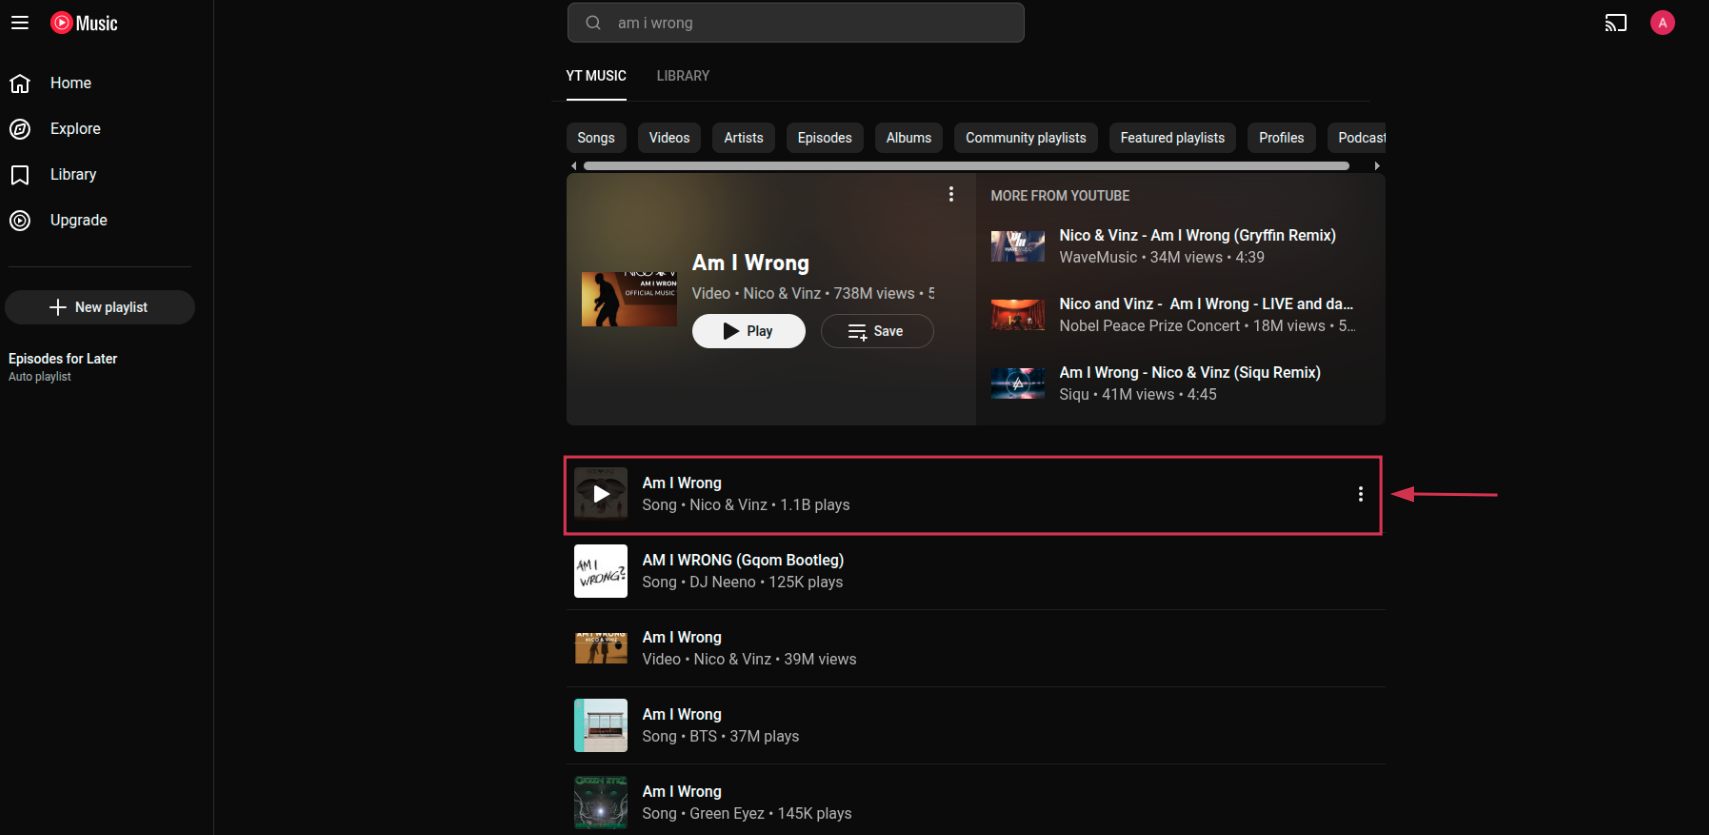
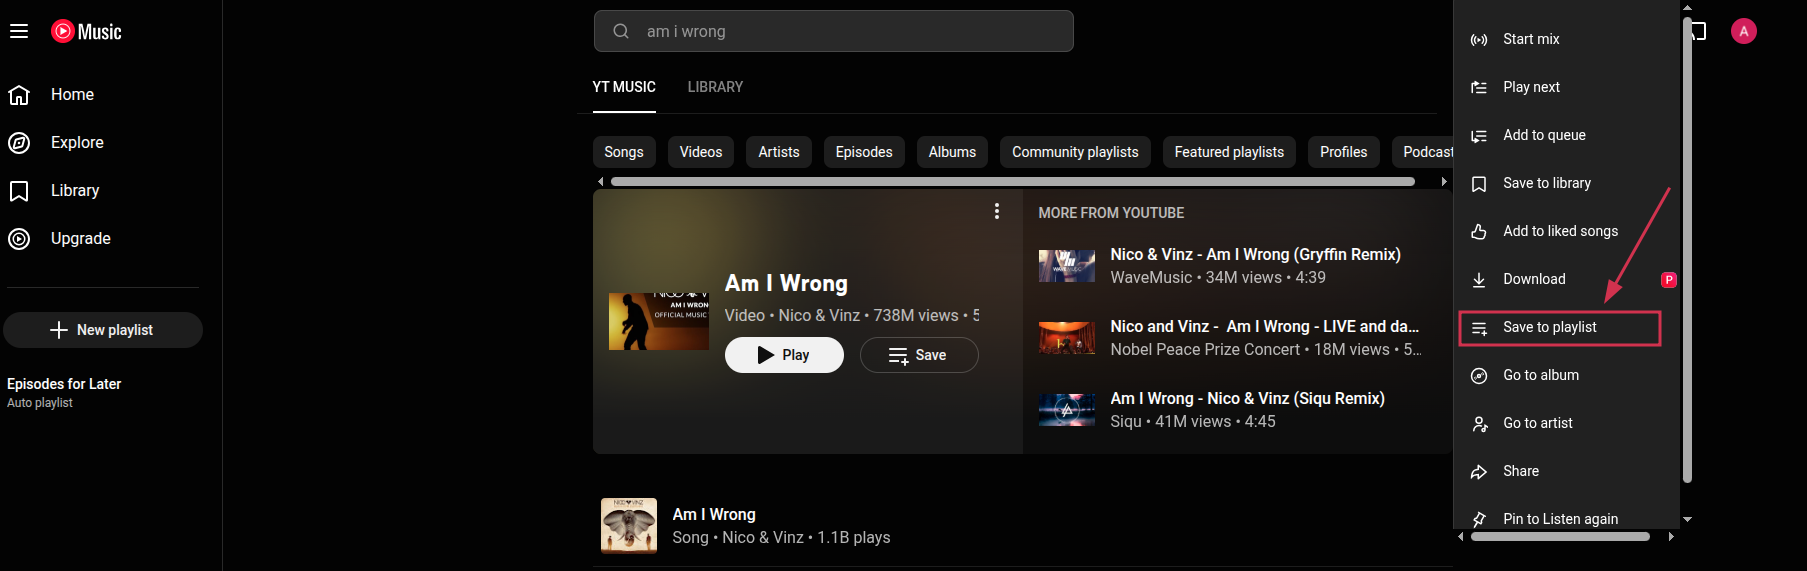
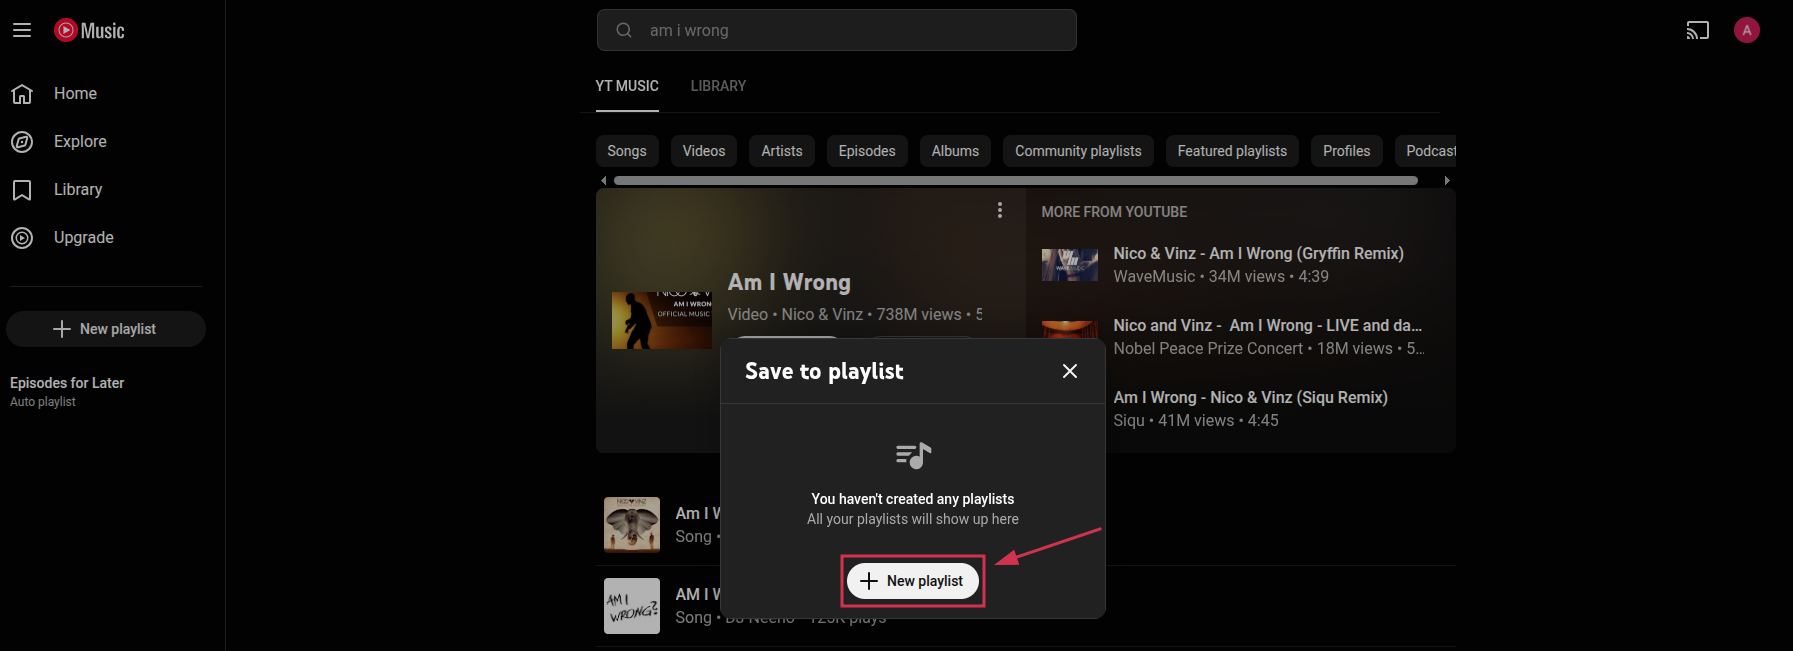
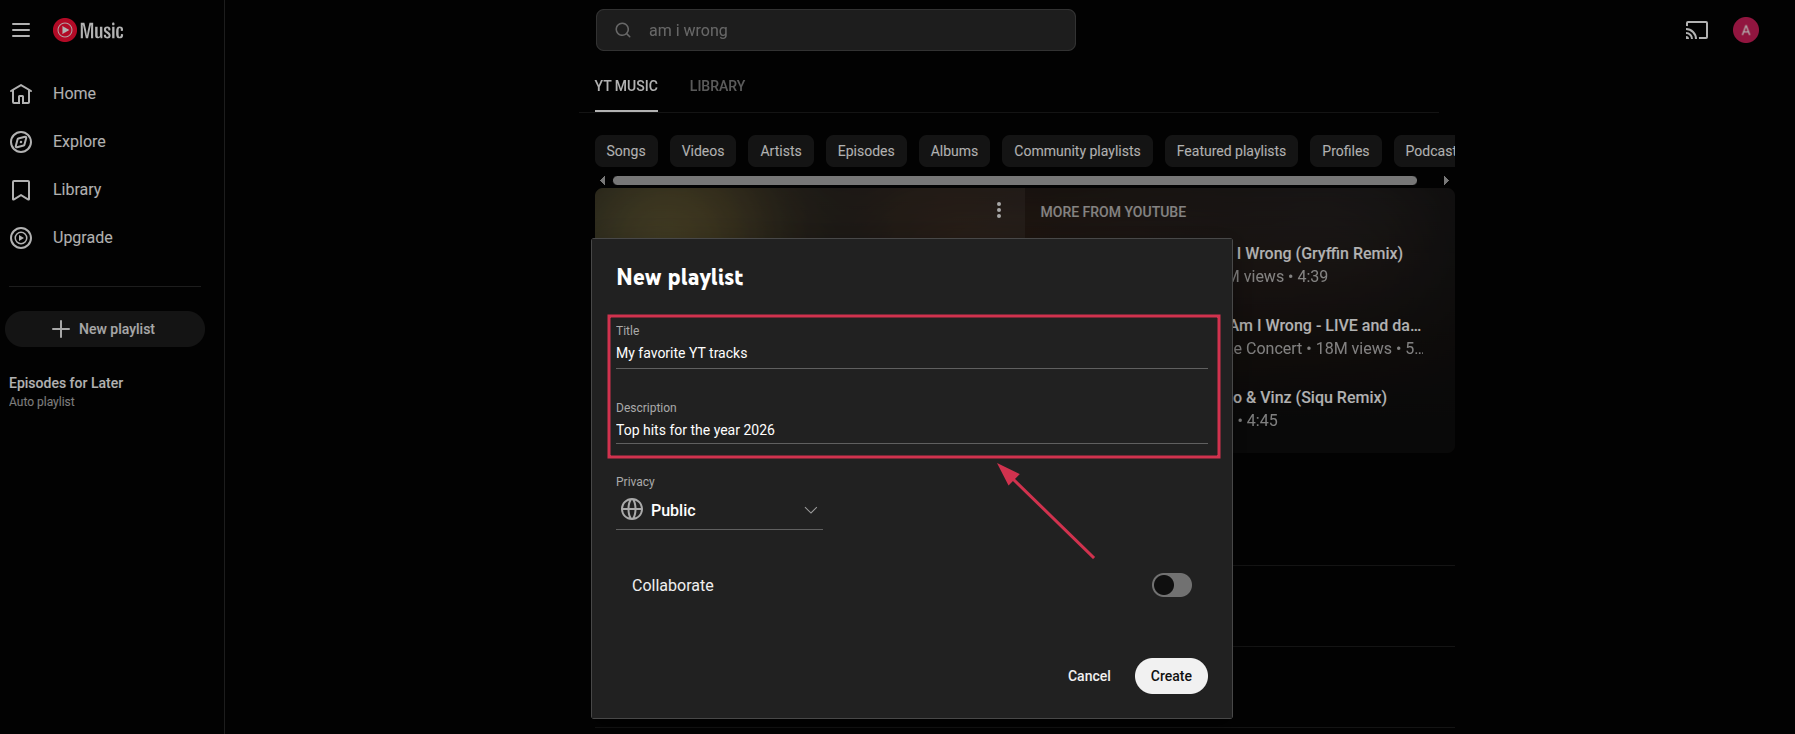
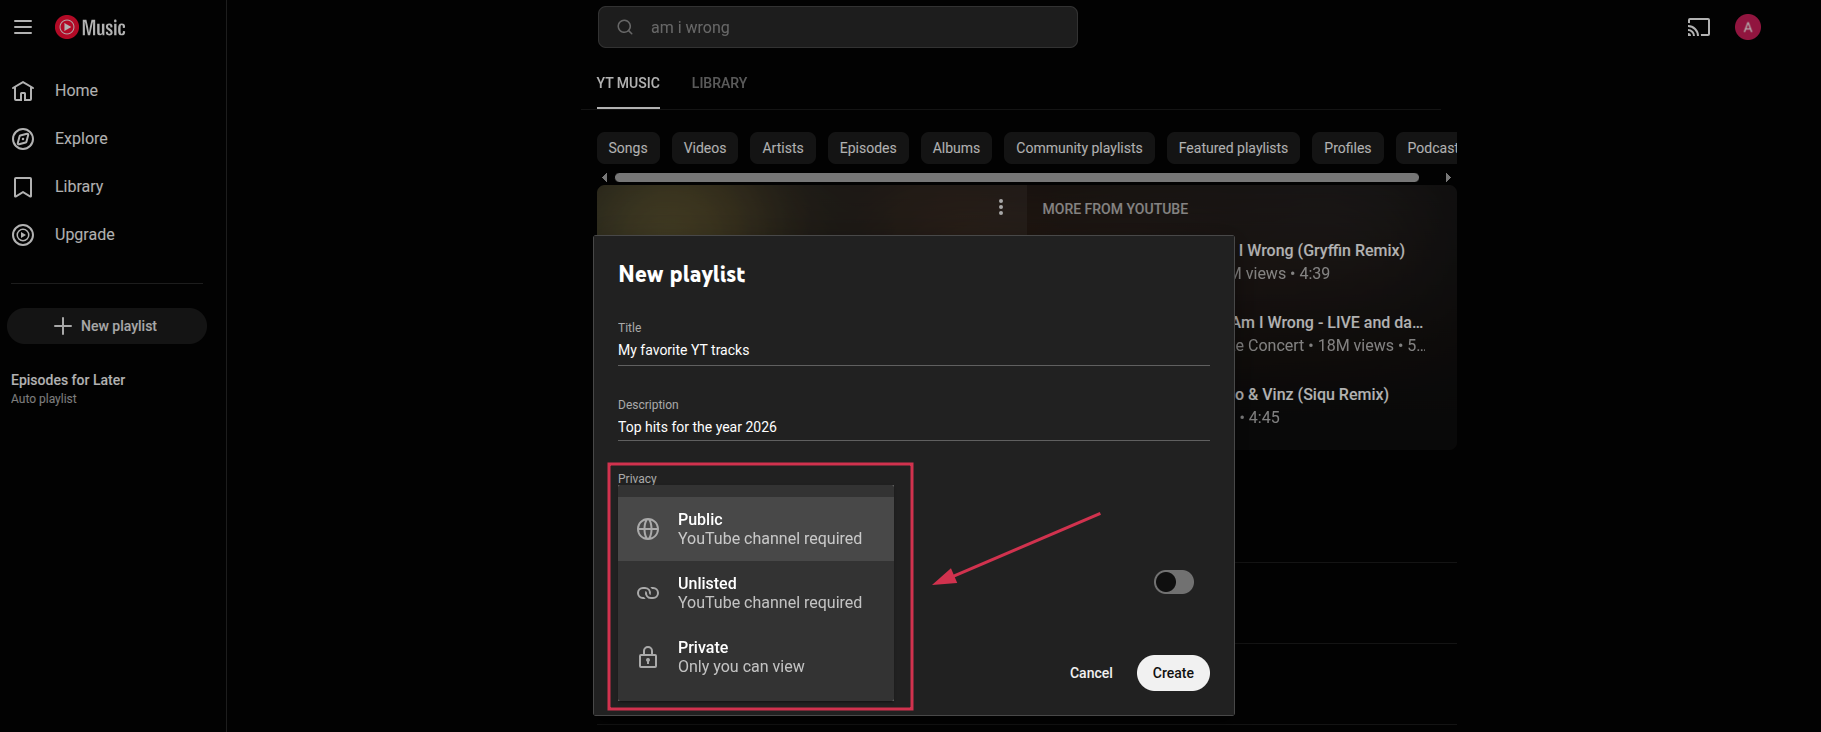
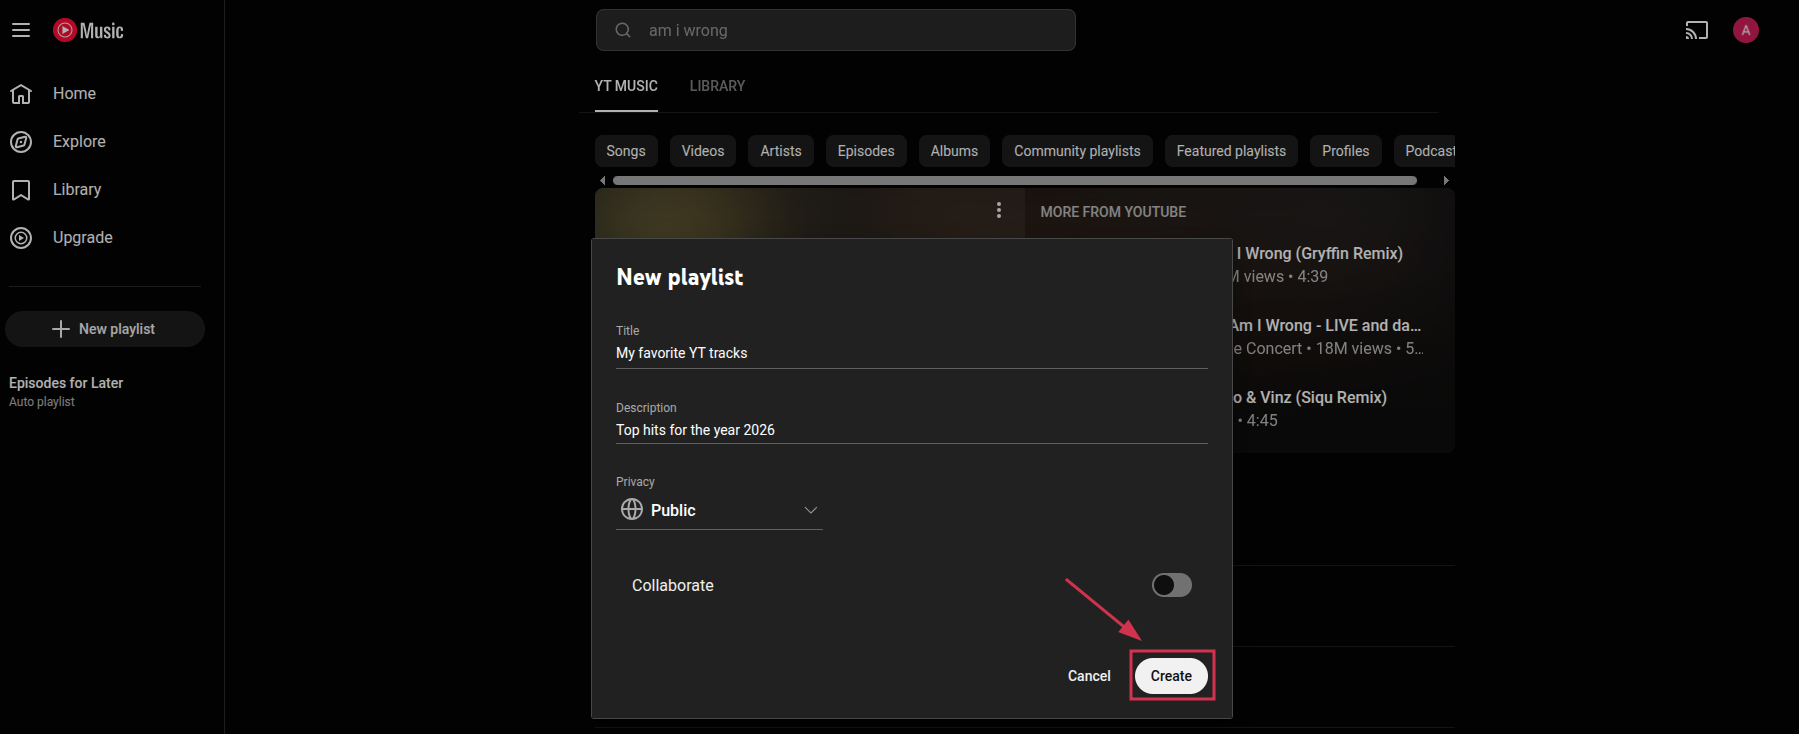
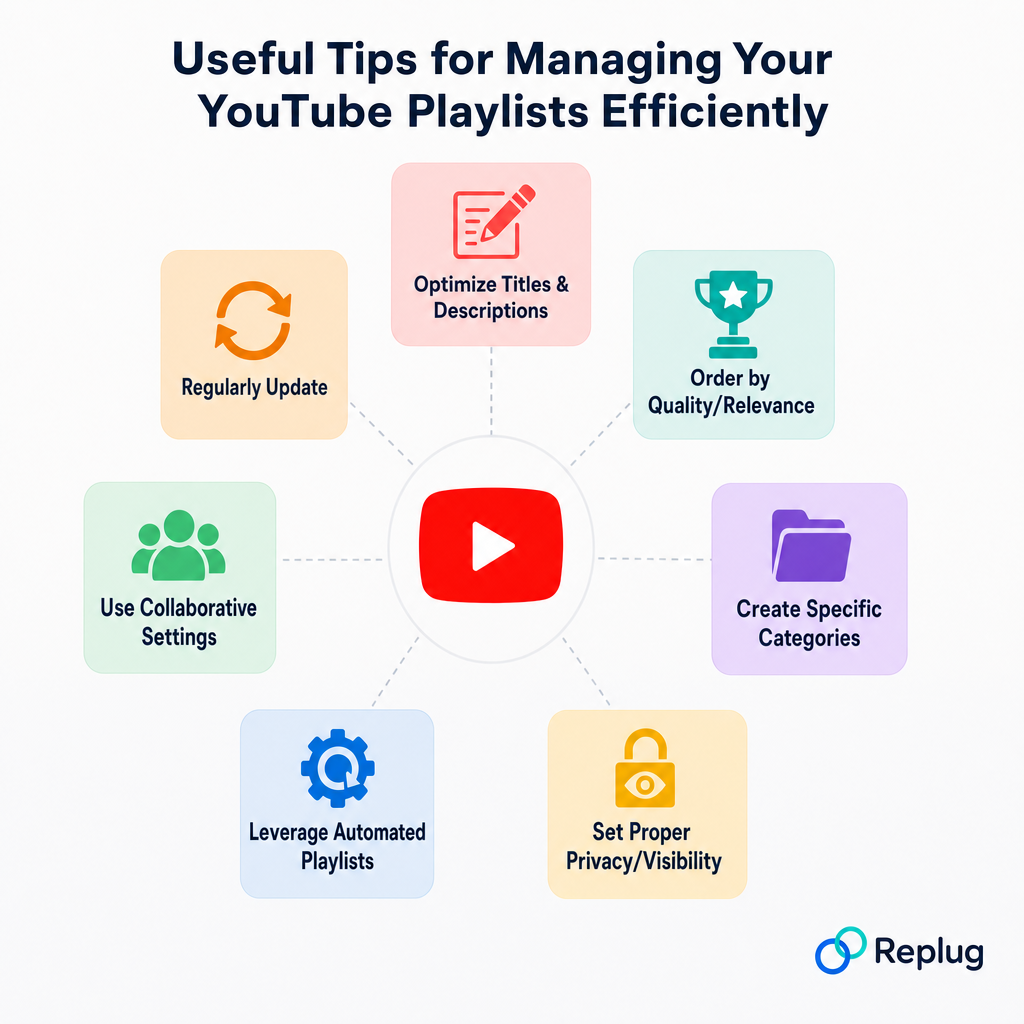

![How to start a YouTube channel for beginners [2026]: Step-by-step YT channel setup + tips for success!](https://internal-blog.replug.io/wp-content/uploads/2026/05/How-to-start-a-YouTube-channel-for-beginners-2026-Step-by-step-YT-channel-setup-tips-for-success.png)