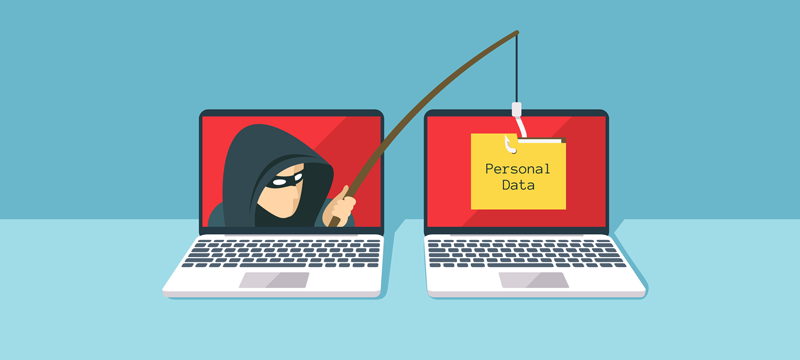
Picture this: you’re hurrying to type your desired website’s address, but unfortunately, you hit the wrong key. What seems like a tiny slip becomes the cue for a scammer.
This is the problem of URL hijacking, where unnoticed typos in our favorite URLs lead us straight into danger. It may seem unlikely, but studies show that the top 3,264 domains alone are targeted by roughly 281 typo variants each, on average.
Now, imagine the consequences: identity theft, drained bank accounts, brand reputations collapsing, all triggered by a single mistyped letter.
The agitation here is real, and the numbers don’t lie: around 68% of phishing sites rely on brand imitation, like misspelled domains.
But don’t worry, we’ve got some good news for you!
In this post, we’ll explore solid defense techniques for spotting, blocking, and preventing these hijacks before they happen. So let’s get started with a closer look at what exactly URL hijacking is, beginning with a quick summary of what it means when someone hijacks a web address.
What is URL hijacking: A brief overview
Think of browsing the web as entering the correct building number to meet a friend, but ending up at a look-alike house instead. That’s essentially what happens in URL hijacking.
Attackers manipulate web traffic so you end up somewhere you didn’t intend to. At its core, URL hijacking (or “typosquatting”) means redirecting users or using near-identical web addresses to funnel them away from the legitimate site.
The major objective? To exploit unsuspecting users (and search engines) for personal data theft, brand damage, or profit, typically through services disguised as the real deal.
What is URL hijacking in cybersecurity
When we talk about URL hijacking in the context of cybersecurity, we’re zooming in on how attackers take advantage of the web addresses you visit, i.e., the actual “links” or “locations” you type or click.
One frequent tactic is called typosquatting, in which an attacker registers a misspelled version of a brand’s domain (for example, “amazom.com” instead of “amazon.com”) and waits for people to land there by accident.
Another is redirecting or manipulating DNS or redirect codes so that you believe you’re going to a trusted page, but you actually land on a malicious look-alike.
From a user’s perspective, this means: you click a link, everything looks legitimate, but behind the scenes, you may be entering your credentials, payment info, or other sensitive data into a fake site. That’s what makes URL hijacking a serious cybersecurity threat.
How does URL hijacking work?
Let’s walk through how this sneaky trick happens in real life. First, the attacker sets the stage, then everything else falls into place. Here’s how the workflow typically unfolds, in a reasonably straightforward way.
Workflow steps:
Domain registration or control: The attacker registers a domain name that closely mimics a legitimate site’s address (e.g., by adding or changing a letter, swapping characters, or using a different top-level domain).
Replication of look and feel: They build a website on that domain that imitates the legitimate brand’s logo, layout, colors, and content, so that casual visitors don’t notice the difference.
Driving traffic: Victims arrive via mistyped addresses (e.g., entering “exampel.com” instead of “example.com”), phishing emails with the fake URL, misleading ads or links, etc.
Redirection or landing: Once the user lands on the spoofed domain, they might be redirected elsewhere, asked to log in, enter payment details, download something malicious, or simply be shown ads.
Exploitation or profit: The attacker gathers credentials, installs malware, hijacks sessions, steals financial or personal data, or monetizes the traffic via affiliate links or advertising.
Covering tracks or scaling: They may register multiple domain variants, shift hosting, change DNS entries, or use redirection chains to evade detection and keep the scam alive.
That’s the typical route from a simple typo or deceptive link to a full-blown hijack.
Permanent & temporary redirects: The major culprits behind URL hijacking
Redirects are a widely utilized tool on the web today. They are used for everything from changing domain names to rerouting traffic during maintenance.
But when used (or misused), especially with the wrong type of redirect, they can become a major weakness that allows someone to hijack your URLs quite easily.
Here are the key types of redirects and how they play a key role in URL hijacking:
Permanent redirect (HTTP 301 / 308): This tells browsers and search engines, “this page has moved for good to this new address.” When used properly, it’s safe and clear. But if someone uses it maliciously, they can shift traffic and visibility away from your legitimate URL.
Temporary redirect (HTTP 302 / 303 / 307): This says “the content is temporarily at this address, but it will return.” The issue here is that search engines may get confused about which URL is the “real” one and may transfer ranking or visibility to the wrong URL. This is exactly what hijackers exploit.
Redirects from typos or look-alike domains: An attacker registers a domain that’s almost the same as yours (think one letter off) and sets up a redirect. Sometimes the redirect is temporary and sometimes permanent. However, the ultimate goal is to divert visitors or hijack your traffic.
Redirect chains or hidden/mis-handled redirects: Multiple hops of redirects, or the use of scripts/meta refresh, may conceal where a user ends up. This increases the chances of something going wrong, getting flagged, or getting hijacked.
In short, you must make sure you’re using the correct type of redirect for your purpose, and monitoring any unexpected ones. This is because misused temporary or permanent redirects are often the gateway to unauthorized traffic takeover.
Various forms of URL hijacking: Common methods listed
URL hijacking isn’t just one simple trick! There are several different practices attackers use to redirect or steal traffic.
Here’s a look at the major ones:
Typosquatting/Brandjacking
This happens when someone registers a domain name that’s almost identical to a trusted one, maybe one letter off, a plural version, or a different top-level domain (say “.net” instead of “.com”).
The goal is that users make a simple mistake and end up on the fake site instead of the real one. Once there, the fake may mimic the real site’s design, tricking you into entering login details or giving up personal info.
Domain hijacking
Here, the attacker takes control of the actual domain name from the rightful owner, for example, by getting access to the registrar account or exploiting lax domain transfer controls.
The main aim is to redirect all traffic meant for the real domain to a malicious site or to claim the domain for themselves. It’s especially dangerous because your brand or site might be “you,” but the traffic goes somewhere completely different, under someone else’s control.
DNS hijacking/poisoning
In this method, instead of attacking the domain name itself, the attacker corrupts the DNS lookup process, i.e., the system that translates your typed address into an IP address.
They insert false DNS records so that when you type a valid URL, you’re routed to a malicious server instead. Since your browser shows the correct URL, many users don’t notice anything’s wrong until it’s too late.
Malware-based browser hijacking
This one doesn’t always involve domains or DNS. Instead, malware or browser add-ons modify your browser settings (homepage, search engine, or extensions), redirecting you or exposing you to malicious content.
For instance, you click what appears to be a normal link, but a malicious extension changes the destination behind the scenes.
Malicious redirects
These are simpler but pretty effective. You arrive at a webpage (maybe by typo, click, or link) and are immediately or slowly redirected through one or more intermediate sites to a final malicious destination.
It might be designed to steal credentials, serve ads, or install malware. This method often overlaps with the others (DNS, domain, or browser hijacks), but the key is the redirect chain itself.
The consequences of URL hijacking: Severe dangers & impacts
When someone hijacks your URLs, it’s not just a harmless annoyance; it can lead to serious fallout for both individuals and organizations. Let’s walk through the main risks you’ll want to keep an eye on.
Theft of sensitive information
When a hijacked URL redirects you to what looks like a legit site, you might end up entering usernames, passwords, credit card details, or other personal data. This kind of data capture sits at the heart of many phishing-based URL hijacks.
Once attackers have that info, they can commit identity theft, access financial accounts, or carry out further attacks seamlessly.
Financial losses for businesses
For companies, the impact extends far beyond a single user being defrauded. A hijacked domain or URL can redirect traffic meant for you to someone else’s site, leading to lost revenue, diverted customers, and the cost of recovering systems. Plus, when customer trust is broken, the long-term hits can be even worse.
Malware installation
Some hijacking schemes involve more than just redirecting users. They may lead to malicious downloads, drive-by installs, or the execution of hidden browser scripts.
In other words: you click a link, land on what looks like the right page, and boom. You’ve got malware quietly running in the background.
SEO damage
Finally, if your domain or URLs are hijacked, your search engine standing can take a hit. Traffic gets diverted, link equity gets lost, and search engines may flag your site for suspicious behavior. All of this can severely hurt your rankings and visibility.
So with these risks in mind, it’s clear why URL hijacking is something you need to take seriously. Up next, we’ll look at how to prevent these kinds of attacks and protect your brand and users.
How to prevent URL hijacking: Protection & mitigation techniques
Protecting against URL hijacking isn’t about one silver bullet; it’s more like putting together a toolbox of good habits, clever tech, and proactive monitoring.
Here’s how you can build that protection together.
Be vigilant
Always keep your eyes open for anything odd, such as unexpected domain variations, sudden traffic drops, or links that look slightly off. Training your team and even your users to double-check the URL before entering credentials or clicking unknown links is a simple but powerful step.
Use reliable security software
Installing and maintaining effective security software, such as firewalls, anti-malware, and endpoint protection, can help block malicious sites, stop compromised redirects, and alert you to any suspicious activity. Keeping everything patched and up-to-date makes a big difference.
Enable multi-factor authentication (MFA)
Even if someone lands on a spoofed site and steals a password, MFA adds another layer of defense. The attacker still needs that second factor (a code, token, etc.) to breach in fully. It doesn’t stop the hijack entirely, but it reduces the damage quite well.
Monitor domain variations
Register common misspellings or look-alike domains of your brand before someone else does, and keep an eye on newly registered domains that resemble yours. This proactive move can block hijackers at the starting line.
Monitor website traffic & backlinks
If you notice a surprising drop in traffic or strange websites or links pointing to domains you don’t recognize, that could be a sign someone’s hijacked your URL or is redirecting your traffic. Things like backlink monitoring and domain name checks are pretty helpful in this case.
Use secure DNS providers
Choosing DNS services with protections (such as DNSSEC, filtering of malicious domains, and monitoring) helps prevent someone from tampering with your DNS records or redirecting your site behind your back.
In complex environments, especially cross-border setups, an IT audit Mainland China can also help identify systemic risks across hosting providers, DNS settings, and vendor access.
URL hijacking vs. URL phishing vs. URL masking vs. URL filtering
Here’s a friendly breakdown of how these terms differ from each other, so you can spot exactly what’s going on.
Technique
What it is (definition)
Key purpose
How to recognize it
URL hijacking
Redirecting or hijacking legitimate URLs to send traffic elsewhere.
Attackers aim to steal traffic, credentials, or hijack brand identity or reputation
You expect to go to site A, but you’re taken to site B. The domain looks similar, or a redirect happens
A defensive tool: blocking or allowing access to URLs based on rules, categories, or threat intelligence.
To protect users and networks from malicious or off-policy web traffic
On your network, you try to visit a site and get “Access denied” or see a block page. The admin controls which URLs are allowed
Wrapping up
URL hijacking might sound like a technical issue, but as we’ve seen, it’s a real threat that can harm your data, business, and online reputation. From typosquatting and DNS hijacking to malicious redirects, attackers keep finding new ways to trick users and steal information.
The good news is that with a bit of awareness, the right security habits, and smart innovative tools, you can stay one step ahead. Always keep an eye on your domains, monitor redirects, and use secure DNS providers.
And if you’re looking for a safe, reliable, and professional way to shorten long URLs, give Replug.io a try today. It’s one of the best custom URL shorteners out there to shorten links hassle-free, built with both branding and security in mind.
Frequently asked questions
What’s another name for URL hijacking?
Another name is “typosquatting”, which often involves registering misspelled versions of a legitimate URL to redirect traffic.
Why does URL hijacking occur, and is it bad?
It occurs because attackers want traffic, credentials, brand misuse, or ad revenue. Yes, it’s a very bad practice because it steals visitors, damages reputation, and enables further attacks.
What is an example of typosquatting?
Here is an example of typosquatting:
For instance, someone registers “faacebook.com” instead of “facebook.com”, so users who mistype their URL land on the fake site instead of the original one.
How do I know if I have a browser hijacker?
If your browser’s homepage, search engine, or new-tab settings change without your approval, or you’re frequently redirected to weird sites, you likely have a browser hijacker.
What is the difference between typosquatting and prepending?
Typosquatting uses misspelled domains to trap users. Whereas prepending involves adding extra characters or domains (like “search.legit-site.com.fake.com”) to trick viewers into thinking they’re on a trusted site.
When are 301 and 302 redirects used?
A “301” redirect is used when a page has permanently moved, while a “302” redirect indicates a temporary redirect. Improper use of these redirect types can cause hijacking issues with search engines.
What is the difference between URL hijacking and domain hijacking?
URL hijacking redirects traffic from a URL variant to a malicious destination, while domain hijacking involves taking control of the actual domain registration or DNS settings without permission.
How do hackers use URL hijacking?
Hackers register look-alike domains, set up malicious redirects, or clone sites. Victims who click or mistype end up on those sites where credentials are stolen or malware is deployed.
What are paid search hijacking and display hijacking?
Paid search hijacking happens when someone bids on your brand’s keywords and appears in your ad space. On the other hand, display hijacking occurs when someone uses your brand’s ad creative on-site to redirect or steal clicks.
Are typosquatting and cybersquatting the same thing?
Not exactly! Typosquatting is actually a subset of cybersquatting. Cybersquatting broadly refers to registering domains that mimic trademarks to profit from or misuse them, while typosquatting specifically exploits typing errors.
Have you ever clicked a link only to be greeted with a red warning screen, and suddenly your traffic starts to decline, getting even worse?
Welcome to the nightmare of a URL blacklist. It’s one of the most frustrating problems website owners face in 2026.
Studies show that over 95% of users bounce instantly when they see a security warning, meaning a single blacklisted URL can wipe out nearly all your visitors overnight.
Worse yet, blacklisting isn’t just for sketchy sites. Even trusted domains can get flagged due to malware injections, phishing alerts, or outdated plugins.
When your site gets blacklisted, your SEO, reputation, and revenue drop pretty fast.
But don’t panic!
There are practical, proven ways to fix it and get your URL back in good standing.
Let’s start with the basics, i.e., the URL blacklist’s meaning.
What does URL blacklist mean?
At its core, a “URL blacklist” is simply a list of specific web addresses, i.e., the URLs you see in your browser, that have been identified as unsafe or harmful.
These lists are maintained by search engines, browsers, hosting providers, and cybersecurity services to keep people safe online by blocking access to sites that might put users at risk.
When a URL is on a blacklist, visitors often see a warning instead of the normal page to protect them from danger.
Is a URL blacklist dangerous?
Being on a blacklist doesn’t cause harm itself; it’s a warning system. But the reasons a URL ends up on one are often dangerous.
Many blacklisted URLs are linked to malware downloads, deceptive redirects, or URL phishing attempts that try to trick you into giving up personal info like passwords, bank details, or login credentials.
That’s why browsers and security tools block them, to stop you from falling into scams or having your device compromised.
URL blacklist example
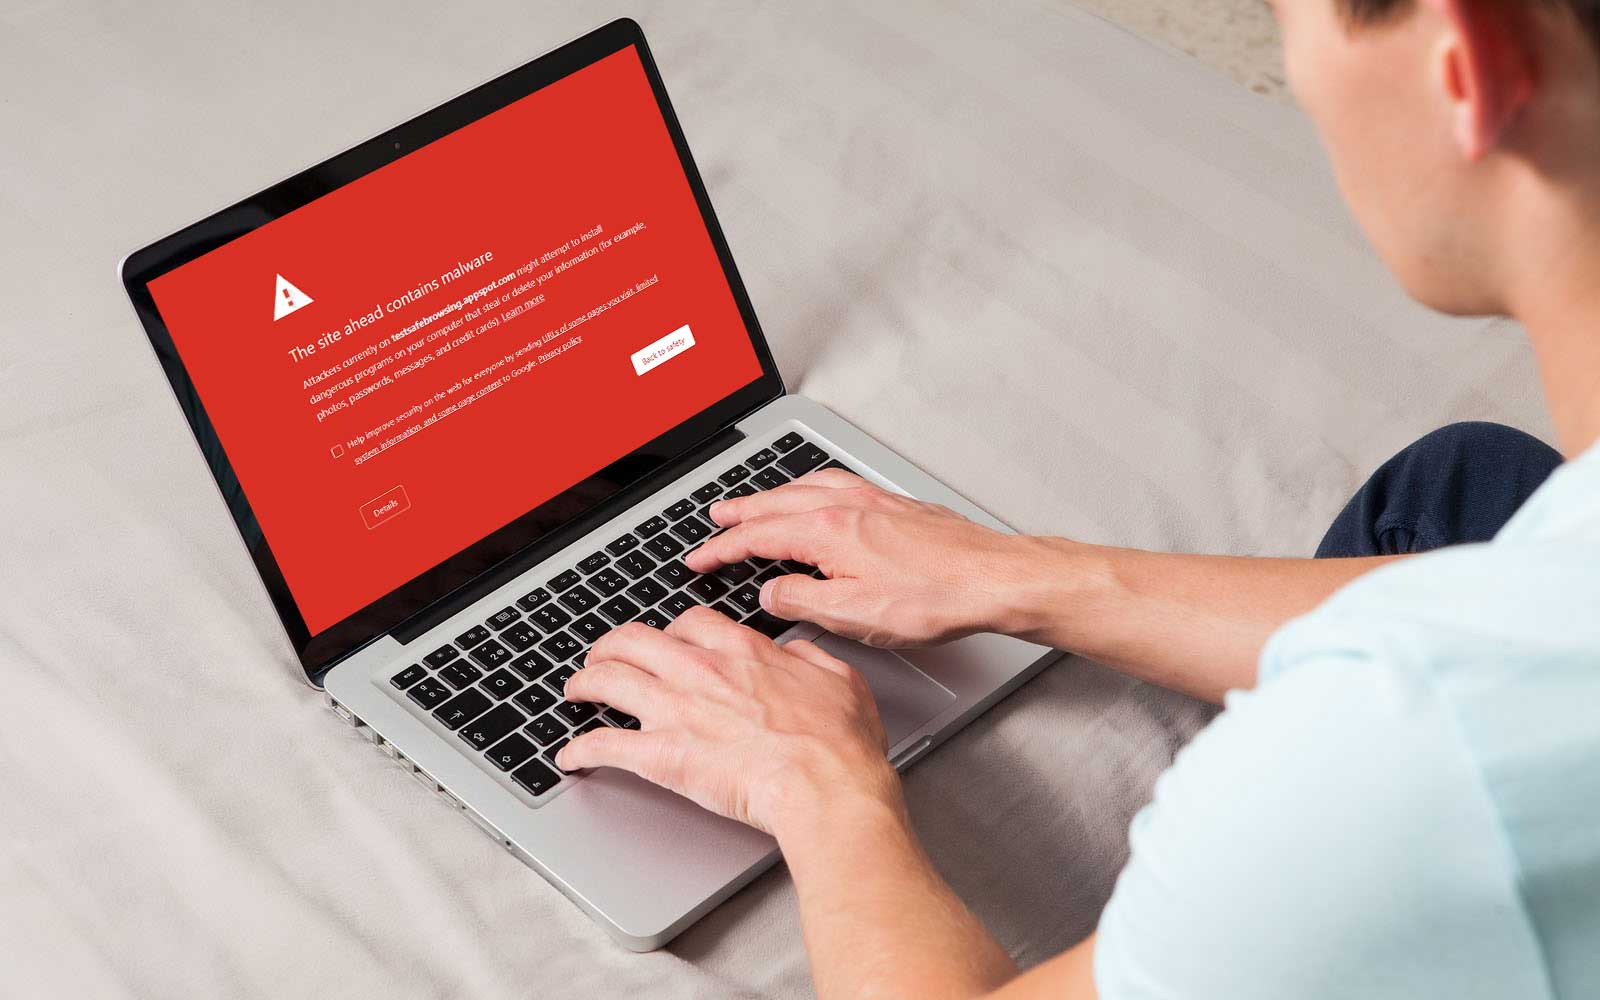
A real-world example is when you click a link hoping to open a site, and instead, you’re greeted with a big red warning page saying the site ahead may be harmful.
That happens because authorities like “Google Safe Browsing” have flagged that URL as unsafe, perhaps because it hosted malware or was involved in phishing schemes.
The goal isn’t to punish a site owner but to protect you from potential threats before you even load the page.
How does a URL get blacklisted?
A URL can end up on a blacklist when security systems detect harmful or deceptive behavior, and they want to protect users from danger before anyone gets hurt.
Here are the most common reasons this happens:
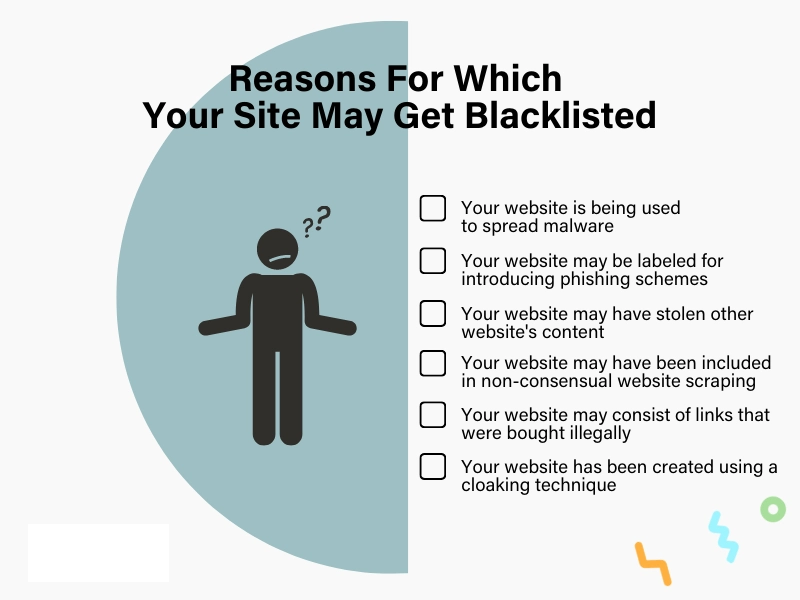
Phishing schemes/plans & content
Sites involved in phishing, where attackers trick visitors into revealing personal info such as passwords or bank details, are flagged quickly. If your URL hosts fake login pages or misleading forms, security services will blacklist it to block those scams.
SEO spamming
Hackers sometimes inject spammy keywords and links into a site to manipulate search rankings or promote sketchy products. This SEO spam harms user trust and makes your site look deceptive, which can trigger blacklisting.
Malware & trojan horses
Malware, including Trojan horses, disguises harmful code as normal downloads or scripts. When security systems detect malware on your site, your URL is blacklisted to stop the spread of infections as quickly as possible.
Harmful & unsafe plugins
Installing plugins from unverified sources or third-party sites (especially outdated ones) can introduce vulnerabilities or hidden malicious code. That can lead to compromised pages and blacklist flags.
Harmful & unsafe redirects
If your site redirects users to unsafe or blacklisted pages (even unknowingly), it can look suspicious to security scanners. Unwanted redirects often signal a compromise and can get your URL blacklisted.
Why do URLs get blacklisted: Common reasons for URL blacklisting
When a URL is flagged as unsafe or harmful, it typically ends up on a blacklist so browsers, search engines, and security tools can protect users from risks and threats.
Here are the most common reasons this happens:
Malware infections or code/viruses/trojans
Sites that host or distribute harmful software, such as viruses, malicious code, or Trojan horses, are quickly flagged and blacklisted to stop infections and protect visitors.
Phishing schemes or scams (stealing user data)
If a URL is used to trick people into giving up private info (often mimicking real sites), it gets blacklisted fast, because phishing is a major online threat.
Hosting spam content/emails & engaging in deceptive practices
URLs tied to bulk spam content or misleading scams dilute trust and can lead to blacklisting, since they harm user experience and security.
Unwanted software or adware distribution (software vulnerabilities)
Sites that push unwanted programs or adware through vulnerabilities are flagged to prevent unwitting users from installing risky software.
Outdated & harmful plugins
Using outdated or unsafe plugins leaves sites open to hacks and malicious injections, which often trigger blacklist warnings from security systems.
Compromised Ad Networks & sites
If your site ends up delivering ads from compromised networks that link to unsafe pages, your URL’s reputation suffers, and it may surely be blacklisted.
Command & Control (C&C) servers
URLs tied to infrastructure used to control malware networks are blocked, so attackers can’t manage harmful software.
Hacking or defacement
When hackers deface your site with malicious pages or links, authorities often blacklist it to prevent further damage.
Distributing pirated or illegal content
Sites that share illegal downloads or break copyright laws are flagged and blocked to protect users and comply with the standard rules and regulations.
Adult or inappropriate content (18+)
URLs serving adult (pornographic) or otherwise inappropriate material without proper labeling can be blacklisted under strict platform policies.
Breaking search engine or hosting policies
Violating service rules, such as manipulating search rankings or infringing hosting terms, can get your URL blacklisted by engines and providers.
Negative domain history
If a domain has had bad behavior in the past, it might carry a tainted reputation in search engines’ eyes, leading to blacklisting even after ownership changes.
Linking to other blacklisted or suspicious sites
Sending users to known bad or flagged URLs can harm your own site’s credibility and cause it to be blacklisted, too. Be aware of such activities and practices!
Violations of Terms of Service (ToS)
Ignoring the ToS of services you rely on (like email platforms, hosts, or ad networks) can result in blacklist penalties when violations are detected.
Avoiding unnecessary redirects
Too many redirects, especially to unsafe or unknown places, can signal problems and increase the chance of being flagged as suspicious.
Note: This breakdown reflects the common risks that lead to URL blacklisting today, and why staying secure and compliant is key to keeping your site visible and trusted online.
How to check if a URL is blacklisted: 10 tested methods discussed
Checking whether a URL is blacklisted can save you time, avoid traffic headaches, and prevent reputation damage.
Here are 10 practical ways you or anyone managing a site can quickly test if a URL is on a blacklist or not (friendly, simple, and effective).
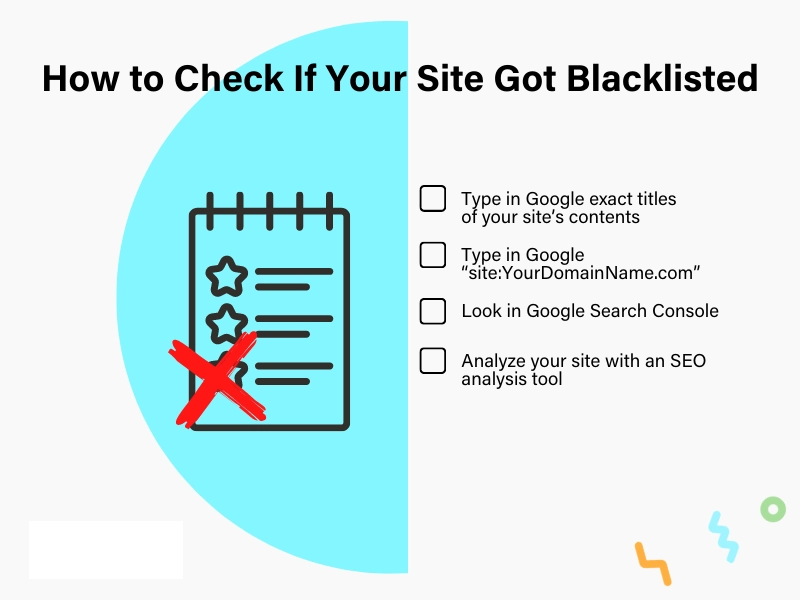
Method #01: Using online URL blacklist checker tools
There are tools online where you paste your URL, and they scan major blacklist databases (Google Safe Browsing, Norton, Avast, AVG, etc.) to show if it’s flagged. Tools like EasyDMARC DMARC checker or similar services check reputation and blacklist status instantly in real time.
Method #02: Using Google Search Console
If you’ve added your site to Google Search Console, check the Security Issues or Manual Actions reports. Google notifies you here if it has marked your site as unsafe or malicious.
Method #03: Via reliable & dedicated browser extensions
Browser extensions (like those from reputable antivirus vendors) can show you in real time if a URL is known to be unsafe when you browse. These act like built-in blacklist checks.
Method #04: Using a security software or tool
Security tools and scanners (malware scanners, web protection software) check URLs against threat lists and alert you if something is blocked or risky.
Method #05: Looking for your site or domain on search engines
Search your site’s domain on Google or Bing. If it’s flagged, you might see warnings like “Site may be hacked” or “This site may harm your computer.”
Method #06: Staying alert for browser warnings
Sometimes the quickest sign is your web browser itself. Messages like “Deceptive site ahead” or other full-page warnings mean the URL is likely in a major blacklist.
Method #07: Watching out for your security plugins
If you use WordPress or another CMS, security plugins can notify you if your site or URL behaves suspiciously or is flagged in malware databases.
Method #08: Checking your hosting provider dashboard
Many web hosts monitor blacklist status and will alert you inside your dashboard or via email if your site is reported as unsafe or dangerous.
Method #09: Inspecting your email for alerts
Services like Google Search Console and some hosts will email you if they detect a blacklist issue, so check your inbox for warnings about unsafe URLs.
Method #10: Analyzing big security blacklists, right away
Go straight to major blacklist listings, such as Google Safe Browsing transparency reports, to see the status of any URL. These show whether Google considers a URL reasonable or harmful.
How to fix a blacklisted URL or site: Useful tips to get your site back & running again
If your URL or site has been blacklisted, don’t panic! There’s a clear path to recover it.
The main idea is to clean up whatever caused the blacklist, secure your site, and then notify the blacklist authority (e.g., Google or antivirus software) that you’ve resolved the issue.
Here are the tips that actually work:
Tip #01: Identify the reason for blacklisting
First, find exactly why your site was flagged (malware, phishing content, hacking, unsafe redirects, etc.). Knowing the root cause guides the cleanup process.
Tip #02: Check security
Before fixing anything, run a full security scan with reliable tools or plugins to identify any threats or suspicious files residing on your site.
Tip #03: Scan & clean
Use security software or malware scanners to detect infected files, malicious code, and hidden threats. Make sure you scan thoroughly so nothing gets missed.
Tip #04: Remove any malware, viruses, or malicious code
Once threats are found, remove them completely, including backdoors, injected scripts, and unsafe files, so your site is immaculate and spotless.
Tip #05: Change all passwords
Anytime your site has been compromised, assume hackers might have access to your credentials. Update all passwords (admin panel, FTP, database, hosting, email accounts) to strong, unique ones.
Tip #06: Fix vulnerabilities
Patch any security holes that let attackers in quietly. Update plugins, remove unused themes, fix file permissions, and tighten access controls as a priority.
Tip #07: Submit a review request
After everything is clean on your end, use tools like Google Search Console or other blacklist removal authorities to request a review and removal of the blacklist status. Be clear about what you fixed.
Tip #08: Prevent future issues
Add a firewall, use security plugins, enable monitoring alerts, and limit login attempts so you avoid the same problem again.
Tip #09: Update & monitor your site regularly
Keep your software and plugins updated, and schedule scans so you notice risks early before they lead to another blacklist. Many tools can automate this for you, as well. Consider them!
Note: Getting blacklisted feels scary, but with careful cleanup and ongoing security habits, your site can bounce back stronger than before.
How to fix a blacklisted URL or site: 6-step practical guide just for you
If your site or a specific URL has been blacklisted, the good news is there’s a practical step-by-step way to get it back on track without guessing what to do next.
Here’s a simple six-step guide you can follow to clean things up and request removal from blacklists like Google Safe Browsing.
Step #01: Take your website offline
If your site is actively infected or showing warnings to visitors, put it in maintenance mode or temporarily take it offline. This stops harm from spreading and protects users while you fix the issues.
Step #02: Update all access credentials (with strong ones)
Change every password (admin login, hosting control panel, FTP/SFTP, database, and email accounts) to strong, unique ones to lock out attackers.
Step #03: Fully scan your website database and all files
Use reputable security scanners(site-level and host-level tools) to check every file and database entry for malware, injected code, hidden backdoors, or suspicious scripts.
Step #04: Clear all potentially harmful files
Remove or clean any infected files, scripts, or harmful code the scanners find. This includes malware, unauthorized redirects, hidden scripts, and any files that don’t belong to the system.
Step #05: Point out the principal cause
Find and fix the root cause (like insecure plugins, outdated software, or vulnerable themes) that let the infection in the first place so it doesn’t happen again.
Step #06: Put forward a reconsideration appeal
Once everything is clean and secured, submit a review or reconsideration request through tools like Google Search Console or the respective blacklist authority’s form, explaining what you fixed and asking for removal.
Note: Following these steps carefully not only helps clear the blacklist flag, but it also strengthens your site against future attacks. A win-win situation as you get back online!
How to prevent your URLs/website from getting blacklisted: Safety measures listed!
Stopping your site from ever landing on a blacklist in the first place is way easier than dealing with the fallout. By putting solid protections in place and staying proactive, you significantly reduce the risk of hacks, malware, or unsafe behavior that triggers blacklist warnings.
Here’s how to keep your URLs and website safe and trusted:
Outdated CMS core files, plugins, and themes are the easiest ways attackers find a way in. Regular updates patch security holes, and removing unused ones removes potential attack points.
Install web application firewalls (WAF) & security plugins (on priority)
A Web Application Firewall (WAF) filters out harmful traffic before it reaches your server, cutting off many common attacks that lead to blacklist flags. Security plugins can also scan for malware and alert you to threats. But please install a reputable one from a licensed provider.
Use strong, unique passwords
Weak or repeated passwords make it easy for hackers to guess your saved credentials. Always use strong, unique passwords for admin, hosting, and database accounts, and change them immediately if you suspect a breach.
Limit user signup/login attempts
Brute-force attacks (where bots try countless password combinations) are pretty common. Limiting login attempts locks out these bots and protects your admin area from being compromised.
Use SSL (HTTPS)
Installing an SSL certificate and forcing HTTPS encrypts data between your site and visitors, preventing attackers from tampering with content or hijacking sessions. Sites without HTTPS are more likely to be flagged as unsafe.
Regularly back up & scan your website database
Regular backups mean you can quickly restore a clean version if something goes wrong, and scheduled scans help catch malware well before it causes real damage or gets you blacklisted.
Use dedicated user roles & restricted user permissions
Only give users the access they really need. Restricting admin rights lowers the impact if an account is compromised and prevents unwanted changes that could trigger blacklist issues.
Watch for suspicious & fraudulent activity (monitor user activity with caution)
Monitor login patterns, file changes, and unusual behavior strictly. Early signs of trouble let you act before a blacklist authority flags your site. Tools or host dashboards often have activity logs for this.
Educate users & staff members
Human error, such as clicking phishing links or installing unsafe plugins, poses a significant risk. Teach your team about good security habits and how to spot threats so everyone helps keep the site secure.
Use a reputable & trustworthy web hosting provider (reliable & managed web hosting)
A good host offers uptime monitoring, automated security scanning, firewalls, and quick support when issues arise. This adds a strong layer of protection and alerts you early if anything looks off the table.
Safeguard & encrypt your site forms
Make sure forms that collect info use encryption and validation. This stops attackers from injecting malicious code or harvesting data, and prevents them from achieving their ultimate goal.
Only use trusted software from official providers
Don’t install plugins or tools from shady sites or third-party providers. Trusted sources reduce the risk of hidden malware or backdoors. Only consider them, please!
Use Google Web Risk API
For dynamic security checks, tools like Google’s Web Risk API are the best options available online. They can tell you if URLs are flagged as malicious before visitors even see them.
Perform regular/weekly security audits
Scheduled audits help catch weak spots you might miss otherwise, giving you a chance to fix them before they cause serious trouble. This is quite a healthy process for your site’s security.
Submit your URLs to search engines
Regularly submitting sitemaps and URLs to tools like Google Search Console keeps engines informed and increases visibility into security issues they detect.
Comply with SEO best guidelines
Following search engines’ standard guidelines (such as natural content and a clean structure) keeps your site credible and reduces the risk of penalties and blacklist signals.
Monitor & scan for viruses and threats
Use malware scanners (such as Sucuri, VirusTotal, or host-provided tools) to check your site often. Catching threats early stops them from worsening and thus saves them from being added to a URL blacklist.
Secure your website (avoid malicious content)
Make sure nothing on your site (pages, downloads, ads) contains pirated, illegal, copyrighted, or harmful content that could get you flagged and harm your site’s reputation at any time.
Monitor backlinks very carefully
Spammy or low-quality backlinks can hurt your site’s domain rating and can lead to the curse of a blacklist. Regularly check and remove risky links using tools such as Google Search Console or SEO platforms.
Maintain email best practices
Set up proper email authentication (like SPF, DKIM, and DMARC) and avoid spammy sends. Poor email conventions can lead to IP blacklisting, which can severely affect your domain’s trust.
Note: These steps build a strong defense that keeps your URLs trusted by users and blacklist services, giving you peace of mind and a safer site overall. You’ll drastically reduce the chance that your site or URLs will ever end up on a blacklist in the first place, keeping your traffic, reputation, and visitors safe.
Consequences of a blacklisted URL for website owners: Major impacts of being blacklisted!
Getting a URL blacklisted can feel like having the digital traffic lights turn red on your site. The visitors stop coming, trust goes down, and things you’ve built up (like SEO and services) take a catastrophic hit.
A massive drop in website traffic (drastic traffic loss)
When your site is flagged and blocked by search engines or browsers, people either won’t see it in search results or will leave as soon as a warning pops up. That means your visitors can drop sharply almost overnight.
High-level damage to brand reputation & trust
Seeing a “This site may harm your computer,” or similar warning scares most users off. Even if the problem is fixed later, many people won’t trust your brand as they did before.
Negative & unwanted SEO consequences (search engine demotion)
Search engines would rather not send people to risky sites, so they either push your pages way down or remove them from results entirely. That’s a big blow to your SEO efforts, and climbing back up can take a long time.
User warnings & alerts
Major browsers and search platforms show clear warnings when a user tries to visit a blacklisted page. Most visitors will click away rather than ignore those alerts, which keeps traffic low and frustrates potential customers.
Suspension/Withdrawal of associated services
It’s not just search engines! Services tied to your URL, such as ad platforms, email marketing tools, or even your hosting provider, might suspend your account until the issue is fully resolved. That adds another layer of disruption and cost.
How to steer clear of the URL blacklist: The best proactive preventive measures
Avoiding a URL blacklist isn’t just about reacting after something bad happens; it’s more about building good habits and keeping your site secure, so you don’t end up on a blacklist in the first place.
Pick secure & reliable tools
Choose trustworthy and well-maintained software, plugins, and tools for your website. Always remember, low-quality or unknown tools can introduce vulnerabilities that hackers love to exploit.
Implement a highly effective security strategy
Put strong security measures in place, such as firewalls, malware scanners, and strong passwords, since they help block threats before they cause trouble that leads to blacklisting.
Don’t give everyone full access to your site. Only grant necessary permissions so that, even if an account is compromised at any time, the damage is limited.
Run monitoring, backups, & scans on a regular basis
Keep a keen eye on your site with regular scans and monitoring to catch issues early, and always maintain up-to-date backups so you can restore your site quickly if something goes wrong.
Stick to a very strict update schedule
Make it a habit to regularly update your CMS, plugins, themes, and other software. Updates often patch security holes that attackers could use to break in.
Summing up
To wrap things up, a URL blacklist isn’t just a technical issue! It’s something that can seriously impact your traffic, trust, and overall online presence.
In this guide, we walked through what URL blacklisting is, why it happens, how to check whether your site is affected, and how to fix it step by step.
More importantly, we covered smart, practical ways to prevent your URLs from getting blacklisted in the first place, so you’re not stuck firefighting later.
Staying secure, keeping things up to date, and using the right tools can save you a lot of stress down the road.
If you want extra peace of mind while managing and sharing links, give Replug.io a try. It’s a top-notch URL shortener that lets you shorten a link in no time and create clean, branded short URLs on the go. A simple, reliable tool built for modern marketers of today!
Maximize marketing ROI
by transforming ordinary URLs into branded short links that convert.
Try Replug for free
Frequently asked questions
What is URL blocking?
URL blocking is when a browser, security software, or network blocks access to a specific web address (URL) to protect users from harmful content such as malware, phishing, or unsafe sites. When a URL is blocked, visitors may see a warning or error instead of the site.
What is a URL blacklist infection?
A URL blacklist infection occurs when a website is flagged and added to a blacklist because it’s been compromised by malware, malicious redirects, or harmful scripts. This usually happens after hackers inject destructive code that makes the site unsafe for visitors.
What is whitelisting?
Whitelisting is the opposite of blacklisting. It’s when a URL, domain, or program is marked as trusted, allowing it access without restrictions. Systems with whitelists let only approved items through, helping avoid false blocks and keep things running smoothly.
How do I know if my URL is blacklisted?
To check if a URL is blacklisted, use tools like Google Safe Browsing, VirusTotal, or Sucuri SiteCheck, or look for browser warnings when you visit your site. You can also check alerts in Google Search Console or ask your hosting/security services for reports.
Why was my site blacklisted?
A site usually gets blacklisted because it shows signs of risk, e.g., it has been hacked and now contains malware, phishing pages, spam content, unwanted redirects, or unsafe plugins. Sometimes, even expired security certificates can make the site look unsafe to scanners.
How do I remove a URL from a blacklist?
To get a blacklisted URL removed:
1. First, find out which blacklist it’s on (Google Safe Browsing, antivirus, etc.). 2. Next, fix the root problem (remove malware, hacked files, or harmful content). 3. Once your site is clean, submit it for a review with the blacklist provider. 4. After that, check that changes have taken effect and follow up if needed so the URL is fully cleared.
How to get rid of the URL blacklist virus?
To remove a “blacklist virus,” first scan your site for malware and clean up any infected files using security tools or a clean backup. Once everything harmful has been removed, submit a review request to the blacklist authority (e.g., Google Search Console) so they can recheck and delist your URL.
Is a URL blacklist safe?
Yes, a URL blacklist is a safety measure, not something inherently harmful. It’s used by browsers, search engines, and antivirus firms to warn users away from potentially dangerous sites that may host malware, phishing, or other threats.
What does URL blacklist mean on Avast?
When Avast flags a URL as “blacklisted,” it means the antivirus/web shield thinks that link may lead to a harmful or risky site. This could be due to malware, phishing content, or even a false positive. You can check the link with multiple scanners to be sure.
How to check using Google Search Console if your website/URL has been blacklisted?
In Google Search Console, go to the Security Issues or Manual Actions report. If Google finds malware, phishing, or hacked content, it will show alerts here. This is the clearest sign your site is flagged and needs fixing.
Who creates and maintains URL blacklists?
Several groups manage URL blacklists:
– Major search engines like Google and Bing; – Antivirus and security firms like McAfee, Avast, and Norton; – Internet service providers (ISPs) that block harmful sites; – Specialized cybersecurity organizations tracking threats; and – Tools like Windows SmartScreen and Google Safe Browsing that protect users from dangerous URLs.
How much time does it take to get off a URL blacklist?
It varies! Cleaning up your site can take a few hours to several days, and after you request a review, engines like Google typically take 24–72 hours or more to lift the blacklist. However, complex cases can take up to a week or longer.
Will a blacklisted URL hurt my website’s SEO?
For sure! While your URL is blacklisted, search visibility drops sharply, and rankings fall or disappear entirely. Even after removal, it can take time to rebuild trust and recover SEO if the issue wasn’t resolved quickly.
What is the actual cost to fix a blacklisted URL?
The cost varies widely. You can fix it yourself using free tools like Google Search Console or scanners. Still, if you hire security services(Sucuri, SiteLock, etc.), prices usually start around $99/year or more, depending on the provider.
What is the difference between a URL blacklist and a domain blacklist?
A URL blacklist flags specific web addresses (like a single page), while a domain blacklist blocks an entire domain (every page on that website). URL blacklists are more targeted, whereas domain blacklists affect the whole site.
List the categories of sites that are classified as blacklisted websites?
Sites can be blacklisted for many reasons, including:
– hosting malware, – running phishing scams, – spreading spam, – showing adult or illegal content, – promoting hate speech, – linking to piracy/torrents, – offering gambling, – giving unverified medical advice, – or being risky social media/chat platforms
These categories are commonly flagged because they pose safety, legal, or ethical concerns for users.
LinkedIn isn’t just another social network anymore! It’s the professional hub where over 1.2 billion professionals connect, share opportunities, and grow their careers in 2026.
With a massive global audience and billions of monthly visits, your LinkedIn profile URL is more than a normal link. It’s your digital business card, résumé, and networking tool all in one.
Yet many users still don’t know the easiest and most effective methods to share that link with potential employers, collaborators, or clients.
No matter if you’re pitching yourself in an email, updating your portfolio, or connecting on a new platform, learning how to share your LinkedIn profile can seriously boost your visibility and opportunities.
Ready to optimize how you present yourself online?
Let’s start by understanding what your LinkedIn profile URL really is and why it matters so much!
What is your LinkedIn profile URL?
Your “LinkedIn profile URL” is simply the unique web address (or URL) that takes someone straight to your LinkedIn profile (no searching required).
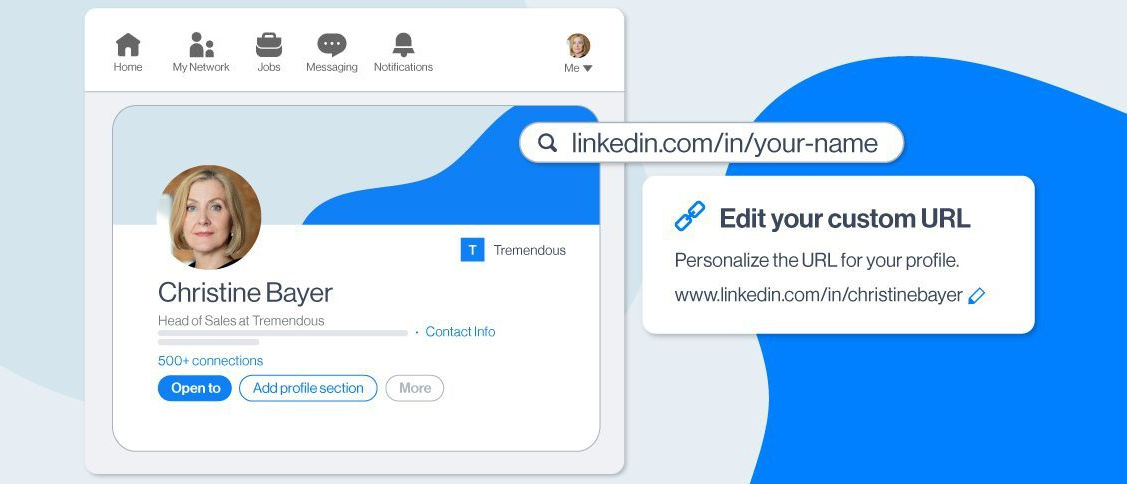
Every LinkedIn account gets one automatically when you sign up, usually in the format https://www.linkedin.com/in/your-name-#######, and you can customize it to make it cleaner and easier to remember.
Think of this URL as your online professional address. Instead of telling someone your name and hoping they find you, you can just share that link, and they’ll land right on your profile.
That makes networking smoother, helps you look more professional on resumes and in email signatures, and makes it easier for people to find and connect with you.
How to share LinkedIn profile on mobile
Sharing your LinkedIn profile from your mobile device is one of the quickest ways to grow your network, whether you’re at a networking event, meeting someone new, or simply connecting online.
On mobile, LinkedIn makes it easy to share your profile link using different built-in options, from copying the link directly to using modern features like QR codes and the “Share Profile” button.
Below, you’ll find how to share LinkedIn profile on phone using multiple methods, with simple step-by-step instructions.
How to share LinkedIn profile link from mobile via the LinkedIn app
Here’s how to share LinkedIn profile link from app:
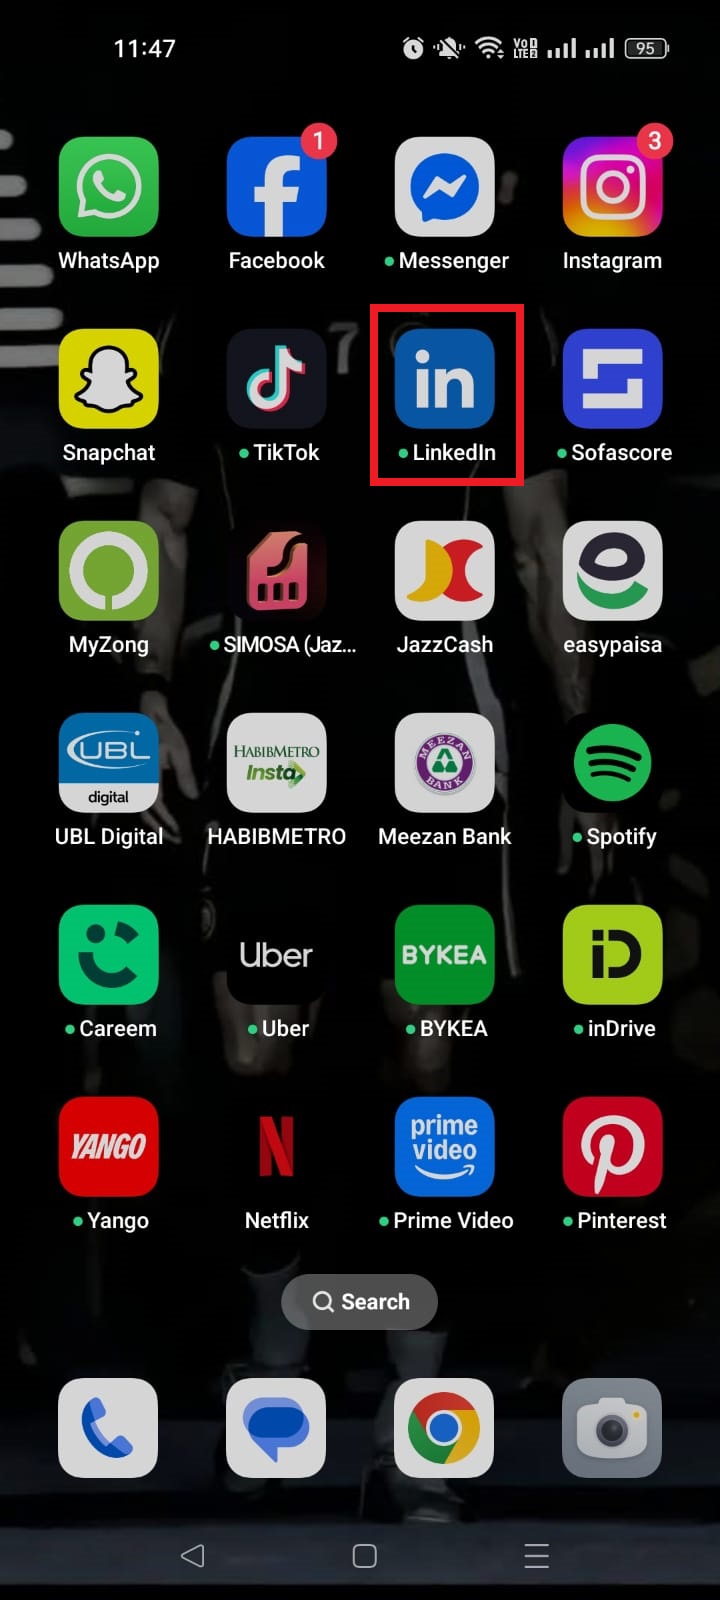
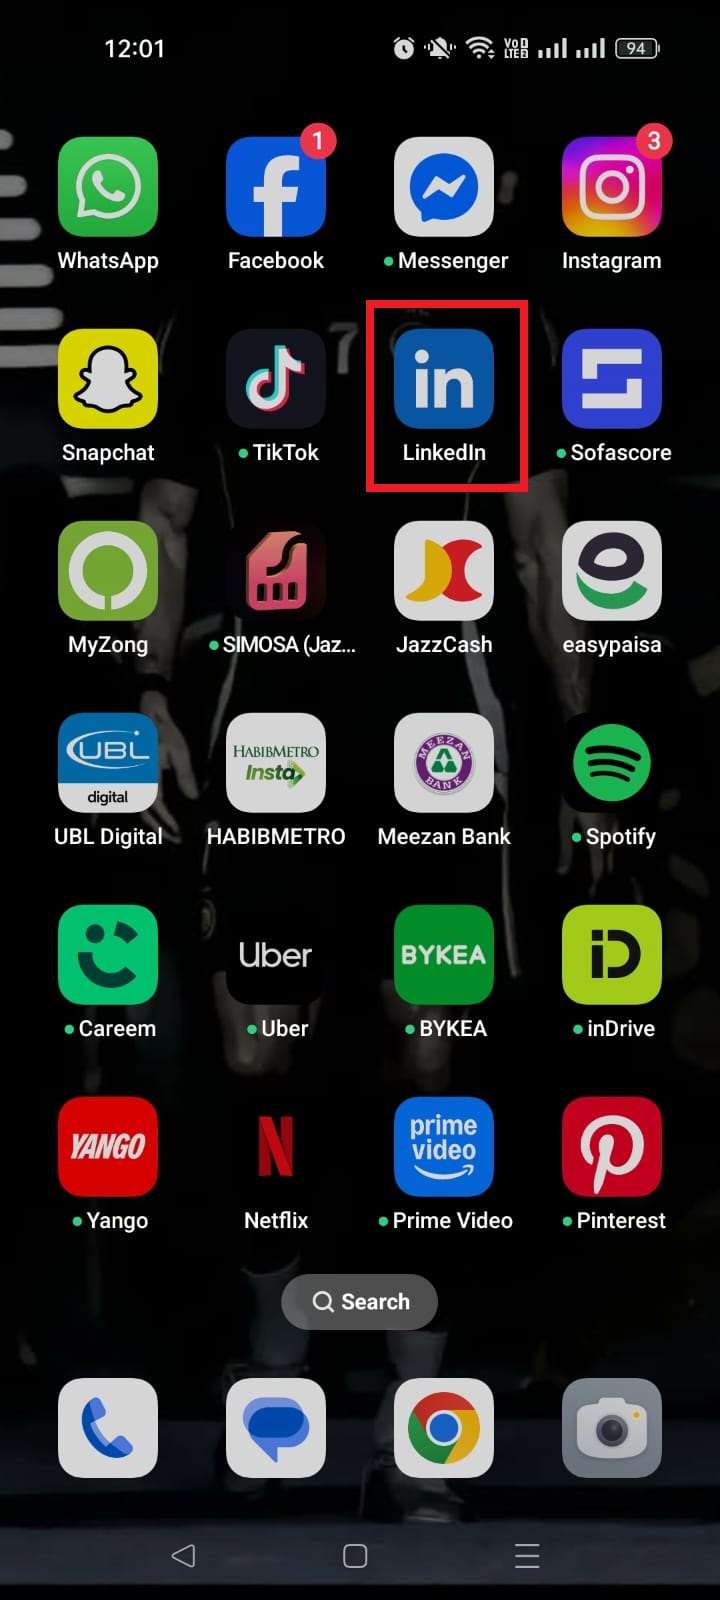
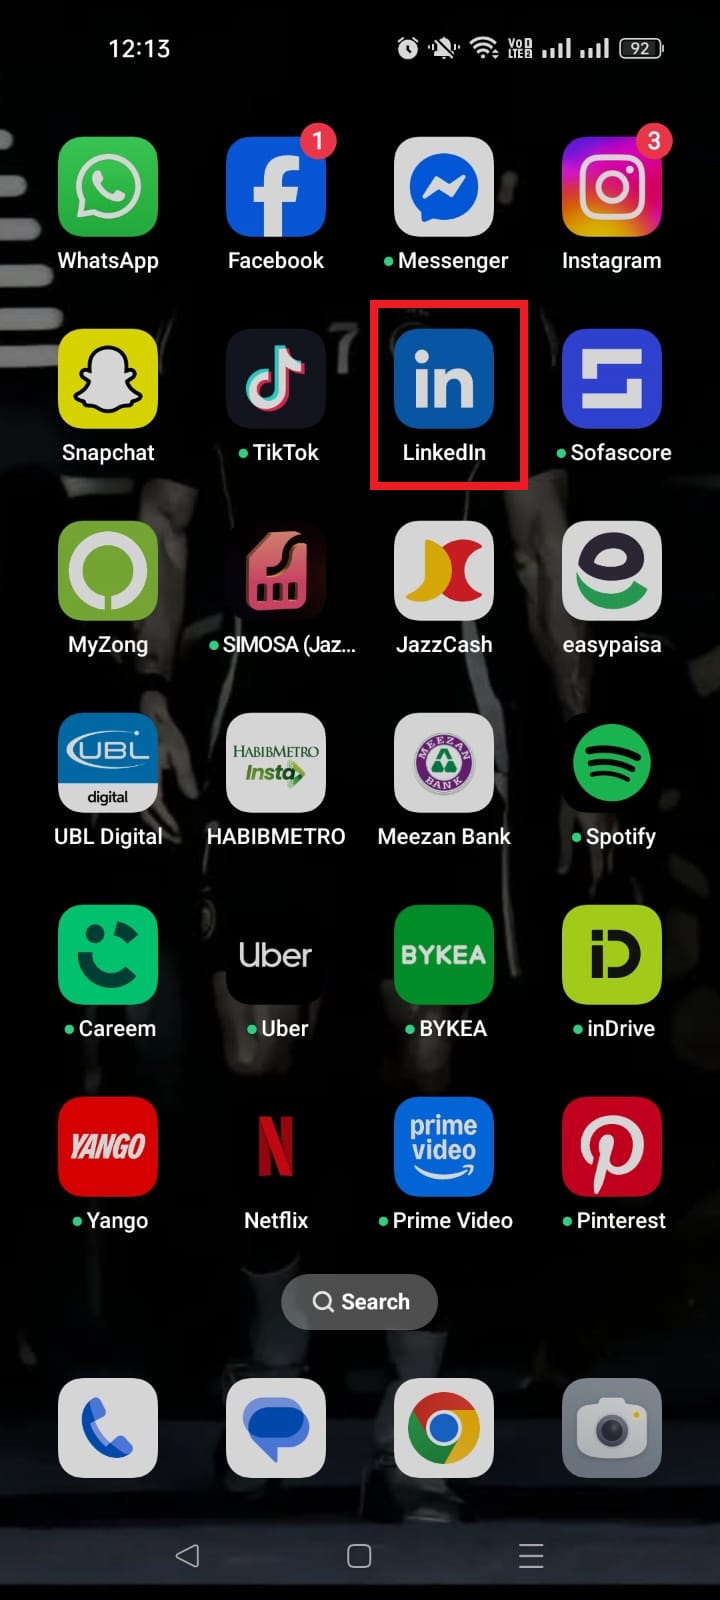
1. Open the LinkedIn app on your iPhone or Android device and sign in.
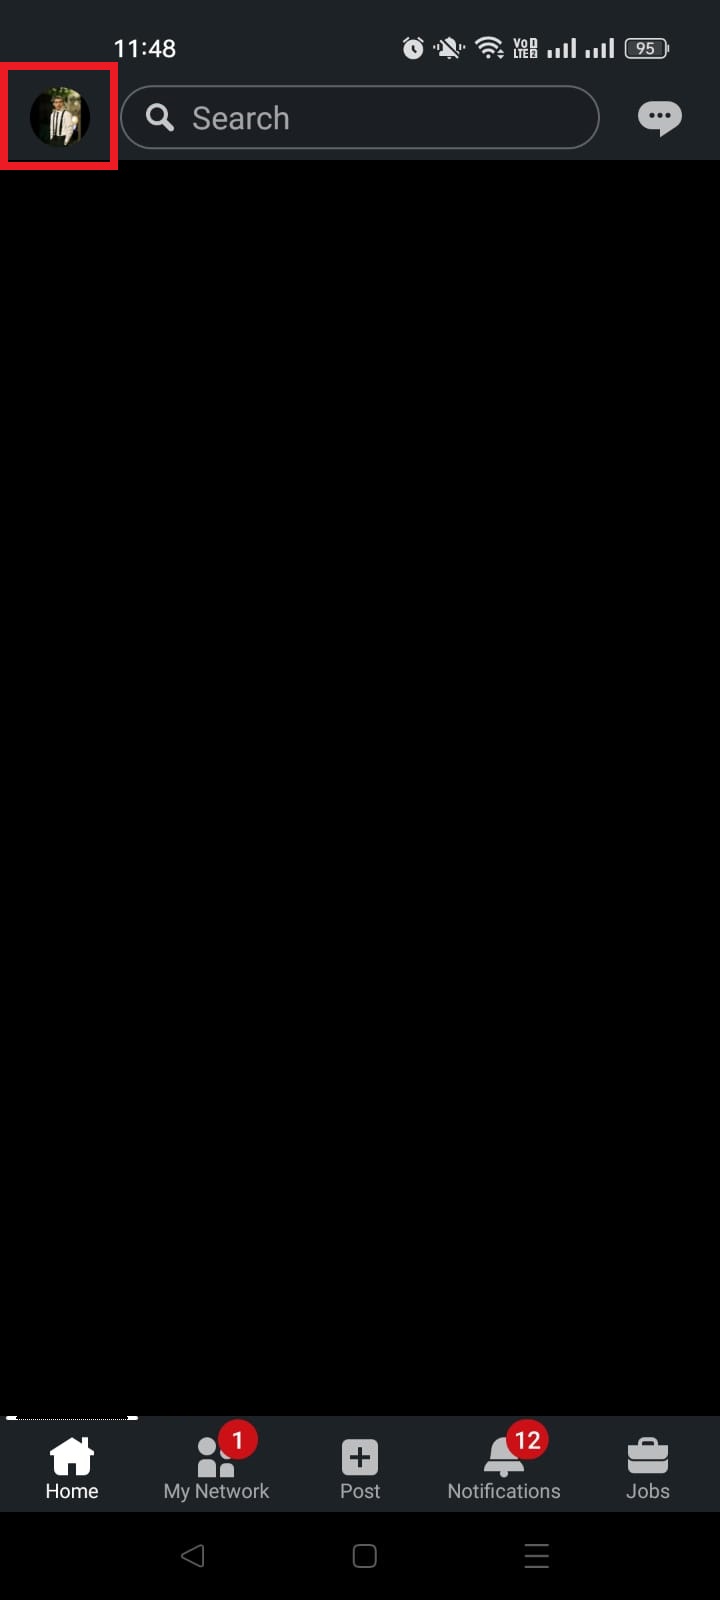
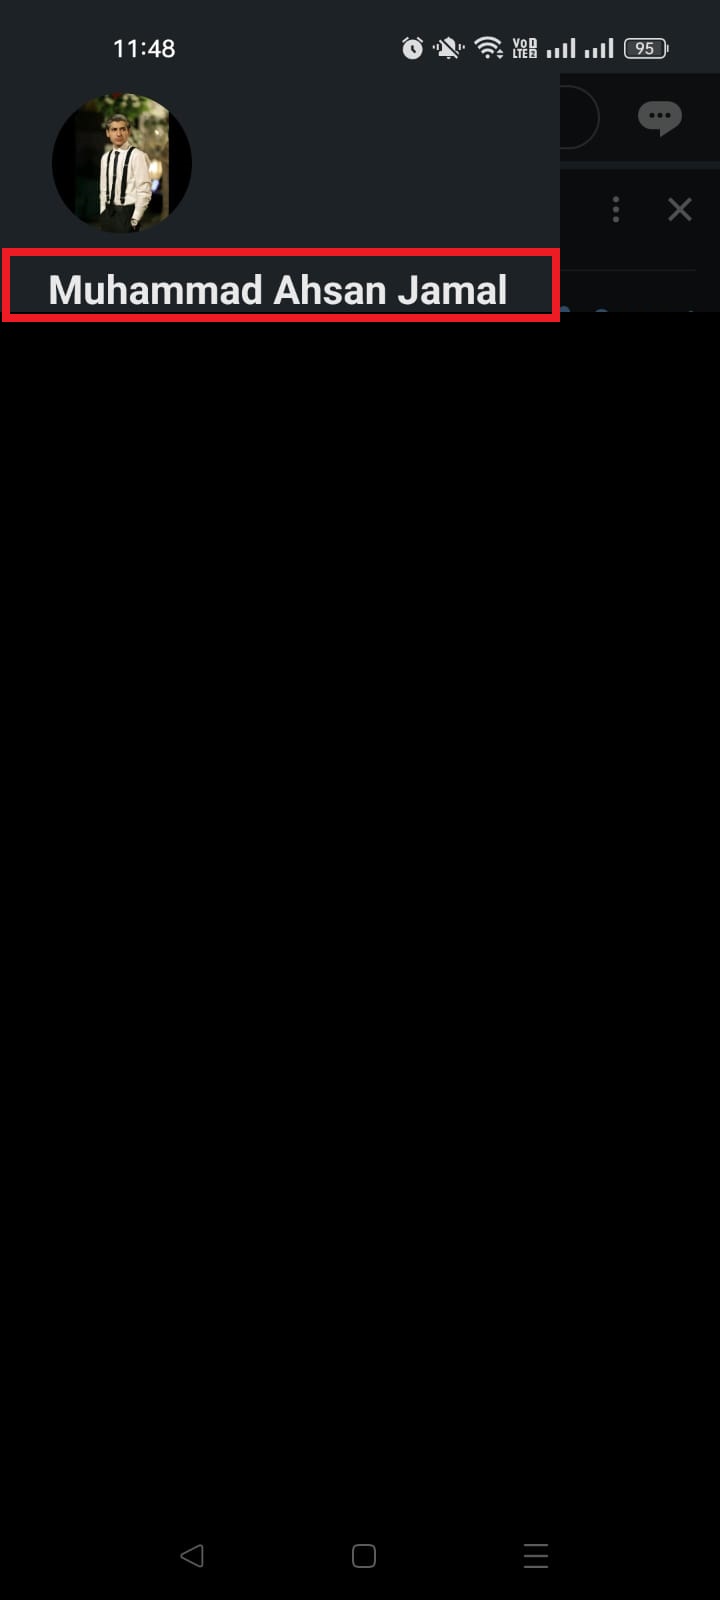
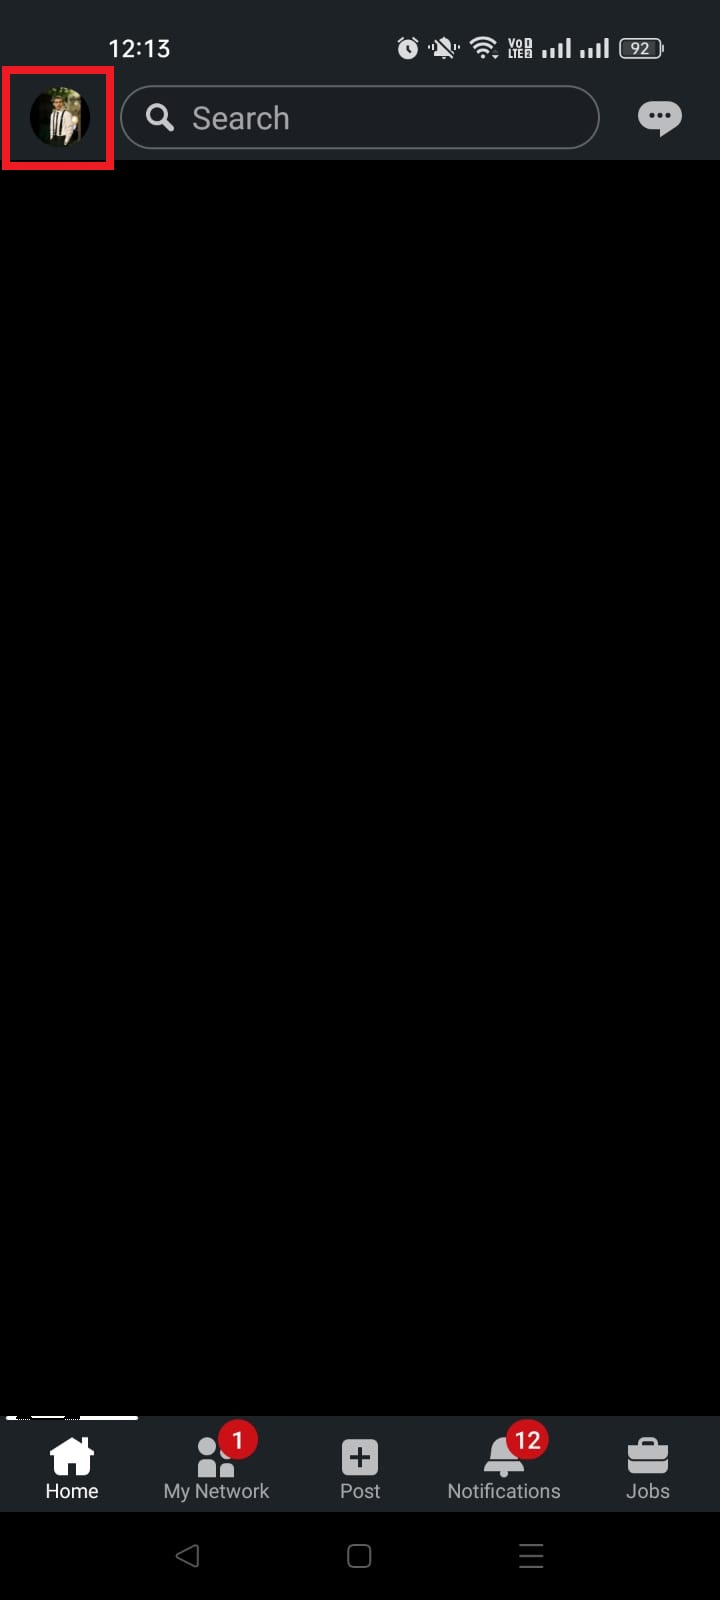
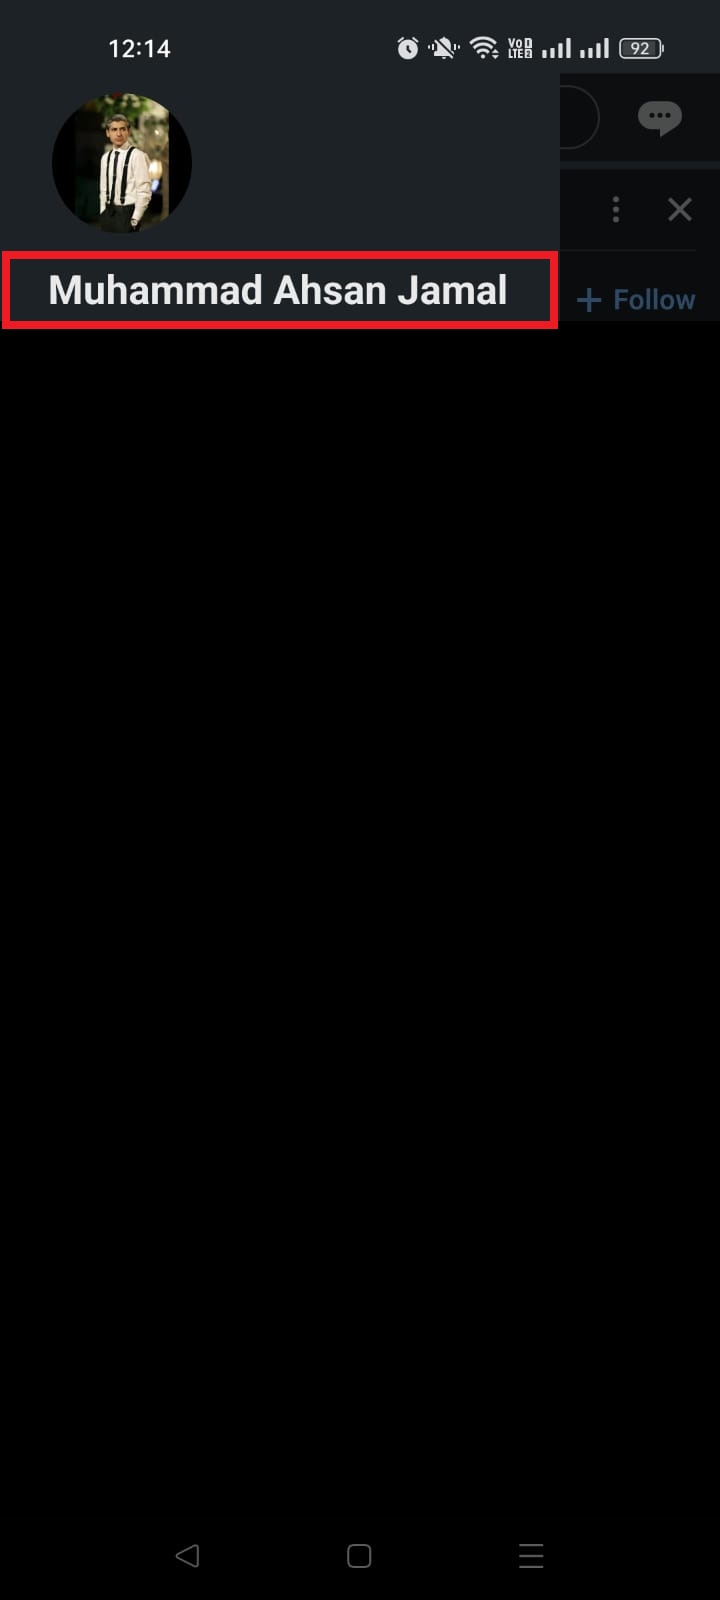
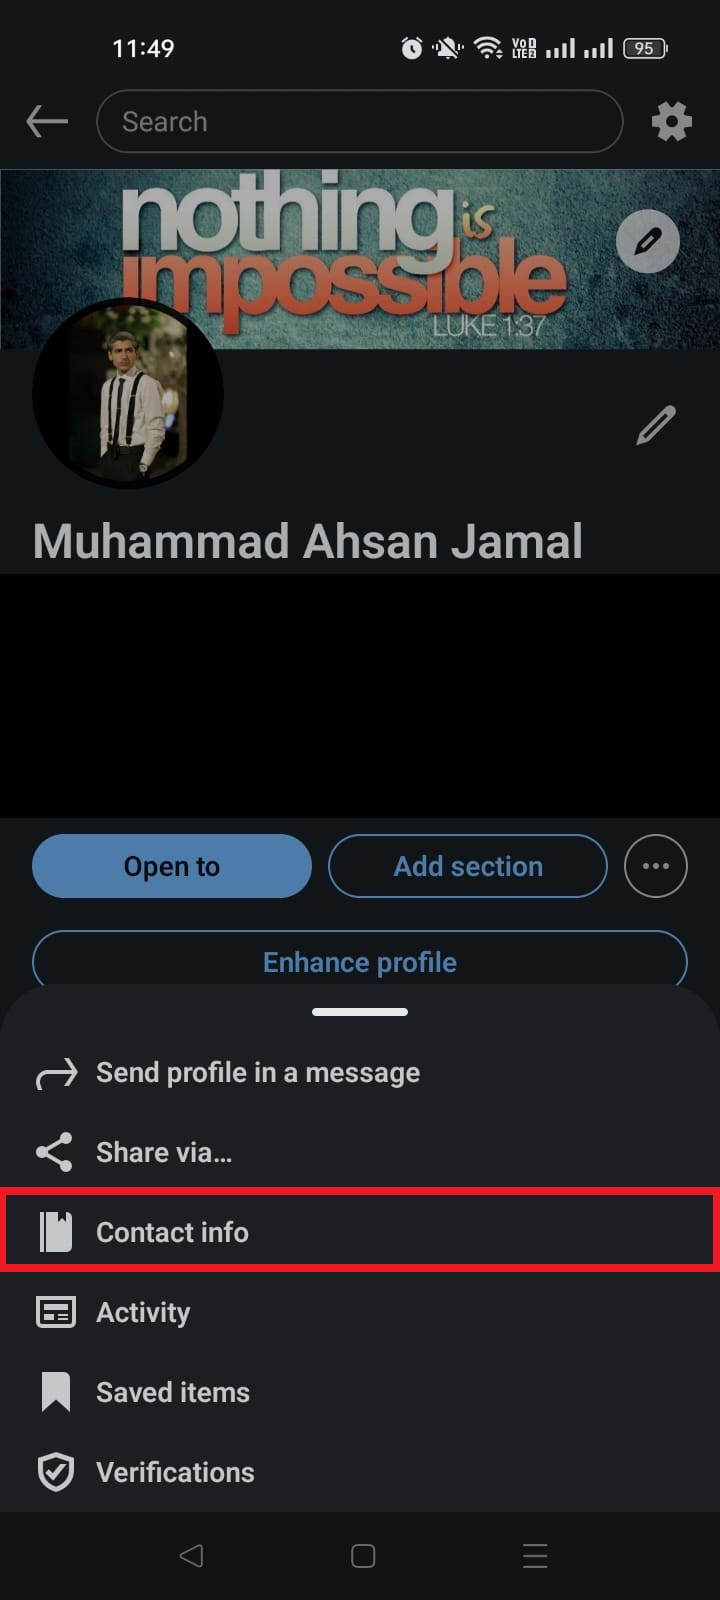
2. Tap your profile picture at the top left, then choose“View Profile,” or simply tap on your name.
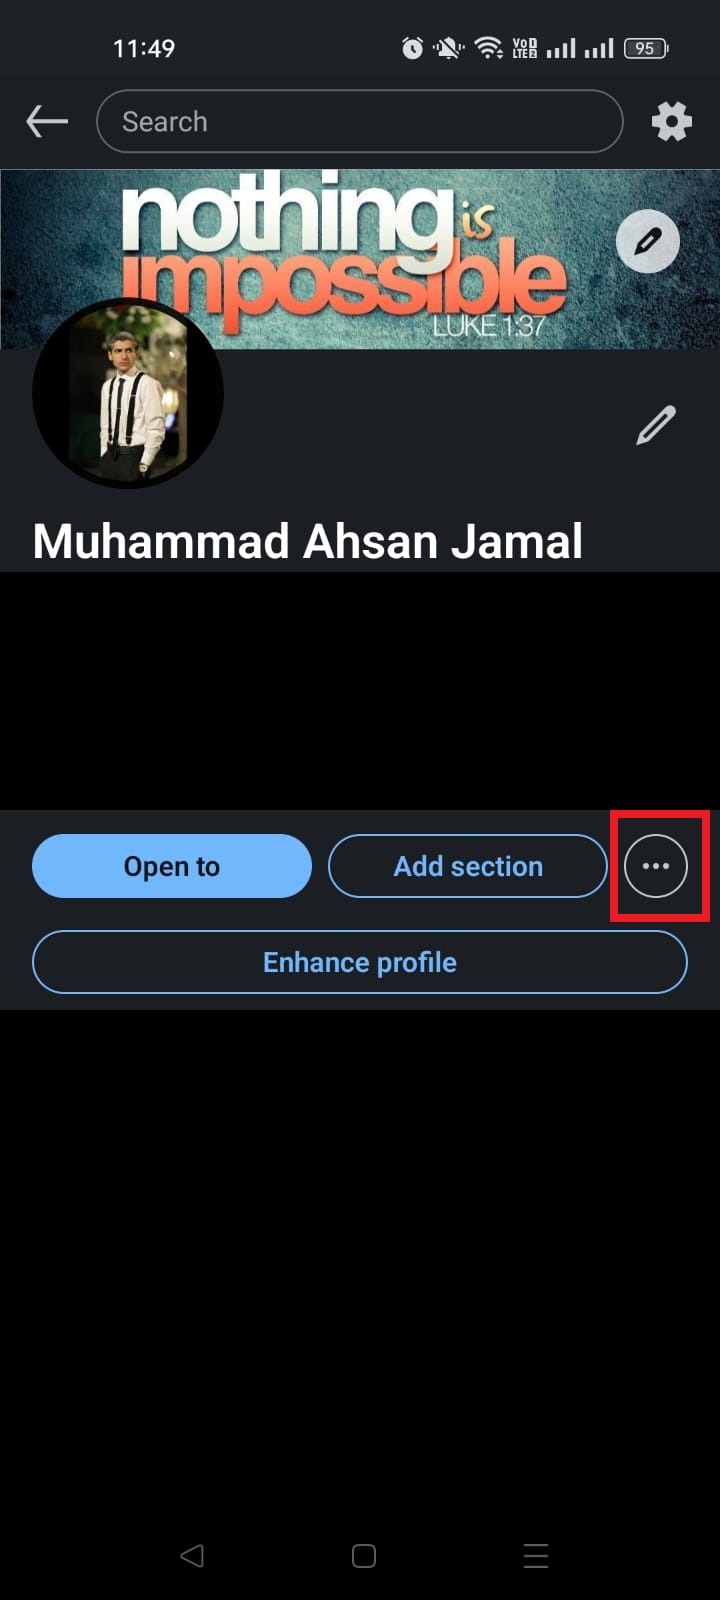
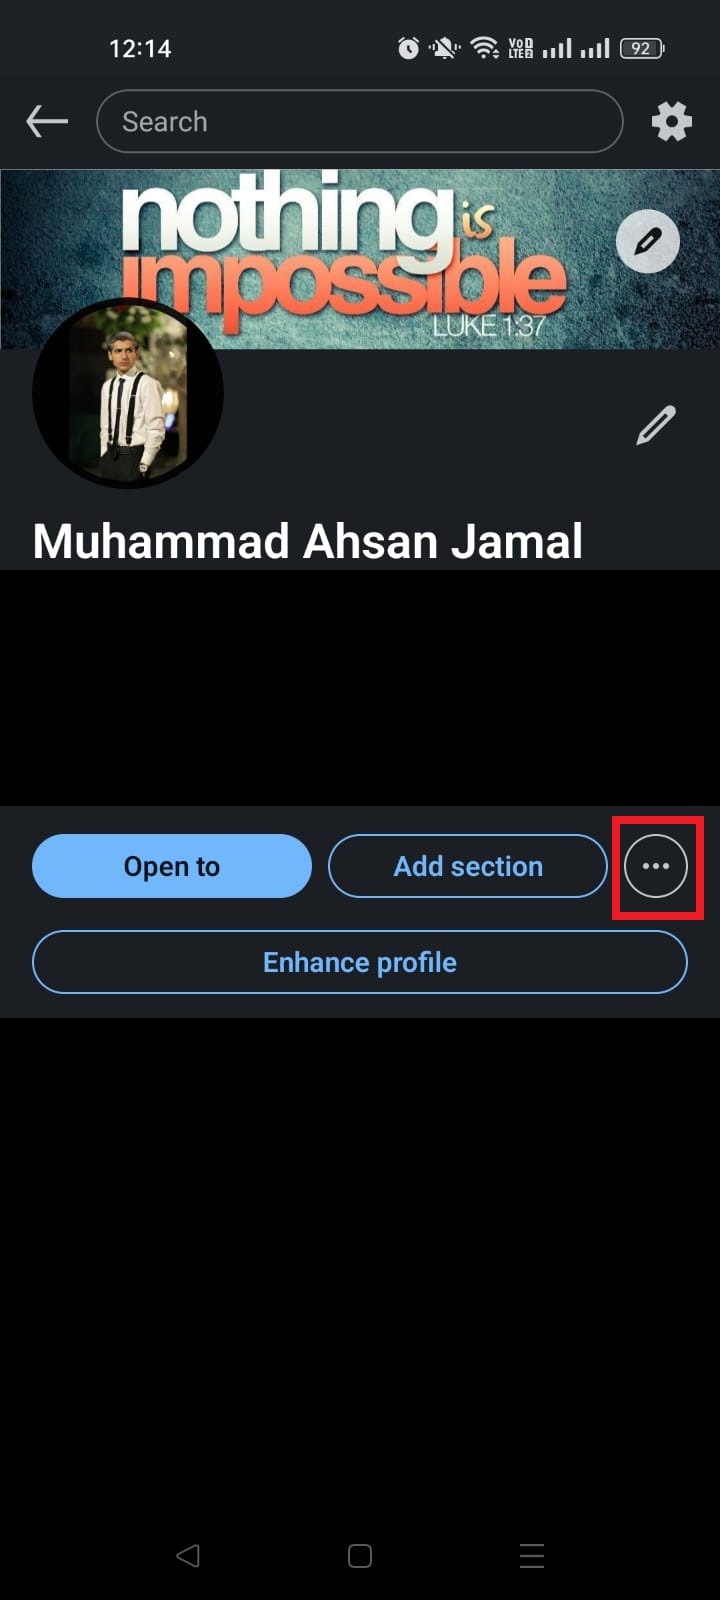
3. Once on your profile, look for the “More (⋯)” button near your photo or under your name. In most cases, it is next to the “Add section” button.
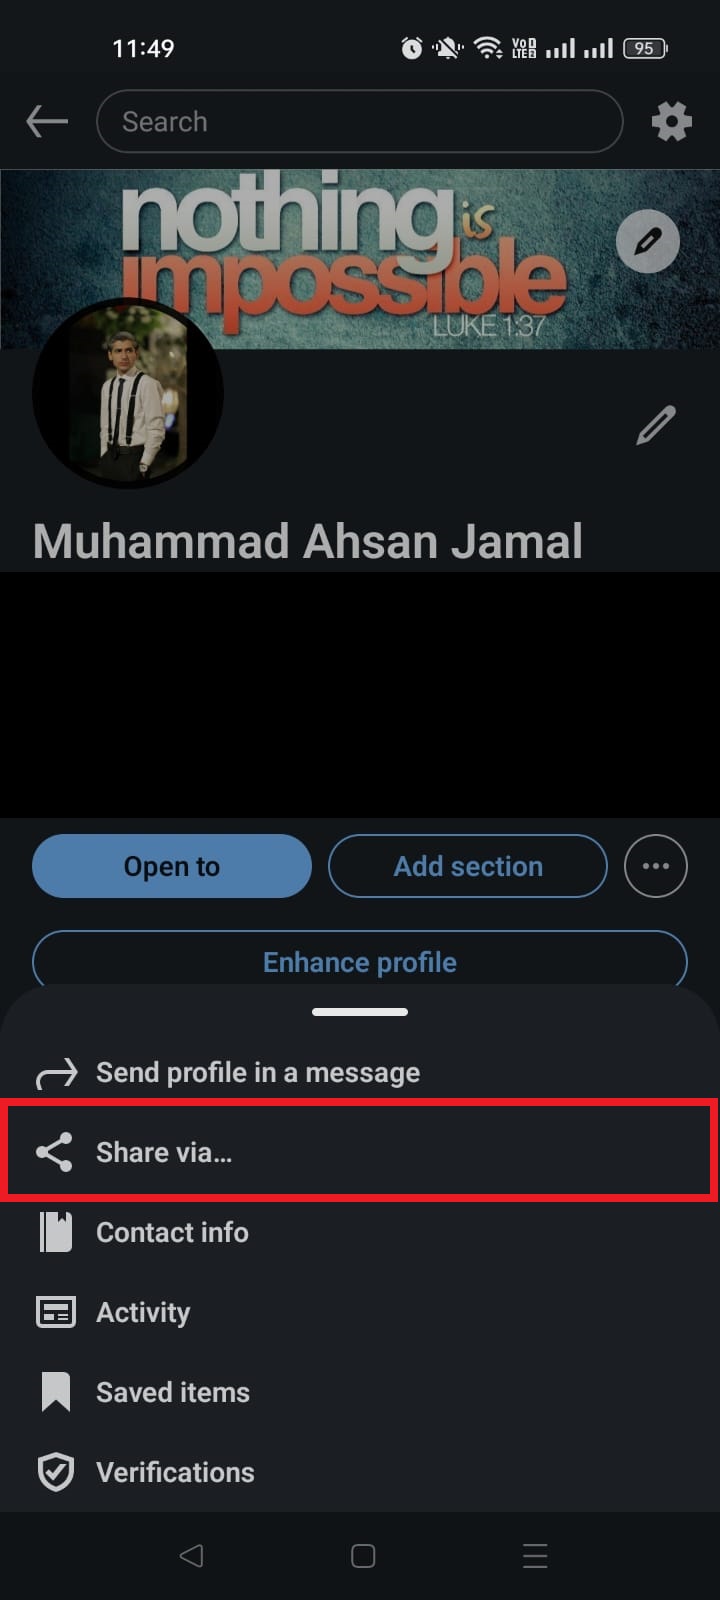
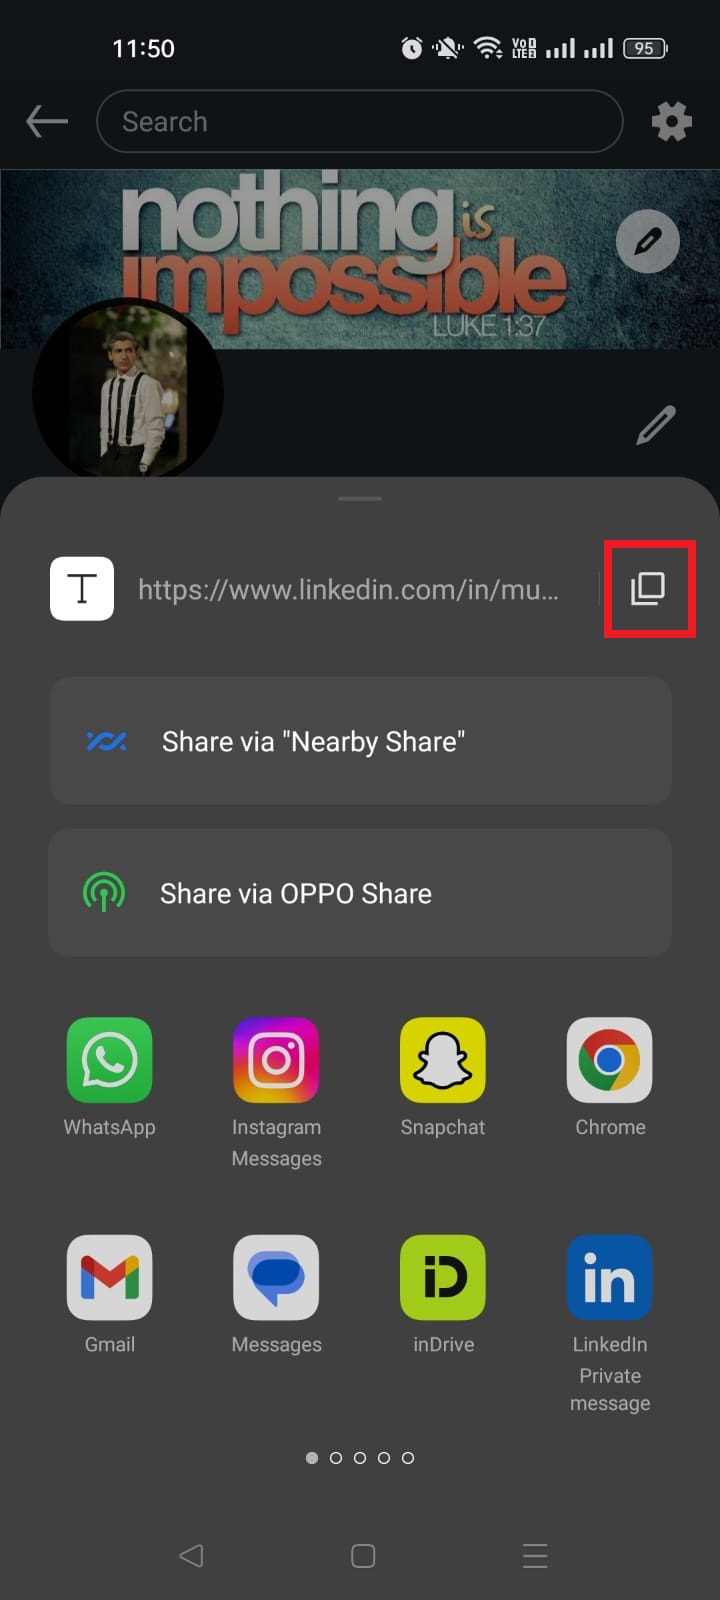
4. Tap “Share profile via…”(or similar option).
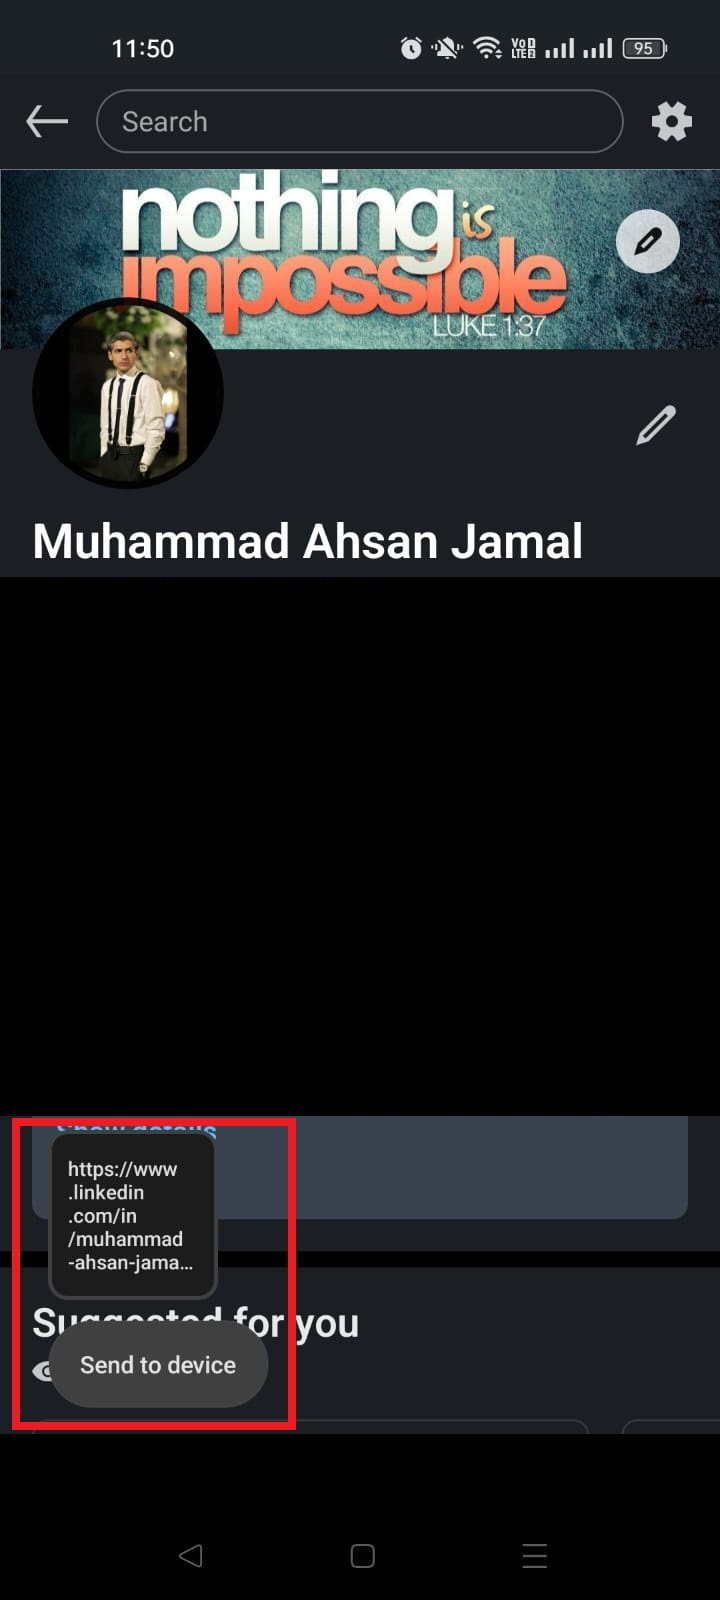
5. From the share menu, tap “Copy link” to copy your profile URL to your clipboard.
6. Paste and send this link anywhere you want (in a message, SMS, WhatsApp, email, or even other apps).
Note: This direct link will take people straight to your LinkedIn profile when clicked.
How to share LinkedIn profile link from mobile using a QR code
Here’s how to share LinkedIn profile via QR code (mobile):
1. Open the LinkedIn mobile app on your phone.
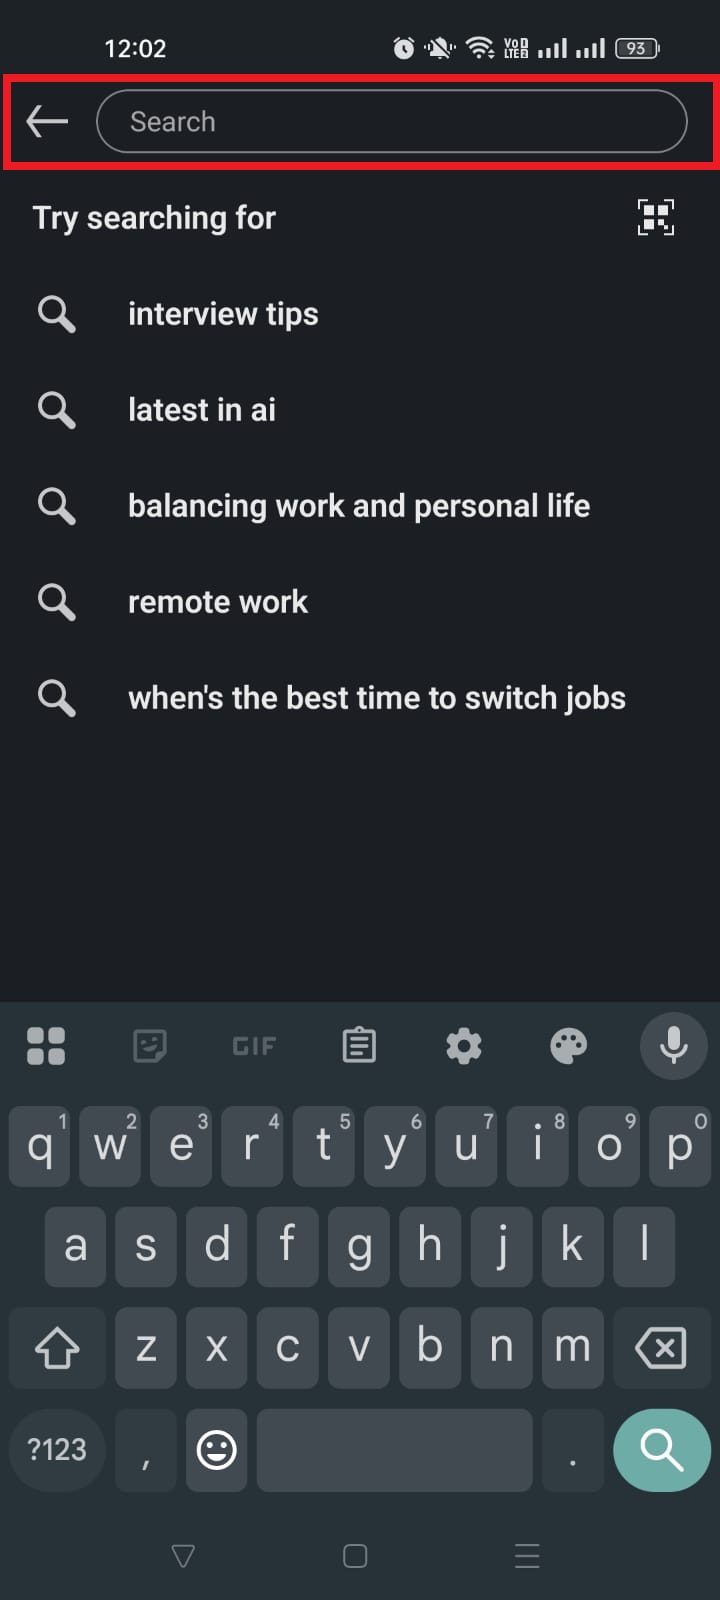
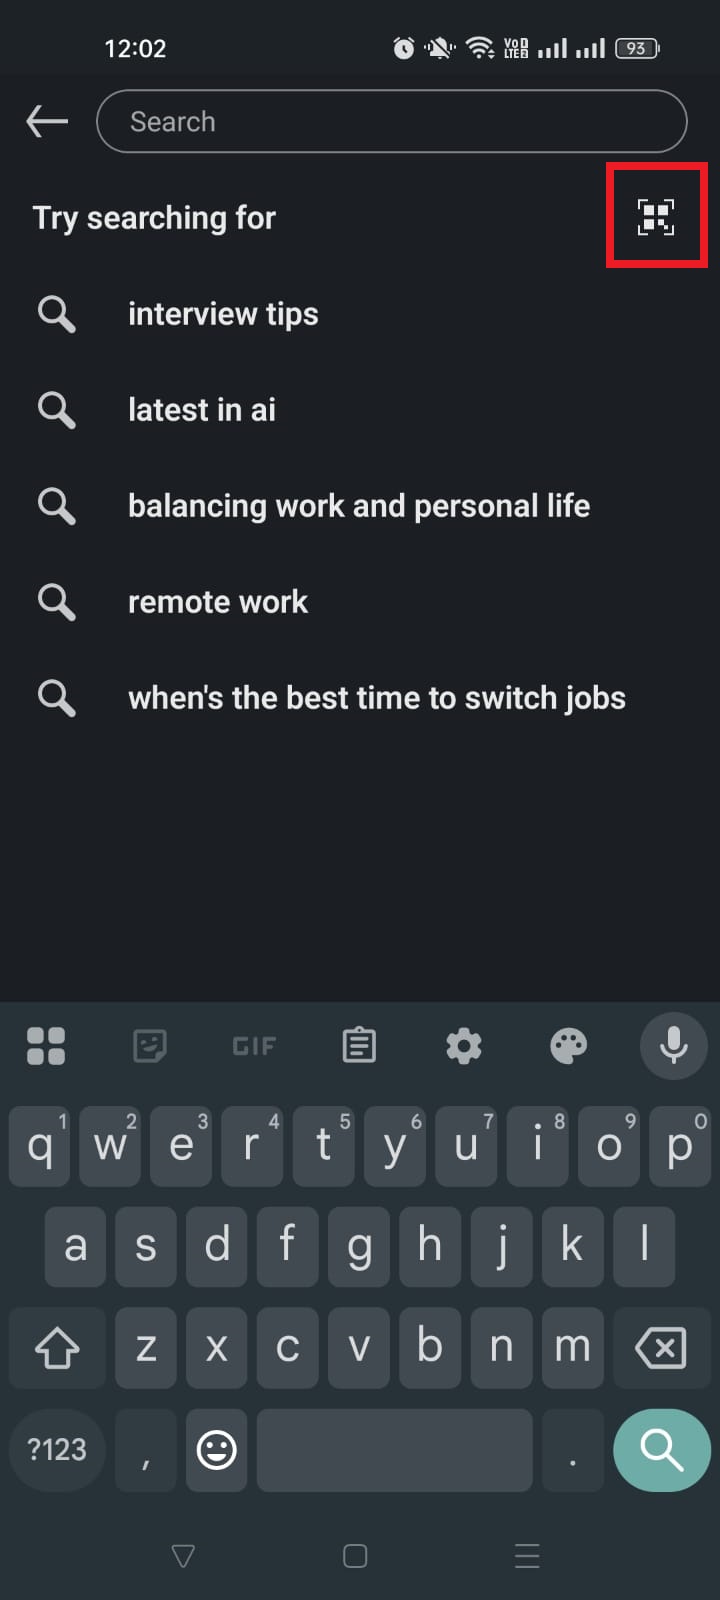
2. At the top of the home screen, tap on the “Search” bar.
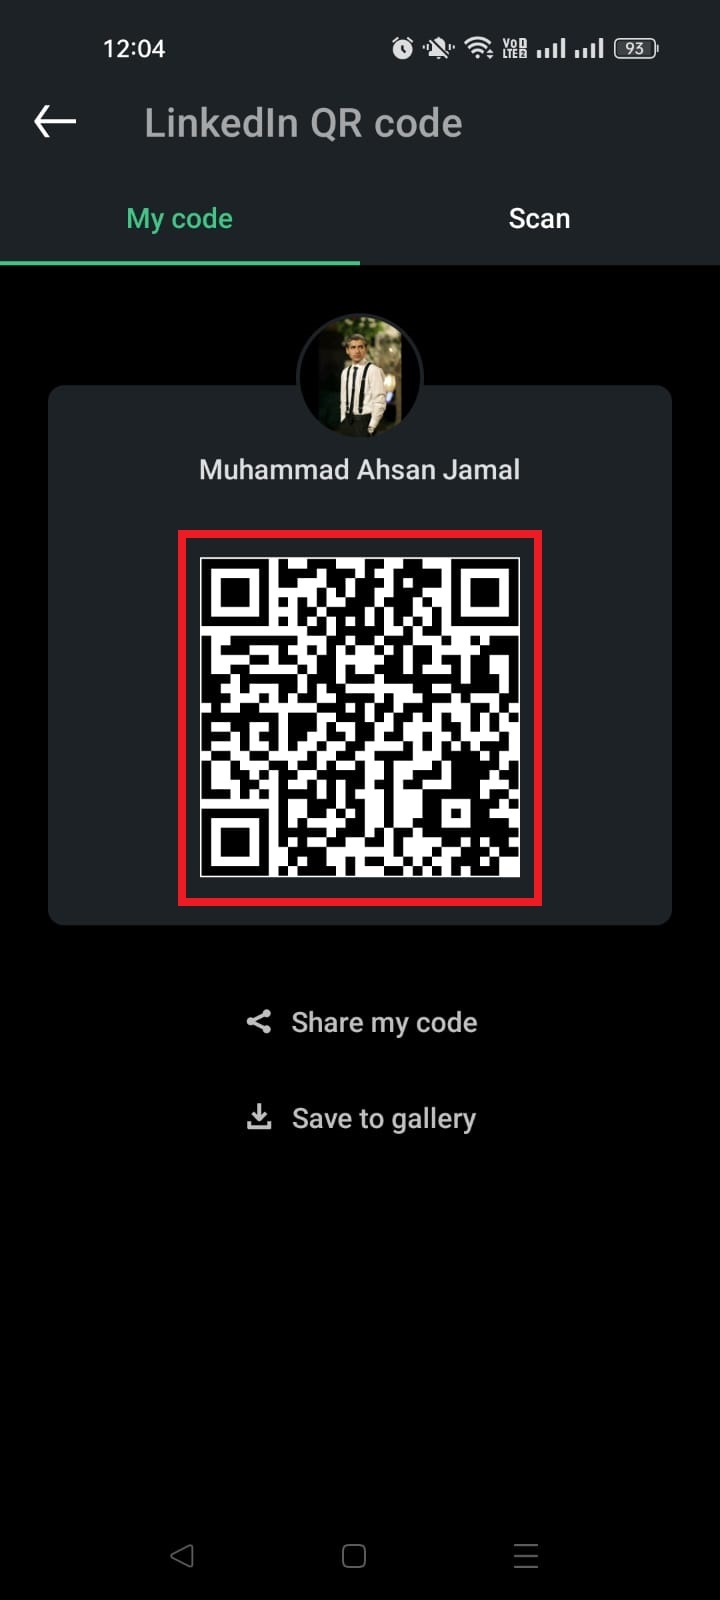
3. Tap the small “QR code” icon next to “Try searching for.” Your personal LinkedIn QR code will appear on the screen.
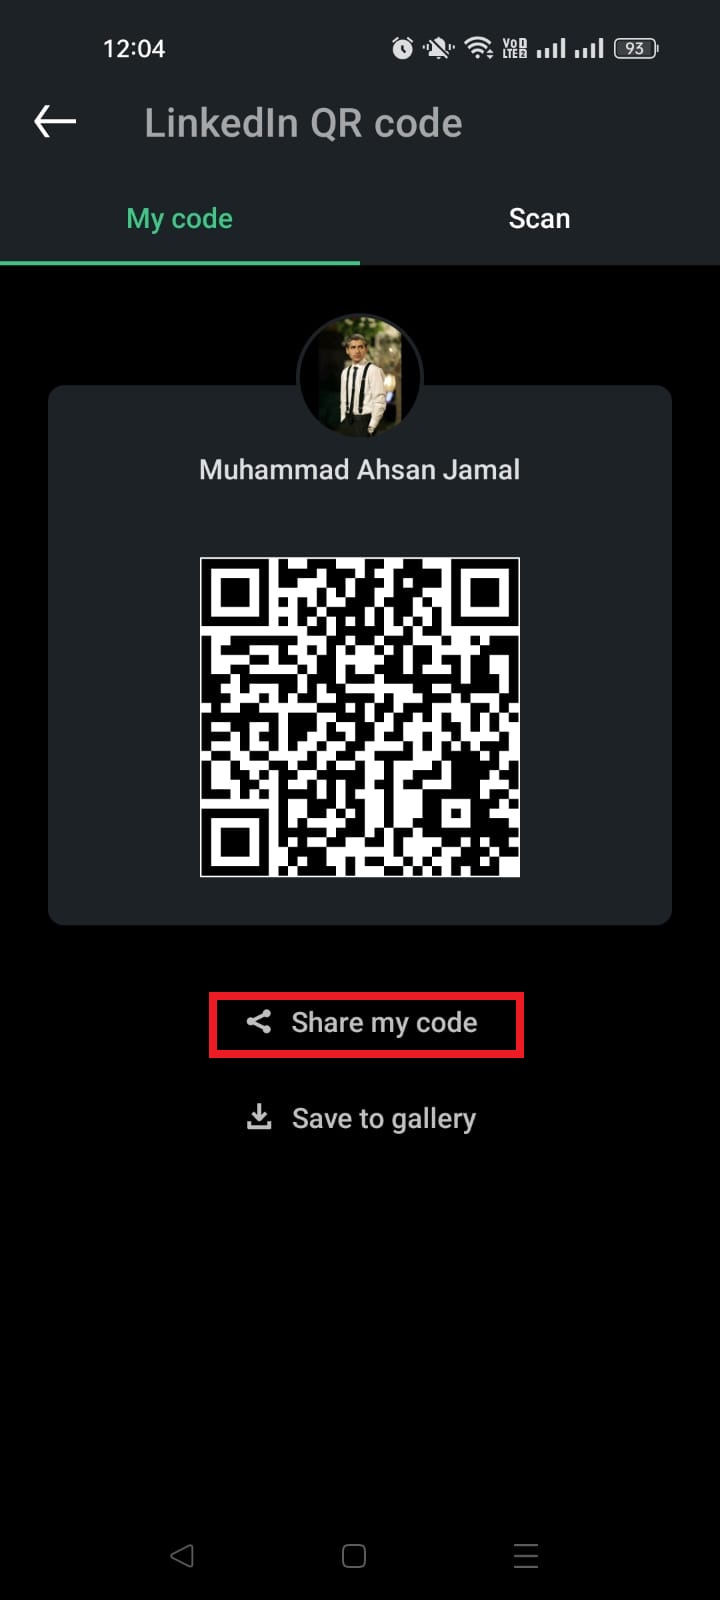
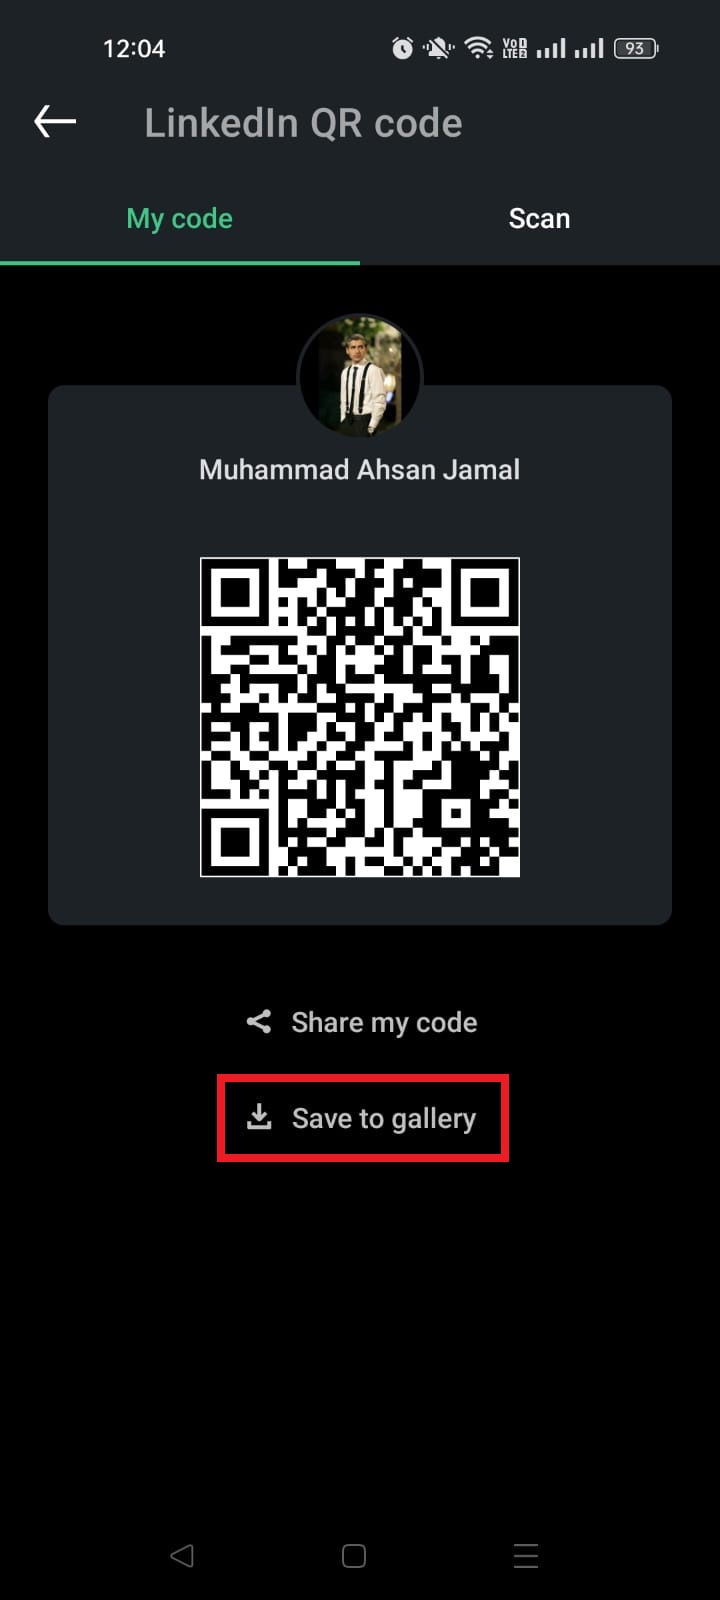
4. You can:
a. Show the code directly to someone nearby so they can scan it with their phone.
b. Tap “Share my code” to send it via messages, email, or social apps.
c. Tap “Save to gallery” to save it to your “Photos” section.
Note: When someone scans the QR code with their phone, they’ll be taken instantly to your LinkedIn profile (no typing or searching needed).
How to share LinkedIn profile link from mobile using the contact info
Here’s how to do it step-by-step:
1. Open the LinkedIn app on your iPhone or Android smartphone and log in to your account.
2. Go to your LinkedIn profile(tap your profile picture in the top left → View Profile).
3. Tap the “(⋯)” button next to the “Add section” button.
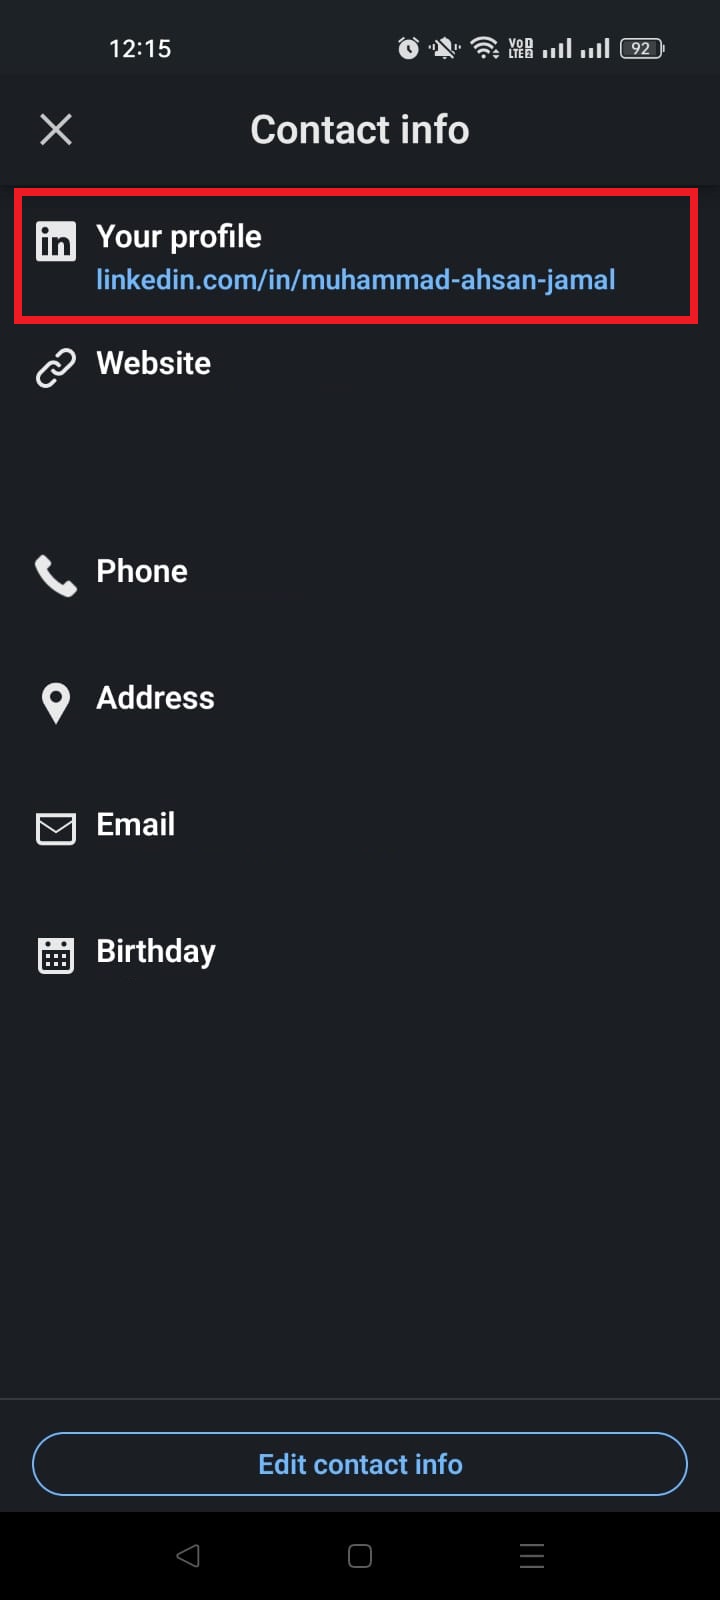
4. From the pop-up menu, tap on the “Contact info” section.
5. Tap “Your profile”.
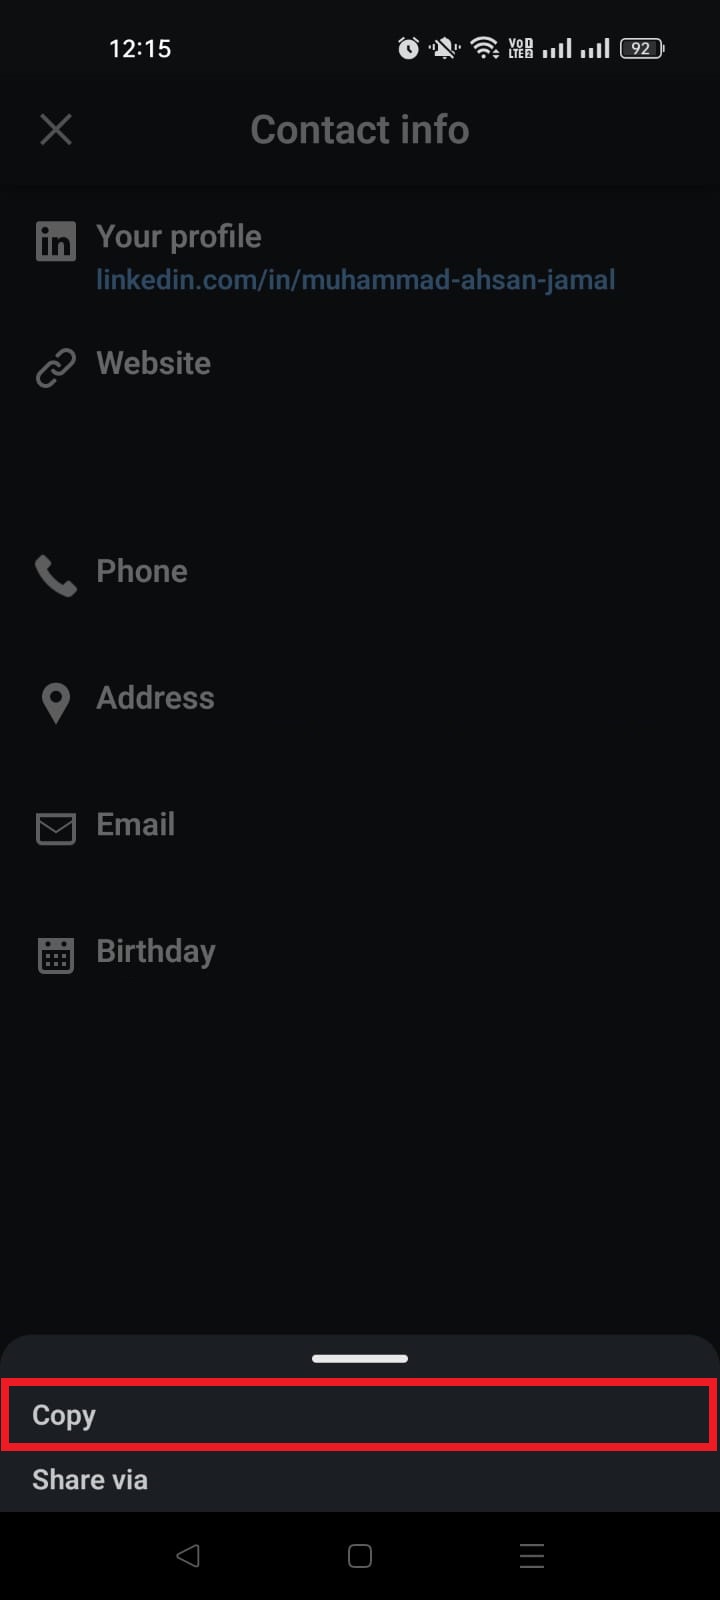
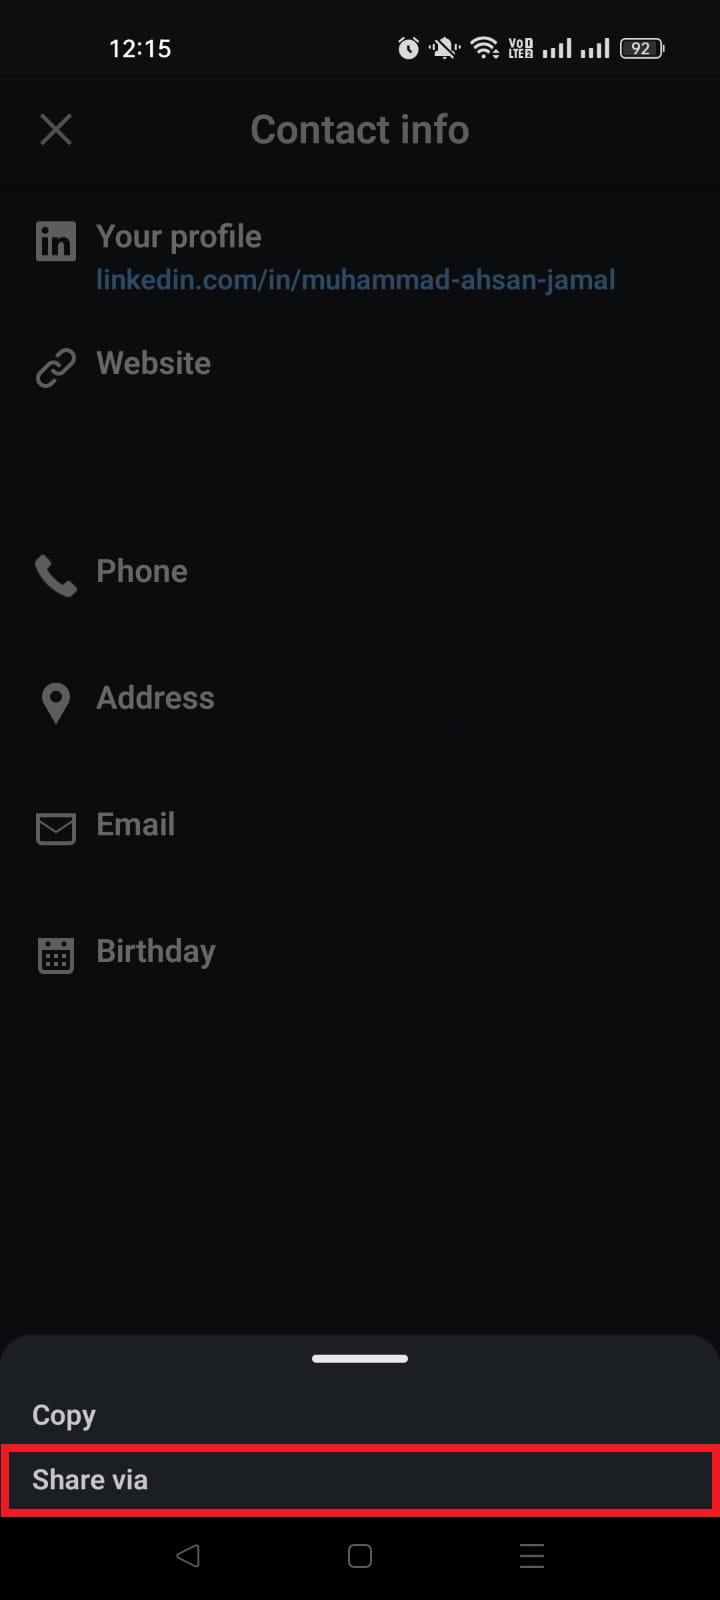
6. Choose whether to “Copy” or “Share via.”
a. If you tap “Copy,” your link will be copied to the clipboard.
b. If you tap “Share via,” your phone’s sharing panel will appear. From here, you can share it wherever you want, like on WhatsApp, Snapchat, Gmail, or Messages.
Note: You can also find your profile URL by clicking “Share profile” within the same “(⋯)” menu.
How to share LinkedIn profile on desktop
Sharing your LinkedIn profile from a desktop or laptop is simple and often more convenient when you’re applying for jobs, emailing clients, or networking professionally.
The desktop version gives you multiple ways to share your profile. You can send it directly through LinkedIn messages, copy and paste the link anywhere, or use a clean custom URL to look more professional.
Below are the easiest step-by-step methods you can follow!
How to share LinkedIn profile link from desktop via LinkedIn text message
Here’s how to do it step-by-step:
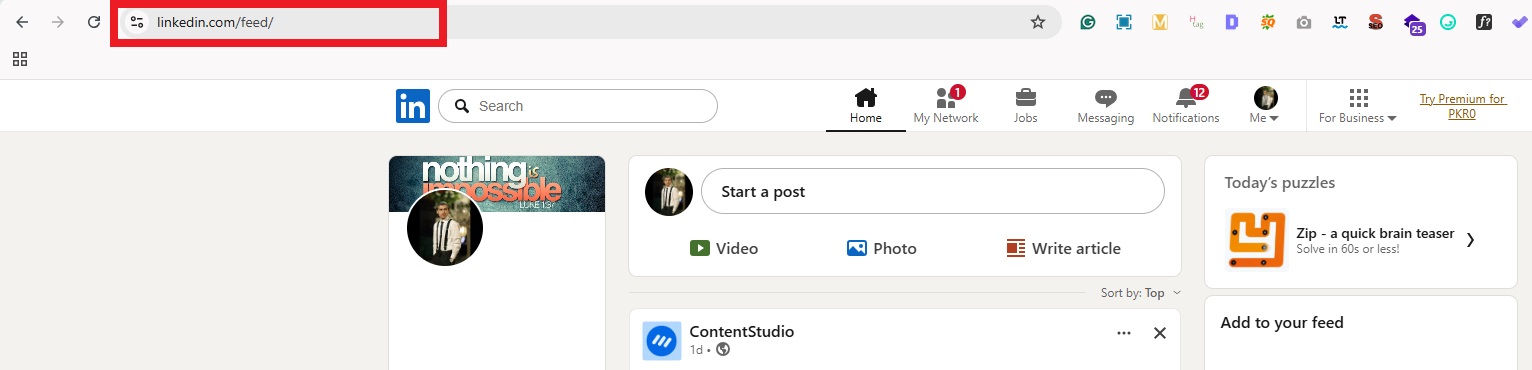
1. Log in to your LinkedIn account using a web browser.
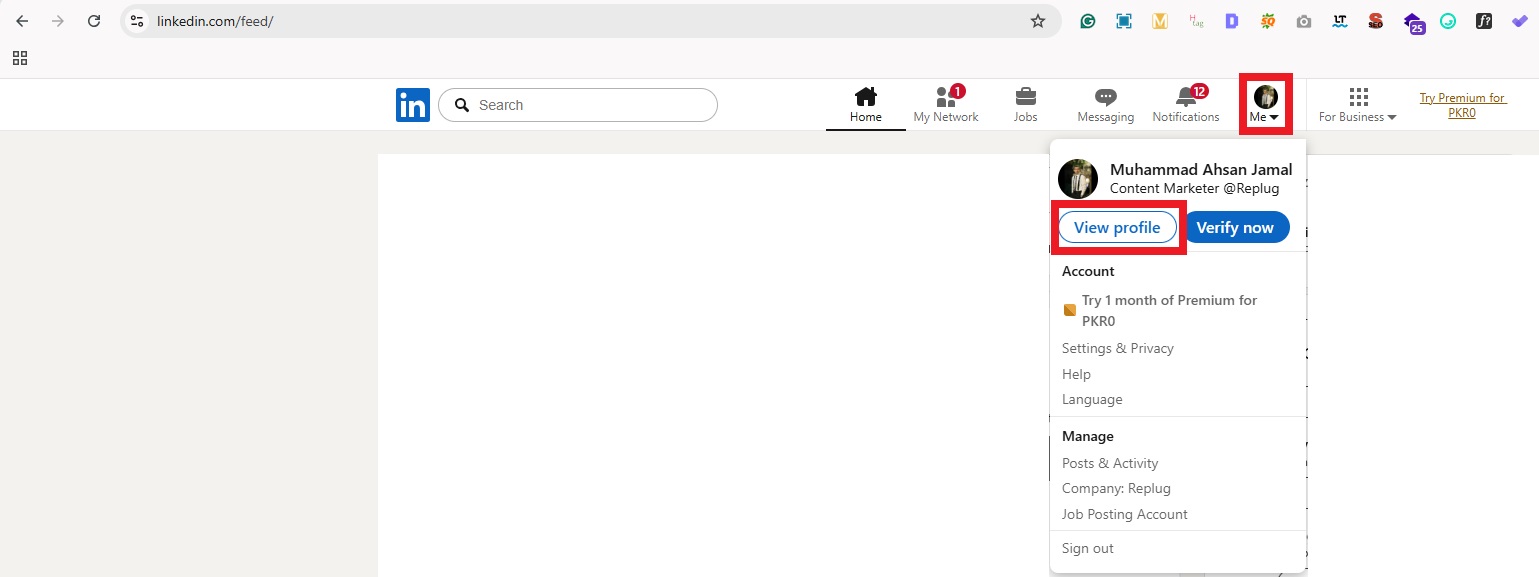
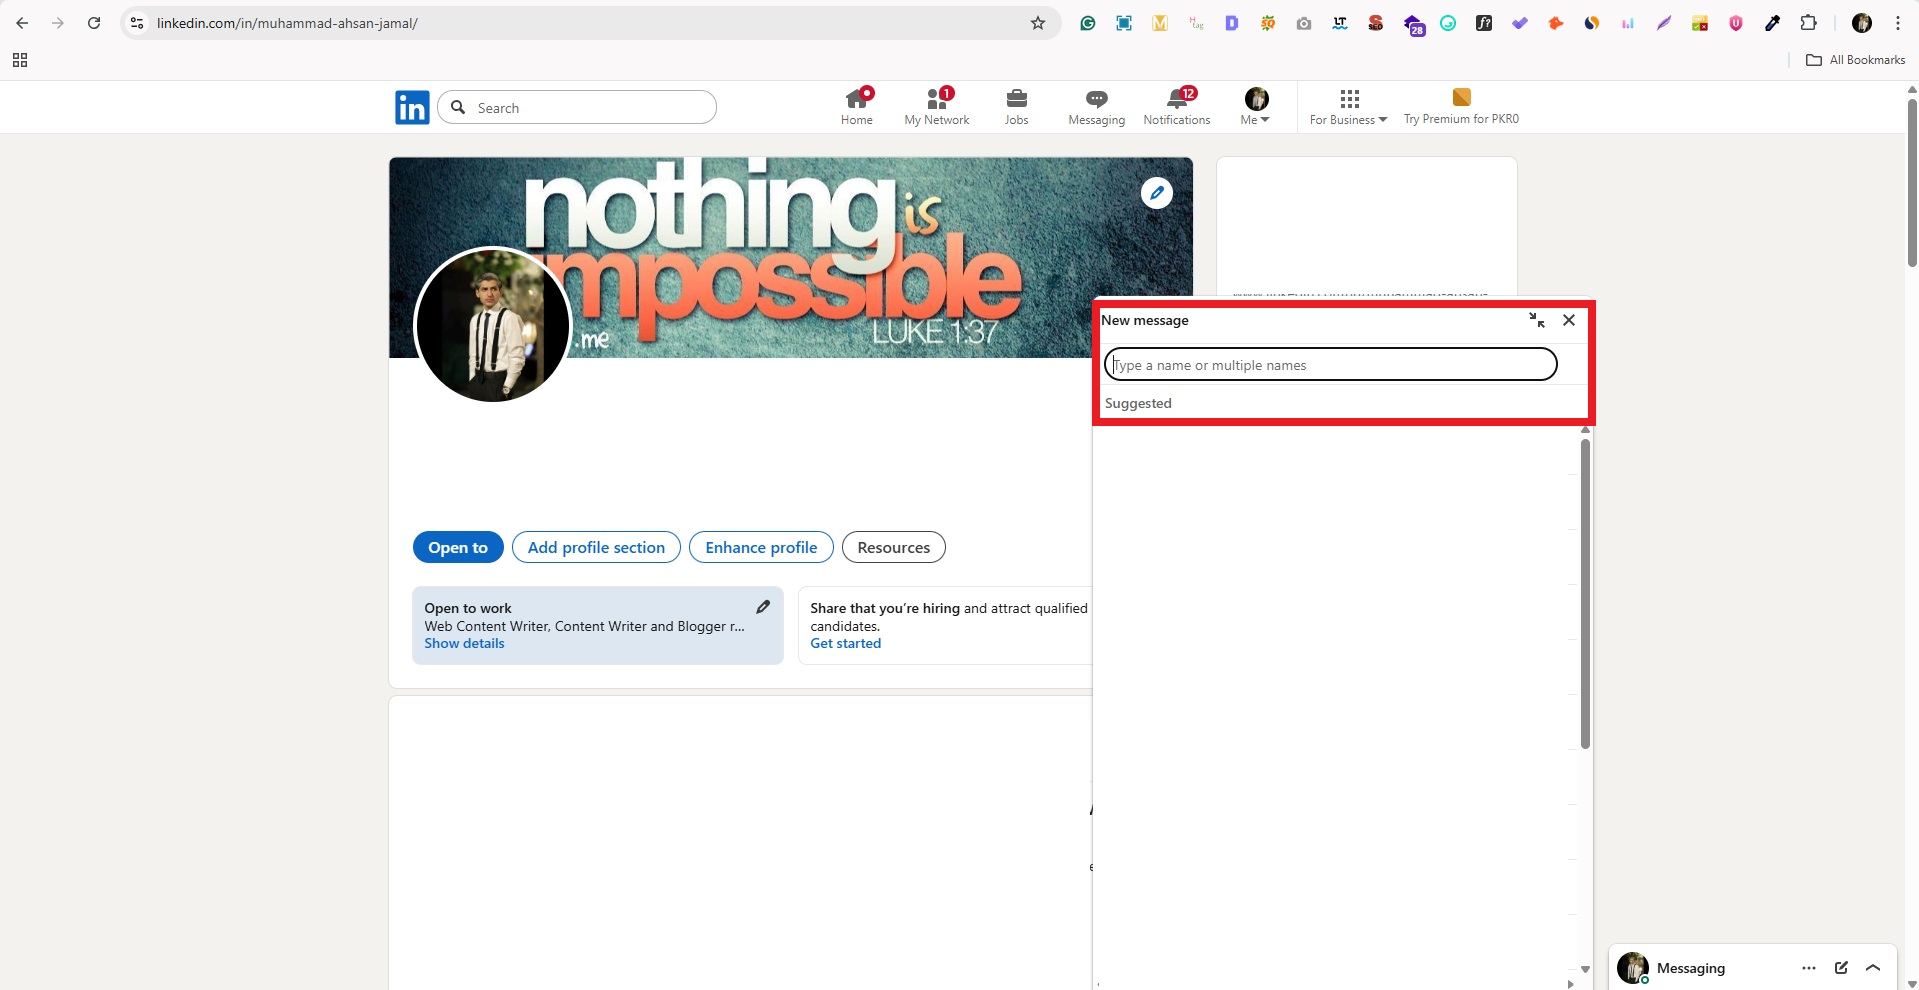
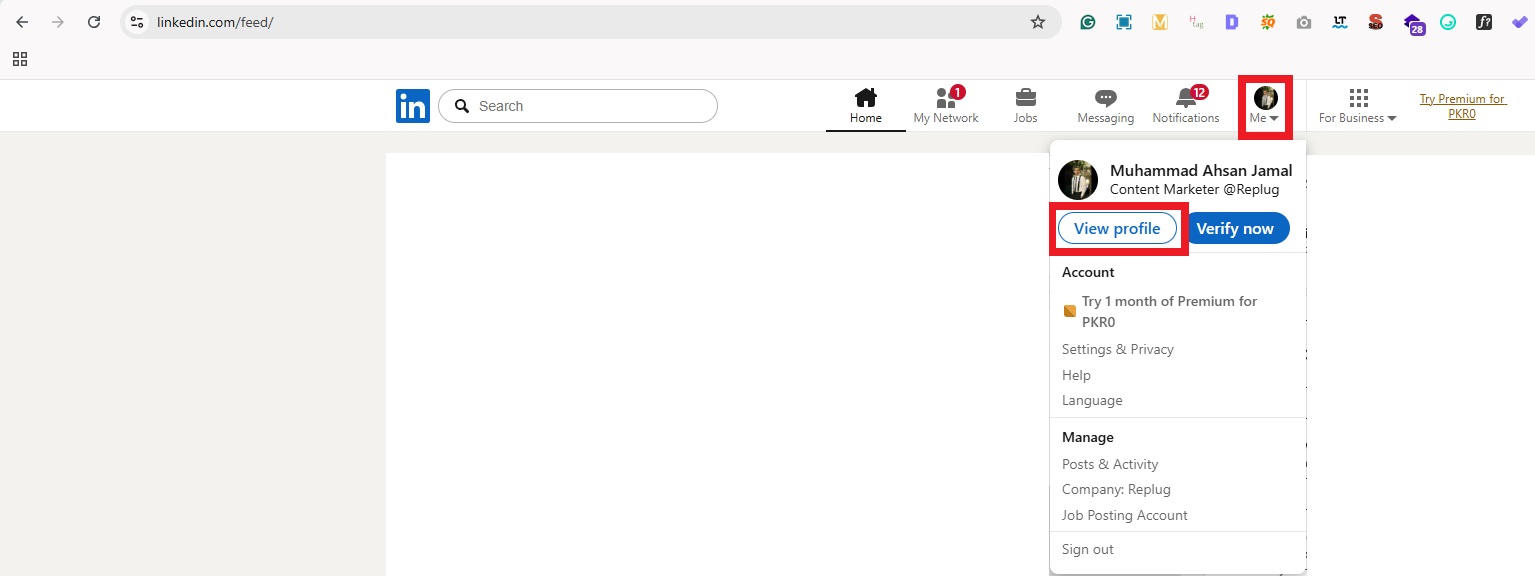
2. Click the “Me” icon at the top of the LinkedIn homepage and select “View profile.”
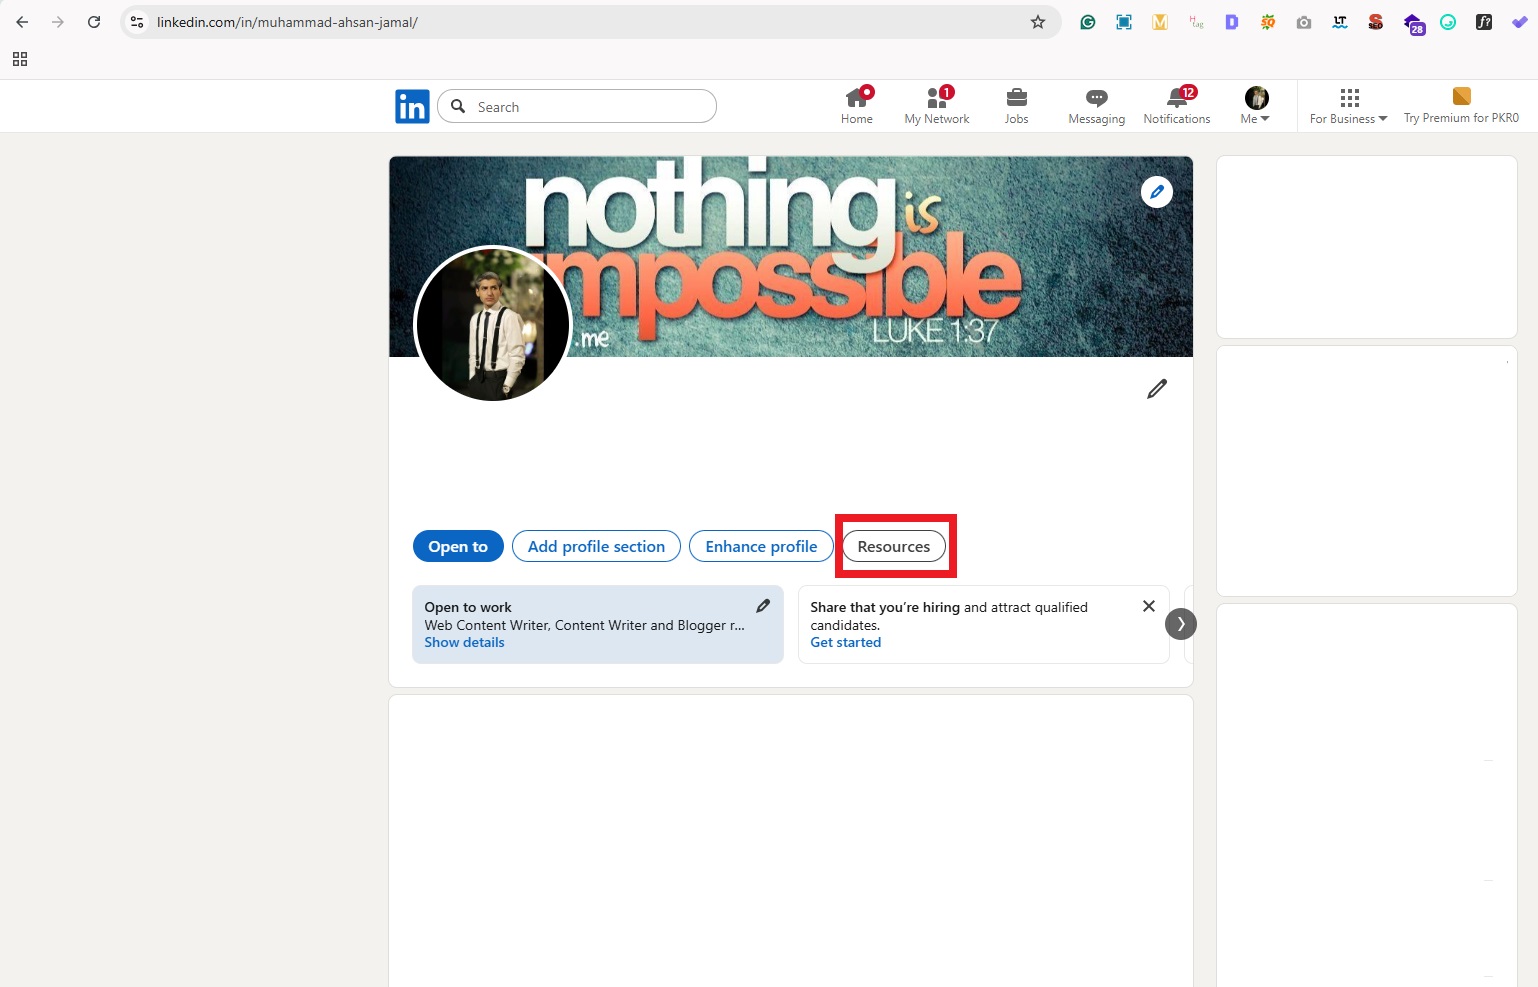
3. On your profile page, look for the “Resources” button(usually below your profile headline), and click on it.
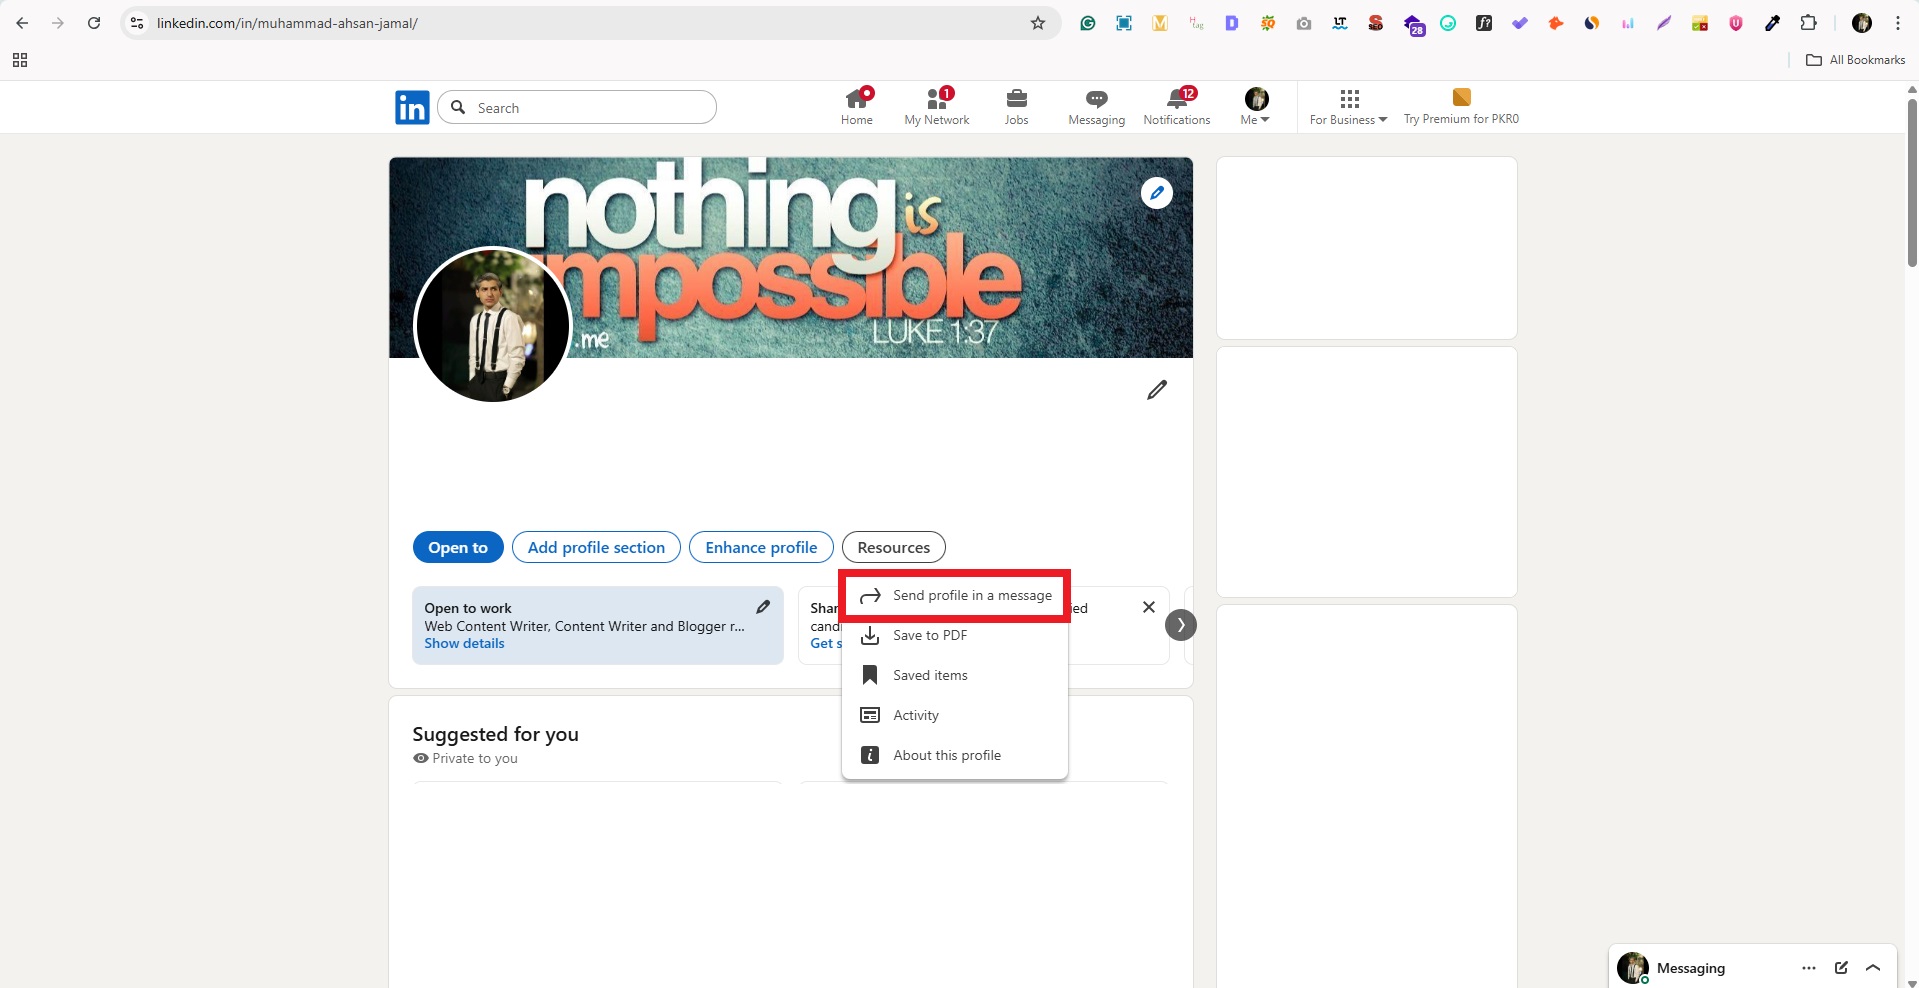
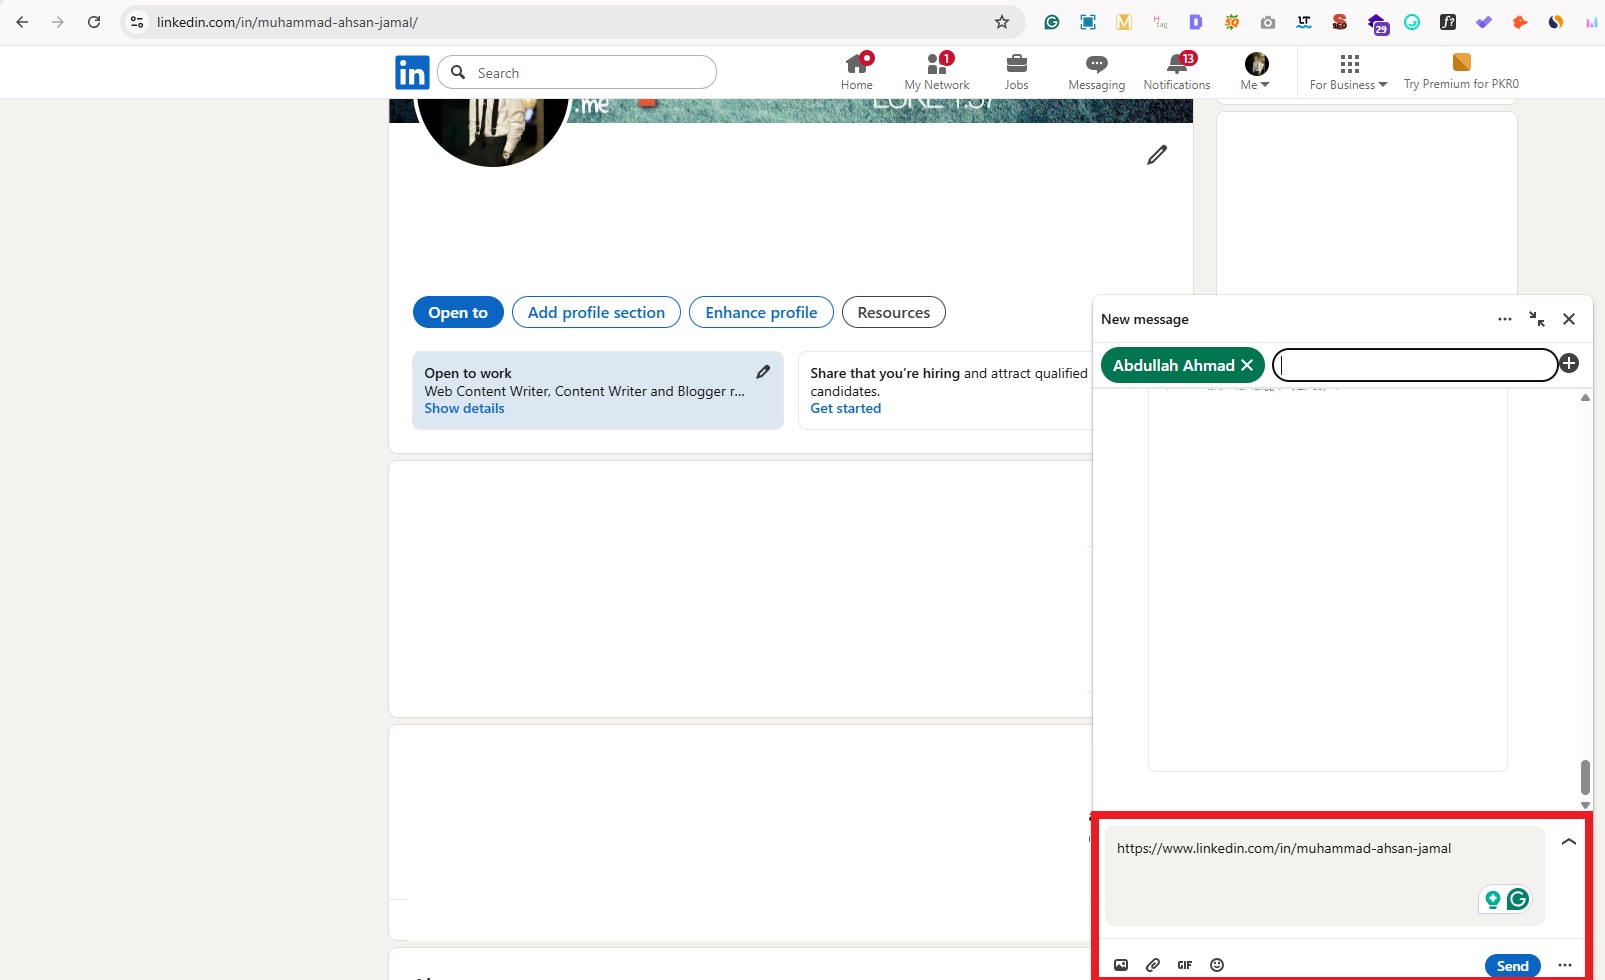
4. Click “Send profile in a message.” This option lets you share your profile directly via LinkedIn messages.
5. Select the connection or type the name of the person you want to send it to.
6. Add a short message if you want, then click “Send.”
This method works great when you’re already talking to someone on LinkedIn and want to share your profile quickly without leaving the platform.
How to share LinkedIn profile link from desktop using copy/paste
Here’s how to do it step-by-step:
1. Open LinkedIn and go to your profile page(Me → View Profile).
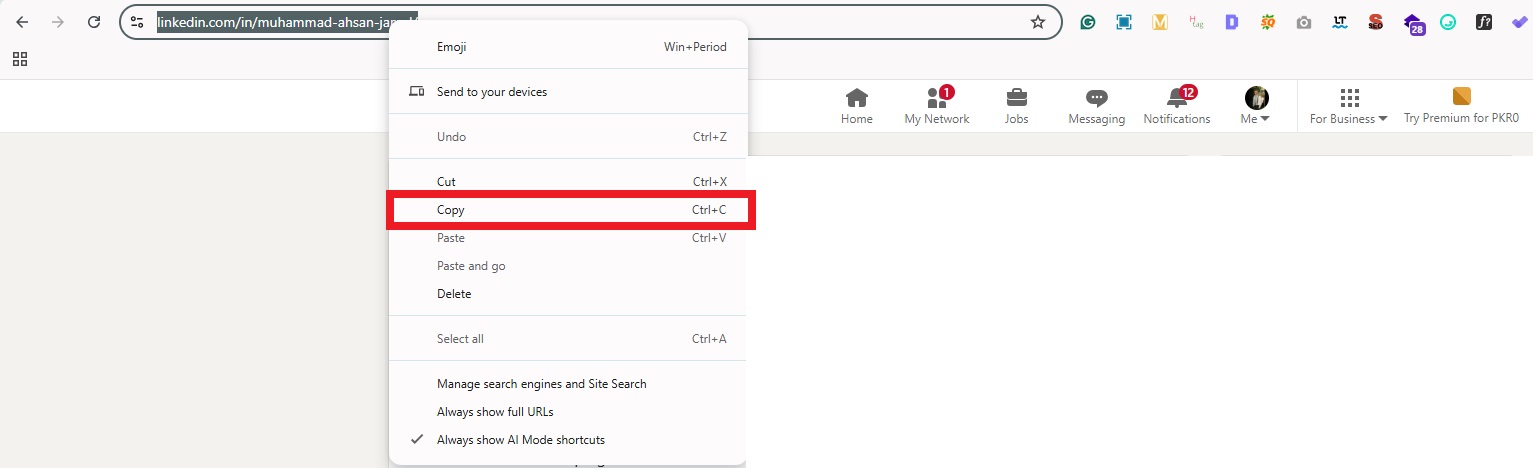
2. Once your profile opens, check your browser’s address bar at the top of the screen. This is your profile link!
3. Click the address bar to highlight the entire link.
4. Right-click and select “Copy,” or press Ctrl + C(Windows) / Command + C(Mac).
5. Paste the link anywhere you want (emails, job applications, resumes, or messaging apps), using Ctrl + V or Command + V.
This is the fastest and most commonly used way to share your LinkedIn profile with anyone, even outside LinkedIn.
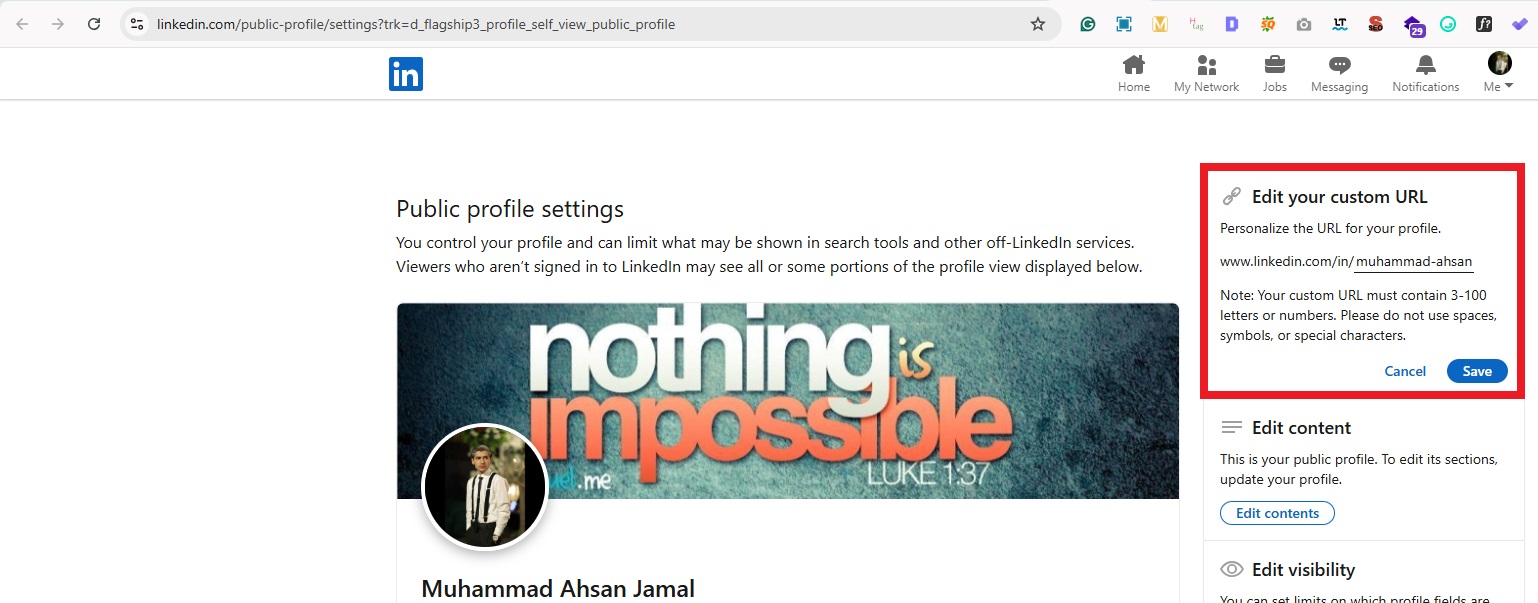
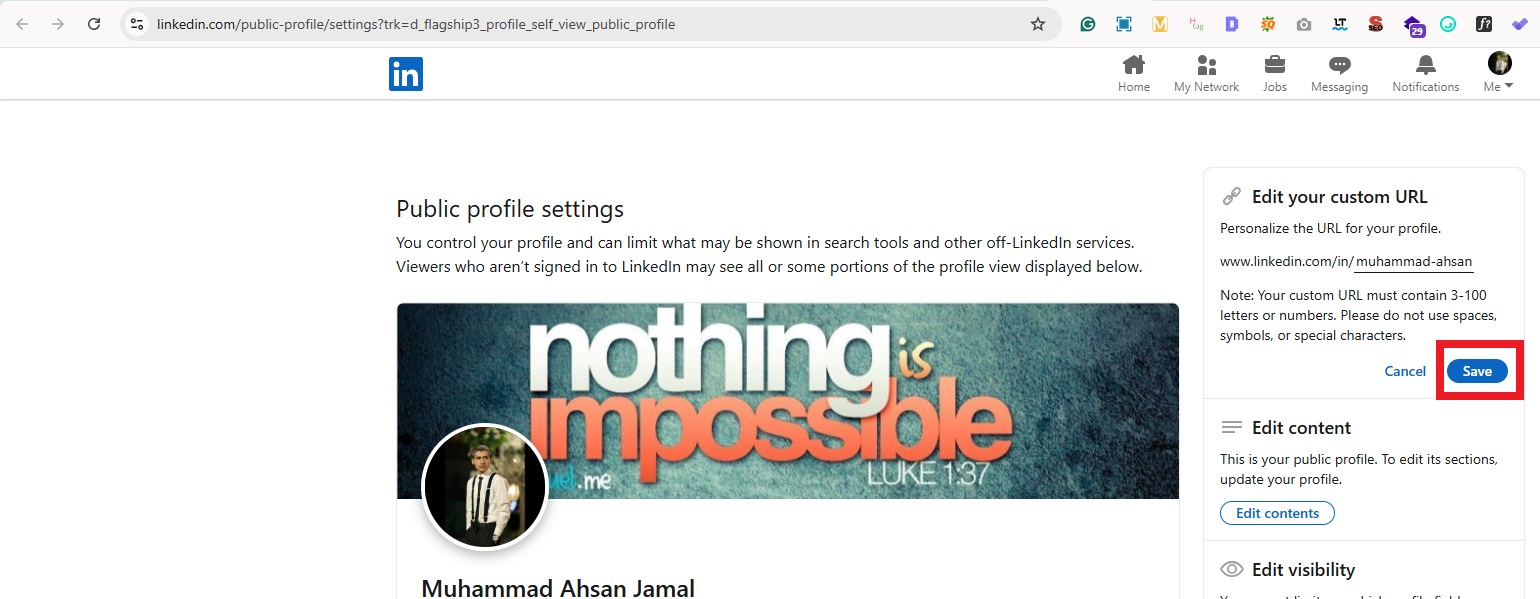
How to share LinkedIn profile link from desktop using your custom URL
Here’s how to do it step-by-step:
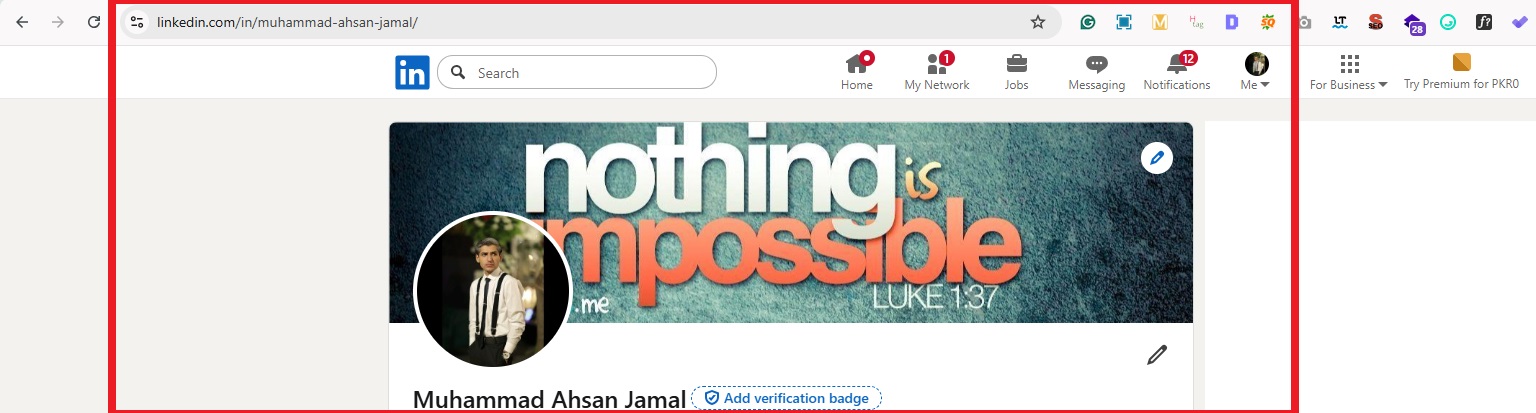
1. Log in to LinkedIn and open your profile page.
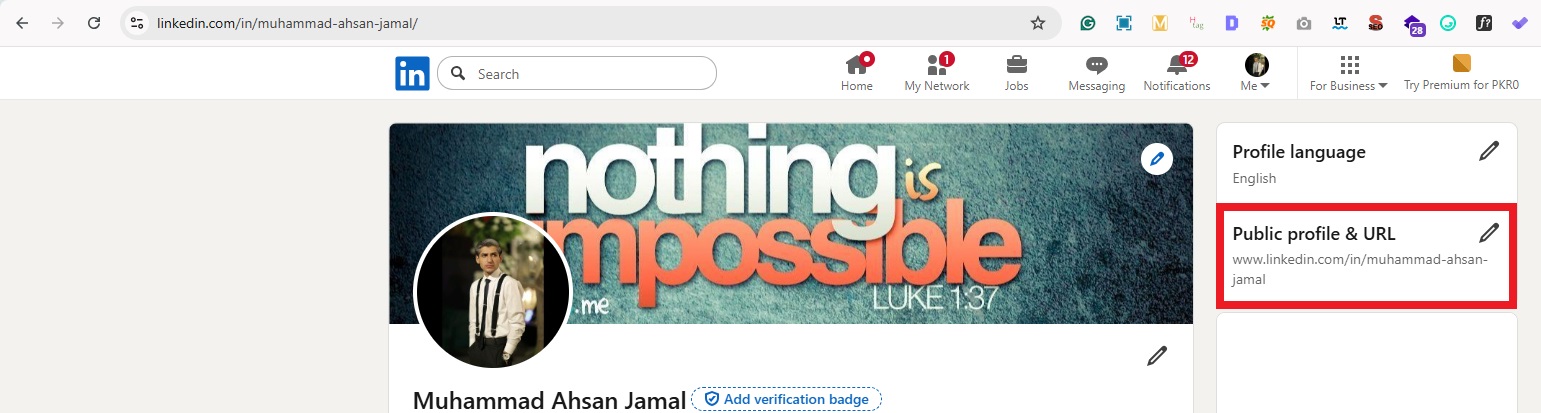
2. On the right side, locate “Public profile & URL.”
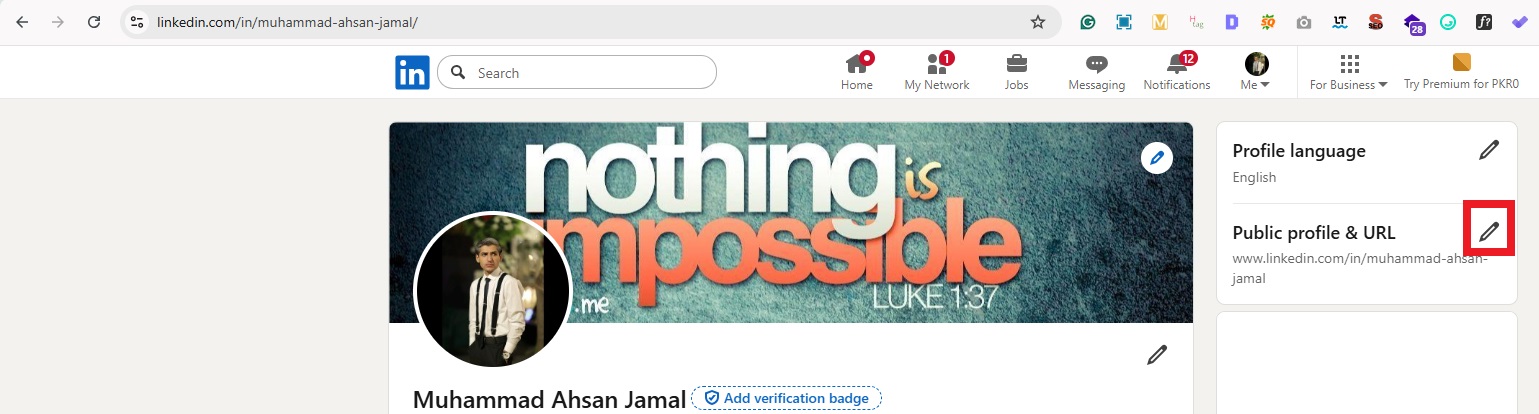
3. Click the edit (pencil) icon. Wait for the page to load.
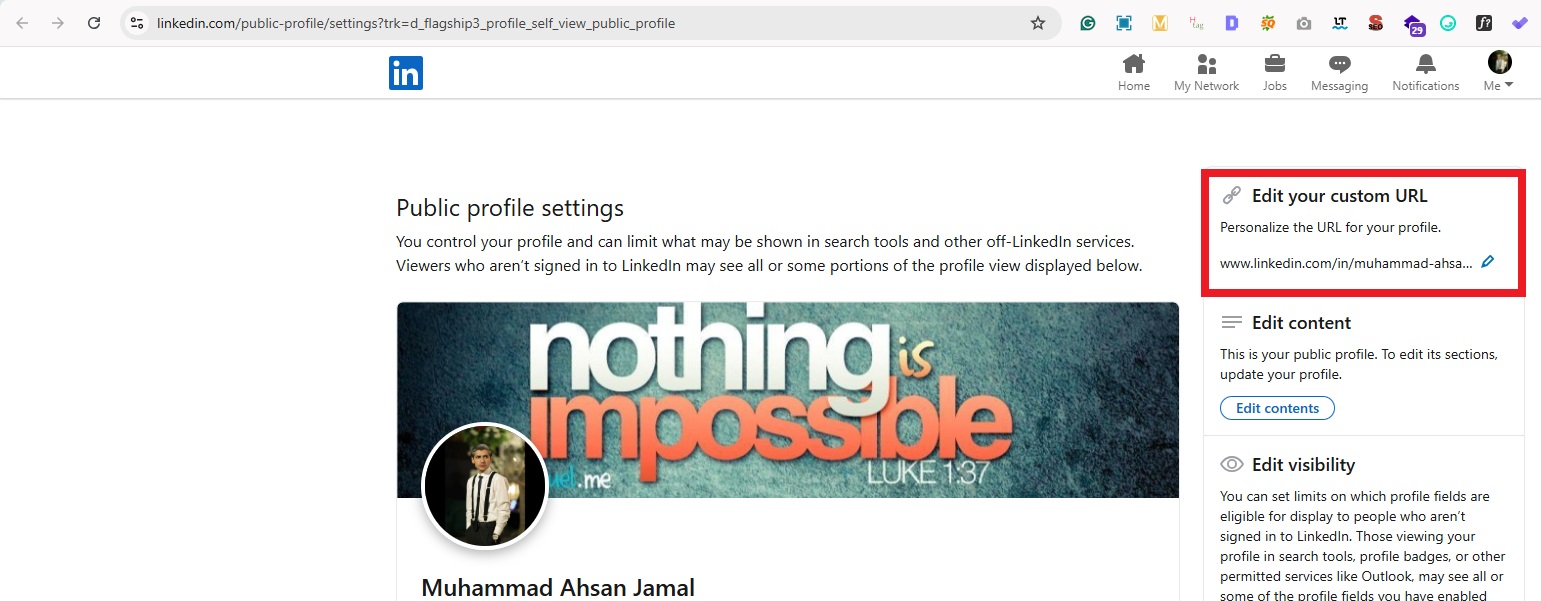
4. On the right side, locate “Edit your custom URL.”
5. Click the edit (pencil) icon. Enter a personalized URL using your name or professional brand (if available).
6. Click “Save” to apply the changes. Copy your new custom link and share it wherever needed.
A custom URL usually looks cleaner and easier to remember, which makes you appear more professional and helps people find your profile quickly.
How to share LinkedIn profile on resume
Adding your LinkedIn profile to your resume is a smart way to give recruiters a deeper look at your professional background.
Your resume shows a summary of your experience, while your LinkedIn profile can highlight projects, recommendations, achievements, and work samples that don’t fit on one or two pages.
When done properly, it makes it easier for employers to learn more about you and verify your professional credibility.
Here’s how to share LinkedIn profile link on resume:
Step #01: Make sure your LinkedIn profile is complete & updated
Before adding your profile to your resume, double-check that it looks professional and matches your resume details. Recruiters often review LinkedIn profiles to see work samples, career growth, and recommendations, so an updated profile helps create a strong impression.
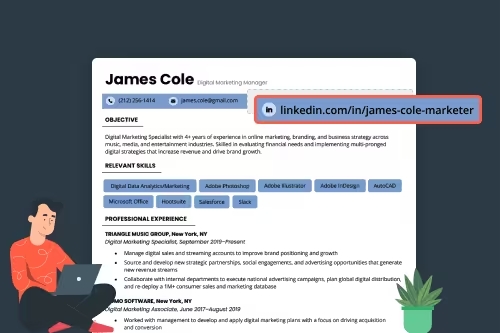
Step #02: Create a clean & professional LinkedIn URL
Go to your LinkedIn profile page → Click the edit (pencil) icon next to “Public profile & URL” → Create a simple custom link using your name (for example: linkedin.com/in/yourname). Remember, a custom URL looks neater, saves space, and appears more professional on resumes.
Step #03: Add your LinkedIn profile to the resume header
Place your LinkedIn profile link in the“contact section” at the top of your resume. It should appear alongside your name, email address, phone number, and location. Recruiters usually check this section first, so adding it here makes your profile easy to find.
Step #04: Format the LinkedIn link properly
Remove extra text like “https://” to keep the link short and neat. If you’re submitting a digital resume or PDF, make the link clickable (clickable hyperlink) for quick access. For printed resumes, a simple, readable text link works best.
Step #05: Test the link before sending your resume
Copy and open the LinkedIn link to make sure it works correctly. A broken or incorrect link can leave a poor impression and make it harder for recruiters to reach your profile. Must perform this step!
By following these steps, you can confidently add your LinkedIn profile to your resume and make it easier for hiring managers to explore your professional story.
Sharing your LinkedIn profile URL helps people quickly learn about your professional background and connect with you with minimal effort. It’s like your online career portfolio, easy to access and share anytime.
Increases visibility to recruiters
Many recruiters rely on LinkedIn to find and evaluate candidates, with studies showing that 70–87% use it to source talent. Plus, most employers review profiles before interviews. Sharing your profile link makes it easier for recruiters to discover you and review your experience, skills, and achievements in one place.
Enhances professionalism & credibility
A shared LinkedIn profile gives others a complete and verified view of your professional identity, including recommendations, endorsements, and career history. Profiles with skill endorsements, for example, can receive significantly more recruiter views, which boosts credibility.
Provides comprehensive context
Unlike a short resume, your LinkedIn profile can showcase projects, certifications, achievements, and work samples in detail. This helps hiring managers and connections better understand your professional journey and strengths.
Facilitates easy networking
LinkedIn is home to over 1 billion professionals worldwide, making it one of the largest platforms for career networking. Sharing your profile link makes it easier for colleagues, clients, and industry peers to connect, collaborate, and stay in touch.
Streamlines job applications
Many job applications ask for or accept your LinkedIn profile URL, helping recruiters quickly review your background and verify your qualifications. It also allows you to apply for jobs faster since your profile already contains most of your professional details.
Places to share your LinkedIn profile in 2026
Sharing your LinkedIn profile in the right places helps you stay visible, build credibility, and grow professional connections naturally.
The more strategic you are about where you place your profile link, the easier it becomes for recruiters, clients, and collaborators to discover you.
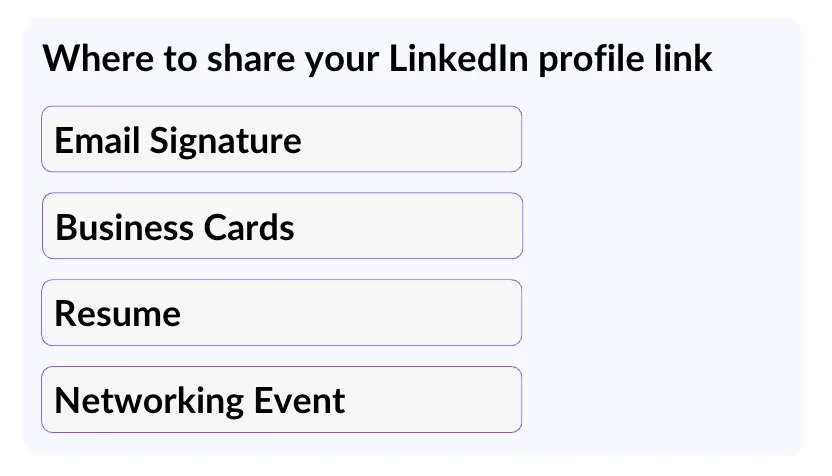
Professional email signatures
Adding your LinkedIn profile to your email signature makes it easy for recipients to learn more about your professional background.
Since emails are still widely used for business communication, this creates a simple, ongoing networking opportunity. It also adds credibility and gives people a quick way to verify your experience.
Personal business cards
Including your LinkedIn profile on business cards allows people to connect with you digitally after meeting in person.
Many professionals now add QR codes that lead directly to their LinkedIn page. It helps turn quick introductions into long-term professional connections.
Alternative social platforms & profiles
You can share your LinkedIn link on platforms like Twitter (X), Instagram, or professional communities to strengthen your online presence. This helps followers from different platforms understand your professional identity. It also makes cross-platform networking much easier.
Digital portfolios & personal websites
Adding your LinkedIn profile to your portfolio or personal website builds trust and adds professional proof. Visitors can quickly verify your career achievements, recommendations, and work history. It also improves your credibility when applying for jobs or attracting clients.
Content platforms
Platforms like Medium, Substack, or YouTube are great places to include your LinkedIn link in your bio or descriptions.
When people find value in your content, they often want to connect professionally. This helps you grow your network organically through your expertise.
Startup & niche boards
Startup communities, freelance platforms, and industry-specific boards often allow profile linking. Sharing your LinkedIn profile here helps you stand out and build authority in your niche. It also increases opportunities for collaborations, hiring, or partnerships.
Local networking events
Sharing your LinkedIn profile link during conferences, meetups, or workshops makes post-event follow-ups much easier.
Instead of exchanging only phone numbers, professionals often prefer LinkedIn for ongoing communication. It helps maintain professional relationships long after the event ends.
Within LinkedIn content
Sharing your profile in comments, posts, or articles on LinkedIn itself helps expand your reach. Engaging in discussions or tagging your profile encourages others to connect with you.
This approach works especially well when you’re actively sharing insights or thought leadership content.
Best practices & tips for sharing your LinkedIn profile
Sharing your LinkedIn profile link well isn’t just about doing it; it’s about doing it smartly. These tips help ensure your link looks professional, reaches the right people, and actually gets clicked.
Tip #01: Customize your profile URL first
Before you start sharing your profile, edit your LinkedIn URL to make it clean and memorable. Ideally, something like linkedin.com/in/yourname. A custom URL looks more professional and is easier to include on resumes, emails, or business cards.
Tip #02: Must keep your profile updated
Make sure your LinkedIn profile reflects your latest experience, skills, and achievements. An up-to-date profile gives anyone who clicks your link a current and accurate picture of your professional story.
Tip #03: Only share when & where appropriate
Don’t drop your profile link everywhere randomly (think about context). Share it in professional settings, such as job applications, networking emails, or industry conversations, not just random forums or casual chats.
Tip #04: Add to digital assets
Include your LinkedIn link in your email signature, digital portfolio, and personal website so people can easily find you. This creates multiple touchpoints for professionals to connect with you hassle-free.
Tip #05: Use QR code
Using a QR code that links directly to your LinkedIn profile makes it super easy for people to connect, especially at events or in print materials. Just make sure the code is tested on different devices before you share it. Try Replug’s free LinkedIn QR code generator to create a custom, branded QR code you can embed anywhere.
Tip #06: Leverage “Share Profile”
LinkedIn’s built-in “share profile” feature lets you send your profile link directly through the platform or to apps like email and messaging. It’s quick and keeps the link accurate.
Tip #07: Personalize connection requests
When sending your LinkedIn link with a connection invite, add a personalized note about whyyou want to connect. It increases the chance they’ll accept. This is probably the best practice widely recommended for LinkedIn outreach.
Shorten your LinkedIn profile URL with Replug: Get a new custom URL & boost your profile!
If your LinkedIn profile link looks long or messy, using a tool like Replug can make it cleaner, shorter, and easier to share on the go.
Replug is a powerful link management platform that helps you create branded, trackable links using a link shortener, making your LinkedIn profile look more professional and easy to remember.
A complete link management solution
for marketing professionals & agencies.
Try Replug for free
It allows you to convert long LinkedIn profile links into short, branded URLs that match your personal or business identity.
Plus, it supports custom domains, which helps strengthen your brand and build trust when sharing your profile in emails, on social media, or in marketing campaigns.
Another great advantage of using Replug is its tracking and analytics features. With its custom URL shortener, you can monitor clicks, analyze audience engagement, and even use tracking tools such as UTM parameters or retargeting pixels to understand how people interact with your shared LinkedIn profile link.
Overall, Replug makes sharing your LinkedIn profile smarter, more professional, and data-driven, helping you build stronger personal branding and networking opportunities.
Summing up
To wrap things up, sharing your LinkedIn profile the right way can open doors to better networking, stronger professional visibility, and smoother job opportunities.
Whether you’re sharing your profile through mobile, desktop, resumes, or events, making your link easy to access and professional-looking makes a real difference.
Tools like this reliable LinkedIn URL shortener help you turn long, cluttered links into clean and memorable ones, making your profile easier to share and track engagement.
Besides, platforms like Replug also support content growth by offering tools such as a LinkedIn post generator to create engaging posts and a LinkedIn video downloader to repurpose valuable content for future use.
When you combine smart sharing with the right tools, you make your LinkedIn presence more impactful and easier for the right people to find and connect with.
Frequently asked questions
How to share LinkedIn URL in 2026?
Open your LinkedIn profile, copy your profile URL, and paste it where you want to share it (email, text, message, resume, etc.). On a desktop, the link is visible in your browser’s address bar and usually looks like linkedin.com/in/yourname.
How to share LinkedIn profile on iphone?
1. Open the LinkedIn app on your iPhone. 2. Tap your profile picture → View Profile. 3. Tap the three-dot menu (•••) → Share profile via. 4. Choose how to share (Messages, Mail, WhatsApp, etc.) or Copy link to paste it.
How to share LinkedIn profile link for job?
Get your LinkedIn URL (via desktop or mobile), then include it in your job applications. Paste the link in your resume header, cover letter, job portal bio, or application form so recruiters can easily view your profile.
How to share LinkedIn profile on Instagram?
First, copy your LinkedIn profile URL.
Now, open the Instagram app → tap your profile icon (in the bottom-right corner) → Edit profile → paste your copied LinkedIn link into the Add link’s “URL” field, and give it a precise title → tap on the (✓) icon in the top-right corner to save changes.
Note: You can also put it in an Instagram story using a link sticker.
How to share LinkedIn profile as PDF?
On desktop, go to your LinkedIn profile, click the “More” (three dots) or Resources menu, then select Save to PDF. Now you can share it easily anywhere as a PDF file.
How do I find my LinkedIn URL?
– On desktop: Go to your profile and copy the URL from the browser address bar. – On mobile:Open your profile → tap the three dots → Share via → Copy link. This copies your LinkedIn URL to your clipboard.
How do I find my LinkedIn post URL?
Open the post you want to share. Click or tap the three dots (⋮) at the top right of that post, and then tap “Share via.” Now, copy the post link and paste it wherever you want to share it.
How do I find my LinkedIn public profile URL on mobile and desktop?
Here’s how to get your LinkedIn profile URL:
– On desktop: Go to your LinkedIn profile → look at the address bar. That’s your public profile URL (starts with linkedin.com/in/…). – On mobile: Open the LinkedIn app → View your profile → tap three dots (•••) → Contact info → Copy your public profile URL.
How to edit your LinkedIn profile URL?
On desktop, go to your profile → locate Public profile & URL → click the pencil ✏️ next to your current URL → type your new custom ending → Save.
Keep it simple: letters, numbers, or hyphens only.
How to add a link to your LinkedIn profile?
You can add links in a few places:
– Contact info: Open your profile → edit contact info → add website URL. – Featured section: Add a link there so it shows near the top of your profile.
Note: Some older custom button features have changed or moved behind Premium options.
Is it safe to share my LinkedIn profile link online?
Yes, sharing your LinkedIn profile link is generally safe for professional networking; that’s what it’s made for. But remember, your public profile information is visible to anyone who has the link, and oversharing personal details can expose you to phishing or spam attempts. Be cautious with sensitive information and alert to suspicious messages.
What is an example of a custom LinkedIn URL?
A good custom LinkedIn URL looks clean and easy to read, like: https://www.linkedin.com/in/jane-doe
Or, if needed:https://www.linkedin.com/in/jane-doe-marketing
Have you ever wondered why everyone keeps asking for your exact TikTok profile link?
With TikTok skyrocketing to roughly 1.6–1.9 billion monthly active users worldwide in 2025, it’s not just a place for dance trends anymore. It’s a global hub where creators, brands, and everyday people build communities and make real connections.
No matter if you’re sharing your latest skit, promoting a small business, or just want friends to find you faster, knowing your TikTok URL is an essential first step.
But if you’re scratching your head, wondering “What is my TikTok URL?”, you’re in the right place.
Buckle up, guys!
In the next section, we’ll break down exactly what a TikTok URL is and why it matters, then show you three easy ways to grab yours seamlessly.
What is a TikTok URL?
When we talk about URLs, we’re really just talking about web addresses, the exact link that takes someone straight to a specific place on the internet.
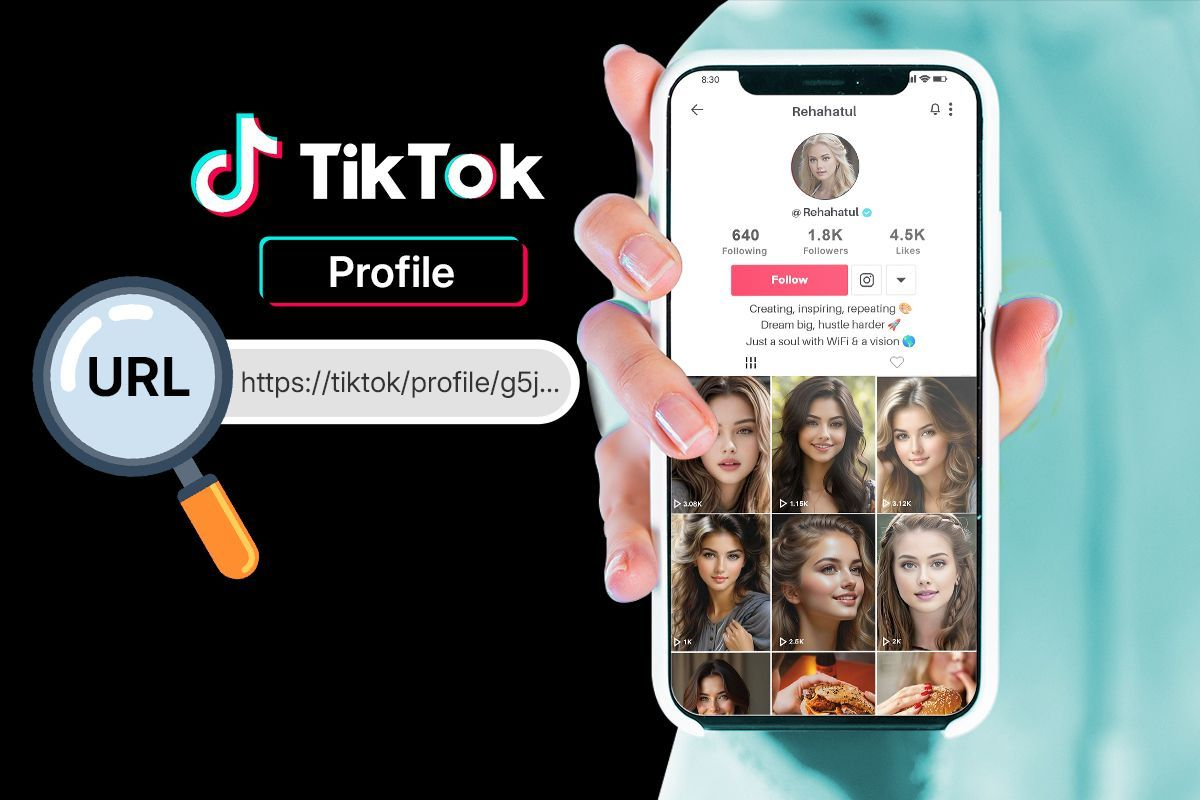
In TikTok’s case, a “TikTok URL” is the address that leads directly to your TikTok profile, so anyone can view your videos and follow you without having to search for you manually.
It’s kind of like your digital calling card, super helpful if you want to share your profile on Instagram, WhatsApp, your website, or in an email.
Think of it as the internet’s way of pointing right at you on TikTok. Without your unique URL, someone would need to search through the app to find your account, which isn’t always easy if your username isn’t super unique!
What is the TikTok URL format?
The standard TikTok profile URL follows a very simple structure:
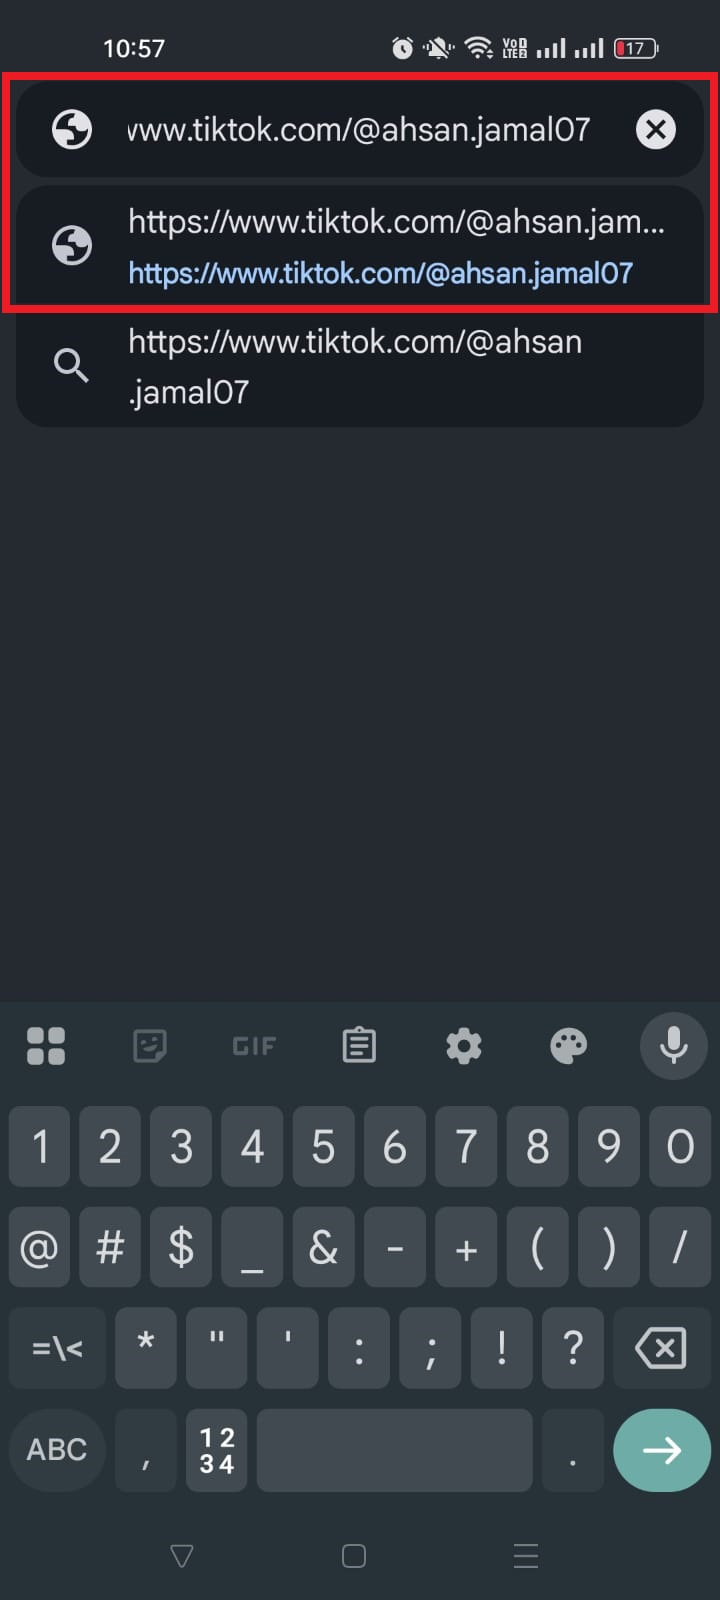
https://www.tiktok.com/@username
In this format, replace “username”with your exact TikTok handle (the one that starts with the @ symbol).
What is an example of a TikTok URL?
Here’s a real example of what a TikTok URL looks like:
https://www.tiktok.com/@charlidamelio
This exact link takes you to Charli D’Amelio’s TikTok profile (one of the platform’s most-followed creators).
Note: Once you know your TikTok URL, sharing your profile with the world becomes a whole lot easier!
Proven methods to get your TikTok account/profile URL
Here’s the deal: finding your TikTok URL doesn’t have to be confusing anymore.
Whether you’re using the app, typing it based on your username, or grabbing it from a desktop browser, there are simple ways to do it. And once you’ve got it, you can share your profile easily anywhere online.
Method #01: From the username on TikTok
This is the quickest way to figure out your profile address if you know your actual username:
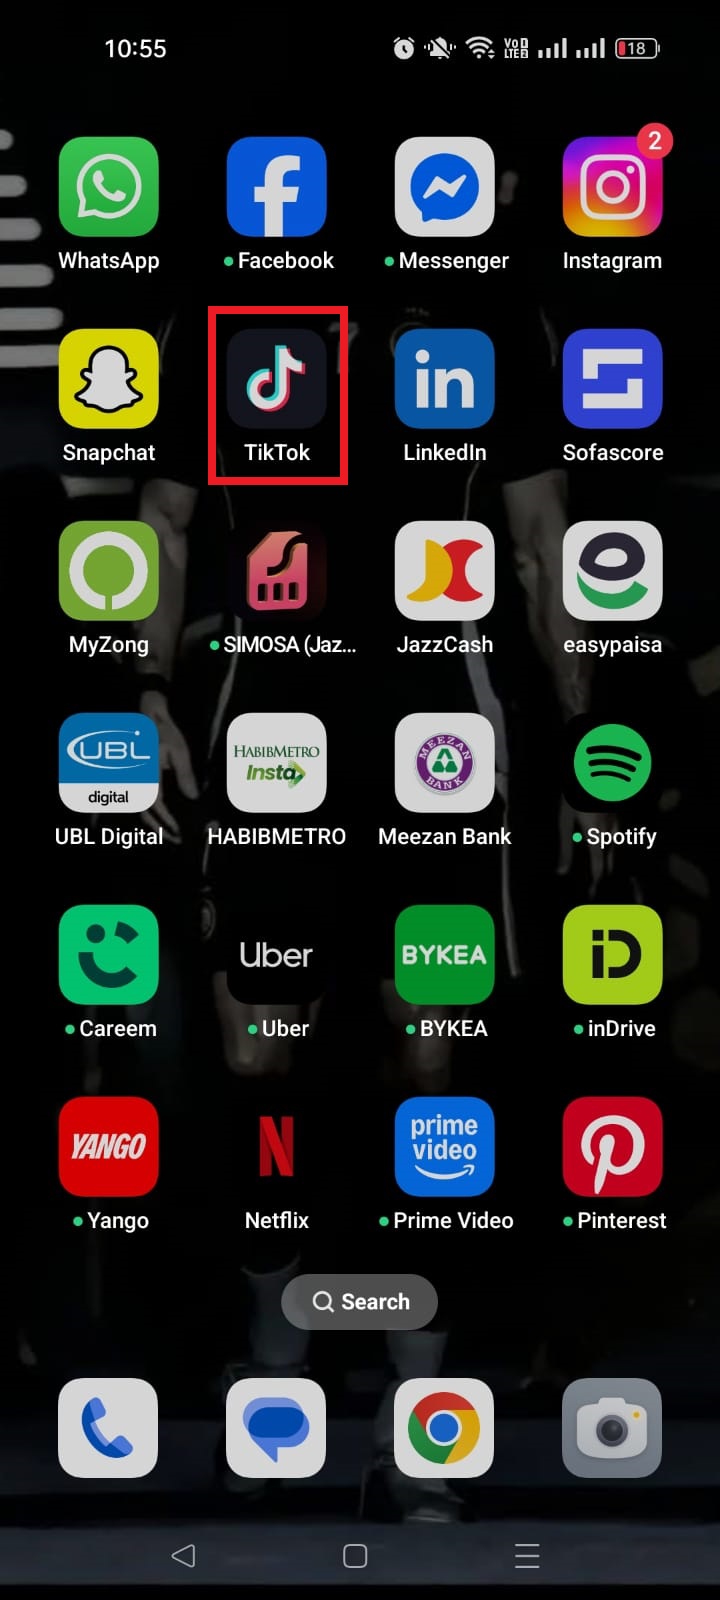
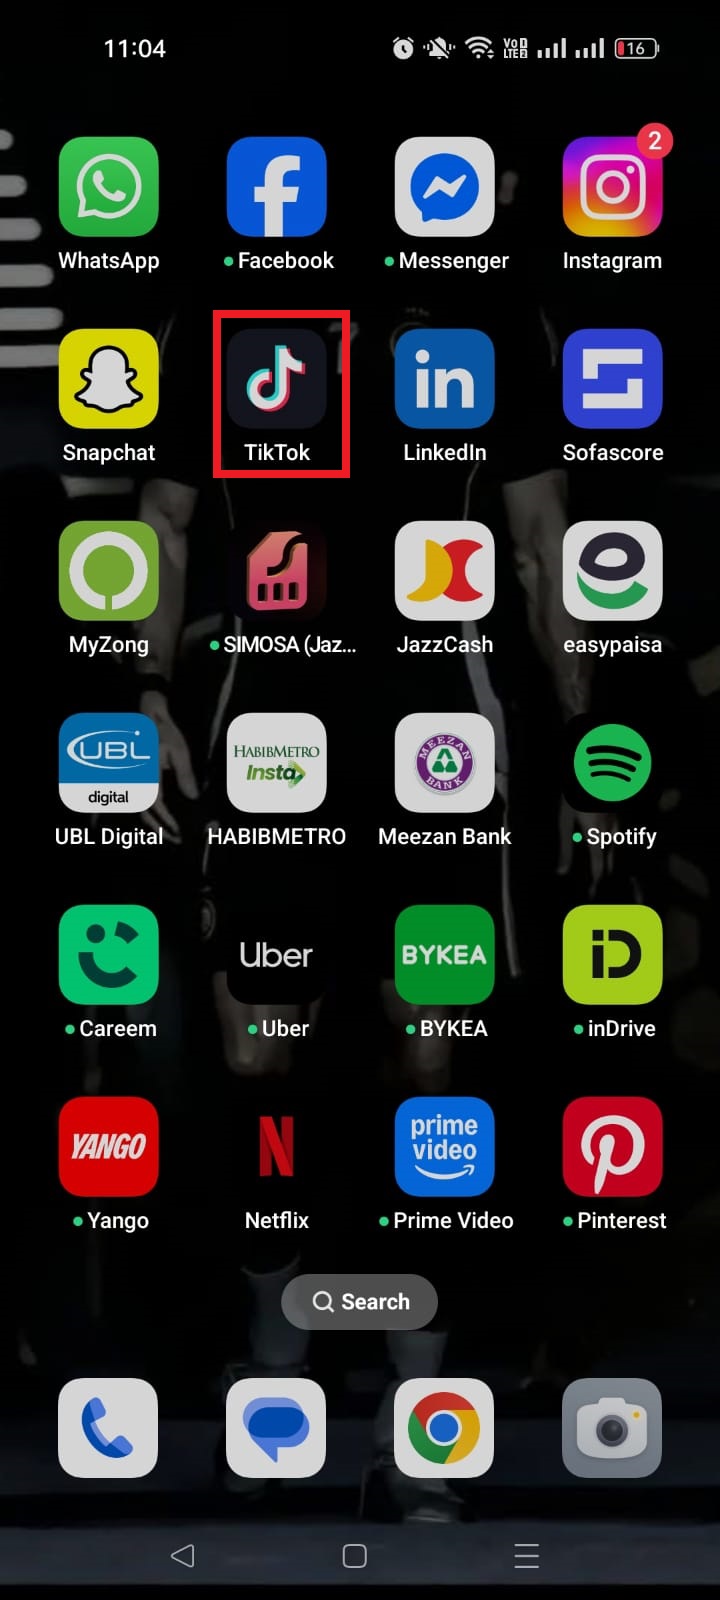
1. Open TikTok.
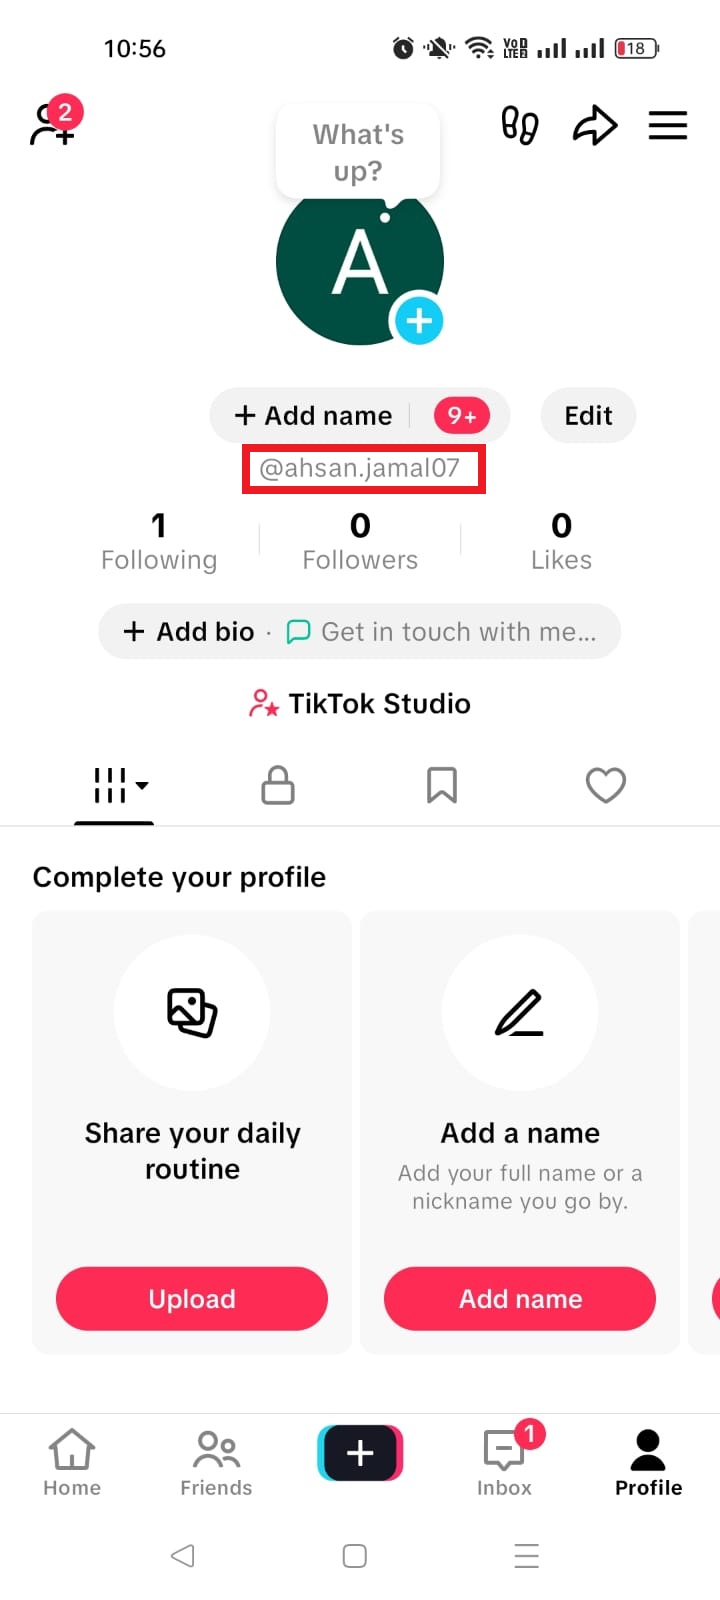
2. Go to your profile page.
3. Look at your username. It starts with an “@” sign.
4. Use the standard TikTok URL structure:
https://www.tiktok.com/@yourusername
Replace “yourusername” with your actual handle.
That’s it!
You now have your TikTok profile link that you can share anywhere (in emails, on your website, or on other social channels).
This method is great if you just want a clean way to share your TikTok account URL without copying it from the settings.
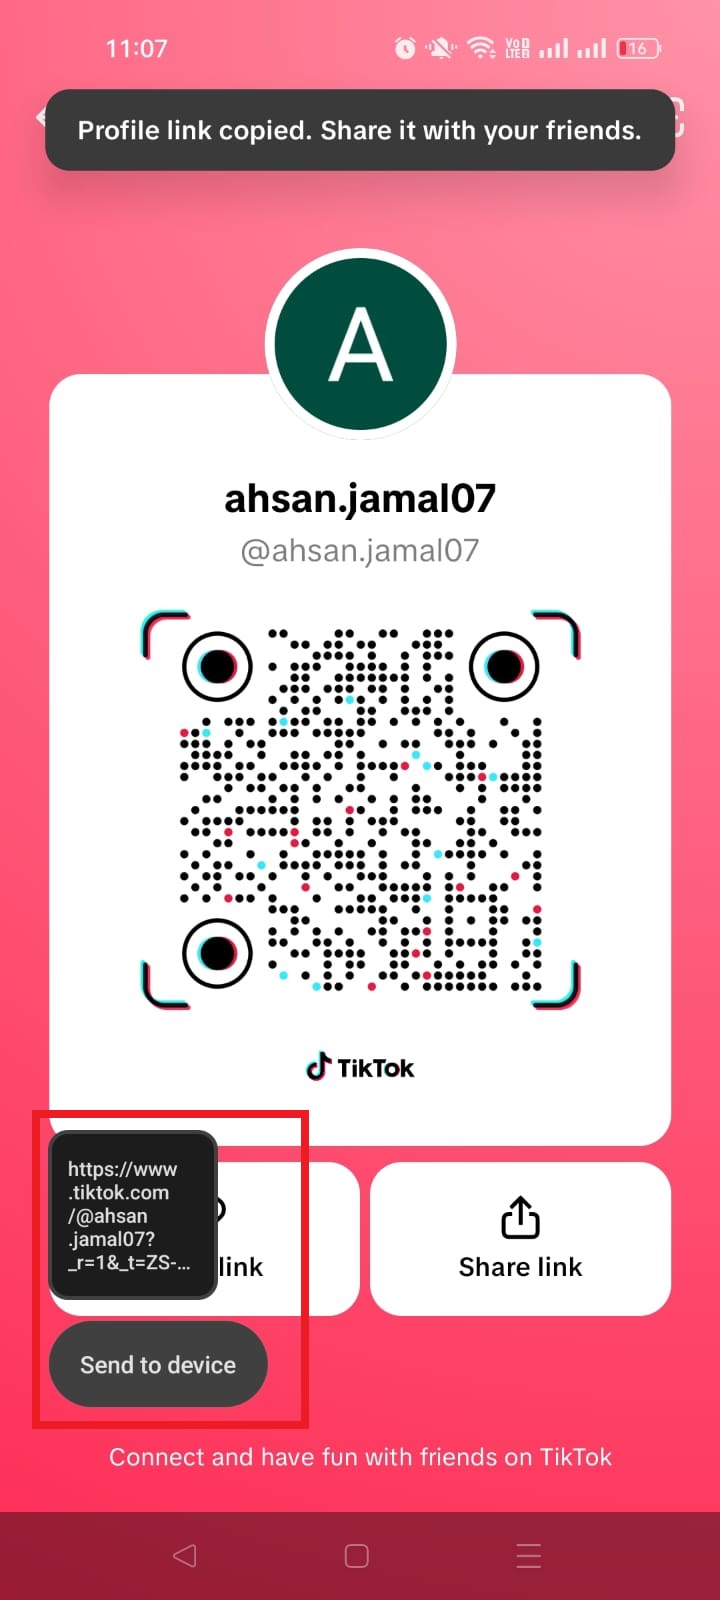
Method #02: Using the TikTok mobile app
If you want TikTok to grab the link for you in a few taps:
1. Open the TikTok app on your phone.
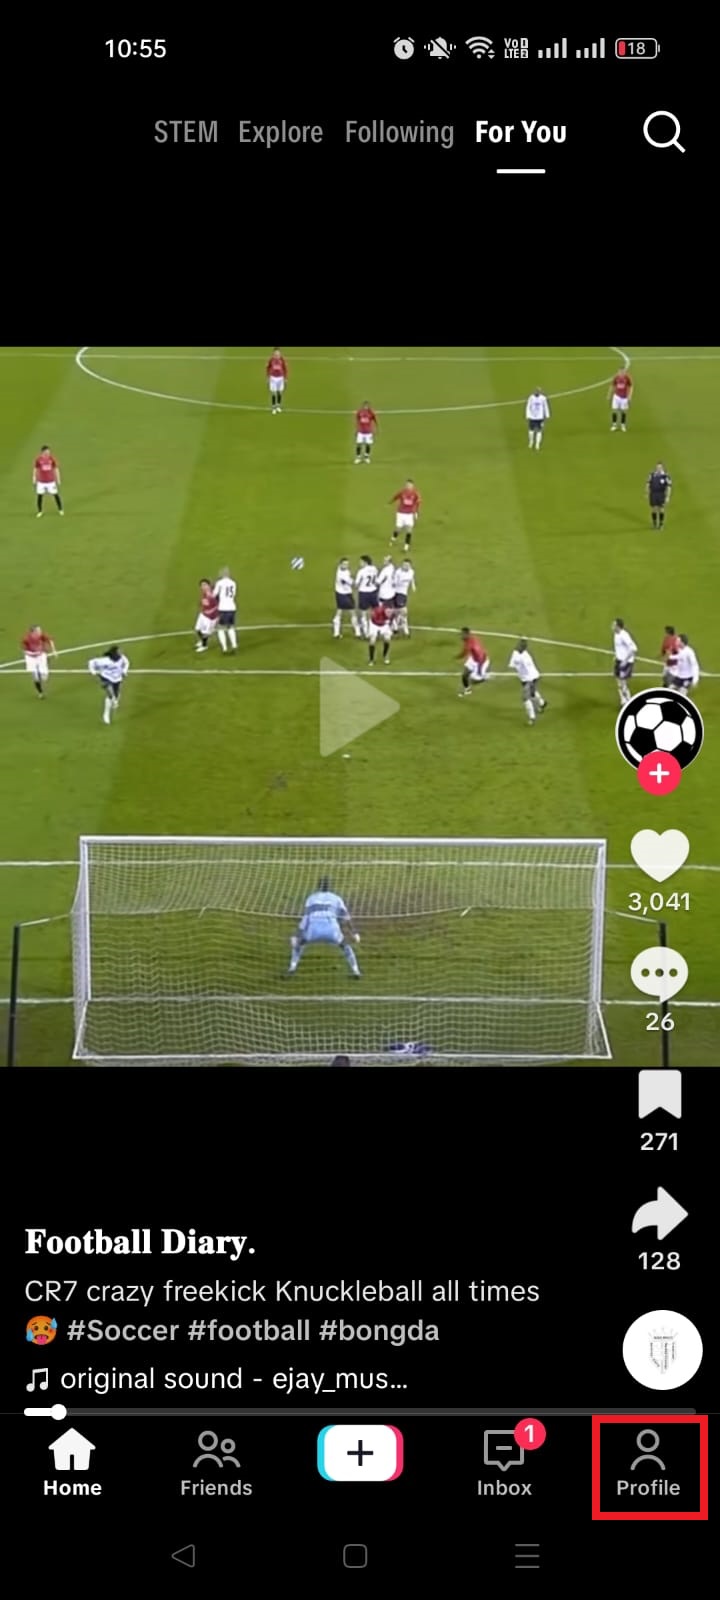
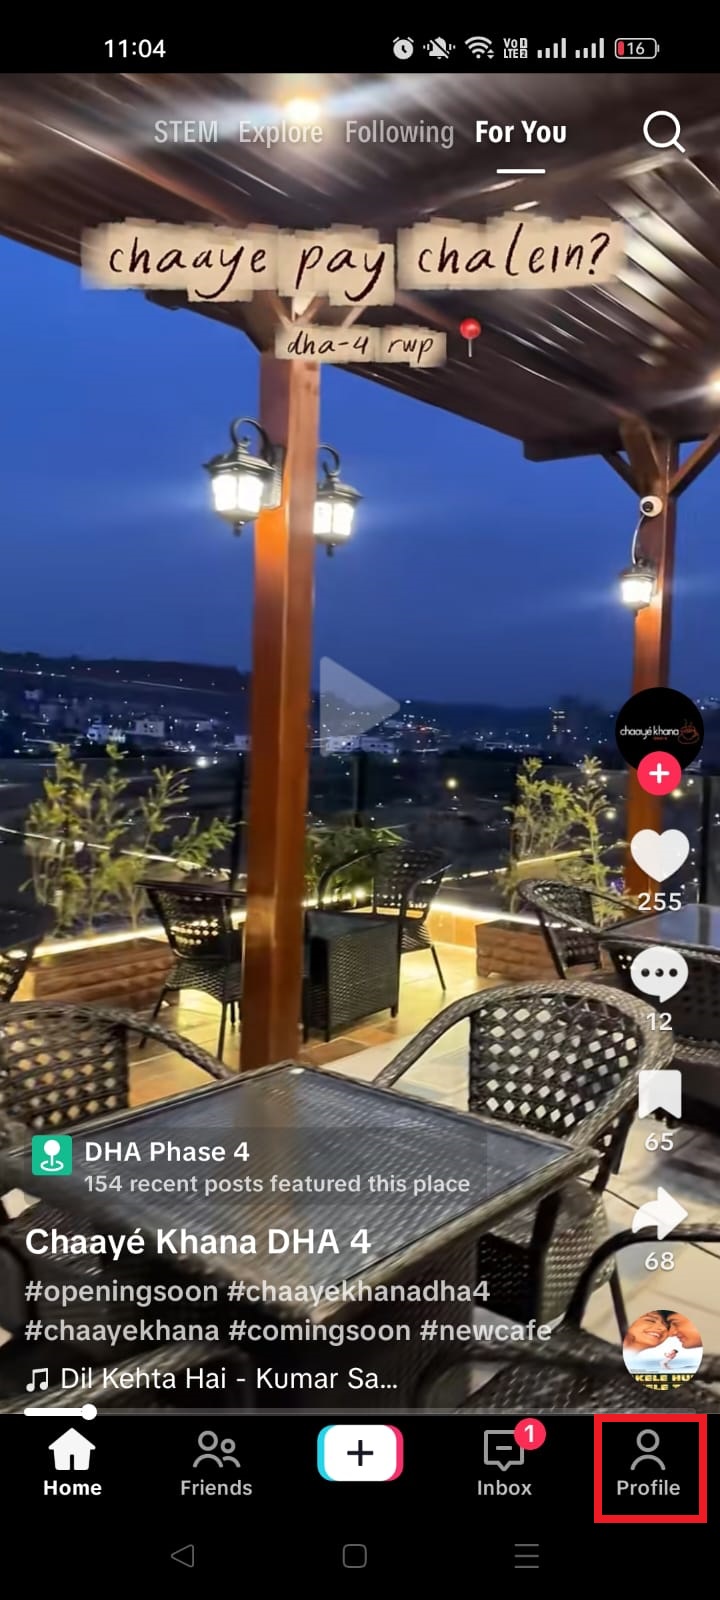
2. Tap the “Profile” icon at the bottom right to go to your profile.
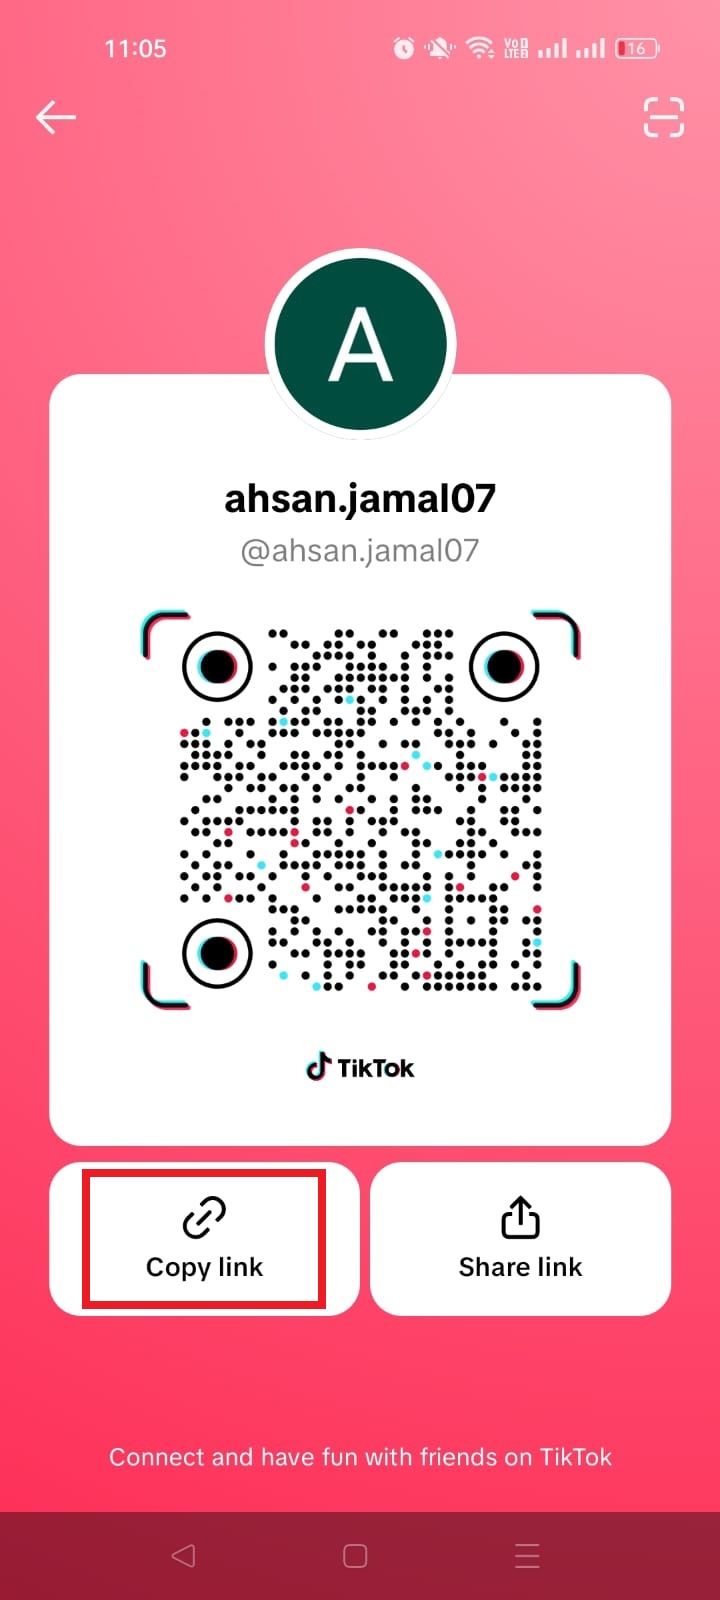
3. Tap the “Share profile” icon (it usually looks like an arrow pointing right).
4. On the pop-up screen, tap “Copy link.” TikTok will copy your full URL to your clipboard.
Now you can paste it anywhere you want!
This is especially handy if someone literally asked me, “What is my TikTok URL on the app?” and I want to show them exactly where to click.
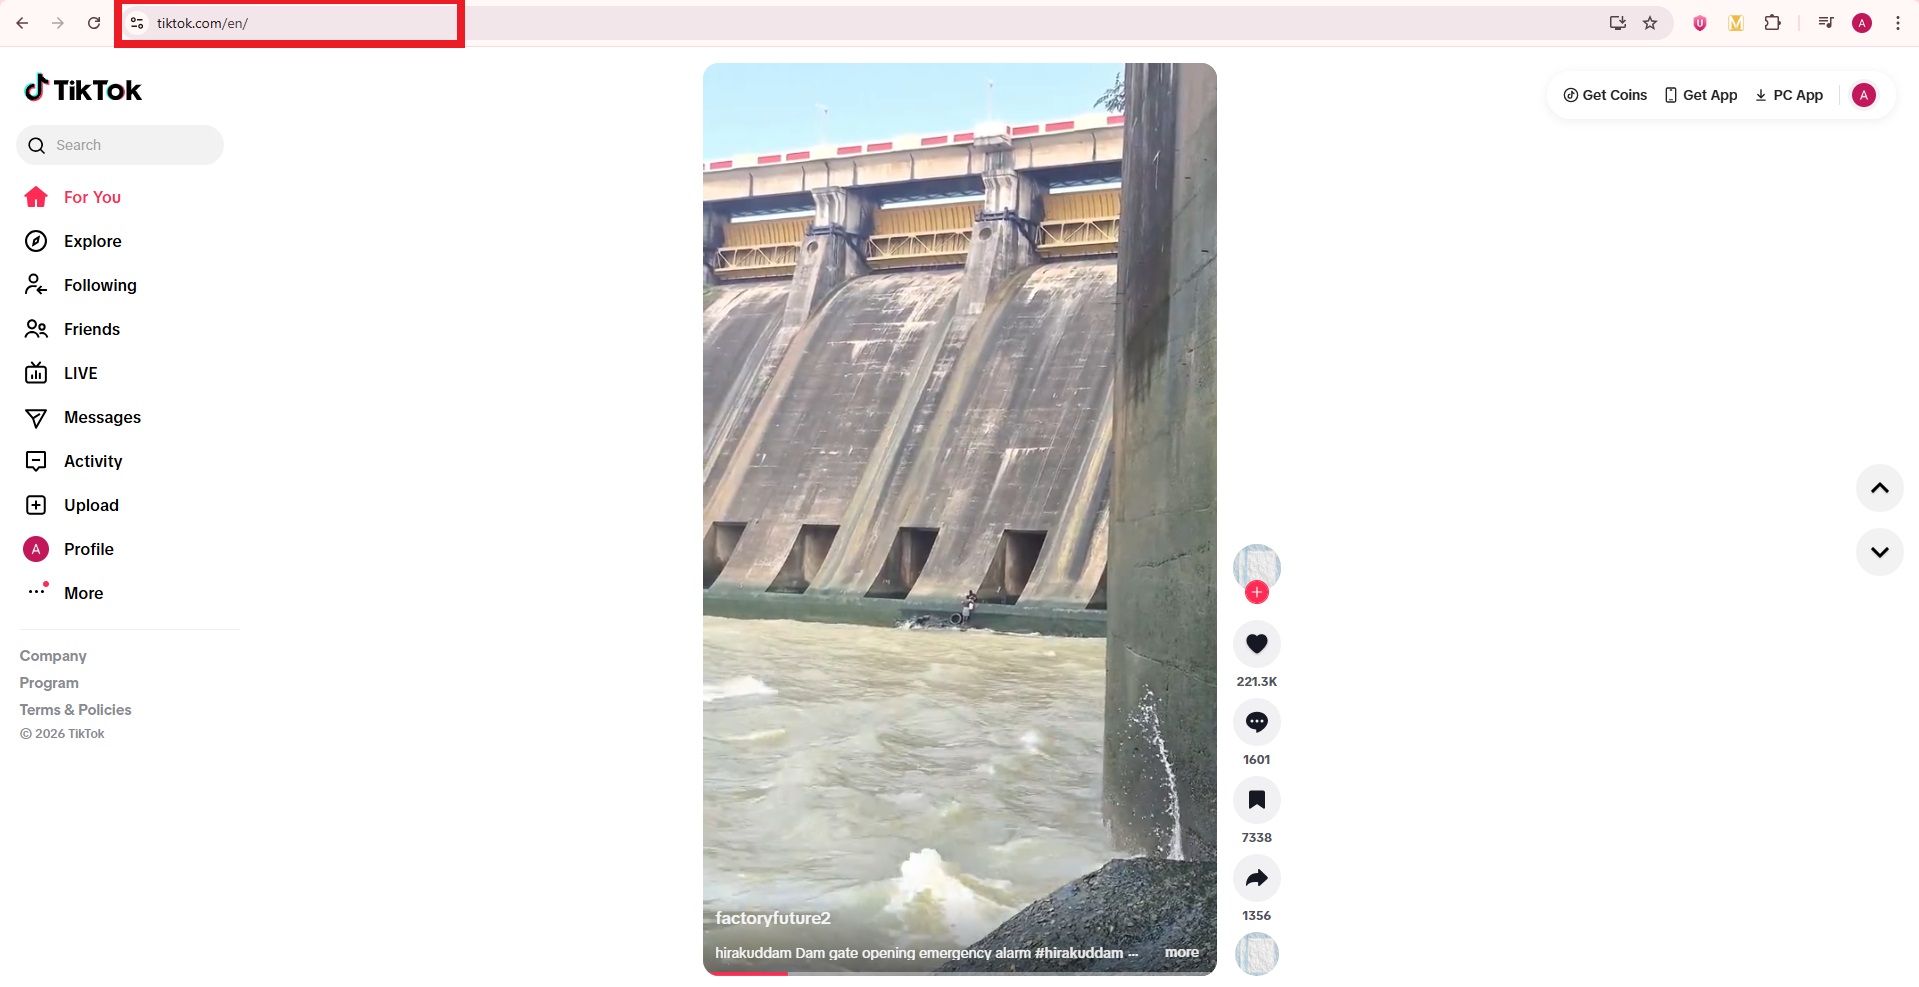
Method #03: Via TikTok web
If you’re on a PC/laptop:
1. Visit “https://www.tiktok.com/en/” and log in with your account.
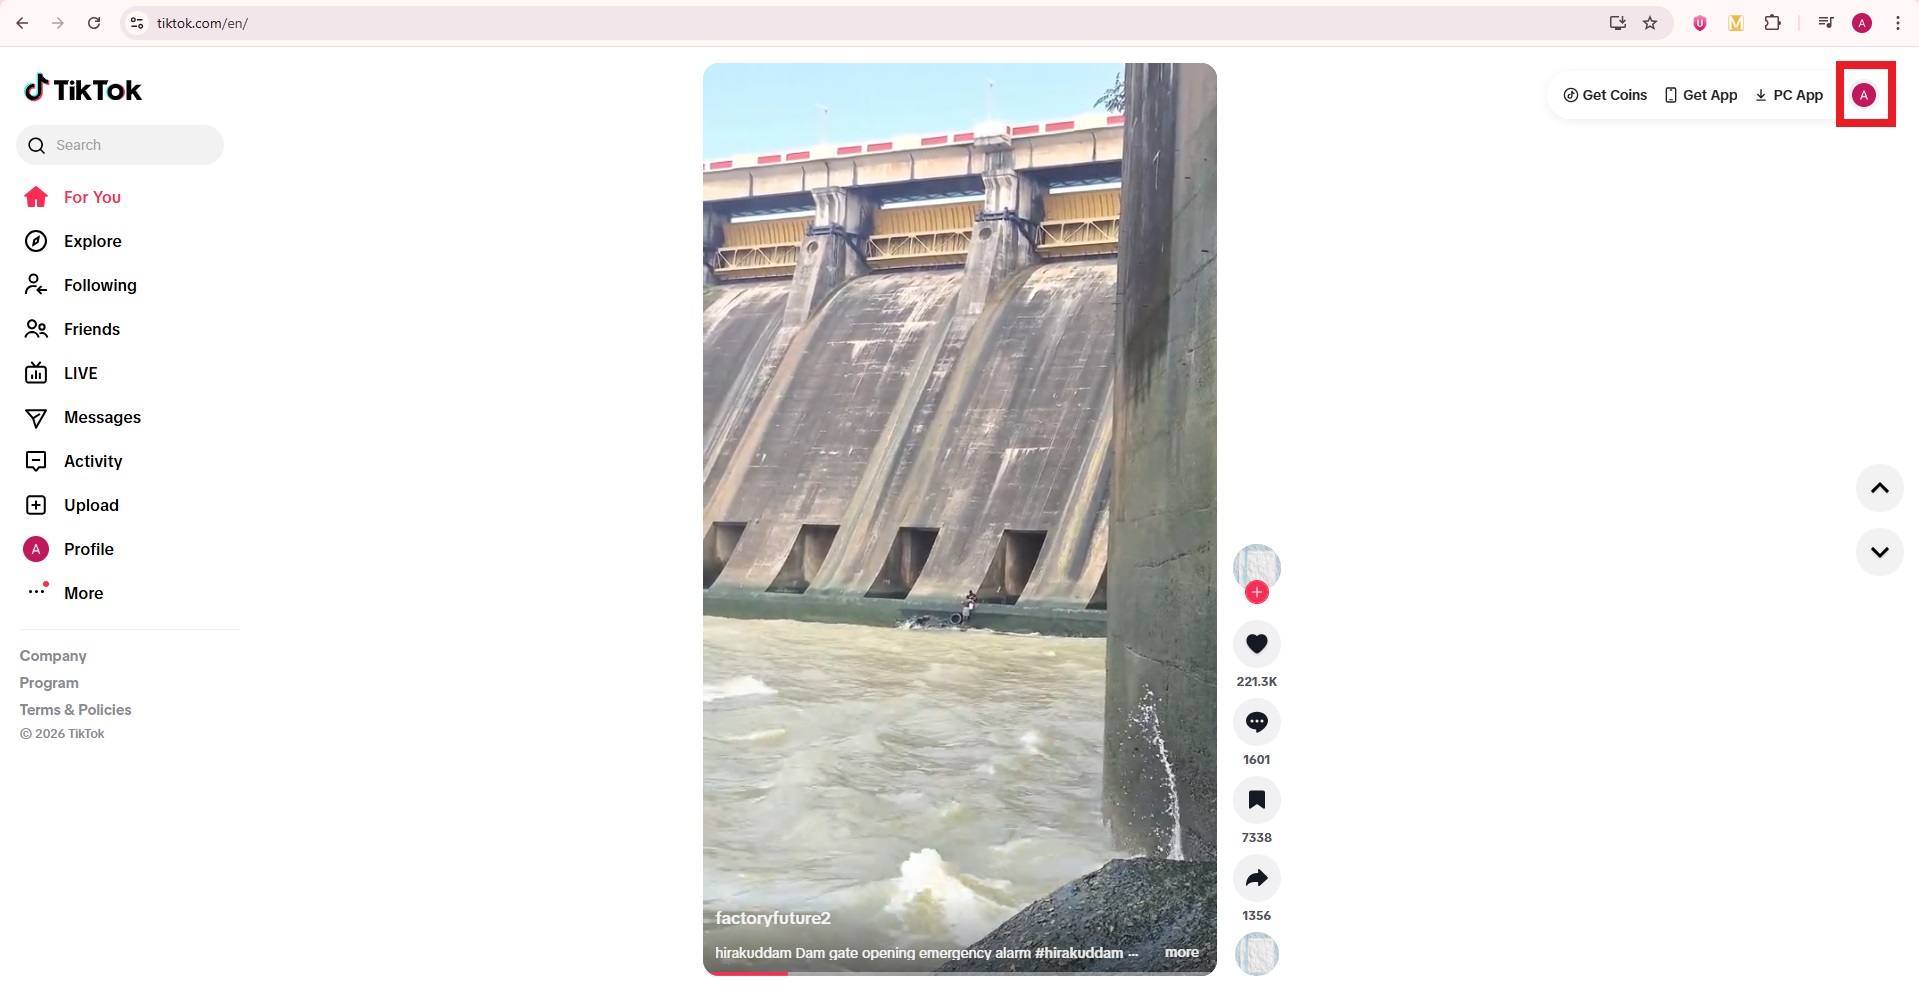
2. Click your “profile picture” in the top right corner.
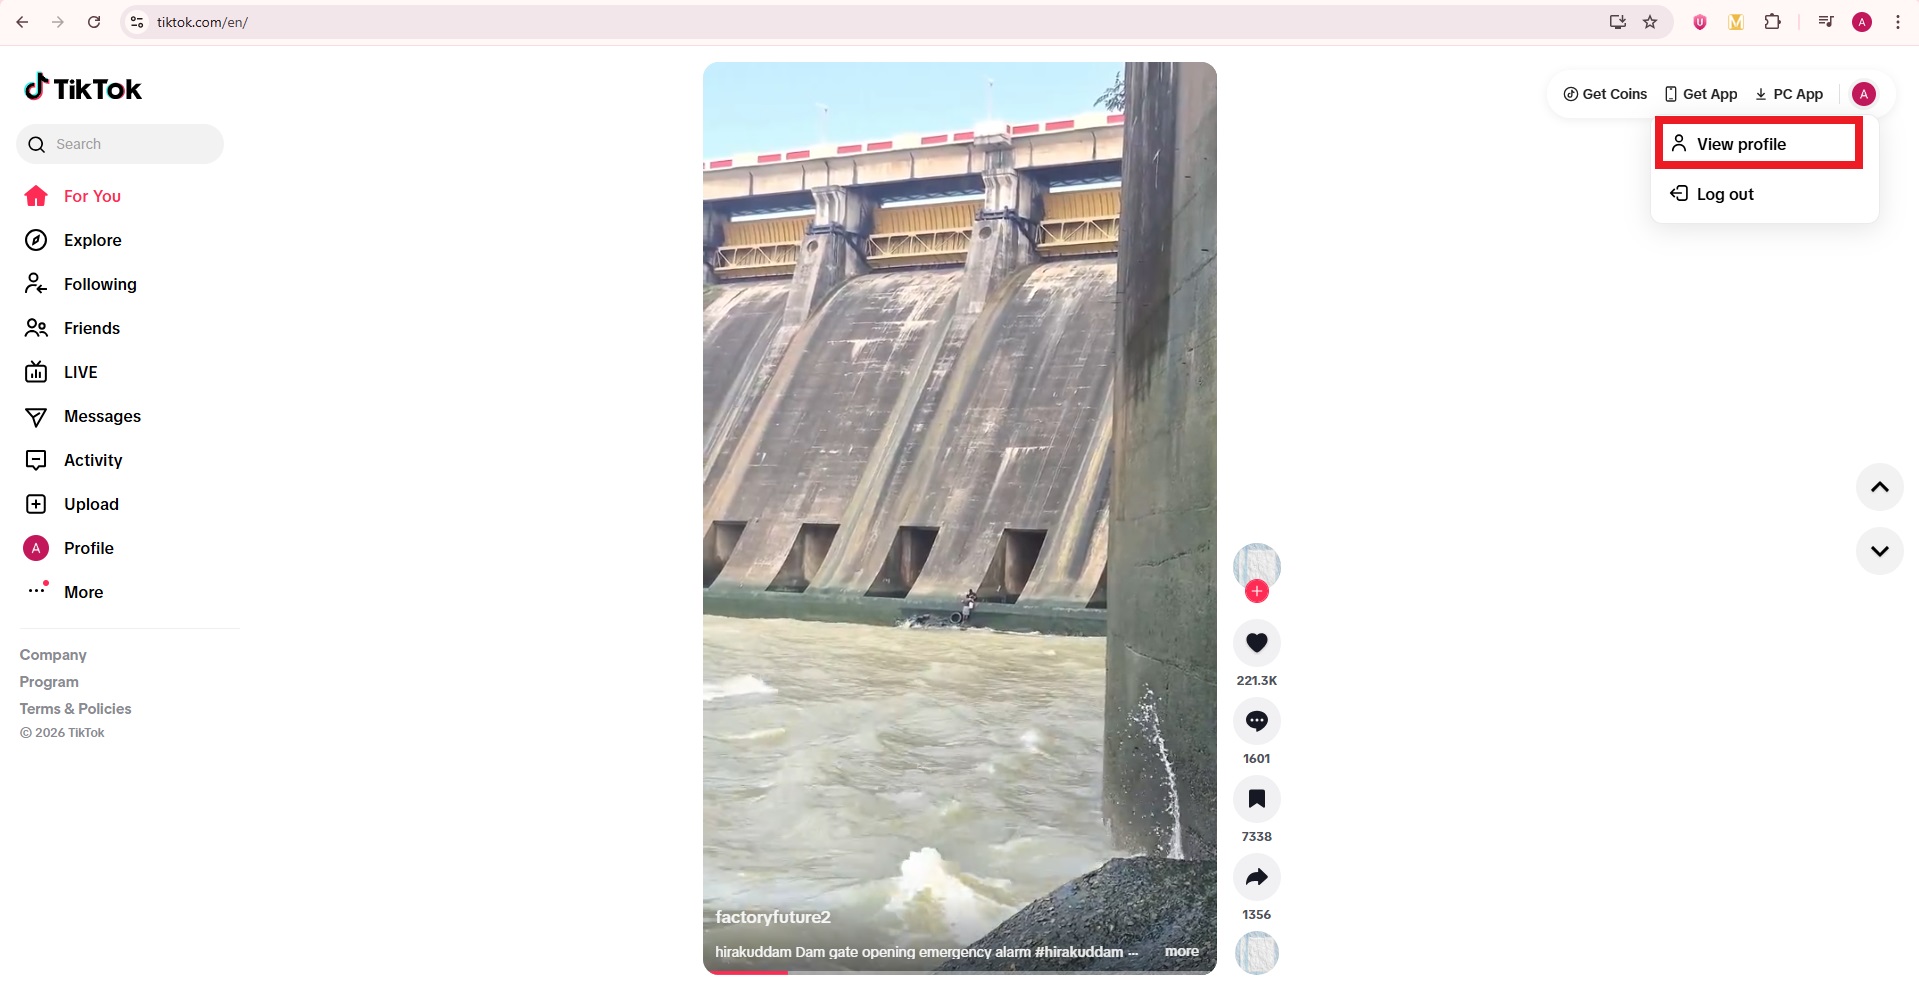
3. From the dropdown menu, select “View profile.”
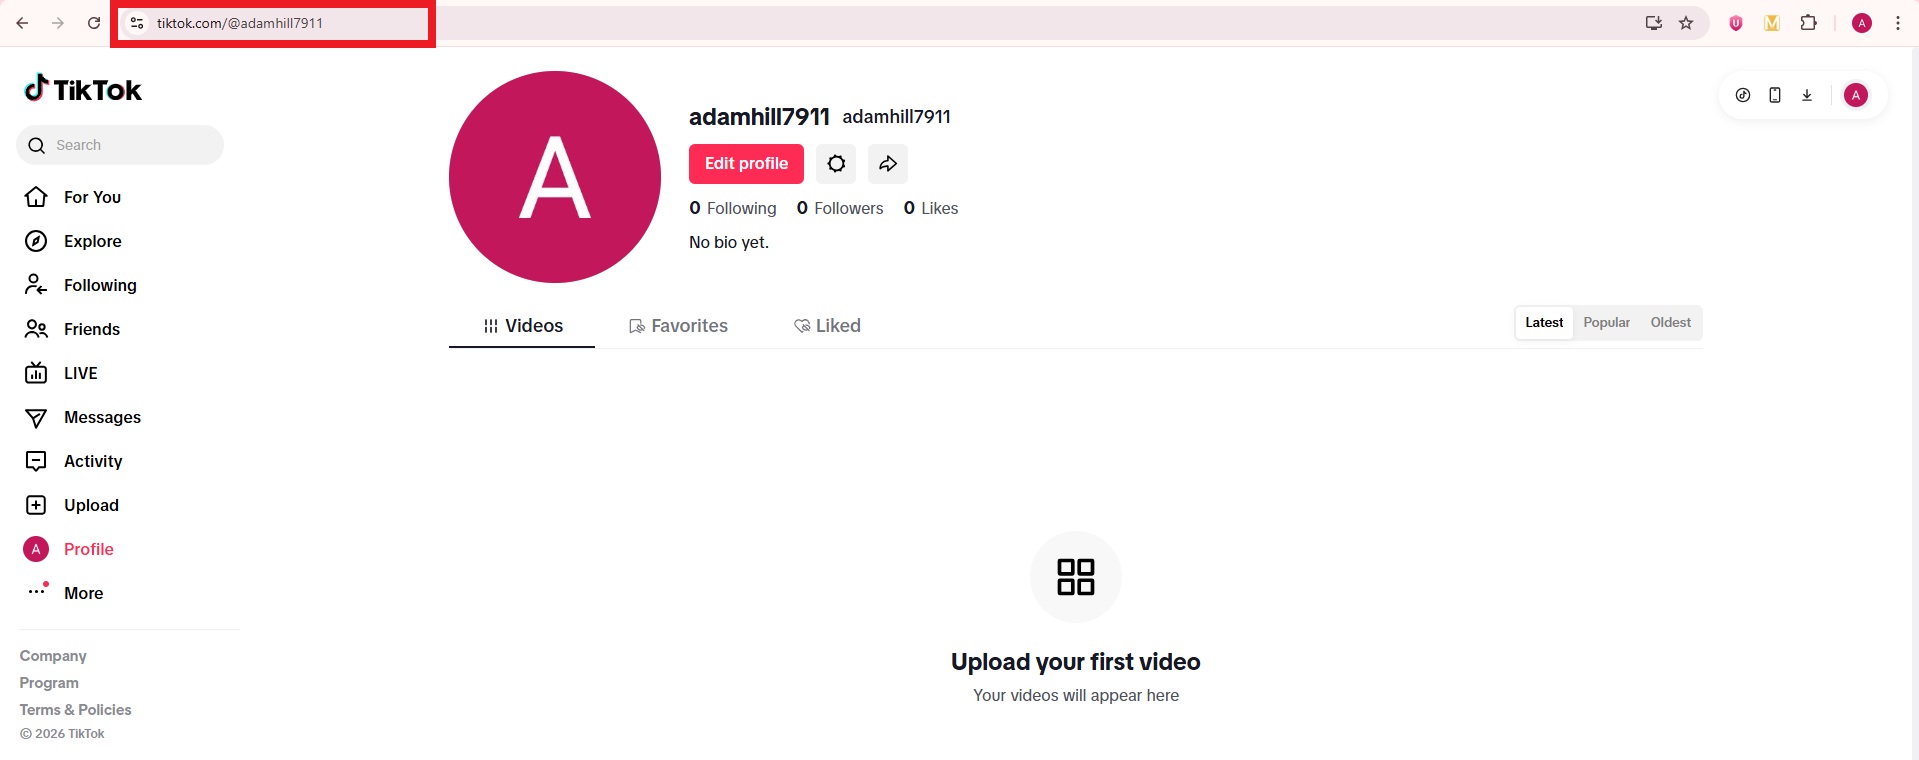
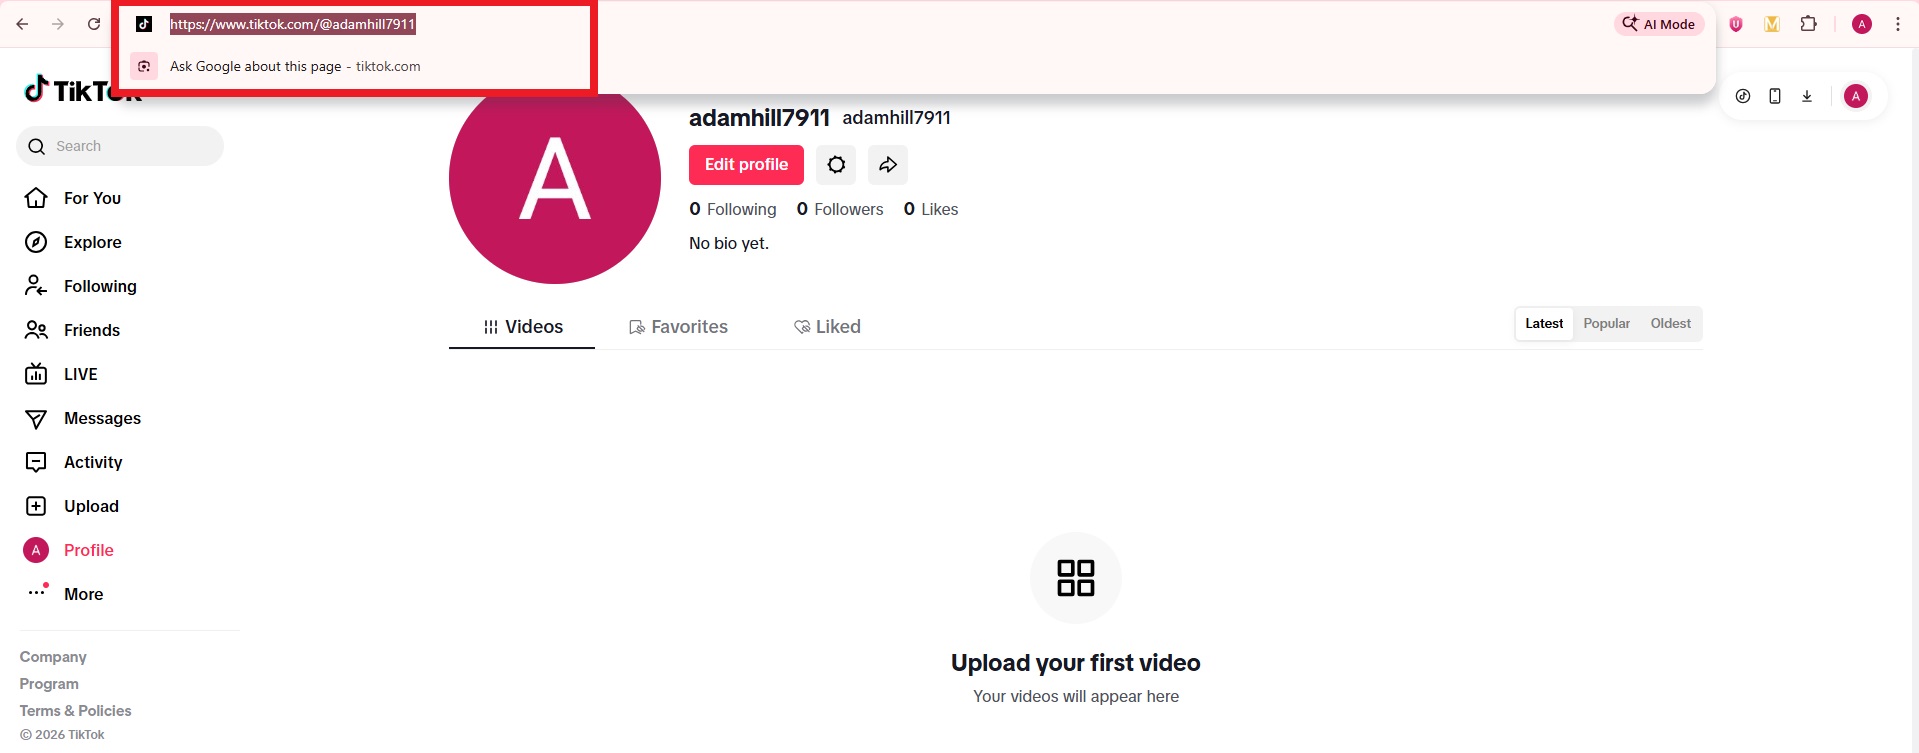
4. Once your profile loads, look at the browser’s address bar. That’s your TikTok profile URL.
5. Highlight it by double-clicking it, and then press “Ctrl + C” to copy it to your clipboard.
This method is perfect when you’re on a computer or desktop and want to share your link quickly without fumbling through your phone.
With these three methods, getting your TikTok URL becomes a whole lot easier, whether you’re on mobile or desktop. Once you have it, you can share your profile instantly and grow your audience with less effort.
Even something as simple as your TikTok URL deserves a bit of thought. It’s how people find, follow, and interact with your profile online.
But there are some real reasons why you should care about how and where you share it.
Unintentional privacy exposure (Doxxing risk)
Sharing your TikTok link can sometimes expose more than you intend. If someone clicks the link, it can reveal your account details and make your profile easier to track down, which could lead to unwanted attention or doxxing.
TikTok’s guidelines take privacy seriously and warn against sharing personal information that could cause harm.
Tracking & data harvesting
TikTok collects a lot of information to personalize your experience and for advertising, including data tied to your activity and how links are accessed (even via profiles). This means clicks on your URL could feed into tracking systems you might not be thinking about.
Persistent profile suggestion
If someone opens or shares your TikTok link, the platform may suggest your profile to others, which is great for growth, but not ideal if you prefer privacy or didn’t mean to boost visibility.
Brand security & “link in bio”
For creators and businesses, a clean TikTok URL is essential for top-notch brand security. It’s what you put in your “link in bio,” on your website, and in promotions, so people know exactly they’re going to the right place.
Reputation management
Once someone has your TikTok URL, it’s tied to your online reputation. If your content or profile information changes, others may form impressions based on what they see, so managing when and how you share that URL matters most!
Staying aware of these points helps you use your TikTok URL in ways that support your goals, no matter if that’s privacy, growth, or brand building (without surprises).
Different types of URLs you can find on the TikTok platform in 2026!
On TikTok, you’ll run into a few different kinds of links depending on what you’re trying to share, from your profile to shopping pages and even live streaming addresses.
Knowing what each type of TikTok URL looks like helps you use and share them the right way.
What is my TikTok mobile app URL?
This is the link you get when you tap Share → Copy Link in the mobile TikTok app. It still leads to your profile but may include extra tracking bits that indicate it came from the app (like _t= or _r= in the link).
This still points to your profile, no matter what device someone opens it on.
What is my TikTok website URL?
This is the clean, browser-friendly version you see when you open TikTok in a web browser and look at your profile’s address bar.
It usually follows this simple format:
https://www.tiktok.com/@coolusername
Perfect for sharing on websites or messages without extra tracking info.
What is my TikTok account URL?
This is another way of saying your profile link. The main link that takes people straight to your personal TikTok page.
It looks the same whether you phrase it as a website URL or an account URL:
https://www.tiktok.com/@coolusername
Just replace “coolusername” with your own.
What is my TikTok shop URL?
If you’re selling through TikTok Shop, you’ll have a specific shop link that leads to your storefront or product page inside the platform’s e-commerce area. It usually looks like a TikTok Shop link tied to your profile or products.
For instance:
https://www.tiktok.com/shop/coolstore
This takes customers straight to your item collection.
What is my TikTok RTMP URL?
This one’s a bit more technical. If you’re using custom RTMP to stream live to TikTok from external software (like OBS or Streamlabs), TikTok gives you a server RTMP URL plus a stream key.
For example, your RTMP info might include something like:
rtmp://live.tiktokcdn.com/…
You plug this into your streaming software to go live.
What is my TikTok live URL?
Your TikTok live URL is the link that takes someone directly to a user’s live broadcast on TikTok. You can usually get it by copying the link while a live stream is active or by editing a profile URL to point to the live section.
A common format looks like: https://www.tiktok.com/@username/live
For example:
https://www.tiktok.com/@coolcreator/live
This will open that user’s live session if they’re currently broadcasting.
What is my TikTok video URL?
A TikTok video URL is the unique link that takes someone straight to a specific video post. You can share it by tapping “Share → Copy link” on a video you’re watching.
Replace the username and video ID with the real ones.
What is my TikTok channel URL?
On TikTok, the term channel URL is often just another way to refer to your profile link (the web address for your account page). This is where people find all your videos, bio, and posts.
For instance:
https://www.tiktok.com/@coolusername
Takes someone to that person’s channel profile effortlessly.
What is my TikTok server URL?
A TikTok server URL is part of the technical setup for live streaming with external software (such as OBS or TikTok LIVE Studio). It’s the address your streaming tool connects to, alongside your stream key.
For example, when setting up a live stream, you might see an RTMP-style address like:
rtmp://live.tiktokcdn.com/…
This directs your software to TikTok’s live servers so your broadcast goes live on your account.
In short, each of these URLs serves a different purpose, from basic profile sharing to live streaming or e-commerce. Knowing what they do makes it easier to use TikTok to its full potential!
How to change your TikTok URL: A step-by-step guide!
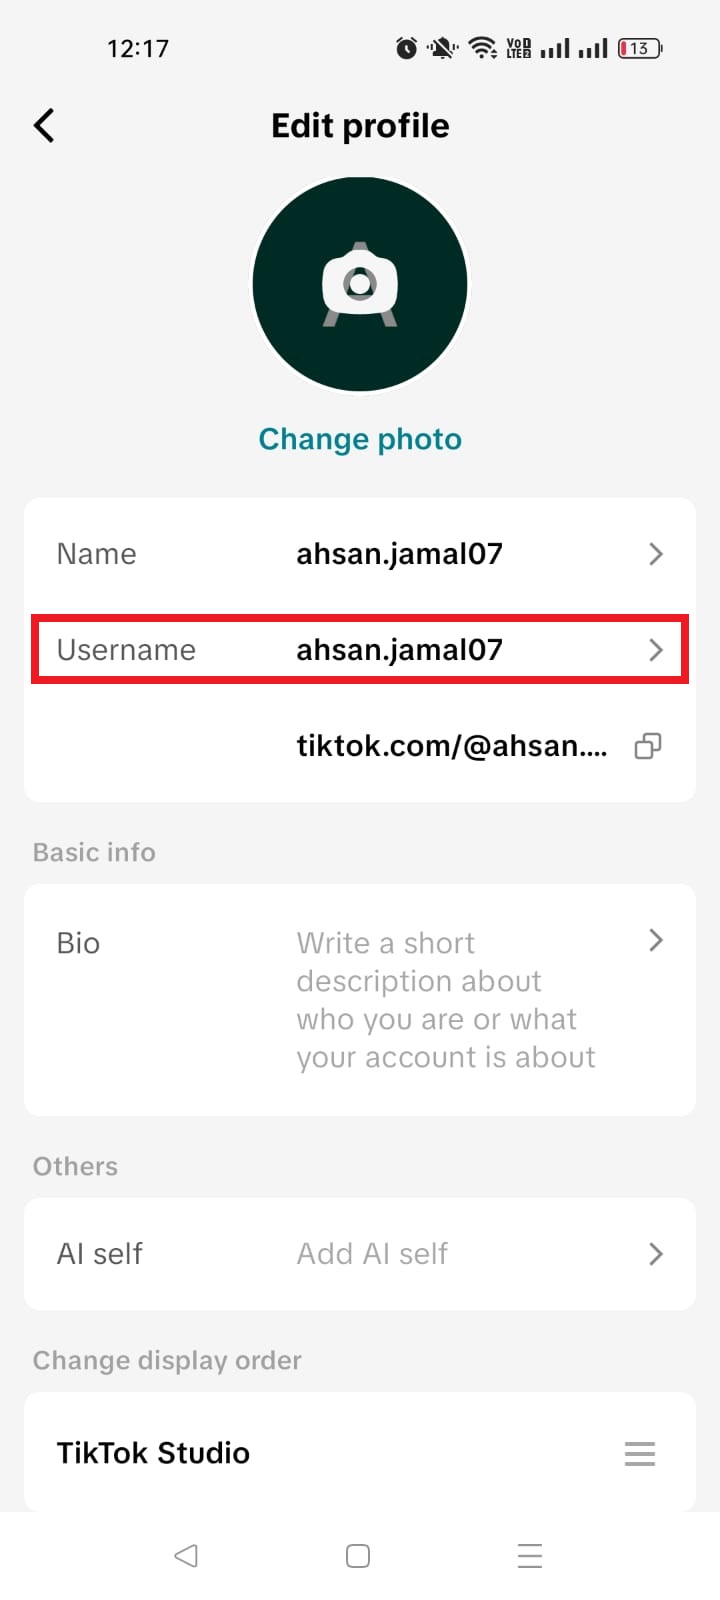
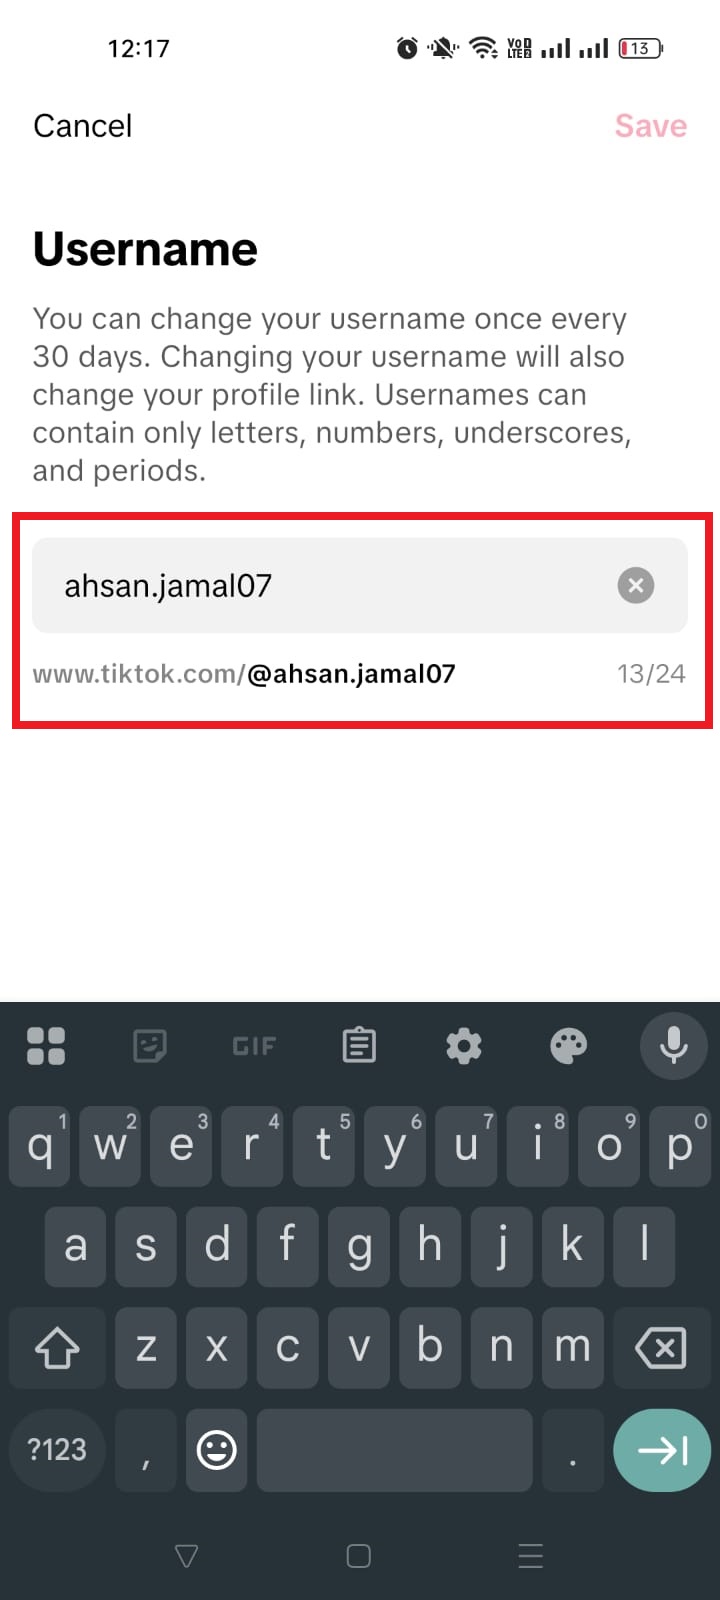
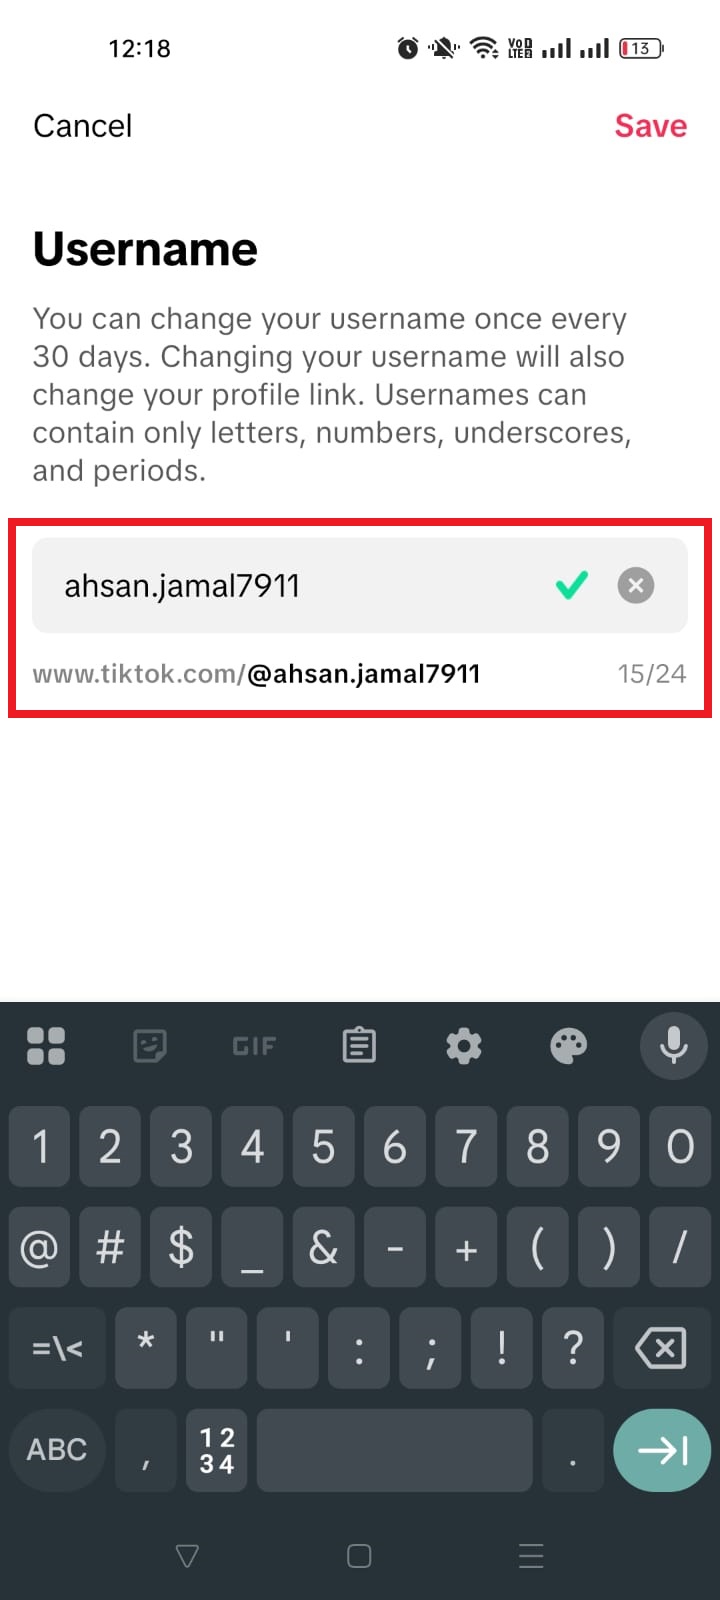
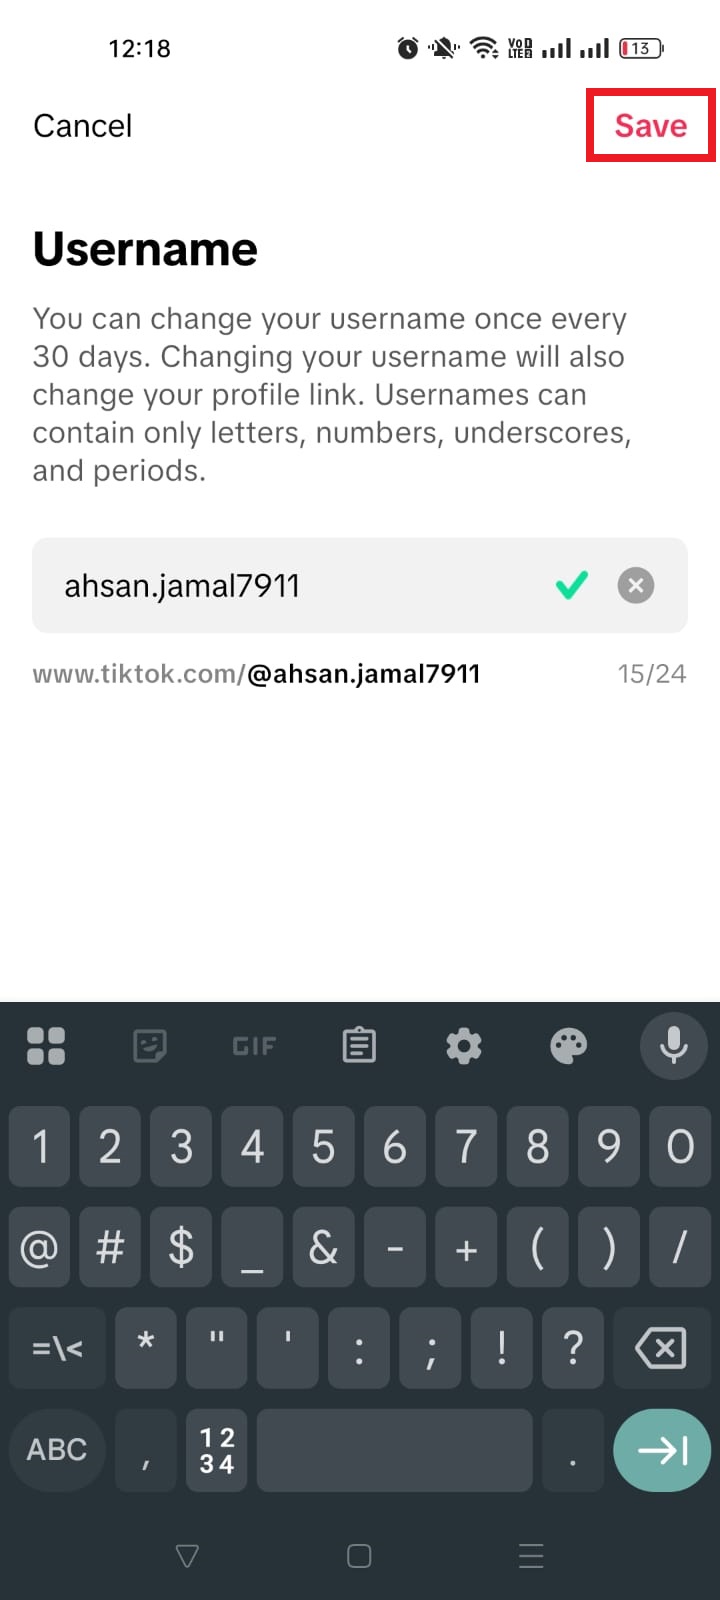
Changing your TikTok URL basically happens when you update your TikTok username, since your profile link is built from your username.
Updating this can give your profile a fresh look or better match your brand, and it’s easy to do right from the app.
Here’s how to do it step by step:
1. Open TikTok and log in: Launch the TikTok app on your phone and make sure you’re signed in to the account you want to update the URL of.
2. Go to your profile page: Tap the “Profile” icon at the bottom right corner. This is where you can see your current username and profile details.
3. Tap “Edit profile”: Just below your profile photo and username, you’ll see the “Edit” button. Tap that!
4. Select the username field: On the “Edit profile” screen, tap the option that says “Username.”
5. Enter your new username: Type in the name you want. TikTok will automatically check if it’s available. If someone else is already using it, you’ll need to try a different one.
6. Save your changes: Once you’ve entered your new username and it’s available, tap “Save” (usually in the top-right corner). Your profile link, and therefore your TikTok URL, will update instantly.
📌 Things to keep in mind: TikTok only lets you change your username once every 30 days, so make sure you’re happy with your new name before saving.
That’s it!
Now you’ve got a brand-new URL that matches your vibe or brand. If you’ve shared your old link anywhere (like in your Instagram bio), be sure to update it so people can still find you hassle-free!
Shorten your TikTok profile URL using Replug!
If you want your TikTok profile link to look cleaner, more professional, and easier to share, using a short link generator like Replug is a smart move.
Replug is an all-in-one link management platform that not only shortens messy, long URLs but also lets you track clicks, brand your links, and even create smart bio pages, all from a single dashboard.
A complete link management solution
for marketing professionals & agencies.
Try Replug for free
Here’s why this helps:
Long TikTok links with tracking codes or extra characters can be hard to read and don’t always look great in bios, messages, or marketing posts.
With Replug, you turn them into short, branded links people are more likely to click, and you get useful data to see how they’re performing in real time.
Here’s how to shorten your TikTok account URL with Replug: 4 simple steps to follow!
1. Sign up or log in to Replug: Head to Replug’s website and sign up for a free account. It’s quick and beginner-friendly. Once signed up, log in to your account.
2. Paste your TikTok profile link: Once you’re in the dashboard, look for the link shortener box titled “Quickly Shorten your link” and paste your full TikTok URL (e.g., https://www.tiktok.com/@yourusername).
3. Generate & customize: Click the blue right arrow button to shorten the link. Replug will create a clean, short version within seconds. You can also edit the slug(the part after the slash) to make it match your name or brand.
4. Save & share: Your new short link is ready! Copy it, and add it to your TikTok bio, Instagram, website, or anywhere you want to promote your profile.
From figuring out what your TikTok URL is to customizing and shortening it, and even understanding the different types of links you might share, you now have everything you need to manage your TikTok presence like a pro.
No matter if you’re growing your brand, sharing content with friends, or using tools like Replug to tidy up your links and track clicks, having a clear handle on your URLs makes your life easier.
And for those who want to save videos for editing or offline viewing, Replug’s free TikTok downloader lets you quickly grab clips without fuss.
So go ahead, update that profile link, share it everywhere, and start turning those clicks into real engagement and growth!
Frequently asked questions
What is my TikTok link?
Your TikTok link is the web address that takes someone directly to your TikTok profile. It normally looks like: https://www.tiktok.com/@yourusername, where “yourusername” is your TikTok username.
How do I know what my TikTok URL is?
To know your TikTok URL, just look for the link that includes your username (@username) after the main TikTok web address (tiktok.com). You can also open your profile in the app and copy the link from the sharing option. That’s your personal TikTok URL link!
How do I find my TikTok URL?
Here’s how to find your TikTok URL:
1. Open TikTok and go to your profile. 2. Tap “Share Profile” and then “Copy link.”
That gives you your profile’s TikTok URL link.
Note: To find someone else’s TikTok URL from their profile, do the same. Open their profile page and tap Share → Copy link.
Where to find the TikTok server URL?
If by TikTok server URL you mean the link used for live streaming (RTMP server URL), that is only available to users who have TikTok Live access and streaming enabled via TikTok Live Studio. It’s not shown in the normal app sharing options.
What is my TikTok URL for a specific video?
Every TikTok video has its own unique URL. To get a specific video’s TikTok link:
1. Find the video in the app. 2. Tap the “Share” arrow. 3. Choose “Copy link.”
You’ll get a link that looks like:https://www.tiktok.com/@username/video/123456789(the numbers are the video’s ID).
What is my TikTok URL on iPhone?
On an iPhone:
1. Open the TikTok app. 2. Go to your profile. 3. Tap the three dots or “Share” icon. 4. Tap “Copy link.”
Now the TikTok URL link is on your clipboard. You can paste it anywhere you want to share it.
What is my TikTok URL on Android?
On an Android phone:
Open the TikTok app → Go to your profile → Tap the “Share” icon (the right arrow) → Tap “Copy link.”
That gives you your TikTok profile URL. It usually looks like https://www.tiktok.com/@yourusername.
Can you find a TikTok video URL with only the video ID (without the username)?
No, TikTok video URLs normally include both the username and the video ID in the link (tiktok.com/@username/video/123…). There isn’t a reliable official way to construct a full video URL with just the numeric video ID alone. However, you can opt for a specific embed player format, since it works with just the ID.
How to copy TikTok profile link URL?
To copy any TikTok profile link URL (yours or someone else’s):
1. Open TikTok and go to the profile. 2. Tap the “Share” icon on the profile page. 3. Tap “Copy link.”
The TikTok URL will be copied to your clipboard.
How to copy my TikTok profile link on PC?
On a computer/PC:
1. Go to tiktok.com and log in. 2. Navigate to your TikTok profile page. 3. Click the address bar and copy the full URL. It will be in the format https://www.tiktok.com/@yourusername.
How to find a TikTok username?
Your TikTok username is shown on your profile page below your display name (e.g., @username). You can also open someone else’s profile; their username shows near the top of the page. No extra tools are required!
How to add a link to your TikTok profile?
To add an external link in your TikTok bio:
1. Open the TikTok app on your phone. 2. Go to Profile → Edit profile. 3. Find the “Links” or “Website” field and enter your link (it must start with http:// or https://). 4. Save your changes.
Have you ever tried sharing your Snapchat profile only to find everyone asking, “What’s your link?” You’re not alone!
With over 900 million monthly users and roughly 469 million people opening the app every single day in 2025, Snapchat remains one of the most buzzed-about social platforms of 2026.
But despite its massive popularity, many users still don’t know how to get or share their Snapchat URL, leaving them frustrated and stuck when connecting with friends, followers, or customers.
That confusion can make something as simple as building your presence feel way harder than it should be.
In this guide, we’ll walk you through exactly how to find your Snapchat URL, starting with the basics. So let’s step in and clear things up!
First up:What is a Snapchat URL link?
What is a Snapchat URL?
A “Snapchat URL” is simply a web link that leads straight to a specific Snapchat profile or piece of content. It’s like a shortcut that saves people from searching around for your username.
Instead of telling someone to type your exact username (which is easy to mess up), you can just send a link that instantly opens your profile in Snapchat. This makes connecting way faster and smoother than the old days of only searching or scanning Snapcodes or QR codes.
The main purpose of a Snapchat URL is to make sharing and adding friends easier. When someone taps the URL, they’ll see your Snapchat page with an “Add” button right away (no extra steps).
That’s especially handy if you’re trying to grow your audience, promote yourself, or just make it simple for friends to find you online.
Snapchat URL example
Here’s what a typical Snapchat profile link looks like:
https://www.snapchat.com/add/yourusername
In this example, replace yourusername with your actual Snapchat username. Now, the resulting link becomes your personal Snapchat URL that you can share anywhere, anytime!
How to get my Snapchat URL on the app: Step-by-step guide!
Getting your Snapchat URL right from the app is super simple! It’s just a few taps, and you’ll have a link ready to share with friends, followers, or in your bio.
📱 Here’s how to get the Snapchat URL on the app:
Step #01: Open the Snapchat app on your phone like you normally would.
Step #02: Go to your profile by tapping your Bitmoji or profile icon in the top left corner.
Step #03:Look for the “Share” icon and tap it. It will be on the left side of the “Settings” icon.
Step #04: On the next screen, you will see an option that says “Share Your Profile.” Under it, tap on the option labeled “Copy.”
Step #05: Snapchat will show you your unique URL (it usually looks like https://www.snapchat.com/add/yourusername).
Step #06: From here, pick how you want to share it. You can copy it to your clipboard, send it in a message, post it on social media (like WhatsApp or Instagram), or save it for later.
And that’s it! You’ve now got your personal Snapchat link ready to go 🥳. It makes adding you way easier than asking people to type your username by hand.
How to copy a Snapchat URL from the app: Grab your link straight from your phone!
Copying your Snapchat URL right from the app is one of the easiest ways to share your profile with others, whether you want friends to add you or you’re promoting your account online.
Here’s how to copy a Snapchat profile link URL:
Step #01: Open the Snapchat app on your phone and make sure you’re logged in.
Step #02: Go to your profile by tapping your Bitmoji or profile icon in the top-left corner of the screen.
Step #03: Look for the “Add Friends” option and tap it. It will be under the section titled “Friends.”
Step #04: On the next screen, you will see an option that says “Invite friends.” Tap that!
Step #05: Now, under the “Invite via” heading, tap “Copy.” This displays your Snapchat profile URL (something like https://www.snapchat.com/add/yourusername) and copies it to your clipboard.
Step #06:Paste it wherever you want, e.g., like in a message, your Instagram bio, or a blog post, by long-pressing and selecting “Paste.”
That’s it! Now you’ve got your Snapchat URL copied and ready to go, making it way easier for people to find and add you.
How to view links on Snapchat: Inside direct snaps & in stories
Sometimes friends send you web links inside snaps or add them to their stories, and Snapchat makes it pretty easy to see what they’re sharing.
No matter if it’s a link in a direct snap or a swipe-up link in a story, you just need to know where to look and how to interact with it.
Here’s a friendly, simple run-through so you never miss a link someone shares with you!
🔍 Viewing links in direct snaps
Step #01: Tap the snap in your chat feed or conversation list to view it.
Step #02: Check the bottom center of the screen for a small arrow pointing up, and you might also see the name or title of the website that’s linked.
Step #03: Drag your finger upward on the screen to load the web page that’s connected to the snap.
Step #04: When you’re done, either tap the down arrow in the corner or pull the page downward to go back to the snap or chat.
That’s all there is to it!
📖 Viewing links in stories
Step #01: Go to the “Stories” section by swiping left from the camera screen, and then tapping the option labelled “Stories.” You’ll see all recent stories from your friends or accounts you follow.
Step #02: As you watch a story, if the creator has attached a link to a snap (using the paper clip icon when they posted it), you’ll see a prompt like “Swipe up to view” or the website title at the bottom.
Step #03: Swipe up on the screen when that prompt appears. This opens the web link right in Snapchat’s browser.
Note: If there isn’t a link included, swiping upward won’t do anything. You need to have the Snapchat app installed on your phone or tablet in order to see the linked content easily.
How to attach a link to a snap: 5 quick steps to follow!
Attaching a web link to your snap lets people swipe up to open a site right from your photo or video. Perfect option for sharing articles, products, events, or anything cool you’ve found online.
It’s quick and works right inside the Snapchat app!
Step #01: Open Snapchat and take a snap.Just shoot a photo or record a video like you normally do.
Step #02: Tap the paperclip icon.On the preview/edit screen, look for this icon in the vertical toolbar on the right; that’s Snapchat’s link button.
Step #03: Enter or paste your URL.Type in the web address you want to share, or paste one you’ve copied from elsewhere.
Step #04: Tap the “Attach to Snap” button.Once the link looks right, hit this blue button. Snapchat will show a little preview so you can double-check it.
Step #05: Send or post your snap.Now just send it to friends or add it to your story. Anyone who sees the snap can swipe up to open the link in Snapchat’s internal browser.
That’s it! This feature makes sharing useful web content super easy without leaving the app. 😊
If your Snapchat URL feels too long and cluttered to share, especially in places like Instagram bios, texts, or tweets, a link shortener like Replug can help you turn it into a clean, simple, and more professional link that’s easier to share and remember.
Shortened links also tend to look better and can boost engagement when you drop them on social media or in your content.
Here’s a simple step-by-step guide to help you shorten your Snapchat URL using Replug:
Step #01: Sign in or create an account on Replug.Go to the Replug website and log in to your account. If you don’t have one yet, signing up is quick, and there’s a free option to get started.
or
Step #02: Paste your Snapchat URL.On the dashboard, find the box labeled “Quickly Shorten your link” and paste your copied Snapchat URL (like https://www.snapchat.com/add/ronnie_07).
Step #03: Generate your short link.Click the blue button to create the short link. Replug will instantly generate a cleaner, shorter version of your Snapchat URL.
Step #04: Customize your short link (optional).You can adjust the text after the slash (called the slug), so it matches your name or brand, making it even more memorable. For this, click the pencil icon.
Step #05: Copy your shortened link and share it.Once you’re happy with it, click the “✔” icon. Then, copy the shortened link by pressing the “Copy Link” button and use it anywhere you like, such as in bios, emails, posts, or chats.
Note: Using a Snapchat URL shortener like Replug not only tidies up your link but also gives you options like link tracking, how many people click it, adding custom call-to-actions, or even using your own domain if you want to look extra polished.
Wrapping up
To wrap up, now you’ve learned how easy it is to find, copy, share, and even shorten your Snapchat URL (no guessing, no confusion).
You saw simple steps for grabbing your Snapchat link, viewing shared links in chats and stories, attaching links to your own snaps, and using a reliable URL shortener to make those links easier to share on socials and beyond.
These tools don’t just clean up long URLs; they help you look more professional and boost engagement wherever you post.
If you’re ready to take your Snapchat sharing to the next level, give Replug a try today!
A complete link management solution
for marketing professionals & agencies.
Try Replug for free
Frequently asked questions
What is my Snapchat URL?
Your Snapchat URL is a unique web link that points directly to your Snapchat profile, usually in the format https://www.snapchat.com/add/yourusername. When someone taps it, they’ll see your profile with an option to add you immediately.
How to find my Snapchat URL?
Here’s how to find a Snapchat URL in the app:
Open Snapchat → Go to your profile (tap your Bitmoji or profile icon) → Tap “Add Friends” → “Invite your friends.” → “Copy.”
This shows your unique profile link that you can copy and share anywhere you want, hassle-free!
What is the Snapchat app URL?
The Snapchat app URL refers to the official download or access links for the Snapchat mobile app, such as the Google Play or Apple App Store pages. These are the links people use to install the Snapchat app on their devices (e.g., the Play Store link with package ID com.snapchat.android).
What is Snapchat’s Share Sheet API?
The “Share Sheet API” is a developer tool from Snapchat that lets third-party websites and apps create links users can click to share a URL directly in Snapchat (as in the desktop experience). The shared link opens Snapchat’s web interface, allowing users to send it to friends seamlessly.
What is the URL for Snapchat Web?
Snapchat Web, i.e., the browser version of Snapchat, is available at https://web.snapchat.com. You can log in with your account to chat, call friends, and use other core features without the need for a mobile app.
How to make a URL on Snapchat?
You make a Snapchat URL by using the “Share Username” feature:
Open Snapchat → Go to your profile → Tap the “Share” icon → Under “Share your profile,” tap on “Copy.”
The generated link looks something like: https://www.snapchat.com/add/yourusername
Is it possible to add bio links to your Snapchat profile?
Yes, if you’ve set up a public Snapchat profile, you can add a link (like your website or another social profile) in your bio when editing your public profile settings. This lets visitors tap through directly to your external URL.
How can brands capitalize on Snapchat URLs or links?
Brands can use Snapchat URLs to drive traffic straight from snaps, stories, or bios to product pages, landing pages, or promotions. By placing links where followers can swipe up or tap, companies can guide engagement, track how users interact with content, and convert attention into action (whether that’s a sale, a signup, or a follow).
What is the easiest way to link to any Snapchat account?
The easiest way to link to a Snapchat account is to use the profile’s Snapchat URL (like https://www.snapchat.com/add/yourusername) and share it wherever you want to direct people. For instance, in messages, on websites, or on other social networks.
How to generate a Snapchat profile deep link? What are its major benefits for businesses and influencers?
A Snapchat profile deep link is a special link that opens the Snapchat app directly to your profile from outside the app (a great option for marketing).
To generate one, start with your Snapchat profile link and use a deep-linking tool that adds app-specific routing and fallbacks.
The big benefits are higher engagement and a smoother user experience. Users click once and land right where you want them without extra steps, helping boost followers and conversions.
Are there any specific Snapchat URLs to block?
Snapchat itself doesn’t publish a list of URLs to block, but avoid linking to unsafe, illegal, or explicit content, as that violates community guidelines and can result in account penalties. Always focus on trustworthy destinations when sharing links.
What is the best free Snapchat link generator online in 2026?
One of the best free tools you can use in 2026 is Boei’s Snapchat Link Generator. Just enter your username, and it creates a shareable Snapchat link instantly. This free generator is easy to use and great for quickly crafting a link you can share in bios, posts, or messages.
A/B testing is a side-by-side comparison of two or more marketing campaigns, landing page designs or other elements to find out which one gets more attention in terms of clicks, conversion and overall performance.
A/B testing is a buzzword in the digital marketing industry. We have been hearing A/B testing or A/B split testing terms for website designs, logos, or banner ads for a while now.
It’s time to pay close attention to this concept and figure out what it is. More importantly, how and where else you could use A/B testing for our good.
It doesn’t matter whether you’re a beginner copywriter or a freelance graphic designer – as long as you’re working in any creative and digital marketing field, it’s going to help you out.
In this blog, you’ll also learn the important factors to consider before doing A/B testing with Replug to see which URLs perform better than the others.
11 Benefits of A/B Testing
Let’s discuss the benefits of A/B testing that every marketer and conversion optimizer should know:
1. Test URLs Performance
Short URLs are in the trend now-a-days. No wonder every major brand uses short links for social media and content sharing across all social platforms.
The best URL shorteners allow marketers and brands to A/B test their URLs to see how people react to different versions of the same URL.
You can take your link management to the next level with Replug’s short url shortener. It is a simple yet powerful tool to create, track, and optimize branded links for better engagement.
Overall, this brilliant link optimization platform assists brands and experts in understanding URL performance effortlessly.
2. Increases Conversion Rates
Conversion rate is a term used for calculating or analyzing the percentage of users who are clicking and buying/downloading the product. For instance, if 100 visitors clicked on an affiliate link and only 10 eventually bought the item, then the conversion rate would be 10%.
One of the reasons why marketers and conversion optimization experts do some sort of A/B testing is that they want to increase the conversion rate. Hence, they make an alternation on the page or copy and test it pans out. So without a doubt, A/B testing is crucial to increasing conversion rates regardless of the industry or product category.
3. Improves User Engagement
User engagement refers to the process of how a website or app keeps the user abreast. The reason why a business would want a user to stick around is that the longer the user stays, the higher the chance of a conversion.
Moreover, it plays an essential role in the success of any website or online business. E-commerce stores, digital product sellers, and affiliate marketers pay close attention to improving user engagement on website pages.
4. Makes Everything Testable
A/B testing allows marketers to test out a wide range of things just to make sure that they prioritize the best-performing unit. One of the huge benefits of A/B testing is that it quickly makes anything testable regardless of the nature of the product, type, and layout.
For instance, if you hire a graphics designer to design three Facebook ad designs and you use all three ad units in an ad set; you could easily analyze which one outperforms the other.
5. Reduce Risk by Assessing User Behavior
Understanding user behaviors saves time, effort, and energy. More importantly, it reduces the risk of putting in the work, effort, and money into something that may not yield positive ROI.
For example, digital marketers build an email list using opt-in forms. Sometimes, they change the design and layout of the opt-in form to see how users behave afterwards. If the number of sign-ups increases, it shows that it’s worth doing it.
So it’s safe to say that A/B testing helps understand user behavior. Therefore, it contributes to reducing the risk.
6. Easier to Analyze the Performance
One of the biggest benefits of A/B testing is that it gets easier to analyze the performance of marketing strategies or organizational management by testing two more cases along the way.
For example, if a blogger puts two types of banner ads to test which type gets more clicks while only one of them gets clicks, then it’s obvious that something is wrong with the other banner ad.
7. Reduce Bounce Rates
A lot of digital marketers and conversion optimization experts want to reduce the bounce rates of their sales pages or overall websites, so they use A/B split testing to see what works for them.
The experts try all sorts of things, for instance, changing the sales page design, colors, fonts, etc. The purpose is to stop people from bouncing off the site sooner. They use engagement tactics such as tables, CTAs, forms, FAQs, pictures, and several other things to stop people from leaving the site.
8. Minimize Cart Abandonment
Car abandonment is a huge problem with e-commerce businesses. Brands and online stores try different tactics to deal with the cart abandonment problem.
One of the ways to deal with cart abandonment is by doing A/B testing across different areas. You could A/B test on the pricing model, call-to-action buttons, and the website theme just to see how it works for you.
9. Help Solve Visitors’ Pain Point
A/B testing assists marketers and merchants in understanding the choices and preferences that users make while browsing through the website. As a result, it helps them make better decisions along the way.
Affiliate marketers and bloggers often put lead magnets on their blogs to build email lists. If their lead magnet is niche-relevant and useful for the audience, it starts to convert well. However, it doesn’t resonate with the audience, and it doesn’t work very well.
So as long as you’re understanding the visitors’ pain points, you have a better chance to get attention and convert prospects into customers.
10. Redesign Website to Increase Future Business Gains
A/B testing is incredibly important for improving the UI/UX of a website or app. User interface and user experience are terms used for noticing how users react to any design or layout or interface.
Usually, marketers test out a landing page or opt-in form designs and layouts to see which ones perform better than others.
A website design revamp is an excellent strategy to rejuvenate your digital marketing campaign. Often companies redesign their websites after four to five years just to stay relevant and up-to-date.
You can always A/B test your site conversion through a website redesign. Analyze how many conversions are happening every month and then do a site design revamp and reevaluate the performance afterwards.
11. Improve Content Engagement
A/B testing isn’t just limited to ad banners or logo designs. You could A/B test all sorts of marketing and engagement content to see what works for you.
Use this A/B testing strategy on your content. You could test out a specific type of content or certain content formatting to notice the difference.
For instance, if you’re doing more sales/commercial content on your blog, try putting out informational content to see the difference in engagement.
Increase User Retention
User retention is how well a website or app retains users through engagement tactics – these engagement tactics could be tools, offers, quality content, etc.
One of the benefits of A/B testing is that one can increase user retention on the website. All it takes is to figure out what needs to be improved, for instance, website copy, design, layout, or call-to-actions, so that the plan of action is determined.
Real-world examples of A/B Testing
Let’s dive deep into a couple of real-world examples of A/B testing:
Example #1: Adding a call-to-action to my blog header
I have first-hand experience adding a call-to-action button on my blog that turned things around for me.
I have been telling this story for years that how a CTA button helped me grow my freelance writing business.
Here’s the short version of the story: I was struggling to earn a living with freelance writing. Little did I know that just a single CTA could change everything for me. As soon as I added that CTA to my blog’s header, I started getting email inquiries about my per-word pricing. I eventually landed some clients afterward.
Here’s what my blog’s header looked like before adding the CTA button:
This is what my blog looked like after adding a text-based CTA button on the header:
In fact, I had to remove that CTA button after a few months because the response was overwhelming – I was unable to handle the burden of work.
I vividly remember forwarding some prospective clients to other writers I knew at that time.
So it’s safe to say that A/B testing has had a huge impact on my success in the writing business.
Example #2: Changing the YouTube video titles helped get traction
The second example of A/B testing is from a blogger and YouTuber named Luke Jordan. He has been quite active on Twitter in the niche site-building and blogging community.
He shared the screenshots of video analytics that he was experimenting with. He shared the side-by-side stats before and after changing the title.
The analytics covered were click-through rate, impressions, and clicks, watch time, daily impressions, daily clicks, total views, average view duration, and est. total minutes watched.
The core point of the experiment was the effect on the performance of the video after changing the title. In the statistics shown from the TubeBuddy screen, the video skyrocketed after the video title was updated.
YouTubers and Vloggers have been changing their low-performing video titles and thumbnails for a long time, and it works in most cases. So you can do the same by A/B testing different variations of content.
6 Key factors to consider before conducting A/B tests
It’s vital to know how to do A/B testing efficiently, so that the results are worth paying attention to afterwards. Here are six key elements of conducting an effective A/B test:
1. Choose one variable to test
A/B testing is not rocket science, but you have to take care of several things to find an accurate result. One of those things is one variable to test out. You might want to be testing several things at once. Instead, focus on one thing and don’t get distracted by testing everything at once.
2. Divide your audience equally
Make sure the size of the audience is the same in either case. You don’t want to have some variations in the sample or audience size. If the audience isn’t properly divided or the sample size differs from each other, then it’d be against the essence of A/B testing.
3. Test versions simultaneously
It’s also recommended to test the versions or samples at the same time or at least give equal time, for instance, if you put a banner ad with image A for 30 days, then put the banner ad with the image B for exactly 30 days to see the accurate result.
4. Give tests time to run
It’s vital to set a proper duration for the test. Once the time is set, don’t make an alternation in the test timing. Instead, stick with the schedule. Don’t rush into concluding your A/B testing before the time.
5. Measure and analyze results
It’s essential to share the results once the testing is over. When the A/B testing completes, analyze the results without any bias or liking for a specific side. Present the results as they are.
6. Act on your results
When you put in the work in conducting the A/B testing, it’s important to put your findings into action. It doesn’t matter whether it’s the link management and you’re doing A/B testing for short links or it’s an opt-in form for email newsletter sign-up, act on your results.
3 Major A/B testing mistakes to avoid
Sometimes, you could do everything you have planned or asked for, but there is always a possibility of something going wrong in the marketing world.
Here are some A/B testing mistakes you should be aware of and try to avoid:
1. Ending tests too soon
If you stop the test too soon or before the actual time, the results may not be accurate. Keep in mind that A/B testing isn’t any kind of prediction. It’s a side-by-side comparison of two cases. You can’t compare a 5-minute test with a 10-minute test.
2. Including too many variables to test
It’ll be difficult to analyze if you include too many variables to test. The reason is that it becomes difficult to manage several factors during an analysis. The smaller the list of key elements, the better.
3. Calling a test prematurely
One of the mistakes rookie marketers make is that they instantly decide to start an A/B test. There is always a little bit of brainstorming that goes behind such activities. So try to avoid this mistake when starting an A/B testing campaign.
FAQs about A/B Testing
Are A/B tests worth it?
A/B testing is worth trying because it’s a tried-and-tested strategy in the digital marketing field. Marketers and conversion optimization experts do all kinds of A/B testing, whether it’s the color scheme of the website, Facebook image ad, or article title. Such A/B tests help them determine the better option to work with.
Why is A/B testing important for social media?
A/B testing is important not just for social media but also for overall digital marketing. One of the reasons why A/B testing is crucial for social media is that you have to be spot-on with your marketing and engagement strategies on social media. Otherwise, you won’t get noticed in the noisy and busy world of social media.
Who needs A/B testing?
Anyone who is trying to put out content, engage the audience through digital media, marketing online through websites/blogs, and run online ads must try A/B testing. It’ll helps to analyze the audience’s behavior and figure out what audiences like the best.
Ever wondered why finding an image URL feels like a tiny digital superpower? You’re not alone!
With over 95 million photos uploaded to Instagram every day and nearly every webpage requesting at least one image (99.9% of them, to be exact), visuals have become the backbone of the internet we scroll, share, and screenshot daily.
No matter if you’re blogging, building a website, or sharing content on social, knowing how to grab an image’s direct link can save you minutes (or even hours) of frustration.
And with content featuring images getting up to 94% more views than text-only posts, mastering this simple trick could seriously boost your creative workflow.
Ready to get started?
First things first, let’s clear up what an image URL actually is…
What is an image URL?
Simply put, an “image URL” is just a URL that points directly to an image file on the internet. It is the exact address your browser uses to find and show that picture online.
Just like regular links help your browser locate web pages, image URLs help it fetch and display images everywhere you see them: blogs, social media, websites, and apps.
Think of an image URL as a direct path to a photo stored somewhere on a server. When you insert that URL into an <img> tag or paste it into a browser’s address bar, the browser knows exactly where to go and what image to pull up.
Image URL example
Here’s what an image URL actually looks like:
https://www.example.com/images/photo.jpg
In this case:
https:// is the protocol telling your browser how to connect.
www.example.com is the domain name where the image lives.
/images/photo.jpg is the path leading right to the picture file.
How to get an image URL on mobile
If you’re on the go and need to grab a direct link to a photo from the internet, your smartphone makes it surprisingly easy (whether you’re using an iPhone or an Android device).
This quick guide will walk you through it step by step so you can copy image URLs straight from your mobile browser without hassle.
How to get an image URL on iPhone
Here’s how to get the URL of an image on an iPhone using a browser (like Safari or Chrome):
1. Open your web browser (Safari or Chrome) and go to the page with the image you want.
2. Tap and hold on the image until a menu pops up.
3. If you see “Copy Image Address” or “Copy”, tap it. This saves the image URL to your clipboard.
4. If you don’t see that option, choose “Open Image in New Tab”, then long-press the image again to see the copy option.
5. Paste the link anywhere you need it. Just tap and hold a text field and hit “Paste”.
This works great in most browsers, and once the image URL is in your clipboard, you can easily share or save it.
How to get an image URL on an Android smartphone
On Android, the process is very similar and usually even more straightforward:
1. Open your mobile browser (like Chrome or Firefox).
2. Find the image you want the link to, then long-press it.
3. From the menu that appears, tap “Copy image address” or something like “Copy link address” or simply “Copy link”. This grabs the image URL.
4. If that option doesn’t show up, choose “Open Image in New Tab”, then copy the URL from the browser’s address bar.
5. Paste the URL into a message, note, or blog editor by tapping and holding a text area and hitting “Paste”.
And that’s it!
With these simple steps, you can learn how to get an image URL on a phone in just a few taps. Perfect for sharing, embedding, or saving photos online!
How to get an image URL on iPad
Grabbing an image URL on an iPad is similar to doing it on other mobile devices, but iPads don’t always show a direct “copy image address” option in Safari as desktops do.
Instead, you’ll use a long-press or alternative browser features to get the link, then paste it wherever you need.
Step-by-step guide to get an image URL on iPad:
1. Open your browser(Safari, Chrome, or another web browser)
If the site you’re viewing has images you want the URL for, start by navigating to that page.
2. Long-press the image
Tap and hold your finger on the image until a menu appears.
In some browsers, you’ll see options like “Share” or “Copy.”
3. Use the Share option
In Safari or the Google app, tap the “More (⋯)” or “Share” button next to the image, then choose “Copy”. This copies the URL (the image’s web address) to your clipboard.
4. Alternatively use Chrome
If Safari doesn’t show the right options, open the same webpage in the Chrome app.
Long-press the image, then choose Share (three dots) > Copy link to get the image’s URL.
5. Paste the URL
Go to the text field where you want to use the link (notes, email, blog editor, etc.), tap and hold, then select “Paste” to insert the image URL.
That’s all there is to it!
With these quick steps on your iPad, you can pull the direct web address of an image quickly and easily, ready to use in your writing, sharing, or content planning.
How to get an image URL from a picture on your computer
Sometimes you have a great photo sitting on your computer, and you want a link (URL) you can share or embed online. But unfortunately, local files don’t automatically have web addresses.
To turn your computer image into a proper image URL, you’ll need to upload it to an online host first, which then gives you that link you can use anywhere.
Here’s how to get the URL of an image on your computer:
1. Choose a trusted image-hosting site. There are free tools like ImgBB, Imghippo, or ImageToURL that let you upload pictures from your computer and instantly generate shareable URLs.
2. Open the site in your browser. Go to the host’s upload page. Most modern browsers work fine (Chrome, Safari, Firefox, Edge).
3. Upload your image file. Click the “Upload” or “Choose File” button, then pick the picture from your computer that you want to turn into a link.
4. Wait for the upload to finish. Most services upload quickly, usually within a few seconds, depending on your file size and internet speed.
5. Copy the generated URL. Once your image is uploaded, the site will show you one or more links, typically a direct image URL you can copy. This is the address that points to your uploaded picture on the web.
6. Use the link wherever you need it. Paste the URL into emails, blogs, websites, or social posts. Anyone with the link can now access the image.
That’s all!
By uploading your picture to a reliable host, you quickly get a proper URL that works just like the image links you find online every day.
Note: You can open your image file in a browser. Either drag the file into an open browser window, or use the keyboard shortcut Ctrl+O on Windows or Command-O on a Mac to browse and select it. Once the image loads, look at the address bar. You’ll see a file:///… URL (for example, file:///C:/Users/YourName/image.jpg), which points to the location of that image on your own computer. This is the local file URL (not for web sharing)!
How to get an image URL from a website on your computer
When you’re browsing the web on a computer and find an image you want to use or share, it’s usually just a couple of clicks to grab its direct image URL.
Most modern browsers make this super easy, and you can then paste that link wherever you need (in a document, blog post, or email).
Get an image URL from a website, step-by-step:
1. Open the webpage in your favorite browser (Chrome, Firefox, Edge, Safari).
Navigate to the page where the picture you want is displayed.
2. Right-click the image you want.
On a Windows PC or Mac with a mouse/trackpad, right-click directly on the picture. (If you’re using a laptop touchpad, a two-finger click usually works the same.)
3. Choose “Copy Image Address” (or similar).
Most browsers will show an option like “Copy image address,” “Copy image URL,” or “Copy image link” in the menu that pops up. Click it!
4. Paste the URL where you need it.
Go to a text field, right-click (or press Ctrl + V / Cmd + V), and paste the link you just copied.
👍 Tip: If the right-click menu doesn’t offer a direct copy (some sites block it), you can often open the image in a new tab and then copy the URL from your browser’s address bar.
And that’s it! You’ve got the image’s web address ready to share anywhere you want!
How to get an image URL from Google Drive (Cloud Service)
If you’ve stored a photo in Google Drive and need to use it online or share it on your blog, you can turn that file into a link. However, keep in mind that Google Drive doesn’t give you a ready-made direct image URL right away.
You’ll first share the file publicly and then tweak the link so it points straight to the image itself.
Here’s how to do it:
1. Sign in and find your image: Open Google Drive in your web browser and locate the image file you want a URL for. Make sure it’s an image (like JPG, PNG, etc.).
2. Share the image: Right-click the image and choose “Share”. In the sharing settings, set access to “Anyone with the link (Viewer)” so others can view it. Then click “Copy link”.
3. Grab the file ID: The shared link looks something like:
Replace FILE_ID with the text you copied. This new URL will display the image itself.
5. Test your link: Paste the final URL into a new browser tab. If it shows just the image and nothing else, you’re all set!
Now you can use that image URL in blogs, websites, or wherever you need it. Just remember that the image must be shared publicly for others to see it.
How to get an image URL from File Explorer
Unlike web browsers, File Explorer on your computer doesn’t give you a shareable online URL for an image, because local files don’t live on the web by default.
What you can do in File Explorer is copy the full file path (the local address of the image on your PC), and if you need a clickable link, convert it into a file-URL format.
This local path is useful for linking to files on your own machine or a shared network or for debugging.
Here’s how to get an image URL (or path) in File Explorer:
1. Open File Explorer: Press Windows + E or click the folder icon on the taskbar to launch File Explorer and navigate to the folder with your image.
2. Select the image file: Click once on the image file you want to get the path for, so it gets highlighted.
3. Copy the full file path
Right-click the file and choose “Copy as path” from the context menu. This copies the image’s full path to your clipboard.
In Windows 11, you can also select the file, click the three dots (…) in the toolbar, then choose Copy Path.
Or press Ctrl + Shift + C as a shortcut in newer versions of Windows.
4. Paste the path where you need it: Go to a text box, document, or message and press Ctrl + V to paste the file path you copied.
5. Turn it into a file-url (optional): If you want a clickable file link (for example, in an email), add file:// in front of the path you copied. For instance:
file:///C:/Users/YourName/Pictures/photo.jpg
This tells Windows and some apps that it’s a file URL rather than plain text.
💡 Note: This local path isn’t a web URL that everyone can open online. It only works on your computer or on a shared network where others have access to the same location.
How to get an image URL from files
Getting a shareable image URL from a file on your computer isn’t something your file system does by itself. Local files don’t automatically have web addresses.
To turn a photo into a usable online link, you need to upload it to an image-hosting service, which then gives you a link (URL) you can paste anywhere.
These tools take your image and generate a link that works just like any other image URL online.
Here is a step-by-step guide to get the job done:
1. Pick an online image host or converter tool: Use a free service that lets you upload images and generate a link instantly. Popular options include PictureToLink and ImageToURL. Both let you upload files and get a direct URL you can use online.
2. Open the tool in your browser: Go to the image-to-URL site using a browser on your computer like Chrome, Safari, or Firefox.
3. Upload your image file: Click the upload button or drag & drop your image into the upload area. Most tools support common formats like JPG, PNG, GIF, and WebP.
4. Wait for the upload to complete: The site will usually take just a couple of seconds to upload and process your picture.
5. Copy the generated URL: Once the image is uploaded, the tool will display a direct link (URL) to your image file. Copy it!
6. Use the link wherever you need it: Paste the image URL into your blog post, social media, website editor, or any other place where you want the picture to show up.
That’s it!
By using an image hosting or link generation service, you turn files on your computer into real, shareable URLs in just a few steps.
How to get an image URL from downloads
When you’ve downloaded an image to your computer or phone, it doesn’t automatically have a web-ready image URL, because downloads live locally on your device, not on the internet.
To turn a downloaded photo into a shareable image URL, you’ll need to upload it to an online platform that can host your file and give you a link you can use anywhere online.
Step-by-step guide to get an image URL from downloads:
1. Locate the downloaded image file
On a computer, open your Downloads folder (usually found in “File Explorer” on Windows or “Finder” on Mac).
On a phone or tablet, open your Files or Downloads app and find the picture you just saved.
2. Pick an image hosting service. Select a free tool online that lets you upload files and quickly turns them into online URLs you can copy.
3. Upload the image. Go to the hosting site in your browser, click the upload button (or drag & drop), and select your downloaded image.
4. Wait for the upload to finish. Most sites only take a few seconds to process your image and generate a link.
5. Copy the generated URL. Once your image is uploaded, the service will provide a direct URL to the image. Just copy it!
6. Use that link wherever you need it. Paste the URL into your blog, social media post, website, or message so others can view the image online.
That’s all!
By uploading your downloaded photo to an online host, you turn a local file into a usable image URL that works anywhere online.
How to get an image URL from a screenshot
Since screenshots live on your device and don’t automatically have a web address, you can’t just copy a URL like you would with an online image.
To get a shareable image URL from a screenshot, you’ll need to upload it to a hosting service that stores your picture online and gives you a link you can use anywhere.
The approach is super simple and only takes a few minutes!
Here’s how to do it:
1. Take the screenshot: Capture the part of your screen you need. On Windows, use PrtScn or Windows + Shift + S. On Mac, use Cmd + Shift + 4, and on mobile, use the button combo or gesture for your particular device.
2. Open a free image uploader: Go to a site like SnipFly, ScrinX, FastSnap, Snipboard.io, or ImgShare.cc in your browser. These services let you upload screenshots or images without creating an account, and they give you a link you can share instantly.
3. Upload or paste your screenshot: Most tools let you drag and drop your file, paste it from your clipboard, or browse to select it from your device. Just follow what the page tells you.
4. Wait a second for processing: These sites handle uploads quickly, usually within a couple of seconds.
5. Copy the generated URL: Once uploaded, the service will show a link that points directly to your screenshot online. Click Copy or highlight and copy the URL.
6. Use the link anywhere: Paste that URL in emails, blog editors, chat apps, or anywhere else you want to share the screenshot.
Just like that, your local screenshot becomes a usable image URL on the internet!
If you want to show an image inside a webpage using HTML, you need to use the image’s URL inside an <img> tag, which tells the browser where to find and load the picture.
The srcattribute holds that image URL, and when the page loads, the browser uses it to fetch and display your image.
Here’s a friendly, step-by-step walk-through to make it simple:
1. Make sure the image is hosted online: Your image must be available somewhere on the web, either on your own server, a cloud drive with public access, or an image host. The URL must point directly to the image file (ending in .jpg, .png, .gif, etc.).
2. Start with a basic HTML file: Open your HTML file in a text editor (like Notepad, VS Code, Sublime, etc.) and make sure it has the basic structure:
<!DOCTYPE html>
<html>
<head>
<title>My Page</title>
</head>
<body>
<!– Image goes here –>
</body>
</html>
3. Add the <img> tag with the image URL: Inside the <body> section, write the <img> tag like this:
<img src=”https://example.com/myphoto.jpg” alt=”A description of the image”>
src=”…” is where your image URL goes. This is what the browser uses to load the picture.
alt=”…” helps people who can’t see the image and also boosts accessibility.
4. Save and open your HTML file: Once you save your changes and open the file in your browser, your image will show up. The browser fetches the file from the URL you provided and displays it on the page.
5. Use relative URLs when possible: If the image file is stored in your website’s folder (like /images/photo.jpg), you can use a relative URL instead of a full web address. The browser will look in the right place based on your site’s folder structure.
And that’s all there is to it!
By putting the correct image URL in the src attribute of an <img> tag, your picture becomes part of your webpage and will load for anyone who visits.
How to get an image URL online using image hosting sites
If you want a shareable image URL without hosting the file yourself, services like ImgBB and Imgur make this super simple.
These platforms let you upload pictures from your computer or phone and then provide a public link you can use anywhere, such as blogs, websites, forums, messages, and more.
Each service works a little differently, so here’s a clear walkthrough for both!
Using ImgBB
“ImgBB” is a free image hosting site that’s really beginner-friendly and doesn’t require an account to upload images.
Steps to get an image URL with ImgBB:
1. Open your browser and go to ImgBB: Visit the site, and you’ll see the upload area right away.
2. Upload your image: Drag and drop your photo into the upload box, or click the upload button and pick the file from your device.
3. Wait for the upload to finish: It usually only takes a few seconds.
4. Copy the link(s) shown: After uploading, ImgBB gives you several link options, including a direct image URL that ends in the file extension, like .jpg or .png. Just click Copy next to that link to save it.
5. Use your image URL: Paste it wherever you want the picture to appear online.
Using Imgur
“Imgur” is one of the most popular image-hosting sites on the web, having been around since 2009. It’s known for fast uploads and easy sharing!
Steps to get an image URL with Imgur:
1. Go to imgur.com or the Imgur upload page: You can use the main site or a direct uploader tool.
2. Add your image: Click “New post”(or drag and drop on some upload pages) and select the photo from your computer or phone.
3. Wait for the upload: After selecting, Imgur will process and upload the image.
4. Get the share link: Once uploaded, Imgur shows your image. Pick the “three dots (•••) or the share icon,” or use the site’s share options (“Get share links”) to copy the URL ending in .jpg, .png, etc. That’s your direct image link.
5. Paste and use: Now you can paste that link wherever you need it online.
How to get an image URL for your own uploaded images
Getting a URL for an image you upload just means uploading the picture to a place on the internet and then copying the web link that points directly to that image. Uploading your own image and grabbing its URL is easier than it sounds.
Here’s a simple guide you can follow step by step:
1. Choose where you’ll upload your image: First, pick a service that lets you upload images and gives you a link.
Free image link tools like ImageToURL let you upload and generate a link instantly, with no login required.
Other sites (e.g., ImgBB) also let you upload images and then copy different kinds of links, like direct links or HTML embed codes.
You can choose whichever one feels easiest.
2. Upload the image file: Once you’re on the tool’s page:
Click the upload button or drag your image file into the box.
Or, pick the image you want from your device.
As soon as the upload finishes, the tool will process your image and prepare a link.
3. Find and copy your image URL: After uploading:
Look for a field labeled “Direct Link,” “Copy Link,” “Image URL,” or “Shareable Link.”
Click the Copy button next to that link, or select the link and copy it manually.
This link is the public web address you can share with others.
4. Use the image URL wherever you want: Now that you’ve copied the link:
Paste it in chat apps, emails, forums, blogs, or your website.
If you’re writing HTML, you can even embed it like this:
<img src=”YOUR_IMAGE_URL_HERE” alt=”My Image”>
That’s all! Your uploaded image now has its own web address!
5. Manage or delete your image later (optional): Some image hosts let you manage your uploaded files later:
You might need to create an account to keep a gallery or delete old images.
With free tools that don’t require an account, the image might remain public as long as the service keeps it online.
How to get an image URL from Pinterest
Getting an image URL from Pinterest means finding a link that points directly to an image file used in a “Pin” so you can share it, download it, or use it elsewhere.
Unlike a normal web image, Pinterest doesn’t always make the file link obvious, but there are a few ways to grab one.
Here’s how to get the job done, step by step:
1. Open the pin you want: First, go to Pinterest and open the pin whose image you’re interested in. You can do this on your phone (in the app or in the browser) or on a desktop.
2. Copy the pin’s page URL: While this isn’t technically the image file URL, it’s the first part you’ll need.
On desktop: click into the pin and copy the link from your browser’s address bar.
On mobile: tap the Share button (usually “⋯” or a share icon) and choose Copy Link.
This gives you the Pinterest pin page link that points to the content you want.
Note: This link is to the Pin page itself, not the direct image file, but it’s the most reliable way to locate the image with online tools.
3. Use a Pinterest image downloader tool: Because Pinterest doesn’t show the actual image file URL in the app by default, most people use a simple online tool that extracts the image for you.
4. Right-click to copy direct image URL (desktop): If you’re on a desktop browser and the tool shows the loaded image in your browser window:
Right-click the image and choose “Copy Image Address,”“Copy Image Link,” or “Open Image in New Tab.”
The URL that appears in the browser when it’s opened alone is the actual image file URL (often hosted on Pinterest’s i.pinimg.com).
This method sometimes works best when you want the original, full-resolution image link.
Friendly tips:
✔️ Pinterest doesn’t always let you directly copy an image URL from the app as a simple “Copy image address”. That’s just how their system works. A pin page link and a downloader tool are usually the easiest route.
✔️ Only public pins are accessible this way. Private boards and protected content won’t show up properly.
✔️ Use the direct image URL responsibly and respect copyright. These images belong to other users unless they’re your own content.
How to get an image URL from Canva
Getting an image URL from Canva means finding a direct link to an image you’ve created or exported in Canva so you can share it, embed it in a webpage, or use it elsewhere (not just a link to the Canva project page itself).
Here’s a simple, friendly step-by-step guide to help you do that without any confusing jargon:
1. Open your design in Canva: First, log in to your Canva account and open the design that has the image you want a URL for. This could be a logo, graphic, photo, or anything you created in Canva.
2. Export or download the image: Canva doesn’t always show the raw image URL inside the editor, so the easiest way to get a usable link is to export the image first:
Click Share (top right) → Download.
Pick an image format like PNG or JPG.
Click Download to save it to your device.
This gives you an image file (like .png or .jpg), but not a URL yet. Don’t worry, we’ll get that next.
3. Upload your exported image somewhere public: Once the image is saved to your device, you need to upload it somewhere that gives you a direct image URL. Common places include:
Imgur
Google Drive / Dropbox (shared publicly)
Online image hosts like FreeImageHosting, Imgbb, etc.
Make sure the upload is set to public view so anyone with the link can see it.
4. Copy the direct image link: After uploading:
Find your uploaded image in the host you chose.
Right-click (or tap the share icon on mobile) and select Copy image address or Copy link.
This link now points to a direct image URL. You can paste it anywhere, and it will show the image.
Quick tips to keep in mind:
✔️ Canva’s share link isn’t the same as an image URL. The regular share link points to the design, not the raw image file.
✔️ Direct image URLs are usually created by uploading the exported file to an image host or cloud storage and then copying the public link.
✔️ Respect copyright and ownership. Only use multimedia you have rights to share.
Getting image URLs in bulk means grabbing a bunch of direct image links at once, rather than doing it one by one.
You can use online tools or browser add-ons that scan a webpage (or a list of pages) and collect all the images they find. Then show or export all those image URLs together so you can download, save, or work with them as needed.
It’s super handy when you’re pulling photos or AI images for research, design boards, social media planning, or archiving.
Various ways you can use these image URLs/links
Image URLs are direct web links that point straight to pictures online, and they can be used in lots of helpful ways across the internet. They make sharing and embedding images super easy and flexible.
Here are some common and useful ways you can use image URLs:
Embed images on websites: Paste the image link into HTML or a content editor to display the picture on your site.
Share on social media or chats: Drop the URL in a message or post to show the image without uploading it again.
Insert into blogs or articles: Use the URL to quickly add visuals to blog posts or online guides.
Add images in web apps or editors: Paste the link directly into tools like WordPress or rich-text editors that accept image URLs.
Use in code or email signatures: Include the URL in HTML <img> tags for emails, newsletters, or site code.
Reference hosted images: Keep the images hosted in one place and reuse the same links across multiple projects without storing multiple copies.
These simple image links make life easier when you want to display, share, or reuse visuals online without having to upload them from scratch.
Shorten long image URLs using Replug!
If you’re looking for a free, short image URL generator that makes messy, long URLs or links clean and easy to share, Replug is a solid choice that does just that while giving you tracking and customization options, too.
Maximize marketing ROI
by transforming ordinary URLs into branded short links that convert.
Try Replug for free
Here’s how to use Replug to shorten long image URLs step by step:
1. Sign in or make a free Replug account: Go to Replug and either log in or sign up.
2. Find the URL field: On your Replug dashboard, look for the box labeled “Quickly Shorten your link.”
3. Paste your long image URL: Paste the long link you want to shorten (this can be the direct link to your image) into that box.
4. Generate the short link: Click the blue arrow button to shorten it. Replug will instantly create a neat, trimmed-down version of your original URL.
5. Customize (optional): If you’d like, you can edit the ending part of the short link (i.e., the URL slug) to make it easier to remember or more on-brand.
6. Copy and use it anywhere: Once it’s ready, copy your new short link and paste it in your social posts, emails, or wherever you need to share your image.
That’s it! A quick way to turn long image URLs into simple, shareable links that look clean and professional.
Summing up
In this blog, we’ve walked through what an image URL is and all the practical ways you can find one, whether you’re on mobile, your computer, from screenshots, cloud storage, or even sites like Pinterest and Canva.
We also covered how to grab these links in bulk and the many ways you can use image URLs in your projects.
And if you’re dealing with long, messy links, remember you can shorten such URLs using Replug to keep everything tidy and trackable.
If you’re looking for an easy way to manage and optimize your links with features that actually help you grow, why not give Replug’s short URL tool a try? It’s a solid all-in-one platform worth checking out!
A complete link management solution
for marketing professionals & agencies.
Try Replug for free
Frequently asked questions
How do I make a URL for an image?
Here’s how to generate a URL for an image:
1. Upload the picture to an online image host or sharing tool (like a free image-to-URL converter). 2. Once it’s uploaded, the site will give you a link that points directly to that image. That’s your URL!
How do I find the URL of my image?
Here’s how to find the URL of a page or image:
1. If the image is already online, open it in a browser and right-click → Copy image address/URL. 2. If it’s on your device, upload it to a hosting service first. Then you can copy the link they give you.
How do I turn a screenshot into a URL?
Take the screenshot and save it. Then upload that file to a free image host or converter tool. Once uploaded, copy the shareable link you’re given. That’s your screenshot’s unique URL.
How to convert a JPG image to a URL link?
Use an online tool (e.g., Imgur, Postimage, Cloudinary) where you upload your JPG file, and it instantly creates a web link for it. After uploading, just copy the generated URL and use it wherever you need.
How to get an image URL from Google Images (on mobile and computer)?
Here’s how to do it:
1. Search for the image on images.google.com. 2. Tap/click the image to open it. 3. Press and hold/right-click the image, and from the menu, tap/click “Copy image link” or “Copy image address” to grab the URL.
This method works for both mobile and computer!
How to get an image URL using developer tools (Inspect Element)?
Here’s how to do it:
1. On a computer browser (Chrome, Firefox, Edge), right-click the page and choose “Inspect” or “Inspect Element” to open developer tools. 2. Look for the <img> tag and find the src attribute. That’s the image URL. 3. Double-click and copy it. This helps especially when right-clicking the image doesn’t show “Copy image address.”
How to get an image URL using Google Images (reverse search)?
Here’s how to do it:
1. Go to images.google.com. 2. Click the camera icon, and either paste an image URL or upload your image. 3. After results load, click the image you want, then copy its URL from your browser’s address bar or long-press/click and choose “Copy image address.”
How to get an image URL using browser extensions?
Install an extension, such as an image downloader or URL copier, in your browser. These add options (like “Copy Image URL”) when you hover over or right-click an image, making it easier to grab the link without digging into developer tools.
How to get an image URL from your phone’s gallery (for your own photos)?
Photos in your phone’s gallery don’t have public URLs unless you upload them somewhere online first (like an image host or cloud service). Once uploaded, open the uploaded image in your browser or app and copy the link it provides. Remember, photos stored only on your device don’t automatically have web URLs.
How to get an image URL using the Photos app on an iPhone?
iPhone’s Photos app doesn’t give a direct web URL for photos stored locally. To get a link, you usually have to upload the photo to a service (like Imgur or Google Photos) that gives shareable URLs. Then you can copy that link.
You can also use shortcuts or third-party tools to help extract URLs once the image is online.
How to get an image URL from a saved image?
If an image is saved on your device, it doesn’t automatically have a public URL because it isn’t hosted on the internet. To get a usable image URL, upload the saved image to an image hosting site or cloud storage (like Imgur, ImgBB, or Google Drive). After uploading, the platform will generate a shareable link. Simply copy that link; it becomes the image URL you can use online.
How to get an image URL for Discord?
Here’s how to do it:
1. Upload the image to a Discord chat or server first. 2. After it appears in the conversation, click the image to open it. 3. Then right-click (desktop) and choose “Copy Image Address” or “Copy Link,” or long-press on mobile and copy the media link.
The copied link is the direct image URL hosted on Discord’s servers, which you can paste anywhere.
How to get an image URL manually?
You can find an image URL directly from a webpage’s HTML code. Right-click the page and choose “Inspect” or “Inspect Element.” In the developer panel, locate the <img> tag and check the src attribute. The value inside it is the image URL.
Have you ever tried opening a website in Chrome only to wish you could block it forever? Whether it’s distracting socials, sketchy sites, or pages you just shouldn’t see at work or home, unwanted URLs are a daily headache for millions.
In fact, organizations now block roughly 100 million malicious URLs every single day to protect users from threats like malware and URL phishing.
But here’s the catch!
Without the right tricks, Chrome won’t stop you from visiting those sites, leaving you stuck clicking away or stressing over digital distractions.
That’s why learning how to block URLs isn’t just a neat skill; it’s essential for productivity, safety, and peace of mind.
Ready to fix this once and for all? Let’s dive into the effective strategies to block a website in Chrome that actually work.
Proven methods to block a URL in Chrome
Before we jump into all the possible ways you can block a URL in Chrome, let’s start with the easiest and most user-friendly option for most people.
If you don’t want to mess with settings or techy stuff, using a browser extension like “BlockSite” makes the whole process quick and painless.
Method #01: Using a Chrome extension named BlockSite (recommended for most users)
BlockSite makes blocking URLs in Chrome super simple, no matter if you’re trying to avoid distractions or keep certain content away.
Install the extension: Open Chrome and head to the Chrome Web Store. Search for BlockSite – Block Websites & Stay Focusedand click Add to Chrome. This will install the extension right into your browser.
Open BlockSite: Once installed, you’ll see its icon near the address bar (if you don’t, click the puzzle 🧩 icon and pin it). Next, click the icon to launch BlockSite.
Skip extras or log in: You might be asked to accept data permissions or choose a subscription plan. You can grant permissions, skip the paid plan, and still block URLs just fine with the free version.
Add the URL to block: Go to the Block Sites tab and type or paste the URL you want to block. Then hit the plus (+) button or Add Item. BlockSite will now stop Chrome from opening it.
Block while browsing: If you’re already on the site you want gone, just click the BlockSite icon and choose Block this site.Super easy!
Manage blocked sites: Want to unblock something later? Just go back to the BlockSite dashboard and remove it from your list.
You’ll learn even more effective methods next!
Method #02: Using Developer Tools (advanced/temporary)
If you’re comfortable opening Chrome’s built-in tools and want a quick, temporary way to block specific URL requests, the Developer Tools Network blocking feature is handy.
Open the page you want to block something on: Go to the site where the URL you wish to block loads.
Open Developer Tools: Press Ctrl + Shift + I on Windows/Linux or Cmd + Option + I on Mac. This opens the DevTools panel.
Go to the Network tab: At the top of DevTools, click Network. This lets you see all network requests (such as images, scripts, and APIs).
Reload the page: Refresh the page to have Chrome log every request in the Network panel. This causes the URL you want to block to appear in the list.
Find the URL request: Scroll through the list and look for the specific URL (or resource) you want to block.
Block it: Right-click on that request and choose Block request URL (or “Block request domain” if you want to block everything from that domain). Chrome will add it to the Network Request Blocking list.
Keep DevTools open: As long as DevTools stays open and the “Enable network request blocking” option is checked, Chrome won’t load that URL. An excellent choice for testing or temporary blocking.
This method is incredible for debugging or testing things on a page without installing anything extra. Just remember it’s not a permanent block, and only works while DevTools is active.
Ready for the next method? Let’s go!
Method #03: Using Google Admin Console (for enterprise/education)
If your organization or school manages Chrome using Google Workspace (formerly G Suite), the Google Admin Console lets you block specific URLs for users across all managed Chrome browsers and ChromeOS devices.
This is super useful for stopping access to distracting or harmful sites without relying on individual extensions.
Here’s how to do it:
Sign in to the Admin Console: Open your browser and go to admin.google.com. Log in with your administrator account. (Note: you’ll need admin rights to make these changes.)
Head to Chrome settings: From the main dashboard, go to Devices → Chrome → Settings → Users & browser settings. This is where most Chrome policies live for managed users.
Select who this applies to: On the left side, choose the organizational unit (OU) you want the block rule to apply to, e.g., a whole department or student group.
Find URL blocking: Scroll down (or use the search box) to find “URL Blocking” under the Content section.
Add the URLs you want to block: In the Blocked URLs field, type or paste the links you want to block; each on its own line. You can enter up to 1,000 URLs here.
Optionally allow exceptions: If you want to allow some sites even if they’re on the blocklist, use the Blocked URL exceptions field. This lets you create safe exceptions.
Save your changes: Click Save at the bottom or top to apply the policy. Chrome will start blocking those URLs for users in that OU (usually within a few minutes).
This Admin Console method is ideal when you’re managing many users, like in a business or school, and want a centralized way to enforce rules across the board.
Method #04: Using the hosts file
Want a system-level way to block a URL in Chrome (and all other browsers) without extensions?
Editing your computer’s hosts file is a classic, no-extra-software method. It works by telling your operating system to redirect a particular website to your own computer (which doesn’t serve that site), so the site never loads when you try to visit it.
Here’s how to block a URL in Chrome (PC) step-by-step:
🪟 On Windows (10/11)
1. Open Notepad as admin: Search for Notepad, right-click it, and choose Run as administrator. This is essential to save changes later.
2. Open the hosts file: In Notepad, go to File → Open, then navigate to:
C:\Windows\System32\drivers\etc
If you don’t see anything, change the file type dropdown to All Files (.)
3. Add the sites you want to block: At the bottom of the file, type:
127.0.0.1 example.com
127.0.0.1 www.example.com
Replace example.com with the site’s address you want to block (include both “www” and “non-www” lines).
4. Save the file: Hit Ctrl+S to save. You might need to confirm administrator access.
5. Restart Chrome: Close and reopen your browser. If the site still loads, you can flush your DNS cache (search “cmd” → run as admin, then enter ipconfig /flushdns).
🍎 On Mac (macOS)
1. Open Terminal: Hit Command + Space, type Terminal, and hit Enter.
2. Edit the hosts file: Type this.
sudo nano /etc/hosts
Press Enter, then type your password when prompted.
3. Add the block entries: At the end of the file, add:
127.0.0.1 example.com
127.0.0.1 www.example.com
Replace example.com with the site you want to stop people from reaching.
4. Save and exit: Press Control + O to save and Control + X to exit. Then flush the DNS cache:
sudo dscacheutil -flushcache
sudo killall -HUP mDNSResponder
💡 Quick tip: This method blocks sites on a system level, but it doesn’t stop someone from using a VPN or proxy to bypass it. And in rare cases, Chrome might ignore the hosts file if Secure DNS is enabled. When you want to undo it later, just remove the lines you added or comment them out with a # and save again.
Next up, let’s look at how to block URLs directly via parental controls.
Method #05: Using parental controls
If you want to block specific URLs on Chrome without extensions, and especially if you’re doing this for kids or other users, built-in parental controls are a solid way to go.
These tools let you filter sites, block particular URLs, and manage what content can be viewed, and unlike browser extensions, they usually work across all browsers on that device.
Here’s how to do it step-by-step:
1. Decide which parental control tool to use:
On Chromebooks and Android devices, Google Family Link is the go-to option.
On Windows 11, you can use the built-in Family Safety controls.
On macOS/iPhone/iPad, Apple’s Screen Time lets you block sites at the system level (applies to Chrome too).
2. Set up a child account (if needed): For tools like Google Family Link or Windows Family Safety, you’ll usually create a child profile first. This lets you apply restrictions to that account without affecting your own.
3. Open the parental control settings:
Google Family Link:Open the app → select your child’s profile → go to Manage settings → Filters on Google Chrome → Manage sites.
Windows Family Safety:Go to Settings → Accounts → Family & other users, choose the child account, then adjust Content filters → Blocked sites and add URLs.
Screen Time on Apple devices:Go to Settings → Screen Time → Content & Privacy Restrictions → Web Content → Limit Adult Websites or Allowed Websites Only, and add the URLs you want to block.
4. Add the URLs you want to block: Inside the parental control dashboard, there’s usually an option like “Blocked sites” or “Never allow” where you paste the complete website addresses you don’t want the user to access.
5. Save and test: Once you save the changes, try opening those sites in Chrome. They should now be blocked according to your settings. If you’re on a child’s account, they won’t be able to access the blocked pages without permission.
Note: Tools like Google Family Link also let you switch to only allowing approved sites, which is even stricter than just blocking a few URLs. Using parental controls gives you a more reliable block than a browser extension, especially if the user isn’t tech-savvy and might uninstall the blocker themselves.
Method #06: Using match pattern with Chrome
If you’re a bit more technical and want to block groups of URLs instead of typing every single address, using URL match patterns can be effective.
Match patterns let you define wildcard rules (like “block everything from this domain or path”) that extensions can use to block sites in Chrome.
Note: This isn’t something built directly into Chrome’s basic settings, so you’ll use an extension that supports URL patterns to block links based on rules you define.
Follow along with these steps:
1. Choose a blocker extension that supports patterns: Search the Chrome Web Store for a URL-blocking extension that lets you enter pattern rules (some blockers call them wildcards or pattern filters). Many extensions let you block based on text or pattern matches.
2. Install the extension: Click Add to Chrome → Add extension. Once installed, pin it next to your address bar so it’s easy to open.
3. Open the extension’s settings: Click the extension icon and go to its options or settings page. This is usually where you add URLs or patterns you want to block.
4. Learn the match pattern basics: Chrome match patterns generally follow a simple rule:
<scheme>://<host>/<path>
Scheme is usually http, https, or * (to match both),
host can be exact (example.com) or use wildcards (*.example.com),
and path often ends with /* to match anything under that path.
5. Enter your patterns: In the blocker’s field, add patterns like:
*://*.example.com/*: Blocks any secure/insecure page on example.com or its subdomains
https://site.com/path/*: Blocks everything under that specific path
These patterns tell the extension which sites to catch when you or someone else tries to open them.
6. Save and test: Hit Save or Apply, depending on the extension. Try visiting a page that fits your pattern. If it’s blocked, your rule works!
7. Tweak as needed: You can add more patterns or edit existing ones. If a site still loads, adjust your pattern (for example, include a wildcard, such as *, to catch subdomains).
💡 Quick tip: Using patterns lets you block many pages at once without typing every URL individually. This is the perfect option if you want to block an entire blog, shopping site, or any group of pages that follow the same structure. Just make sure the extension you choose supports this type of pattern input.
Method #07: Using Chrome’s SafeSearch feature
If your goal is less about blocking specific URLs and more about filtering out inappropriate or explicit content from your Google Search results in Chrome, then SafeSearch is a simple built-in way to do it.
It doesn’t block websites outright, but it does help keep search results cleaner by filtering out adult or offensive content (great for kids, work, or just a safer browsing feel).
Here’s a stepwise walkthrough:
Open Google in Chrome: Launch Chrome and go to www.google.com.
Go to SafeSearch settings: On desktop, scroll down the page and click Settings, then Search settings. Alternatively, you can visit www.google.com/preferences directly.
Turn on SafeSearch: In the SafeSearch filters section, check the box next to “Turn on SafeSearch” to filter out explicit content from Google Search results.
Save your settings: Scroll to the bottom and click Save to apply the change.
Lock SafeSearch (optional): If you’re doing this for kids, you can lock SafeSearch, so others can’t turn it off. You’ll need to be logged in to your Google account to do it.
Note: Just keep in mind that SafeSearch only affects Google Search results. It won’t stop people from visiting a site directly by typing its URL or clicking a link. This is a simple way to make Chrome searches safer before moving on to more advanced blocking techniques!
Method #08: Using the BlockList URL feature
If you’re managing Chrome across a business, school, or any organization, you can use Chrome’s URLBlocklist/URLAllowlist policies to block specific websites for all users.
This method isn’t something you do in the ordinary Chrome settings. It’s for admins who need a central, enforceable block using Group Policy (GPO) on Windows or JSON policy files on other systems.
Here’s how to get it done:
Get the Chrome policy templates (for GPO): First, download the latest Chrome Enterprise policy templates from Google’s official bundle. These include the ADMX/ADML files you’ll use in the Group Policy Editor.
Load the ADMX templates into GPO: Open Group Policy Management Editor → go to Administrative Templates → Add/Remove Templates and import the Google Chrome ADMX files. Once loaded, you’ll see a Google → Google Chrome section under policies.
Configure URLBlocklist via GPO: Under Google → Google Chrome, find Block access to a list of URLs. Enable the policy and add the URLs you want to block (one per line). Chrome will prevent users from visiting these sites.
Use URLAllowlist to make exceptions (Optional): Still in GPO, enable Allow access to a list of URLs and add URLs that should be accessible even if they match the block pattern. This override sits above the block rules!
Deploy and refresh policies: Apply the GPO to your target machines/users. On managed devices, users may need to restart Chrome, and you can verify it by checking chrome://policy in the browser. It should show “URLBlocklist” and “URLAllowlist” with status “OK.”
Now, using JSON policy files (for macOS, Linux, or managed devices)
If you’re not using Group Policy, e.g., on macOS, Linux, or Chrome managed outside of Active Directory, you can define the same settings in a “JSON file”.
Here’s what to do:
1. Create a JSON file in the managed policy folder: For Chrome on Linux/macOS, place a file inside /etc/opt/chrome/policies/managed/ (or the equivalent managed directory).
2. Add your blocklist/allowlist entries: Make the policy JSON look like this:
{
“URLBlocklist”: [
“https://badsite.com”,
“https://anotherbad.com”
],
“URLAllowlist”: [
“https://goodsite.com”
]
}
This tells Chrome to block sites in “URLBlocklist” and allow those in “URLAllowlist”, with the allowlist taking precedence.
3. Restart Chrome: Once the file is in place and properly formatted, restart Chrome to apply the changes.
Note: Blocking URLs this way is enforceable from the admin side. Users can’t easily remove the block because it’s based on your organization’s policies. And if you’re using both blocklist and allowlist together, remember that allowlist entries will override blocklist rules when a URL matches both. This approach is perfect for schools, workplaces, or any environment where you need a consistent, managed block across many users.
How to block a URL in Chrome (Android)
Chrome on Android doesn’t let you block sites directly inside the browser. One of the best ways to filter and block websites (including specific URLs) is by configuring your phone’s Private DNS with a service like “NextDNS”.
This makes all your device’s DNS lookups go through NextDNS, where you can set up blocklists that stop unwanted sites from resolving.
Here’s how to set up Private DNS with NextDNS:
Sign up for a NextDNS account: Go to https://nextdns.io/ and create a free account. Once you’re signed in, make a configuration profile (for example, “Android”). After you do that, NextDNS will give you a unique DNS-over-TLS (DoT) endpoint. It looks like xxxxxx.dns.nextdns.io.
Add URLs you want to block in the NextDNS dashboard: In your NextDNS account online, use the Blocklists, Denylist, or Custom rules settings to add the websites or domains you want to prevent from loading on your phone. NextDNS lets you block entire domains (like example.com) and also more advanced rules if needed.
Open Android Settings: On your Android phone, open Settings → Network & internet → Private DNS. (The exact path can vary slightly on different brands, but it’s usually under “Network & Internet”.)
Choose “Private DNS provider hostname”: Tap Private DNS provider hostname and paste in the NextDNS endpoint you copied from the NextDNS dashboard (xxxxxx.dns.nextdns.io).
Save and exit: Tap Save to apply the change. Your phone will now use NextDNS for all DNS lookups, including in Chrome. Any sites you’ve blocked in your NextDNS settings won’t load in the browser.
Test it: Try visiting a blocked URL in Chrome. If everything’s set up correctly, the site should fail to load (or be filtered) because NextDNS is now handling and blocking those DNS requests based on your rules.
✔️ Why this works: Android’s Private DNS feature (available on Android 9 and later) lets you specify a secure DNS provider, and when you set it to a service like NextDNS with blocklists configured, you essentially filter and block sites before the browser even tries to load them.
Note: Some networks or carriers may interfere with custom DNS, so if you have connection trouble, check your DNS hostname spelling or switch back to “Automatic” and try again. This setup works for all apps and browsers on your Android device (not just Chrome) and gives you a flexible way to block unwanted URLs without a separate app continuously running in the background.
How to block a URL in Chrome (iPhone)
Because iOS doesn’t let you block sites directly inside Chrome, the best solution is to use an app like “Freedom,” which can block websites system-wide (including in Chrome) by starting a blocking session with your custom site list.
Using Freedom to block URLs on iPhone:
1. Download Freedom from the App Store: Open the App Store, search for “Freedom: Screen Time Control”, and install it on your iPhone. This app is designed to block distracting apps and sites across your device.
2. Sign in or create an account: Open the Freedom app and log in with your email. If you don’t have an account yet, you can create one right from the app.
3. Give screen time permissions: Freedom uses Apple’s Screen Time settings to block apps and websites. When prompted, tap Allow Screen Time and follow the iOS prompts to grant the app the permissions it needs. This step is required for the app to block URLs inside browsers like Chrome.
4. Create a blocklist:
Tap the Blocklists tab in the app.
Tap Add New Blocklist to make a custom list.
On the blocklist screen, scroll until you see options to add websites.
Enter the exact, unique URL you want to block (e.g., example.com).
Add more URLs if needed, then tap Save.
5. Start a blocking session:
Go to the Start Session tab.
Choose the blocklist you just created.
Pick your session length (how long the block should stay active).
Tap Start. Freedom will now block the sites in that list on your iPhone (including in Chrome) for the duration of the session.
6. Test it in Chrome: Open Chrome and try to visit one of the blocked URLs. Freedom should stop the site from loading and show a block screen instead.
Note: Freedom uses your iPhone’s Screen Time system and, optionally, a local VPN or profile to enforce blocks, so please make sure you grant the permissions it requests. You can edit or add new blocklists at any time and start new sessions to keep unwanted sites blocked whenever you need.
How to block a website in Chrome without an extension
Chrome doesn’t have a built-in “block this site” option or button, so if you prefer not to use an extension, you’ve still got a few solid workarounds.
These methods work outside Chrome itself and will prevent certain sites from loading even when no extension is installed.
Edit your computer’s hosts file (system-level block)
Here’s how to block sites at your router or network level:
If you want to stop a site for everyone on your Wi-Fi, you can log into your router settings and use its website blocking or parental control tools.
Find your router’s admin page (often something like 192.168.1.1).
Log in with your credentials.
Look for “Website Block,” “URL Filtering,” or “Parental Controls”.
Add the URLs you want to block.
This stops access on all devices connected to that network (including Chrome) without touching the browser itself.
Why block URLs in Google Chrome?
Blocking specific URLs in Chrome isn’t just a random tech trick; it’s something a lot of people do for clear, practical reasons.
No matter if you’re trying to stay focused, protect yourself or others from harmful sites, or manage access across a group of users, blocking URLs gives you control over what can be loaded in your browser.
What happens when you block a URL in Google Chrome?
When you block a URL in Chrome (whether using tools, settings, or network rules) here’s what typically happens:
Access is prevented
Chrome simply won’t load the blocked website. Instead of letting the page load, the browser will stop the request and display an error or a blocking message. This is the core result of URL blocking! You attempt to visit the address, and Chrome stops it from opening.
Distractions and unwanted content are kept away
By stopping particular sites from loading, you won’t be pulled into time-wasting or inappropriate pages. Many people use this to stay productive or to protect family members, especially kids, from content they shouldn’t see.
Security threats are lowered
Blocking malicious or phishing URLs stops Chrome from attempting to connect to sites known for malware or risky content. Many URL filtering systems will redirect blocked requests to a warning or safe page instead of letting Chrome navigate normally.
In short, blocking a URL in Chrome changes the browsing experience at the network access level. Chrome doesn’t complete the connection to the blocked address, keeping you away from whatever page or content you don’t want to see.
Best practices for blocking URLs effectively in Chrome
When you’re blocking URLs, you want to think not just about how to block them, but also where and how well each method works. Whether it’s just in your browser, across your whole device, or even for everyone on your network.
✔ Combine methods: For instance, use DNS filtering at the network level plus Chrome extensions on personal devices for stronger coverage.
✔ Use strong permissions: Set passwords or admin restrictions, so others can’t easily turn off blocks (especially handy with parental controls or extensions).
✔ Test your blocks: After setting up any method, try accessing the blocked URL in Chrome to make sure the block is working as expected.
✔ Keep rules updated: Whether it’s a blocklist in a DNS service or a router, check it occasionally to remove outdated blocks or add new ones.
Wrapping up
Blocking URLs in Chrome doesn’t have to be confusing anymore. If you’re trying to stay focused, keep someone safe, manage access across devices, or set rules for an entire network, there’s a method that fits your needs.
From browser tools and system settings to DNS filtering and parental controls, this guide walked you through every practical approach you can use right now.
The goal is simple: give you control over what loads (and what doesn’t) in Chrome, so your browsing stays intentional and safe.
If you’re also looking to take complete control of the links you share, give Replug a try now! It’s a reliable link management platform and URL shortener that lets you create branded short links in seconds and track every click with ease.
Frequently asked questions
How do you block a specific URL in Chrome?
You can block a specific URL in Chrome by using a site-blocking tool (like extensions such as BlockSite), managing network filters (like NextDNS), editing system settings (hosts file), or using admin policies for work/school accounts.
Chrome itself doesn’t have a built-in single URL blocker for everyday users, so most people use extensions or system/network-level settings to stop access.
How do I block a specific URL path?
Blocking a specific path (e.g., example.com/page) is more difficult than blocking a whole domain. Most browser tools focus on domains rather than page paths.
Some advanced blockers or pattern-based tools (like Requestly or extension pattern rules) let you block parts of a URL using wildcards or filters, but Chrome’s default settings won’t do this on their own.
How to block a URL in Chrome on a Chromebook?
On a Chromebook, you can block URLs using supervised or managed settings in Google Family Link for kids, or via the Google Admin console if the device is part of a school/business domain. In the Admin console, you can add sites to a URL Blocklist to block access.
How do I permanently block a URL?
Permanent blocks require system- or admin-level controls such as setting router filters, using DNS services that block domains at the network level, editing the OS hosts file, or applying managed policies (e.g., Google Admin URLBlocklist). Browser extensions can also “permanently” block for you as long as they stay enabled.
How do I unblock a URL once it’s blocked?
To unblock a URL, just remove it from whatever block list you used, e.g., in the extension’s settings, in your DNS block list, or in the Admin/hosts file/router filter you set up. After that, refresh Chrome, and the site will load again.
How to block a URL on your kid’s phone?
Use parental controls:
– On Android, use apps like Google Family Link or DNS-based filters. – On iPhone, use Screen Time (Settings → Screen Time → Content & Privacy Restrictions → Web Content → Never Allow) to add the URL you want blocked.
How to block a URL in Incognito mode?
Chrome blocks extensions from working in “Incognito” by default. To block URLs in Incognito mode, enable your blocking extension under chrome://extensions → Details → Allow in Incognito. Then your block list will apply even in private browsing.
Can I block URLs for specific users only?
Yes, in managed environments (like schools or businesses), you can block URLs only for specific users or groups via tools like Google Admin console or Windows Group Policy. Personal Chrome profiles don’t have that feature natively, so you’ll need supervised accounts to target individual users.
Are Chrome extensions safe for URL blocking?
Most extensions (like BlockSite) are safe, but you should only install ones from trusted sources, check reviews, and review the permissions they ask for. Some low-quality or third-party extensions might misuse data, so always pick well-known blockers with a good reputation.
Why should I block certain URLs on Chrome?
Blocking URLs helps you stay focused, protect kids or others from harmful content, prevent security risks, and manage network use. It’s a simple way to control what content is accessible in your browser or across devices.
A/B testing tools allow users to compare two or more products, designs, or items side by side to determine which one receives more attention from the audience. This testing can be applied to a variety of elements such as written copy, advertisement design, email subject lines, and anything else is presented to an audience.
Marketers do A/B testing to observe the clicks, conversions, and reach to analyze the outcome of the campaign. The goal is to assess the results and compare the performance of two or more elements to determine the best performing one.
Have you ever thought about why marketers rave about “What is A/B testing?” Well, most beginners hear the term “A/B testing” and fail to comprehend what it is and how they can utilize it.
Since link management is a crucial area of online marketing, A/B testing of URLs is imperative to a successful digital marketing campaign.
This article will highlight the A/B testing tools in two sections. a) The first section showcases the best A/B testing tools with A/B testing as their prominent feature. b) The second section showcases URL trackers with the A/B testing feature. This will help you figure out what A/B testing is and how experts use A/B testing in modern-day digital marketing.
Before I dig deeper into A/B testing tools, let me give you an overview of the A/B testing.
Why should we do A/B tests?
Over time, I learned that every content marketer, affiliate marketer, and the digital marketer does A/B testing in some form or shape.
It could be a blog’s sidebar banner, email copy, Facebook image ad, YouTube thumbnail, or URL performance tracking – A/B testing is crucial to analyzing the audiences’ liking.
Therefore, marketers need to conduct A/B testing at some point in their marketing journey.
However, if you need some crystal clear reasoning for trying the A/B testing, here are seven reasons for using A/B testing:
i. Increased Conversions
It can help increase conversions by providing insights into what works best for your audience. By testing different variations of elements such as copy, CTA’s design, and layout, you can determine what resonates with your target audience and increase conversions.
ii. Improved User Experience
By conducting A/B tests, you can make informed decisions about what works and what doesn’t, ultimately leading to an improved user experience. As a result, the customer satisfaction goes up.
iii.Data-driven Decisions
It provides data-driven insights into what is and isn’t working, allowing you to make informed decisions about your marketing strategy. By relying on data instead of intuition, you can be more confident in your decision-making.
iv. More Engagement
A/B tests can help you determine what resonates with your target audience and increase engagement. By testing different elements of your content, you can find what resonates with your audience and create more engaging content.
v. Better Understanding of Customer Needs
By conducting A/B tests, you can gain a better understanding of what your customers want and need. This information can help you create better products and services that meet their needs.
vi. Optimized Marketing Spend
By using split testing, you can optimize your marketing spend by determining what is most effective. This can help you maximize your return on investment and save money in the long run.
vii. Better ROI
Ultimately, the goal of this strategy is to increase ROI. By making data-driven decisions, you can optimize your marketing strategy, increase conversions, and improve overall performance, leading to a higher return on investment.
If you are looking for a tool with A/B Testing as their primary feature then take a look at five of the best A/B testing tools in the market:
1. Optimizely
The first tool in our A/B testing tools list is Optimizely. It is a complete CRO suite with a number of tools to take your digital marketing campaign to the next level. Optimizely allows marketers and webmasters to optimize websites and landing pages.
It’s a powerful marketing and engagement tools hub that allows users to implement visual editing without coding, page optimization, audience segmentation, and advanced targeting.
Moreover, it’s one of the industry’s leading platforms to deliver personalized messages and product recommendations to multiple segments of the audience.
Optimizely has mainly focused on large enterprise-level clientele. It goes all-in on offering web optimization and experimentation. However, customers could also utilize mobile apps and messaging services to run experiments.
As far as the pricing is concerned, it’s quoted upon application.
2. Omniconvert
Omniconvert is a SAAS platform that provides businesses with a variety of software tools to help them transform data into effective growth strategies. The main features of Omniconvert are split URL testing, A/B testing, personalization, stacked tests, overlays and popups, advanced segmentation, and unlimited CSS & JS editor.
One of their main conversion optimization sections/features is Explore, which Omniconvert proudly refers to as “the CRO tool for developers,” thanks to its many specialist features.
One of the most notable features of Explore is the unlimited CSS and JS editor, which provides complete control over the coded variations in use. This feature allows developers to optimize the code for loading times, which is crucial when tests are running.
Additionally, Explore is equipped with a CDN cache bypass, which ensures that all tests run live immediately. This feature is particularly important because cached versions of a site can skew results and lead to unreliable data.
Another fantastic feature of Explore is stacked testing. Once a winning variation has been identified, it is automatically set as the default for continued testing, ensuring reliable data collection over time.
These features all work together to create a platform that is ideal for developers looking to optimize and improve their digital brand’s conversion rate.
The pricing starts at $167 per month.
3. VWO Testing
Another great A/B testing tool is VWO. It offers a comprehensive set of conversion rate optimization (CRO) tools that assist brands and marketers in optimizing their website pages and content. It includes various testing tools such as A/B testing, multivariate, and split URL experiments, a visual editor for creating variations without coding, and advanced targeting and segmentation options.
VWO also has unique features like behavioral segmentation and asynchronous coding, which improves the performance of tests and avoids common issues with A/B testing software.
Overall, VWO is a great option for those looking for an almost-enterprise CRO system at a more reasonable cost.
The pricing for plans with an A/B testing feature starts at $199 per month.
4. AB Tasty
AB Tasty is a robust A/B testing tool that provides a wide range of testing tools and features that make it a suitable option for those looking for an efficient and user-friendly platform.
In addition to traditional A/B split and multivariate testing options, the platform also offers funnel testing, which allows you to experiment with changes across several pages at once.
Moreover, to ensure the validity of test results, AB Tasty provides a real-time view of your tests, enabling you to make informed decisions based on the insights derived from your tests.
What sets AB Tasty apart from other A/B testing tools in the market is its intuitive drag-and-drop editor. Although other A/B testing platforms have editors like this, AB Tasty’s editor is more efficient and user-friendly, enabling you to work seamlessly without getting in the way of your workflow.
To get the prices, ask for a quote.
5. Adobe Target
Adobe Target is a high-end personalization platform designed for enterprise use and comes equipped with the A/B testing feature. It also provides features like automated personalization, mobile app optimization, and recommendations based on customer data and behavior.
The platform follows a three-step process for experimentation, where you create a variant, target a specific audience segment, and customize your goals and settings for the test.
It is popular among enterprise brands due to the self-learning algorithms in Adobe Target. These algorithms continually analyze visitor behavior and content to produce optimal results, adjusting content in real time for customer satisfaction.
Request a demo to get the quote.
5 Best URL shorteners for AB Testing
A/B testing can also be conducted through URL shorteners as well as which URLs perform better. Therefore, A/B testing is a crucial marketing technique used to improve conversions and engagement in digital marketing. Here are five of the best URL shorteners with A/B testing features:
1. Replug
Replug is the best A/B testing tool amongst other URL shorteners available online. In addition to its reliable short URL generator, it also offers several other amazing features such as branded URLs, URL tracking, UTM codes, bio links, SMS marketing, QR code marketing, lead generation, and retargeting.
It’s a complete link management suite to manage your short URLs and elevate your social media engagement and marketing. Additionally, Replug has a Chrome extension for managing your short links without logging in to your Replug account.
As far as the pricing goes, the Replug Basic plan costs $15 per month (on annual pricing) and the next up is the Professional plan which costs $39 per month. However, the Agency plan is priced at $63 per month. You can start with a 14-day free trial account with no credit card required. Register here!
2. Sniply
Sniply is also a URL shortener for marketers, influencers, and bloggers. It comes with a URL analytics feature to track your target audience through URL tracking. The key features include custom URL shortening, click tracking, call-to-actions, CTA tracking, custom domains, link customization, A/B testing, content discovery, and more.
The call-to-action buttons that appear associated with the URL campaigns show up when users click on the short links and visit the destination pages. It allows marketers and bloggers to drive extra website traffic from social media by sharing even others’ content.
Furthermore, the users could test the different variations of destination URLs for CTAs to analyze the performance.
3. Pixelfy
Pixelfy is yet another popular URL shortener tool that offers several URL management features such as URL shortening, deep linking, A/B testing, campaign tracking, QR codes, retargeting, and analytics.
Social media influencers and bloggers could track clicks on their short links and analyze the link campaign performance. Furthermore, the A/B testing feature plays an integral role in evaluating different links to see which ones work best. l
Moreover, users could use geo-targeting to target users based on countries or regions and use the retargeting feature to connect with the audience that clicks on the short URLs on social media platforms.
4. ClickMeter
ClickMeter is a powerful short link tool that helps digital marketers, affiliate bloggers, and social media influencers with creating, monitoring, and tracking URLs for understanding audience behavior and improving conversion rates.
Other features include URL shortening, branded domains, A/B test link rotation, and conversion tracking. Furthermore, ClickMeter works best for marketers and bloggers with content-heavy blogs and websites monetized with multiple affiliate marketing programs.
Moreover, it also helps social media influencers and gurus that use social media marketing channels to engage the audience and promote their products across different social networks.
5. Cutly
Cuttly is a well-known link management tool that offers URL management services. The features it provides are URL shortening, A/B testing, QR code generator, UTM tracking, custom domain, advanced targeting, API access, and real-time analytics.
While this tool provides extensive link management solutions, users can monitor clicks on shortened URLs and measure the effectiveness of their marketing campaigns.
Furthermore, this platform has a rather user-friendly interface, which makes it easier for beginner marketers and bloggers to play around with it.
A/B testing tools FAQs
Let me answer some of the burning questions about A/B testing:
Which tool is used for A/B testing?
A/B testing has a wide spectrum when it comes to online marketing. There are different types of A/B testing that marketers perform, for instance, A/B testing on images, links, CTAs, etc.
Therefore, it’s essential to determine what the goal is and what you want to achieve with your A/B testing, then you could choose the right tool for the job.
How long should we run ab testing?
It’ll be unfair a cap the A/B testing campaign to a specific period because it may vary from campaign to campaign.
However, it’s important to run the A/B testing for at least a few weeks and give all the cases equal time, attention, and exposure to find the best results.
How do A/B testing tools work?
The basic idea is the same for every type of A/B testing tool. However, the only difference is what you’re trying to achieve with your testing.
The way A/B testing tools work is that they allow users to test two cases, meaning let the cases expose to the audience and track the performance to see which ones get more attention.
For instance, Replug’s A/B testing feature helps users drive traffic to multiple web sources to see how visitors react to it.
What questions can A/B testing help me answer?
It mostly depends on several factors and the questions may be different for each person or brand. However, the fundamental purpose of A/B testing remains the same – it helps people identify which option the audience likes the best, for instance, case A or case B.
Link management can feel like herding cats. One team member uses a raw UTM link, someone else pastes a long tracking URL, and pretty soon, you have no idea which click came from where. Yet every click carries power.
Studies show branded short links can lift click-through rates by around one-third compared with generic links, meaning messy URLs are leaving real money on the table.
Across channels, a single brand may share hundreds of links every month. Without proper link management, tracking performance, protecting online reputation, and staying consistent is almost impossible.
This guide walks through what link management is, how it works, and how tools like Replug help you keep every link organized, on brand, and trackable.
First up is the foundation: what exactly is link management, and why does it matter so much in 2026?
What is link management?
Link management is the process of creating, organizing, branding, and tracking all the URLs your marketing team shares.
The main goal is simple: control every link so you can improve performance, keep your brand consistent, and understand what really drives results. Instead of treating links as throwaway items, link management treats them as small but powerful marketing assets.
It matters because links sit everywhere, i.e., on ads and landing pages, newsletters and transactional emails, social posts and bio links, QR codes and print materials, influencer campaigns and partner content, etc.
When they are random and untracked, reporting becomes disordered and growth slows. But if they are planned and measured, you get clean data, a better user experience, and more confident decisions.
Key aspects of link management:
Customization and branding turn ugly, long URLs into short, branded links that look professional and build trust. People are more likely to click when they recognize your brand name. This is especially helpful on crowded feeds where every character counts.
Performance tracking adds click data to every link so you know which channels, posts, and campaigns work best. You can see sources, locations, devices, and trends effortlessly. That information guides smarter content and budget choices.
Organization keeps your growing library of links searchable and tidy. With tags, folders, and campaigns, you can quickly pull reports by client, product, or promotion. That structure saves time for marketing teams and agencies.
Efficiency comes from using one place to create, edit, and manage links instead of scattered spreadsheets. New team members can follow the same process, which reduces mistakes and duplicated work.
Flexibility means you can update destinations, pause links, or redirect traffic without changing the visible URL. You keep the same shared link while adapting offers, pages, and tests as your strategy changes.
Core link management features
Modern link management tools and platforms do far more than shorten URLs. They give you control over every part of the click path: from the domain your audience sees, to the page they land on, to the data you record along the way.
These core features are what separate true link management from a basic shortener tool.
Custom-branded short links
Custom-branded links replace random characters with your own domain and meaningful slugs. Instead of a generic service name, people see something like yourbrand.link or go.youragency.com.
This builds trust and signals a professional approach. Branded links also help protect your online reputation because scammers usually rely on generic domains.
Protecting a brand’s reputation effectively involves more than just link formatting; it necessitates the use of real-time threat intelligence to monitor for domain spoofing and malicious activity.
Good branded link practices include:
Keeping slugs human-readable (for example, /spring-sale instead of /x7Fg4)
Matching naming with your campaign structure
Avoiding misleading language that might feel spammy
Domain-level link customization
With domain-level control, you can manage multiple custom domains and workspaces from a single dashboard. Agencies can keep each client on a separate domain, while bigger companies can split links by product line or region.
This setup keeps reporting clean and prevents confusion when many teams work in the same account.
In Replug, this kind of setup makes it easy to:
Keep client or department activity clearly separated
Enforce naming and branding rules per workspace
Share access only with the people who should see each domain
Centralized link tracking & insights
Centralized tracking pulls all click data into a single analytics view. It is a practice backed by research on how to unlock the power of data linkage to enable more informed, evidence-based decision-making.
You see which campaigns are winning across email, social, ads, QR codes, and influencers. In Replug, you can filter by campaign, country, device, or referrer, so you can quickly answer questions like which platform drives the highest conversion rate this month.
Centralized link analytics also help you:
Compare paid vs. organic results without jumping across tools
Identify content that keeps working long after launch
Spot suspicious traffic spikes or bots before they skew decisions
Dynamic destinations & link optimization
Dynamic links let you change where a URL sends people without editing the link they already have. You can route traffic based on date, location, device, or A/B tests.
For example, you can:
Send mobile users to app deep links and desktop users to your main site
Send visitors from different countries to localized pages
Split traffic between two landing pages and keep the better performer for long-term use
With Replug, these rules are managed from a single dashboard, so your team can adapt campaigns without asking developers to change hard-coded URLs.
Structured campaign categorization system & naming framework
A clear naming framework is the quiet hero of modern link management. When every link follows the same style or pattern for campaigns, sources, and content, reporting becomes far easier.
Tags and folders mirror your real marketing structure, such as clients, quarters, or product launches.
Replug supports:
Tags for grouping by campaign, product, or channel
Folders and workspaces for clients or internal teams
Bulk actions, so cleaning up old campaigns and links stays simple
Over time, this structure turns your link library into a searchable archive rather than a pile of random URLs.
QR codes for physical-to-digital engagement
Smart QR codes bridge offline experiences with online tracking. A single short link can generate a dynamic QR code for packaging, flyers, events, or in-store displays.
Because the QR code points to your managed link, you can change the destination later and still keep all scans tracked in the same analytics view.
Practical uses include:
Product packaging that leads to how-to videos or upsell pages
Event badges that link to schedules, maps, or feedback forms
Print ads that direct readers to time-limited offers
Major advantages of effective link management
When link management is set up well, it touches nearly every part of your marketing. You get better data, smoother experiences, and more predictable results from the same content and spend. These benefits add up fast for social media managers, agencies, and in-house teams.
Improved SEO & site authority
Clean internal and external links help search engines crawl your site more easily. When redirects are tidy and old links are updated instead of left broken, you avoid wasting link equity.
Over time, this supports stronger site authority, which works alongside your link-building services packages instead of fighting against them.
Some SEO-friendly link practices are:
Redirecting outdated campaign URLs to relevant evergreen pages
Avoiding endless redirect chains that slow pages down
Updating links in high-traffic content when pages move
Better user experience & navigation
Short branded URLs and accurate redirects create smoother paths for visitors. People reach the right page the first time, rather than encountering 404 errors or confusing chains.
That simple experience lowers frustration, especially on mobile, and supports repeat visits and word of mouth.
With a managed link setup, you can:
Fix mis-typed or outdated links without editing every post
Guide users from generic links to the most relevant product or article
Keep printed materials useful long after the original campaign ends
Centralized control & efficiency
With link management in one place, you do not need dozens of random documents to store URLs. Team members know exactly where to create, edit, and search links. This central control is especially helpful for agencies dealing with many clients or brands with several departments posting content every day.
Centralization helps you:
Reduce duplicate links that distort your reporting
Speed up onboarding for new team members
Keep permissions and access under control
Advanced analytics & data tracking
Click data from every channel feeds into one precise analytics view. You can see which posts, ads, or emails lead to meaningful actions instead of guessing.
Replug takes this further with conversion tracking and UTM support, so you can connect clicks to leads and sales rather than just counting traffic.
Consistent branding & more efficient marketing
Branded links show your name across all channels, from TikTok bios to email signatures. That steady presence supports online reputation and makes your content easier to recognize.
When every link follows the same style, your team spends less time reworking assets and more time testing new ideas.
Consistent link branding can:
Make affiliate and partner promotions feel less intrusive
Help customers spot genuine offers vs. scams
Tie together campaigns across different networks and devices
Improved collaboration & increased conversions
Shared workspaces, tags, and standardized naming make it easier for teams and agencies to collaborate. Designers, writers, and media buyers can all use the same links with confidence.
That alignment speeds up launches, reduces broken URLs, and creates more chances to guide clicks toward high-converting offers.
This is especially useful when:
Multiple agencies work on the same brand
Different regions handle their own campaigns under one domain
Subject-matter experts contribute content, but marketing owns tracking
Flexibility & redirecting
Campaigns change often. A link that promoted a flash sale last week might now need to go to a general category page.
With proper link management, you update the destination once you’re inside the platform, and all existing clicks follow the new path. No need to edit old posts, ads, or QR codes.
This flexible control helps you:
Keep promotions current without chasing old placements
React quickly when products sell out or prices change
Direct crisis communication traffic to updated information
Optimized resource allocation
When you know which channels and campaigns drive the best results, budget planning becomes far easier. Underperforming sources are simple to spot.
Teams that sell link-building service packages can use this data to clearly demonstrate value to clients and adjust tactics without guesswork.
You can:
Allocate more spend to channels that drive revenue, not just clicks
Reduce waste in campaigns that bring low-quality traffic
Prioritize content formats that lead to conversions or signups
Common link management challenges
Even with great tools, link management can get messy without a proper plan. As your number of campaigns and teammates grows, problems tend to show up in the same places. Knowing these issues ahead of time helps you avoid them or fix them quickly.
Scalability & organization
What works for 10 links might fall apart at 10,000 links. Without folders, tags, or a clear naming style, older URLs become hard to find. New team members may create duplicate links or forget to add link tracking.
In such a case, a platform like Replug helps by providing dedicated workspaces, search, and bulk actions that scale with your marketing.
To stay organized as you grow:
Agree on naming standards from the start
Train every new collaborator on how to create links
Schedule periodic cleanups to archive or retire old campaigns
Quality & relevance
Outdated or low-quality destinations waste traffic. Maybe a blog post is no longer accurate, or a product is out of stock. If no one regularly reviews links, people keep clicking and end up on weak pages.
A review schedule plus clear ownership for each campaign keeps links pointing to content that still matches your message.
A simple checklist for link quality:
Is the destination page still live and accurate?
Does it reflect your brand and current pricing or offers?
Does it give visitors a clear next step?
Time-consuming process
Manually building UTMs, shortening URLs, and pasting them across platforms takes significant time. It also increases the risk of small typing mistakes.
Automation within a link management platform, such as RSS-based link creation or browser extensions, speeds up daily work so you can focus on strategy rather than copy-paste tasks.
Replug can help by:
Auto-generating branded short links from new content
Applying saved UTM templates for common campaigns
Integrating with tools you already use for publishing
Broken links & redirects
Any site update or migration can create broken links. Without central tracking, you might not notice until a customer complains. Tools that monitor click errors and allow fast redirect updates fix this problem.
Replug supports easy redirect changes so you can keep traffic flowing even as your site structure changes.
You can:
Create replacement destinations for popular but outdated URLs
Track 404 patterns to spot recurring issues
Update QR code targets without reprinting materials
Tracking & ROI
If some links are tracked and others are not, reports become unreliable. It is hard to prove the return on ad spend, influencer fees, or content production.
Standardizing link creation and using a single platform for tracking keeps your numbers clean. That makes it much easier to show a clear ROI to executives or clients.
Algorithm compliance
Social and ad platforms can change rules for link formats or tracking parameters. If your links look spammy or break guidelines, reach may drop.
Good link management includes watching platform updates, keeping links user-friendly, and avoiding tricks that might trigger filters or harm performance over time.
Practical tips:
Avoid excessive redirect chains that slow loading
Keep link text and preview content honest
Test links in “preview” modes of ad platforms before scaling
Internal linking complexity
Large sites often face tangled internal link structures. Old pages might still receive traffic from many internal URLs, and cleaning them up manually is hard.
Using tracked short links for key internal paths gives you clearer data on how people move through your site and makes later changes easier.
This approach lets you:
Analyze how users move between content clusters
Retire or merge pages without losing insight
Route visitors toward higher-value sections of your site
Lack of insight from untracked links
Every untracked link is a blind spot. You may be paying for content promotion or influencer work without seeing a direct impact.
By swapping raw URLs for managed, trackable links, you get visibility across campaigns. This is also a core part of true link management that goes beyond vanity metrics.
Even simple steps like standardizing links in email signatures or support replies can reveal surprising patterns in how customers find key pages.
Examples of how businesses use link management in 2026
Different teams use link management in different ways, but they all share the same goal: make every click count. Here are common use cases that show how marketers, agencies, and creators put these tools to work in real campaigns.
Branded & shortened links for trust
Brands use short, branded URLs across social bios, paid ads, and print. A clean link with their name feels far safer than a random string. This trust boost often leads to higher click-through rates, especially on platforms where audiences are cautious about spam or phishing attempts.
For example:
A SaaS company uses go.example.com/free-trial in all ads
A retailer adds a branded short link to product packaging for care tips
A creator uses one consistent bio link across platforms, updated behind the scenes
Tracking marketing campaigns
Every paid and organic campaign gets its own tracked link. Social media managers create separate URLs for each post style or audience, then compare results in one dashboard. This helps them decide which creative and copy styles to scale and which to retire.
With Replug, teams can:
Auto-attach UTM parameters based on campaign presets
Group links by theme (product launch, event, seasonal sale)
Export reports for clients or internal stakeholders in a few clicks
“Pay-by-link” for invoicing & sales
Service businesses send customers secure payment or checkout links instead of long invoices. With link management, those pay-by-link URLs are branded, trackable, and easy to update if the offer changes. Teams can see how many invoices were opened, which helps with follow-up and cash flow planning.
This method works well for:
One-off services or consulting sessions
Deposits for events or bookings
Fast-checkout offers in DMs or live chats
SMS & reminder automation
Short links are perfect for SMS, WhatsApp, and reminder messages where character limits matter. A hospital, gym, or salon can send appointment reminders with a link that tracks confirmations and no-shows. Over time, they can test different reminder timings and wording for better response rates.
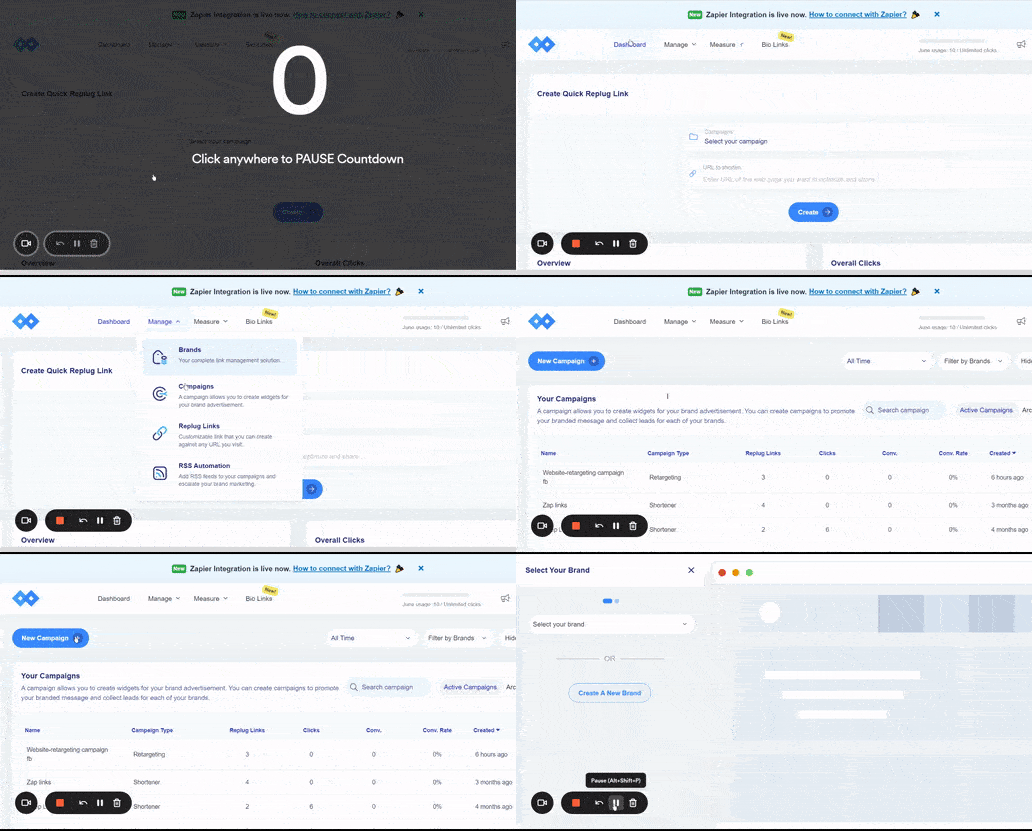
Typical flows include:
“Confirm/cancel” appointment pages
Post-visit feedback forms
Renewal or rebooking offers sent after a visit
Dynamic redirects for campaigns
Retailers and SaaS companies use a single evergreen promo link that changes its destination over time. During a holiday sale, it leads to a special offer page, then it switches back to a general pricing page. Because the visible link stays constant, they can reuse it in ads, QR codes, and emails without confusion.
Dynamic redirects make it easier to:
Run flash sales without creating new URLs every time
Test new offers while keeping old posts and videos active
Retire discounts while preserving clean redirect paths
In-person selling with QR codes
At events, pop-up stores, or trade shows, sales teams use QR codes tied to tracked links. People scan from banners, product tags, or display screens and land on targeted landing pages. Later, one can see which booth or event layout produced the most scans and signups.
This data helps you:
Compare performance between locations or dates
Refine booth design or signage based on real engagement
Follow up with different offers depending on where the scan happened
Personalized customer journeys
Marketers create slightly different links for segments such as new leads, returning buyers, or VIP members. Each group lands on a page that matches their stage, not a generic homepage. Over time, this kind of routing tends to raise conversion rates and customer lifetime value.
In Replug, you can:
Duplicate a base link and adjust destinations per segment
Track how each audience responds to similar offers
Fine-tune upsell and cross-sell flows based on results
Customer experience
Support teams include branded short links in help articles, chat replies, and follow-up emails. Because each link is tracked, they see which resources customers actually use. That insight guides improvements in documentation and helps reduce repeat tickets.
For example, you can:
Identify which FAQs get the most traffic from support replies
Spot gaps where customers keep asking for help
Test new help-center layouts by routing traffic through managed links
Event promotions
Event organizers create a set of tracked links for each promotion channel: email, partners, paid social, influencers, and local posters with QR codes. After the event, they know exactly which channels drove registrations and check-ins, which shapes budgets for the next run.
Data from event links can reveal:
Which partners brought the highest-intent attendees
How early-bird vs. last-minute offers performed
Which content pieces led people to sign up, not just click
A/B testing
Marketing teams use link rotation or A/B testing to route traffic from a single short link to multiple variants. A link management platform like Replug can distribute clicks across several landing pages or offers, then show which one performs best. Once a winner emerges, the team routes all traffic to that winner without changing the shared URL.
Top link management tools to streamline your workflow (2026)
There are many tools that can shorten links, but fewer that truly support full link management. The best choice depends on your team size, tech stack, and reporting needs.
Here is a quick comparison of leading options, with Replug at the center for marketers who want data, branding, and conversion features in one place.
Tool
Best for
Highlights
Replug
Marketers and agencies needing full control
Branded links, advanced analytics, retargeting pixels, CTA overlays, A/B testing, dynamic QR codes, and white-label options for agencies.
Bitly
Simple use cases and basic link tracking
Easy-to-use interface with custom domains, basic analytics, and integrations with popular social and automation tools.
Rebrandly
Brands focused on domain level customization
Strong focus on custom domains and branded links, plus team features for managing multiple brands from one account.
Linkly
Marketers wanting detailed traffic rules
Good for geo targeting, device targeting, and affiliate-style routing, plus link tracking for paid campaigns.
Dub.co
Product teams and startups
Open source background, API friendly, and flexible tracking options for technical users who like customization.
BL.INK
Larger organizations with data needs
Enterprise features, detailed reporting, and governance controls suited for bigger teams with strict compliance rules.
TinyURL
Quick public shortening with minimal setup
Very simple shortener for one-off links, with some options for branded domains and tracking on paid plans.
PrettyLinks
WordPress-based businesses
Works as a WordPress plugin that manages affiliate links and redirects directly from the site admin area.
Link management vs. link tracking: Key differences explained!
People often use the terms “link management” and “link tracking” as if they mean the same thing. In practice, tracking is only one part of the wider management picture.
Understanding the difference helps you choose tools and workflows that support both daily work and long-term growth.
Aspect
Link management
Link tracking
Definition
Complete process for creating, organizing, branding, routing, and measuring links across channels
Recording and analyzing clicks and related metrics on specific URLs
Scope
Covers link creation, naming rules, redirects, branding, access control, and reporting
Focuses mainly on click counts, sources, and basic performance data
Goal
Give teams central control over every link so campaigns stay organized and on brand
Show how many people clicked a link and where they came from
Actions
Create links, edit destinations, group by campaigns, assign tags, manage QR codes, and share access
Place tracking parameters, read reports, compare click results between links
Components
Custom domains, short links, QR codes, folders, tags, UTM builders, and analytics in one platform
Tracking pixels, analytics reports, and sometimes simple shorteners or redirect tools
In simple terms, link tracking tells you what happened, whereas link management gives you the tools and structure to do something about it.
Earn success in your marketing campaigns with Replug’s link management tool
Replug is an all-in-one link management platform built for marketers, agencies, and creators who care about data and branding.
At its core, Replug works as a custom URL shortener powered by advanced routing, retargeting, and analytics. That means every link you share can carry your domain, your message, and rich performance data.
Inside Replug, you can:
Create branded short links in seconds
Organize them with tags, folders, and campaigns
Track every click in a clean, filterable dashboard
Generate dynamic QR codes and deep links that connect offline and in-app experiences to the same reporting
A complete link management solution
for marketing professionals & agencies.
Try Replug for free
Many professionals trust Replug to manage links for social media, email, paid ads, and influencer work. If you are ready for true link management instead of scattered spreadsheets, the Replug link management tool gives you the control and insight needed to improve results without adding extra tools. Try it now!
Summing up
Links might look small, but they carry the weight of your campaigns, content, and brand trust.
When link management is messy, reporting falls apart, and it is hard to prove what actually works. But when it is organized, branded, and backed by strong analytics, every click turns into a clear signal you can act on.
By using features such as custom domains, dynamic redirects, QR codes, and centralized tracking, you make life easier for your team and clearer for your audience. Tools like Replug bring these pieces together so you can plan, test, and refine with confidence.
Start treating your links as real marketing assets, and your campaigns in 2026 will feel far more controlled and predictable.
Frequently asked questions
Is link management legit?
Yes, link management is a standard practice used by brands, agencies, and creators of all sizes. It gives structure to how you create, track, and update URLs. When done correctly, it improves user trust and makes your reporting far more accurate.
What is the LMP link management protocol?
LMP usually refers to the Link Management Protocol used in computer networking, not marketing. It helps network devices coordinate the setup and maintenance of links. For marketers, link management is more about URLs, tracking, and analytics than low-level network behavior.
What is link asset management?
Link asset management means treating each URL as a small digital asset. You track where it is used, how it performs, and when it should change or expire. This approach keeps your campaigns tidy and avoids wasted clicks on outdated or broken pages.
What is a link management platform?
A link management platform is a tool that centralizes link creation, branding, tracking, and organization. Replug is one example, offering custom domains, analytics, retargeting, and QR codes in one dashboard. These platforms replace chaotic spreadsheets with a single source of truth for all your links.
What is branded link management?
Branded link management focuses on using your own domains and naming style for every short link. Instead of generic service URLs, you share links that clearly show your unique brand name. This supports online reputation, improves click-through rates, and makes your content easier to recognize.
What is link management in computer networks?
In networking, link management refers to how devices set up, monitor, and adjust physical or logical connections. It deals with things like link health, capacity, and failover. While the term is similar, this is separate from marketing-focused link management for URLs.
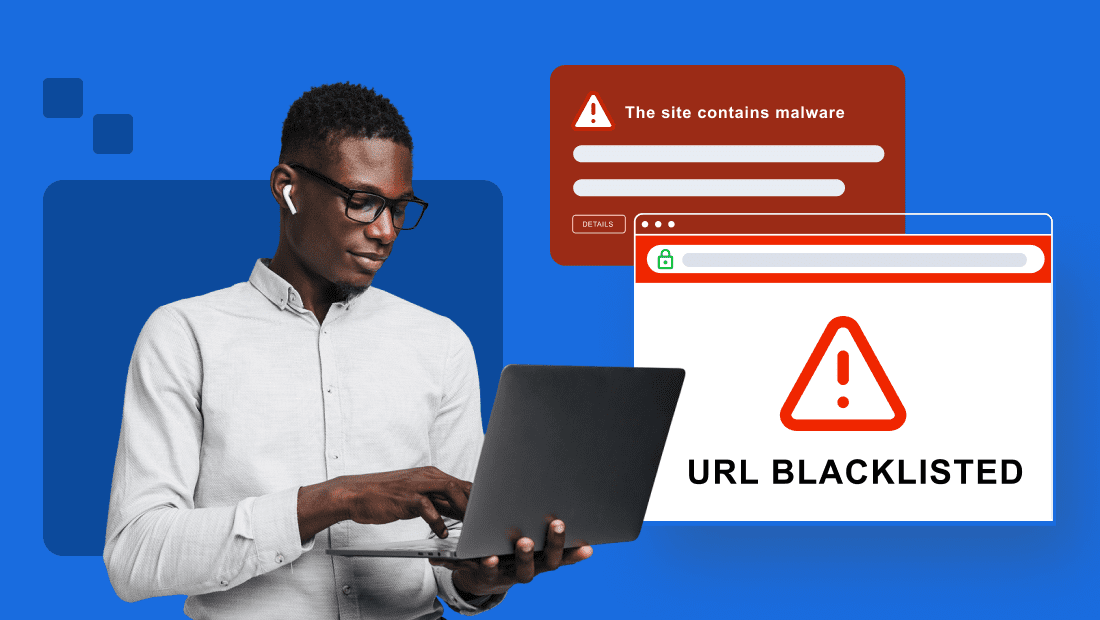
Would it be possible to automate link creation?
Yes, many platforms support automation through integrations, RSS feeds, or browser extensions. Replug, for example, can generate short links automatically from new content or imports. This saves time and makes it easier to keep tracking consistently across large campaigns.
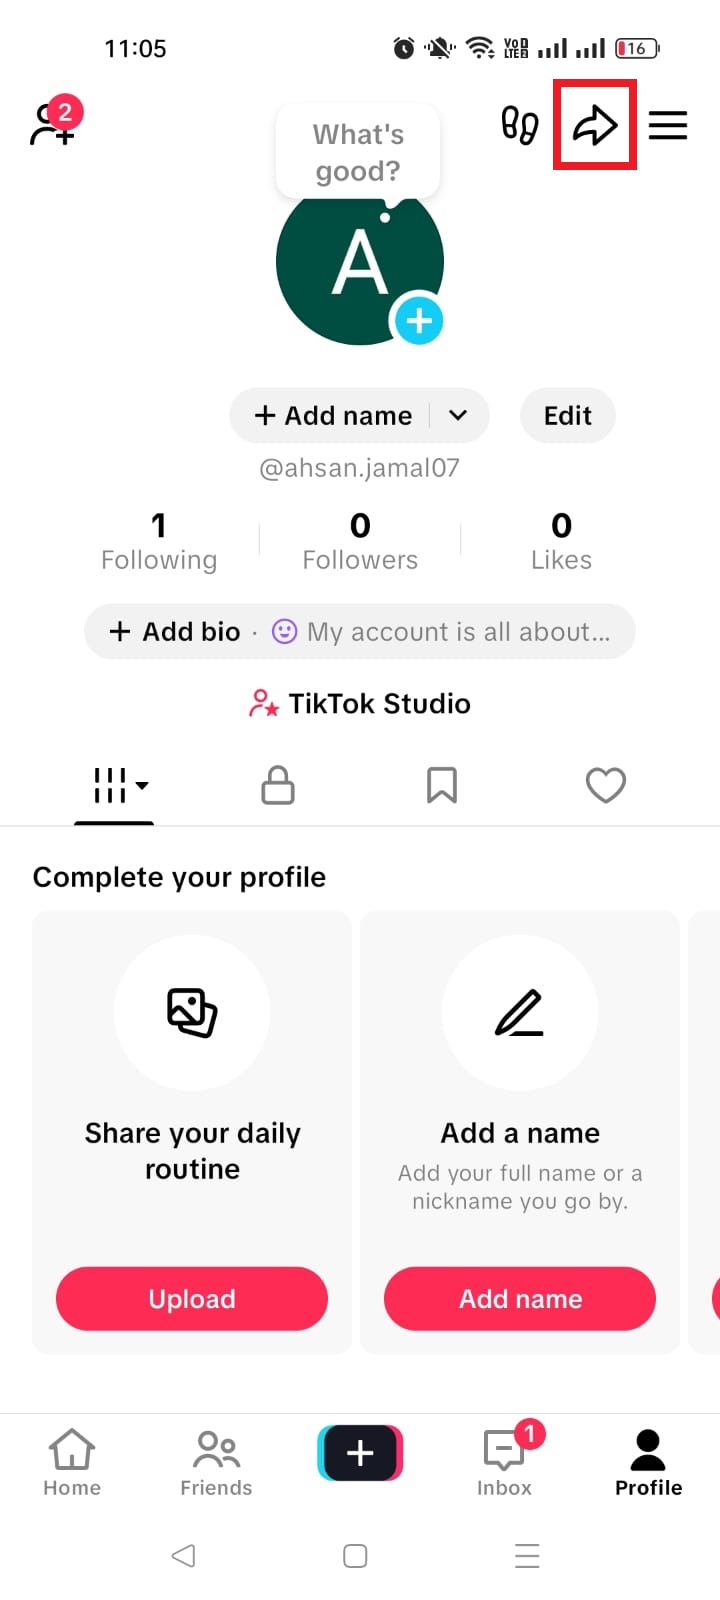
Is it possible to integrate link management with my existing stack?
In most cases, yes! Modern link management tools connect with social schedulers, email platforms, ad managers, and analytics tools, hassle-free. Replug also supports integrations and web-based widgets, so your links and data flow smoothly into systems you already use.
How does link management differ from basic link shorteners?
Basic link shorteners primarily replace long URLs with shorter ones and provide minimal statistics. Link management, on the other hand, covers branding, routing rules, QR codes, collaboration, and deep analytics. It is designed for teams that run ongoing campaigns rather than one-time personal links.
How do teams use link management in real workflows?
Teams use link management to standardize UTM tags, create branded links for every campaign, and track results across channels. Agencies bake it into client reporting, while in-house marketers use it to test offers, protect online reputation, and refine content. With a platform like Replug, these tasks happen in one place rather than across many separate tools.