Imagine this: your website’s link lands in the search results. Isn’t that a good start?
But then you notice it reads like a random string of nonsense, full of messy parameters and no clues about what the page is about.
That’s the problem with non-optimized URLs. With around 13.7 billion searches happening on Google every single day, each URL becomes a tiny battleground for clicks and visibility.
Now here’s where it gets even worse. A confusing, long URL won’t just annoy visitors; it can drag down your search ranking and click-through rate, spoiling your chances even before users arrive.
The perfect solution?
Crafting SEO-friendly URLs that both search engines and real humans love. In the following sections, we’ll discuss exactly what an SEO-friendly URL looks like and why it matters so much.
So, let’s get started!
What is an SEO-friendly URL?
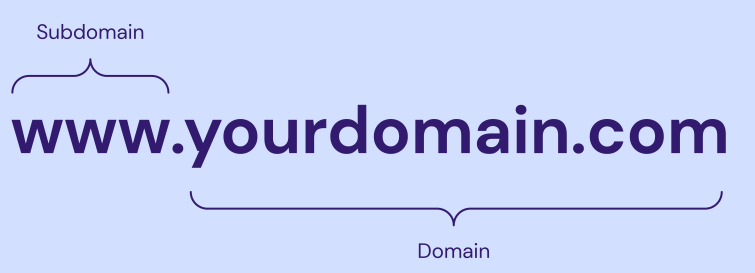
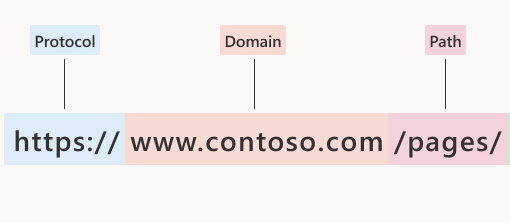
An SEO-friendly URL is simply a web address that’s easy to read, meaningful to both people and search engines, and gives a quick clue about what the page is all about.
According to experts, “such URLs are unique URLs or links designed to meet the high standards of Google search engines and users”.
Key characteristics of SEO-friendly URLs:
Descriptive: It clearly describes the content of the page, so someone taking a quick look at it can guess what it’s about.
Keyword-rich: It includes the page’s main topic or keyword, not in a spammy way, but naturally.
Human-readable: It treats humans in a really nice way. No strings full of code, numbers, or random characters.
Short & precise: It doesn’t carry on forever. The shorter and more to the point it is, the easier it is to remember and share.
Lowercase letters: Using all lowercase letters avoids confusion and problems with case-sensitive systems.
Static (not dynamic): It avoids long query strings, lots of URL parameters, and IDs, keeping the link stable and meaningful.
Use hyphens: Words are separated by hyphens (“-”) rather than underscores (“_”) or no separators, because search engines treat hyphens as word breaks.
By sticking to these attributes, your URLs become far more user-friendly, shareable, and better understood by both search engines and humans.
Example of an SEO-friendly URL (bad one):
Example of an SEO-friendly URL (good one):
Why SEO-friendly URLs are important
Your URL is more than a link. It’s a sneak peek into your content!
When your URLs speak the same language as your audience and search engines, you win on multiple fronts — more clicks, better rankings, greater trust, and ease of use.
Here’s why SEO-friendly URLs matter:
Improves search engine rankings: A clean, descriptive URL gives search engines helpful context about your page. Even if it’s a moderate factor, it adds up.
Enhances click-through rates: When users see a URL that makes sense and reflects the content, they’re more likely to click. Descriptive URLs like “exampledotcom/best-coffee-recipes” attract more clicks than generic ones like “exampledotcom/page123”.
Better user experience: Easy-to-read URLs help users understand what a page is about before they click, which builds confidence.
Enhances user trust & avoids confusion: A cluttered or disorganized URL full of parameters and random numbers looks inadequate; a clean and readable one feels trustworthy and credible.
Make search results more meaningful: When the URL itself contains readable words relevant to the content, search results become more transparent and aligned with user intent.
Enhances crawlability & indexing: Search engines prefer logical, structured URLs. They’re quite easier to crawl and index.
Optimizes link sharing: Clean, short URLs are easier to copy, paste, and share on social media and other sites, boosting visibility.
Simplifies site navigation: A well-organized URL structure helps users and crawlers understand your site’s hierarchy and navigate more intuitively.
Supports a long-term SEO strategy: Rather than quick fixes, an SEO-friendly URL structure lays the foundation for scalable, maintainable SEO over time. This helps in fewer redirects, no broken links, and less confusion.
20 best practices for creating SEO-friendly URLs
Crafting SEO-friendly URLs isn’t just about adding keywords; it’s about building clear, meaningful links that both users and search engines can easily understand.
To help you get it right every time, here’s a quick breakdown of the essential do’s and don’ts. Simple rules you can follow to make every link count.
Do’s
Don’ts
Use descriptive keywords: Include primary keywords relevant to the content.
Avoid keyword stuffing: Repeating the same keyword excessively.
Keep it short and simple: Aim for concise and easy-to-read URLs.
Avoid long URLs: Don’t include unnecessary words or parameters.
Use hyphens to separate words: Makes URLs more readable for both users and search engines.
Avoid underscores or spaces: These can confuse search engines and users.
Ensure the URL structure matches the site hierarchy: Helps users navigate more easily.
Avoid complex structures: URLs with excessive parameters or IDs are harder to read and rank lower in search results.
Use lowercase letters: Prevents duplicate content issues.
Avoid mixed-case URLs: They can cause confusion and potential errors.
Make it evergreen: Use URLs that remain relevant even as content updates.
Avoid dates in URLs: Limits the perceived freshness of content.
Optimize for mobile users: Ensure URLs are user-friendly on mobile devices.
Avoid unintuitive URLs: Random strings of letters and numbers are off-putting.
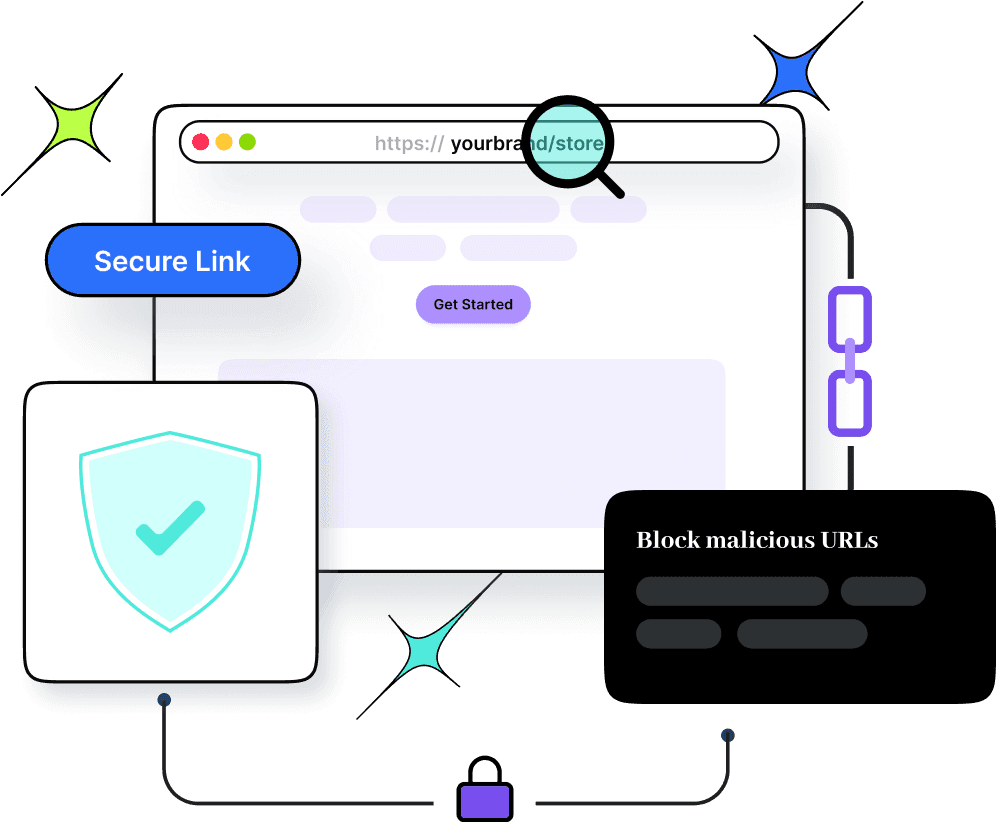
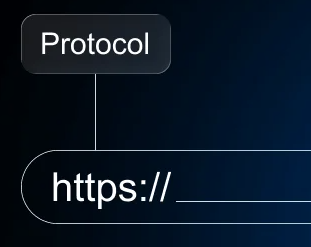
Use secure URLs: Always use HTTPS to build trust and boost rankings.
Avoid HTTP: Non-secure links can harm rankings and trust.
Test URLs periodically: Ensure they lead to the correct pages and load properly.
Avoid broken links: Damages SEO and user experience.
Incorporate branding when possible: Branded URLs boost recognition.
Avoid generic URLs: URLs like “page1.html” lack context.
Let’s take a closer look!
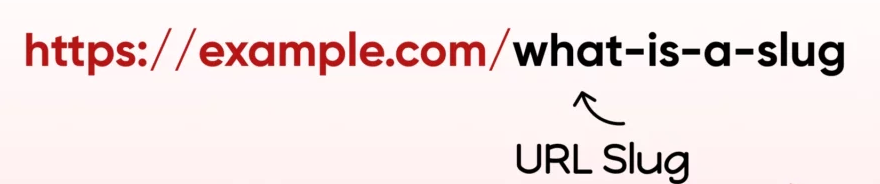
1. Optimize the URL slug
The URL slug is the part of the URL after the domain name, such as:
Keep it relevant and descriptive, clearly signaling the webpage’s content.
Take out non-essential words in the slug, such as random characters, special symbols, and numbers that don’t contribute to clarity.
Helpful Tip: If you’re updating content, avoid changing the slug unless necessary, to retain backlinks and traffic.
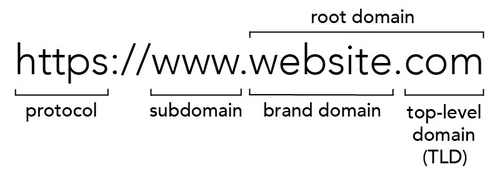
2. Choose a top-level domain (TLD)
Your domain extension (e.g., .com, .edu, .net, .org) influences user trust. While TLDs don’t directly affect SEO, “.com” is widely recognized and preferred by users, which creates a sense of credibility and reliability.
3. Keep the URL short & precise
Short links, or URLs, perform better in search engines and are easier to remember and share. Aim for a URL length of under 60 characters. While Google doesn’t penalize long URLs, shorter URLs contribute to a better user experience and higher click-through rates.
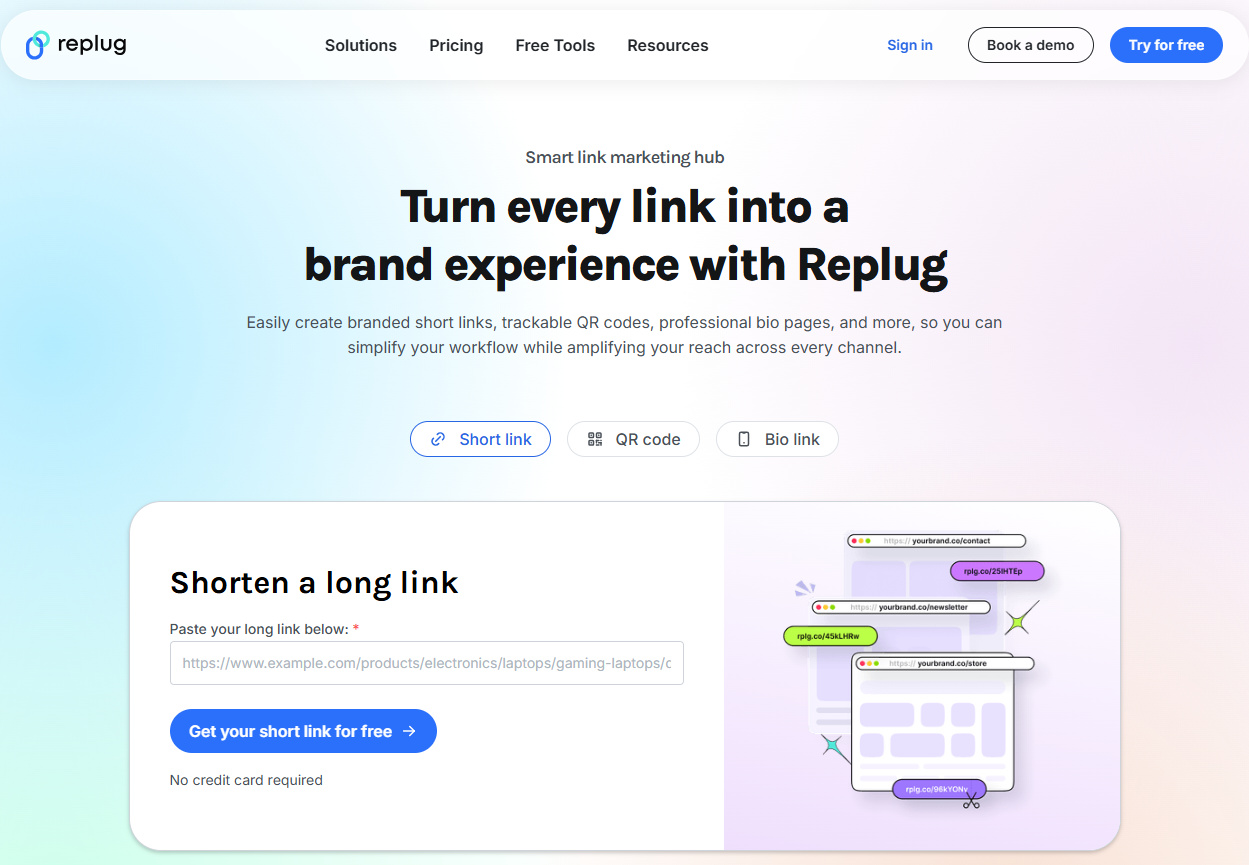
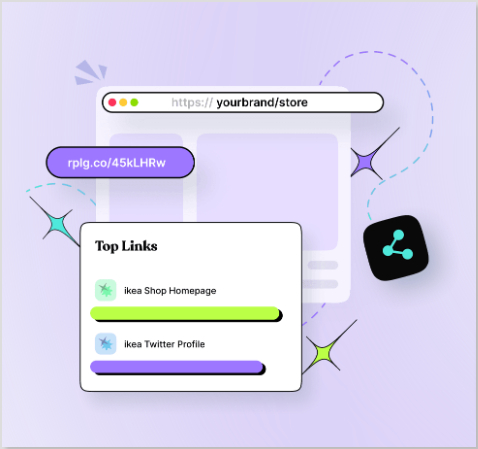
Maximize marketing ROI
by transforming ordinary URLs into branded short links that convert.
Try Replug for free
4. Avoid using the full blog title as the URL
Don’t use complete blog titles as your URL slug, as they can use up unnecessary characters. Long blog titles result in lengthy URLs.
Optimize your URL by choosing a relevant focus keyword related to that web page. The aim should be to create descriptive URLs, so users are not confused about the particular page’s content.
5. Remove punctuation marks
Punctuation can unnecessarily complicate URLs, making them harder to handle efficiently. By eliminating them, you can create clean, user-friendly URLs that are easy for both visitors and search engines to interpret.
6. Incorporate the primary keyword (must)
Including the primary keyword in your URL contributes to improved SEO. This practice reinforces the topic of your page, increasing its likelihood of matching search queries and ranking higher in search results.
For instance, if you’re offering SEO services in a specific region or state, using a URL that emphasizes “SEO services in California” helps signal both the service and location to search engines. Pairing this approach with a local citations service further strengthens local signals, improving search rankings and attracting users specifically looking for SEO services in California.
7. Use lowercase letters
Some servers treat uppercase and lowercase URLs differently, potentially causing duplicate content issues. Stick to lowercase to avoid complications and ensure SEO-friendly URLs.
Note: WordPress users shouldn’t worry, as it automatically puts URLs in lowercase and adds hyphens.
8. Use hyphens, not underscores
Google treats hyphens as spaces, making it easier to analyze your links. Underscores, however, can obscure your meaning.
For example:
Good: seo-friendly-url
Bad: seo_friendly_url
Using hyphens makes it easier for Google’s web crawlers to understand and estimate the information on your website, helping in generating steady results.
9. Incorporate keywords strategically
Keywords in URLs can boost SEO and enhance user understanding. But it is a good practice to avoid keyword stuffing.
1–2 keywords are enough. You must never repeat a keyword in a URL. Google will never reward you for using the same keyword in a URL more than once.
For instance:
Good practice:
Bad practice:
10. Limit folders & subfolders in the URL structure
Keep URLs short and straightforward by minimizing the use of folders and subfolders. This practice improves readability and user experience, as excessively nested subfolders can make navigation complex for visitors and search engines.
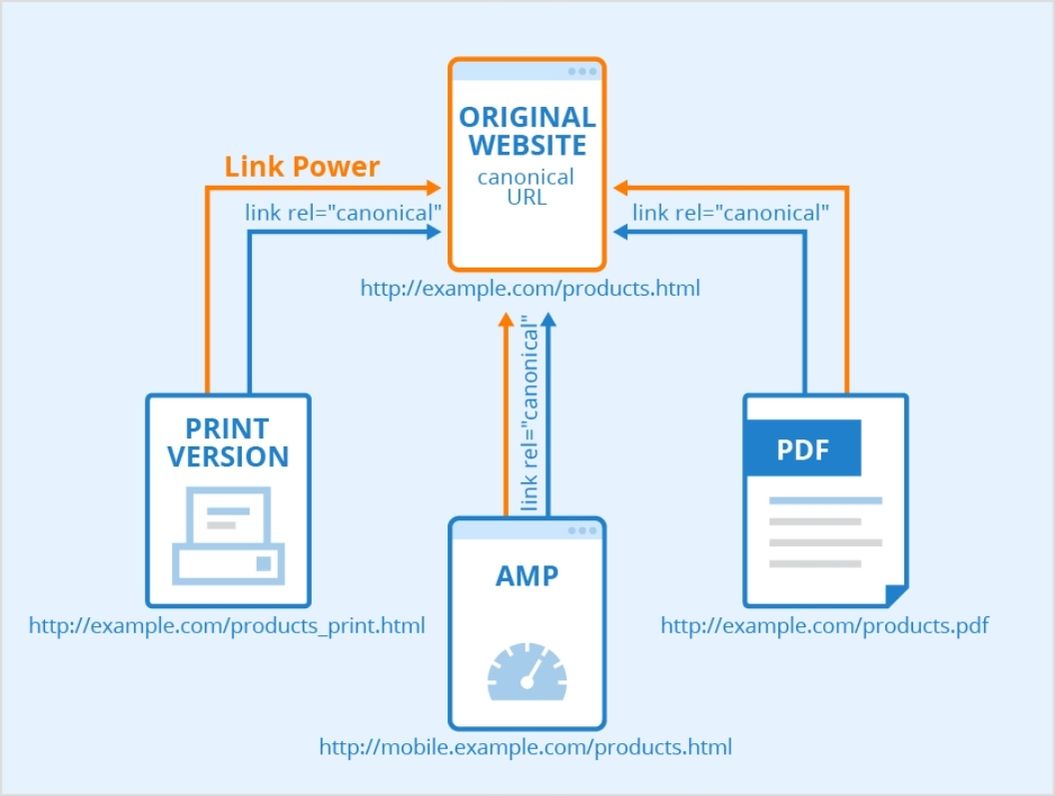
11. Use canonical tags for duplicate content
If the same content exists on multiple URLs, canonical tags tell search engines which version is the original. This prevents duplicate content issues and ensures proper indexing.
Look at the figure below to know how canonical tags work:
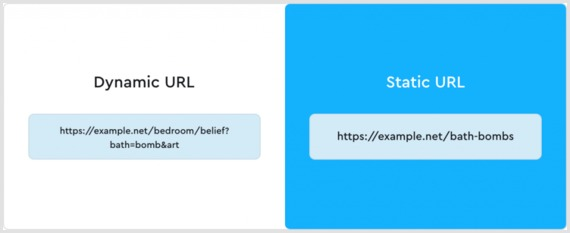
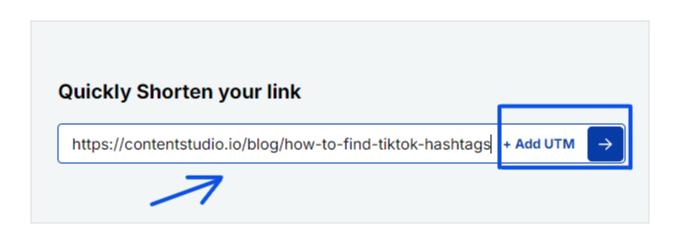
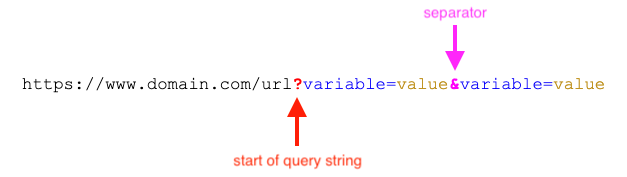
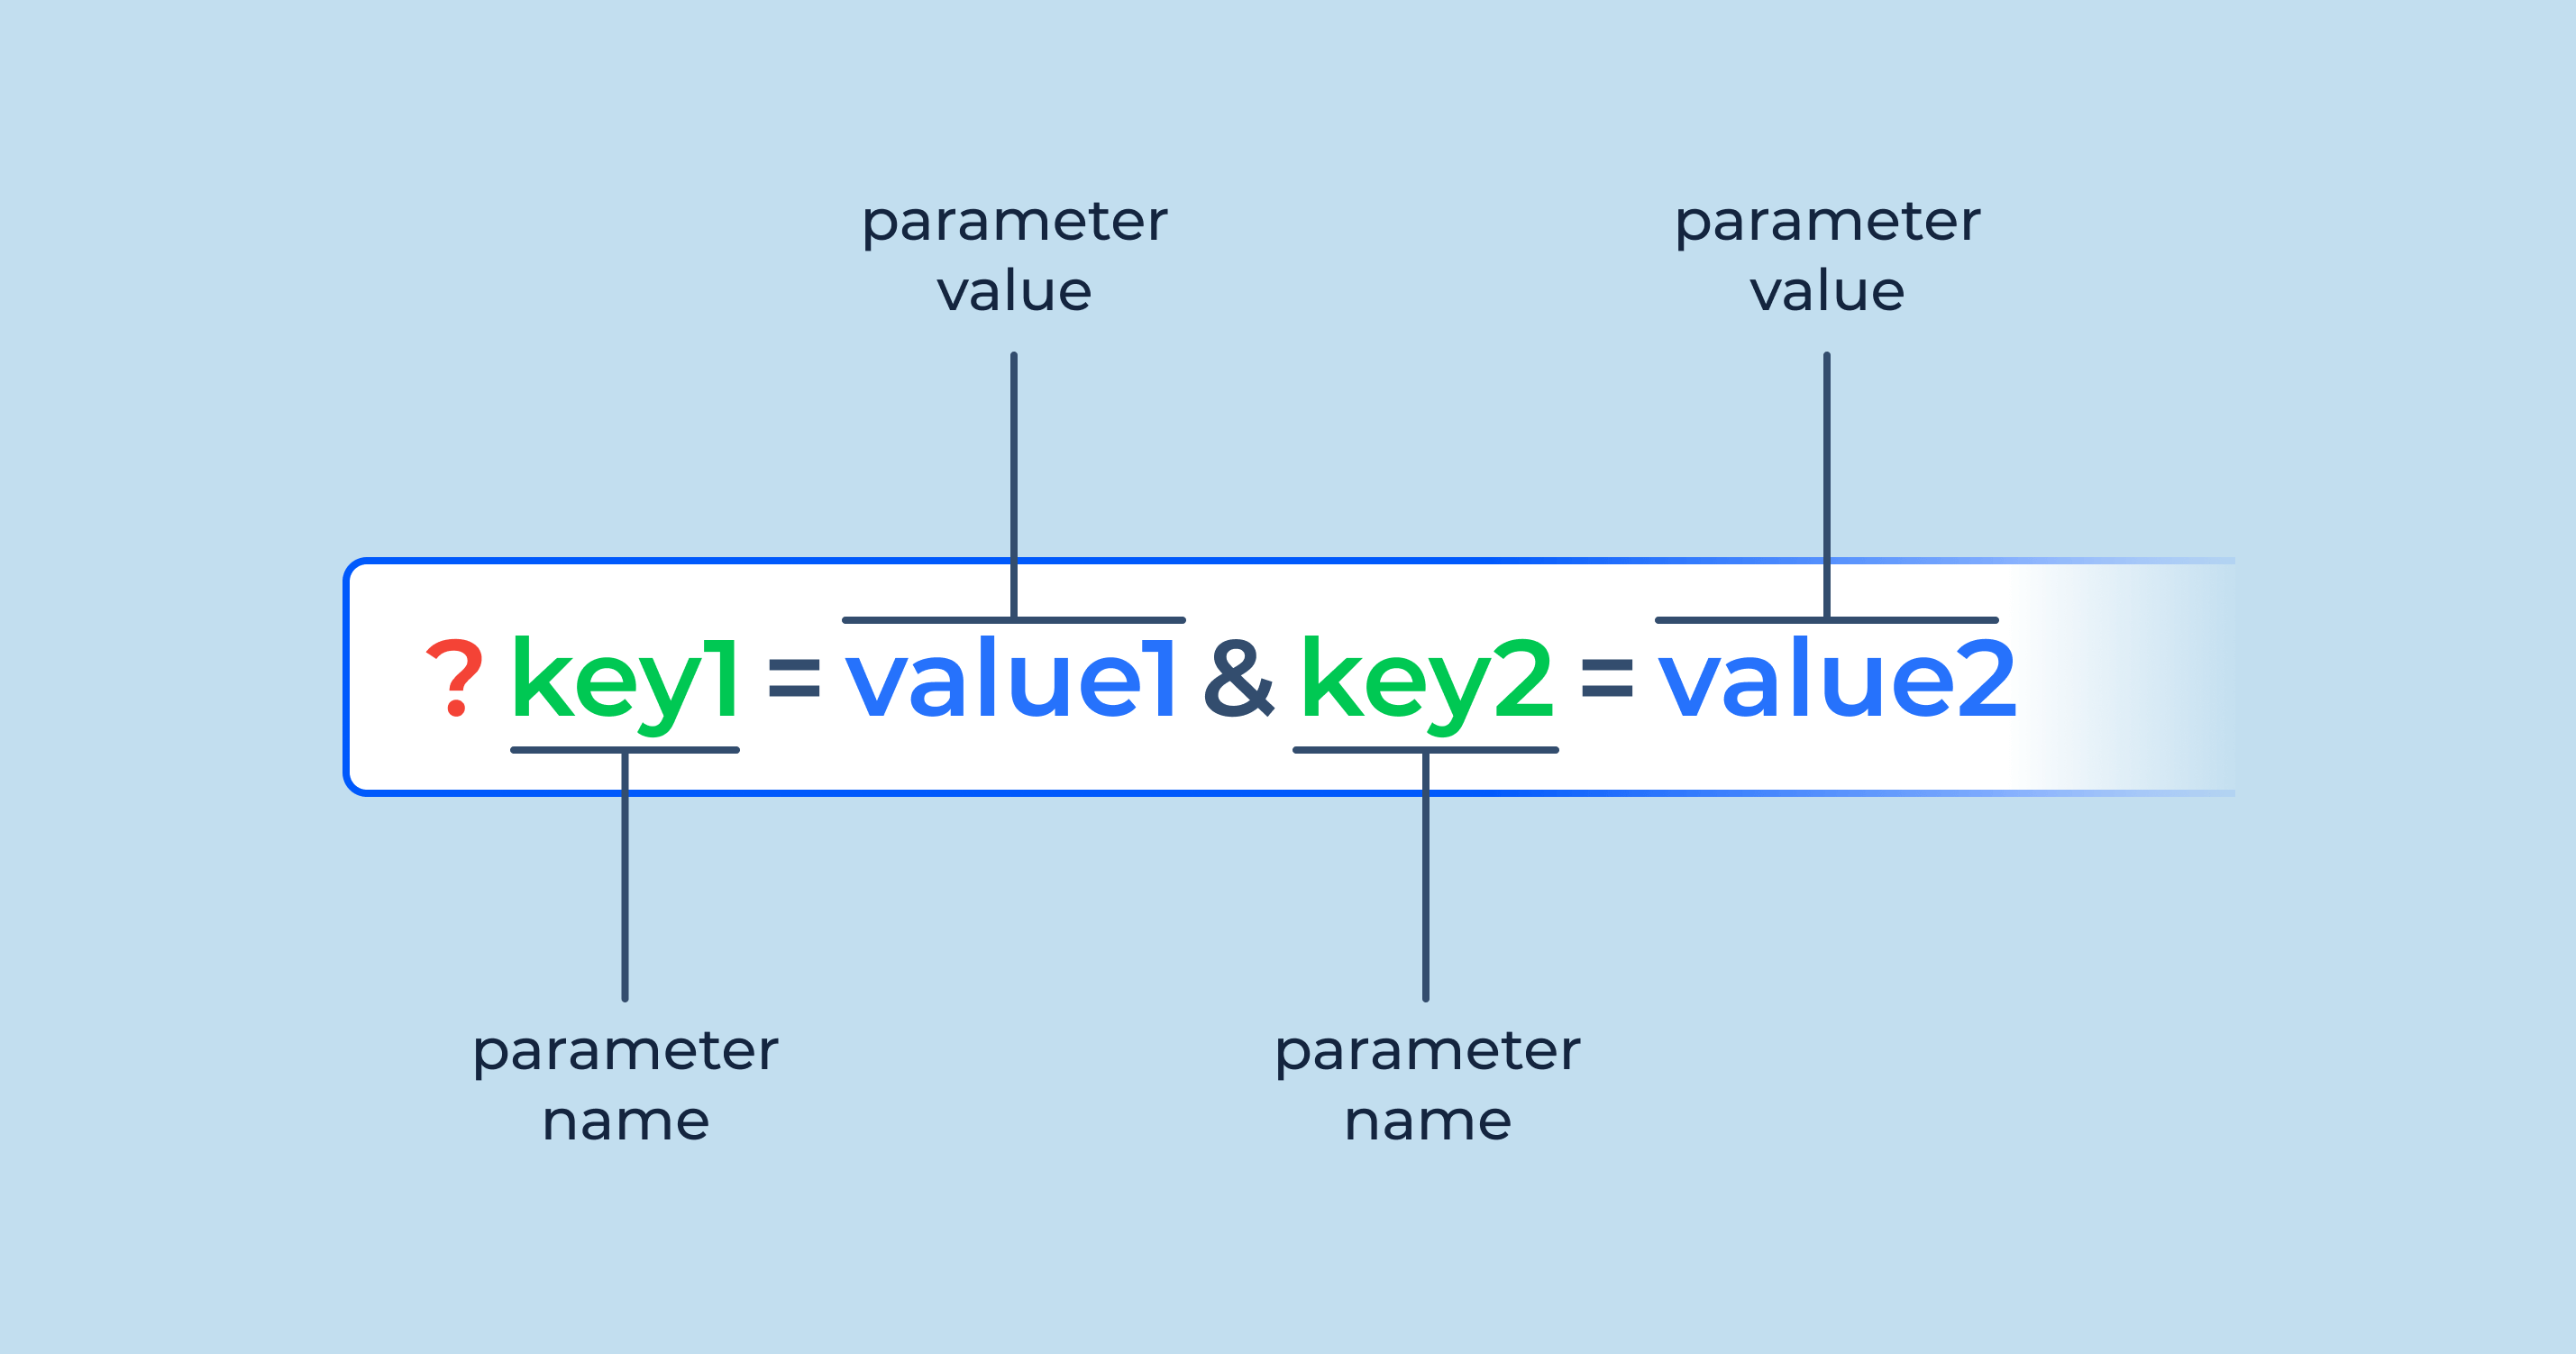
12. Prefer static over dynamic URLs
Static URLs are more straightforward, easier to read, and more SEO-friendly. Dynamic URLs, on the other hand, are less search-engine-friendly, include UTM parameters, and are complex to understand.
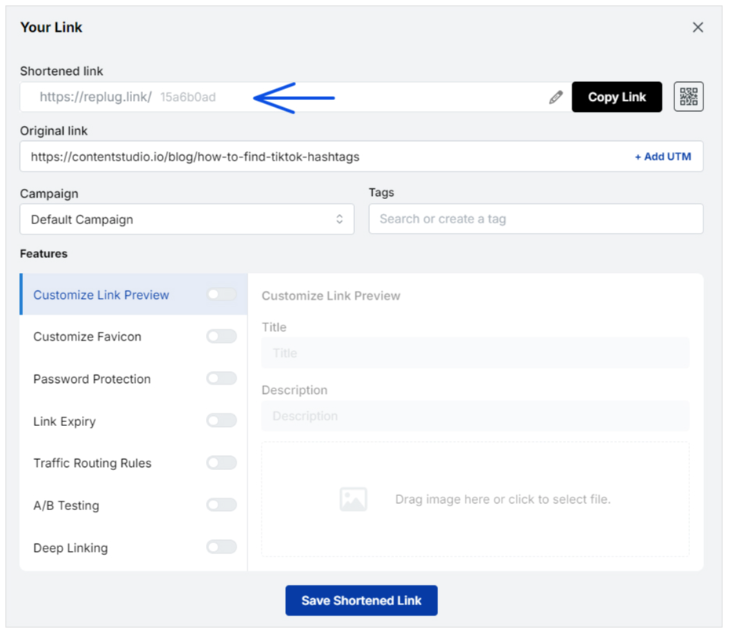
Pro Tip: Using a first-rate, SEO friendly short URL generator gives you more control over your links through customization and tracking.
Minimizing redirect loops improves site speed and user experience. While redirects are sometimes necessary, excessive use can lead to issues with search engine crawlers. When needed, opt for 301 redirects for better SEO results.
Besides, regularly check for and fix broken links, as they can harm your site’s credibility, disrupt user journeys, and negatively impact your SEO performance.
14. Utilize futureproof URLs
Refrain from incorporating dates in URLs to prevent content from becoming outdated. Futureproofing URLs by excluding time-sensitive information enables content updates without altering the URL structure.
15. Hide “www” and HTTPS prefixes
Modern browsers already indicate secure connections with a lock icon, so hiding prefixes like “www” or “https” can streamline your URLs.
Sub-domains can help organize content for specific markets or purposes. Anyhow, use them conservatively to avoid diluting your website’s authority.
These domains improve navigation and organize your website. The end goal of SEO is to improve user experience, and sub-domains just do that.
17. Eliminate stop words
Words like “the,” “is,” or “of” are often unnecessary in URLs. Removing them reduces URL length while retaining clarity.
For example:
Before (👎):
After (👍):
18. Use “safe” characters
Stick to alphanumeric characters and hyphens in your URLs. Avoid spaces, &, %, #, and other special symbols that require encoding and may confuse both users and search engines.
19. Prioritize readability
Your URL should clearly convey what the page is about. Use meaningful words, separate them with hyphens, and keep it easy to read so both users and crawlers understand it at a glance.
20. Avoid over-optimization
Don’t force keywords into the URL or make it unnaturally long. Overloaded, spammy URLs harm user trust and may reduce SEO value even if technically allowed.
Make every link count: Build SEO-friendly URLs with Replug!
And there you have it!
Everything you need to know about creating SEO-friendly URLs that rank higher, attract clicks, and keep your visitors coming back.
Remember, a clean, clear URL isn’t just suitable for search engines; it’s a trust signal for real people, too. So, take a few minutes to clean up your links, and you’ll see the difference in your traffic and engagement.
Ready to take things up a notch? Give Replug a try today! It’s one of the best tools out there for generating short, branded, and truly SEO-friendly URLs!
Frequently asked questions
Which URL is best for SEO?
A “vanity URL”, like “yourbrand.com/seo-guide”, is ideal because it’s short, easy to remember, and clearly communicates the page’s topic. That kind of clean address helps both users and search engines alike.
How to check SEO-friendly URL?
Use a tool like an SEO-friendly URL checker to evaluate whether your URL is readable, descriptive, uses hyphens, and avoids unnecessary parameters.
Should a URL include keywords?
Yes, including one relevant keyword helps users and gives a minor context signal to search engines. However, just don’t stuff in multiple keywords redundantly.
Which is the best example of a SEO-friendly URL?
Something like this:
example.com/how-to-create-seo-friendly-urls
Human-readable, descriptive, hyphen-separated, lowercase, and no weird characters or long query strings.
How long can a URL be for SEO?
There’s no strict character limit for SEO. Aim for ~60–70 characters or fewer to keep it clean and share-friendly, but readability and clarity matter more than exact length.
Are long URLs bad for SEO?
Not necessarily bad, but longer, cluttered URLs can hurt readability and user trust. They might cut off in search results or be harder to share.
How to use SEO-friendly URLs in your site?
Make sure when you publish or edit content, you:
– use lowercase letters – hyphen-separate words – keep the slug short & meaningful – avoid dynamic parameters and session IDs – maintain a logical folder structure
The URL shortener market is expanding and growing rapidly, valued at USD 360.4 million in 2024 and projected to exceed USD 1,020 million by 2033.
The rising demand for personalized user experiences has made URL shorteners a must-have tool for brands, agencies, and content creators. Once seen as a simple link shortening tool, it has now transformed into a full-fledged marketing platform.
And here’s the exciting part. In 2026, link shorteners aren’t just about making complex and lengthy links shorter. They’ve leveled up into powerful tools loaded with features like advanced analytics, retargeting pixels, branded domains, QR codes, and even bio link pages. As a result, they are providing businesses more ways than ever to increase engagement and track performance.
So, which ones are the good URL shorteners that are worth your time (and money)?
We’ve rounded up the top URL shorteners of 2026, complete with features, pricing, and reviews, to help you find the ideal tool to supercharge your links.
What are URL shorteners?
URL shorteners are online tools or services that convert long, complex web addresses into shorter, more manageable links without changing the destination page.
These shortened URLs are easier to share on social media, emails, and other digital platforms where space is limited or readability matters. Popular examples include: Replug, Bitly, TinyURL, and Rebrandly.
Beyond just shortening links, modern URL shorteners often provide additional features such as click tracking, analytics, custom aliases, and branded domains. This allows businesses and individuals to monitor engagement and enhance their marketing strategies.
By simplifying lengthy URLs, these tools improve user experience, link aesthetics, and shareability across platforms.
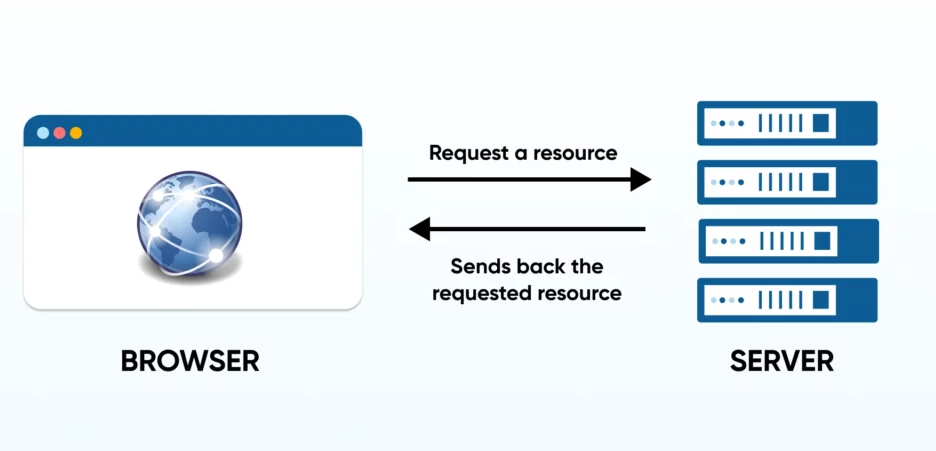
How does a URL shortener work?
A URL shortener works by creating a unique, compact identifier that redirects users to the original long URL.
When a user inputs a long web address into a shortening service, the system stores that URL in its database and generates a short, unique code, usually a random string of letters and numbers.
This code is appended to the shortener’s domain (e.g., replug.io/abc123). When someone clicks the shortened link, the shortener’s server looks up the corresponding original URL and instantly redirects the user to that destination using an HTTP 301 or 302 redirect response. This process happens in milliseconds.
Advanced URL shorteners also track user interactions, such as click count, location, device type, and time of access, providing valuable insights for analytics and digital marketing optimization.
In recent years, URL-shortening tools have seen significant growth. After detailed research, we have identified the following 7 link shorteners as the best.
This is because they are comprehensive link management tools and offer ideal and optimal solutions in terms of pricing, features, user-friendliness, and customer reviews.
7 Best URL shorteners for marketing professionals [2026]
Choosing the right URL shortener can significantly enhance your marketing efforts by improving link tracking, branding, and audience engagement.
Below, we’ve rounded up the top tools that offer powerful analytics, customization options, and seamless integration to supercharge your campaigns.
Let’s start with Replug.
1. Replug
The first on our list and the most top-notch custom URL shortener is Replug. It is an all-in-one link management tool for agencies and marketing pros with cost-effective pricing.
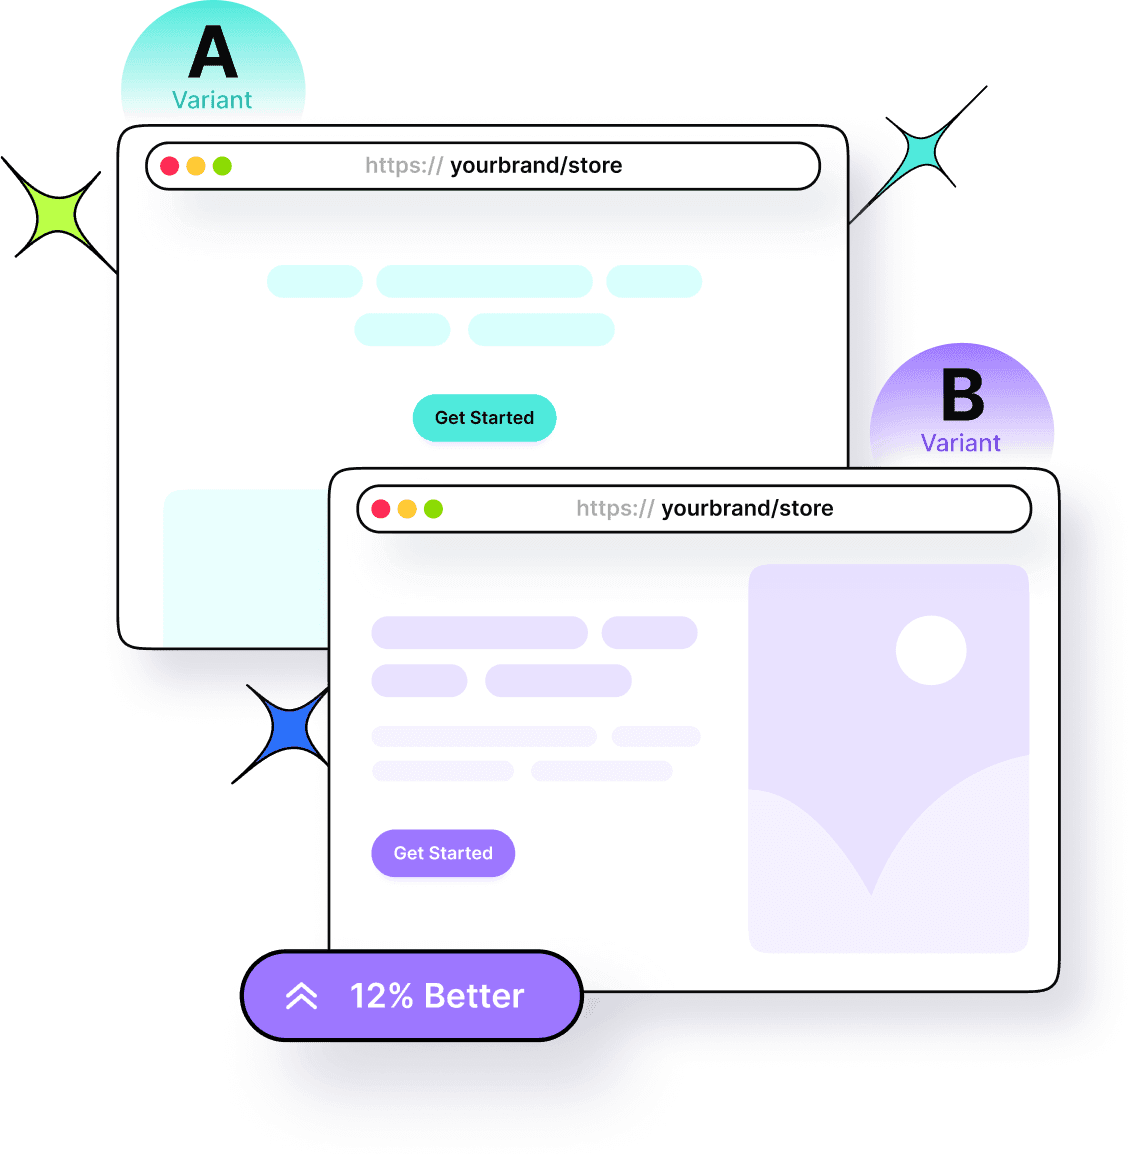
With this handy and easy link shortener tool, users can shorten branded URLs, do A/B testing, create link previews, set up link expiry, build bio-links, and much more.
Some of the most significant features of this best all-around URL shortener are:
Hassle-free link management: Easily organize, edit, and monitor all your links from one intuitive dashboard.
Top-notch white-label solution: Customize links with your own domain and branding for a professional, trustworthy look.
Advanced link tracking: Get real-time insights into clicks, audience behavior, and campaign performance.
Smart retargeting pixels: Reconnect with users who’ve interacted with your links to boost conversions.
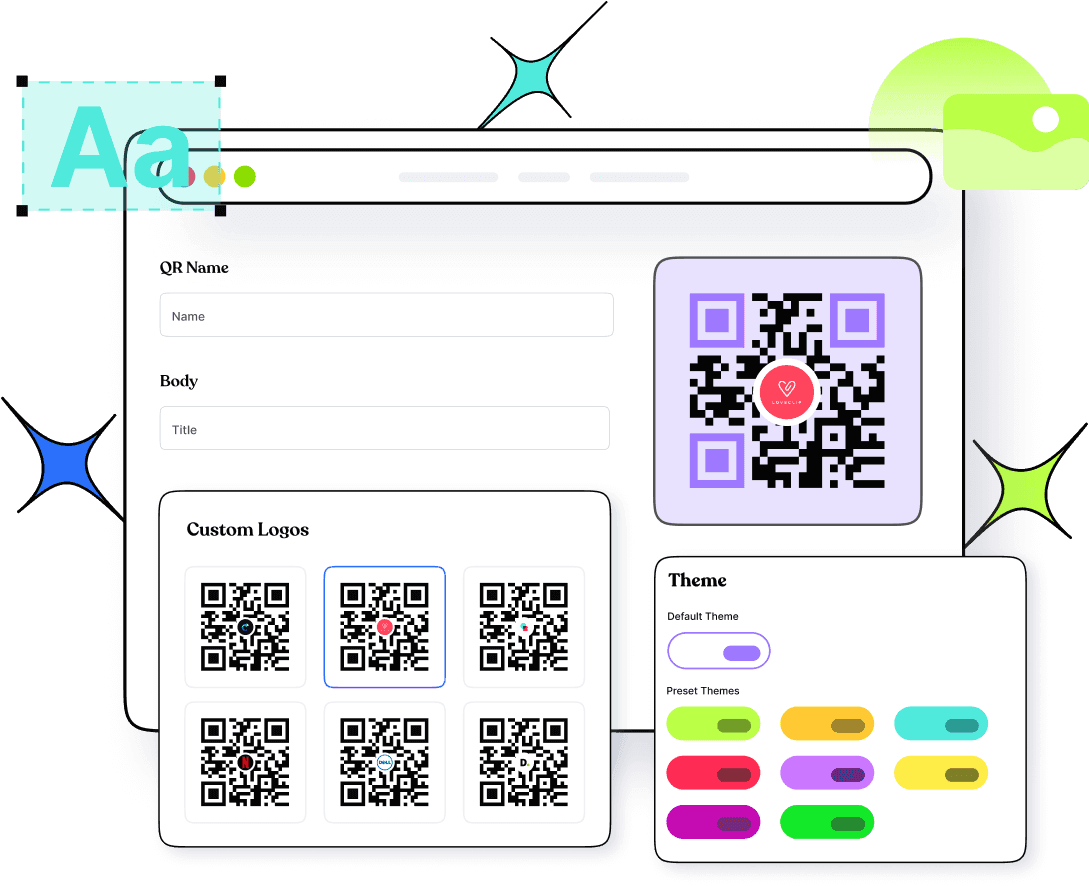
Built-in QR code generator: Create shareable QR codes instantly for offline and online campaigns.
Link rotation feature: Distribute traffic across multiple URLs for A/B testing or marketing experiments.
Deep linking capabilities: Send users directly to specific pages or app sections for a seamless experience.
All-in-one bio-link tool: Create a single, branded page that houses all your important links for social media.
Unlike its competitors, Replug also has a dedicated Chrome extension and a user-friendly web app. It also provides additional benefits such as link retargeting, link history, high-end customer support, tracking individual links, bulk link creation, and viewing related analytics on a dashboard.
With Replug.io, you can even track the performance of specific marketing campaigns in particular locations. All in all, it’s the perfect fit for businesses of all sizes and industries.
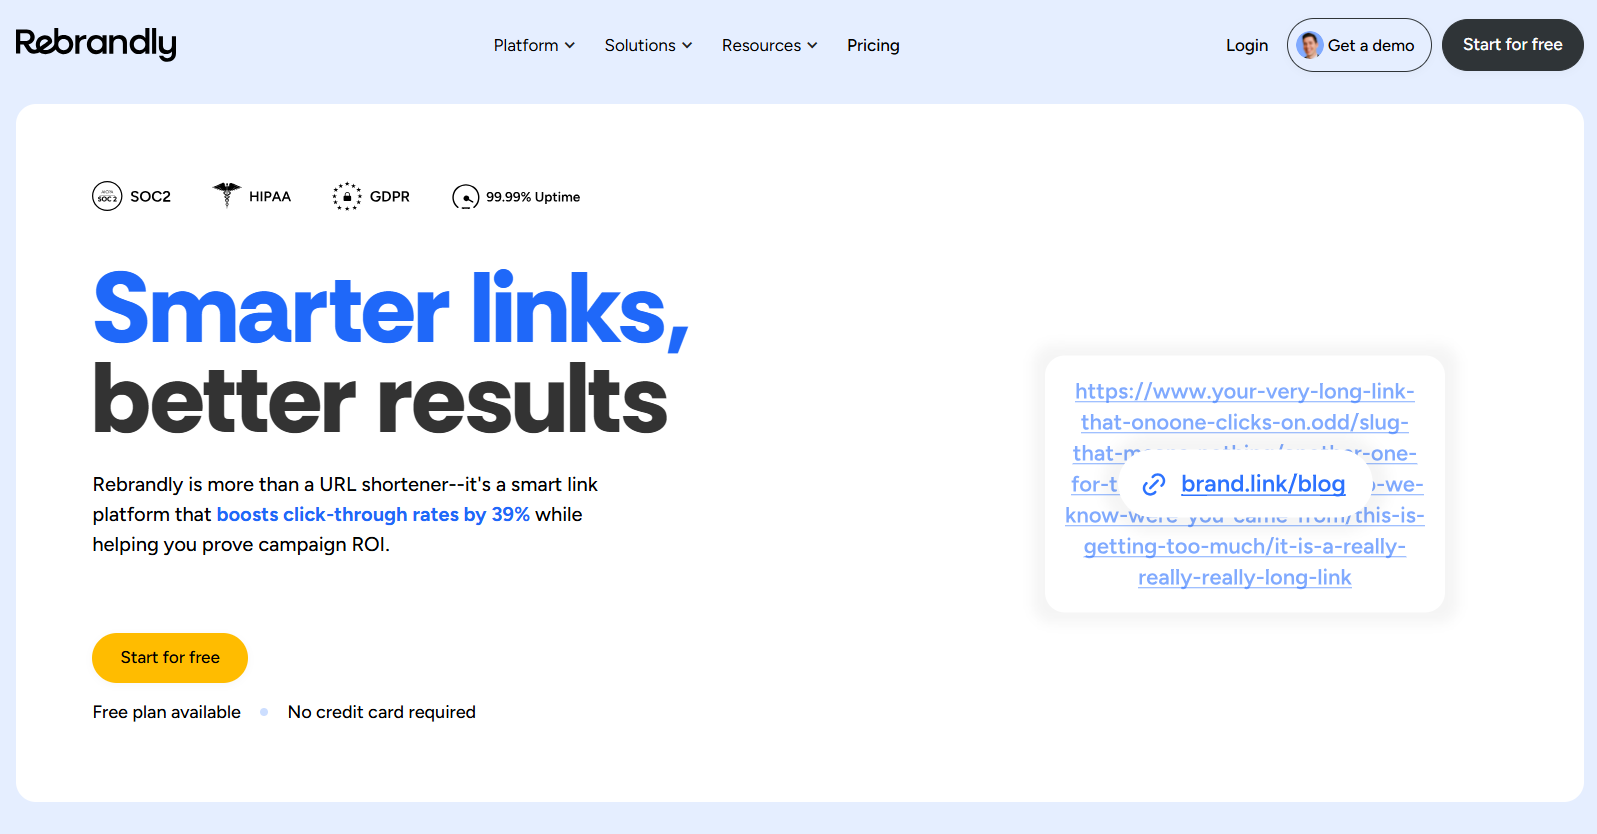
Rebrandly is a state-of-the-art URL-shortening solution with a host of features. With this digital tool, you can craft custom, branded, and concise links that are memorable and easily shareable across various social media platforms.
It is preferred for team collaboration and allows you to set up multiple workspaces and invite team members, making it an excellent choice for team-based URL-shortening needs.
Additionally, it offers advanced features such as link retargeting support, making it a well-rounded and versatile solution.
Bitly is a widely used tool to shorten URLs, making them more manageable. Alongside URL shortening, it includes a QR code generator, which is commonly preferred by social media influencers and businesses.
While these basic features are available for free, they come with Bitly branding on the shortened links.
For users seeking more advanced capabilities, the paid version of Bitly offers additional features. This includes link retargeting, access to detailed link history, priority customer support, and a user-friendly dashboard to track and analyze link performance easily.
Pricing plans
Free: $0/month
Core: Annual plan only
Growth: $35/month
Premium: $300/month
Pros
Cons
✅ Enhanced shareability for enterprise businesses.
❌ Does not offer as many advanced features as some competitors.
✅ Detailed link analytics.
❌ Limited customization options.
✅ Flexibility and redirection control.
Customer Reviews
4. Dub
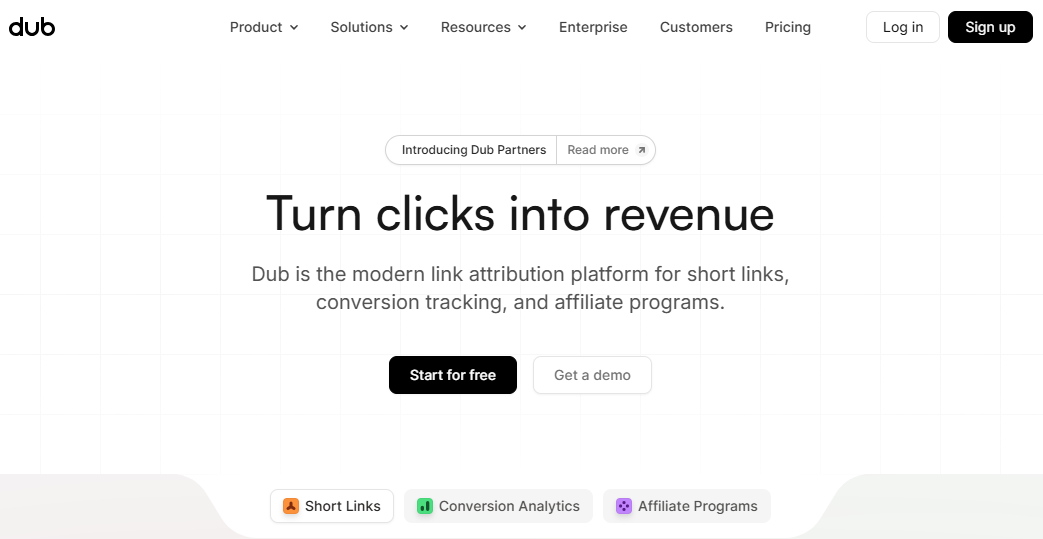
Dub is an open-source modern URL shortener built for flexibility, speed, and scalability. It’s especially popular among startups, developers, and businesses that want more control over their link management.
With Dub, you can shorten branded links, track analytics in real time, and much more.
Pricing plans
Pro: $30/month
Business: $90/month
Advanced: $300/month
Enterprise: Custom
Pros
Cons
✅ Advanced feature set.
❌ Technical setup required for advanced use.
✅ Custom domains to brand your links for higher trust.
❌ No free plan for users.
5. BL.INK
BL.INK is an all-in-one platform that manages links, tracks them, and gauges their performance exceptionally. It shows how links perform, either through reports or by collaborating with tools like Google and Adobe.
Plus, it effortlessly combines with other systems using its open API. It is suitable for businesses of all sizes, ensuring security with top-notch features and customizable user access.
Pricing plans
Expert+: $48/month
SMB:$99/month
Team: $299/month
Business: $599/month
Enterprise: Custom
Pros
Cons
✅ Feature-rich URL-shortening tool.
❌ A bit costly, compared to competitors.
✅ Pretty easy to use.
❌ It can be a bit buggy at times.
✅ Suitable for data-driven marketing.
Customer Reviews
6. TinyURL
TinyURL is one of the oldest and most reliable URL shorteners, trusted for its simplicity and ease of use. While initially just a quick way to shorten long links, it now offers branded domains, link tracking, and link expiry, making it a solid option for personal and small business use. It is one of the best tools for getting free, fast, and anonymous short URLs.
Pricing plans
Free: $0.00/month
Pro: $12.99/month
Bulk 100K: $129.00/month
Enterprise: Custom
Pros
Cons
✅ Very beginner-friendly.
❌ Website is a bit outdated.
✅ Detailed tracking and analytics.
❌ Limited feature set in comparison to others.
7. Short.io
Short.io is a full-featured, best URL shortener free tool designed for businesses and marketing teams. It allows branded short links, advanced analytics, and team collaboration, along with geo-targeting and device-based redirects, making it perfect for global campaigns.
Pricing plans
Free: $0/month
Hobby: $5/month
Pro: $18/month
Team: $48/month
Enterprise: $148/month
Pros
Cons
✅ Excellent geo-targeting options.
❌ Dependence on third-party services.
✅ Strong team collaboration features.
❌ Lack of transparency.
What is the best URL shortener service in 2026?
The best URL shortening service is Replug, an all-rounder link management tool for shortening URLs, adding pixels for retargeting, embedding call-to-action, and building bio-links for social media.
With white-label options, highly affordable pricing, and other rich features, Replug is the best platform for brand marketing and promotion using shortened, branded URLs.
It stands out not only for its versatility but also for its focus on helping marketers build stronger connections through every shared link. Moreover, its intuitive dashboard, in-depth analytics, and automation features empower businesses to track performance, boost engagement, and maximize ROI effortlessly.
In short, Replug is more than just a URL shortener. It’s a complete link management powerhouse designed to elevate brand visibility and marketing efficiency.
Boost ROI with branded URLs!
Enhance your marketing campaigns by creating shareable, trackable, and fully multi-purpose
customizable branded URLs.
We’ve highlighted some of the top and widely used URL shorteners above. However, if you’re seeking alternative options, consider the following ones listed below:
Using a URL shortener offers numerous advantages across different areas, making it a valuable asset for anyone.
Here’s why it’s the ultimate advantage for your specific needs.
Tracks the number of impressions, clicks & conversions.
Condenses complex URLs into more recognizable ones, thus improving web traffic, CTR, and conversion rates.
Offers custom short links, boosts brand promotion, and enhances brand reach.
Short branded URLs generated by this tool take up less character space, making them ideal for SMS & social bios.
Branded links produced are easier to share and remember, which means enhanced brand recalls.
Improves user experience through smooth navigation.
Enrich SEO efforts by optimizing messy, long URLs with branded keywords.
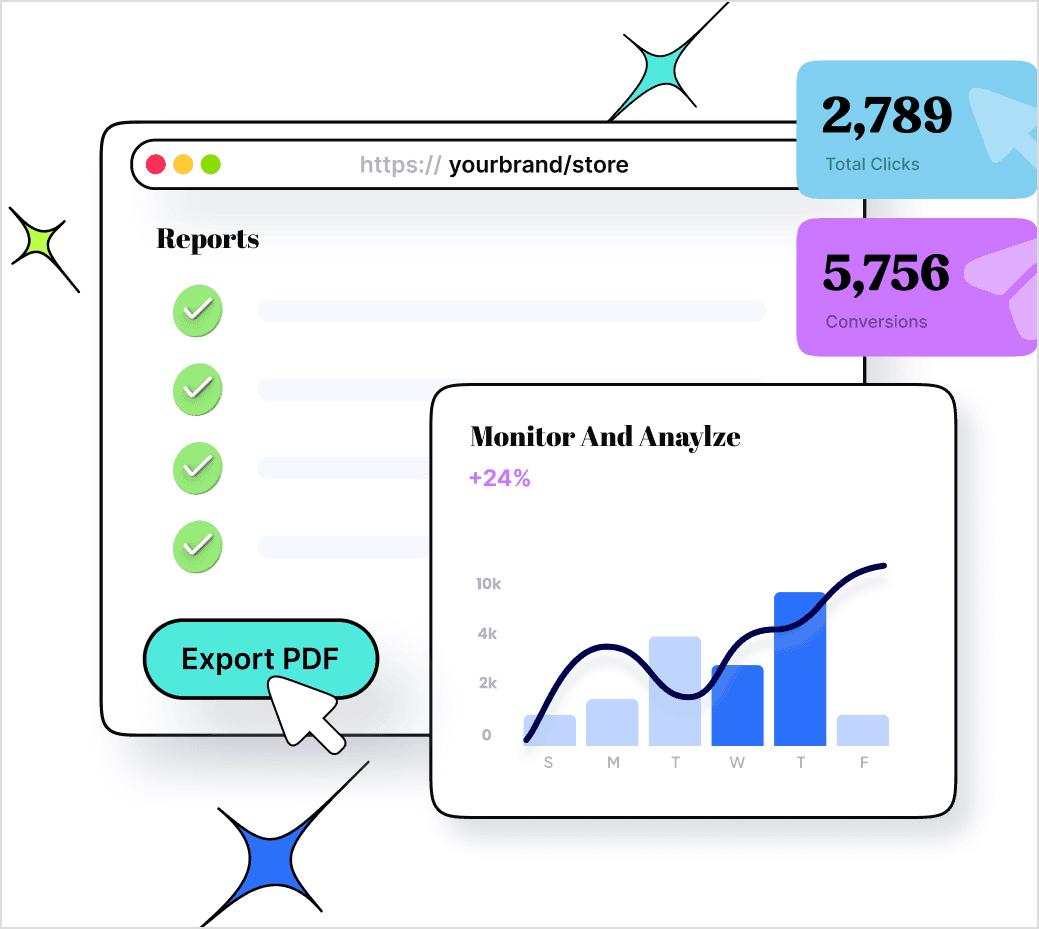
Provides data in the form of reports, helping content creators and businesses make informed decisions.
Aids in rotating links to preferred link destinations on a specific date, time, or location.
Feature-rich URL shorteners provide multiple options for utilizing a short link. Create personalized bio landing pages, generate QR codes of any shortened link, A/B test performance of multiple URLs, etc.
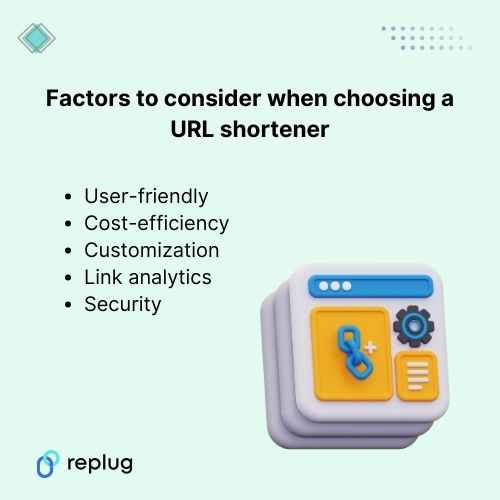
Points to keep in mind when choosing a URL shortener
Picking the right URL shortener can be tough with so many options out there, each with its own perks. To make the best choice, it’s important to consider the following points when checking out URL shorteners.
1. User-friendly
One of the primary considerations when selecting a URL shortener is its user interface. A streamlined interface that simplifies shortening links enhances the overall user experience.
The interface design and functionality should prioritize ease of use, allowing users to generate shortened URLs quickly and effortlessly.
However, the integrations with other tools and platforms you’re already using, along with compatibility across devices and browsers, further add to its usability.
2. Cost efficiency
Pricing is also a key factor when picking a URL shortener tool. Be sure to evaluate the cost of each service and consider what features are most important to you when making your decision.
While free options are fascinating, they might come with constraints that limit their utility. This makes premium versions with additional features more appealing for businesses or advanced users.
Customization or personalized options are essential because they allow you to tailor your shortened URLs to your liking. Keep in mind that adding branded domains or specific keywords to your links reinforces brand identity.
However, this can be particularly useful if you’re using them for branding, specific campaigns, or content categories, as it allows you to make your links more recognizable and memorable.
4. Link analytics
Link analytics is a critical feature when deciding on a URL shortener. The ability to track clicks, conversions, and other key metrics can help you understand the performance of your campaigns and make data-driven decisions about your marketing efforts.
5. Security
Privacy and security are vital points that play a significant role when choosing a URL shortener. A reliable URL shortener should prioritize link safety and protection against malicious activities.
Encryption, expiration features, and measures to prevent link manipulation ensure the integrity and safety of shared links.
Moreover, privacy considerations, such as the handling of user data and adherence to data protection regulations, are essential for individuals and businesses concerned about confidentiality.
Conclusion
In this blog, we covered some of the best URL shorteners for 2026, including tools like Bitly, Rebrandly, and TinyURL. While each has its strengths, if you’re looking for an all-in-one solution with advanced analytics, retargeting, customizable bio links, branded domains, and team collaboration, Replug stands out as the top choice.
If you want a link shortener that goes beyond shortening and actually helps you boost traffic, track performance, and grow your business, Replug is the tool to bet on in 2026.
Frequently asked questions
Why should I use a URL shortener for my links?
URL shorteners make lengthy URLs more concise and visually appealing. These links are easier to share, track, and manage across various platforms, especially in limited-character settings like social media posts.
Are URL shorteners safe to use for sharing links?
Most URL shorteners include security measures to protect links from malicious activities. They often use encryption and other security protocols to ensure the safety and integrity of shared links.
How can I measure the performance of shortened links?
URL shorteners typically provide analytics tools that track click-through rates, user engagement, geographic data, and conversion rates to assess the effectiveness of shortened links.
Can I customize shortened URLs to match my brand?
Yes, many URL shorteners allow customization, enabling users to create branded and memorable short links by using custom domains or adding specific keywords.
What are the best URL shorteners to make money online?
The top URL shorteners for earning money online in 2026 are:
– ShrinkMe.io, offering up to $22 per 1,000 views with instant PayPal payouts and global reach, –Linkvertise, for its ad-based monetization allowing earnings per click without minimum thresholds, and –Shrinkearn, which provides the highest CPM rates for publishers and quick payments via multiple methods.
These platforms reward users for shortened link traffic, making them ideal for affiliate marketers and content creators.
What are the best URL shorteners for Facebook?
For Facebook, the best URL shorteners include:
– Replug for its seamless integration, detailed analytics on shares and clicks, and branded links that boost engagement. – Rebrandly for custom domains that align with your brand and avoid platform restrictions, and – PicSee, optimized for enhancing link previews and performance on Facebook feeds and groups.
These tools ensure links aren’t flagged as spam while providing tracking for social campaigns.
Which ones are the best URL shorteners for Instagram?
The leading URL shorteners for Instagram in 2026 are:
– Replug, with built-in bio link tools for creating shoppable profiles and retargeting pixels for ads, – Bitly for precise tracking of story swipes and post clicks with custom branding, and – Short.io, offering dynamic routing to direct users based on location or device for personalized experiences.
They enhance visibility in bios, stories, and reels without violating Instagram’s guidelines.
What is the safest link shortener available at present?
As of 2026, Replug.io stands out as the safest URL shortener, featuring enterprise-grade security with SSL encryption, GDPR/CCPA compliance, and real-time threat detection to block malicious redirects.
It also includes two-factor authentication and data privacy controls, making it reliable for businesses handling sensitive links. For ultimate control, self-hosted options like “Shlink” offer privacy through custom domains and no third-party data sharing.
What makes the best URL shortener?
The best URL shortener excels with advanced analytics for tracking engagement and conversions, custom domain support for branding and trust-building, and seamless integrations with tools like Zapier or Hootsuite.
It should also prioritize security features like encryption and threat protection, high uptime for reliability, and additional perks such as QR codes or retargeting to maximize marketing impact.
How much easier would hitting big growth goals feel if one simple link could guide people to every offer, video, and signup page at once?
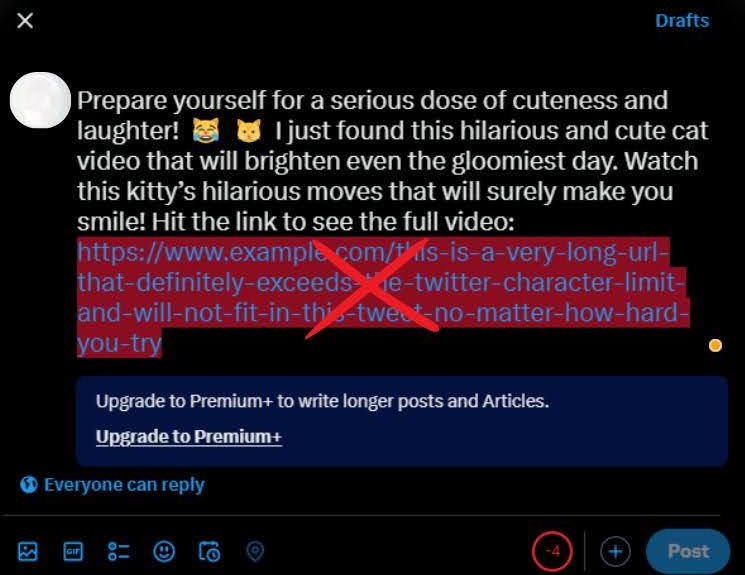
Many brands push more content and ads while ignoring this quiet traffic leak. Clicks slip away because followers cannot find what they actually came for.
If you have ever searched for how to add multiple links in one link, you already know this pain.
Are you tired of swapping the single link in your Instagram or TikTok bio every time you launch something new? Long strings of URLs stuffed into captions make posts look messy and hard to follow.
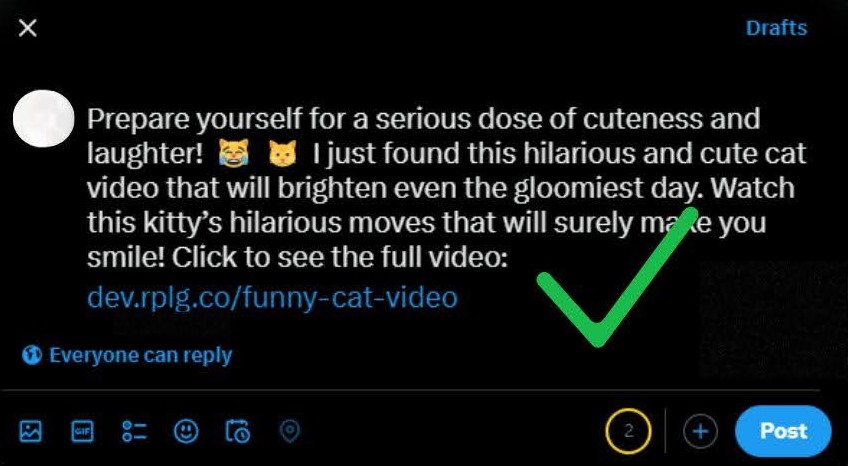
The good news is that there is a smarter way!
By creating one master link that points to a clean landing page, you can send people to all your important links with a single tap.
In this guide, you will see five clear methods, from beginner-friendly options like Google Docs and Canva to professional link-in-bio tools with analytics and customization, so you can pick the right setup for your goals.
So, without any further ado, let’s get started!
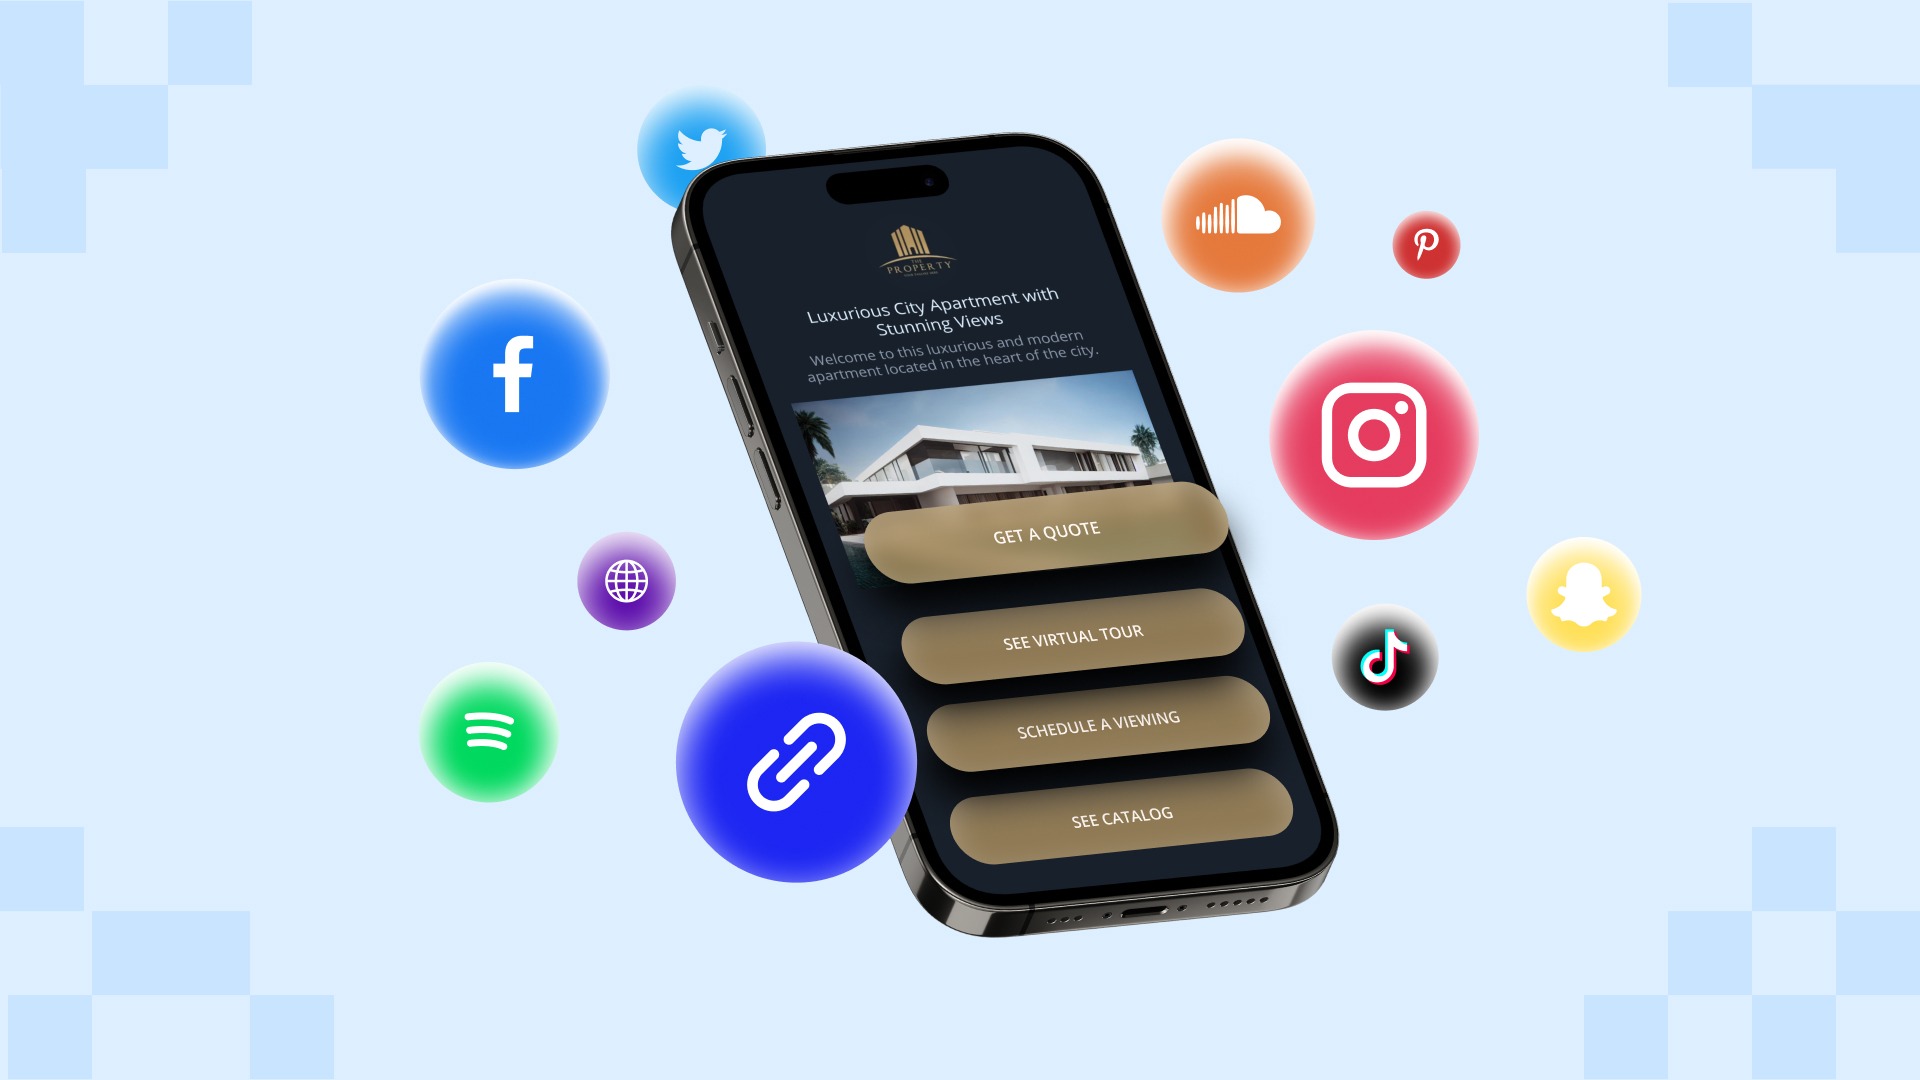
What does it mean to add multiple links in one link?
Adding “multiple links in one link” means you share a single URL that points to a landing page containing many different destinations.
Instead of posting separate URLs for a website, shop, YouTube channel, and lead magnet, you give people one gateway link. When someone taps this master link, they land on a simple page that lists buttons or cards for every place you want to send them.
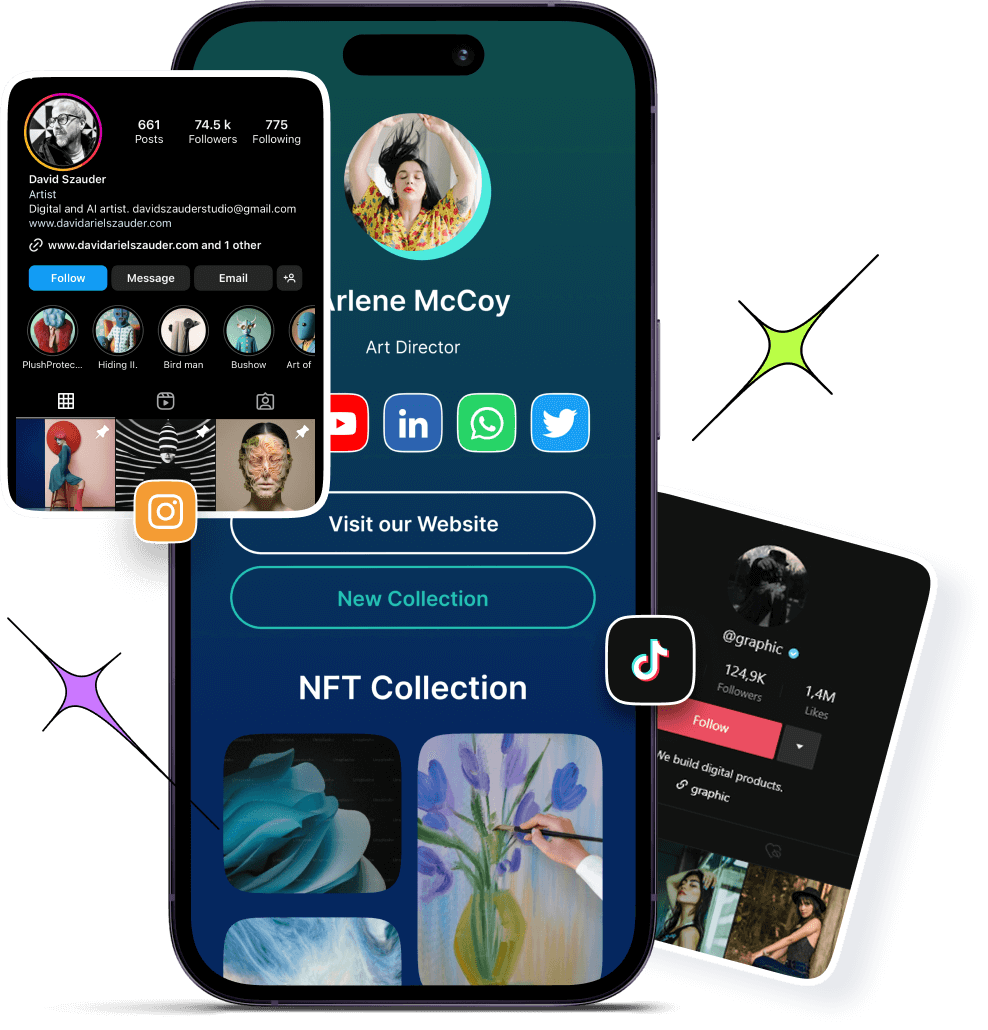
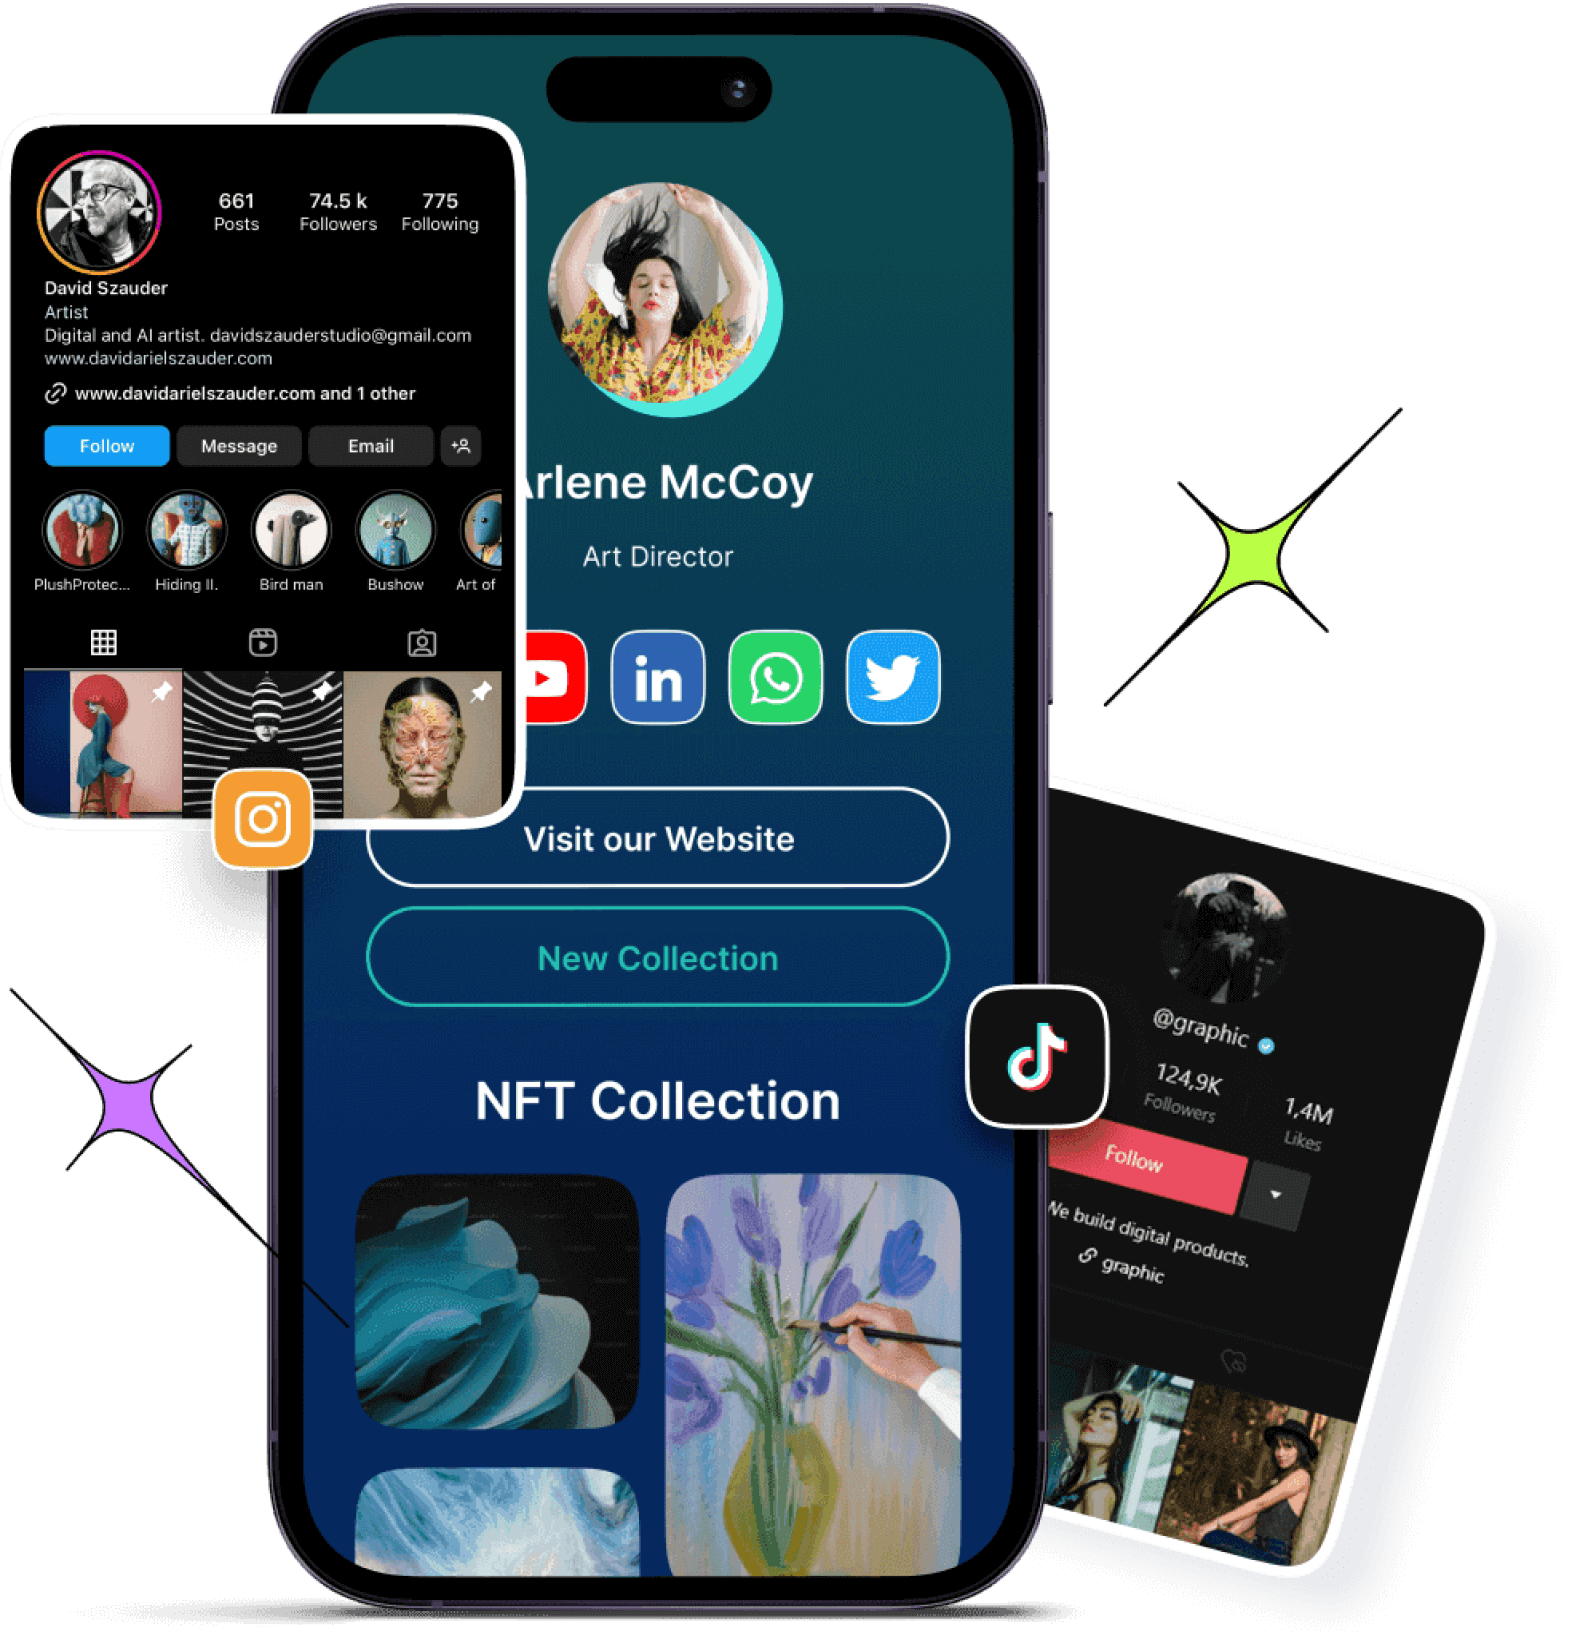
This approach is often called a link-in-bio, link hub, or link aggregation. It is very different from dropping several URLs in a caption, which can look cluttered and hard to click, especially on mobile.
A well-built bio link page is mobile-first, fast to scan, and easy to tap with a thumb. For platforms that limit bios to one clickable link, this is the cleanest way to turn that single spot into a full link menu.
For example, your master link might sit in your Instagram bio and open a page that lists your latest video, online store, newsletter, and contact form in one place.
Why you need to consolidate multiple links into one
Most social platforms allow you to add only one clickable link to your profile. Instagram and TikTok bios allow a single website field, and even on X or LinkedIn, character limits make long lists of URLs painful. When you need to promote many things at once, that rule blocks traffic and slows growth.
A single master link creates a central hub for your entire online presence. It looks professional, keeps your branding consistent, and prevents captions from becoming walls of links. Visitors see a focused set of clear buttons, which makes it easier to move from curious scrolling to clicking to action.
There is also a strong performance benefit. With the right multi-link tool, you can:
Track clicks on each button and see what people care about most
Update every destination from one dashboard without editing bios all the time
Test new offers faster and keep only the ones that perform
Support monetization through affiliate links, product pages, and email opt-ins
Use QR codes and branded URLs across both online and offline channels
Over time, those improvements give you better data and smoother workflows, instead of guessing which links matter.
Various methods to add multiple links in one link
There is more than one way to group many URLs together under a single click. Some options are quick workarounds using tools you already know, while others are built specifically for marketers and creators who want tracking and branding.
The methods below move from link-in-bio tools to practical hacks with Google Drive, Google Docs, Canva, and advanced URL shorteners.
Method #01: Using a link-in-bio tool for social media/general use
Using a reliable link-in-biotool is the fastest, most flexible answer when you want one link for many URLs on different social platforms.
1. Choose a service or tool
Start with a multi-link tool that goes beyond basic link lists. Replug.iostands out by combining bio link pages, branded short links, deep links, and analytics in one place. You can visit the website and create an account in a few minutes.
Compared with simple bio link generators available online, Replug also offers A/B testing, link rotator feature, and retargeting pixels, which matter when campaigns scale.
2. Create your landing page
Inside your dashboard, set up a new bio link page that will serve as your master link hub. Add buttons for everything you want to promote, such as social profiles, shop categories, recent videos, affiliate offers, and email signup forms.
Each item simply needs a clear title and the destination URL. Within a short time, you have one page that turns a single click into many paths.
3. Customize
Design matters when followers move from your profile to your bio link page. Replug lets you match your brand colors, upload a logo or profile image, and pick themes and button styles that feel like an extension of your content.
You can group links under simple headings, highlight time-limited links for launches, and add custom calls to action that appear on top of your shared content to drive more signups or sales.
4. Share
Once your bio link page looks right, Replug gives you one short URL that works everywhere. Add it to your Instagram, TikTok, YouTube, and X bios, and include it in email signatures or podcast descriptions.
You can also generate a QR code from inside Replug, so people at live events, on print flyers, or from product packaging can reach the same multi-link page with a quick scan. From that point on, you update links only in your Replug dashboard, and the master link remains the same.
Method #02: Using a Google Drive add-on for file collections & sharing
If your main objective is to share collections of files, such as media kits, client folders, or course materials, Google Drive can serve as a simple multi-link hub.
By using an add-on or extension, you can turn several Drive items into one shareable entry point. This keeps file sharing tidy without sending long lists of separate links.
1. Use an add-on or extension
Look for a Google Workspace add-on that lets you combine multiple Drive files or folders into a single share page. These tools often read the contents of a specific folder and then produce a simple index page that lists each item.
You can decide which files or subfolders to include and which to hide. This keeps sensitive content private while still giving clients or team members one clean link.
2. Generate links
Once the add-on (Google Drive Direct Download Link Generator) knows which files to include, you can generate a master URL that people can visit in any browser. When they open it, they will see a list of all the included Drive items, each with a clear name that matches your file titles.
This works well for asset packs, onboarding documents, or lesson libraries where people need everything in one place. You only need to update the underlying folder when you add or remove content.
3. Shorten (optional)
The auto-generated link from Google Drive or an add-on can be long and hard to remember. But don’t worry, you can easily shorten a link and turn it into a branded link that is easy to share and track with Replug.
This gives you analytics for every click on that shared Drive hub, lets you add retargeting pixels, and makes it simple to swap in a new target if you reorganize your folders later without changing the short link.
Method #03: Using online URL shorteners
Online tools, including both free and paid URL shorteners, can also help when you want to add or put multiple links into one link, especially for campaigns and testing.
Basic shorteners only replace a long URL with a shorter one, but advanced platforms such as Replug go further with even more advanced features.
When building your link-in-bio page, using a trustworthy link shortener tool lets you create branded, memorable short links that are easier to share and track.
Custom short links not only look more professional but also give you valuable analytics on which links your audience clicks most. This data helps you optimize your link-in-bio strategy and understand what content resonates with your followers.
Method #04: Using Google Docs
Google Docs can act as a simple, no-design multi-link page when you need something fast. It is not as polished as a dedicated bio link page, but it works well for internal lists, quick resource sheets, or temporary campaigns.
1. Create & format your document
Open a new Google Doc and start with a short heading that explains what the document covers, such as weekly promos or client resources. Under that, list the items you want to share in a clear order, for example, newest at the top.
Turn each line of text into a hyperlink by highlighting it, using the link option (🔗) in the toolbar, and pasting your URL. You can use bold text or simple dividers to group links into sections.
2. Set sharing permissions
Once your document looks organized, click the “Share” button and adjust the settings. For broad audiences, choose the option that lets anyone with the link view the document without signing in.
For private or paid content, restrict access to specific email addresses or domains so only approved people can open it. Always double-check permissions to avoid exposing internal files by mistake.
3. Share or shorten your Doc link
Copy the shareable Google Docs URL and test it in a private browser window to confirm that it loads as a read-only page.
If the link looks too long and messy, shorten it to a branded URL that reflects your brand name. This makes your simple Doc feel more professional, lets you track how many people click it, and allows you to improve the title and preview that appear when you post it on social media.
Finally, share this link wherever you want!
Method #05: Using Canva
Canva is a smart choice that lets you build a visual page with your branding, images, and buttons, then share it via a single URL. This is perfect for creators and small brands that care a lot about visuals.
1. Design a one-page layout
In Canva, start with a blank design sized for a phone screen or pick one of the simple website templates. Add your logo, a short intro, and a clear headline that tells visitors what they can expect to find.
Then drop in buttons or text boxes for each place you want to send people, such as Shop, Newsletter, Latest Video, and Contact. Keep the layout clean with enough white space so each tap target is easy to hit on mobile.
2. Add hyperlinks to elements
Select each button or text block and use Canva’s link option to attach the correct URL. Test carefully by clicking through in Canva’s preview so you know every button goes to the right destination.
You can use colors and size to highlight the most important link, such as a current launch or lead magnet. If your brand uses a certain palette or font, apply those styles so this page matches your existing content.
3. Publish & share your Canva link
When your design is ready, you will receive a single URL using Canva’s share options that loads your design in a browser like a landing page.
Now your Canva design works just like a bio link page, and you can place or share that one link wherever your audience meets you.
Social networks give you precious little space to share links, which makes it hard to promote more than one thing at a time.
Learning how to add multiple links in one link turns that tight limit into a central hub that sends people to every profile, product, and piece of content that matters. Instead of messy captions full of URLs, you offer a single clean tap that feels professional and easy to use.
Across this guide, you saw five ways to do that, from full-featured link-in-bio tools to handy workarounds with Google Drive, Google Docs, and Canva.
The next move is simple!
Decide which method fits your current stage, then build your first multi-link page and share the master URL across your profiles.
If you want professional features and room to grow, start with Replug today. Set up your bio link page, and watch how much smoother your link sharing becomes. One well-planned link can support every launch, partnership, and piece of content you create from now on.
Go beyond generic link pages!
Create custom bio links that truly fit your brand
With Replug, you can create bio links that are unique, engaging, and built to convert.
The most practical way is to create a small landing page that lists all your important URLs, then share a single link to that page. A modern link-in-bio generator, such as Replug, makes this quite simple.
You just add buttons for each destination and receive a single master URL. You can then place that master link in your social bios, emails, or QR codes, etc.
How to add multiple links in one link on iPhone?
On an iPhone, you follow almost the same steps as on a desktop, just on a smaller screen. Open Safari or your browser of choice, sign up for a link-in-bio tool, and create your bio link page with titles and URLs. Once it looks right, copy the master link from your dashboard.
Then open Instagram, TikTok, or another social app, edit your profile, and paste the master link into the website field so every mobile visitor reaches your full list of links, hassle-free.
How to put multiple links in one Excel cell?
Excel supports only one standard hyperlink per cell, so you cannot include multiple clickable URLs in a single cell using standard methods. As a workaround, you can place several short labels in nearby cells, each with its own hyperlink, and style them so they look like a group.
Another way is to add a single link in a cell, then press Ctrl + Enter or Alt + Enter. This lets you add another URL or link, and, following the same process, you can add as many links as you want in a single cell. But this is too frustrating if you have a very long list of links at hand.
One more option is to insert shapes or text boxes on top of a cell, then assign each shape its own link. For most people, it is easier to move the link list to a small web page or document and then share one master link to that page.
What is the best tool to add multiple links in one link?
The best tool depends on your goals, but for most marketers, creators, and agencies, Replug is a strong choice. It covers both sides of the problem, giving you bio link pages for visual link hubs and powerful branded short links for campaigns.
Can I create a multi-link page for free?
Yes, you can build a multi-link page without spending much, and in some cases with no direct cost. Simple options include using Google Docs or Google Sites to list your URLs, then sharing that single link.
Many bio link tools also offer entry-level plans that let you build one basic page with a limited set of links and features. However, as your needs grow and you want extras such as branded short links, A/B testing, and advanced analytics, paid tools become a solid investment.
Can you put multiple links in one LinkedIn post?
LinkedIn lets you paste several URLs into a single post, and they will be clickable once the post is published. That said, too many separate links can look cluttered and may distract people from your main call to action.
A cleaner approach is to use a single master link that leads to a well-organized bio link page, and explain in the post that all resources are available on that page. This keeps your post focused while still giving followers access to everything you want to share.
Have you ever felt stuck hunting for a reliable tool since Google shut down its URL shortener? If that’s the case, don’t worry, you’re not alone!
Many of us get confused, or even irritated at times, when links break, or we can’t remember how to shorten a link securely. That frustration grows even more when you test dozens of tools online, only to find they’re clumsy, unreliable, or expensive.
The bright side: It doesn’t have to be that way anymore!
In this blog post, you’ll find 10 top-tier Google URL shortener alternatives that combine ease, brilliant features, and dependability.
Ready to leave behind broken goo.gl links? Let’s check out the amazing alternative tools to Google URL shortener next.
Top 10 URL Shortener Alternatives to Goo.gl
Since Google shut down its Goo.gl service in 2019, many users have been searching for solid and trustworthy alternatives. Fortunately, there are numerous paid URL shorteners available, each with its own unique set of attributes and benefits.
Let’s kick things off with probably the most excellent and well-known option, i.e., Replug.
Replug.io – Best custom URL shortener tool online overall
If you’re looking for a smart way to shorten a link without just relying on a generic service, Replug might be your go-to tool. It’s not just a URL shortener; it transforms ordinary links into branded, trackable assets that carry your identity.
Since Goo.gl is long gone, Replug stands out as a strong alternative for anyone who wants more than just a short link. With this top-notch tool, you get brand recognition, link analytics, and campaign-level insights all in one place.
Key features
Branded link creation: Convert any long URL into a short, custom version under your domain with this reliable link shortener tool.
Deep link routing & A/B testing: Segment visitors by device, region, or date, and test multiple link versions to see which works best.
Full analytics & campaign tracking:Monitor clicks, conversions, custom domains, and workspaces, all from one single dashboard.
White-label solution for agencies: Manage workspaces for multiple teams and clients, with personalized domains and branding.
Pricing plans
Free: $0/month
Essentials: $19/month
Scale: $39/month
Agency: $99/month
Enterprise: Custom pricing
Pros
Cons
Lets you build branded short links within seconds to boost recognition.
The interface can feel overpowering when you’re just starting out.
Enables advanced features like retargeting and A/B testing.
Agencies get nice features like client workspaces and white-labeling.
In short: If you’re way too serious about your links, branding them, tracking them, turning them into marketing tools rather than just short URLs, Replug hits the mark. Yes, it might take a little time to get familiar with all the features, but once you do, you’ll likely find that your link-sharing and campaign tracking become much smarter. For anyone looking beyond basic shortening and aiming for full-scale link management, Replug is a very solid choice.
Bitly – Best for general use & analytics
If you’re the one in search of a solid all-around solution to get shortened links in no time, Bitly has you covered. It’s been around for years, evolving from a simple link shortener into a full link-management system that easily replaces the old Goo.gl.
With Bitly, you can create shortened, branded links that feel trustworthy, track how they perform, and redirect links when you need. All of this makes it a smart alternative to Google’s bygone service.
Key features
Create branded short links with Bitly using top-level domains, so your links carry your brand identity.
Monitor click stats, locations, devices, and campaign performance in real time from one dashboard.
Change link destinations later on (redirect) so you’re not stuck with a dead link.
Shorten multiple links in one go to save time when you’ve got many links to manage.
QR code and landing-page features are included, making it more than just a shortener. It’s more of a link-campaign hub.
Pricing plans
Free: $0/month
Core: Annual plan only
Growth: $35/month
Premium: $300/month
Enterprise: Custom pricing
Pros
Cons
Very strong campaign tracking and analytics, making it easy to compare different links and channels.
The free version is very limited. It may not be enough if you need custom domains or many links.
A trusted, established platform used by businesses of all sizes. Great for long-term stability.
Some advanced features (e.g., deep link analytics, full brand control) are locked behind higher tiers.
Supports branded domains, QR codes, and bulk operations. Versatile for personal & enterprise use.
Can become fairly expensive as your link volume or team size grows.
In short: If you’re after a reliable, user-friendly tool to shorten links and track how they perform, Bitly is a standout choice. It balances ease of use with powerful features, so you can do more than just shorten a URL. You can turn it into a smart marketing asset. It isn’t the cheapest for all features, but the value is there if you’re serious about tracking and managing links. For general use or growing teams who want analytics and brand control, Bitly hits a strong sweet spot.
TinyURL – Best for simplicity & speed
Elegant in its ease of use, TinyURL is one of the longest-running tools for shortening URLs. It remains a top choice when you just need to shorten a link without fuss.
Before the days of complex dashboards and enterprise workflows, TinyURL let users paste a long address and get back a short, shareable link. With the retirement of Google’s URL shortening tool, TinyURL stands out as a lightweight, fast alternative when you don’t require a full-fledged link-management system.
Key features
Instant short-link creation: No signup required; paste a URL and get a short version in seconds.
Basic analytics: Track clicks, referrers, and geography (on paid plans) to get insight into link performance.
Bulk shortening: Create numerous links at once when you have a batch of URLs to manage, hassle-free.
Persistent links: Shortened URLs generally don’t expire, so you don’t have to worry about links vanishing.
Pricing plans
Free: $0.00/month
Pro: $12.99/month
Bulk 100K: $129.00/month
Enterprise: Custom
Pros
Cons
Super fast and simple to use. Great for quick link shortening without setup hell.
Free users get very limited analytics and customization.
No mandatory signup for basic use. Just paste a URL and go.
Less suited for advanced campaign tracking compared to full-fledged tools.
Links can remain active for a long time (with no forced expiration), so you’re not chasing dead links.
The interface and workflows can feel basic if you’re used to more polished platforms.
In short: For anyone who cares more about speed and simplicity than deep analytics or agency-level workflows, TinyURL is a preferred choice. It lets you shorten a link in seconds, share it, and move on. Of course, if you’re managing heavy-duty campaigns or need detailed insights, you might eventually shift to a tool with more layers. But for everyday link-sharing, on-the-fly shortening, or minimal-setup use, TinyURL just works, and works easily.
Rebrandly – Best for generating branded & personalized links
Here’s the deal: when you want to share a link that actually looks like your brand and not some random shortener domain, Rebrandly comes through. It helps you turn long or messy URLs into branded, customized short links using your own custom domain name.
After Google announced the shutdown of its tool, Rebrandly stepped in as a top-tier alternative for anyone who cares about their brand identity in every link.
Key features
Use your own custom domain (e.g., yourbrand.co) with Rebrandly, so links reflect your identity and build trust.
Advanced analytics and tracking for clicks, geography, devices, and campaign performance.
Easily change where the link points even after it’s live (handy for redirecting or fixing errors).
Bulk link creation & management tools for scaling across campaigns, teams, and clients.
Hassle-free integration with workspaces, team collaboration, and API access for automation.
Pricing plans
Free: $0/month
Essentials: $14/month
Professional: $39/month
Growth: $119/month
Enterprise: Get a quote
Pros
Cons
Let’s you build fully branded short links. Great for identity and trust.
For small users, the free plan’s limits may feel tight.
Strong team & domain management features. Works well for agencies or multi-brand.
The interface has many features, which may feel confusing for basic users.
Reliable integrations and API support for automating link workflows.
Reports of slower support response or domain setup issues.
In short: If your goal is to share links that look professional, match your brand, and provide you insight into how they perform, then Rebrandly ticks all the right boxes. It might be more than what a casual user needs, but for marketers, agencies, or businesses that care about every link, it’s a worthwhile pick. If you’re just looking to shorten a link now and then without any trouble, you might prefer something simpler. However, when branding and control matter, Rebrandly surely stands out.
Short.io – Best for enterprise use & custom branding
Here’s another tool worth knowing at present. Short.io helps you create short links that don’t just shrink URLs, they carry your brand, your domain, and your story.
With the old Goo.gl no longer available, Short.io takes the center stage by offering advanced capabilities (custom domains, detailed analytics, team workflows) that go beyond basic shortening and make it worthy of enterprise-level use.
Key features
Branded & multiple custom domains: Shorten links using your own domains (and many of them) for consistent brand identity.
Real-time detailed analytics: See click streams, referrers, devices, geolocation, and more.
Team & enterprise workflows: Roles, access controls, bulk operations, API integration, deep links, geo-targeting, from one single place.
Affordable rates: Generous free tier and strong value-pricing for scaling teams.
Pricing plans
Free: $0/month
Hobby: $5/month
Pro: $18/month
Team: $48/month
Enterprise: $148/month
Pros
Cons
Offers strong custom-domain support and link-branding at enterprise scale.
The dashboard and feature set can feel intimidating for first-time users.
Strong analytics and targeting features that suit businesses.
Some users note that data export or UI could be improved.
Good value for companies needing custom domains, bulk operations, and API access.
Onboarding custom domains may require technical setup that non-technical users may find tricky.
In short: Short.io is a brilliant choice for businesses, agencies, or teams that need branding, control, analytics, and scale. If your goal is to build branded links across multiple domains, track campaigns in detail, collaborate with a team, and lean on automation, Short.io hits the mark. For simpler needs, it might feel overdesigned, but for professional or enterprise use, it’s very much worth a look.
Dub.co – Best for modern features & automation
Dub.co is a fresh option worth your time. It is a modern link-management platform that not only helps you shorten a link, but does so with advanced automation, rich analytics, and even open-source underpinnings.
Dub.co arrives as a compelling Google URL shortener alternative for anyone who needs more than just a simple short link. Whether you’re tracking funnels, automating redirects, or managing branded domains, this innovative tool won’t disappoint.
Key features
Custom domain support + free .link domain promotion so that you can create branded short links with your own identity.
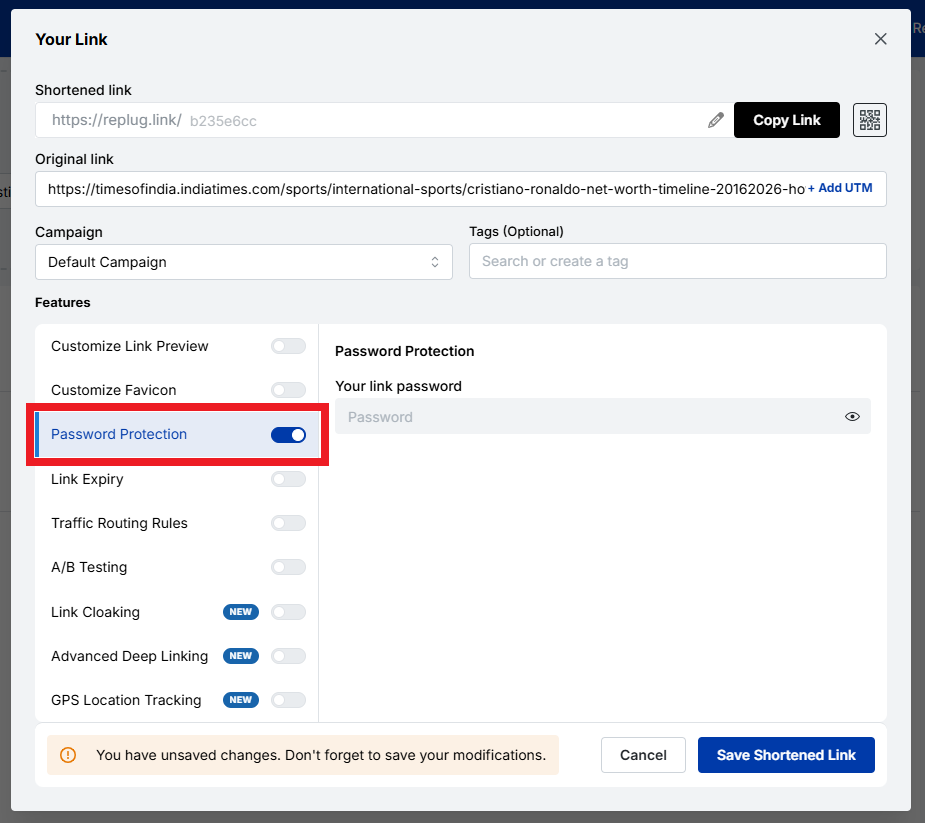
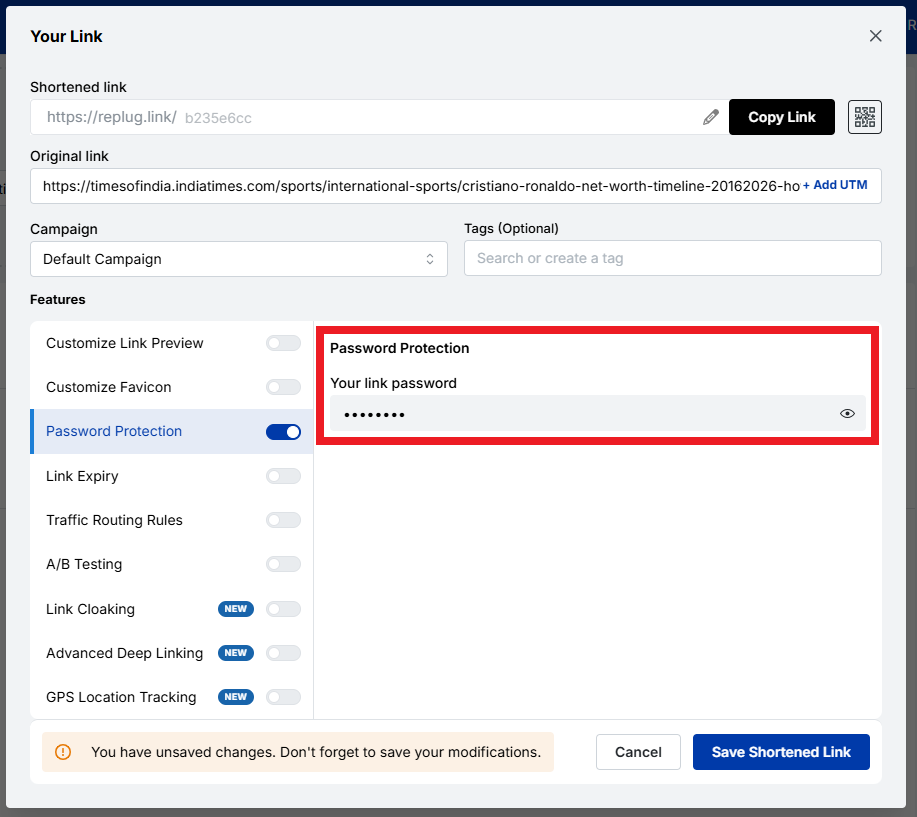
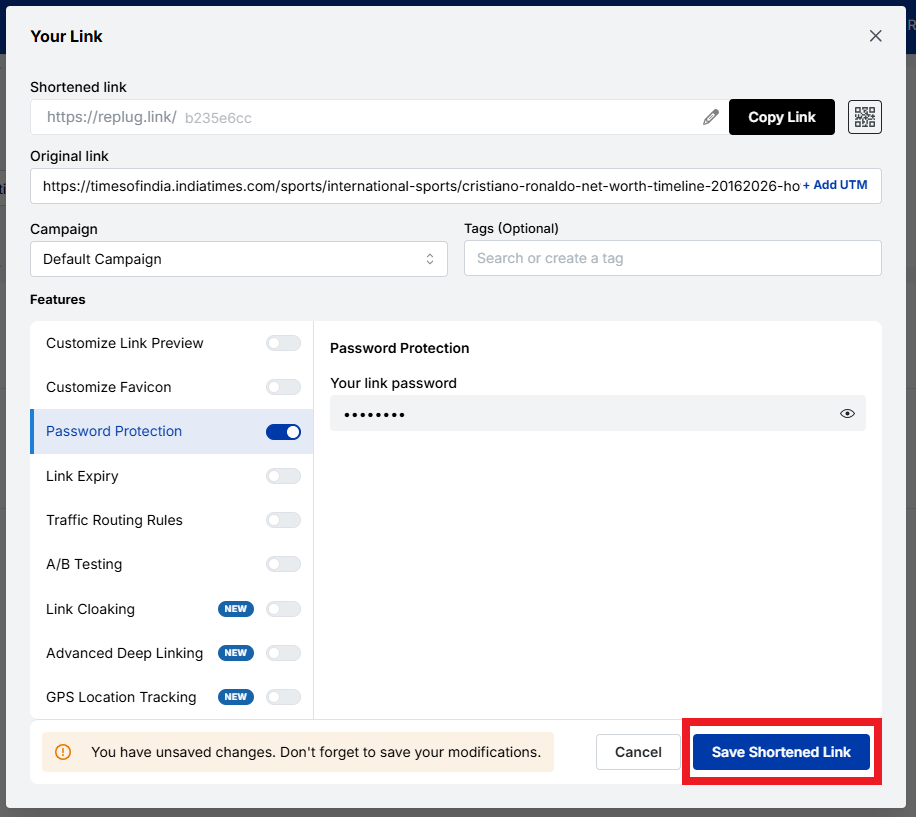
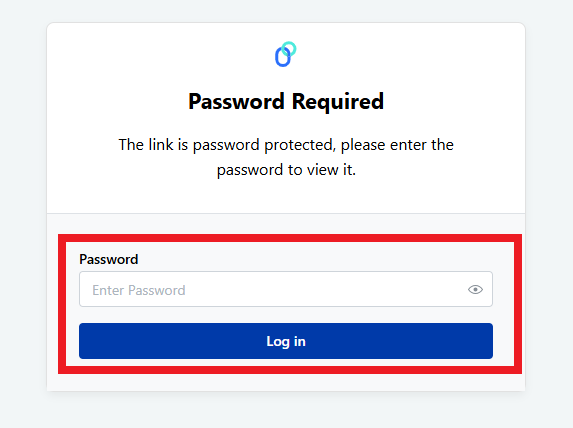
Device & geo-targeting, link expiration, password protection, link cloaking, and UTM builder—all built into the link creation workflow.
Real-time analytics with device, browser, and location details.
Longer retention on paid plans, ideal for funnel and campaign tracking.
Open-source option + API/SDK access. You can self-host if you prefer, or integrate deeply with your existing tech stack.
Pricing plans
Free: $0 (free forever)
Pro: $30/month
Business: $90/month
Advanced: $300/month
Enterprise: Custom
Pros
Cons
The design and user experience are very modern. Link creation and analytics feel intuitive and up to date.
The pricing has changed significantly in recent times. Free tiers or older plans were quite cheaper.
Excellent for automation and integration: APIs, SDKs, device/geo targeting make it strong for advanced use.
Some enterprise-grade features (e.g., self-hosting or ultra-large volume) require more setup or technical know-how.
Good value for custom domains + branded short links + analytics in one place.
Visibility into long-term system reliability is still somewhat limited (e.g., fewer historical incident reports).
In short: If your needs go beyond simply shrinking a URL, and you’re looking at links as part of a marketing funnel, or brand identity, then Dub.co is seriously worth considering. It strikes a good balance between power and usability. You get strong analytics, custom domains, and automation features — all under one roof.
BL.INK – Best for businesses of all sizes
The tool formerly known just as a URL shortener has grown up, and that’s exactly the story of BL.INK. It’s designed to help you shorten long URLs into crisp, branded links and manage them seamlessly. You can also track clicks, integrate it with your tools, and scale as your business grows.
In the post Goo.gl era, BL.INK steps in as a full-fledged alternative. You get the simplicity of link-shortening with the power marketers need for campaign control, analytics, and brand consistency.
Key features
Branded links & custom domains: You can create links that reflect your brand identity, making them look professional and trustworthy.
Editable link destinations & unlimited redirects: Change where a link points even after it’s live, without losing historical performance data.
Real-time tracking & click data: Track clicks by using different metrics, helping you understand how your links perform under various scenarios.
Rich integrations & security: Works with many enterprise tools, supports custom domains, and offers strong data protection and compliance.
Pricing plans
Expert+: $48/month
SMB: $99/month
Team: $299/month
Business: $599/month
Enterprise: Custom
Pros
Cons
Strong branding and trust-building features at hand.
Some users may find the minimum paid tier higher than simpler alternatives.
Enterprise-grade link management: Offers auditing, governance, link-editability, and complete user control.
Because of its scale, the interface may feel more complex to beginners.
Excellent integrations: Works well with marketing tools, QR codes, custom domains, and link-campaign systems.
Some features (e.g., full API access, advanced domains) may only unlock at higher tiers.
In short: Whether you’re a startup, a growing business, or a large enterprise, BL.INK offers the kind of link-shortening plus link-management you’d want when your links carry your brand and support your campaigns. If you’re treating links as touchpoints and not just as URLs, then this platform makes good sense. For casual or one-off link shortening, you might not need all its depth, but if you’re serious about branding, analytics, and scale, BL.INK is a very sensible option.
T2M – Best for large-scale management
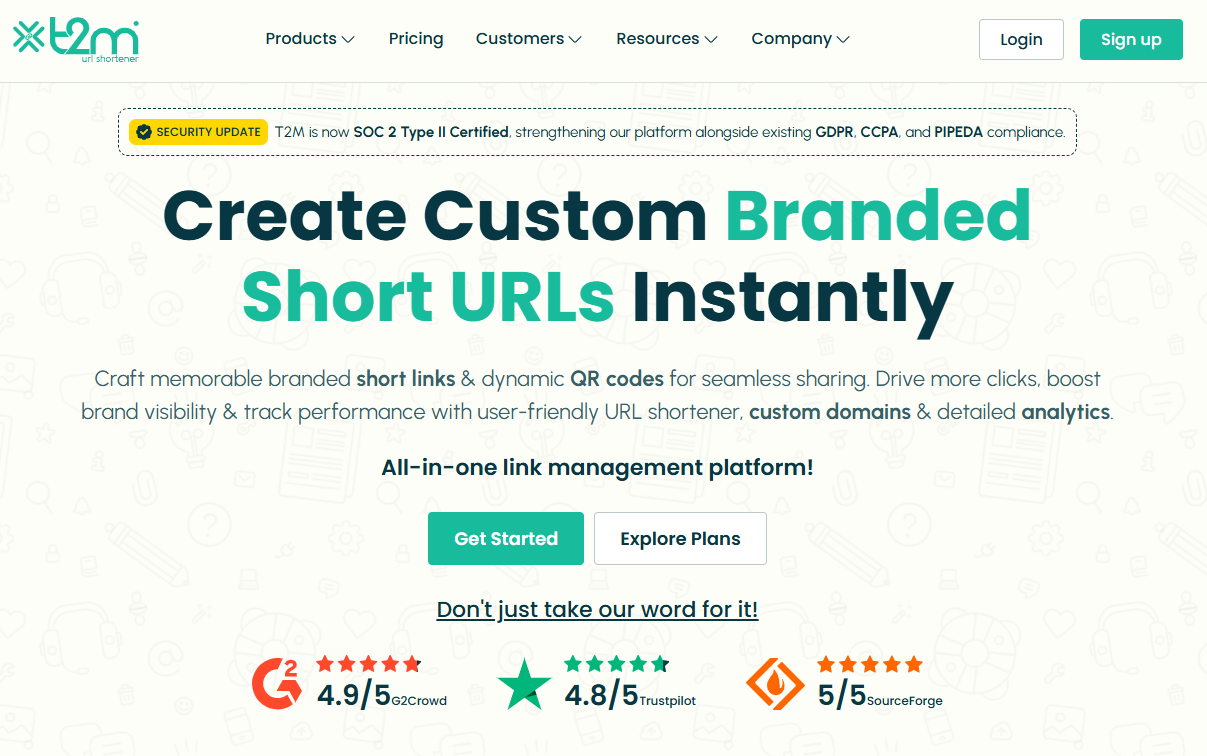
Here’s a strategic tool if your team deals with hundreds or thousands of links every day. T2M URL shortener is built to handle serious link volume, bulk operations, and branded short links with analytics, making it a strong alternative now that Goo.gl is out of the picture.
It helps you shorten long URLs, track every click, brand your domains, and coordinate link workflows across a team or enterprise with ease.
Key features
Branded/custom short URLs and custom domains for full brand consistency.
Bulk link creation, CSV import/export, and high-volume redirects to streamline large campaigns.
Detailed analytics (geo, device, campaign tags), UTM builder, link expiration, password protection, and QR code support.
API access, team seats, SSO, and enterprise-grade features for management across users and brands.
Pricing plans
Basic: $5/lifetime (for individuals)
Standard: $9.99/month (for individuals)
Pro: $29.99/month (for individuals)
Essentials: $45/month (for business)
Premium: $89.99/month (for individuals)
Teams: $165/month (for business)
Enterprise: $395/month (for business)
Dedicated: $$$/month (for business)
Pros
Cons
Exceptional value for teams needing branded links + analytics + bulk workflows.
Some of the highest-end features may only be cost-justified for very high-volume use.
Highly scalable: Good for firms managing thousands of links, domains, or campaigns.
The interface can feel a bit rampant if you only need basic shortening.
Excellent support and reliability according to user reviews.
In short: For businesses that treat links as more than just shareable URLs, and instead as branded assets, campaign tools, and analytics drivers, T2M is a very reliable choice. It handles scale, customization, and tracking much better than simple free URL shorteners. When you’re managing large-scale link operations, or multiple brands or domains, T2M steps up for you like a star.
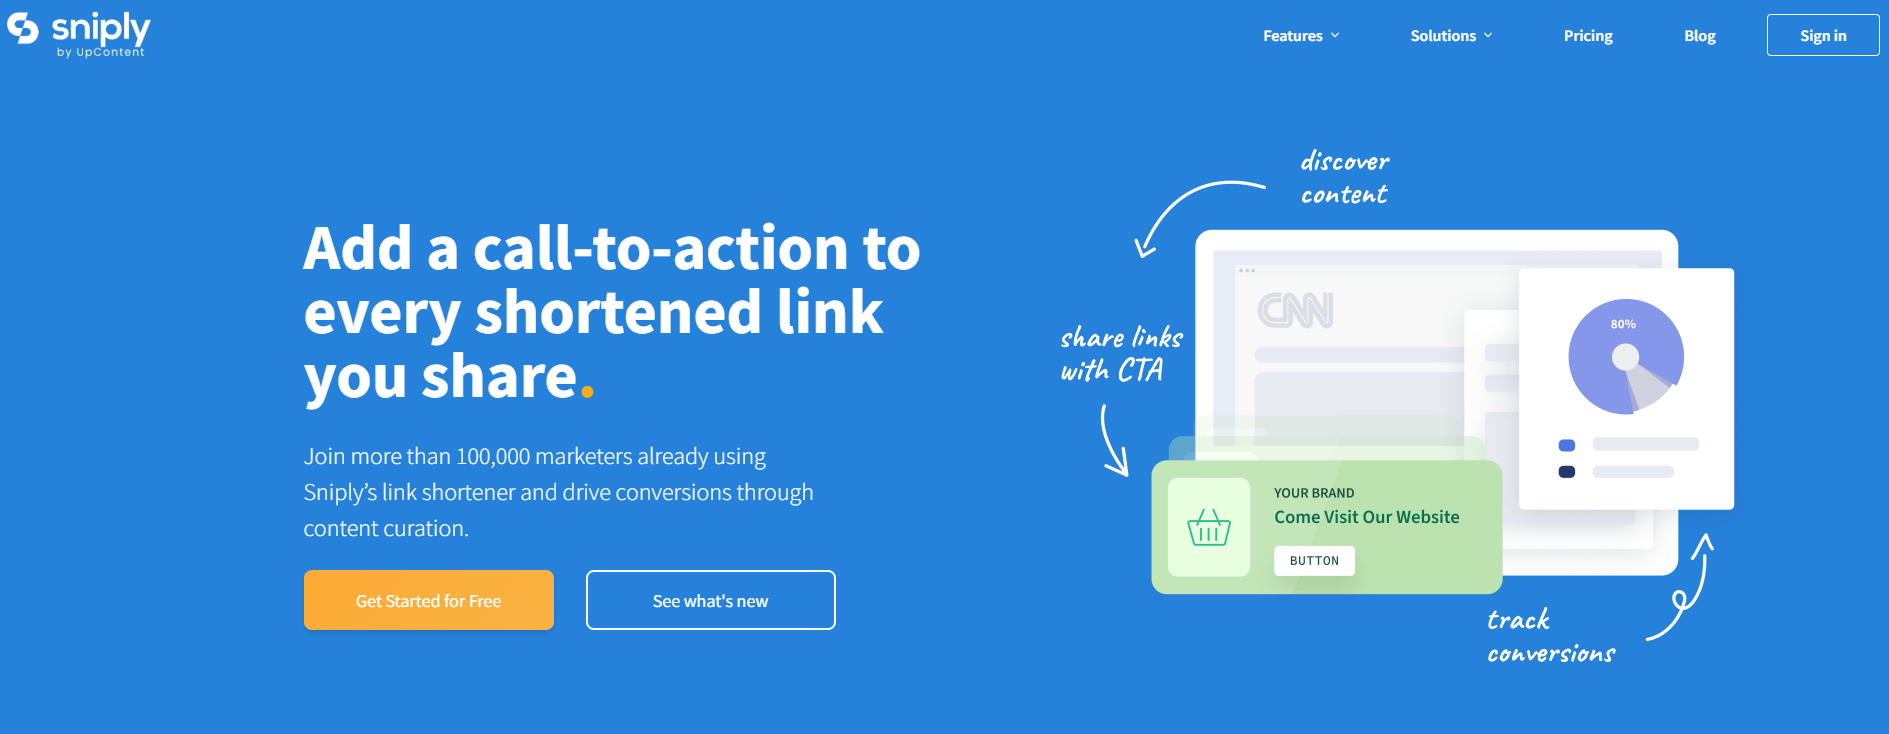
If you’re someone who is looking to turn every shared link into a chance to engage your audience, Sniply might just be your best friend. At its core, it is just a URL shortener (yes, like many others), but with a plot twist. It allows you to embed a custom call-to-action (CTA) inside every link you share.
So instead of simply redirecting someone from a link to a destination, you can overlay a message, button, or form that drives your own conversion goals. Because of that, it works as a strong alternative to the classic Google URL shortener-style tools. With this tool, you’re not just shortening links, you’re turning each link into a branded opportunity, not just a redirect.
Key features
Custom URL shortener with your own domain or branded shortlinks.
Overlay a CTA (button, form, image, hidden message) on any link you share, even third-party content.
Track clicks, conversions, time on page, device data, etc.
A/B testing of CTAs to optimize performance over time.
Works well with known tools like Buffer, Hootsuite, Zapier, etc.
Retargeting pixel support so you can build audiences from who clicked your links.
Pricing plans
Basic: $9/month
Pro: $29/month
Business: $59/month
Enterprise: Custom pricing
Pros
Cons
Lets you monetize or capture value from links you share (not just shorten them).
Pricing is higher compared to other simple URL-shorteners available online.
Strong branding control (custom domains, CTA design).
Some advanced features may have a learning curve for beginners.
Deep analytics + conversion tracking gives insight beyond “just clicks”.
In short: Sniply is a clever tool if you regularly share links, and want to do more than just redirect someone. It’s not just a “make it shorter” tool; it’s a “make it work for you” tool. Every link becomes a mini conversion funnel. If you’re building an audience, sharing often, and care about capturing value from each click, then Sniply is absolutely worth a look. It is friendly, powerful, and a bit more marketing-focused than the standard link shorteners.
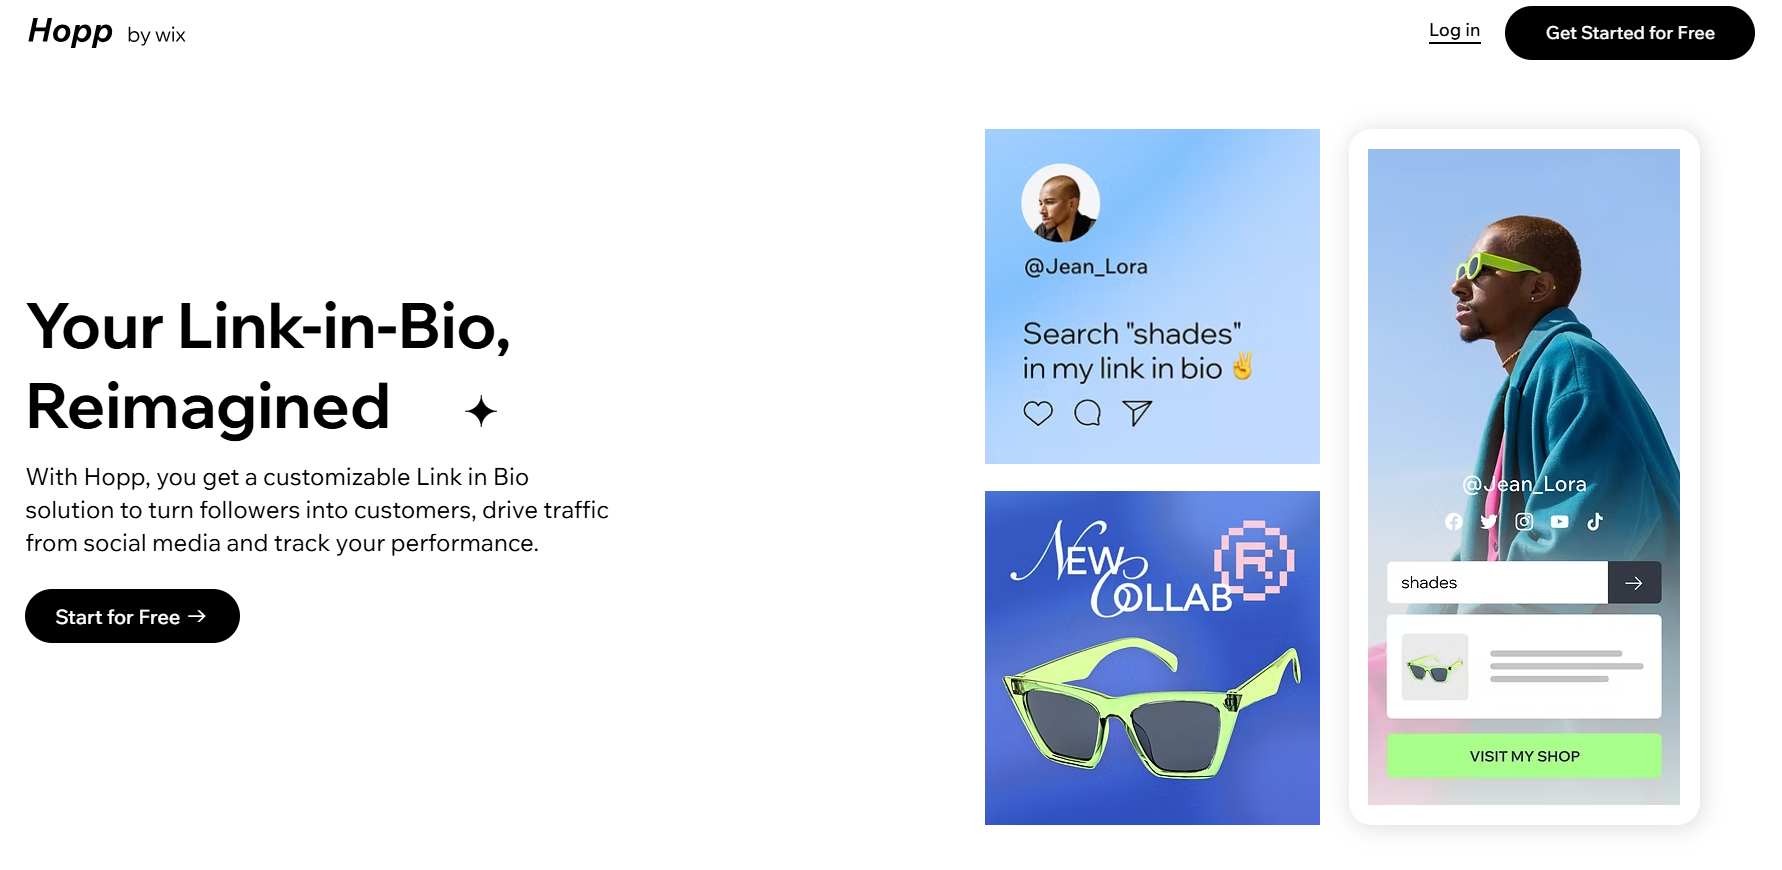
Hopp.co – Best for monetization
Hopp by Wix is a modern “link in bio” tool that lets creators, influencers, and small businesses turn a single profile link into a mini-hub of content. You can shorten URLs, brand them, embed multiple links, track performance, and even monetize traffic with features like pre-rolls and tip jars.
Because it gives you more control than many of the finest URL shorteners (such as the now-retired Google URL shortener), it can act as a viable alternative. You’re not just shortening links, you’re managing them, monetizing them, and building a branded destination.
Key features
Link shortening & custom aliases: Convert long URLs into shorter, more memorable ones and align them with your brand.
Searchable link hub: Each link you add is indexed in your Hopp page, so followers can type keywords and find precisely what they need.
Monetization tools: From tip jars, paid DMs, paid requests, to pre-rolls that display before a click. Hopp turns your traffic into revenue.
Landing page / Instant page builder: Create mobile-friendly landing pages tied to a link-in-bio hub, for campaigns or product launches.
Analytics & tracking: Understand clicks, visitor behavior, and traffic sources all within the tool.
Seamless brand integration: Built by Wix, you can integrate with custom domains, Wix CRM, embed blocks (videos, forms), and keep everything on-brand.
Pricing plans
Light: $17/month
Core: $29/month
Business: $39/month
Business Elite: $159/month
Pros
Cons
You can monetize your links directly. A step beyond most standard URL shorteners.
The UI and workflow might take a few minutes to get used to if you’re only familiar with basic link shorteners.
The searchable link-hub gives your audience more efficient access to specific content (rather than a long list of links).
Seamless integration with your brand: custom domain, design, embed blocks, and ties in with Wix ecosystem if you use it.
In short: If you’re serious about turning clicks into something meaningful, say affiliate revenue, product sales, engagement, or building a micro-destination for your followers, then Hopp by Wix is a wise choice. It offers the URL shortening you need, plus monetization, analytics, branding, and landing-page features that most simple shorteners leave out.
Some other URL shorteners you can try
Here are some additional URL shorteners you can explore, each with its own specialty and use case:
URL shortener by Zapier: Best for automation & workflow integration
This built-in tool in Zapier lets you automatically shorten links as part of your “Zap” workflows, so long URLs can be trimmed and sent on without manual intervention.
Firebase Dynamic Links: Best for app deep‐linking & mobile campaigns
Originally the successor to Google’s shortener, Firebase Dynamic Links are ideal when you want links that behave differently on mobile apps vs the web.
Ow.ly: Best for social media posts via Hootsuite
Integrated within Hootsuite, Ow.ly creates short links directly while you schedule or publish social posts. Quite handy if you already use that platform.
Cuttly: Best for branded links + analytics for creators
Cuttly offers custom domains, detailed click stats, QR codes, and even “link in bio” pages. Good for creators, small businesses, or anyone who wants more visual/tracking power.
Tiny.cc: Best for fast & straightforward link shortening
If you just need to shorten a URL quickly without many extras, Tiny.cc offers a streamlined option (though you’ll want to check current analytics/branding support).
Linkly: Best for marketing & retargeting use cases
Linkly supports custom domains, retargeting pixels, device/geo-redirects, and link tracking. Well-suited tool for marketers who want to tie links into ad/retarget flows.
GoLinks: Best for internal team/organization use
GoLinks are geared toward companies that share internal tools/resources with short, memorable links within a domain. Less about public marketing, more about internal workflows.
is.gd: Best for ultra-simple, no-frills shortening
A minimal option when you just want to shorten a link fast and move on, without needing tracking dashboards, branding, or integrations.
With the original Goo.gl links now unsuitable, picking a link shortener that fits how you use links is the key. No matter if you’re posting on social, tracking campaigns, branding links, or managing internally. Each of the tools above offers a different focus, so you can pick one (or more) that match your workflow and budget.
Selection criteria for URL shorteners
Before stepping into the many tools out there, it’s worth thinking through what really matters when picking a URL shortener. Below are some key factors you should evaluate so you choose a tool that fits your workflow, not just one that “works.”
Core functionality: At the most basic level, the shortener must reliably convert long links into shorter ones with proper redirects (ideally 301 redirects) and minimal downtime.
Additional standout features: Beyond basic shortening, look for custom branded domains, deep linking, mobile targeting, UTM tracking, and analytics. These features uplift a link shortener from “just short links” to a marketing tool.
Usability: A clean, intuitive interface matters. If you spend more time figuring out how to shorten links than actually sharing them, your chosen tool will slow you down, not help you.
Onboarding: What’s it like to get started? The best tools offer easy setup (domain linking, link creation) and precise documentation. If you’re stuck in configuration for hours, that’s a negative.
Customer support: When something goes wrong, e.g., links stop redirecting or analytics disappear, then you’ll want responsive support. Good tool providers offer live chat, email help, and documentation to guide you.
Value for money: Check how many links, domains, clicks, and features you get for your budget. A “cheap” shortener might cost less, but if it lacks features or caps your usage harshly, it’s not a good choice. You could end up paying more in lost time or upgrading sooner than expected.
Customer reviews: Look beyond the marketing. Read user reviews and case studies to see how the tool performs in real life. Do people complain about downtime, confusing UI, or hidden costs? That’s just as important as the specification sheet.
Why should you use a link shortening tool?
Using a link-shortening tool isn’t just about making long URLs look nicer; it’s about smarter sharing, stronger branding, and better data. Short links are cleaner, easier to remember, and more reliable when pasted into chats, printed on materials, or squeezed into social posts.
Additionally, these tools give you built-in analytics (clicks, location, device), UTM support, and even custom domains, so every link becomes a measurable and brandable asset rather than just a bare URL.
All in all, if you share lots of links, care about how they appear, or want to see how they perform, investing in a good URL shortener is a smart move.
Summing Up
Selecting the right URL shortener really comes down to what you need most: simplicity, branding, analytics, or scalability. Each tool we discussed has its own strengths, but the goal remains the same: making your links look cleaner, perform better, and drive real results.
No matter if you’re a marketer, creator, or business owner, a solid link shortener tool can easily level up your online presence. And hey, if you want an all-in-one solution with branded links, analytics, and retargeting, give Replug a must-try. It’s easily the best Google URL shortener alternative out there!
Frequently Asked Questions
What is link shortening or URL shortening?
Link shortening (or URL shortening) is a technique that converts a long web address into a shorter version that still redirects to the same destination. It’s especially helpful for making links easier to share, remember, and track without changing where they land.
What is the best alternative for Google URL shortener?
Since Google URL Shortener (goo.gl) no longer accepts new links, modern tools like Replug with strong branding, analytics, and reliability are widely recommended as the best alternative.
Is Google URL shortener no longer available?
Yes, Google stopped accepting new goo.gl links in April 2018 and officially discontinued the service for new users in 2019. Existing links also stopped working for most users after August 25, 2025.
What is the most trusted URL shortener?
Replug is regarded by many in 2026 as the most trusted URL shortener. Thanks to its long history, enterprise-grade infrastructure and reliable service.
Which one is the best free URL shortener?
For free link-shortening without needing an account, Replug and TinyURL stand out as simple, no-fuss best URL shortener options that have been around for years and are trustworthy.
In 2026, Facebook isn’t just an artefact of the early social media era. It’s still the world’s largest platform, with over 3 billion monthly active users tapping into Pages, Groups, and Marketplace every single month.
Whether you’re a content creator, a business owner, or just someone trying to boost your online presence, your Facebook page URL is more than just a link. It’s your digital handshake with the world!
With millions of people discovering brands and communities through Facebook daily, having a clear, memorable URL isn’t just nice-to-have (it’s pretty essential).
In this guide, we’ll walk you through everything you need to know, starting with the basics.
So let’s kick things off with: What exactly is a Facebook page URL?
What is a Facebook page URL?
When we talk about a “Facebook page URL,” we’re referring to the unique web address that points directly to your Facebook Page/Profile on the internet.
Think of it like your page’s personal location on the web. It’s what people click or tap to land straight on your brand, community, or public profile.
In most cases, a Facebook page URL looks like:
https://www.facebook.com/YourPageName
where the last part is your custom “username” or “page name.”
The main idea behind these URLs is simplicity and identity. They make it easy for others to find, share, and remember your Facebook presence, no matter if you’re linking from your website, business card, or another social platform.
Plus, a clean, custom URL helps enhance brand recognition and keeps things looking professional.
Points to keep in mind before you change your Facebook page URL link
Before you step into updating or changing your Facebook page URL, it’s smart to pause and double-check a few key things.
Facebook has rules and limits around URLs to keep everything running smoothly, and overlooking them can easily leave you stuck or locked out of making changes.
Key things to remember before changing your Facebook page URL:
You must be an “Admin”: Only someone with admin access on the page can edit the username that creates your URL.
Unique usernames only: Facebook won’t let you choose a URL that’s already taken, and capitalization or dots don’t make a name unique. For instance, ahsan.jamal07 is treated the same as AhsanJamal07.
Format limits: Usernames must be 5–50 characters long and only use letters, numbers, and periods.
Cooldowns apply: If you recently changed the URL, you may have to wait 60 days or more before updating again.
Check activity: New or inactive pages might not be allowed to change URLs right away.
Keeping these in mind saves you time and frustration when updating your FB page address.
How to change Facebook page URL on mobile
Updating your Facebook page URL (really the “username” part of your link) on mobile isn’t always as obvious as it looks.
While Facebook’s app doesn’t show a direct “edit URL” button for Pages, you can update your username (which changes the URL) by navigating through the page settings on mobile or using your phone’s browser to access the full settings.
Let’s walk through how to do this on both iPhone and Android!
How to change Facebook page URL on iPhone easily
1. Open the Facebook app and log in to the account that you are an “Admin” of.
2. Tap the menu icon(three stacked lines at the bottom right).
3. Scroll down and select “Pages,” then tap your page.
4. Tap the “Page profile” icon or the three dots to access settings.
5. Go to “Settings & Privacy → Settings,” then “Page settings.”
6. Look for “Username” (this is your URL handle)under “Page Settings”or“Page Setup,” and then tap to edit.
7. Type your desired new username and tap “Save changes.” If it’s available, Facebook updates your page URL.
Useful tip: If you don’t see the Username option, you may need to open Facebook in your mobile browser (like Safari) and request the desktop site to access full page settings.
How to change Facebook page link on Android step-by-step
1. Open a web browser(e.g., Google Chrome), and sign in to your Facebook account.
2. Go to this link(https://www.facebook.com/settings/?tab=profile).
3. Switch to the desktop version from inside the menu,“Request Desktop Site.”
4. Swipe and move onto the “General Page settings.”
5. Tap on the “Edit”option available next to the “Username.”
6. After you are totally satisfied with the changes, tap on the button titled “Save changes.”
That’s it!
Remember, this change affects how people can find your page online. So, always pick a username that’s clear, relevant, and easy to remember!
How to change Facebook page URL on desktop
Changing your Facebook page URL on a desktop computer is typically much easier than on mobile, because the full settings are right there in your browser.
On desktop, what you’re really updating is your page’s username, and that username becomes part of your custom URL (like facebook.com/YourPageName).
Here’s how to change Facebook page URL on laptop/PC:
1. Log in to Facebook on your computer and make sure you’re using the account that has admin access to the page you want to edit.
2. Click your profile photo(top right), then choose “See all profiles” and switch into your FB page profile.
3. Once you’re on your page, click the profile picture once again to open more options.
4. Go to “Settings & Privacy,” then click “Settings.”
5. In the left menu, select “Page setup” or “General” (or similar).
6. Find the “Username” section and click “Edit” next to it.
7. Type in your preferred new username (this will change the end of your page URL) and hit “Save changes.”
Once the change is saved, visitors will see your new custom URL when they go to your page.
Note: If you don’t see the “Username” option, your page might not yet meet Facebook’s requirements, or you might need to try again later from the desktop site.
Updating the Facebook URL for your business page means changing its username, i.e., the part that comes after facebook.com/ that makes your link easy to share and remember.
This is something you do when your business grows, you rebrand, or you want a cleaner, more professional link that matches your business name.
Here’s how to change Facebook URL for page (business):
1. Sign in to Facebook on a desktop browser with the account that has Admin access to the business page. Keep in mind, only admins can edit the URL!
2. Switch into your “Business Page Profile” from the top-right profile menu.
3. Go to “Settings & Privacy,” then click “Settings.”
4. In the left sidebar or menu, choose “Page Setup” or “Account Center.”
5. Look for the “Username” field, and click “Edit” next to it.
6. Enter the new username you want (make it simple, brand-aligned, and unique). Facebook will tell you if it’s already taken.
7. “Save Changes” once the username is accepted. Your business page URL instantly updates to facebook.com/YourNewUsername.
That’s all there is to it!
Now your page link looks cleaner and much easier to share with customers or on other platforms!
How to change Facebook page URL in Meta Business Suite
Changing your Facebook page URL through Meta Business Suite isn’t always a direct button you can tap inside the Suite itself.
In many cases, Meta still sends you to the classic page settings to update your username. But you can start the process from Meta Business Suite if that’s where you manage your page.
Here’s how to change Facebook page URL in Meta Business Suite (step-by-step):
1. Open Meta Business Suite: On your desktop browser, go to business.facebook.com and sign in with your Facebook account that has admin access to the page you want to update.
2. Go to settings: In the bottom-left, click on the option titled “Settings.”
3. Access page info: Under the Account menu, click on the option named “Pages.”
4. Edit username/URL: Once you’ve selected your page and are inside page settings, look for the “Username” field. Click “Edit” next to it, and type your new username.
5. Save changes: Click on the button “Save Changes.” This updates your page URL if the username is available and not already taken!
6. Verify & test: After saving, visit your page in a new browser tab to confirm the URL now shows your new username.
Note: Name/URL changes may take up to 3 days to be reviewed. Also, if approved, you cannot change the URL again for 7 days.
Why customize your Facebook page URL in 2026?
Customizing your Facebook page URL is one of those small tweaks that makes a surprisingly big difference.
Instead of a long string of numbers, a clean, branded link helps people recognize and remember your page hassle-free, which matters more than ever at present.
Here’s why you should consider customizing your Facebook URL:
Improved brand consistency & trust: A URL that matches your brand name reinforces who you are and appears more reliable to visitors and customers.
Better discoverability & SEO: A clean, keyword-friendly URL helps both Facebook’s internal search and Google understand what your page is about, improving your chances of being found.
Enhanced shareability: Short, memorable URLs are easier to share in posts, emails, business cards, or ads, and people are more likely to type them correctly.
Easier tagging: When your URL/username is simple and branded, fans and followers can tag your page more easily in posts and stories, increasing your reach.
Customizing your link isn’t just decorative! It’s a smart move to make your page work for you online, in the best possible manner.
Important Facebook page URL rules you must know?
Before you customize your Facebook page URL, it helps to understand all the rules Meta sets. These guidelines ensure URLs remain unique, clear, and safe for everyone using the platform, and knowing them can save you time and frustration.
Critical Facebook page URL guidelines to understand:
Admin access required: Only a page admin can set or change the username (which becomes your URL).
Unique & case-insensitive: Your username must be one-of-a-kind on Facebook, and capitalization or periods don’t make something unique.
Allowed & forbidden characters: You can use letters (A–Z), numbers (0–9), and periods (“.”). However, no special symbols, spaces, or domain extensions like “.com”. Also, usernames cannot begin or end with a period or hyphen.
Minimum length: Must be at least 5 characters long.
No impersonation: Usernames shouldn’t mimic someone else’s identity, trademark, or brand.
Activity requirement: Facebook may remove usernames from inactive or low-engagement pages and allow only active, real pages to claim them.
Page age & engagement criteria: New pages may need to be a few weeks old (at least 30 days old with a minimum of 25 followers) and show basic engagement before they can set a custom URL.
60-day lock/limits: After you change a username, Meta often limits how soon you can change it again (cooldown periods).
Broken links & branding limits: If you pick something too generic or unrelated to your page’s name, Facebook may reject it to prevent broken links or misleading brands.
Understanding these rules & regulations makes it much easier to select a URL that Facebook will accept on the first try, and keeps your page looking polished and professional.
Picking the right Facebook page URL: Best practices to consider!
Choosing the right Facebook page URL is more than just a technical step. It’s part of how people recognize and find your brand online.
A clean, branded URL helps you look professional and makes sharing easier in 2026 and beyond.
Best practices to consider:
Keep it branded & simple: Your URL should match your business or page name so people know exactly who they’re clicking on. Also, simple links are easier to remember and type!
Ensure consistency across platforms: Use the same or very similar handles you use on Instagram, YouTube, or Twitter. Consistency helps followers recognize you quickly.
Optimize for search (SEO): Including a relevant keyword or your actual brand name improves visibility inside Facebook’s search and on Google.
Technical constraints & rules: Stick to Facebook’s requirements (only letters, numbers, and periods; at least 5 characters) to avoid rejection when saving your URL.
Strategy & timing:Think before you set it! Once chosen, Meta may limit how often you can change it, so pick something you’ll be happy with long-term.
Keeping these tips in mind helps your page look polished, consistent, and discoverable. A real boost for your online presence!
Shorten your Facebook URL with Replug!
When we talk about shortening your Facebook URL with Replug, what we really mean is using a smart tool that makes those long, messy Facebook links look clean, branded, and easy to share.
Replug is a brilliant link management platform that does much more than just shorten URLs. It lets you organize, track, and customize the links you share across social platforms like Facebook, Instagram, email, and more.
A complete link management solution
for marketing professionals & agencies.
Try Replug for free
If you’ve ever asked yourself, “How do I shorten my Facebook page URL?”, Replug has you covered. With it, you can get a shortened, custom Facebook page URL that not only looks nicer but also lets you see analytics on clicks and engagement.
The process is seriously simple: You just paste your long Facebook link into Replug’s Facebook URL shortener tool → tweak the slug or branding if you want → and hit the arrow button to generate a sleek short link.
This link is ready to share in posts, ads, messages, or anywhere online. It’s especially handy if you want your links to look professional and easy to remember.
Wrapping up
To wrap things up, your Facebook page URL might seem like a small detail, but it plays a big role in how people find and remember your brand.
We’ve walked through what it is, what to watch out for before changing it, and how to update it across mobile, desktop, business pages, and Meta Business Suite.
We also covered why customizing your Facebook vanity URL still matters in 2026 and the key rules and best practices to follow when choosing one.
Once you’ve picked the right URL, tools like a reliable URL shortener can make sharing even easier and hassle-free. Pair that with a Facebook post generator, and you’re all set to create posts that look polished, professional, and easy for your audience to click and trust.
Frequently asked questions
How do I change my Facebook profile URL link?
Here’s how to change Facebook URL for profile, by editing your username in your account settings.
On desktop, go to “facebook.com” → Log in to your account with admin access → go to “Settings & Privacy” → “Settings” → “Username,” type the username you want (must be unique and 5+ characters), and save it.
Facebook then updates your profile link to facebook.com/yournewusername.
Note: This feature may be limited depending on account age, previous changes, or if Facebook has restricted username edits on your account.
How to get Facebook page URL easily on mobile and desktop?
– On desktop, open the page you manage and copy the link from the browser bar. That’s your URL. – On mobile app, go to your page, tap the three-dot menu, and choose “Copy link.” This works for both profile pages and business pages.
Is a Facebook URL the same as a username?
Not exactly! The username is the text that comes after facebook.com/ and forms your URL. So your Facebook URL includes your username (e.g., facebook.com/YourName), but the username itself is just the short identifier part.
What are the problems faced while changing a Facebook URL? Provide their solution as well.
Here are common issues and how to fix them:
– URL unavailable: Someone else might already be using it. Try a variation or add numbers. – Username length constraints: Facebook requires at least 5 characters. Pick a name that meets this rule. – URL change disabled following recent update: Facebook may limit how often you can change it, often with a cooldown (such as 60 days). Wait and try again later. – Error messages displayed while saving changes: Sometimes the site caches old data. Try a different browser, clear your cache, or check that your username complies with Meta’s rules & regulations. – Non-permitted characters & symbols detected: Only letters, numbers, and sometimes periods are allowed. Special symbols trigger errors, so you must avoid using them. – Name violates standard Facebook policies: If your username looks spammy, impersonates someone, or violates rules, Facebook will for sure block it. So, tweak it to be compliant.
Can anyone besides an admin change the Facebook page URL?
No! Only someone with admin access to the Facebook page can edit the page’s username and URL. Other roles, like editor or moderator, cannot change the vanity URL.
After merging two accounts, can I still modify the Facebook URL?
Yes! After merging two pages into one, you can change the URL of the new merged page as long as it meets Facebook’s rules and you have the proper admin access. Just be aware that sometimes Facebook may require you to wait a short period after the merge before edits are allowed.
How do I find the Facebook username setting in the app?
In the Facebook mobile app, go to Settings & Privacy → Settings → Accounts Center → Profiles, then select your profile and tap Username to see or edit it. This controls the part of your URL after “facebook.com/”.
Does Facebook allow users to reserve a page username for later use?
No! Facebook doesn’t let you reserve a username for future use. If a username isn’t currently used, anyone can claim it. So if it matters to you, grab it when it’s available.
Is it possible to request a Facebook page URL change through Google?
No! You can’t request a change to a Facebook page URL through Google. URL and username changes must be made directly in Facebook’s settings or in the Accounts Center on the platform itself. Remember, Google doesn’t control Facebook’s username system!
Why am I unable to change my Facebook page URL?
There are a few common reasons you might not see the option:
– You’re not an admin of the page, – Facebook recently restricted edits, – You’re hitting a cooldown after a recent change, or – The username you want isn’t allowed under Facebook’s rules (e.g., not meeting the minimum length or uniqueness requirements).
Double-check your role and wait if necessary before trying again.
It’s no surprise that marketers, influencers, and bloggers use all sorts of tools, software, and plugins that improve their content reach, engagement, and conversion.
One such essential tool is a URL shortener that trims down long URLs into shorter, more manageable links. Undoubtedly, short URLs have become a crucial part of the modern-day digital marketing ecosystem.
The purpose of a URL shortener is to shorten the link, thus making it much easier for users to share, publish, and analyze the URL. However, if you’re curious about how URL shorteners work, then this blog is going to reveal the process for you.
The technology behind URL shorteners
Before moving onto the step-by-step process, it’s essential to understand both the URL structure and the underlying system that makes this link shortening possible.
Technical architecture of a link shortener
Link shortening is the process of converting a long, complex URL into a shorter, more concise version without altering its destination.
A link shortener relies on a streamlined architecture comprising four main components that work together to create, store, and redirect URLs.
At a glance:
User interface (UI): The front end where users paste long URLs and receive short links.
Backend server: Validates input, generates short codes, stores mappings, and manages redirects.
Database: Stores long-to-short URL mappings and ensures fast retrieval. Often built with scalable systems like MySQL or MongoDB.
Integration: Ensures smooth communication between UI, backend, and database for quick link creation and reliable redirection.
How does a URL shortener work: Replug’s process defined
Behind the scenes, URL shortening follows a simple workflow:
1. Entering the URL: You start by submitting a long link into a URL shortener, either through its website or application.
2. Creating a Short Code: The tool then generates a unique, shortened code or identifier, usually a mix of letters and numbers, like replug.link/15a6b0ad.
Note: The first part of the short URL (e.g., replug.link) serves as the default short domain. Brands can also configure a custom short domain for branding purposes.
3. Saving the Mapping: This short code is saved in the service’s database, where it’s linked to the full, original URL you entered.
4. Handling Click Requests: When someone clicks on the shortened link, the server recognizes the short code and processes the request.
5. Redirecting to the Original Page: The system looks up the original URL associated with the short code and issues an HTTP redirect, guiding the user’s browser to the intended destination.
Replug – The best URL shortener in 2026
Replug is more than a URL shortener; it’s a complete link management tool. It helps brands create branded short links, track performance, and retarget audiences for higher engagement.
Here are some reasons to consider this top-notch platform.
Branded link customization
Replug provides rich customization options. You can use your custom domain to create branded short links that match your brand’s identity. This adds a professional touch to your links and enhances brand recognition.
Centralized link management
Categorize, tag, and search links to ensure nothing gets lost in the clutter. Add expiry dates, link previews, and password-protect your links.
Advanced link analytics
Replug doesn’t just shorten links; it gives you actionable insights. Its analytics let you track the number of clicks, user locations, devices, and referral sources. With this data, marketers can measure performance, identify top-performing campaigns, and fine-tune strategies for better ROI.
Campaign tracking with UTM parameters
For advanced campaign tracking, Replug allows you to add UTM parameters directly to your links. Whether it’s email, social media, or paid ads, these tags help you analyze traffic correctly and understand which channels deliver the best results.
QR code generator for easy sharing
Replug automatically generates QR codes for your short links, bridging the gap between the offline and online worlds. Businesses can add QR codes to posters, brochures, packaging, or event materials, making it effortless for customers to scan and access digital content instantly.
Smart dynamic link rotation
Replug supports intelligent link rotation, enabling a single link to direct users to different landing pages based on conditions such as location, device, or time. This is especially useful for A/B testing, regional campaigns, or time-sensitive offers, helping marketers maximize conversions.
Retargeting with every click
Replug takes short links to the next level with retargeting. Easily integrate retargeting pixel codes directly in your links to track clicks & conversions from the Replug dashboard.
Privacy and security
Replug prioritizes data safety. With strong privacy controls and secure link handling, you can confidently manage campaigns without worrying about unauthorized access or data leaks.
On top of these features, Replug offers flexible pricing plans that cater to individuals, small businesses, and large enterprises, making it a scalable choice for anyone serious about link management.
Additional: Using a website link checker can help verify the safety of shortened URLs before clicking.
Common use cases of URL shortening
URL shorteners have moved far beyond just making links look tidy. Today, they play a vital role in marketing, web development, and content distribution.
Here are some of the most common use cases where shortened links add real value:
Implementing URL shortening in web development
This is considered one of the most common yet practical technical aspects of URL shorteners. Implementing URL shortening in your well-built web application can enhance user experience, improve click-through rates, and provide valuable analytics.
Using shortened links in advertising campaigns
In paid advertising, every character counts, and messy links can discourage clicks. Shortened URLs keep ad copy clear and attractive while maximizing space in search ads, display banners, and sponsored posts.
More importantly, advertisers can attach tracking parameters to short links, enabling them to monitor impressions, clicks, and conversions associated with specific campaigns. This allows for better performance measurement and smarter budget allocation, making shortened URLs a must-have for digital advertising.
Shortened URLs for SMS and email campaigns
SMS messages have strict character limits, and long links can look disorganized or even break in transmission.
Similarly, in email campaigns, shorter links look more professional and trustworthy. Marketers use URL shorteners to make links more compact while tracking engagement metrics like open rates and click-through rates.
Blog post short links for sharing
For bloggers, short links make content easier to distribute across multiple platforms. Instead of relying on long, cluttered URLs, they can generate short links for each new post, either manually or through automation when publishing.
Readers can then share these links seamlessly on social media or messaging platforms. Shortened blog links also enable bloggers to track engagement, providing them with valuable insights into which posts resonate most with their audience.
Link cloaking for affiliate links
Affiliate marketers often use link cloaking to make long and complex affiliate URLs look cleaner and more trustworthy. Cloaking replaces the messy affiliate link with a short, branded URL that encourages more clicks while reducing the risk of link hijacking.
It also helps maintain consistency in marketing campaigns and provides accurate tracking for conversions and commissions.
Short URL integration in social media scheduling tools
Social media scheduling tools often integrate URL shorteners to simplify the posting process. When marketers schedule posts, the tool automatically shortens long links, keeping the captions clean and concise.
Beyond aesthetics, this integration offers built-in tracking, allowing users to measure clicks and engagement across various platforms. This automation saves time and ensures that every link shared is both manageable and trackable, without requiring any extra manual effort.
Summing Up
URL shorteners have become essential tools for digital marketers, providing cleaner links, enhanced tracking, and a better user experience. By understanding how they work and the technology behind them, marketers can make more intelligent choices for their campaigns.
Whether you’re sharing links on social media, in emails, or through ads, using a reliable link shortening platform ensures professionalism, performance, and measurable results.
Start optimizing your links today with a trusted solution like Replug!
Frequently asked questions
How do you shorten a URL?
Follow these steps:
1. Choose a URL shortener – Start by selecting a reliable tool like Replug. 2. Paste your long URL – Copy the link you want to shorten and paste it into the input field on the tool’s website. 3. Click the ‘Shorten’ button – The tool will process your link. 4. Copy your short URL – Once generated, copy the new, shorter link and use it wherever you need.
Which URL shortener is popular?
Some of the most popular URL shorteners right now are:
Replug — widely used, good analytics, custom/vanity links. TinyURL — one of the oldest tools; simple and reliable. Rebrandly — great for branded URLs and business/team use.
Do URL shorteners affect SEO?
URL shorteners do not negatively affect SEO as long as they use 301 redirects, which pass most of the link equity to the destination URL. Search engines treat these shortened links like regular links when properly implemented.
Does Google prefer short URLs?
Yes, Google generally prefers short, clean URLs because they are easier to read, understand, and share. While URL length is not a major ranking factor, shorter URLs often perform better in terms of user experience and click-through rates, which can indirectly benefit SEO.
Many people are understandably cautious about clicking on links, whether due to annoying website pop-ups or emails from unfamiliar sources.
At the same time, this hesitation poses a challenge for marketers, as getting users to click on URLs is vital for engagement and conversions.
This is where a free link shortener with tracking capabilities comes into play. It helps you create short URLs quickly and hassle-free.
These attractive and concise links have become popular among influencers, brands, marketers, and bloggers. These professionals utilize them to enhance marketing efforts, engagement, and click-through rates across various platforms.
Let’s explore the concept of shortened URLs and the possibilities of using short, branded URLs to boost marketing campaigns.
What are short URLs?
A short URL is a compressed version of a longer web address, created using a URL shortening service like Replug.
These links redirect users to the original URL but take up far less space, making them ideal for social media posts, SMS messages, email campaigns, and print materials.
The primary purpose of using such URLs is to enhance readability, make links more shareable, and provide a cleaner, more professional appearance across digital platforms.
The ultimate goal is to enhance user experience and maximize click-through rates (CTR) by making links easier to recognize, trust, and remember.
In fact, Backlinko reports that the top Google result earns a 27.6% CTR, showing just how impactful optimized URLs can be, especially when they’re concise and keyword-rich.
Importance of Short URLs
🔗 Improved click-through rates (CTR): Shorter, cleaner links tend to attract more clicks, especially when customized with relevant keywords.
📱 Better user experience: Long URLs can be messy and irritating. Short links are easier to read, type, and share, particularly on mobile devices.
📢 Cross-platform compatibility: Short URLs work seamlessly across all channels, from emails and tweets to offline QR codes and posters.
🎯 Efficient space usage: Especially useful in character-limited platforms like Twitter, where every character matters.
📊 Trackable engagement: The best URL shorteners come with built-in analytics to track performance, including clicks, device types, locations, and referrers.
Branded short links are more than just shortened URLs. They’re powerful marketing tools that enhance brand visibility, trust, and campaign performance.
🧠 Increased Brand Awareness: Branded links (e.g., yourbrand.link/offer) keep your business name front and center, reinforcing brand identity.
🤝 Higher Trust & Credibility: Users are more likely to click a link that includes your brand name rather than a random string of characters.
📈 Enhanced Conversion Rates: Recognizable, trustworthy links can drive more conversions by reducing hesitation and building confidence.
🔍 SEO Benefits & Keyword Relevance: Branded short links with targeted keywords can improve link context and searchability.
🛠️ Campaign Differentiation: Marketers can create unique branded links for different campaigns or platforms, making it easier to measure effectiveness and ROI.
How to use short URLs for marketing purposes
In today’s fast-paced digital world, every character counts, especially in marketing. Short URLs not only help streamline your messaging across channels but also offer powerful branding, tracking, and optimization opportunities.
When used strategically, they can significantly uplift your campaigns’ performance, improve engagement, and boost brand recognition.
Select a branded domain
Branded short links do more than just save space; they make a lasting impression.
Raise trust
Generic short URLs (like bit.ly or tinyurl.com) can appear suspicious to users. A branded short domain (e.g., nyti.ms for The New York Times or amzn.to for Amazon) instantly signals credibility.
Consumers are more likely to click on links that clearly indicate their source, which reduces bounce rates and enhances user confidence.
Boost brand recognition
A consistent, customized short link reinforces your brand with every share. When your brand name is visible in the link (e.g., yourbrand.link/offer), it becomes a subtle yet powerful marketing asset.
Over time, this repeated visibility strengthens brand recall and sets your content apart from generic competition.
Create meaningful custom links using a URL shortener
A short URL should still tell a story.
Contextualize
Avoid ambiguous strings like bit.ly/3kYs8dQ. Instead, create links that provide immediate context, like yourbrand.link/fall-sale.
This not only improves click-through rates but also helps users understand what they’re about to view.
Utilize keywords
Including relevant keywords in your custom URL improves both SEO and user engagement.
For instance, a campaign for a new product launch might use yourbrand.link/new-smartwatch, instantly conveying value while helping search engines index the link contextually.
Take advantage of the tracking & analytics capabilities of a URL shortener
One of the greatest strengths of short URLs lies in the data insights they provide.
Monitor clicks
Track how many times your links are clicked, and when. This helps determine peak engagement hours, ideal publishing times, and overall campaign performance.
Segment data by channel
Most paid URL shorteners (like Bitly, Rebrandly, or Sniply) allow segmentation by traffic source. Whether the link was clicked via Instagram, email, or a QR code on a flyer, you can pinpoint which platforms drive the most traffic.
Track performance
Beyond raw clicks, evaluate metrics such as bounce rate, time on site, and conversions associated with each short link.
For instance, yourbrand.link/discount might drive 10,000 clicks but only 1% conversions, prompting a change in strategy or landing page design.
Monitor multi-channel campaigns
Use unique short URLs for each channel in a multi-channel campaign (e.g., yourbrand.link/email, yourbrand.link/facebook, etc.). This gives you precise insights into what’s working and what needs refinement across your marketing mix.
Refine campaigns
Data from short links isn’t just for reporting, it’s actionable. Low click-through rates on a particular platform may suggest poor copy or ineffective targeting. Conversely, high-performing links can serve as templates for future campaigns.
Gain insights into audience engagement
Are mobile users engaging more than desktop users? Are certain geographic regions clicking more frequently?
Link analytics can provide rich behavioral insights, enabling you to tailor your messaging and audience targeting more precisely.
Deploy the short links across all marketing channels
Short links excel in their flexibility and universal applicability.
Social media
Character-limited platforms like Twitter and Instagram bios benefit greatly from short links. For example, a post might include yourbrand.link/freeguide to maximize space and visibility without clutter.
Emails
Short URLs keep your emails clean and clickable. They’re especially useful in tracking which links recipients engage with the most, allowing for precise list segmentation and follow-up.
SMS campaigns
Text message or SMS marketing succeeds due to its conciseness. A short, branded link not only fits character limits but also makes the message feel more professional, increasing trust and CTR.
Content marketing
In blog posts or downloadable PDFs, short URLs are easier to remember and type. They’re especially useful in content upgrades or linking to gated assets (e.g., yourbrand.link/checklist).
Print & offline media
Short URLs often back QR codes. But even without a QR code, having a memorable short URL on a poster, business card, or flyer (e.g., yourbrand.link/event) makes it easier for users to engage offline.
Test & iterate
Effective marketing is a cycle of experimentation and refinement.
A/B testing
A/B testing is a method for comparing two or more cases to see which one performs better. Use multiple variations of your short URLs to test different messages, formats, or landing pages.
For example, test yourbrand.link/save20 vs. yourbrand.link/20off to see which resonates better with your audience.
Stay consistent
Consistency builds familiarity. Stick to a recognizable format and naming convention for your URLs to make them more memorable and reinforce your brand across all campaigns.
Short URLs are more than a space-saving tool; they’re a strategic marketing asset. When branded, customized, and tracked effectively, they enhance trust, boost engagement, and provide actionable insights that help refine your campaigns.
Whether you’re launching a new product, running a seasonal promotion, or simply sharing blog content, integrating short URLs across your marketing channels ensures your message is not only seen, but remembered and acted upon.
How to use short URLs for marketing campaigns: Some good examples at hand
Let’s explore five successful examples of brands using short URLs to drive marketing results effectively.
Coca-Cola’s “cokeurl.com”
Strategy: Coca-Cola created a custom branded short domain, cokeurl.com, to reinforce its brand identity in digital campaigns.
Use case: In global promotions like the “Share a Coke” campaign, they used short URLs to direct users to personalized bottle pages or social contests.
Why it works: These links were easy to remember and instantly associated with the brand, thereby improving engagement across platforms such as Twitter and SMS.
New York Times’ “nyti.ms”
Strategy: The New York Times uses nyti.ms, a branded short domain, for sharing articles across social media.
Use case: Each shortened link redirects to a full NYT article, especially effective on platforms like X (formerly Twitter), where character count matters.
Why it works: Branded URLs, such as nyti.ms/abc123, build trust, signaling to users that the link leads to a reputable source — a key factor in increasing click-through rates.
Amazon’s “amzn.to”
Strategy: Amazon uses the custom short domain amzn.to, powered by Bitly, for affiliate and product links.
Use case: Affiliates and marketers share these links on blogs, YouTube descriptions, and social media to drive sales and earn commissions.
Why it works: These URLs are concise, trackable, and clean, enabling both Amazon and its partners to monitor traffic, conversions, and optimize campaigns in real-time.
Spotify’s campaign-specific short links
Strategy: Spotify uses short URLs for sharing playlists, artist pages, and marketing campaigns, often through branded or campaign-specific domains.
Use case: During the launch of new features or artist collaborations (e.g., “wrapped” campaigns), Spotify uses custom short links to drive mobile traffic.
Why it works: These links enhance shareability and enable Spotify to collect user data, including location and device information, for retargeting and analytics purposes.
Pepsi’s QR & short link integration in campaigns
Strategy: Pepsi integrates short URLs alongside QR codes in product packaging and TV commercials.
Use case: During promotions like the “Pepsi Stuff” rewards program, they used memorable short links to direct users to sign-up pages and promo details.
Why it works: Combining visual codes with short, branded URLs ensures a seamless user experience, especially for mobile users who may not be able to scan a QR code (at times) but can easily type a simple URL.
The best URL shortener for online marketing in 2026
Replug.io is an all-in-one link management tool designed for brands, marketers, SEO specialists, and bloggers to create, manage, and analyze short URLs.
It’s a comprehensive URL shortening tool that provides several link management services to upgrade your social media marketing to the next level.
Thousands of happy customers worldwide trust Replug for the link shortening task. One major reason for its success is that it offers much more than the average URL shortener freely available online.
Users find URL shortening, tracking, bio links, and much more under the same umbrella. It’s, without a doubt, the best URL shortener for social media marketers.
Key features
Precise URL shortening
Custom domain configuration for branded short URLs
URL analytics to track and monitor URL performance
QR code management for links
Customizable call-to-actions
Pricing
Free: $0/month
Essentials: $9/month
Scale: $23/month
Agency: $79/month
Wrapping up
To sum up, short URLs have become vital tools for modern marketers, helping improve brand visibility, track campaign performance, and enhance user engagement.
By integrating branded short links into your digital marketing strategy, you can establish trust, drive higher click-through rates, and measure success with precision.
No matter for social media, email campaigns, or influencer collaborations, short URLs simplify link management and boost overall marketing efficiency.
As 2026 continues to reshape online marketing, choosing the right URL shortener is crucial for staying ahead.
Replug offers everything you need, from branded links to advanced analytics, making it the ultimate solution for professionals.
Try this amazing URL shortening tool today and advance your link management game!
Frequently Asked Questions
How do I use a short URL link?
To use a short URL link:
– Select a reliable service like Replug, and paste your long URL into their input field. – The tool then generates a shortened version, which is often customizable for branding purposes. – Copy the short link and paste it into emails, social posts, or websites. – When clicked, it redirects to the original URL seamlessly.
How to use short URLs for marketing on Facebook?
On Facebook, short URLs enhance marketing by making posts cleaner and more engaging, as they avoid long, cluttered links that hinder clicks.
Use tools like Replug to shorten links, add UTM parameters for tracking, and integrate them into ads, posts, or stories.
This enables monitoring of click-through rates, audience engagement, and campaign performance through built-in analytics.
How to use short URLs for marketing on Google?
For Google marketing, particularly in Google Ads or Search Console, use short URLs from services like Replug or Google’s own Firebase Dynamic Links (for apps) to create concise, trackable links.
Append UTM tags for analytics in Google Analytics, and embed them in ad copy or search results snippets. This improves click rates and provides data on user behavior across campaigns.
How to make money from shortened URLs?
Earn from shortened URLs via pay-per-click (PPC) services like AdFly, Linkvertise, or ShrinkMe, where you shorten links and share them. Each click views a short ad, earning you a commission (typically $1-10 per 1,000 views).
Sign up, generate links, and promote them on social media or websites, but comply with platform policies to avoid bans. Payouts vary by traffic quality and geography, with thresholds around $5-10 for withdrawal.
Can URL shorteners track clicks?
Yes, most URL shorteners offer built-in click tracking, providing metrics such as total clicks, geographic locations, referral sources, and device types.
Premium plans enhance this with advanced analytics, integration with Google Analytics, and real-time data. This helps marketers optimize campaigns without needing extra tools.
What is the relationship between short URLs and social media shares?
Short URLs boost social media shares by making links more aesthetically pleasing and shareable, fitting character limits on platforms like X (formerly Twitter), and improving click-through rates.
They correlate with higher engagement, as clean posts appear more professional and trustworthy. Analytics from shorteners also reveal share patterns, helping refine content strategies.
Should I shorten links even for email or social posts?
Yes, shortening links for emails and social posts is recommended to enhance readability, track engagement, and fit character limits, especially on mobile devices.
It prevents long URLs from breaking layouts or appearing spammy, while providing analytics on opens and clicks. However, use branded URL shorteners like Replug to build trust and avoid generic ones that might raise security concerns.
What are some of the most common challenges marketers face when using shortlinks?
Marketers often struggle with link trustworthiness, as shortened URLs can conceal malicious content, resulting in lower click rates or platform flags. Analytics accuracy can vary, with issues like bot traffic inflating metrics or service downtime causing redirect failures.
Additionally, dependency on third-party shorteners risks data privacy breaches or sudden policy changes that could affect campaigns.
We’ve all experienced the frustration of copying a long, messy URL and thinking, “This looks terrible.” We’ve been there, more times than we’d like to admit!
That’s why URL shorteners exist: to simplify and streamline one’s link management needs, making links more user-friendly and professional.
These link shorteners are the perfect solution in this case. They take those clunky, unattractive URLs and transform them into concise, clean links that are easier to share and use.
Moreover, the benefits of URL shorteners go far beyond aesthetics. This blog covers everything, from the definition of a URL shortener to its key benefits that you should be aware of.
So, let’s get started!
What is a URL shortener?
A URL shortener is simply a tool that condenses long URLs into short, easy-to-share links. These tools don’t change the destination; they just repackage it into something cleaner, clickable, and far more professional.
Replug acts as your custom URL shortener, ideal for turning long, messy links into branded, trackable URLs that look tidy and perform much better.
8 major benefits of URL shorteners: Key advantages explained!
There are numerous benefits to using URL shorteners. From making your links look clean to tracking link analytics, these tools are becoming increasingly essential for anyone seeking to enhance their online presence and optimize their digital strategy.
Here’s a list of the top benefits of URL shorteners that you must know as a content marketer or business professional:
Improved aesthetic appeal
A short URL is like a crisp, well-edited photograph, while a long one is like a blurry, poorly taken snapshot. The edited photograph (short URL) is clear and appealing, whereas the blurry snapshot (long URL) can look messy and unrefined.
Now, let’s make a comparison. Which one looks better?
Long URL:
Short URL:
Clearly, short links have a far greater aesthetic advantage, and only a top-notch URL shortener can perform this task optimally.
Let’s face it, long URLs can be a real pain to share on social media. That’s where link shorteners come in; they’re a total lifesaver!
They offer links that fit perfectly on platforms with character limits, such as Twitter (X) and SMS. Besides, they also make it extremely easy to copy, paste, or share links.
For example, imagine you’re trying to share a link to a funny cat video on Twitter (X). The original URL is massive, about 120 characters long, but with a tool like Replug, you can share it in just 20 characters!
Amazing right!
By using shortened links, you’ll make it easier for others to engage with your content. And who knows, you might just get more likes, shares, and even a few laughs!
Boost clicks and conversion with custom URLs
People trust links that look branded and professional. A custom URL shortener allows you to add your brand domain instead of a random string, enabling you to share personalized links, hassle-free.
Branded links make your content instantly recognizable and give users confidence that they’re clicking a safe and trustworthy URL. This increased trust often translates into higher click-through rates and better engagement.
For example, instead of sharing a generic short URL like:
You can share a custom one like:
In-depth analytics and link tracking
Being able to monitor click performance is one of the most valuable benefits of URL shorteners. They can be used to track analytics, providing insights into who’s clicking, when, and how often.
Additionally, they also inform you where your traffic is coming from, including geographic locations and the devices used.
For instance, let’s say you launch a promotion with shortened links and find that your “funny cat meme” campaign gets the most clicks from a region known for its cat lovers. Plus, you see that mobile users are way more engaged than desktop ones.
With this info, you might double down on those cat memes and create a special mobile offer, turning your marketing into a cat-themed hit.
One of the most significant advantages of URL shorteners is the flexibility to redirect a link even after it has been created.
If your landing page changes or a campaign URL needs updating, you don’t have to resend new links. You can simply update the destination behind your short link.
This keeps campaigns consistent, saves time, and prevents lost clicks from outdated links.
But it doesn’t stop there!
Modern link shorteners also support dynamic links, which automatically tailor the destination based on factors such as device, location, or even the time of click.
For example, mobile users can be directed directly to your app store download page, while desktop users are sent to your website. Similarly, a global campaign can send US visitors to your .com site and UK visitors to your .co.uk site, all from the same link.
This combination of flexible redirection and link rotation ensures your audience always lands on the most relevant page, enhancing user experience, engagement, and conversions.
Amazing retargeting opportunities
Did you know that up to 88% of online users won’t return to a site after a bad experience, and the average website has a bounce rate of 37%? But don’t worry!
Top-notch URL shorteners can help you re-engage your audience and breathe new life into lost connections.
By integrating a reliable link shortener like Replug, which features powerful capabilities such as a retargeting pixel, you can track user interactions, create targeted ads, and re-serve ads to interested users.
This effective combo boosts tracking and analytics, ad relevance, and ROI, while seamlessly integrating with your existing strategies.
But don’t just take our word for it!
For instance, major companies such as Adobe, Starbucks, Best Buy, Amazon, Coca-Cola, The New York Times, McDonald’s, and Reddit are utilizing link shorteners to retarget their audiences.
Here’s how “Amazon” and “The New York Times” are using URL shorteners in their marketing strategy:
Note: The next time you leave a website and get an email that says, “Hey, you forgot something in your cart!” or you see an ad pop up for that exact pair of shoes you were eyeing, that’s retargeting in action.
Better offline marketing (QR codes & print)
URL shorteners aren’t just for online campaigns; they bridge the gap between online and offline marketing through QR codes.
Most current link shortening tools let you instantly generate a scannable QR code for every shortened link. This makes it much easier to share digital content through physical channels.
Imagine you’re running a restaurant and printing flyers for a new menu. Instead of typing a long URL, customers can just scan your QR code and instantly view the digital menu.
Similarly, event organizers can place QR codes on flyers, posters, tickets, or merchandise to lead people directly to registration pages, videos, or exclusive offers.
Since QR codes have gained hype and popularity post-COVID, this feature makes URL shorteners essential for creating engaging, interactive print campaigns.
Enhanced mobile experience
Most internet traffic today originates from mobile devices, making it compulsory to deliver a seamless mobile experience.
Short links are easier to click, copy, and share on smartphones compared to long, clunky URLs that break across lines or look suspicious.
Beyond convenience, advanced link shorteners optimize the mobile experience by supporting deep linking.
For instance, if someone clicks a short link to your YouTube channel from their phone, the link can open directly in the YouTube app, rather than in a browser.
The same applies to e-commerce apps, social media platforms, or custom brand apps. This reduces friction, enabling users to reach their destinations faster and increasing the likelihood of engagement and conversions.
Some disadvantages of URL shorteners
While URL shorteners offer numerous benefits, it’s essential to be aware of the potential drawbacks of these tools before entirely relying on them in your campaigns.
Drawback
Explanation
Trust issues
Shortened links can look suspicious if they don’t show the final destination.
Dependency on services
If the link shortening service shuts down, your links may break.
Broken links
Discontinued tools (e.g., Google’s goo.gl) can render links inactive.
Limited transparency
Some platforms or users may block or distrust shortened URLs.
Extra management
Large campaigns require more effort to organize and track links.
Feature limits
Free tools often lack analytics, retargeting, or customization options.
Cost factor
Advanced features, such as branding or deep analytics, usually require paid plans.
Closing thoughts
In this blog, we explored what URL shorteners are, their practical benefits, and the few drawbacks you should be aware of.
From making links look clean and professional to enabling custom branding, the pros of URL shorteners can genuinely transform the way you manage and share links.
While there are some limitations, like trust issues or service dependency, the advantages far outweigh the drawbacks when used wisely.
If you’re ready to unlock these benefits and take your marketing strategy to the next level, try Replug today! A custom URL shortener built to help you brand, track, and optimize every link you share.
Frequently asked questions
What are the benefits of a short URL?
The following are the advantages of a short URL.
–Improves click-through rates (CTR): Clean, concise links look more trustworthy and clickable. – Enhances user experience: Easier to read, type, and share, especially on mobile or print. – Saves space: Ideal for character-limited platforms like X (formerly Twitter) or SMS. – Boosts brand visibility: Branded short links increase recognition and trust. – Enables tracking and analytics: Most URL shorteners provide click data, source, and geolocation. – Supports A/B testing: Easily test different link placements or campaigns with trackable variations. – Prevents link breakage: Short URLs are less likely to break in emails or messaging apps.
Who can benefit from URL shorteners?
URL shorteners aren’t just for marketers. A wide range of users can benefit from their simplicity and tracking capabilities.
– E-commerce businesses → Use branded links, bio links, retargeting, and custom CTAs to improve visibility and conversions. – Content creators → Customize link previews, set expiry dates, run A/B tests, share via SMS, and generate QR codes for easy promotion. – Affiliate marketers → Cloak long links, add deep links for higher conversions, and rotate offers through a single short link. – Agencies → Provide white-label solutions, advanced link management, and tailored tools to enhance client campaigns.
How does a URL shortener work?
A URL shortener works by taking a long web address and converting it into a much shorter, more manageable link. When a user enters a long URL into a shortening tool, the service generates a unique short link that redirects to the original destination. When someone clicks the short link, the tool quickly redirects them to the full URL behind the scenes.
How do URL shorteners impact SEO?
URL shorteners can impact SEO positively if they use 301 redirects, as this ensures link equity (or “link juice”) is passed to the final destination. They’re useful for tracking and sharing links on social media, but excessive use can reduce transparency, affect user trust, and potentially lower click-through rates.
A URL looks simple on the surface, but it does a lot of tedious work behind every click. If someone asks what is a URL, most people just point to the address bar and move on. Yet that line of text determines where traffic goes, how campaigns are tracked, and even whether a visitor trusts a page.
Recent estimates say more than five billion people go online each day, and every visit starts with a link. For marketers, social media managers, and creators, URLs are tiny but powerful building blocks for reach and revenue.
This guide breaks down web addresses in plain language: definition, format, types, examples, modern techniques, and much more. Let’s start with the URL meaning and a quick look at how these web addresses came to be!
What is a URL: A brief overview & history
A URL (Uniform Resource Locator) is the full web address a browser uses to find something on the internet. When anybody asks about a URL, the simplest answer is that it is the entity that tells the browser both where a resource lives and how to request it. That resource might be a web page, image, video, file, API endpoint, or app deep link.
The idea was formalized in 1994 by Tim Berners‑Lee and the Internet Engineering Task Force. URLs combined domain names with file-style paths so people could reach content without memorizing IP addresses. Over time, the format remained stable while the surrounding web grew from static pages to dynamic apps, social platforms, and streaming services.
URLs matter because they quietly run almost everything online:
Addressing: URLs act as the “address system” of the web. Without them, browsers, apps, and search engines would have no simple way to reach the right server and file, and ordinary users would be stuck with raw IP numbers instead of readable addresses.
Search: URLs drive how search engines crawl and index content. Their structure influences how pages are grouped, how easy it is to discover new content, and how well pages can rank for key topics or search terms.
Tracking: URLs carry tracking and targeting data. Marketers use URL parameters to attribute traffic, measure campaign performance, run retargeting, and understand which channels drive clicks, signups, and sales.
Trust: URLs shape trust and click behavior. Clear, branded links look safe and professional, while random strings full of numbers or tracking URL codes often lower click-through rates and can scare people away.
Integration: URLs connect tools and services behind the scenes. From web hosting dashboards to webhooks and APIs, these web addresses enable different platforms to communicate and transfer data reliably.
Structure of a URL: Core URL components defined!
To work confidently with URLs, it helps to understand the basic anatomy of a URL in the first place. Each part has a unique job, and once you can read these pieces, diagnosing link issues or planning a clean URL structure becomes far easier.
A full URL looks something like this: https://blog.example.com/seo/url-structure?utm_source=twitter#basics.
Below, each component is broken down in simple terms.
Scheme/Protocol
The scheme tells the browser which protocol to use when talking to the server. In most cases, this will be http or https, where the “s” adds encryption and security.
When a browser sees https://, it sets up a secure, encrypted connection using SSL or TLS. That keeps logins, payments, and other private data from being read by others on the network.
Professionals should always prefer https because it protects users, builds trust, and is a positive factor for search visibility.
Other schemes exist, such as mailto for email links or ftp for file transfer. Still, for normal websites, https is the standard and should be non‑negotiable.
Subdomain
A subdomain is the part that comes before the main domain, such as blog in blog.example.com. It helps split one brand into clear sections without buying a new domain for each area. Teams often use subdomains for blogs, support centers, apps, or country-specific areas.
For example:
app.example.com can hold a web application
support.example.com can host documentation
Search engines may treat subdomains somewhat separately from the main site, so one should plan how content is distributed across them.
From a user’s point of view, subdomains hint at what to expect, which makes URL links easier to understand at a glance.
Root domain
The root domain is the core of the address, like example.com. It includes the main name plus the top-level domain, such as .com, .org, or newer options like .io.
This is what most people think of as a website name. It is what gets registered with a domain registrar and pointed to web hosting or scalable hosting infrastructure through DNS records.
Brand strength often lives here, so using a clear, short domain that matches the brand name is a big win for recognition.
Path
The path is everything after the domain and the first slash, for instance /blog/url-basics. It tells the server which resource under that domain the browser wants.
Originally, paths pointed straight to folders and files on a server. Today, many sites use routing rules so the path becomes more about structure than actual folders. That freedom lets teams design clean paths that mirror their content strategy, such as /blog/, /products/, or /pricing/.
Well-planned paths help both search engines and humans understand how content is grouped and how deep a page sits inside the site.
Subdirectory
A subdirectory is a folder inside the path, such as /blog/ or /products/seo/. Multiple subdirectories stack together to show hierarchy, like /resources/guides/url-basics.
For SEO and content management, subdirectories are handy because they organize content under one domain in a way that is easy to crawl and report on. For example, a marketer might pull analytics just for /blog/ to see how content marketing performs versus /product/.
Too many subdirectory levels can make URLs long and hard to scan, so it’s better to stick to a simple depth of one or two levels at max.
Slug
The URL slug is the final readable part of a path, like url-structure in /blog/url-structure. This short phrase usually describes the specific page.
A good slug is:
Short
Descriptive
Focused on the main keyword
For example, /what-is-a-url says far more than /page-123. When someone asks, “What is a URL?” and lands on a page with that slug, they instantly know they are in the right place.
Slugs play a strong role in click behavior. People are more likely to click links that look clear, and search engines also use slugs as another hint about page content.
Port
The port is an optional URL number after the domain, such as :8080 in https://example.com:8080/test. It tells the browser which “door” on the server to connect to.
Standard web traffic uses:
Port 80 for HTTP
Port 443 for HTTPS
Because those are default settings, browsers assume them, so you do not see them in normal URLs. Custom ports appear more often in testing, internal tools, or apps running on specialized services rather than on public marketing pages.
Note: If a link includes an odd port number, it usually indicates that the page is part of internal infrastructure or a specialized web hosting setup rather than a public-facing site.
Query
The query is the part that starts with a question mark, such as ?utm_source=twitter&utm_medium=social. It comes after the path and before any fragment.
Queries pass extra data to the server or client. For marketers, this is where campaign tracking tags live, often in the form of UTM parameters. A single path can then serve many campaigns, with the URL query telling analytics tools how a visitor arrived.
Queries are powerful for testing and personalization, but long strings full of random characters can look messy. Many teams use URL shorteners to hide these and keep links clean on social platforms.
Parameters
Parameters are the key-value pairs inside the query, such as utm_source=twitter or page=2. Each pair passes a specific piece of information.
Sites use parameters for search results, filters, pagination, and tracking. For instance, an ecommerce site might use ?category=shoes&sort=price_desc to show the particular product list. Analytics tools then read UTM parameters on top of that to track campaigns.
One must manage parameters wisely. Some parameters should be tracked in analytics but not indexed in search to avoid duplicate content issues and cluttered reports.
Fragment
The fragment is the part after a hash symbol, such as #pricing at the end of a URL. It does not go to the server; it is handled only in the browser.
On a normal page, the fragment helps the browser jump to a specific section with a matching ID. That is handy for long guides, FAQ sections, or tables of contents. In media like videos, fragments or similar patterns can point to a timestamp.
Fragments are great for user experience because they let you send people to the exact part of a page that matters, without needing a new page.
Tip for content teams: Use fragments on long pages and link directly to the most relevant section. This reduces friction and gets visitors to answers faster.
Different types of URLs
Not all URLs are the same. Once you understand the basic structure, different URL types make more sense and become practical tools for SEO, analytics, and app integrations.
Here is a quick overview table, followed by short explanations of each type.
URL type
What it is
Simple example
When marketers use it
Absolute URLs
Full URLs with scheme, domain, and complete path
https://example.com/blog/url-basics
Linking across domains, email campaigns, ads, or any context without page context
Relative URLs
Shorter URLs that rely on the current page for missing parts
/blog/url-basics
Internal links within the same site, templates, and CMS-generated links
Semantic URLs
Clean, readable URLs that describe content
https://example.com/what-is-a-url
SEO content, blogs, product pages, and any public page meant to rank or be shared
Data URLs
URLs that store small files as text inside the URL
data:image/png;base64,...
Special cases like embedding small icons or inline assets in code
Canonical URLs
Preferred versions of pages for search engines
Link tag pointing to https://example.com/post
Handling duplicates, like tracking variants, parameters, or print-friendly versions
Callback URLs
URLs that an external service calls after an action
https://example.com/oauth/callback
OAuth, payment gateways, and app integrations
Vanity URLs
Short, memorable URLs that redirect to longer links
https://brand.link/blackfriday
Ads, print media, podcasts, and social bios where short, branded links matter
Persistent URLs
URLs designed not to change even if the content moves
Stable library or archive links
Academic content, documentation, and long-lived resources
Protocol-relative URLs
URLs that skip the scheme and use the current page scheme
//example.com/style.css
Older setups for CDN or resource loading on both HTTP and HTTPS
Internationalized URLs
URLs that include non-ASCII characters from local languages
https://es.ejemplo.com/página
Serving audiences in other languages and character sets
FTP URLs
URLs used with the File Transfer Protocol
ftp://user@server.example.com/file.zip
Legacy file transfer or server management workflows
Mailto URLs
URLs that open an email client to send a message
mailto:hello@example.com
Contact links on sites, email signature buttons, support calls to action
RSS feed URLs
URLs that serve XML feeds of updates
https://feeds.bbci.co.uk/news/rss.xml
For subscribers, syndication, and feed readers
Webhook URLs
URLs that receive push notifications from other services
https://webhook.site/abc-123
Automations, CRM updates, and cross-platform event handling
SEO-friendly URLs
URLs designed for search performance and readability
https://example.com/url-structure-guide
Blog posts, landing pages, and any page aimed at organic traffic
Absolute URLs
Absolute URLs include the full address, starting with the scheme and ending with the path and any query or fragment. For example, https://example.com/blog/url-basics is absolute because it works anywhere, even outside the site.
When you paste a link into an email, ad platform, or PDF, it must be an absolute URL so the reader’s browser knows exactly where to go. Use absolute URLs whenever you point traffic to your site from external channels.
Relative URLs
Relative URLs skip certain parts, usually the scheme and domain, and rely on the current page as context. A link like /blog/url-basics only makes sense when the browser already knows it is on https://example.com.
Relative URLs keep internal links shorter and easier to manage inside templates, CMSs, or single-page apps. They also help when moving a site between staging and production environments without rewriting every internal link.
Semantic URLs
Semantic URLs are clean and meaningful, such as /what-is-a-url instead of /post?id=123. They use real words, often including the main keyword, to describe the primary page content.
Readers can infer what they will see from the link alone, which improves trust and click-through rates. Search engines also read semantic URLs as a strong hint about page topics, which is important for SEO-focused content.
Data URLs
Data URLs store the file data directly in the URL using base64 text. For example, a tiny image can be embedded inside CSS or HTML using a data URL. This avoids extra HTTP requests for very small assets.
Data URLs do not show up in public marketing links, but front-end developers sometimes use them for icons, inline styles, or experimental work where performance tuning is important.
Canonical URLs
A canonical URL is the version of a page you want search engines to treat as the main one. It is usually set with a <link rel="canonical" href="..."> tag in the page HTML.
This matters when several URLs show the same or very similar content, such as filtered pages, print views, or links with tracking parameters. By pointing all variants to a single canonical URL, you protect your search performance and avoid splitting authority between duplicates.
Callback URLs
Callback URLs are destinations that external services call after a task is completed. For example, when a user signs in with Google, the service redirects back to a pre-registered callback URL on your site.
Payment gateways, social logins, and many APIs rely on such URLs to hand results back to your app. Marketers often encounter this concept when connecting tools such as CRMs, ad platforms, or automation platforms.
Vanity URLs
Vanity URLs are short, branded, and easy to say out loud, like https://brand.link/spring-sale. They usually redirect to a longer, tracking-heavy destination.
These links shine in social bios, podcasts, print ads, and any channel where you want people to remember or type the link later. With a tool like Replug, you can turn long campaign URLs into neat vanity links that still keep full tracking in the background.
Persistent URLs
Persistent URLs are designed to stay the same for a very long time, regardless of changes in hosting or internal structure. Academic papers, standards documents, and libraries often need this stability.
If a page moves, the old URL should be permanently redirected to the new one so that past citations continue to work. For brands, setting up good redirect rules and avoiding random URL changes helps keep links “persistent” for users and search engines.
Protocol-relative URLs
Protocol-relative URLs look like //example.com/script.js, without http or https written out. They tell the browser to match the current page’s scheme.
This pattern once helped ensure resources were served on both secure and non-secure pages without mixed-content errors. Today, almost everything runs on HTTPS, so protocol-relative URLs are less common, and plain https links are safer and clearer.
Internationalized URLs
Internationalized URLs use characters from local languages, such as accents or non-Latin scripts. Modern browsers support these by converting them behind the scenes into ASCII-safe forms for DNS and routing.
For global brands, internationalized URLs can make sites feel natural to local audiences, since product and category names can appear in the native language directly in the address bar. Just make sure analytics and SEO tools handle encoding and reporting correctly.
FTP URLs
FTP URLs, such as ftp://server.example.com/file.zip, work with the File Transfer Protocol. They let users upload and download files to and from servers, often used by developers or admins.
While many hosts now prefer more secure alternatives like SFTP, you may still run into FTP URLs in legacy systems or old documentation. These links are not meant for marketing campaigns, but understanding them can help when talking with technical teams.
Mailto URLs
Mailto URLs start with mailto and open the default email client to send a new message. A simple link like mailto:hi@example.com can be expanded with subject and body text.
From a user’s point of view, this is a fast way to start an email without copying and pasting addresses. For marketing pros, mailto links are a lightweight way to encourage contact or support requests without building a full contact form.
RSS feed URLs
RSS feed URLs return XML that lists recent posts or updates from a site. A blog might expose https://example.com/blog/feed.xml so feed readers, and other apps can pull new articles.
Although RSS is quieter than it once was, it still powers many syndication workflows, podcast delivery, and content aggregators. If content publishing is a key part of your work, knowing your RSS feed URLs is handy.
Webhook URLs
Webhook URLs accept data pushed from other services when certain events occur. For example, a payment platform might call your webhook URL whenever a subscription renews.
Webhooks keep systems in sync and can trigger automations across tools. Many marketing stacks use these URLs to move leads into CRMs, update scores, or trigger retargeting workflows in near-real-time.
SEO-friendly URLs
SEO-friendly URLs are a mix of semantic, stable, and well-structured URLs with a very thoughtful use of keywords. They tend to be short, descriptive, and free from random characters.
A good SEO-friendly URL helps search engines and humans understand the topic in seconds. When someone searches for “what is SEO” and sees a clear URL containing that phrase, they are more likely to trust and click it.
How do URLs work
Behind the scenes, a lot happens between typing a URL and seeing a webpage. Understanding this flow helps with debugging issues, planning scalable hosting, and explaining why some errors appear. Here is what happens in simple steps.
Step #01: Input
Everything starts when a user types a URL into the address bar, taps a bookmark, or clicks a link. The browser reads the scheme, domain, path, and other components to plan what to do next.
If the URL is missing a scheme, the browser usually assumes https and fills it in. Clean, well-structured URLs are easier to recognize and less likely to confuse at this very first step.
Step #02: DNS lookup
The browser needs to turn the domain name into an IP address, which is the server’s numeric location on the network. To do this, it asks a DNS resolver, which checks cached records and, if needed, queries upstream servers until it finds the correct address.
This DNS step is a bit like looking up a contact in a phone directory before making a call. Fast DNS and solid web hosting or scalable hosting setups keep this step quick, so pages start loading without delay.
Step #03: Request
With the IP address in hand, the browser opens a network connection to the server. It sends an HTTP or HTTPS request that includes the method (usually GET for normal page views), the path from the URL, and various headers.
For secure sites, the browser and server also agree on encryption settings so data stays private. Any tracking parameters in the URL get passed along and become available to the application or analytics scripts.
Step #04: Server response
The server receives the request and decides how to handle it. That might mean fetching a static file, rendering content through a CMS, or calling database queries to build a dynamic page.
If everything goes well, the server returns a 200 OK status with HTML, CSS, JavaScript, and other assets. If the URL no longer matches any resource, the server might send a 404 Not Found or a redirect to a new URL.
Good web hosting and scalable hosting infrastructure help the server respond quickly, even under heavy traffic from campaigns.
Step #05: Rendering
The browser parses the HTML and starts building the page. As it reads, it finds more URLs pointing to images, scripts, styles, fonts, and other resources and requests those too. JavaScript might then make additional requests to APIs using URL endpoints.
Once enough assets arrive, the page appears, and the user sees the content that the original URL pointed to. From the user’s point of view, this whole process feels instant, even though many small steps just happened in sequence.
Top 10 examples of URL
Real examples make theory easier to apply. Below are simple, concrete URL examples that match everyday tools and platforms you use for marketing and content.
1. URL for a website
A basic website URL might look like https://www.example.com/. This points to the homepage and often serves as the default landing page for new visitors.
For campaigns, you might use a more specific URL like https://www.example.com/pricing to direct people deeper into the site. Always double-check that the scheme/protocol is https so visitors see a secure padlock icon in the browser, and feel safe on your page.
2. URL for YouTube
A typical YouTube video URL looks like https://www.youtube.com/watch?v=VIDEOID. The v parameter identifies the exact video.
When you run video campaigns, you might add UTM parameters, turning it into something like:
A URL shortener such as Replug can hide this long string behind a neat branded link for social posts.
3. URL for Facebook
A Facebook page URL usually looks like https://www.facebook.com/YourBrandName. For posts, the URL is longer and includes IDs that identify the exact content.
When sharing a Facebook page on other channels, using the clean page URL without extra tracking is often enough. For heavy analytics, you can add campaign parameters when linking back to your own site from Facebook.
4. URL for Instagram
An Instagram profile URL follows the pattern https://www.instagram.com/username/. Individual posts add more detail, such as https://www.instagram.com/p/SHORTCODE/.
Because Instagram shortens and wraps many links in bios and stories, marketers often rely on effective tools to create a single central bio link that routes to multiple destinations, hassle-free.
5. LinkedIn URL example
A LinkedIn company page URL might use a format like https://www.linkedin.com/company/yourbrand/. Personal profiles use a similar format, with /in/ instead of /company/.
These URLs are handy for email signatures, outreach, and about pages. Keeping profile URLs consistent and recognizable across platforms helps people confirm they are following the right brand.
6. Discord URL example
A Discord invite URL looks something like https://discord.gg/shortcode. This invite link can point to a server or a specific channel, depending on the settings.
For communities, sharing this URL across social platforms brings people to your server. You can run simple tests by using different short links that all redirect to the same Discord invite and then compare performance in your link management tool.
7. Inbox URL example
Web-based inboxes, such as email or helpdesk tools, often use URLs like https://mail.example.com/ or https://support.example.com/inbox. Inside, individual messages may get their own URLs with IDs or parameters.
For security reasons, many inbox URLs require login before content loads. When linking to an inbox in documentation or training, use generic URLs and remind users to sign in.
8. Profile URL example
Across many platforms, profile URLs follow a simple platform.com/username pattern. For example:
https://x.com/username
https://tiktok.com/@username
Using the same handle across multiple networks helps people quickly find the right profile. Marketers often pull these profile URLs into a single “link in bio” page, then share that one URL using a branded short link.
9. Vanity URL example
A vanity URL could be https://go.yourbrand.com/summer. To the user, it is short, branded, and easy to remember.
Behind the scenes, it might redirect to a longer destination, such as:
With Replug, you get analytics on the short link itself while keeping the simple vanity URL in all your on-air mentions.
10. SEO-friendly URL example
An SEO-friendly URL might look like https://www.example.com/blog/what-is-a-url-guide. It is descriptive, includes the key phrase someone might search, and sits under a logical /blog/ folder.
Compare that with https://www.example.com/post?id=987, which is hard to read and offers no clue about the topic. Both might technically work, but the first is much better for users and search engines.
Best practices for creating user-friendly URLs
Strong content deserves strong URLs. A few simple habits will make your links easier to read, share, track, and rank.
Keep it short & descriptive
Shorter URLs are easier to scan, remember, and share, especially on social platforms and in chat. You do not need to strip every word, but avoid stuffing entire headlines into the slug.
Focus on the main idea, such as /url-structure instead of /everything-you-need-to-know-about-url-structure-in-2026. If someone reads just the URL, they should have a good sense of what they will see on the page.
Use hyphens, not underscores
Search engines and users both prefer hyphens to separate words in a slug. A URL like /what-is-a-url is easier to read than /what_is_a_url, which can blur together.
Many analytics and sharing tools also display hyphenated URLs more cleanly. When setting up rules in your CMS, choose hyphens as the default separator so writers do not have to think about it.
Use lowercase letters
Sticking to lowercase letters in URLs avoids confusion and technical issues. Some servers treat /Blog and /blog as different paths, which can create unexpected duplicates.
Lowercase URLs also look cleaner in social posts and email campaigns. Make it a standard on your team to use lowercase for folder and slug names.
Include keywords
Including the primary keyword in the URL slug helps both search engines and humans like us. For a page answering “what is a URL,” a slug like /what-is-a-url is a natural fit.
Do not stuff multiple variations in; one clear phrase is enough. When planning content, write the title and slug together so the keyword appears in both in a natural way.
Maintain logical structure
Think of your URLs as a map of your site. Group related content under clear parent folders, such as:
/blog/ for articles
/resources/ for guides and tools
/features/ for product information
This makes it easier to apply filters in analytics, manage redirects, and give users a sense of where they are. Avoid jumping between different folder patterns for similar content unless there is a strong reason.
Avoid special characters & dynamic parameters
Characters like spaces, ampersands, and many symbols must be encoded in URLs, which can make these links look messy and break some systems. Heavy use of dynamic parameters for things like filters or sessions can also create confusing URLs.
When possible, use clean slugs and keep parameters short and meaningful. For complex tracking or personalization, consider using a link shortener like Replug to hide the clutter.
Use static URLs
Static URLs are paths that stay the same and do not show random IDs or timestamps. They are easier to share, bookmark, and index.
Even if your site is powered by a dynamic CMS, configure it to output static-looking URLs. If you need to change a URL later, set up a permanent redirect so that old links still point to the correct page.
Use HTTPS
Always serve site content over HTTPS rather than HTTP. Modern browsers warn users when a page is not secure, which can hurt trust and conversions.
HTTPS protects login details, payment data, and other user information from snooping. It is also a positive signal for search engines. When you switch to HTTPS, make sure all old HTTP URLs redirect cleanly to their secure versions.
Remove stop words
Stop words are tiny words like “and,” “of,” “the,” and “to.” While fine in titles, they often bloat slugs without adding much meaning.
For example, /guide-to-urls can be shortened to /url-guide or /url-basics with no loss in clarity. Removing extra words keeps URLs shorter and cleaner while still reflecting the main topic.
Implement URL redirects (if applicable)
Whenever you change a URL or remove a page, plan how visitors from old links will be handled. A 301 (permanent) redirect is ideal for moving traffic and search value from an old URL to a new one.
Use redirects for site restructures, rebrands, and content pruning. Well-managed redirects keep users from hitting 404 pages and help preserve the value of past marketing efforts.
How to use URLs: Multiple ways mentioned!
URLs show up in more places than just the browser’s address bar. Knowing the main ways people use them helps you design better campaigns and content flows.
Way #01: Navigate to a website
The most direct way to use a URL is to type it into the browser’s address bar and press Enter. People use this for homepages, known resources, and simple vanity URLs heard on podcasts or seen in print.
Short, branded URLs are much easier to type than long, complex ones. That is why marketing professionals often create simple redirects like brand.link/freeguide for spoken or printed mentions.
Way #02: Click links
Most visits start with a click on a hyperlink in an email, social post, ad, or search result. The clickable text, known as anchor text, points to a URL behind the scenes.
Good anchor text describes what the user will get, while the URL controls where they land. When planning campaigns, consider both the visible text and the target URL to keep expectations and destinations aligned.
Way #03: Share or copy
People copy and paste URLs into chats, DMs, and documents all the time. Messy, long URLs can break across lines or hide important details when shared this way.
A short branded link looks neat and is less likely to cause issues in messaging apps. This matters a lot to social media managers and content creators who rely on shares to build reach.
Way #04: Bookmark
Browsers let users save URLs as bookmarks so they can quickly return to pages later. However, if your URLs change often, bookmarks can break and send people to 404 pages.
Stable, predictable URLs make bookmarks reliable and keep return visitors happy. Encouraging users to bookmark important pages, like dashboards or documentation, can reduce friction in ongoing engagement.
Various URL techniques you must know in 2026
As the web grows more connected, certain URL-related techniques recur across marketing, security, and development. Here is a quick comparison before we look at each in more detail.
Technique
What it means
Why it matters for marketers
Risk or note
URL shortening
Turning long URLs into short ones that redirect
Cleaner links, better clicks, and detailed tracking
Must use a reliable, trusted service
URL encoding
Converting special characters into safe formats
Keeps parameters and non-English text working correctly
Incorrect encoding can break links
URL filtering
Blocking or allowing URLs based on rules
Protects users and networks from harmful or off-policy content
Overly strict rules can block real content
URL hijacking (typosquatting)
Registering similar domains to catch misspellings
Often used by attackers to trick users or steal traffic
Brands should monitor and defend against lookalike domains
URL masking
Showing one URL while loading content from another
Used for clean affiliate links or hiding long destination URLs
Can be abused for phishing if used in a deceptive way
URL phishing
Crafting fake URLs that look real to trick users
A common attack that targets login pages, banks, and popular services
User education and good filtering are key defenses
URL shortening
URL shortening is the process of taking a long URL, often full of UTM parameters, and creating a short redirecting link. For example, a lengthy product link can become https://go.brand.com/offer. This is perfect for social media posts, SMS messages, and print materials where space and readability matter.
With Replug as your link shortener, you also get detailed click analytics and link management features, along with a compact URL.
URL encoding
URL encoding replaces unsafe characters with percent-encoded versions so they can be transmitted safely across the web. For instance, spaces become %20, and Non-ASCII characters in international URLs become encoded sequences.
This process prevents queries, parameters, and paths from breaking when they contain special characters or non-English text. Developers and marketers both rely on encoding when building tracking links, search URLs, or localized pages.
URL filtering
URL filtering uses rules to decide which URLs are allowed or blocked on a network or device. Companies use this technique to block access to known malicious sites or categories that do not comply with company policy. Email security tools also scan links and block ones that look suspicious.
For marketers, this means badly structured or shady-looking URLs are more likely to be filtered, so clean, trustworthy links are allowed.
URL hijacking
URL hijacking, often called typosquatting, occurs when someone registers domains that look almost identical to a known brand, such as by swapping letters or using nearby keys on a keyboard. Attackers then use these fake domains to catch users who mistype the real URL address and may present phishing pages or ads.
Brands should monitor these lookalike domains, especially if they notice unusual traffic patterns or reports of fake sites.
URL masking
URL masking shows one URL in the browser bar or in a link while loading content from another destination. Some affiliate marketers use masking to turn long referral URLs into neat branded ones.
When used transparently and with fair disclosure, this can improve the appearance of links and build trust. However, the same technique can hide malicious destinations, so many innovative security tools keep an eye on it.
URL phishing
URL phishing is any attempt to trick users into clicking a fake link that looks almost real. Attackers might change just one letter in a URL domain name, swap similar-looking characters, or hide the real destination behind untrusted link shorteners.
Once a victim lands on the fake page, the site may ask for logins, card details, or other sensitive data. Training teams to inspect URLs and using safe, consistent, branded links are among the best defenses.
Get branded, short URLs with Replug today!
Clean, trackable URLs are now a basic part of marketing, not a nice extra. Long, messy links waste space, hurt clicks, and make campaigns harder to measure. That is where Replug.io steps in as an all-in-one link management platform built for marketing pros, content creators, and agencies.
Replug acts as your brand’s link shortener, turning long URLs into short, branded links on a custom domain. Instead of sharing something like https://www.example.com/store/collection?id=123&utm_source=facebook&utm_medium=social, you can share https://go.example.com/sale. Under the hood, Replug tracks every click, including location, device, referrer, and campaign data, so reports stay accurate and easy to read.
Maximize marketing ROI
by transforming ordinary URLs into branded short links that convert.
Try Replug for free
For social media managers, affiliate marketers, and other digital marketers, this means sharing a single clean link while still retaining the data and control needed to improve performance.
Wrapping up
URLs might look simple, but they power almost everything that happens on the web. From learning what a URL is to understanding its structure, types, and behavior, you now have a clear picture of how web addresses guide traffic, shape SEO, and carry tracking data.
Remember, clean, semantic URLs help search engines and users, and smart use of parameters and redirects supports accurate measurement and smooth site changes. As campaigns grow across email, social, paid ads, and apps, link management becomes more important.
Replug gives you short, branded, and trackable URLs that keep your work organized and your reporting solid. With the basics and best practices in hand, every link you share can work harder for your brand.
Frequently asked questions
What is my URL?
“Your URL” usually means the web address of the page you are on. To find it on a computer, look at the address bar at the top of the browser window and read the full line starting with http or https.
If someone wants the URL of your website, they are often asking for your homepage address, such as https://www.yourbrand.com/.
What is a URL, and where is it located?
A URL is the full web address that points to a page, file, or resource on the internet. It includes the scheme, domain, path, and sometimes additional parts such as parameters or a fragment.
In every browser, the URL appears in the address bar at the top of the window or tab.
How do I find out my URL on my iPhone?
On an iPhone, open Safari or another browser and go to the page you like. Tap the address bar at the bottom or top of the screen, and the full URL will appear highlighted.
You can then copy it by pressing and holding until a copy option shows, and paste it wherever needed.
What does it mean when someone asks for a URL?
When someone asks for a URL, they are asking for the exact web address of a page, file, or profile. This lets them or their system go straight to that resource without searching for it.
For example, a designer might ask for a landing page URL to check the layout, or a colleague might ask for a shared document URL.
Are there any length limitations for URLs?
There is no strict universal limit in the web standards, but practical limits exist. Many browsers and servers work best with URLs shorter than about 2,000 characters.
Very long URLs can cause errors in older systems or when pasted into some tools. Keeping URLs short and tidy is safer and easier to manage.
How to create, open, or block a URL?
– To create a URL, publish a page or file on a server or platform, and that system gives you a unique address.
– To open a URL, type or paste it into the browser’s address bar and press Enter, or click a link that points to it.
– To block a URL, use browser extensions, parental controls, security software, or network filters that let you add that address to a block list.
Can URLs be case-sensitive?
The domain part of a URL, such as example.com, is not case-sensitive, so Example.com and example.com are treated the same.
However, the path and everything after it can be case-sensitive on some servers. That means /About and /about might be different pages, which is why best practice is to stick to lowercase for paths and slugs.
What is a URL used for?
A URL is used to locate and request resources on the Internet. Browsers, apps, and tools rely on URLs to fetch pages, images, videos, APIs, and more.
For marketers, URLs also carry tracking data, help shape SEO, and connect different systems through webhooks and callbacks.
What is URL defense?
URL defense usually refers to systems that scan and rewrite links in email or messages to protect users from harmful sites. These tools check URLs for known threats and may route clicks through a secure scanning service first.
If a link is later found to be risky, the system can block access even if the email has already been delivered.
What is the difference between a URL and a hyperlink?
A URL is the actual web address, such as https://example.com/page. A hyperlink is the clickable element in a document or web page that takes you to the URL.
The hyperlink can display any text, such as “Read more,” while the URL remains hidden and points to the destination.
What is the difference between an absolute URL and a relative URL?
An absolute URL includes the scheme, domain, and full path, so it works anywhere on its own. A relative URL, on the other hand, skips some parts and relies on the current page for context, such as just /contact.
Absolute URLs are used in emails, ads, and any cross-site links, while relative URLs are common inside a site for internal navigation.
Can a URL point to a specific section within a webpage?
Yes, a URL can point to a specific section of a page using a fragment. This is the part after the hash symbol, such as https://example.com/guide#faq.
When the page loads, the browser scrolls directly to the element with the matching ID, giving users a faster path to the content they care about.
Can a URL be changed over time?
A URL can be changed, but doing so without considering important factors can break links and harm SEO. If you must change a URL, set up a 301 redirect from the old address to the new one, so visitors and search engines are guided correctly.
Planning a structure well from the start reduces how often you need to rename URLs later.
What is a URL example? Give a good and a bad one?
– An example of a URL (good one) is https://www.example.com/blog/what-is-a-url, which is clear, short, and descriptive.
– A weaker example is https://www.example.com/index.php?id=987&ref=home, one that looks confusing and gives no clue about the topic.
Both might technically work, but the first is far better for users and search engines.
What is a URL blacklist?
A URL blacklist is a list of web addresses known or suspected to be harmful, such as phishing pages or hosts of malware. Security tools, browsers, and email providers use these lists to block or warn users before they visit those sites.
For brands, staying off such lists means keeping sites secure, avoiding spammy practices, and monitoring for hacks or injected content.
In a world where 16 billion passwords and login credentials have already been exposed online, it’s no longer enough to hope your messages are safe (you have to guarantee it).
Between record breakers in data leaks and billions of compromised records floating around the dark web, hackers aren’t just after big corporations. They’re after everyday conversations, shared files, and yes, that link you just sent to a colleague.
Studies show that up to 30% of data breaches are linked to weak or reused passwords and insecure sharing habits, such as via email and SMS. This only makes matters worse!
So if you’re sending something sensitive (legal documents, contracts, personal info), how do you keep it truly private?
Let’s start by understanding what a password-protected link actually is.
What is a password-protected link?
A “password-protected link” is a special kind of URL that won’t open the content you’re sharing until someone enters the correct password first.
Think of it like locking your digital door. Even if someone has the address (the unique URL), they can’t get inside without the key (the password) you set.
It’s a simple but powerful way to control access to sensitive files, private pages, or confidential information you’re sharing online, especially when you don’t want just anyone with the link seeing it.
With password protection, only people who know the right password can pass through the gate and view the destination content.
Why is password protection so important?
Here’s why:
Stops unauthorized access: Without a password, anyone who slips upon or forwards your URL can see your content. Password protection adds a layer of defense against this.
Keeps confidential info safe: Whether it’s financial docs, legal contracts, or personal files, password-protecting the link helps prevent accidental leaks.
Works with tools you already use: You can manage link passwords alongside a password manager to keep all your access keys organized and strong.
Simple yet effective: There’s no need for complex authentication systems. A protected URL with a solid password does the job for most use cases.
Common methods for creating password-protected links
When you want to share sensitive information or material online but still control who can access it, knowing how to set up a password-protected link is super useful.
One of the easiest ways to do this is to use URL shorteners that let you turn regular URLs into secure, password-protected versions before you share them.
Method #01: Link shorteners & managers
The best link shortener tools not only make long URLs cleaner and easier to share, but they also often have built-in password protection features that turn any link into a controlled-access URL.
Below are some of the most reliable tools you can use today and how they handle password-protected links:
Replug
Replug is an efficient link shortener and tracker that also works as a password-protected link generator, letting you set a password for any URL you shorten, hassle-free.
Here’s how to create a password-protected link using Replug (step-by-step):
2. Once you’re logged in, go to the Replug links dashboard and click a link of your choice. If you are a new user, look for the “Quickly Shorten your link” option.
3. Enter the link (or URL) you want to shorten and get password-protected. Then, click the blue right arrow button.
4. You’ll get your shortened URL within seconds. Now, turn on the “Password Protection” toggle button.
5. Set a strong password under the “Your link password” option.
6. Finally, save the link by clicking the “Save Shortened Link” button.
7. Once done, anyone who tries to open the link will be asked for the password you set before they can see the content.
That’s all there is to it!
Note: If you’re just starting out and want a password-protected link for free, Replug offers this feature, along with link tracking and branding tools, at no extra cost.
Short.io
Short.io lets you create short URLs and add password protection, so anyone who clicks your link must enter the correct password first. This feature is part of their password protection settings. When you create or edit a short URL, you can also customize how the password page looks.
Dub
With Dub, you can protect your short links by setting a password during the link creation process. You enter your destination URL and set a password in the password settings, and Dub will prompt visitors to enter it before redirecting them. It’s available on their Pro plans and above!
Nimble Links
Nimble Links makes it easy to shield any link with a password by just pasting your URL, setting a key, and generating a protected link. Visitors trying to open the short URL will first see a password prompt. However, keep in mind this is best for casual sharing or internal use rather than for highly sensitive content.
Method #02: Specialized security tools
Some tools are built specifically for secure information exchange, allowing you to create highly private links that often expire, self-destruct, or require additional safeguards beyond a standard password prompt.
These are great when you want one-off secure links or when you’re sending sensitive info like credentials or agreements.
Password.link
Password.link is a simple service that lets you create secure, one-time links to send or receive confidential information.
It encrypts your content directly in the browser and generates a link that can be configured to expire or be opened only a certain number of times. An ideal option for sharing details that should vanish after use.
You can also request secure data from others through a similar link. Its focus on one-time secure URLs makes it perfect for time-sensitive or highly private exchanges.
Link Lock
Link Lock is a lightweight tool that lets you encrypt any URL with a password so that only people who know it can access the real destination.
Instead of hovering around a standard address, visitors first see a password prompt and only reach the original URL after entering the correct credentials. Everything happens client-side, meaning your passwords and links aren’t stored on external servers.
Method #03: File sharing services
Cloud-based file services often let you not only upload files but also password-protect the shared URLs you generate, adding another layer of safety to your file links.
Proton Drive
Proton Drive is a secure cloud storage service that lets you upload files and then generate shareable links with password protection and optional expiration dates.
The files are end-to-end encrypted before they leave your device, and you can withdraw access whenever you want. Even if someone has the link, they can’t open it without the password you set.
MEGA
MEGA offers encrypted cloud storage and links that can be password-protected at the time of creation. When the link is protected, anyone who clicks it will be prompted to enter the password before access is granted, helping ensure that your shared content stays private.
Password-protected MEGA links often use a unique format that separates the password from the visible part of the URL for added security.
Method #04: Website protection
If you’re sharing content from your own website (not just files), you might want to secure entire URLs or sections of your site so that visitors must enter a password to view confidential content.
SiteGround
With SiteGround hosting, you can password-protect specific URLs or pages through the hosting control panel.
In the site tools area, there’s a section for protected URLs where you can specify which parts of your site require a username and password to access. This adds a gate before the page even loads, helping you control who sees private web-based content.
Here’s a snapshot of real-world password-protected link examples you can use or learn from, whether you’re sharing files, documents, or curated content online.
Each service below highlights how platforms let you restrict access so that only those with the URL can view or download what’s behind it.
Password-protected link Google
Google Drive does not natively support password-protected links for shared files or folders. This means you can share URLs, but the service itself won’t ask for a password before granting access.
Security instead relies on Google account permissions and who you choose to share with. For true password protection, users often turn to third-party tools that wrap Google Drive links with a password layer.
Password-protected link Google Drive
Because Google Drive lacks built-in password prompts on share links, many people use external services (like MultCloud) to generate a link that requires a password to view a Google Drive file.
Password-protected link OneDrive
OneDrive also doesn’t offer straightforward password protection on shared links in most consumer plans. Instead, security relies on sharing only with specific people or using organizational policies.
Enterprise-level Microsoft 365 tenants can apply password protection on links via admin settings, especially for “Anyone with the link” shares.
Password-protected link Dropbox
With Dropbox (on Professional and higher plans), you can add a password directly to a shared link, so recipients must enter it before accessing files or folders. Passwords and link expiration settings are built into the link settings on the Dropbox site or app.
Password-protect link SharePoint
In SharePoint Online, you can create password-protected sharing links for files and folders. But keep in mind, this works with “Anyone with the link” share permissions and is usually managed through the SharePoint Online interface. Recipients must enter the correct password to view the content.
Password-protect link ShareFile
While ShareFile doesn’t let you set a classic password prompt on public links, it does offer very strict access controls. This ensures that only signed-in or specified users can access a share link, effectively controlling access in a way similar to password protection.
Password-protected link Linktree
Linktree lets you lock individual links on your bio page using a “Code Lock.” Visitors must enter a 4-digit code before they can open that specific link. This is great for exclusive content or gated experiences.
Password-protected link Words Puzzle Page
Sites like puzzle pages or member-only content pages often use simple password gates on URLs, so only people with the password can access them.
You set a password and share the link plus the password with your audience. This isn’t built into every platform, but it’s a good example of how password protection can control access to interactive content (think of a custom WordPress page with password protection enabled).
How can you make your links more secure?
Making sure your links are actually safe to share is more than just adding a password. It’s about layering smart practices to reduce the risk of unauthorized access or data leaks.
Here are key ways you can boost the security of your shared URLs:
🔒 Use strong, unique passwords: Don’t fall for simple phrases like “1234” or “password”. Aim for longer, unpredictable passwords with a mix of characters. A password manager can help you generate and store these securely so you don’t have to remember them all.
📤 Share passwords separately: Never send the password in the same message as the link itself. For example, email the link and send the password over text or a secure messenger so someone intercepting one can’t open the content.
⏱️ Set expiration dates: Make links expire after a certain time (like a day or a week) so they don’t stay open forever if someone else missteps on them later.
📈 Limit access & track usage: Where possible, set limits on how many times the link can be used and monitor access attempts. This helps you catch weird activity early.
🍃 Use secure channels & networks: Before sharing anything sensitive, make sure you’re on a trusted, private connection rather than public Wi-Fi, which can be snooped on more easily.
🔐 Combine protections: Password protection is just one part. Combining it with features such as click limits, link expiration, and encryption provides a stronger defense than passwords alone.
Doing these things together keeps your password-protected links truly protective, so only the right people can open them.
Wrapping up
As you’ve seen, sharing sensitive content online doesn’t have to be risky anymore, especially when you use the right tools and practices.
From simple cloud drives to password-protected link shorteners, there are plenty of ways to add an extra layer of security to your shared URLs.
No matter if it’s a private file, an invite-only page, or something you don’t want publicly indexed, protecting your short URL with a strong password and good link hygiene helps prevent unauthorized eyes without slowing you down.
Just remember to share passwords separately, set expiration dates when possible, and choose tools that match how sensitive your content really is. With these steps, your links stay concise, easy to share, and most importantly, secure!
Frequently asked questions
Can I password-protect a link?
Yes, for sure! Many online tools let you add a password to a URL, so anyone trying to open the link must enter your chosen password first. This works by wrapping the destination inside a password gate before redirecting.
Can password-protected links be hacked?
Yes, password-protected links aren’t unbreakable. If someone guesses or brute-forces a weak password or the service storing the link is compromised, the protection can be bypassed. Strong, unique passwords reduce this risk, but nothing is 100% safe.
How do I add a password to a URL?
To add a password to a URL, use a service that generates a protected link. Paste your destination URL → set a URL password (of your choice), and it gives you a new link that prompts for that password before access.
Is a password link trustworthy?
A password link can be trustworthy for casual or temporary sharing, but its safety depends on the service and setup. For sensitive data, a one-time password link or a platform with strong encryption is generally more reliable. This is because simple password gates may be vulnerable if passwords are weak or shared insecurely.
How to disable or turn off password-protected sharing?
In most tools, you can go to the link’s settings or dashboard and remove the password or turn off protection, which restores normal access to the link without a password prompt. The exact steps vary by service.
Is it safe to use password-protected links for sensitive information?
Password-protected links add a layer of security, but they aren’t as strong as full encryption. For very sensitive and confidential information, you should combine password protection with strong encryption or secure file sharing. Plus, avoid sending the link and password in the same message.
What’s the difference between password protection and encrypting files?
Password protection simply requires a correct password to access something. Encrypting files shuffles the file data itself so it’s unreadable without a decryption key. This protects content at rest, not just at access. Encryption is generally stronger and protects the actual data, while a password gate just controls entry.
How to manage users’ access to protected URLs?
To manage access for users on protected URLs, open your link or share settings in whatever service you’re using (like Dropbox or a URL tool). From there, you can change who has the link, update the password, or cancel access entirely. Some tools also let you see who accessed the link and block specific users.
How to change the password for a password-protected URL?
To change the password on an already password-protected URL:
1. Go to your link’s dashboard or settings. 2. Find the link. 3. Choose “Edit”. 4. First, enter the old password, then enter a new one. 5. Save the changes.
After this, only the new password will work!
How to remove password protection from a URL or link?
To remove password protection, edit the protected URL settings and turn the password option off or delete the password. The link will then open normally without anyone needing a password.
How to password-protect a folder or file and access it later?
To password-protect a folder or file, many cloud services let you set a password that must be entered before viewing or downloading. On your own computer or host, you can use built-in features (e.g., encrypt with a password in Office apps) or tools that wrap files/folders with a password prompt. Once set, you’ll need that password every time you access them.
How to send a password-protected link?
To send a password-protected link, first create it using a dedicated password-protected link app by entering your destination URL and setting a password. Once generated, send the protected link to your recipient via a secure service and share the password separately. This keeps the link private and safe until the intended user enters the password.
How to make a password-protected link in HTML?
With plain HTML alone, you can’t reliably secure content, because all HTML and CSS are visible to anyone who inspects the source. What you can do is add a simple form and a bit of JavaScript that asks for a password and then redirects to a URL if the correct password is entered. But this method is not real security. For real protection, you need server-side code or a service that checks the password before showing the link.
How to bypass a password-protected link?
There’s no legitimate password-protected link bypass way without the correct password. That’s the whole point of the protection. Some systems offer authorized access links that work without a password because the unlock token is embedded in the link, but those must be created by the owner and aren’t true bypasses. Trying to break or bypass a password without permission is not appropriate and often illegal.
How to unlock password-protected links without a password?
You normally can’t unlock a password-protected link without the correct password. That’s exactly what the protection is for. The only legitimate ways are to ask the owner for the password or, if you own the link, remove the password from the settings. There isn’t a built-in bypass for security reasons. (General security principle)