Author: Arslan Jadoon

  • Branded Link Management: Your Key to Online Success

    Branded Link Management: Your Key to Online Success

    Links serve as vital assets that connect your brand with the digital world, so having full control over them is essential. Branded Link management empowers you to safeguard your brand, optimize your marketing, and efficiently handle the many links your company generates. 

    Therefore, a central link management tool is essential to enhanced collaboration, accurate tracking, and brand protection.  It can also help to increase brand awareness and streamline link sharing between colleagues.

    Here’s what branded link management is and why it’s crucial for your company’s online success.

    What is branded link management?

    Branded link management, often referred to as branded link shortening is a specialized facet of link management that focuses on shortening, customizing, and optimizing links, particularly for branding and marketing purposes. 

    Branded links are shorter and more user-friendly versions of URLs, and they often feature a custom domain that aligns with a brand or campaign.

    Key aspects of branded link management:

    • Customization: Branded links allow you to tailor URLs to match your brand, campaign, or content. For example, a complex and long URL can be transformed into a concise and branded link.
    • Branding: By using branded links, you reinforce your brand identity in every link you share. This consistency can boost brand recognition and trust among your audience.
    • Tracking and analytics: Branded link management tools often offer robust tracking and analytics features. This data helps you measure the performance of your branded links, enabling data-driven marketing decisions.
    • Link security: Branded link management platforms often include security features that protect your links from malicious activities, ensuring the integrity of your brand’s online presence.
    • User experience: Branded links are user-friendly and can enhance the overall user experience, as they are easier to remember and share.
    Replug Branded Short Links CTA
    A complete link management solution
    for marketing professionals & agencies.
    Try Replug for free

    Branded link management: why do you need it?

    Companies, particularly those engaged in e-commerce, affiliate marketing, and social media marketing, benefit from using a link management tool for several compelling reasons:

    1. URL shortening: 

    A branded link management tool shortens long and cumbersome URLs, making them more user-friendly and aesthetically pleasing. This is particularly useful for sharing links on social media, in email marketing campaigns, and within content.

    1. Tracking and analytics: 

    Branded link management tools offer robust tracking and analytics features, allowing companies to monitor the performance of their links. This includes tracking click-through rates, conversion rates, and other essential metrics to assess the effectiveness of marketing campaigns.

    1. Conversion analysis: 

    Companies can analyze the conversion rates associated with specific links. This insight helps in optimizing marketing efforts and understanding which links are driving the most conversions and sales.

    1. Branding: 

    Branded links provide consistency and reinforce a company’s brand identity with every link shared. This consistency can boost brand recognition and trust among the audience.

    1. Efficiency: 

    Link management tools streamline the process of creating and managing links, saving time and reducing the risk of errors. This is especially valuable for companies that deal with a large number of links.

    1. Social media traffic: 

    Many link management tools offer features like bio links, which are crucial for social media marketers. These tools help drive social media traffic to the company’s website by providing a simple and appealing way to share links on platforms with character limits or visual constraints.

    1. Lead generation and retargeting: 

    Some link management tools go beyond shortening links and offer lead generation and retargeting capabilities, enabling companies to capture leads and re-engage with potential customers who clicked on their links.

    Replug Branded Short Links CTA
    A complete link management solution
    for marketing professionals & agencies.
    Try Replug for free

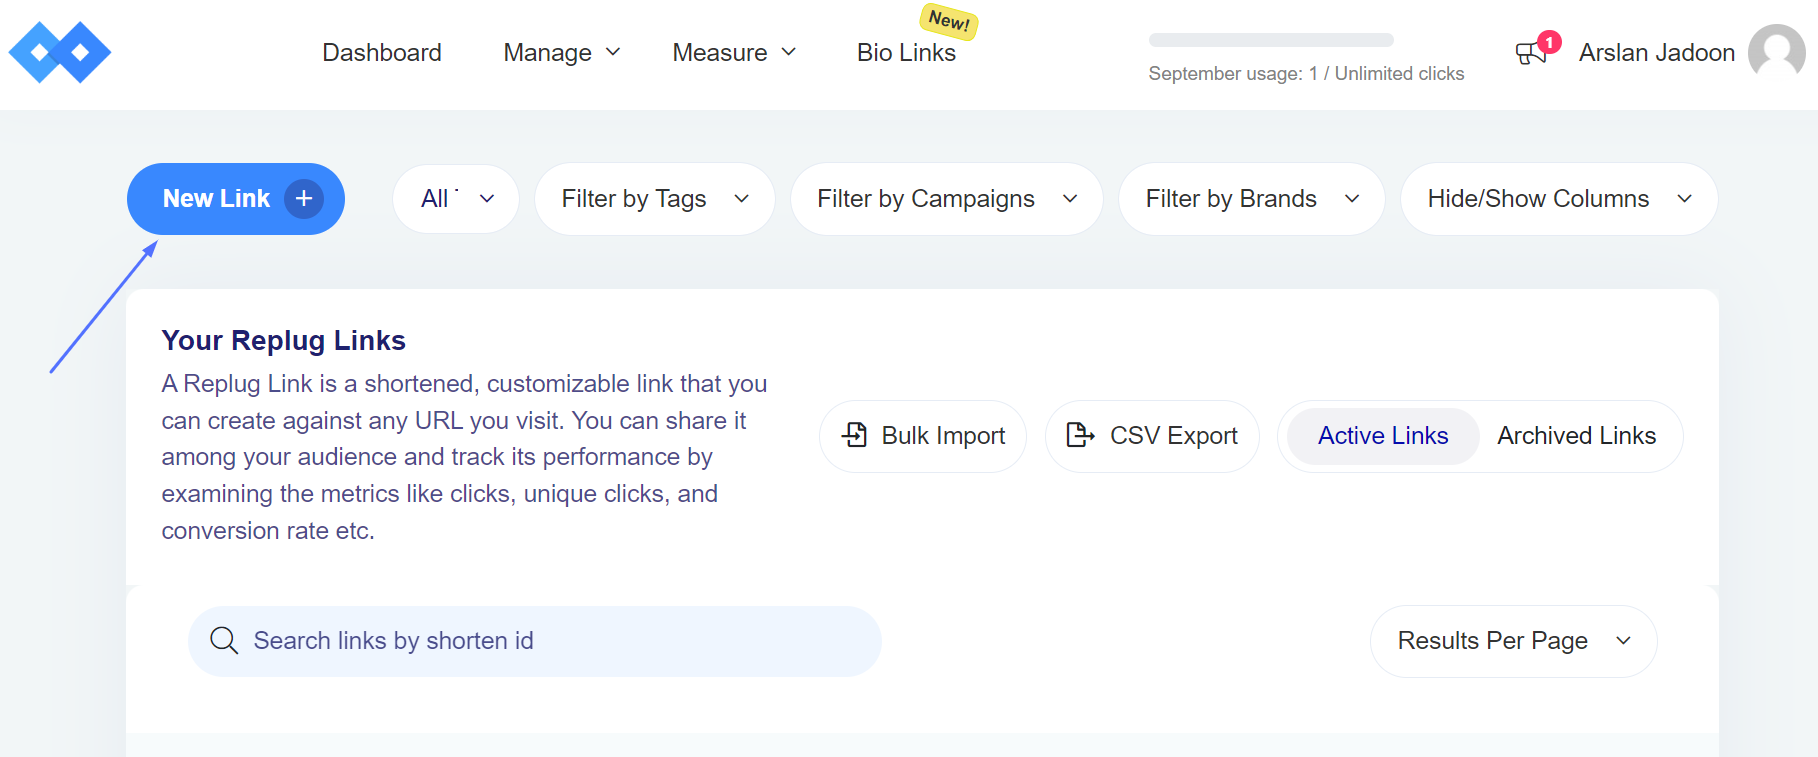
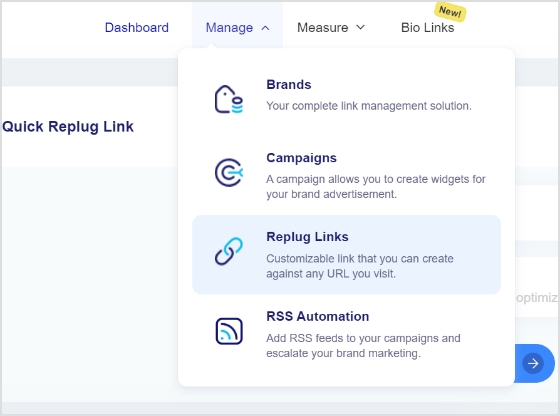
    Brand and manage your links with Replug

    A powerful link management tool can be the difference between success and obscurity. Replug.io is not just another option; it’s the best choice, and here’s why:

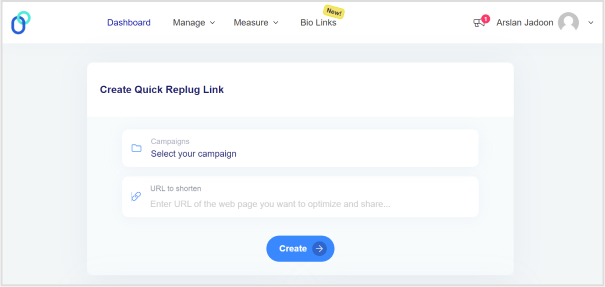
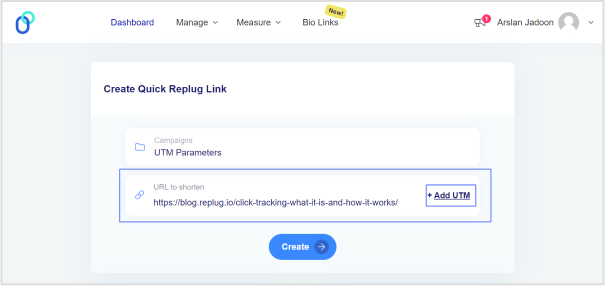
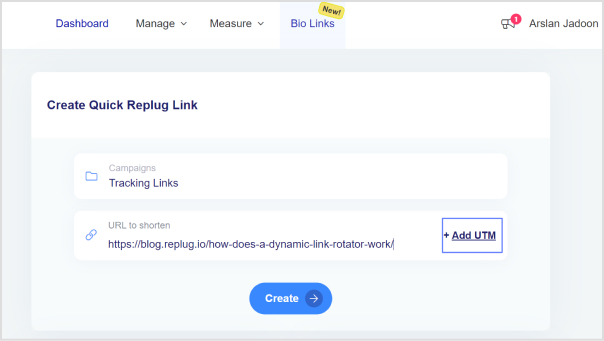
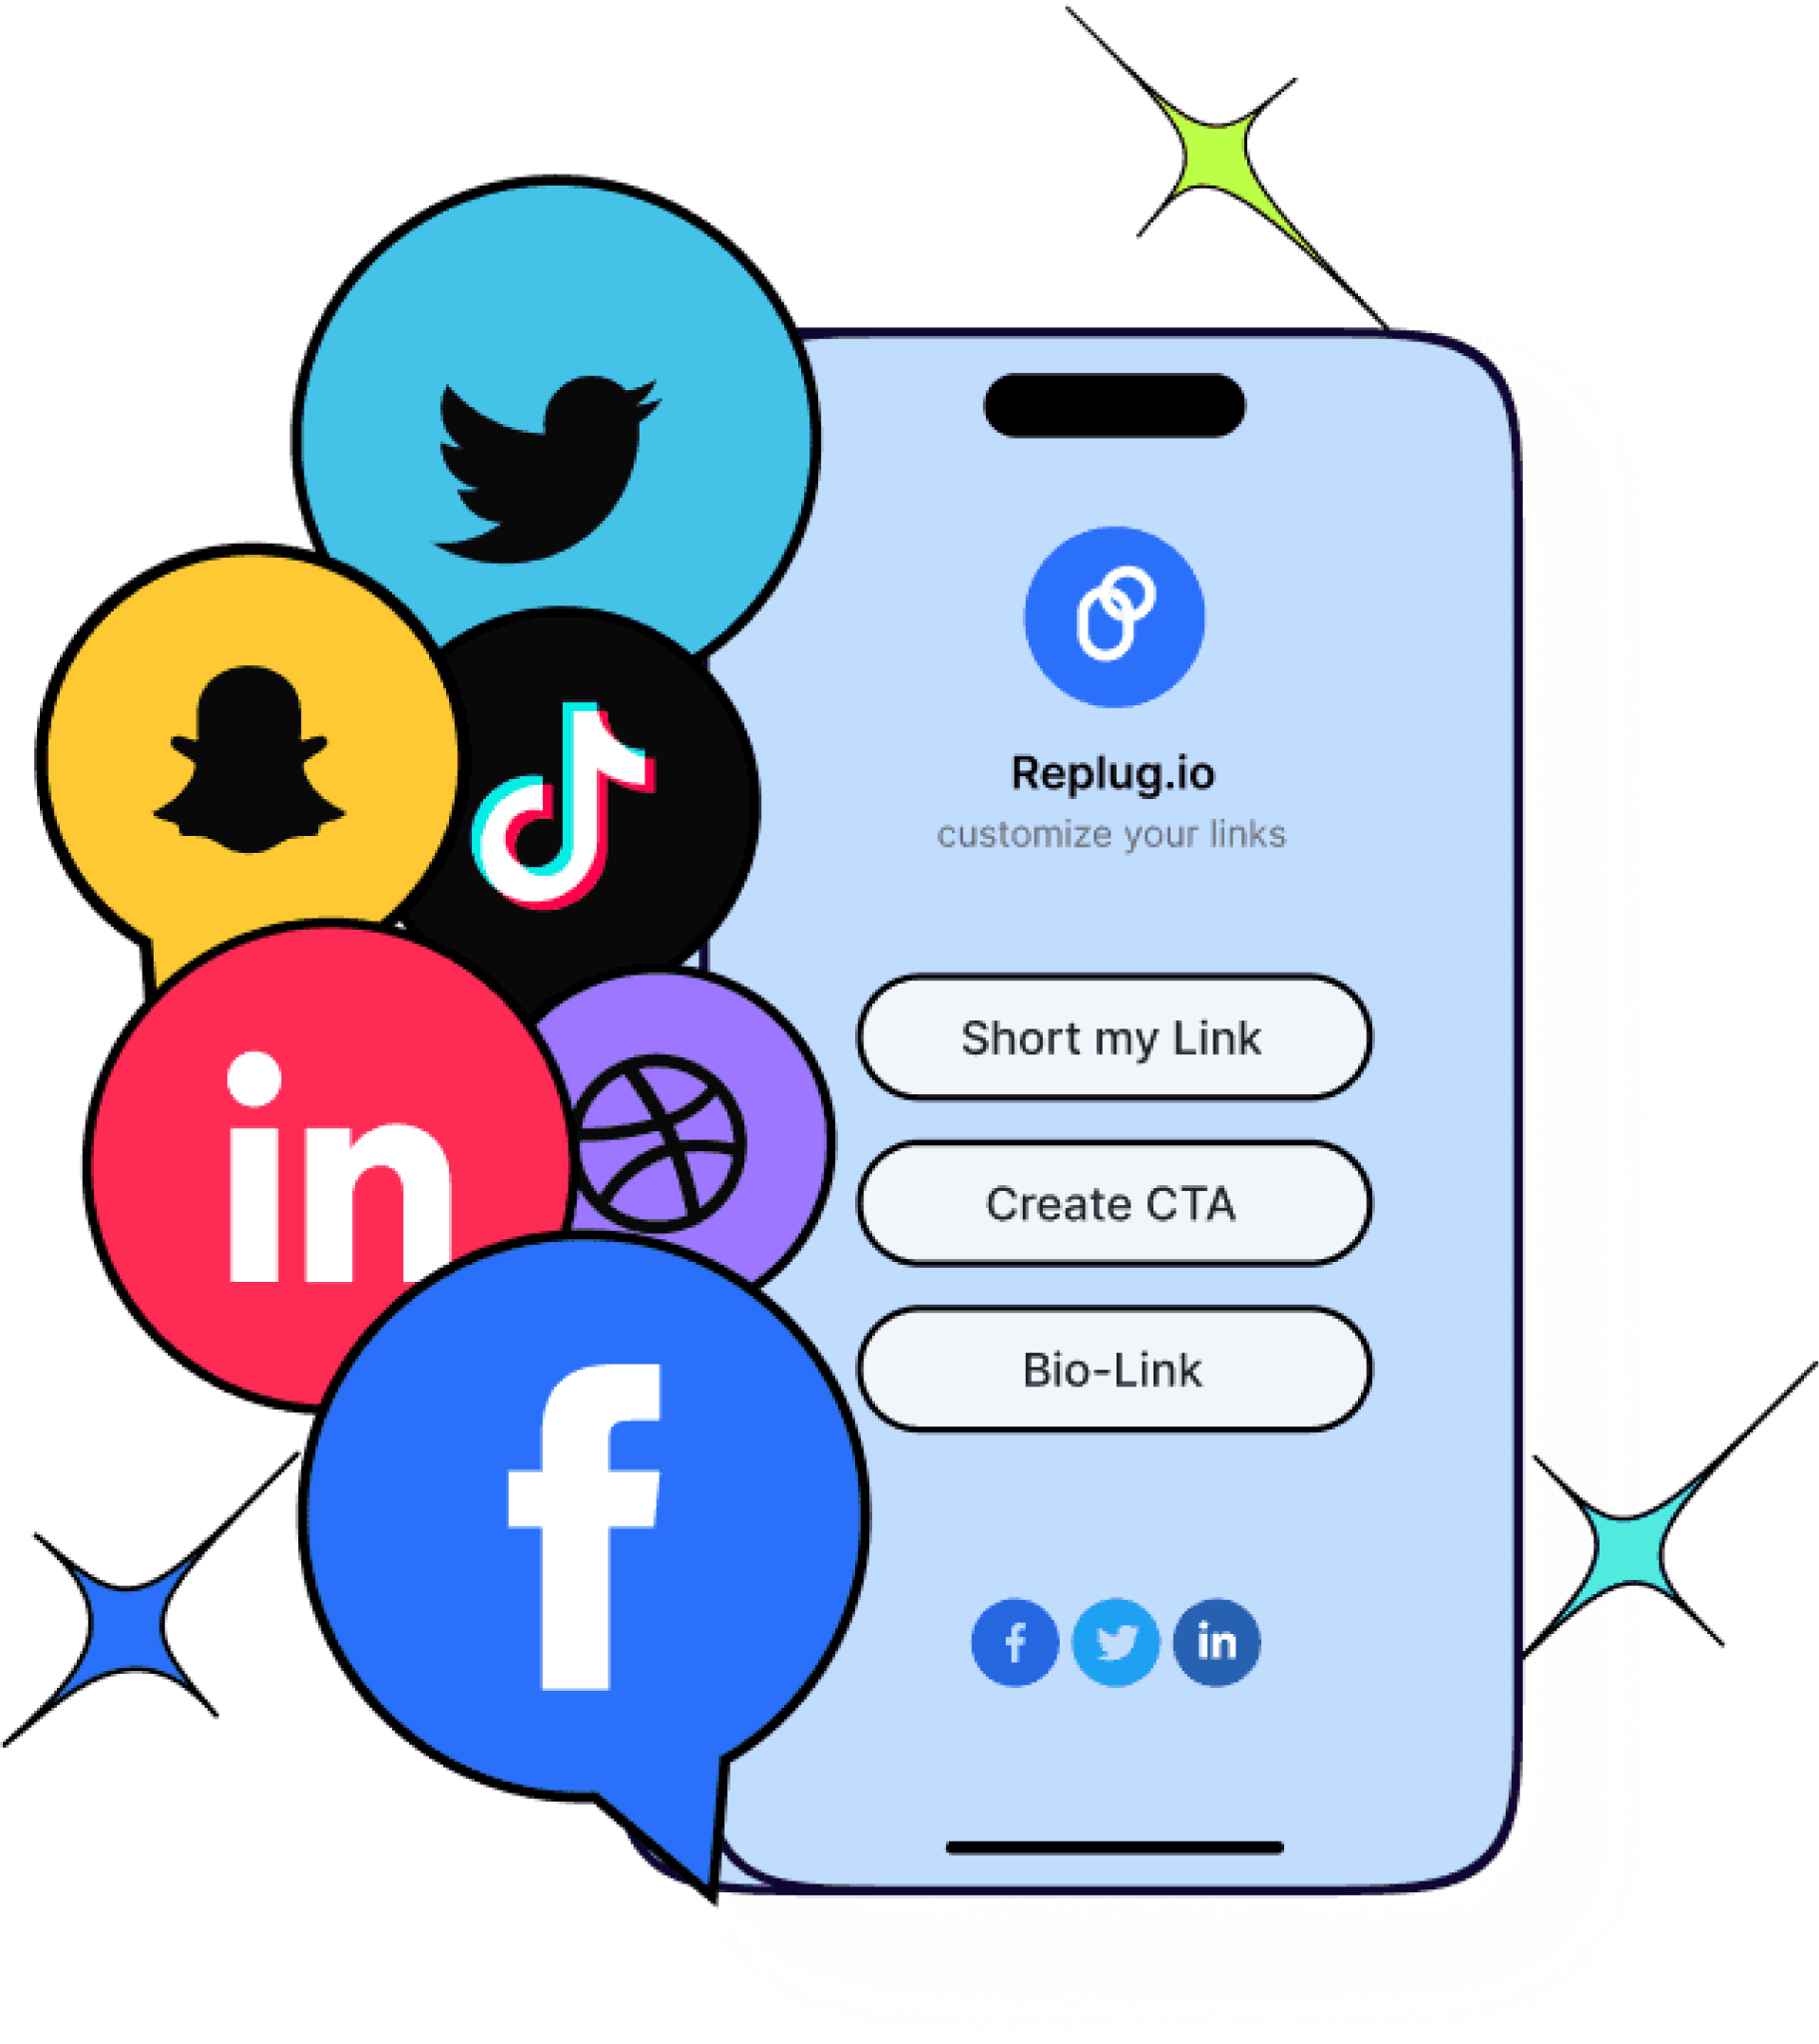
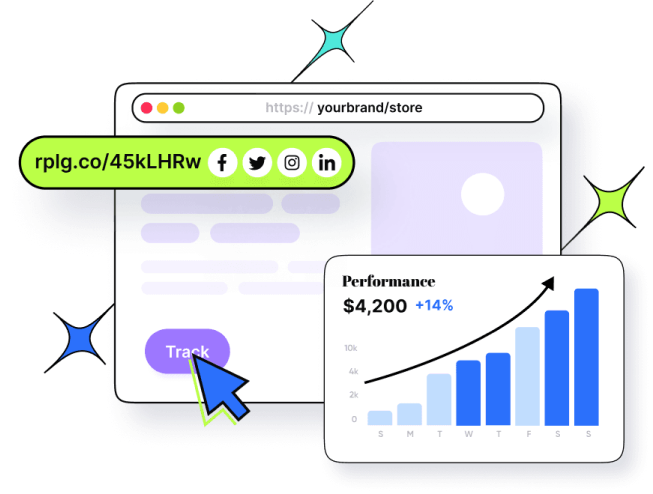
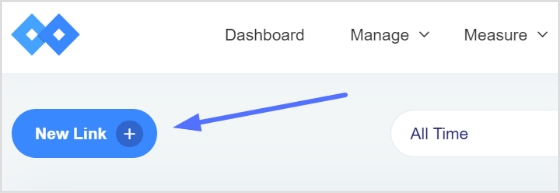
    Branded short links: 

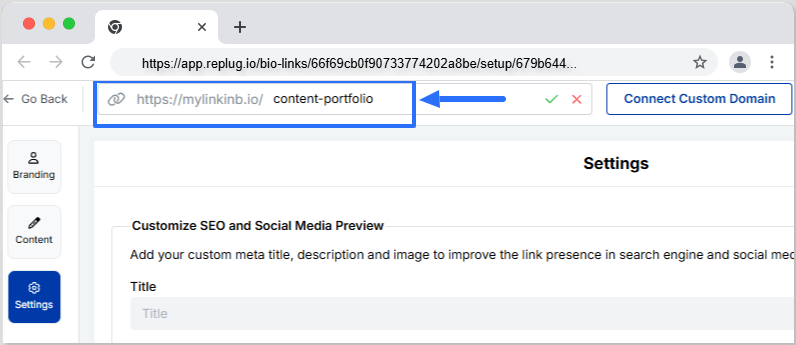
    Replug’s link shortener transforms lengthy URLs into concise, branded short links. Now, you can create short links in no time at all. Your audience will remember and trust these links, and you can even use your custom domain for that extra touch of professionalism.
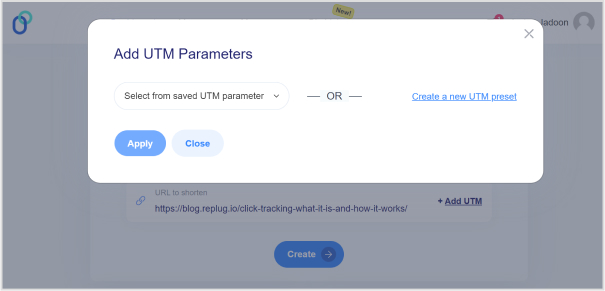
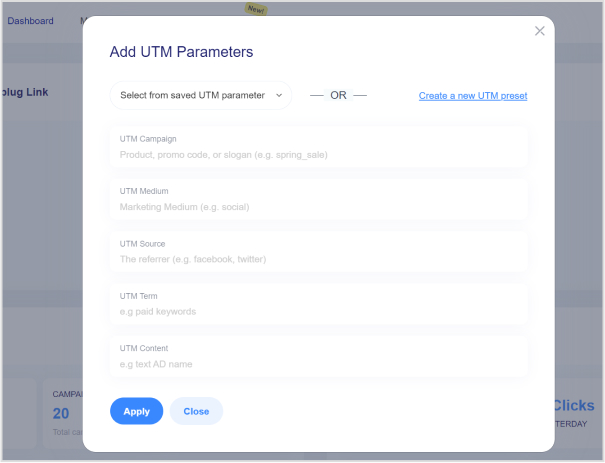
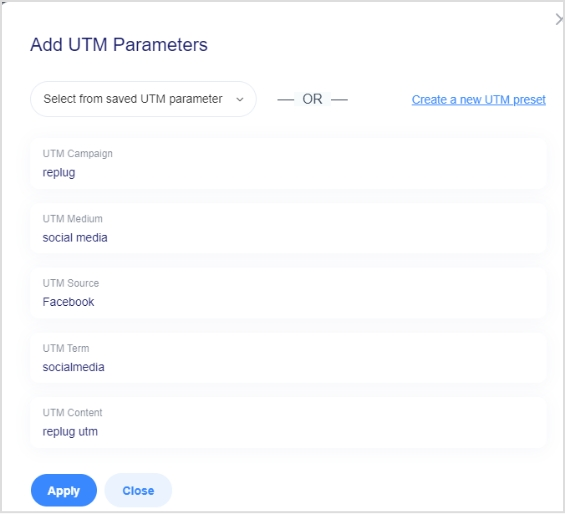
    Link analytics: 

    Replug provides in-depth link analytics, so you’re never in the dark about your link performance. UTM tracking allows you to monitor metrics at your fingertips, enabling data-driven decisions.
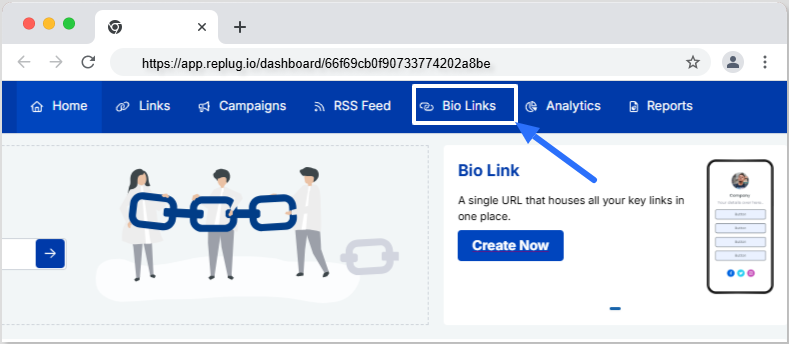
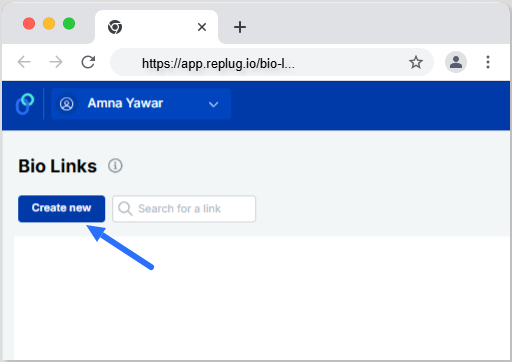
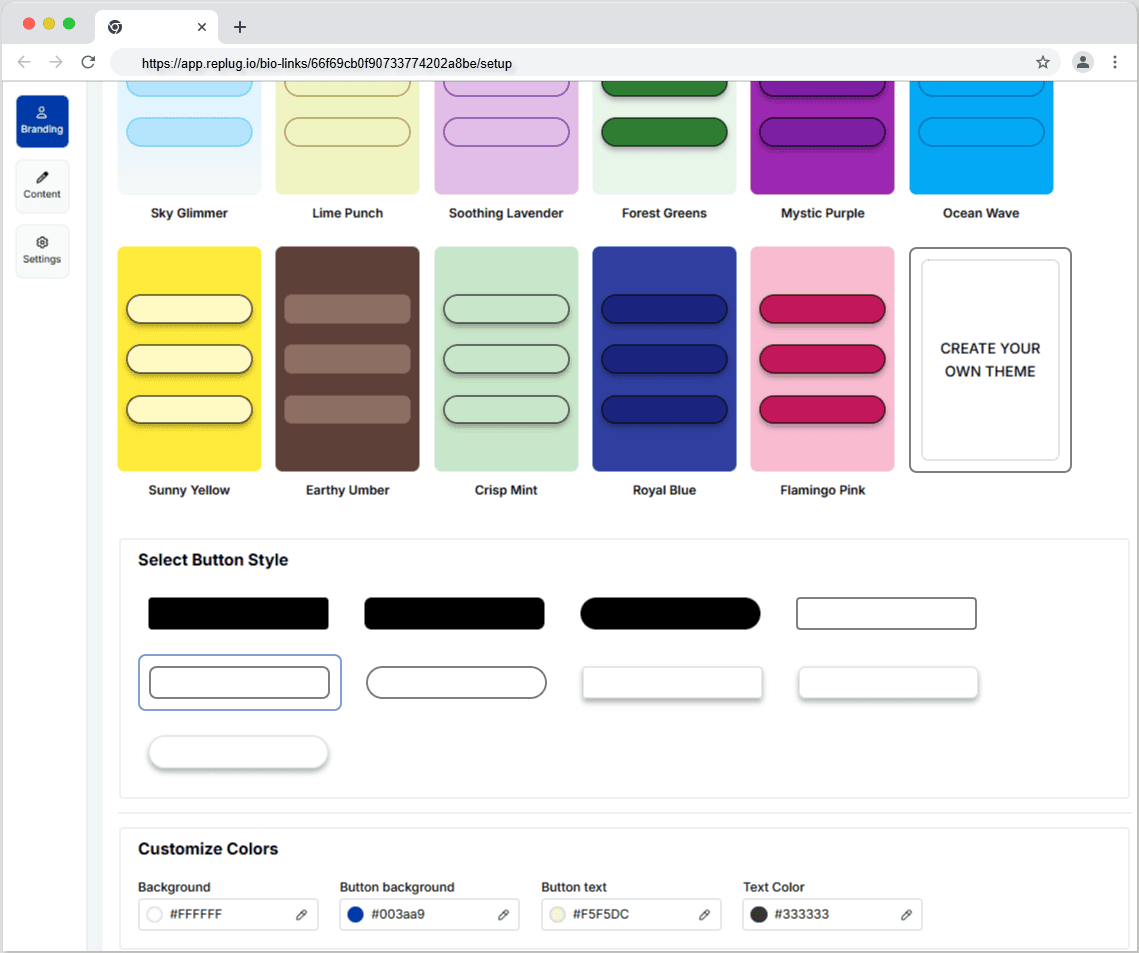
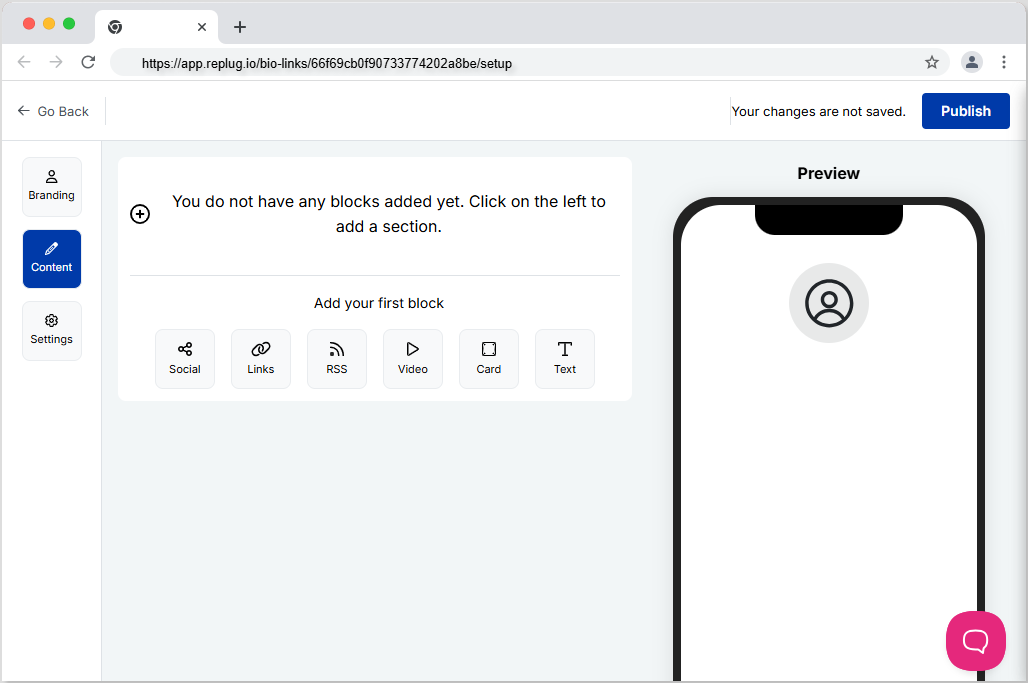
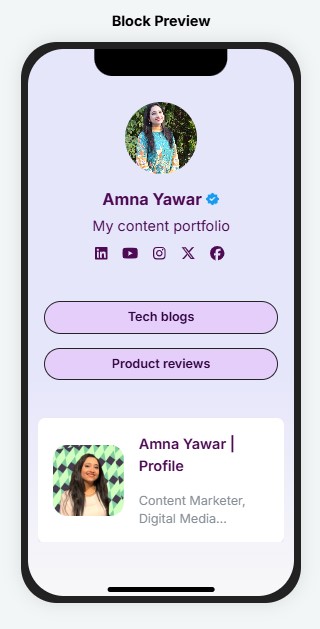
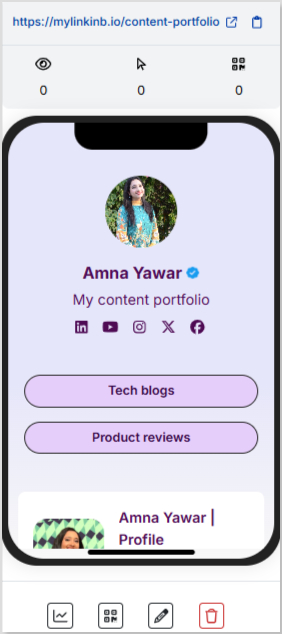
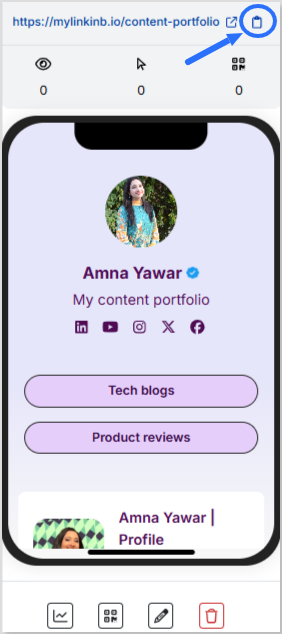
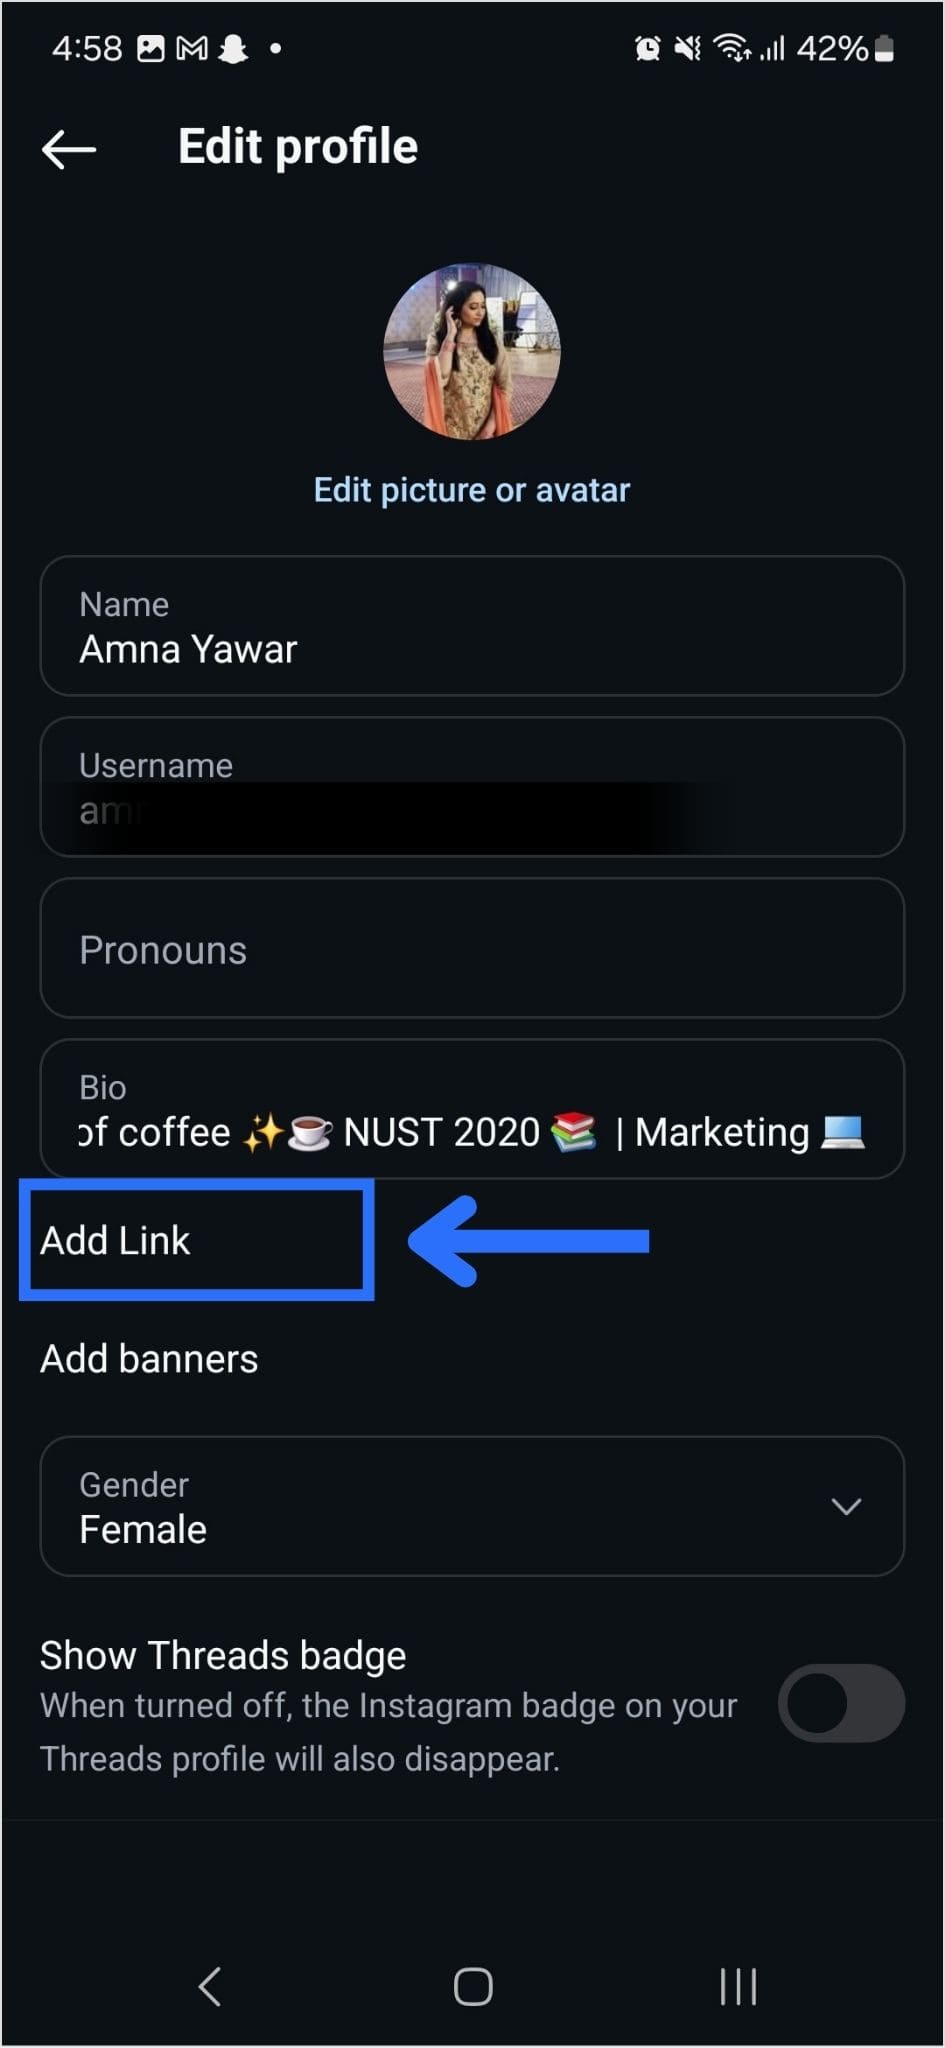
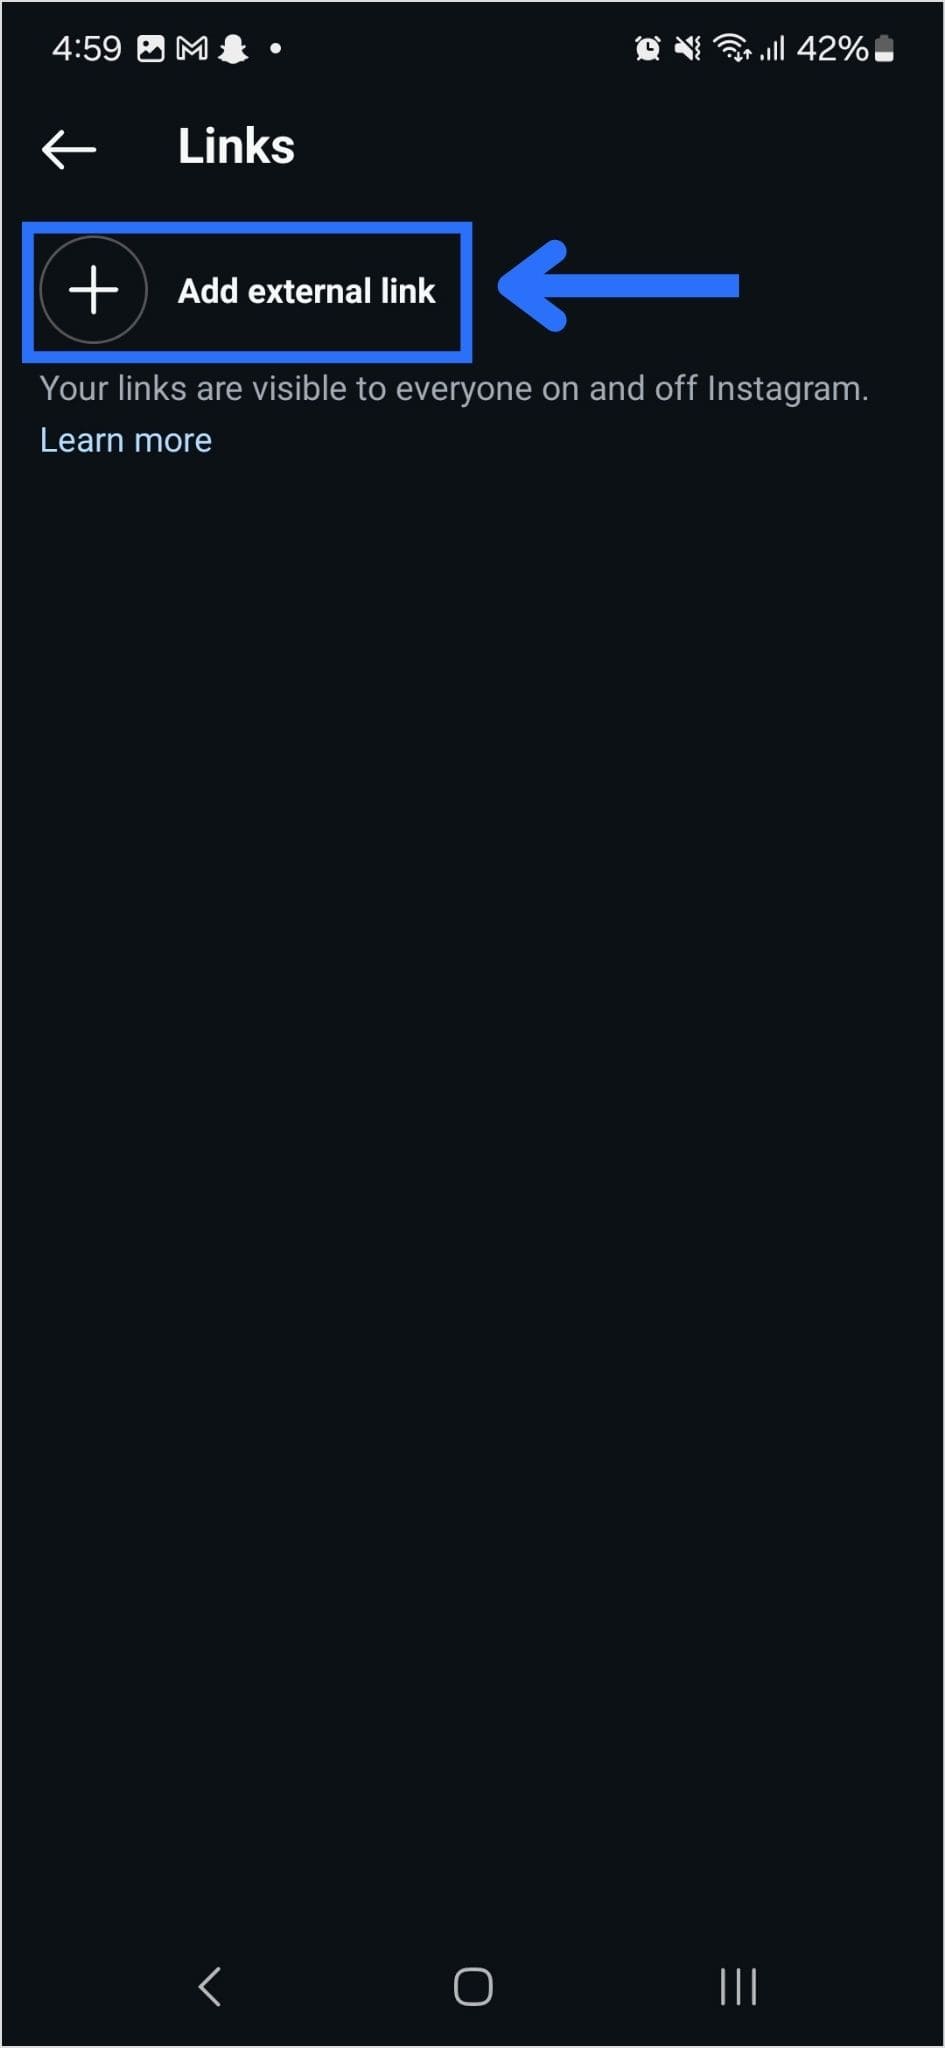
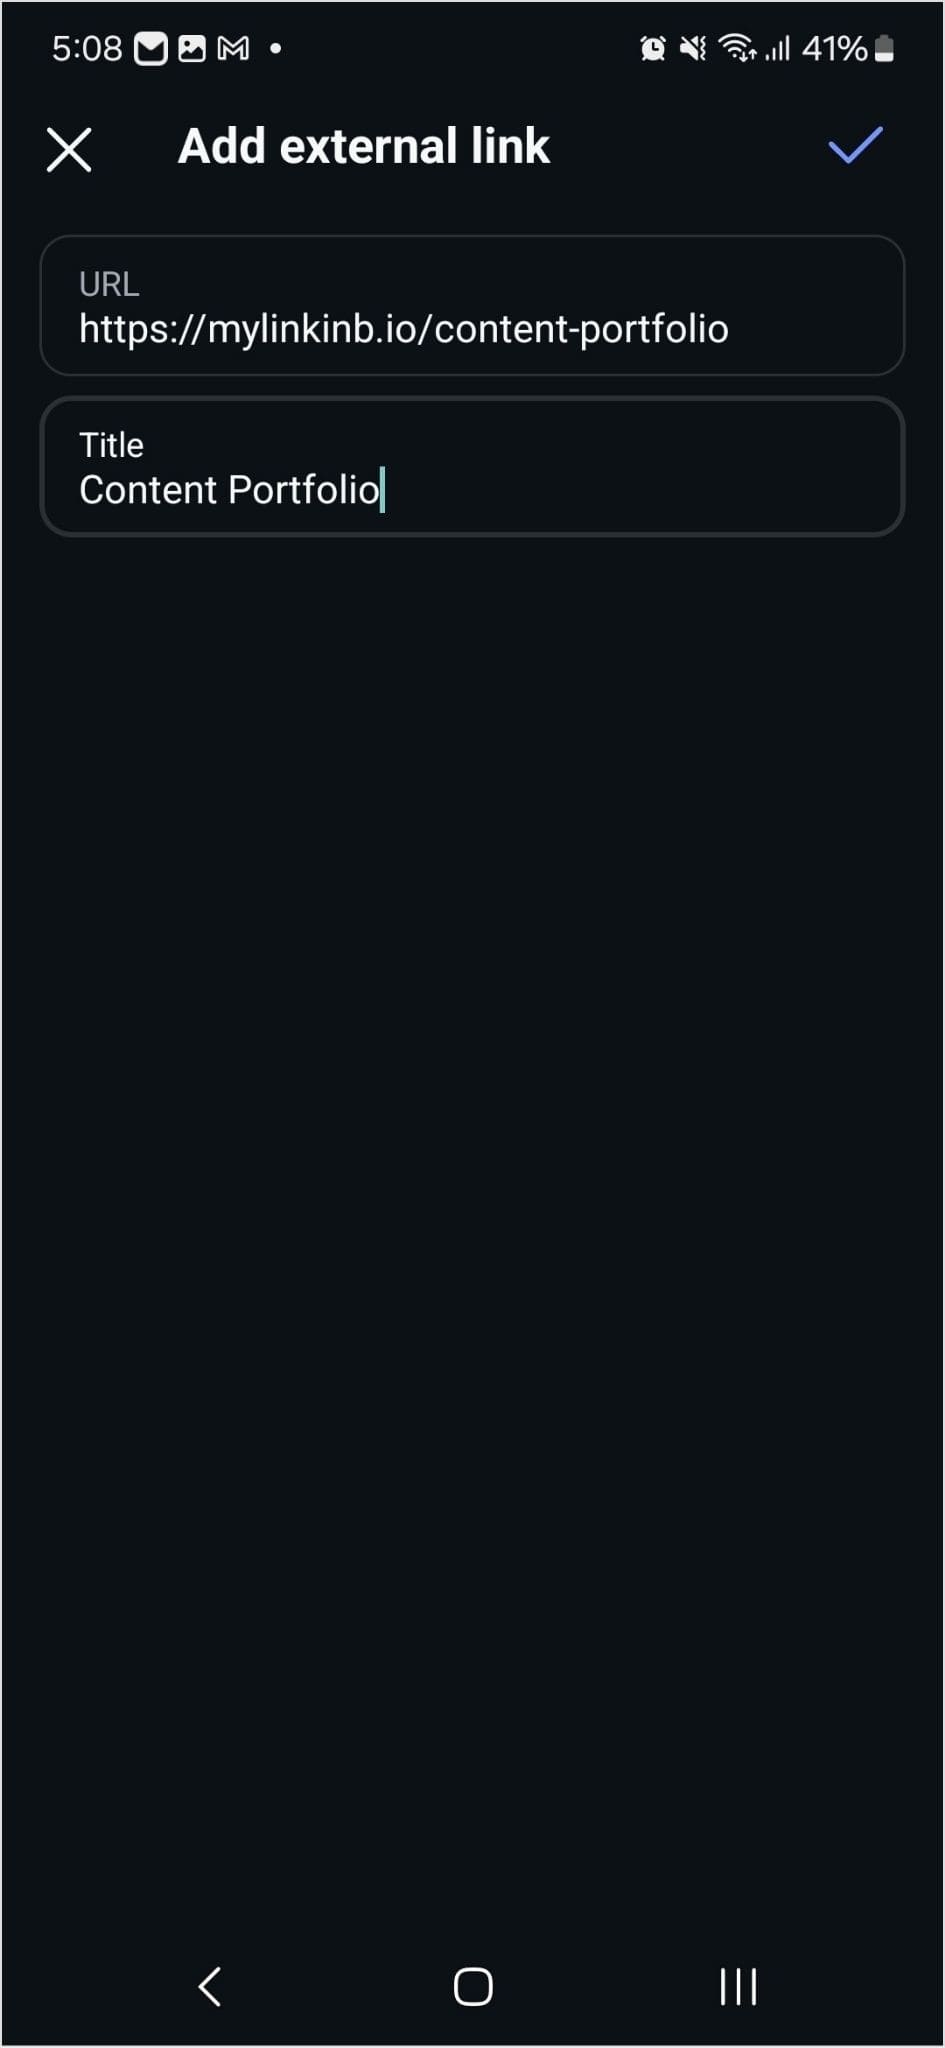
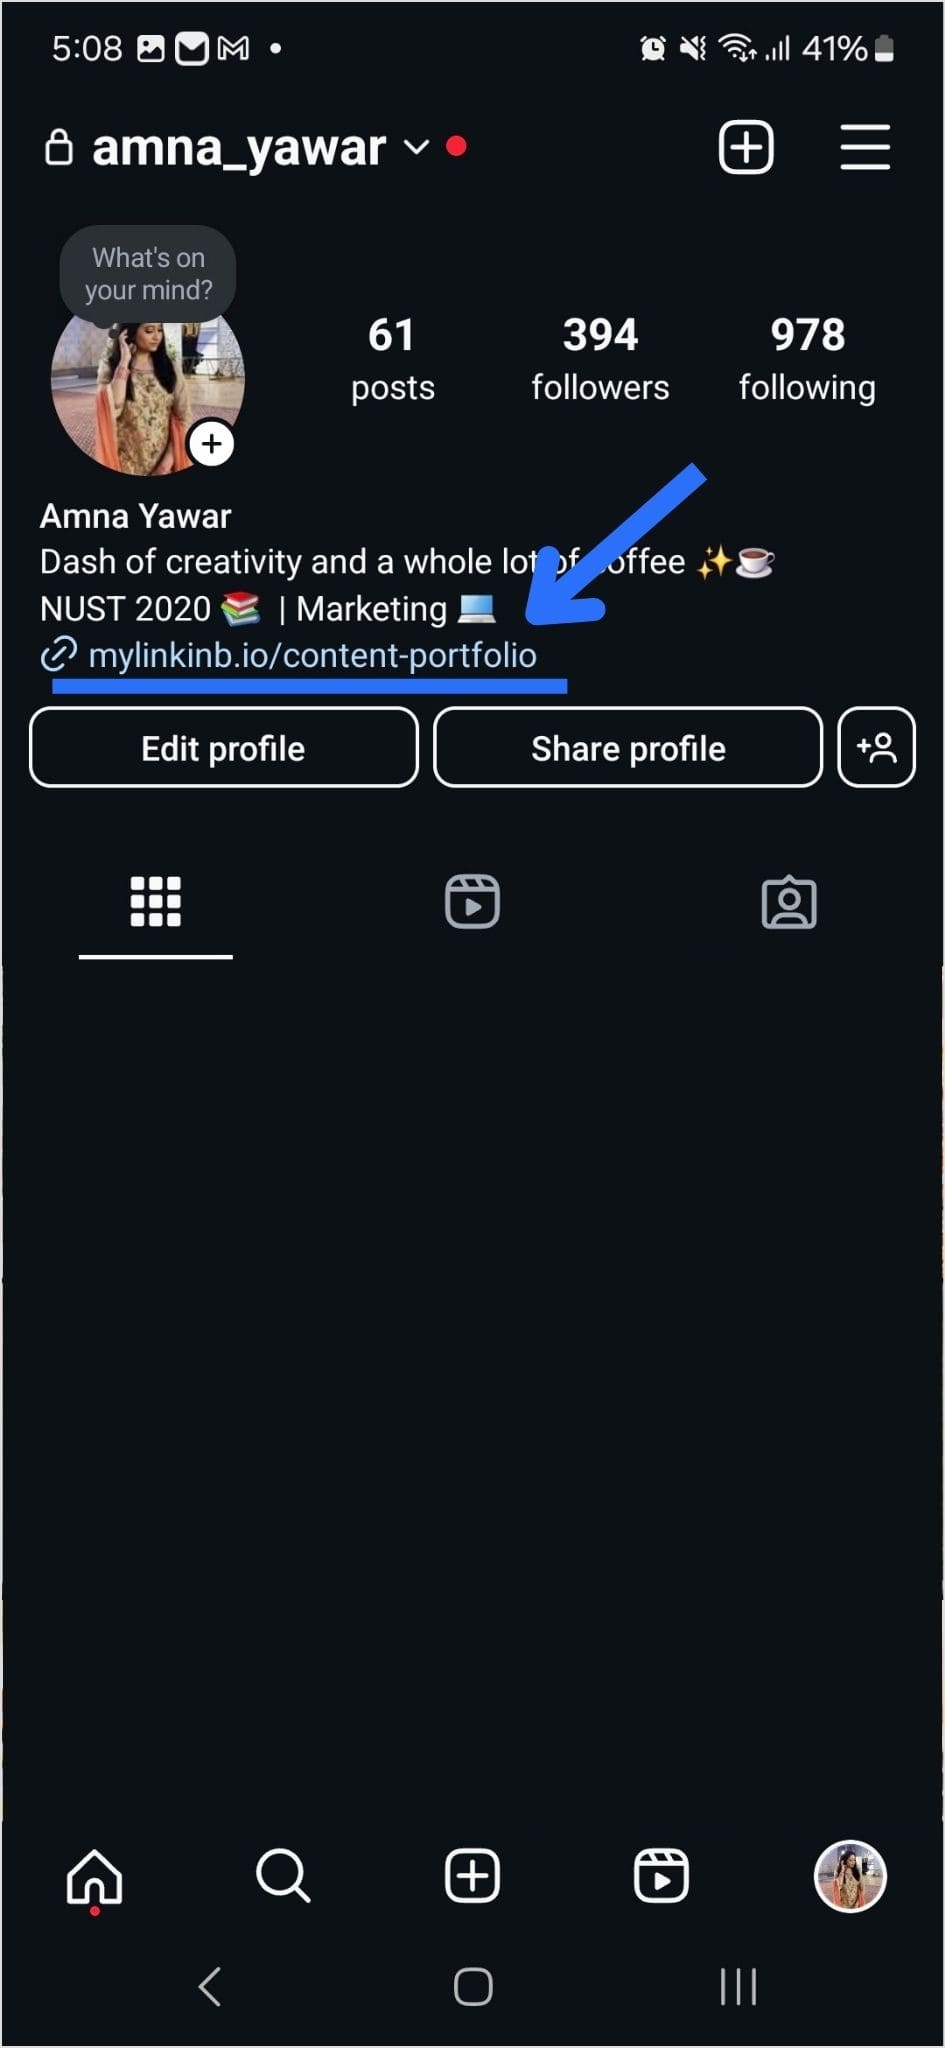
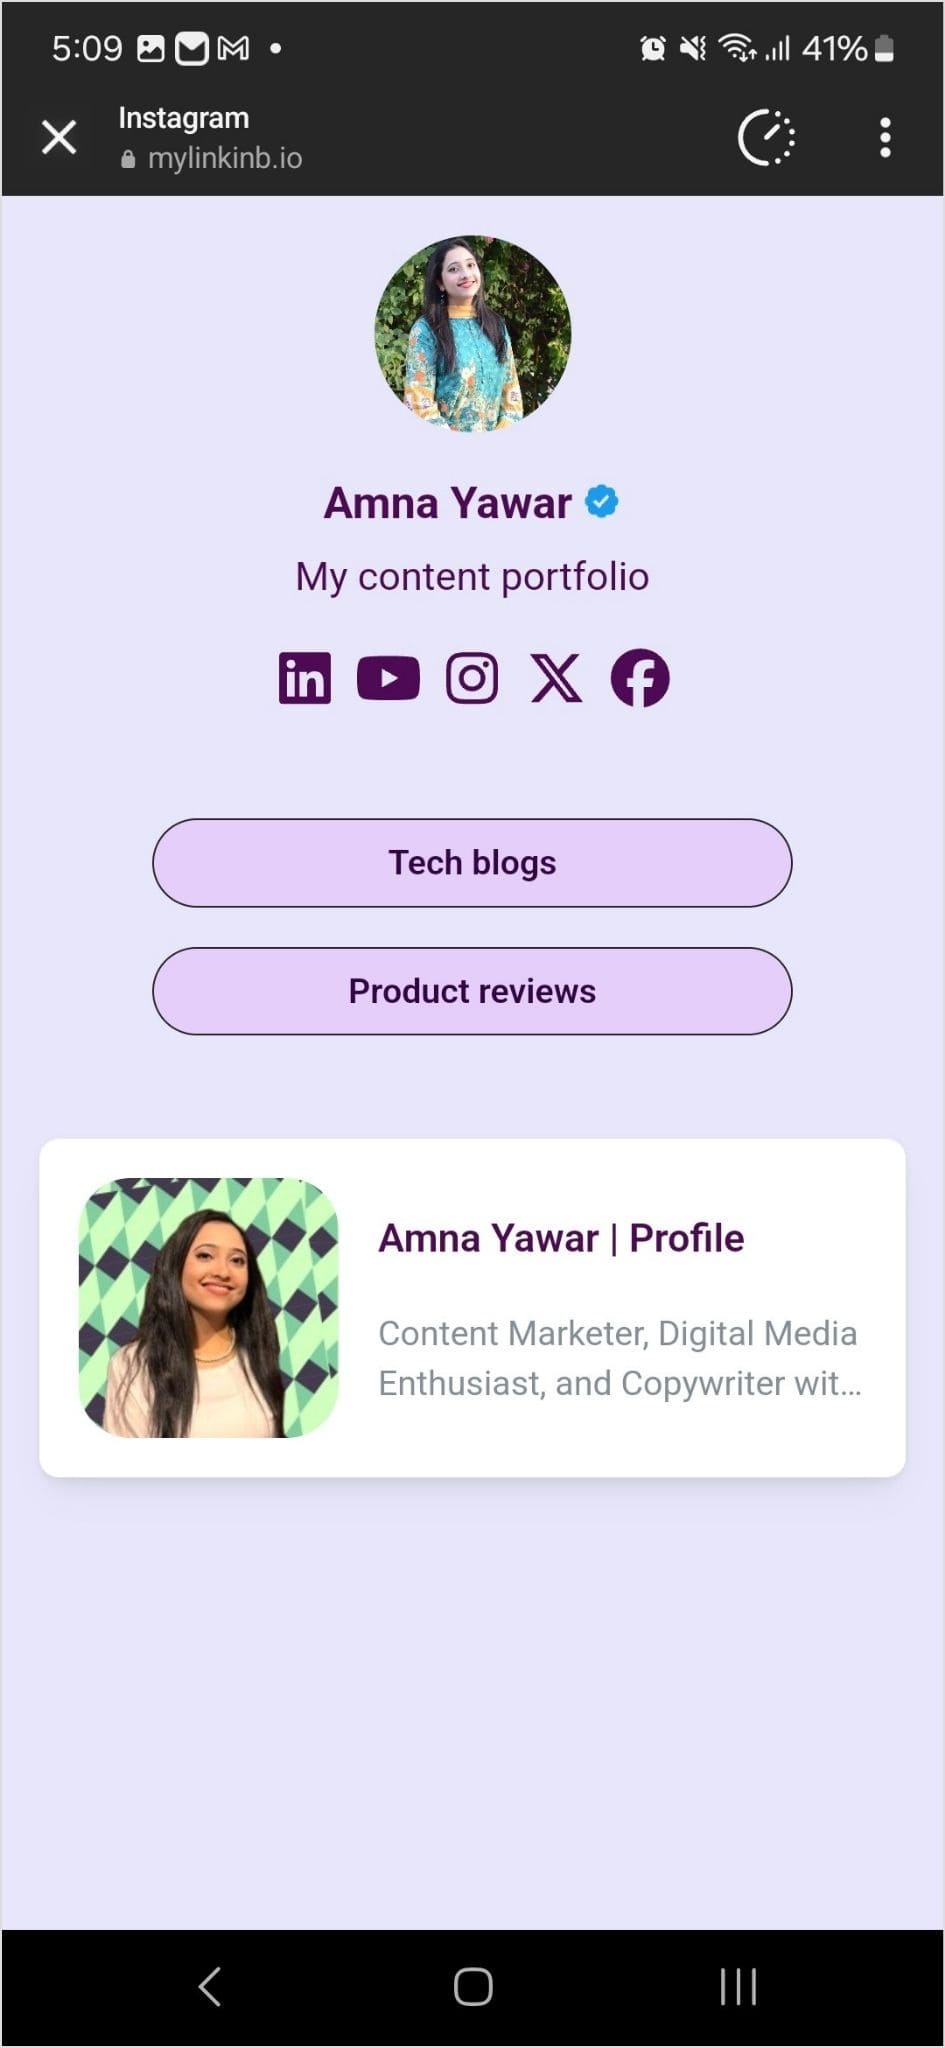
    Bio links: 

    Say goodbye to juggling multiple links. With Replug, you can consolidate all your branding needs into a single, sleek bio link. It’s a one-stop landing page to engage your audience effectively.

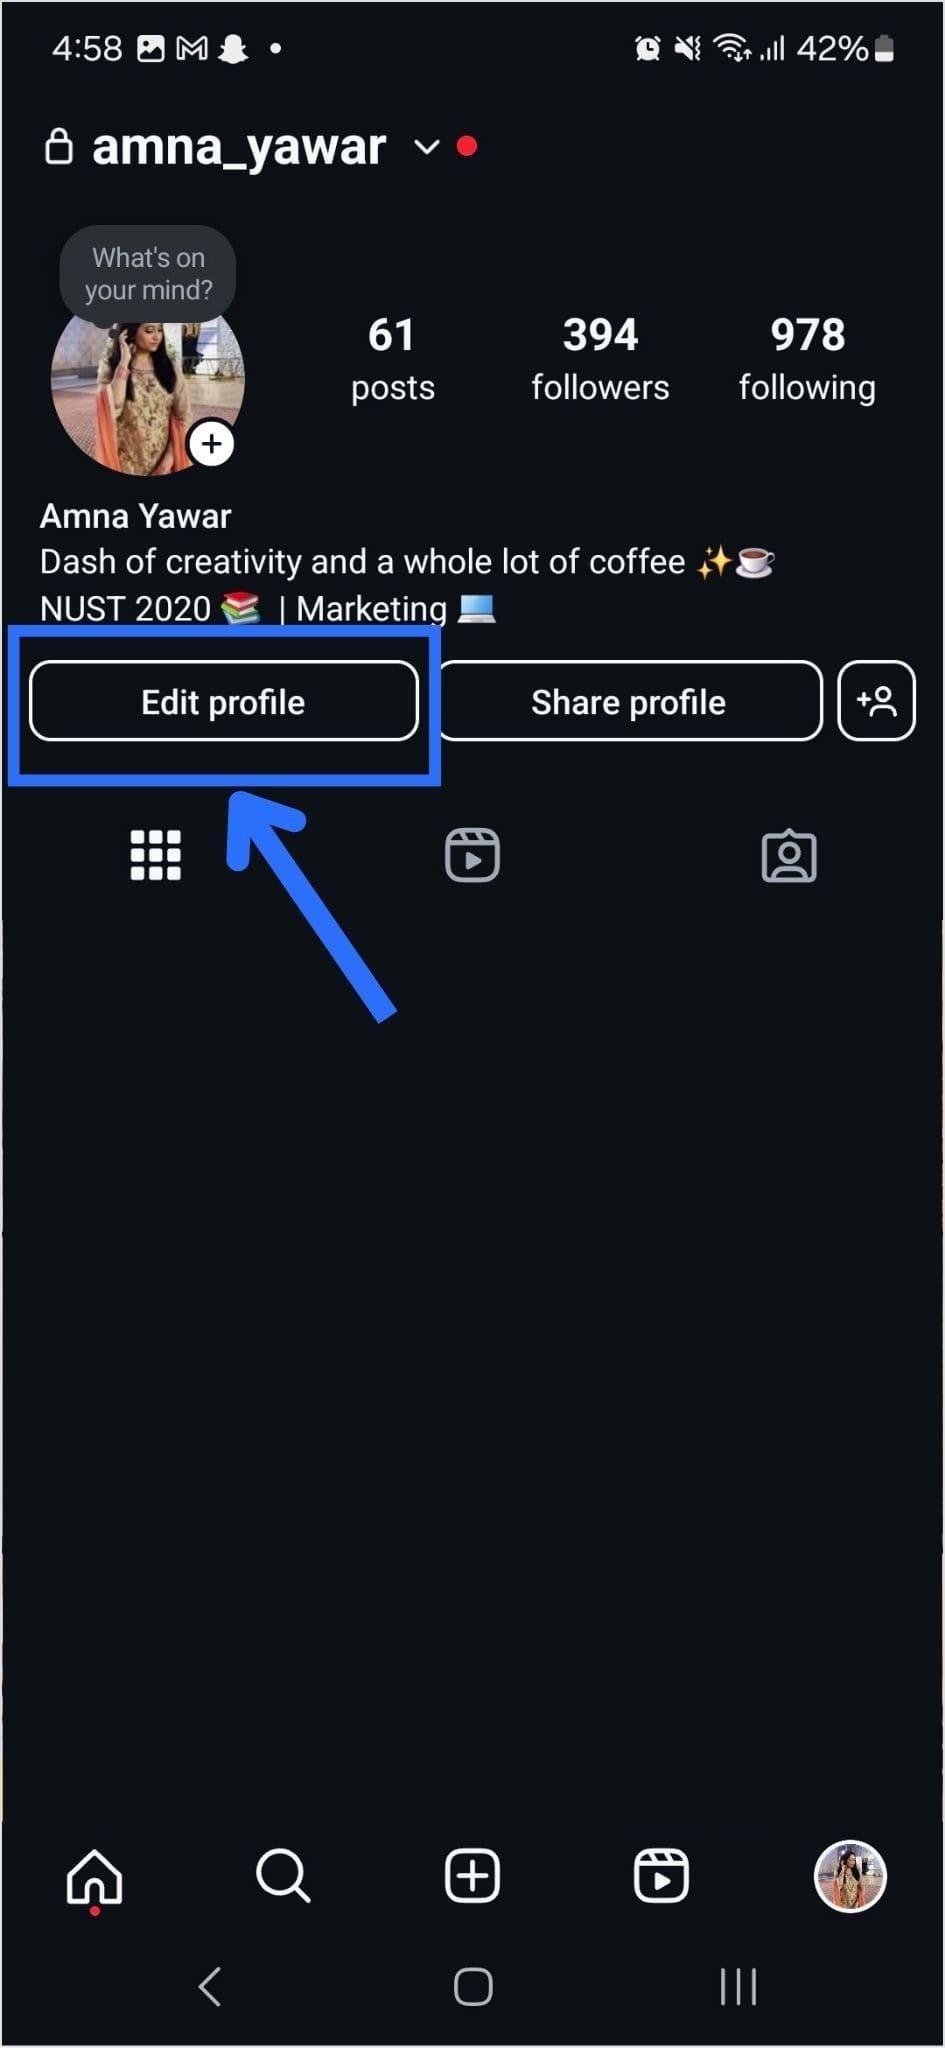
    Also read: How to Add Multiple Links to Instagram Bio Using Replug?

    Retargeting pixel: 

    Lost sales don’t have to stay lost. Replug’s retargeting pixel enables you to re-engage potential customers across multiple networks, increasing your chances of conversion.

    QR code: 

    Create dynamic marketing interactions with QR codes. They’re versatile tools that can bridge the gap between the digital and physical worlds.
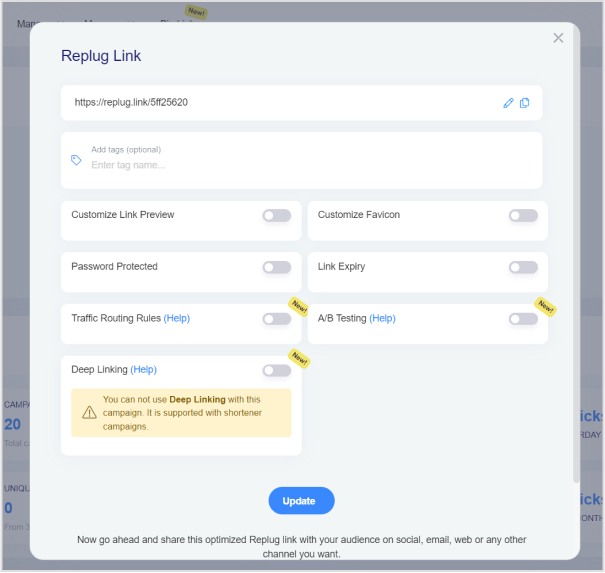
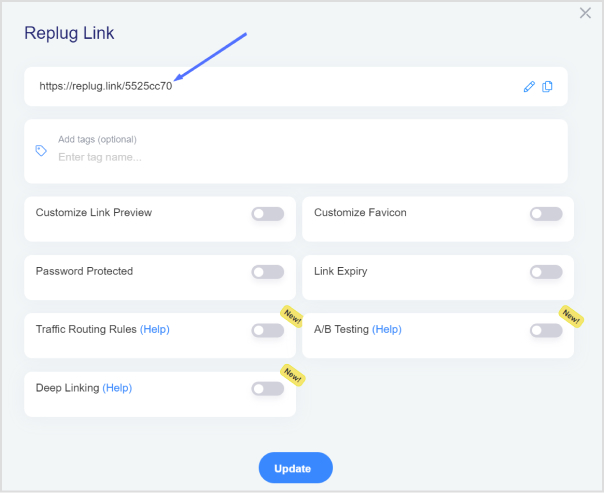
    A/B testing: 

    Experiment with up to 10 variations of your URLs to find the winning formula. Replug’s A/B testing feature helps you optimize your links for the best results.
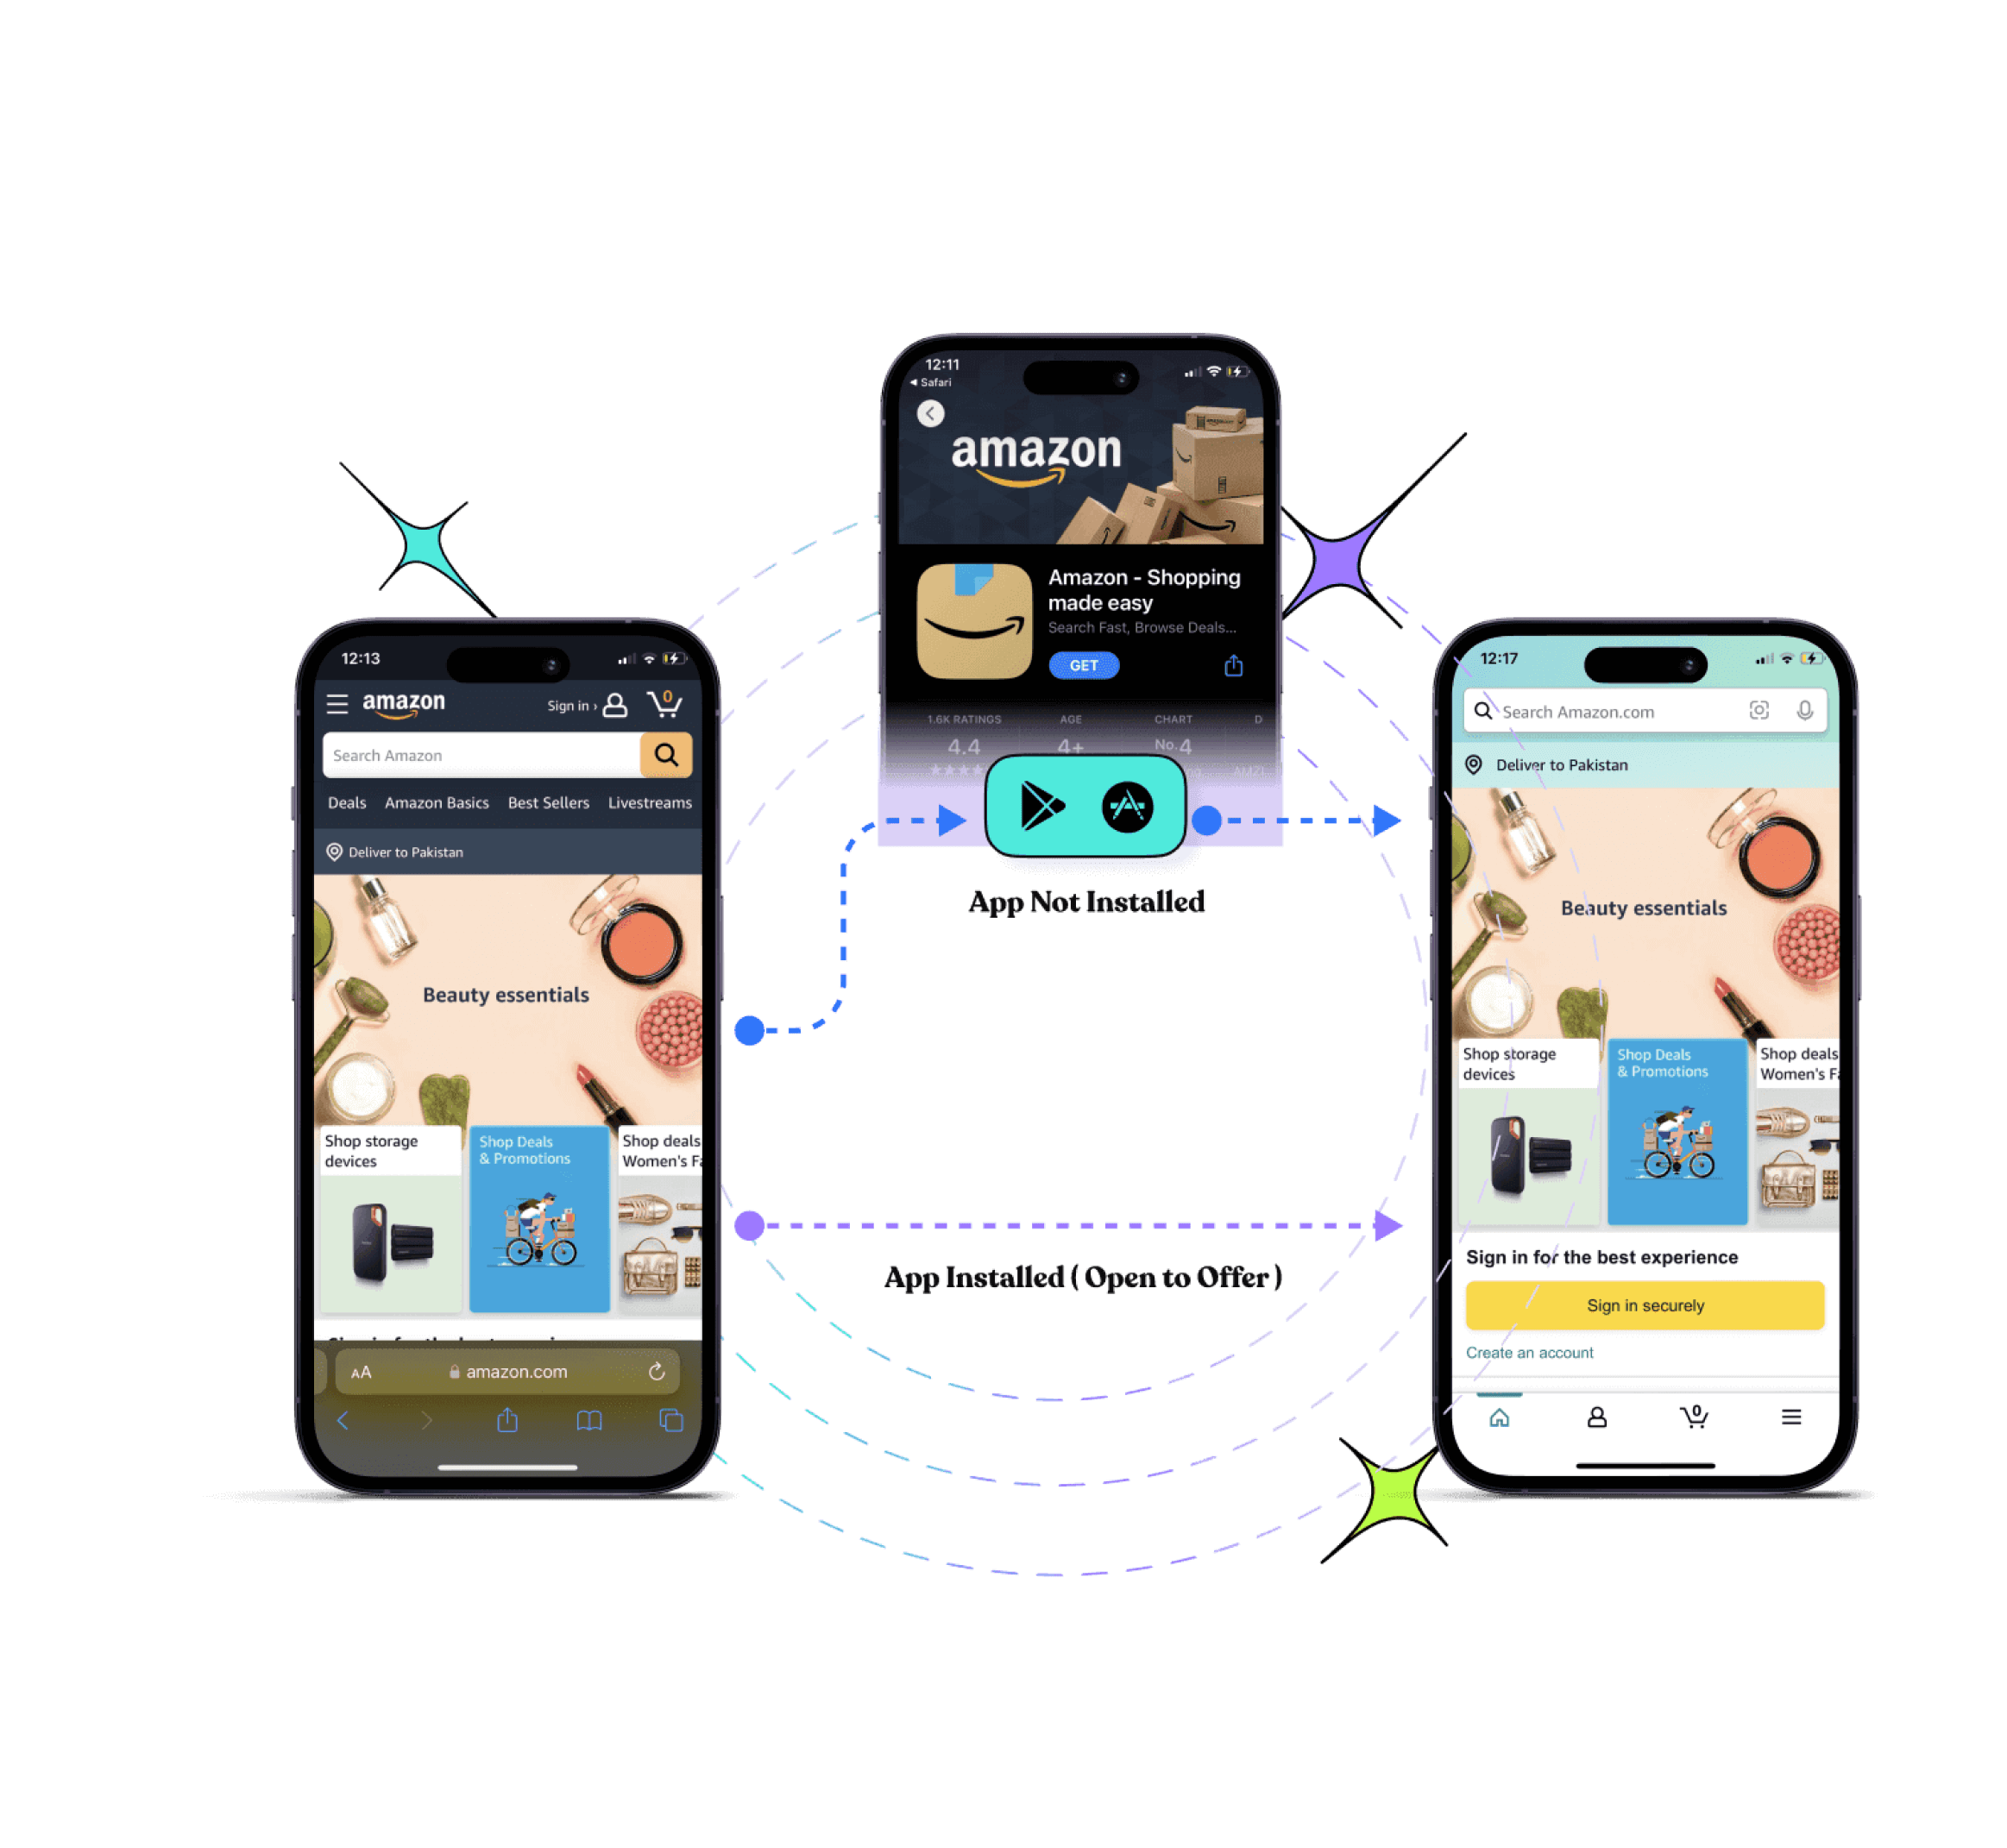
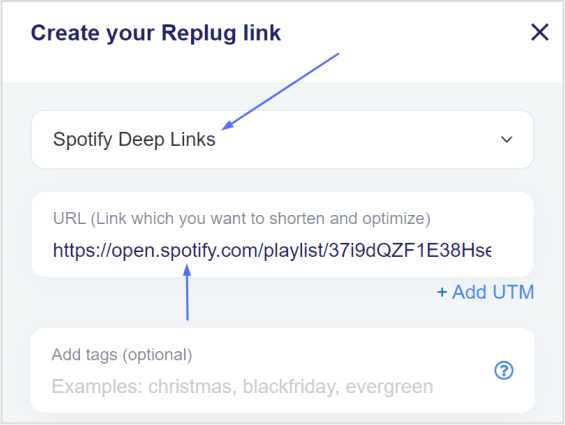
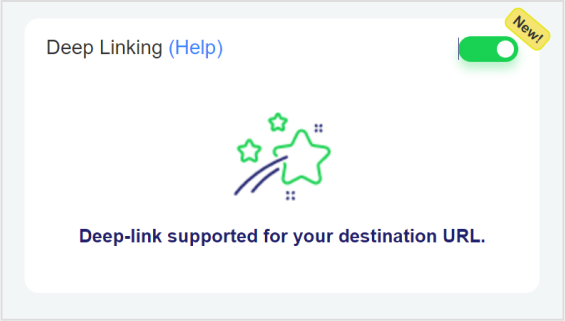
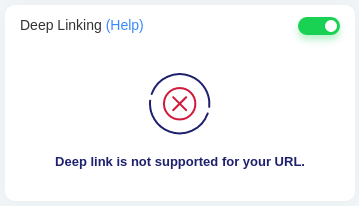
    Deep links: 

    Guide your audience through smooth in-app experiences with deep links. These links enable users to navigate seamlessly within mobile apps, enhancing the customer journey.
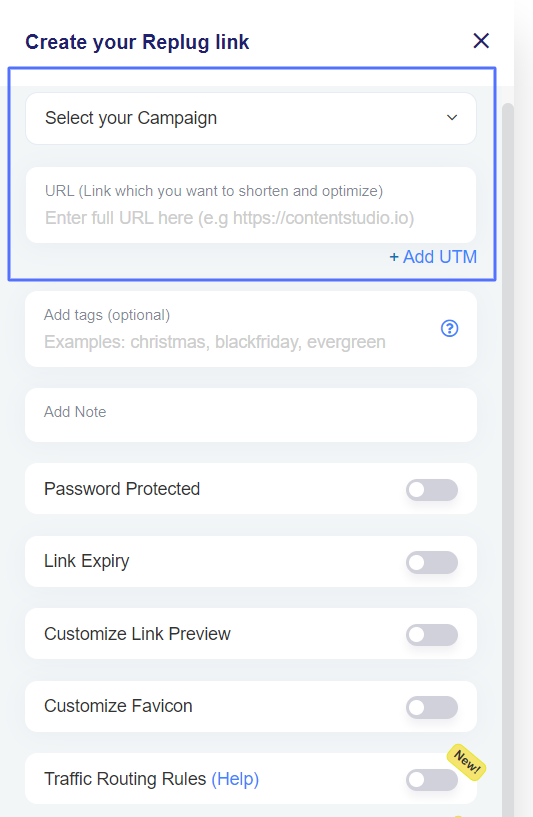
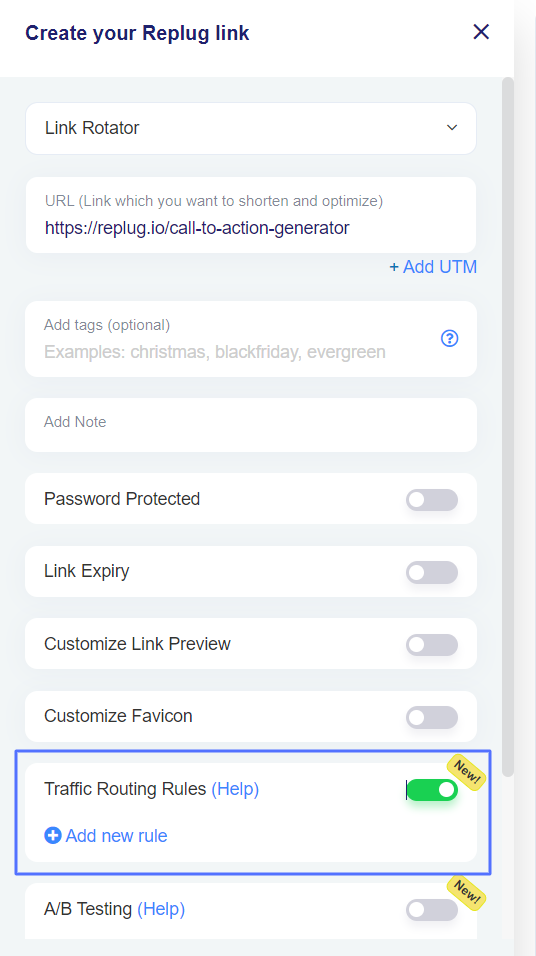
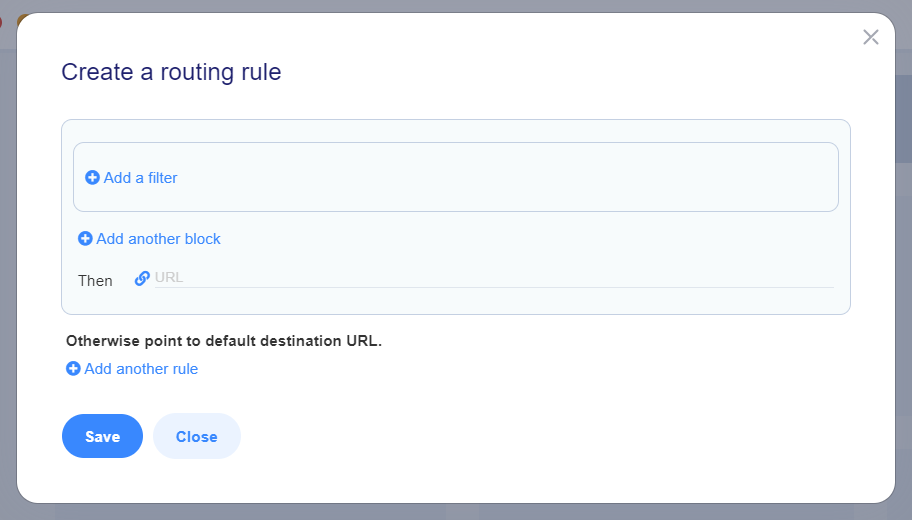
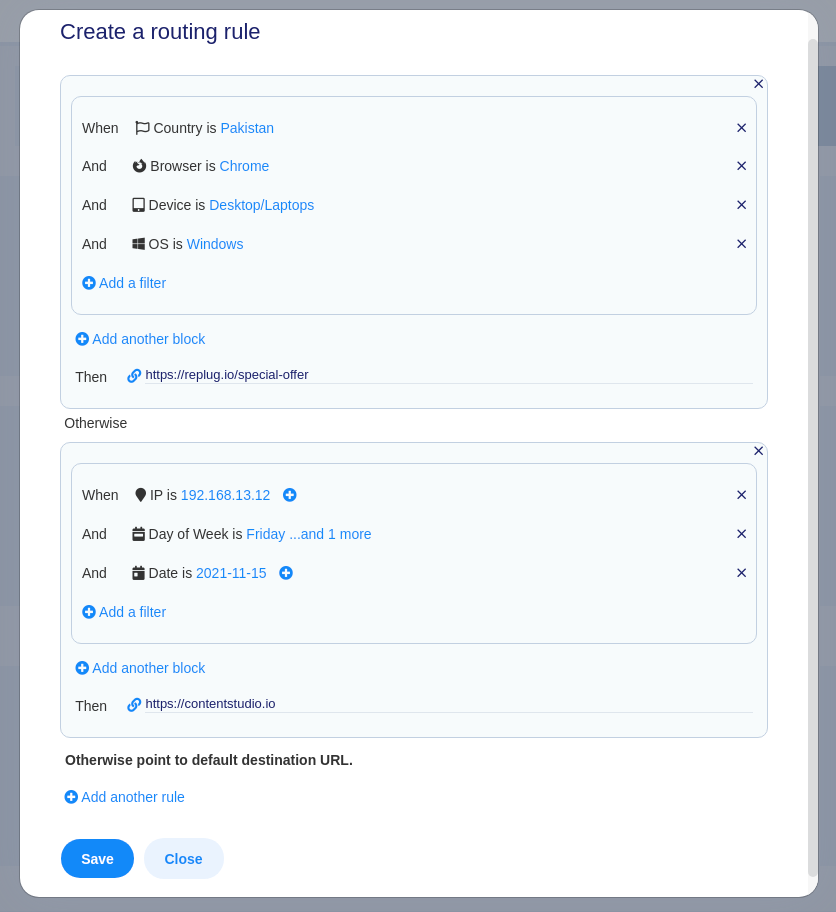
    Link rotator: 

    Optimize user experiences by intelligently routing traffic based on user preferences. It’s a powerful tool for keeping your audience engaged and interested.

    SMS links: 

    Improve your SMS marketing efforts with bulk short links and insights provided by Replug. Enhance your messaging strategy and drive more conversions.

    Call to action generator: 

    Simplify your calls to action (CTAs) to increase engagement and conversions. Replug makes it easy to create effective CTAs that drive results.

    Replug Branded Short Links CTA
    Maximize marketing ROI
    by transforming ordinary URLs into
    branded short links that convert.
    Try Replug for free

    Replug’s white label solution: Your brand, your link management

    For businesses, agencies, and professionals looking to maintain brand consistency and provide top-tier link management services, Replug’s White Label Solution is the game-changer you’ve been waiting for. Here’s why it’s the ultimate choice:

    • In-house link management: Replug’s White Label Solution allows you to have your very own, in-house link management tool. It’s an extension of your brand, ensuring a seamless user experience for your clients.
    • Branded experience: Every interaction with your link management tool is a branded experience. Your clients see your branding, reinforcing your identity and building trust.
    • Client control: With your white-label solution, you maintain full control over your client’s experience, ensuring that it aligns perfectly with your brand’s values and message.
    • Streamlined workflow: Replug’s white-label tool streamlines the link management process, saving you time and reducing the risk of errors. It’s all about optimizing your workflow to be more efficient and productive.
    • Data insights: Comprehensive data insights are at your fingertips. Understand how your clients are using the tool and gain insights to guide your services.
    • Agency growth: As an agency, offering a white-label solution positions you as a full-service provider and strengthens your brand as a leader in your industry.

    Final verdict:

    Replug is not just a link management tool; it’s a comprehensive solution that empowers your brand, streamlines your digital efforts, and positions you for success in a competitive online landscape. 

    Whether it’s enhancing brand visibility with branded short links, providing a white-label solution for your agency, or offering a range of powerful features, Replug is the ultimate choice for those who aspire to stand out, make every click count, and unlock their brand’s full potential in the digital world. 

    FAQs

    What is branded link management?

    Branded link management combines link shortening with customization using your branded domain, creating links that reinforce your brand’s identity.

    Can I track the performance of branded links with analytics?

    Yes, our link management tool offers robust analytics, enabling you to monitor click-through rates, conversion rates, and other essential metrics for branded links.

    Can branded link management be used by agencies for their clients?

    Yes, agencies can benefit from white-label branded link management solutions like Replug to provide branded link management services to their clients.

    What tools are available for effective link management?

    Numerous tools and platforms are available, including Replug, which offers branded link management, analytics, custom domains, bio links and more. 

  • What are UTM Codes and How Do They Work?

    What are UTM Codes and How Do They Work?

    Marketing can be complex, but measuring its effectiveness doesn’t have to be. UTM codes are your answer to understanding what’s working and what’s not in your campaigns and, more importantly, to pinpoint which campaigns are doing the heavy lifting. This is where UTM codes come into play, offering a simple solution to the challenge of marketing success. So, let’s break it down:

    What are UTM codes?

    UTM codes are essentially strings of text that are added to URLs. These strings contain specific parameters that provide invaluable information about the source, medium, and campaign that led a user to a particular webpage. In other words, UTM codes act as data markers, offering a clearer view of the user’s journey, from the initial interaction to conversion.

    Here’s a breakdown of the key UTM parameters:

    1. Source: 

    This parameter specifies the origin of your traffic. Is it coming from an email, a social media platform, a search engine, or another source? Accurately tagging the source helps you identify which channels are driving the most traffic.

    1. Medium: 

    The medium parameter describes the type of marketing medium used. It could be an email, social, organic search, paid search, or any other medium relevant to your campaign. Categorizing your traffic in this way allows you to determine which marketing avenues are the most effective.

    1. Campaign: 

    The campaign parameter enables you to track a specific marketing campaign or initiative. Whether it’s a product launch, a seasonal promotion, or an event, this parameter helps you differentiate between different efforts within the same source and medium.

    1. Term (optional): 

    This parameter is often used for paid search campaigns to identify the keywords that triggered the ad click. It’s an optional parameter and is mainly relevant to search engine advertising.

    1. Content (optional): 

    Another optional parameter, content can be used to differentiate between different elements of your marketing efforts, such as different ad variations or links within the same campaign.

    Understand with an example:

    Let’s create an example URL with UTM parameters added.

    Original URL:

    https://www.example.com/product-page

    Now, let’s add UTM parameters to track the source, medium, and campaign:

    • Source: Let’s say the traffic is coming from an email newsletter.
    • Medium: The marketing medium is email.
    • Campaign: It’s part of a campaign called “SummerPromo.”

    Now, we’ll add these UTM parameters to the URL:

    https://www.example.com/product-page?utm_source=email&utm_medium=email&utm_campaign=SummerPromo

    With these UTM parameters added, you can track that anyone who clicks on this URL is coming from the source “email,” through the medium “email,” and as part of the “SummerPromo” campaign. This allows you to monitor the performance of this specific link in your marketing efforts.

    How to create UTM tracking codes?

    Creating UTM tracking codes is a pivotal part of monitoring the performance of your online marketing efforts. While it’s technically possible to manually create these codes by adding specific strings to your URLs, it can be complex and time-consuming, especially when you have to manage them at scale. This is where UTM code generators come into play, making the process much more efficient.

    Google Analytics URL builder:

    Google Analytics offers a straightforward UTM code generator, which has become the go-to choice for many businesses. Here’s how you can use it:

    1. Visit Google’s URL Builder tool.
    2. Fill in the required fields for your campaign: the URL of the landing page, source, medium, campaign, term (optional), and content (optional).
    3. Click “Generate URL,” and Google will create the UTM-coded URL for you.
    how-to-create-utm-parameters-url

    Replug – A convenient alternative:

    Replug.io is another powerful tool for UTM code creation, and here’s why it’s worth considering:

    • Automatic UTM code generation: 

    Replug automates the UTM code creation process, saving you the trouble of manual entry. This means you can gather valuable analytics data as soon as your campaign goes live.

    • Shortened and customized URLs: 

    UTM-coded URLs can become quite lengthy, which can be a problem on platforms like Instagram or when users need to copy and paste links. Replug’s URL shortener free tool shortens and customizes these URLs, making them more elegant and user-friendly.

    For example, a long UTM-coded URL might look like this:

    https://replug.io/pages/resources/blogs/influencermarketing?&utm_source=contentdigest&utm_medium=email&utm_campaign=ebook-influencer-marketing&leadchannel=email&leadchanneldetail=contentdigest

    With Replug, it could be as sleek as this: 

    https://rplg.co/Influencer02

    While preserving all the essential UTM data.

    Also read: How to Create UTM Links: A Step-by-Step Guide

    • Advanced tracking and analytics: 

    While UTM codes are a solid foundation for analyzing marketing performance, they have limitations. Replug offers an enhanced solution called Campaigns, providing in-depth insights and a more hassle-free tracking experience, especially when managing multiple campaigns across various marketing channels.

    Replug Branded Short Links CTA
    A complete link management solution
    for marketing professionals & agencies.
    Try Replug for free

    Elevate Your Brand Performance with Replug

    UTM codes are a fundamental tool for tracking the success of your brand campaigns, links, and platforms. They provide valuable data, but those unwieldy, lengthy links can be a drawback. As your marketing endeavors become more intricate, it’s essential to adopt a system that offers both enhanced power and efficiency.

    This is where Replug steps in as the ideal solution. Replug not only helps you track traffic effectively, even in the most complex marketing landscapes, but it also simplifies the process. With Replug, you obtain concise, stylish links that seamlessly fit into any context. Moreover, it offers an analytics tool that’s user-friendly and excels at managing multichannel marketing campaigns.

    In essence, Replug empowers you to elevate your brand’s performance, making tracking and managing your marketing efforts a smoother, more efficient, and ultimately more successful process.

    Frequently asked questions

    What are UTM codes?

    UTM codes are tracking parameters added to URLs to measure marketing performance. They’re vital for data-driven decision-making and proving campaign success.

    How do I create UTM codes for my campaigns?

    You can create UTM codes manually, but it’s easier and error-free to use online UTM code generators like Google’s Campaign URL Builder or Replug’s UTM code builder.

    What is Replug, and how does it work for link tracking?

    Bitly is a URL shortening and link management platform that not only shortens links for sharing but also provides link tracking and analytics to measure click-through rates and engagement.

    You may also like:

    Click Tracking: What It Is and How It Works?

    How to Add Multiple Links to Instagram Bio Using Replug?

    How to Shorten a link using a URL shortener?

  • How to Create UTM Links: A Step-by-Step Guide

    How to Create UTM Links: A Step-by-Step Guide

    Creating UTM links is a straightforward process that helps you track the effectiveness of your marketing campaigns and understand where your website traffic is coming from. UTM parameters are tags added to your URLs to provide more information about the source of a click. 

    Here’s a quick and effective approach to creating UTM links:

    Understand UTM Parameters:

    UTM parameters are tags added to the end of a URL to provide more information about the source of a click. They are essential for tracking and analyzing the performance of your campaigns, allowing you to make data-driven decisions and optimize your marketing strategies. 

    Here’s a breakdown of the key UTM parameters and their purposes:

    utm_source:

    • Purpose: Identifies the specific source of the traffic, such as a website, platform, or publication.
    • Examples: “facebook,” “google,” “newsletter,” “twitter.”

    utm_medium:

    • Purpose: Specify the medium or channel through which the link was shared or clicked.
    • Examples: “cpc” (cost-per-click), “social” (social media), “email,” “organic.”

    utm_campaign:

    • Purpose: Names the marketing campaign or effort where the link is used.
    • Examples: “spring_sale,” “product_launch,” “holiday_promotion.”

    utm_term:

    • Purpose: Typically used in paid search campaigns to specify the keywords associated with the ad.
    • Examples: “running+shoes,” “digital+camera,” “best+smartphone.”

    utm_content:

    • Purpose: Differentiates between variations of the same link within a campaign, such as different ad creatives or locations.
    • Examples: “banner_ad,” “sidebar_button,” “top_menu_link.”

    Here’s an example of a URL with UTM parameters:

    https://www.example.com/page?.utm_source=facebook&utm_medium=social&utm_campaign=spring_sale&utm_term=shoes&utm_content=banner_ad

    How to create UTM links using Replug?

    Replug is a feature-rich link management platform that excels in simplifying UTM tracking while offering robust link management capabilities. Its versatility, customization options, and detailed analytics make it a compelling choice for marketers. 

    Additionally, Replug provides precise link shortening via a brilliant URL shortener free tool, efficient campaign organization, and seamless integration possibilities, making it an attractive option for businesses of all sizes.

    Here’s how to add UTM codes to your URLs using Replug:

    Step 1: Sign in or create an account

    Begin by signing in to your Replug account. If you don’t have one yet, you can easily create a free account.

    Step 2: Select your campaign

    Once you’re logged in, click “Select your campaign” on the main dashboard or create a new campaign.

    how-to-create-utm-links

    Step 3: Paste the URL

    Locate the “URL to shorten” section below “Select your campaign”, and paste the URL to which you want to add UTM parameters.

    Step 4: Add UTM tag

    At the end of the “URL to shorten” section, you’ll see an “add UTM” tag. Click on it to proceed.

    how-to-create-utm-links

    Also read: Click Tracking: What It Is and How It Works?

    Step 5: Choose UTM parameters

    You have the option to either “select from saved UTM parameters” if you’ve used these before or “create a new UTM parameter.”

    how-to-create-utm-links

    Step 6: Fill in UTM parameters

    If you decide to create a new UTM parameter, provide the necessary information such as the source, medium, campaign, term, and content. Once you’ve completed this, click “Apply.”

    how-to-create-utm-links

    Step 7: Create the URL

    Click the “create” button, and Replug will automatically generate a shortened URL with the added UTM parameters.

    Step 8: Edit UTM code (optional)

    If you wish to further customize the URL, you can do so by clicking the edit icon.

    how-to-create-utm-links

    Also read: How to Create a Trackable Link: A Step-by-Step Guide

    Step 9: Copy and update

    After any edits (if necessary), simply copy the URL with the UTM parameters and click the “update” button to save your changes.

    Step 10: Access your URL

    To access and manage the URL you’ve just created with UTM parameters, navigate to the “Manage” section in Replug and click on “Replug links.”

    By following these steps, you can harness the full potential of Replug to seamlessly integrate UTM parameters into your URLs, improving the accuracy and effectiveness of your marketing campaign tracking and analysis.

    Replug Branded Short Links CTA
    A complete link management solution
    for marketing professionals & agencies.
    Try Replug for free

    Frequently asked questions 

    What are UTM parameters?

    UTM parameters are tags added to URLs to track the source and performance of your marketing links. They’re essential for understanding where your traffic comes from and how effective your campaigns are.

    How do I create UTM links for my marketing campaigns?

    Use an online UTM builder like Replug or manually add UTM parameters to your URLs to create UTM links.

    What are the common mistakes to avoid when using UTM parameters?

    Avoid using spaces or special characters in your UTM parameters, and make sure they are applied consistently. Be careful with sensitive data like user information in UTM parameters.

    You may also like:

    How to shorten link using a URL shortener?

    How to Add Multiple Links to Instagram Bio Using Replug?

  • Click Tracking: What It Is and How It Works?

    Click Tracking: What It Is and How It Works?

    Companies in the digital age must monitor and optimize their online efforts to maximize engagement, conversions, and profitability. Click tracking is an invaluable approach that allows businesses to gain insights into the performance of their online links and marketing campaigns. This guide explores what click tracking is, where it is used, and how it can elevate your brand’s online presence. So, let’s get started.

    What is click tracking?

    Click tracking is a digital marketing technique that involves monitoring and recording the interactions or clicks made on links, typically hyperlinks, with the aim of gathering data and insights into user behavior and engagement. 

    It is commonly used in web analytics and online marketing to track the performance of various online elements, such as links in emails, websites, advertisements, or social media posts. 

    Click tracking is achieved by attaching a unique tracking code, which allows the tracking system to record when and where users click on the link.

    How click tracking strengthens your brand: 6 key benefits

    Here’s a concise breakdown of how click tracking elevates your brand with six key benefits:

    1. Analyzing user behavior: 

    Click tracking helps you analyze your audience’s behavior. It answers questions about what messaging prompts them to act, which content resonates the most, and how they access your site, leading to a better user experience.

    1. Optimizing and improving content: 

    By embedding trackable links, you can assess content performance, determine the type of content that engages your audience, and identify where your content performs best, enabling better content marketing strategies.

    1. Aiding in A/B testing: 

    Click tracking provides essential data for A/B testing, enabling in-depth analysis of marketing efforts. It helps compare elements like CTA buttons, landing page designs, and email subject lines to find the most effective strategies.

    1. Enhancing social media and content marketing: 

    Click tracking allows you to evaluate the impact of your social media strategies by tracking page views and click-throughs. It provides insights into audience demographics, helping you improve your social media marketing.

    1. Simplifying data-driven decision-making: 

    Click tracking eliminates guesswork and facilitates data-driven decision-making. By reviewing precise measurements tied to your efforts, you can identify which initiatives worked well and which didn’t, leading to more informed decisions for future campaigns.

    1. Finding and fixing website errors: 

    Click tracking can help proactively identify website errors, broken links, non-functional CTAs, etc. This ensures a seamless user experience, preventing potential disruptions to your customers’ journeys.

    Utilizing click tracking in different areas

    Click tracking is employed in various aspects of digital marketing and user experience analysis, including tracking marketing campaign performance, monitoring email engagement, and optimizing web design to enhance the user experience. It provides valuable insights for data-driven decision-making in these domains.

    1. Link tracking for marketing campaigns:
    • Click tracking is instrumental in assessing the success of marketing campaigns on platforms like Facebook, LinkedIn, Instagram, and PPC. By incorporating UTM tracking codes, marketers can attribute traffic sources and campaign details.
    • UTM parameters, which are query strings added to URLs, help identify essential details such as traffic sources, mediums, and campaign names.
    • This method enables the accurate attribution of traffic, leads, and sales to various marketing campaigns, enhancing segmentation and offering insights into custom campaigns using tools like Google Analytics and Usermaven.
    1. Email link tracking:
    • Many email marketing tools employ tracking pixels within email messages, allowing marketers to monitor user actions, including opens, clicks, on-site activity, and subscriber engagement.
    • This feature empowers marketers to discern subscriber preferences, such as content format (text or design-heavy), optimal email send times, and effective subject line formats.
    • It provides actionable insights for refining email marketing strategies and engagement tactics.
    1. UX click tracking:
    • In addition to link tracking, UX (User Experience) click tracking offers a visual representation of user interactions on a website.
    • Heatmap tools like Hotjar record and visualize all user activities, such as clicks on links, images, and site elements, both above and below the fold.
    • Heatmaps reveal hot areas of user focus and cold areas that are often ignored, helping businesses understand user behavior and interaction patterns.
    • These insights guide web design improvements to enhance the overall user experience.
    • Click tracking can identify issues such as high bounce rates without clicks or scrolls above the fold, prompting A/B testing of design elements to enhance customer retention.
    Replug Branded Short Links CTA
    Maximize marketing ROI
    by transforming ordinary URLs into
    branded short links that convert.
    Try Replug for free

    Using Google Analytics and Google Tag Manager for click tracking:

    Google Analytics is a web analytics tool that allows you to track and analyze user behavior on your website. And Google Tag Manager serves as an intermediary between your website and Google Analytics. It helps you set up and manage tracking tags for specific user interactions, such as clicks on buttons or links. These tags are then sent to Google Analytics to collect data.

    click tracking

    Using Google Analytics:

    • Account setup: Start by creating a Google Analytics account if you don’t already have one. Within your account, you’ll set up a property for the specific website you want to track.
    • Tracking code: Google Analytics provides a tracking code snippet. You’ll need to add this JavaScript code to every page of your website. This code collects data on user interactions and sends it to your Google Analytics property.
    • Verification: After installation, you can verify that Google Analytics is correctly tracking your website’s data. It helps ensure that information is being accurately collected.

    Using Google Tag Manager:

    • Account and container: Create a Google Tag Manager account and set up a container for your website. The container is where you manage all your tracking tags and triggers.
    • Container snippet: Google Tag Manager also provides a container snippet, which consists of JavaScript code. Similar to Google Analytics, you’ll add this snippet to your website, both in the <head> and <body> sections.
    • Tag creation: In Google Tag Manager, you create tags for specific user interactions you want to track, such as clicks on particular buttons or links.
    • Triggers and variables: You’ll configure triggers and variables that specify when and what data to collect. Triggers determine when a tag fires and variables collect specific data, such as the elements clicked.
    • Tag deployment: After setting up your tags, triggers, and variables, you’ll publish the changes in Google Tag Manager. This makes the tags live on your website.

    By combining these two tools, you streamline the process of click tracking, manage the tracking codes effectively, and ensure that data is accurately collected and sent to Google Analytics for in-depth analysis of user interactions.

    How to use Replug for link tracking?

    Replug is a comprehensive link tracking and management platform that empowers marketers, businesses, and website owners to create, customize, and track their links for various marketing and promotional purposes. It offers a wide range of features designed to enhance link engagement, analyze user behavior, and optimize marketing strategies.

    Here’s how to create a tracking link using Replug.io:

    Step 1: Sign in or create an account

    If you’re not already a Replug user, you can sign up for a free account, or log in to your existing Replug account.

    Step 2: Choose or create a campaign

    From the main dashboard, you can either select an existing campaign or create a new one. Campaigns are used to organize and group your tracking URLs.

    Step 3: Enter the destination URL

    Enter the destination URL that you want to track in the “URL to shorten” section, located below the “Select your campaign” option.

    link tracking

    Step 4: Add UTM parameters

    On the right side of the “URL to shorten” section, locate the “add UTM” tag and click on it.

    Step 5: Select or create UTM parameters

    You have the option to either select from saved UTM parameters or create a new set.

    If you’re creating a new one, fill in the UTM parameters, including source, medium, campaign name, and other necessary details.

    add-utm-parameters

    Step 6: Generate the tracking URL

    After adding or selecting the UTM parameters, click the “Create” button. Replug will automatically generate a shortened version of your URL with the appended UTM parameters.

    Step 7: Customize the tracking URL (optional)

    If desired, you can further customize the URL by clicking the edit icon.

    click-tracking

    Step 8: Copy and update

    Copy the generated tracking URL to use in your marketing materials.

    Click the “Update” button to save your changes.

    Step 9: Access your tracking URL

    To access the newly created tracking URL and monitor its performance, follow these steps:

    • Go to the main dashboard.
    • Click on “Manage.”
    • Select “Replug links.”

    By following these steps, you can efficiently create, customize, and manage tracking URLs using Replug, and monitor their performance through the main dashboard.

    Replug Branded Short Links CTA
    A complete link management solution
    for marketing professionals & agencies.
    Try Replug for free

    Replug offers additional features beyond basic link tracking, such as link retargeting, A/B testing, deep linking, bio-links, link management, and more. Depending on your subscription level, you may have access to more advanced features.

    Don’t miss out our free link shortener and tracker, give it a a go!

    Frequently asked questions

    What is click tracking?

    Click tracking is the process of monitoring user interactions with links on a website or within marketing materials. Businesses use it to gain insights into user behavior, track the performance of marketing campaigns, and make data-driven decisions to improve their online strategies.

    How does click tracking help improve marketing campaigns?

    Click tracking provides valuable data on which links are being clicked, where users are coming from, and what actions they take. This data helps businesses optimize marketing efforts, understand user preferences, and refine their strategies for better results.

    What tools are typically used for click tracking?

    Common tools for click tracking include Google Analytics, Google Analytics, Usermaven and Replug. These platforms offer features to create, customize, and analyze tracked links.

  • How to add multiple links to Instagram bio using Replug?

    How to add multiple links to Instagram bio using Replug?

    Ever felt frustrated by Instagram’s link limit? You’re not alone! While Instagram now allows up to five links in your bio, that might not be enough if you have multiple websites, social media accounts, or affiliate links to share.

    That’s where Replug comes in. It lets you create a single, sleek bio link page where you can add unlimited links, making it easier for your audience to find everything in one place.

    Let’s dive into how you can set up multiple links in your Instagram bio using this top-notch URL shortener!

    Why add a Replug link to your Instagram bio?

    Before we discuss the how, let’s know the why.

    Why should you even consider integrating a Replug link into your Instagram bio? 

    Beyond the obvious advantage of offering an in-depth view of your presence, here are some compelling reasons:

    • Boost your follower base: Direct your Instagram followers to explore your other platforms, encouraging them to follow you on those as well. You can also add links to your Instagram in the bios of your other accounts to drive cross-platform engagement and get leads from social media.
    • Monetize your audience: Replug helps you turn Instagram followers into customers by linking to your e-commerce store, Etsy shop, or other products. Direct users to your purchasable content, turning your followers into potential buyers and boosting sales for Instagram business accounts.
    • Monitor analytics: Replug provides insights into user engagement, tracking clicks, views, and click-through rates (CTR). For influencers, this data is essential for refining your content strategy, helping you optimize performance and improve audience engagement across platforms.
    • Offline connection: Share your Instagram QR code with followers to connect them to your other platforms. Whether it’s for a restaurant menu or event info, the offline-to-online connection creates an easy way for users to engage with your content anytime, anywhere.
    • Customizable landing pages: Build a personalized landing page with Replug that reflects your brand’s style and identity. Customize everything from layout to colors to create an on-brand experience for your audience.
    • Unlimited links: Replug allows you to share an unlimited number of links through its bio link feature. From your website and blog posts to products and affiliate content, it gives you a simple place to drive traffic and keep your audience engaged.
    • Retargeting pixel support: Improve your ad campaigns with retargeting by tracking visitors who clicked your links. This feature helps you stay connected with your audience and drive conversions by reaching users who have shown interest.
    • Mobile-friendly and fast: Replug ensures that your landing pages and links work seamlessly on all devices, offering a fast and smooth experience for users accessing your content from smartphones, tablets, or desktops.

    You may also like: 7 benefits of bio links you need to know: your ultimate manual

    How to add multiple links to Instagram bio using Replug?

    Here’s how to add multiple links to Instagram:

    Step 1: Sign in to Replug or create a free account if you don’t have one.

    Sign in or create an account on Replug

    Step 2: Access the “bio links” feature on the Replug dashboard.

    Click on Bio Links

    Step 3: Click the “New Bio Link” button to create a new bio link specifically for your Instagram bio.

    Create new bio link

    Step 4: Personalize your bio profile to your heart’s content. With Replug, you can add a profile picture, profile title, bio description, and even a verification badge!

    Now comes the creative and fun part. You choose from stunning pre-designed templates or create your own. You can also customize colours, select from button styles, and customize colours.

    Personalize your bio link profile

    Step 5: Now customize the content you want on your bio link landing page. You can choose from multiple blocks, including social, links, RSS, video, card, and text. This is a great way to add all your links inside a single and clean landing page. It prevents your bio from looking cluttered and messy because of multiple links.

    Add blocks to your bio link landing page

    Step 6: The final step is to customize SEO and social media preview. Here, you’ll have the option to add your custom meta title, description, custom favicon image, and retargeting pixel to improve the link presence in search engines and social media channels.

    Customize bio link SEO and Social Media Preview

    Step 7: Customize your bio link slug for a personalized touch.

    Customize bio link URL

    Step 8: Update your bio link and preview it for final touches.

    Bio Link Block Preview

    Step 9: Go back to your bio link dashboard. You will now see that your bio link has been generated and is live.

    You can now copy your bio link URL, view your bio link analytics, download the QR for easy sharing, edit your bio link if required, or delete it permanently.

    Bio link dashboard

    Add bio link URL to Instagram bio:

    Step 1: Copy your bio link URL from Replug.

    Copy bio link URL

    Step 2: Open Instagram on your mobile and tap your profile icon in the bottom right corner.

    Instagram Profile

    Step 3: Tap on the edit profile button on your profile page.

    Edit Instagram profile

    Step 4: Now, you will see the add link section on your mobile screen. Tap on it.

    Add link to Instagram Profile

    Step 5: Tap the add external link section to add your website address.

    Add external link to Instagram

    Step 6: Paste the bio link URL in the URL section and add a title in the title section.

    Add Replug bio link URL to Instagram profile

    Step 7: Your link in the bio will now appear in your profile.

    Instagram bio link

    Step 8: Your Instagram profile now has multiple links in the bio. The bio link URL is now clickable. Here’s what the landing page looks like in our example:

    Bio link landing page
    Boost ROI with branded URLs - Replug dashboard showing performance metrics and branded URL creation
    Turn your bio links into click-boosting machines
    Check

    Drive up to more clicks than plain URLs

    Check

    Share multiple destinations with one link

    Create bio links free

    Also check out: How to remove link from Instagram bio?

    End Note

    Adding multiple links to your Instagram bio can enhance your profile’s functionality and engagement. By using services like Replug and following the steps mentioned earlier, you can efficiently manage and share multiple links within your Instagram bio. 

    Keep your audience informed and connected with your content. Explore the possibilities and make the most of your Instagram presence!

  • How Does a Dynamic Link Rotator Work?

    How Does a Dynamic Link Rotator Work?

    Ever wondered how to make your online engagement more personalized and effective? That’s where link rotators come into play, and they’re pretty awesome.

    Picture this: You have a single link, but you want to send people to different web pages based on where they’re located, what language they speak, or even the device they’re using. That’s exactly what link rotators do, and they can seriously up your online game.

    In this guide, we’re going to walk you through link rotators. We’ll break down how they work, why they’re so important, and how you can use them to boost your online strategy. 

    So, if you’re ready to take your online engagement to the next level, let’s dive in!

    What is a link rotator?

    A link rotator is a web service or software tool that dynamically redirects users clicking on a single link to various destination URLs based on predefined conditions or rules. These conditions can include factors like user location, language, device, or specific time frames. 

    This tool is commonly used in online marketing and website optimization to deliver personalized and contextually relevant content to different segments of an audience, enhancing user engagement and campaign effectiveness.

    How does a link rotator work?

    Here’s a simplified explanation of how it operates:

    • Incoming Click: When a user clicks on a link that is managed by a link rotator, their action triggers the link rotator’s evaluation process.
    • Condition Check: The link rotator checks the user’s click against a set of predefined conditions. These conditions can include factors like the user’s location, language preferences, device type, or even the time and date of the click.
    • Rule-Based Redirect: If the user’s click aligns with one or more of the predefined conditions, the link rotator automatically redirects the user to a specific destination URL associated with that condition.
    • Personalized Experience: This dynamic redirection process ensures that users are directed to content or web pages that are most relevant to their specific characteristics or context.

     Example Scenario:

    Imagine a user clicks on your link from a mobile device located in Germany. In this case, the link rotator will recognize both the mobile device and the user’s location. It will then execute the predefined rule, directing the user to the European mobile page, ensuring a tailored and user-centric experience.

    In essence, a link rotator is your dynamic tool for creating personalized, efficient, and responsive journeys for your online audience. It’s about delivering the right content to the right audience, at the right time, and in the right way.

    Also read: 5 Top Link Rotators: Convert More With Traffic Routing & A/B Testing

    How does Relug’s dynamic link rotator work?

    Replug’s link rotator empowers personalized online journeys by directing users to different URLs based on factors like date, language, and location. 

    It’s perfect for time-sensitive campaigns, multilingual support, and regional targeting. Plus, it distinguishes between devices for a tailored experience.

    Here’s how to use Replug’s link rotator feature:

    Utilizing the traffic routing feature in Replug.io is a straightforward process. Follow the steps below:

    Step 1: Login and access Replug

    • Click on the “New Link” button to start the link creation process.
    • Click on “Choose your campaign” or create a new one, and then enter the URL you want to shorten or optimize, which will serve as the destination.

    Step 2: Enable traffic routing

    • Before saving the link, enable the traffic routing feature by toggling its slider button.
    • Enabling this feature will reveal the “Add new rule” button, allowing you to create routing rules.

    Note: Traffic Routing Rules and A/B testing cannot be used at the same time.

    Also read: How do UTM Parameters Work: A Complete Guide

    Step 3: Create routing rules

    • Click on the “Add new rule” button to open a modal window.
    • In this modal, you can define filters based on criteria like country, device, browser, and operating system.

    Configure the rules based on your criteria. For example:

    • If the visitor’s country is Pakistan,
    • the browser is Chrome,
    • the device is Desktop/Laptop, and
    • the operating system is Windows,
    • then route them to: https://replug.io/special-offer/.
    • Otherwise, if the IP Address is 192.168.13.12, the day of the week is Friday/Sunday, and the date is 2021-11-15, then route them to: https://contentstudio.io/.
    • If none of the specified conditions match, direct them to the default destination URL.

    Step 4: Save and Share

    • You can create up to 10 rules, and each rule can consist of multiple blocks with multiple filters.
    • For a rule to take effect, at least one block within that rule must match the user’s conditions; otherwise, the default destination URL will be used.
    • Once you’ve configured your rules, click the “Save” button at the bottom left of the popup.

    Your branded link with the Traffic Routing feature enabled is now ready for use. Share it with your audience to provide them with a personalized experience.

    Important Note: It’s crucial to select the appropriate campaign type, especially when using the Traffic Routing feature. When opting for a CTA-type campaign, the destination URLs must be iframed (displayed within another website).

    Check out this detailed guide for adding traffic routing rules in Replug!

    Replug Branded Short Links CTA
    A complete link management solution
    for marketing professionals & agencies.
    Try Replug for free

    Why Use Replug’s Dynamic Link Rotator?

    When it comes to optimizing your online engagement strategy, Replug’s dynamic link rotator stands out as a game-changing tool. Here’s why it should be a vital part of your campaigns:

    Dynamic URL redirection:

    At its core, Replug’s traffic routing feature dynamically redirects users to various destination URLs based on predefined conditions or rules. This dynamic flexibility means that your audience can be sent to precisely the right place based on factors like location, language, and device type.

    Personalization:

    Replug’s traffic routing feature empowers you to deliver a highly personalized user experience. By analyzing user data and behavior, you can tailor their journey, providing content that matches their unique preferences and needs.

    Marketing campaigns:

    Link rotators are essential for marketing campaigns, especially time-sensitive promotions. They allow for effortless transitions between different offers, making them ideal for rotating product promotions and limited-time deals.

    Multilingual support:

    For businesses with a diverse, multilingual audience, Replug’s link rotator automatically redirects users to content in their preferred language, significantly boosting user engagement and satisfaction.

    Geographic targeting:

    Replug’s link rotator can detect a user’s location and seamlessly redirect them to content or offers specific to their region. This is particularly beneficial for global businesses seeking to tailor campaigns for different countries or regions.

    Device-specific routing:

    Replug’s link rotator distinguishes between various devices, such as mobile phones and desktop computers. It ensures that users are directed to pages optimized for their specific device, providing an exceptional user experience.

    A/B testing:

    Marketers love Replug’s link rotator for A/B testing. By directing users to different versions of a web page, you can analyze which version performs better in terms of conversion rates, user engagement, and other crucial metrics.

    Analytics and tracking:

    Replug’s traffic routing comes equipped with comprehensive analytics and tracking features. This allows you to closely monitor link performance, track click-through rates, and gather valuable data to refine your campaigns for maximum impact.

    By integrating Replug’s dynamic traffic routing feature into your online strategy, you unlock a world of possibilities. You can create highly targeted, personalized, and data-driven campaigns that not only deliver results but also enhance the overall user experience.

    You can seamlessly uplift this strategy even further by using Replug’s link shortener tool to optimize and track your URLs, ensuring every campaign is both measurable and performance-driven.

    Boost ROI with branded URLs - Replug dashboard showing performance metrics and branded URL creation
    Boost your conversion rates with irresistable CTAs with

    for your marketing campaigns.

    Check

    Higher clicks

    Check

    More leads

    Check

    Better ROI

    Generate free CTAs

    FAQs

    Do I need technical expertise to set up traffic routing?

    No, most Link Rotator tools are designed with user-friendly interfaces, making it accessible even for non-technical users to set up and configure.

    Are there any limitations to using a Link Rotator?

    Some limitations may include a maximum number of rules or conditions, and it’s essential to ensure the destination websites allow iframing for certain campaigns.

    Can I track the performance of links in a Link Rotator?

    Yes, most Link Rotators come with built-in analytics and tracking features that allow you to monitor link performance, track click-through rates, and gather valuable data for optimization.

    Are Link Rotators compatible with different devices and browsers?

    Yes, Link Rotators can be configured to work with various devices and browsers, ensuring a seamless user experience regardless of the platform.

    Can I change the destination URLs in a Link Rotator after they’re set up?

    Yes, you can typically modify the rules and destination URLs in a Link Rotator as needed, offering flexibility in your campaigns.

    Is there a limit to the number of rules or conditions I can set in a Link Rotator?

    Many Link Rotators allow you to create up to a certain number of rules or conditions, but this limit can vary depending on the specific tool or service you’re using. It’s important to check the capabilities of the Link Rotator you choose.

  • How to Create a Link to a Website?

    How to Create a Link to a Website?

    Knowing how to create website links is vital in today’s digital world. Whether you’re working with documents, using your smartphone, sending emails, or even building web pages, the ability to connect users to web content is essential.

    This guide offers simple, step-by-step instructions for creating website links in four critical contexts: Microsoft Word, HTML for web pages, smartphones, and emails. 

    Discover how to make online interactions more efficient, engaging, and user-friendly. Whether you’re a web designer, a content creator, or an everyday user, we’ve got you covered. Let’s dive in!

    How to create a link to a website in HTML?

    Creating a link to a website is a simple task, and it’s typically done using HTML if you’re working on a web page. 

    Here’s how you can create a basic hyperlink:

    how-to-create-a-link-to-a-website

    In this HTML code:

    “<a>” is the anchor element, which is used to create links.

    “href” is an attribute within the anchor element that specifies the URL (web address) of the website you want to link to. Replace “https://www.example.com” with the actual URL of the website you want to link to.

    The text “Visit Example.com” is the visible link text that users will see on your web page. You can replace this with any text you prefer.

    Here’s a breakdown of the steps:

    Step 1: Replace “https://www.example.com” with the URL of the website you want to link to.

    Step 2: Replace “Visit Example.com” with the text you want to display for the link.

    Once you’ve added this HTML code to your webpage, the text “Visit Example.com” will be a clickable link, and when users click on it, they will be taken to the specified website.

    Step 3: Remember to save your HTML file with a “.html” extension and open it in a web browser to test the link.

    How to create a link to a website in Word?

    Here’s how to create a link to a website in Microsoft Word:

    Step 1: Open your Microsoft Word document.

    Step 2: Select the text or image you want to turn into a hyperlink. Highlight the text or click on the image.

    Step 3: In the menu bar at the top, click on the “Insert” tab and Look for the “Link” or “Hyperlink” option (the label may vary depending on your Word version). Click on it.

    how-to-create-a-link-to-a-website

    Step 5: A dialog box will appear. In the “Enter Link” field enter the URL (web address) of the website you want to link to (e.g., “https://www.example.com”).

    how-to-create-a-link-to-a-website-in-word

    Step 6: You can also give your link a display text if you selected text in Step 2. This is the text that will be visible to readers. If you link an image, this option may not be available.

    Step 7: The text you selected will now be a clickable link in your Word document.

    Replug Branded Short Links CTA
    A complete link management solution
    for marketing professionals & agencies.
    Try Replug for free

    Creating a link to a website in Microsoft Word is a useful skill, especially for client reports or branded content. Many businesses also consult a web designer to integrate links seamlessly across landing pages, ensuring both visual appeal and conversion efficiency.

    How to create a link to a website on a phone?

    Creating a website link on a phone typically involves adding a website shortcut to your home screen for easy access. Here are the steps for Android and iOS:

    For Android:

    Step 1: Open the web browser on your Android phone.

    Step 2: Visit the website you want to create a link for.

    Step 3: Tap the three-dot menu icon (usually located at the top right or bottom of the screen).

    Step 4: Select “Add to Home screen” or a similar option from the menu.

    how-to-create-a-link-to-a-website-on-a-phone

    Step 5: Give the shortcut a name (this will be the label on your home screen).

    how-to-create-a-link-to-a-website

    The website link will now appear as an icon on your home screen for easy access.

    Also read: How to Create a Smart URL Link: Step-by-Step Guide

    For iOS (iPhone/iPad):

    Step 1: Open the Safari web browser on your iOS device.

    Step 2: Visit the website you want to create a link for.

    Step 3: Tap the “Share” button (it looks like a square with an arrow pointing up, usually located at the bottom center or top of the screen).

    Step 4: Scroll down and select “Add to Home Screen.”

    Step 5: Customize the name of the shortcut (if desired) and tap “Add.”

    The website link will now appear as an icon on your home screen.

    How to create a link to a website in an email?

    Creating a link to a website in an email depends on the email client you’re using. Here are general steps that apply to many email clients:

    Step 1: Open your email client and compose a new email.

    Step 2: In the body of the email, type the text that you want to turn into a link.

    Step 3: Highlight the text you just typed and look for an option in your email client’s toolbar that resembles a chain link icon or says “Insert Link” or “Hyperlink.” Click on it.

    how-to-create-a-link-to-a-website

    Step 4: A dialog box should appear. In the URL or Link field, enter the web address (e.g., “https://www.example.com”) you want to link to.

    how-to-create-a-link-to-a-website

    Step 5: Optionally, you can specify link text or a title (if your email client allows).

    Step 6: Send your email. The text you highlighted will now be a clickable link when recipients open the email.

    Boost ROI with branded URLs - Replug dashboard showing performance metrics and branded URL creation
    Boost ROI with
    branded URLs!

    Enhance your marketing campaigns by creating shareable, trackable, and fully multi-purpose customizable branded URLs.

    Try Replug for free

    For those seeking a simple, reliable tool to manage all your link needs, from creation to tracking, Replug.io offers an intuitive dashboard that simplifies link building across documents, web pages, and more.

    Moreover, if you want to make those links cleaner and more manageable, especially for sharing or marketing, you can shorten link using Replug’s built-in link shortener to produce crisp, user-friendly URLs.

    FAQs

    What is a website link?

    A website link, also known as a hyperlink, is a clickable element that connects one web page or online resource to another. Clicking on a link typically takes you to the linked web page or resource.

    What is the purpose of creating website links in emails?

    Creating website links in emails allows you to direct recipients to specific web pages, resources, or information relevant to the email’s content, making it easy for them to access additional information.

    How do I create links in WordPress when building a website?

    In WordPress, highlight the text or image you want to link, click the “Insert/edit link” button in the editor toolbar, and enter the URL you want to link to. Click “Add Link” to create the hyperlink.

    How can I troubleshoot issues with broken links on my website?

    You can use online link-checking tools, verify the link’s correctness, and update or fix broken links by correcting the URLs.

    You may also like:

    How do URL shorteners work: A practical guide for digital marketers

    How to create a custom QR code for website?

  • How to add a link to your Instagram story?

    How to add a link to your Instagram story?

    Instagram has made it easier than ever to share valuable resources and information with your followers. You can now add links to your Instagram Stories, regardless of your account size. Whether you’re a business, creator, or an individual, this feature empowers you to connect with your audience in new ways. 

    In this guide, we’ll show you how to add a link to your Instagram story, enabling you to share what matters most to you. Let’s get started.

    Why do you need to add a link to your Instagram story?

    Adding a link to your Instagram story serves several important purposes:

    1. Share resources: You can direct your followers to external websites, articles, or resources related to the content of your story. This is valuable for sharing information, promoting products or services, or providing additional context.
    2. Drive traffic: If you have a website, blog, or online store, adding a link to your story can help drive traffic to your site. This is essential for businesses and content creators looking to expand their online presence.
    3. Enhance engagement: Links in stories can prompt user interaction. When viewers tap on the link, it provides a way for them to engage further with your content, whether it’s to learn more, shop, or explore related content.
    4. Promote events: If you’re hosting an event, webinar, or live stream, you can use links in stories to invite your audience and provide event details or registration links.
    5. Support causes: Advocates and change-makers can use links to share information about social causes, fundraisers, or petitions, helping raise awareness and drive action.
    6. Connect with your audience: Adding links enables you to offer your followers valuable resources, making your content more relevant and engaging.
    Boost ROI with branded URLs - Replug dashboard showing performance metrics and branded URL creation
    Turn your bio links into click-boosting machines
    Check

    Drive up to more clicks than plain URLs

    Check

    Share multiple destinations with one link

    Create bio links free

    How to add a link to your Instagram story?

    Here’s how to add a link to your Instagram story:

    Step 1: Open Instagram

    Ensure you have the Instagram app installed on your mobile device. Log in to your Instagram account if you’re not already logged in.

    Step 2: Access your story creator

    Tap your profile picture or swipe right from your home feed to access the story creator.

    Step 3: Capture or upload content

    At the bottom of the screen, you’ll see options to capture a photo or record a video using your device’s camera. Alternatively, you can swipe up or tap on the gallery icon to upload existing content from your camera roll. Choose the content you want to add to your story.

    Step 4: Access the sticker tool

    After capturing or uploading your content, you can enhance your story with various stickers and features. To add a link to your story, tap the “Sticker” icon from the top navigation bar.

    Also read: How to add YouTube links to Instagram story?

    Step 5: Add the link sticker

    In the sticker options, locate and tap on the “Link” sticker. This sticker is used to add the link you want to share with your followers.

    Step 6: Enter your desired link

    A pop-up window will appear, allowing you to enter the web link you want to share. Type or paste the URL into the provided space.

    Step 7: Confirm and customize

    After entering the link, tap “Done” to confirm. You can also customize the appearance of the Link sticker by tapping on it, which may allow you to choose from different color variations or styles, depending on Instagram’s features at the time.

    Step 8: Place the sticker on your story

    Now, you can place the Link sticker on your story. Simply drag and drop it onto your image or video, just like you would with other stickers.

    Also read: How to add a link in bio to your Instagram profile?

    Step 9: Publish your story

    Once you’re satisfied with how your story looks with the added link, you can proceed to share it with your followers. Tap the “Your Story” button at the bottom of the screen to post your story.

    Step 10: Viewers interact with the link

    When someone views your story and taps on the Link sticker, they will be redirected to the web page you’ve shared.

    Important Note: Instagram has certain safety measures in place. New accounts and accounts that repeatedly share harmful content or violate community guidelines may not have access to the Link sticker feature. Be sure to follow Instagram’s guidelines and policies to maintain access to this and other features.

    Replug: Simplify your social media link management

    Managing links on social media platforms like Instagram can be a crucial part of your online strategy. Replug is a comprehensive link management platform and bio-link tool designed to simplify this process. 

    With Replug’s efficient short URL generator, you can create shortened, trackable links that are perfect for Instagram bio links or sharing in your stories. This Instagram link shortener provides valuable analytics to help you measure the performance of your links, including click-through rates and audience engagement data. 

    Whether you’re a marketer, business owner, or content creator, Replug can enhance your social media marketing efforts by making link management effortless and effective.

    Try Replug today and take control of your links to maximize your online presence.

    Replug Branded Short Links CTA
    A complete link management solution
    for marketing professionals & agencies.
    Try Replug for free

    FAQs on adding a link to Instagram Story

    Can I add links to any type of Instagram Story, including photos and videos?

    Yes, you can add links to both photos and videos in your Instagram Stories.

    Is there a limit to the number of links I can add to a single Instagram Story?

    You can typically add one link per Instagram Story. If you want to share multiple links, consider creating multiple stories or using the link in the bio feature.

    Who can add links to their Instagram Stories?

    Instagram has expanded access to this feature, so now, users of all account sizes, including businesses, creators, and individuals, can add links to their stories.

    Are there any restrictions on the types of links I can share in my Instagram Story?

    Instagram has guidelines in place and links that violate their Community Guidelines may be restricted. It’s important to ensure your content adheres to Instagram’s policies.

    Can I track how many people clicked on the link in my Instagram Story?

    Yes, Instagram provides insights on the number of clicks your link receives. You can view this data by swiping up your story.

  • How to Share Spotify Playlist: Step-by-Step Guide

    How to Share Spotify Playlist: Step-by-Step Guide

    So you’ve just created an awesome Spotify playlist, and you’re eager to share your musical taste with the world (or maybe just a few friends). Good news – sharing a Spotify playlist is a breeze, and we’re here to walk you through the steps. 

    Whether you’re jamming on your phone, hanging out on your computer, or even if your friends aren’t Spotify users, we’ve got you covered. 

    Let’s dive into the simple process of spreading those musical vibes far and wide. 

    There are three methods to share your Spotify playlist:

    • Method 1: Using the Spotify mobile app 
    • Method 2: Using the Spotify web player
    • Method 3: Create a collaborative Spotify playlist

    Method 1: Using the Spotify mobile application

    Step 1: Launch the Spotify app on your device and make sure you’re logged in to your account.

    Step 2: Find the playlist you want to share in your playlists library and open it.

    Step 3: On the playlist page, you’ll see three dots (also known as the “More” option). Click on them to reveal a drop-down menu.

    Step 4: In the drop-down menu, click on the “Share” option. This will open up the sharing options.

    Step 5: You’ll see various options to share the playlist, such as sharing on social media platforms, copying the link, and more.

    Step 6: Depending on how you want to share, select the platform. If you choose a social media platform, the Spotify app will likely integrate with that platform’s sharing feature. If you choose “Copy Link,” the link to the playlist will be copied to your clipboard.

    Step 7: Follow the prompts to complete the sharing process. If you copied the link, you can paste it into a text message, email, or any other platform where you want to share it.

    Also read: How to share youtube playlist using deep links?

    Method 2: Using the Spotify web player

    Step 1: Go to the Spotify web player (https://open.spotify.com) and log in to your account.

    Step 2: Find the playlist you want to share in your playlists library and click on it to open it.

    Step 3: Similar to the mobile app, you’ll see three dots next to the playlist’s name. Click on them to reveal a menu.

    Step 4: From the menu, click on the “Copy Playlist Link” option. This will copy the playlist’s link to your clipboard.

    Step 5: Now, you can paste the link in emails, messages, or on social media platforms to share the playlist.

    That’s it! You’ve successfully shared a Spotify playlist using different methods depending on your preferences and the platform you’re using.

    Method 3: Create a collaborative Spotify playlist

    Step 1: Open Spotify and click on the “Your Library” tab.

    Step 2: Click on the “Create (+)” icon in the top right corner then select “Playlist” from the options.

    Also read: A Quick Guide To Deep Linking & Its Benefits

    Note: If you’re inviting collaborators, it’s a good idea to fill out some information first. Select whether to make your playlist public or private, and enter a name, description, and cover art. The first thing you can do is add a few tracks.

    Step 3: Click on the “3 vertical dots” then click on “Invite collaborators” to add collaborators to your playlist. 

    Replug Branded Short Links CTA
    Drive more clicks, conversions, and app installations by deep linking
    to your favorite platforms.
    Try deep links for free

    How to share Spotify playlists using deep links?

    Replug’s deep links offer a streamlined way to share content and direct your audience to specific points within apps or websites. 

    Here’s a step-by-step guide on how to create and use deep links for Spotify playlists using Replug:

    Create deep links for Spotify Playlists:

    Step 1: Log in to the Replug Application and navigate to the “Replug Links” tab under the “manage” section.

    manage and replug links

    Step 2: Click on the “New Link” button to initiate the process of creating a new link.

    new link

    Step 3: Here, choose a relevant “campaign” name that helps you categorize and organize your deep links. Then, paste the URL of the playlist you want to create a deep link for into the “URL field.”

    campaign-url

    Step 4: To enable the Deep Links feature for this link, toggle the state to “on.” If the destination URL is compatible with being used as a Deep Link, an indicator will confirm this.

    Note: If the destination URL cannot be used as a Deep Link, a different indicator will be displayed.

    deep-link-not-supported

    Step 5: Once you’ve set up your deep link preferences, click the “save link” button. This action will save your link with the deep linking feature enabled. Your deep link will now be ready for sharing.

    By following these steps, you can create powerful deep links using Replug that allow you to direct your audience to specific content within videos and gain insights into how these links are performing. This approach enhances user experience, increases engagement, and provides valuable data for optimizing your content-sharing strategies.

    Replug Branded Short Links CTA
    A complete link management solution
    for marketing professionals & agencies.
    Try Replug for free

    By pairing your deep links with a branded short URL, you can make your links cleaner, easier to share, and even more trackable—amplifying the overall impact of your content strategy.

    FAQs

    Can I share my Spotify playlist link directly?

    Yes, you can share your Spotify playlist link directly with others. Follow the steps mentioned earlier to generate the playlist link and share it via various platforms.

    What are Spotify playlist deep links and how do they work?

    Spotify playlist deep links are specialized links that allow you to direct users to a specific song or point within a playlist. When clicked, these links open the Spotify app or web player and take the user directly to the specified song within the playlist.

    Are deep links compatible with Spotify playlist sharing?

    Yes, deep links can enhance the sharing of Spotify playlists. They allow you to share a link that takes users directly to a specific song within the playlist, providing a seamless and targeted listening experience.

    Can I track the performance of my shared Spotify playlist deep links?

    Unfortunately, Spotify itself does not offer detailed analytics for tracking the performance of shared deep links. However, by using Replug’s Spotify link shortener, you can create branded deep links that lead users directly to your playlists while tracking clicks, locations, referral sources, and device types.
    Replug’s built-in analytics dashboard gives you real-time insights into how your links perform, helping you measure engagement and optimize your Spotify promotions more effectively.

    How to optimize Spotify playlist sharing using deep links?

    To optimize Spotify playlist sharing with deep links, focus on sharing specific songs that resonate with your target audience. Additionally, use descriptive and engaging descriptions when sharing the links on social media or other platforms.

    What platforms support Spotify playlist deep links?

    Spotify playlist deep links are supported on various platforms, including social media, messaging apps, websites, and more. They allow users to directly access specific songs or points within a playlist, enhancing the listening experience.

  • How to Find and Submit a Sitemap URL to Google?

    How to Find and Submit a Sitemap URL to Google?

    Sitemaps are vital roadmaps for search engines like Google. They ensure that every nook and cranny of your website is explored and indexed accurately. Without a sitemap, search engines might miss important pages or content updates. 

    By providing a clear layout of your website’s structure, you enhance its visibility and accessibility, leading to higher search rankings and better user experiences. 

    Sitemaps are like GPS for search engines, guiding them to navigate and showcase your digital presence effectively.

    This guide will teach you everything you need to know about understanding, creating, and submitting your sitemaps to Google. Let’s get started!

    What is a Sitemap URL?

    A sitemap URL is a web address that points to a sitemap. 

    A sitemap is a list of all the pages on a website. It helps search engines find and index the pages on your website. The sitemap URL is usually in the format of https://www.example.com/sitemap.xml.

    When you create a sitemap for your website, you typically save it as an XML (Extensible Markup Language) file. This XML file contains a list of URLs to different pages and sections of your website, along with additional information like when the page was last updated and its importance relative to other pages. 

    By submitting your Sitemap URL to search engines, you enable them to efficiently crawl and index your website’s content. This helps improve your website’s visibility in search results and ensures that search engines can accurately represent your website to users.

    Important note: We are discussing XML sitemaps throughout this guide.

    XML Sitemap URL example:

    Here’s a simple example of what an XML sitemap might look like:

    Sitemap-url-example

    In this example, each `<url>` element represents a page on the website. The `<loc>` tag contains the URL of the page, `<lastmod>` indicates when the page was last modified, `<changefreq>` specifies how often the page’s content changes (options include “always,” “hourly,” “daily,” “weekly,” “monthly,” “yearly,” and “never”), and `<priority>` indicates the priority of the page relative to other pages (values range from 0.0 to 1.0).

    Keep in mind that this is a basic example. Depending on your website’s structure and content, your XML sitemap might include more elements and attributes. Also, the URLs in the example should be replaced with the actual URLs of your website’s pages.

    Boost ROI with branded URLs - Replug dashboard showing performance metrics and branded URL creation
    Boost your conversion rates with irresistable CTAs with

    for your marketing campaigns.

    Check

    Higher clicks

    Check

    More leads

    Check

    Better ROI

    Generate free CTAs

    How do I find my Sitemap URL?

    To find the Sitemap URL of your website, you can follow these methods:

    1. Check the root domain: 

    Most websites place their sitemap file at the root of their domain. This means you can access it by adding “/sitemap.xml” to your domain name. For example, http://www.yourwebsite.com/sitemap.xml

    1. Robots.txt file: 

    Open your website’s robots.txt file. For example, if you want to view the robots.txt file for yourwebsite.com, enter https://www.example.com/robots.txt into the browser’s address bar. This file often contains a line that indicates the location of the sitemap. Look for a line that looks like Sitemap: http://www.yourwebsite.com/sitemap.xml

    1. Google search console: 

    If you’ve registered your website with Google Search Console, you can find the submitted sitemap URL there. Log in to Google Search Console, select your property, and navigate to the “Sitemaps” section. The sitemap URL should be listed there.

    1. Content management system (CMS): 

    If you’re using a CMS like WordPress, there might be plugins that generate and manage your sitemap. In some cases, these plugins provide you with the sitemap URL directly in the plugin settings or dashboard.

    Also read: The Importance of Choosing the Right URL Slug for SEO Success

    How to find my Sitemap URL in WordPress?

    In WordPress, finding your sitemap URL can be quite straightforward, especially if you’re using popular SEO plugins like Yoast SEO or All in One SEO Pack. Here’s how to find your sitemap URL on WordPress using these plugins:

    Using Yoast SEO:

    1. Log in to your WordPress dashboard.

    2. Navigate to “SEO” in the left-hand menu and click on “General.”

    3. Click on the “Features” tab.

    4. Look for the “XML Sitemaps” feature and make sure it’s enabled.

    5. Once enabled, you can access your sitemap by clicking on the “XML Sitemaps” link that appears.

    Using all-in-one SEO pack:

    1. Log in to your WordPress dashboard.

    2. Go to “All in One SEO” in the left-hand menu.

    3. Click on “Feature Manager.”

    4. Find “XML Sitemaps” and make sure it’s enabled.

    5. After enabling, a new menu item “XML Sitemap” will appear in the All in One SEO menu. Click on it to access your sitemap.

    If you’re not using these plugins or want to find your sitemap manually, it’s often located at `http://www.yourwebsite.com/sitemap.xml` (replace “yourwebsite.com” with your actual domain name). However, please note that the actual location of the sitemap might vary based on your website’s setup or theme.

    If you’re still having trouble finding your sitemap, consider checking your theme’s documentation or asking your website administrator for assistance.

    Also read: How to Redirect a URL in WordPress – Ultimate Guide

    How to submit a Sitemap URL to Google?

    Submitting a Sitemap URL to Google is an essential step to ensure that your website’s pages are properly indexed and displayed in search results. Here’s a simple guide on how to do it:

    1. Create a Sitemap: 

    First, ensure you have a sitemap for your website. If you haven’t already, you can create a sitemap using various online tools, plugins, or even manually.

    1. Sign in to Google search console: 

    If you don’t have a Google Search Console account, you’ll need to create one. Go to the Google Search Console website (search for “Google Search Console”) and sign in using your Google account.

    1. Add your property: 

    Once logged in, click on the “Add a property” button and enter your website’s URL. Follow the verification process to prove that you’re the owner of the website.

    1. Access the Sitemaps section: 

    After verifying your property, select your website from the Google Search Console dashboard. In the left-hand menu, click on “Sitemaps” under the “Index” section.

    1. Submit your Sitemap URL: 

    On the Sitemaps page, you’ll see an “Add a new sitemap” button. Click it and enter just the part of the URL that comes after your domain name. For example, if your sitemap URL is http://www.yourwebsite.com/sitemap.xml, you would enter only /sitemap.xml. Then, click “Submit.”

    how-to-submit-sitemap-url
    1. Check status and errors: 

    Google will now process your sitemap submission. You can check the status of your submitted sitemap and any potential errors by refreshing the page or checking back later.

    1. Monitor and update: 

    As your website evolves, it’s a good practice to regularly update your sitemap and resubmit it to Google whenever you add new content or make significant changes.

    Remember, submitting a sitemap helps Google crawl and index your website more effectively, which can improve your website’s visibility in search results. If you encounter any issues during the process, Google Search Console provides helpful information and troubleshooting options.

    Replug Branded Short Links CTA
    Drive more clicks, conversions, and app installations by deep linking
    to your favorite platforms.
    Try deep links for free

    Also read: How to Submit a URL to Google: A Quick and Easy Guide

    Frequently asked questions

    Can I submit multiple sitemaps for different sections of my website?

    Yes, you can submit multiple sitemaps for various sections or content types of your website. This helps Google understand the diverse content your site offers.

    What should I do if my sitemap contains errors or broken links?

    It’s crucial to fix errors and broken links in your sitemap to ensure proper indexing. Regularly review and update your sitemap to maintain its accuracy.

    How often should I update and resubmit my sitemap to Google?

    Update and resubmit your sitemap whenever you add new content, make structural changes, or when Google introduces updates that affect indexing.

    Do other search engines besides Google also support sitemaps?

    Yes, other major search engines like Bing and Yahoo also support sitemaps. Submitting sitemaps to multiple search engines can improve visibility across various platforms.