“Link in Bio” is all about breaking the limits of a single link. It’s a way to share multiple links, content, and products, making it an essential tool for individuals, businesses, and influencers.
In this guide, we’ll explore the basics, the role it plays in personal branding and marketing, and how it’s revolutionizing the way we navigate the online world. Whether you’re a social media pro or a newbie, link in bio is your shortcut to success in today’s fast paced world.
Here’s what you need to know.
What does “link in bio” mean?
Link in bio refers to a clickable URL appearing in your profile description, often on platforms like Instagram, TikTok, and Twitter. This link allows users to direct their audience to external websites, content, products, or any other online destinations.
Since many social media platforms limit the number of links or direct clickable links in posts and comments, the link in bio or “bio link”serves as a workaround, enabling users to share multiple links or promote specific content more effectively by directing their followers to their bio section, where they can find and click on the desired link.
It has become a valuable strategy for personal branding, content promotion, and marketing.
If you’re active on social media, you’ve probably run into the dreaded “limited links” problem. Instagram gives you five spots (generous…ish), but TikTok? Just one lonely link. Not exactly the dream when you’ve got a podcast, a blog, a product launch, and a playlist to share. That’s where a link in bio saves the day, turning that single space into a mini hub for everything you want your audience to click on.
Here’s why you should create a link in bio:
One link, many destinations: Social media platforms limit you to just adding a few links in your bio. A link in bio helps you make it count by leading visitors to multiple pages.
Showcase everything: Whether it’s your website, shop, blog, videos, or sign-up forms, you can share it all in one neat place.
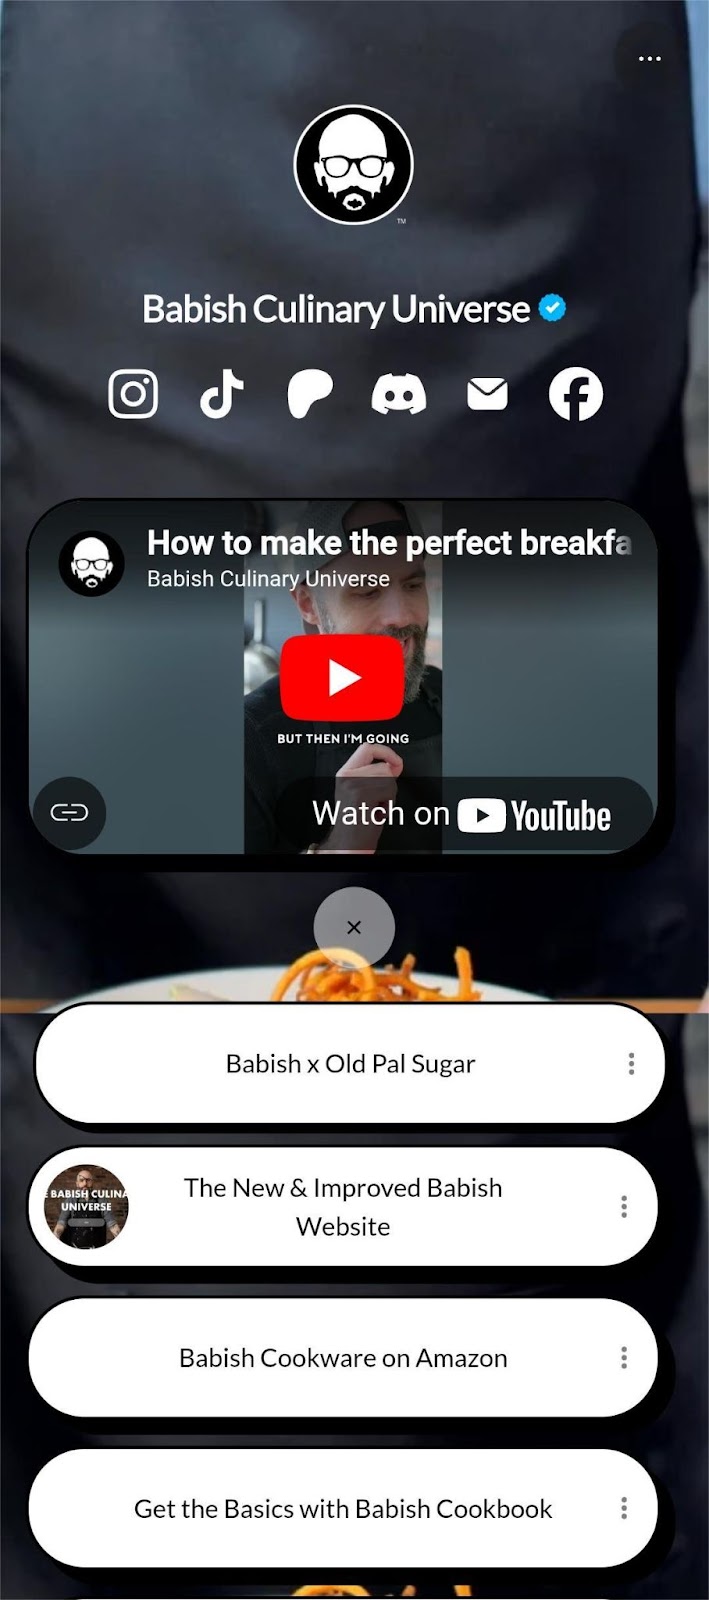
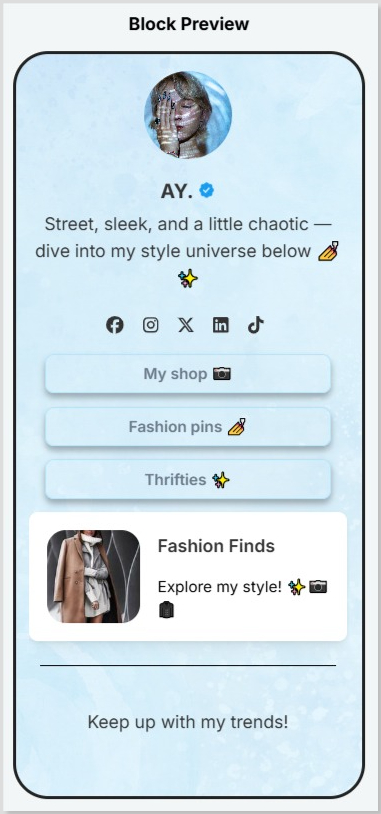
Here’s an example of the famous American Cook, Andrew Rea’s link in bio page for his series “Babish Culinary Universe”:
Make navigation easy: No more “link in latest post” confusion. Your audience knows exactly where to go.
Stay organized: Keep your important links tidy, clickable, and easy to update whenever you need.
Boost engagement: Get more clicks, views, leads, and conversions by directing people to the right content at the right time.
Top benefits of link in bio
A link in bio does more than hold a single URL; it helps you organize, optimize, and amplify your online presence. Here’s a quick look at why it’s a must-have for anyone growing their brand:
Combines all your important links into one
Instead of juggling multiple URLs, your link in bio leads followers to everything you want them to see, whether it’s your latest YouTube video, blog post, or product drop.
Simplifies the path to purchase or action
A link in bio lets you turn browsers into buyers by placing shop links, discount codes, or sign-ups just one tap away, all in one neatly organized spot.
Lets you retarget everyone who clicks
With tools like Replug, your link in bio becomes retargetable so that every click can feed into future ad campaigns and bring people back to your page.
Shows what content your audience loves
You can track clicks on your link in bio from one single dashboard using a top-notch link management platform. This tells you what’s resonating—so you can do more of what works.
Lets you create a fully branded mini landing page
Instead of a plain list of links, your link in bio can become a branded microsite that matches your aesthetic and makes your profile look polished and pro.
Automatically updates with your latest content
Add an RSS feed to your link in bio to keep it fresh, so whenever you post a new video, blog, or podcast, it shows up without you lifting a finger.
Boosts visibility through SEO-friendly design
An optimized, custom link in bio page can be indexed by search engines, giving your most important content extra visibility beyond just social clicks.
💡 Who benefits from a link in bio? Creators, brands, freelancers, agencies; anyone using social media to drive traffic, grow followers, or sell online.
To create a winning link in bio using Replug’s bio links feature, you can follow these steps:
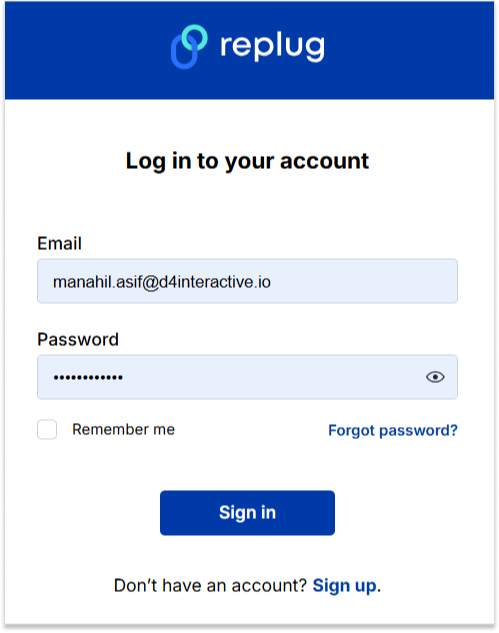
Step 1: Access your Replug account
Sign in to your Replug account, or create one to start your 14-day free trial if you’re new to the platform.
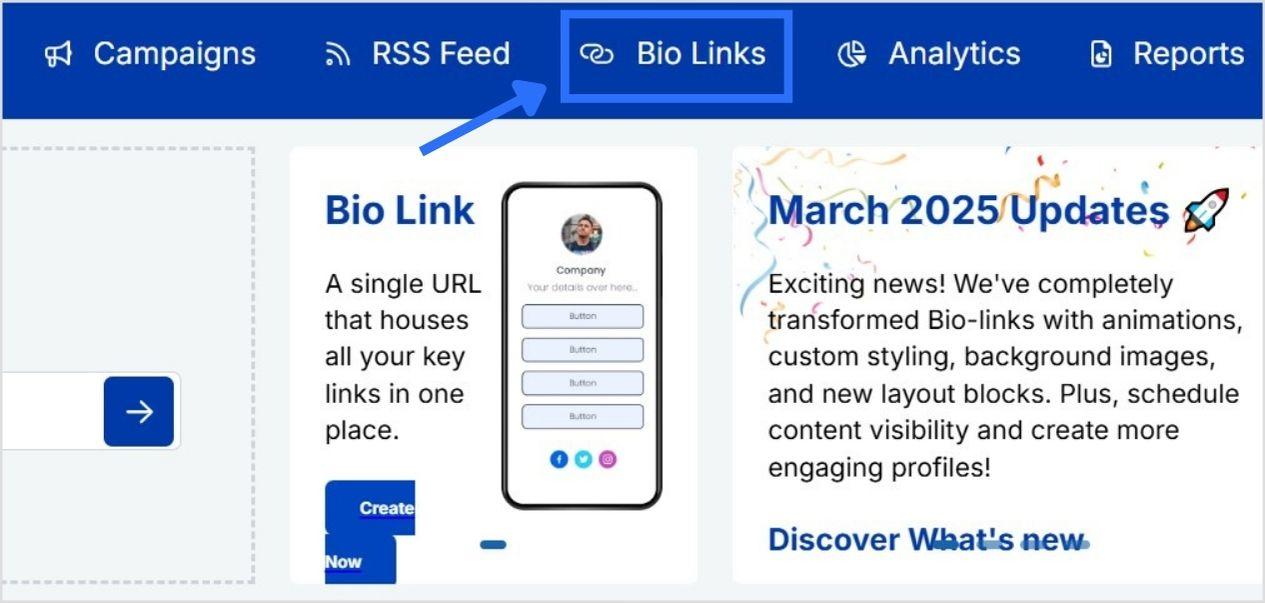
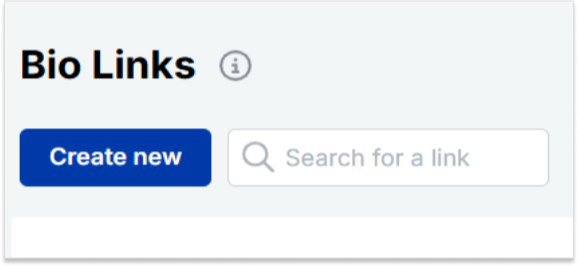
Step 2: Click on “Bio Links”
Once you’re logged in, go to the Replug dashboard and click on “Bio Links” from the navigation bar to get started.
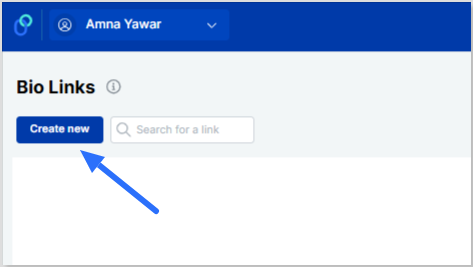
Step 3: Start creating a new link in bio
This will take you to the “Bio Links dashboard. From here, click on the “Create new” button to start creating a new bio link.
Replug lets you easily manage your bio profile with three main categories: Branding, Content, and Settings.
Branding: Customize the look and feel of your profile with themes, colors, fonts, and button styles.
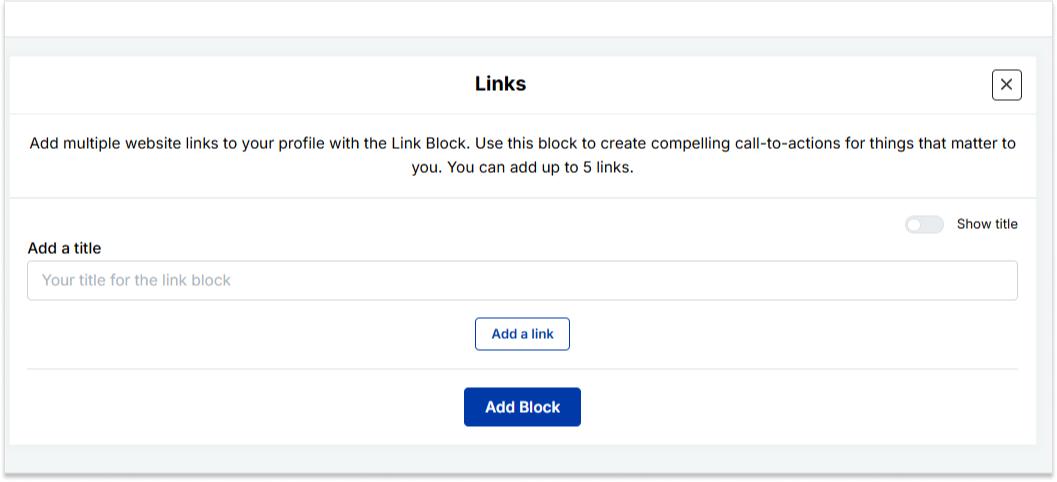
Content: Add and organize different blocks like links, videos, images, and more to showcase your content.
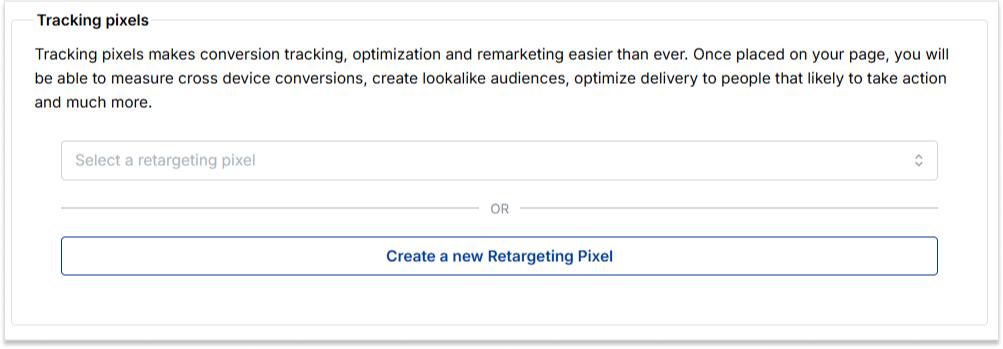
Settings: Adjust SEO settings, control how your profile appears in social media previews, and add tracking pixels.
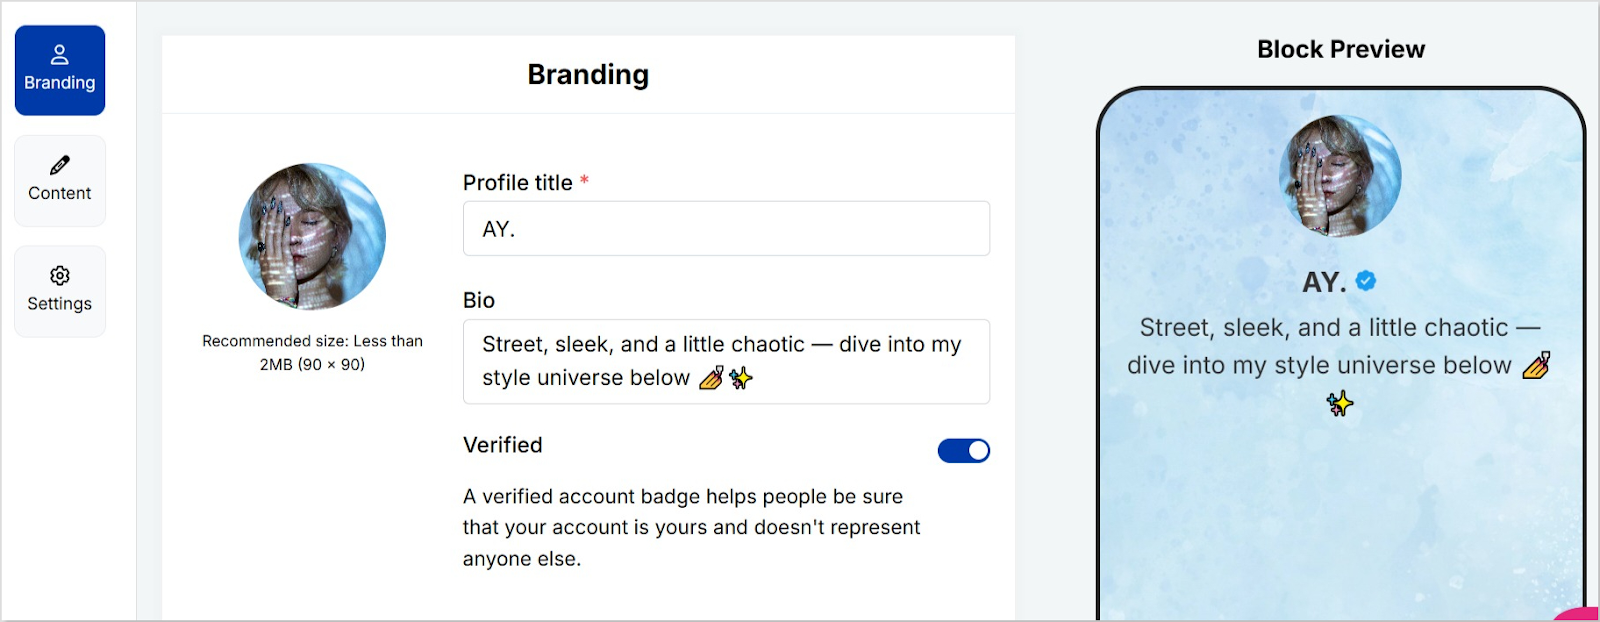
Step 4: Brand your link in bio
Customize your bio profile to match your personal style or brand. Upload a profile image, add your title and bio, and choose from a variety of themes, button styles, and colors.
You can also enable a background image and adjust its opacity for a more personalized look. If your account is verified, a badge will appear to help others recognize it’s officially you.
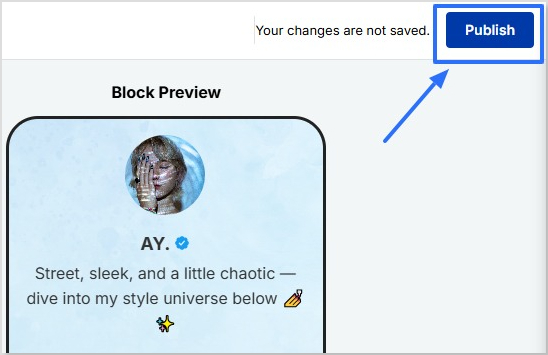
Click on the “Publish” button on the top rightto start customizing your bio link further. If you don’t, you won’t be able to save changes in real-time.
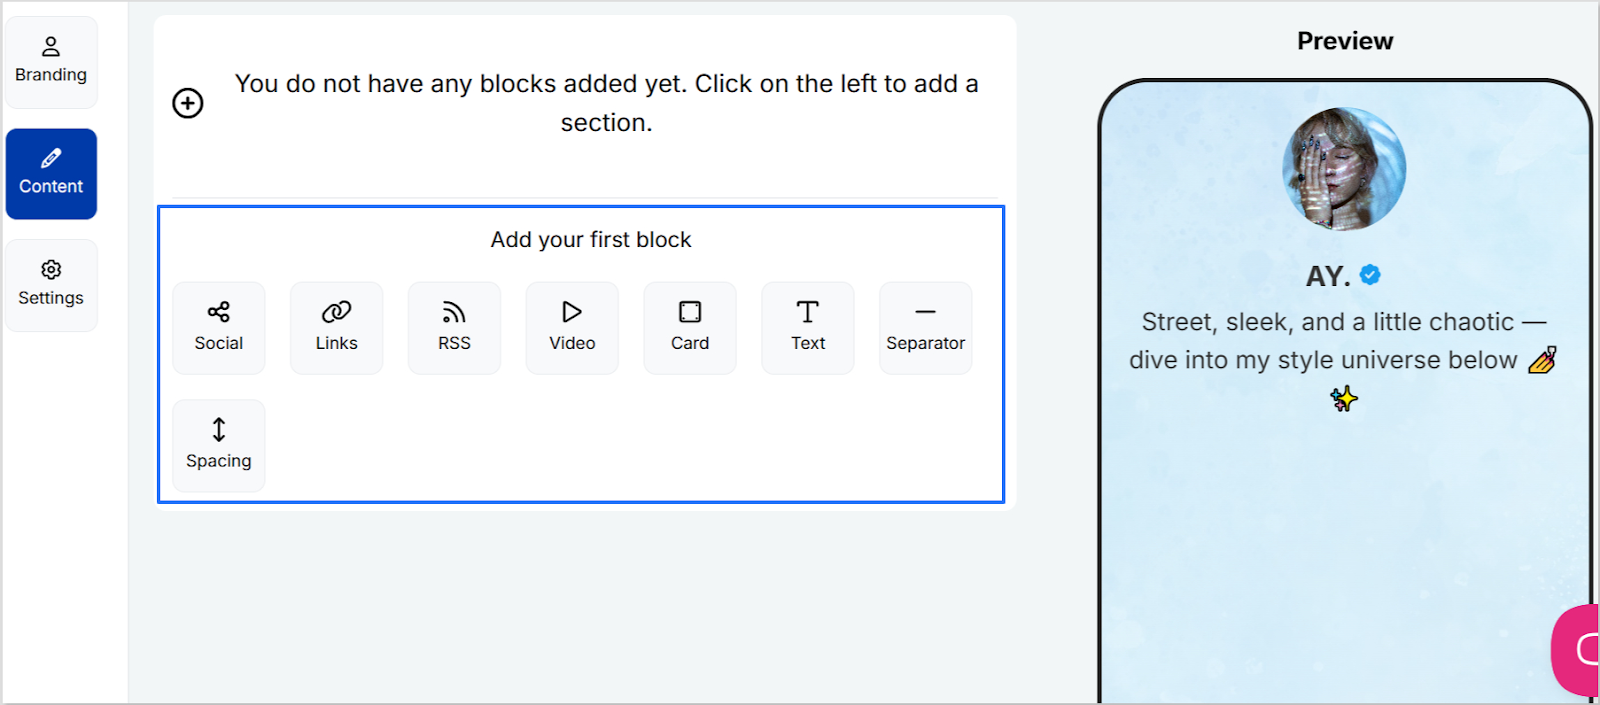
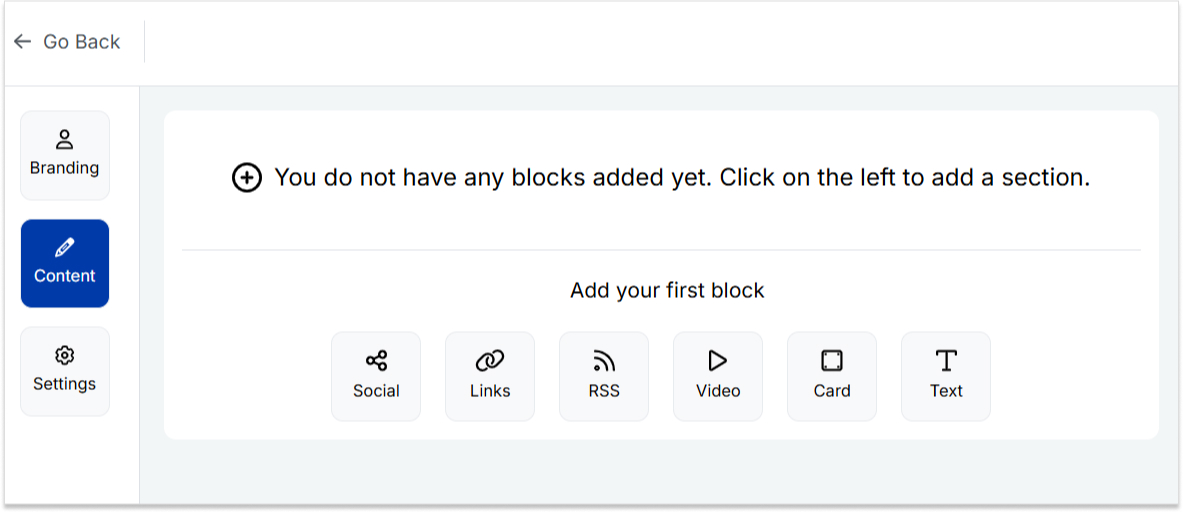
Step 5: Choose content blocks
Choose the type of content blocks you want to add to your bio link page.
Replug offers various content block options, including social icons, links, RSS feeds, audio, video, text, cards, separator, and spacing. Select the ones that best suit your needs.
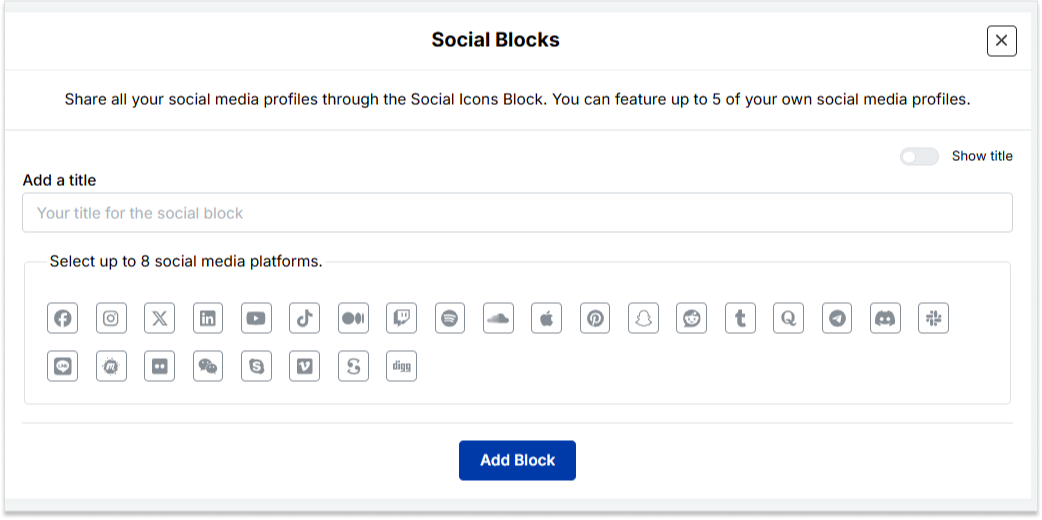
As an example, let’s start with adding social icons. For that, click on the “Social” block button.
Provide titles for each platform, customize the colors for the social icons, and paste the corresponding links. To add each platform, click the “Add Block” button.
You can also schedule, animate, or customize the appearance of your blocks.
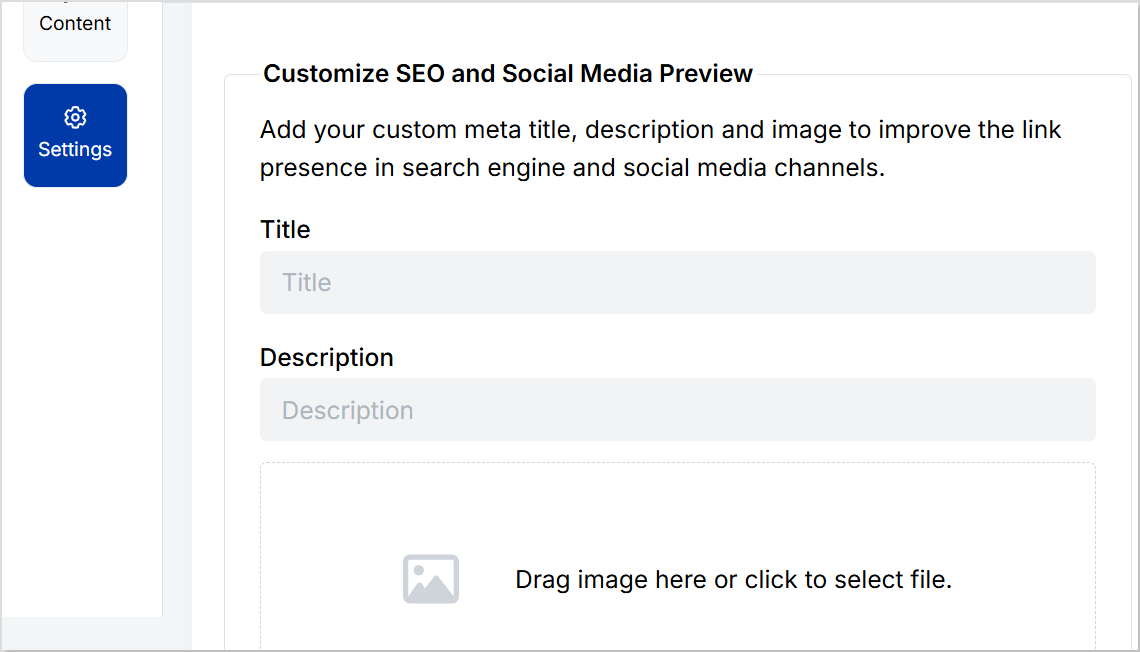
Step 6: Go to Settings and Customize SEO and Social Media Preview
Go to “Settings” to customize your bio link page further by adding a custom meta title, description, image, favicon image.
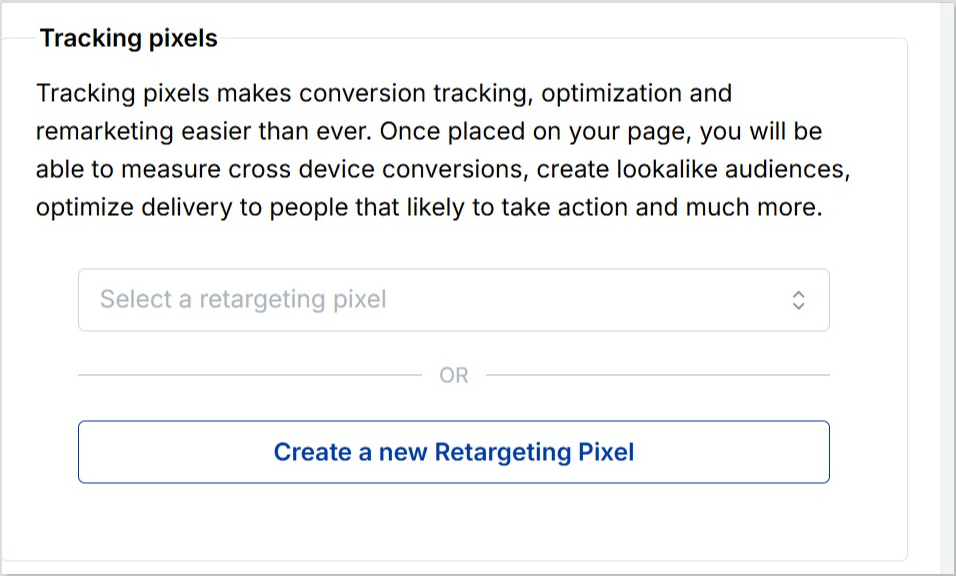
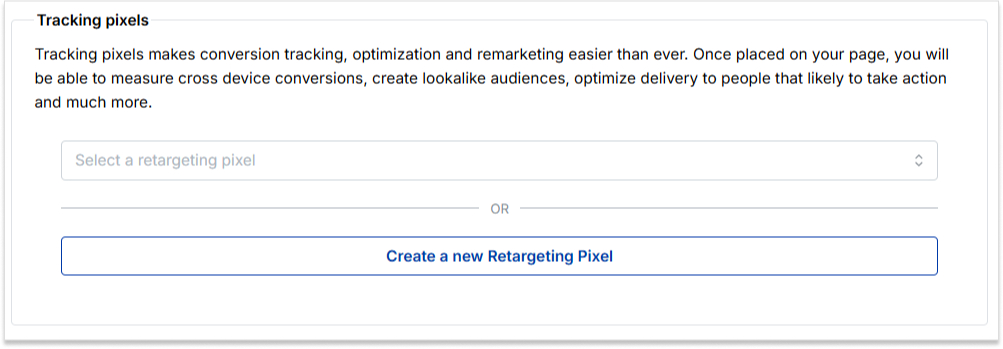
Furthermore, you can also add tracking pixels for conversion tracking, optimization, and remarketing.
Step 7: Review link in bio page
Review your link in bio page as you create it to ensure it looks and functions as you intended. Take advantage of the preview feature to see how it will appear.
Step 8: Update and create a custom URL for your bio link
Update your bio link to save changes.
Create a custom URL by changing the slug of your bio link. You can also connect your custom domain if you have one.
With your Replug-generated bio link, you can effectively share multiple links and content with your audience, making it a valuable tool for content promotion and marketing on the platform.
Enhance this even further by using this custom URL shortener free to create branded, trackable links that boost engagement.
Go beyond generic link pages!
Create custom bio links that truly fit your brand
With Replug, you can create bio links that are unique, engaging, and built to convert.
Make sure your bio link is short and easy to remember.
Use a clear and concise title for your bio link.
Add a description that tells people what they can expect to find on your bio link.
Use an eye-catching image for your bio link.
Share your bio link across your social profiles and include it in your emails. An email signature generator makes it easy to add your link professionally, so every message subtly drives traffic to your content.
Promote your bio link in your email signature and on your website.
Frequently asked questions
What is a “Link in Bio”?
A “Link in Bio” is a clickable hyperlink placed in the bio or profile description of a social media account, allowing users to direct their audience to external websites, content, or products.
Why use a “Bio Link”?
Users employ “Bio Link” to overcome limitations on the number of links in social media posts, making it easier to share multiple links, promote content, and enhance user experience.
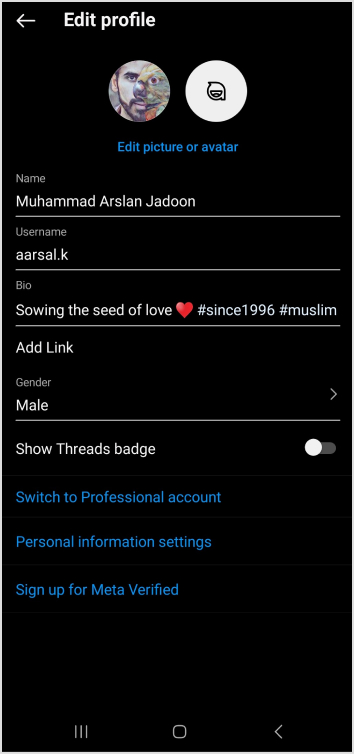
How can I add a “Link in Bio” on Instagram?
To add a “Link in Bio” on Instagram, go to your profile, click on “Edit Profile,” and enter your desired link in the website field. This link becomes your “Bio Link.”
Are there tools or services to manage “Link in Bio”?
Yes, there are third-party bio link tools and services like Replug that provide features to create and manage “Link in Bio” pages with multiple links.
Can I customize my “Link in Bio” page?
Yes, many “Link in Bio” services allow users to customize the appearance of their bio link page by adding branding elements, titles, and descriptions.
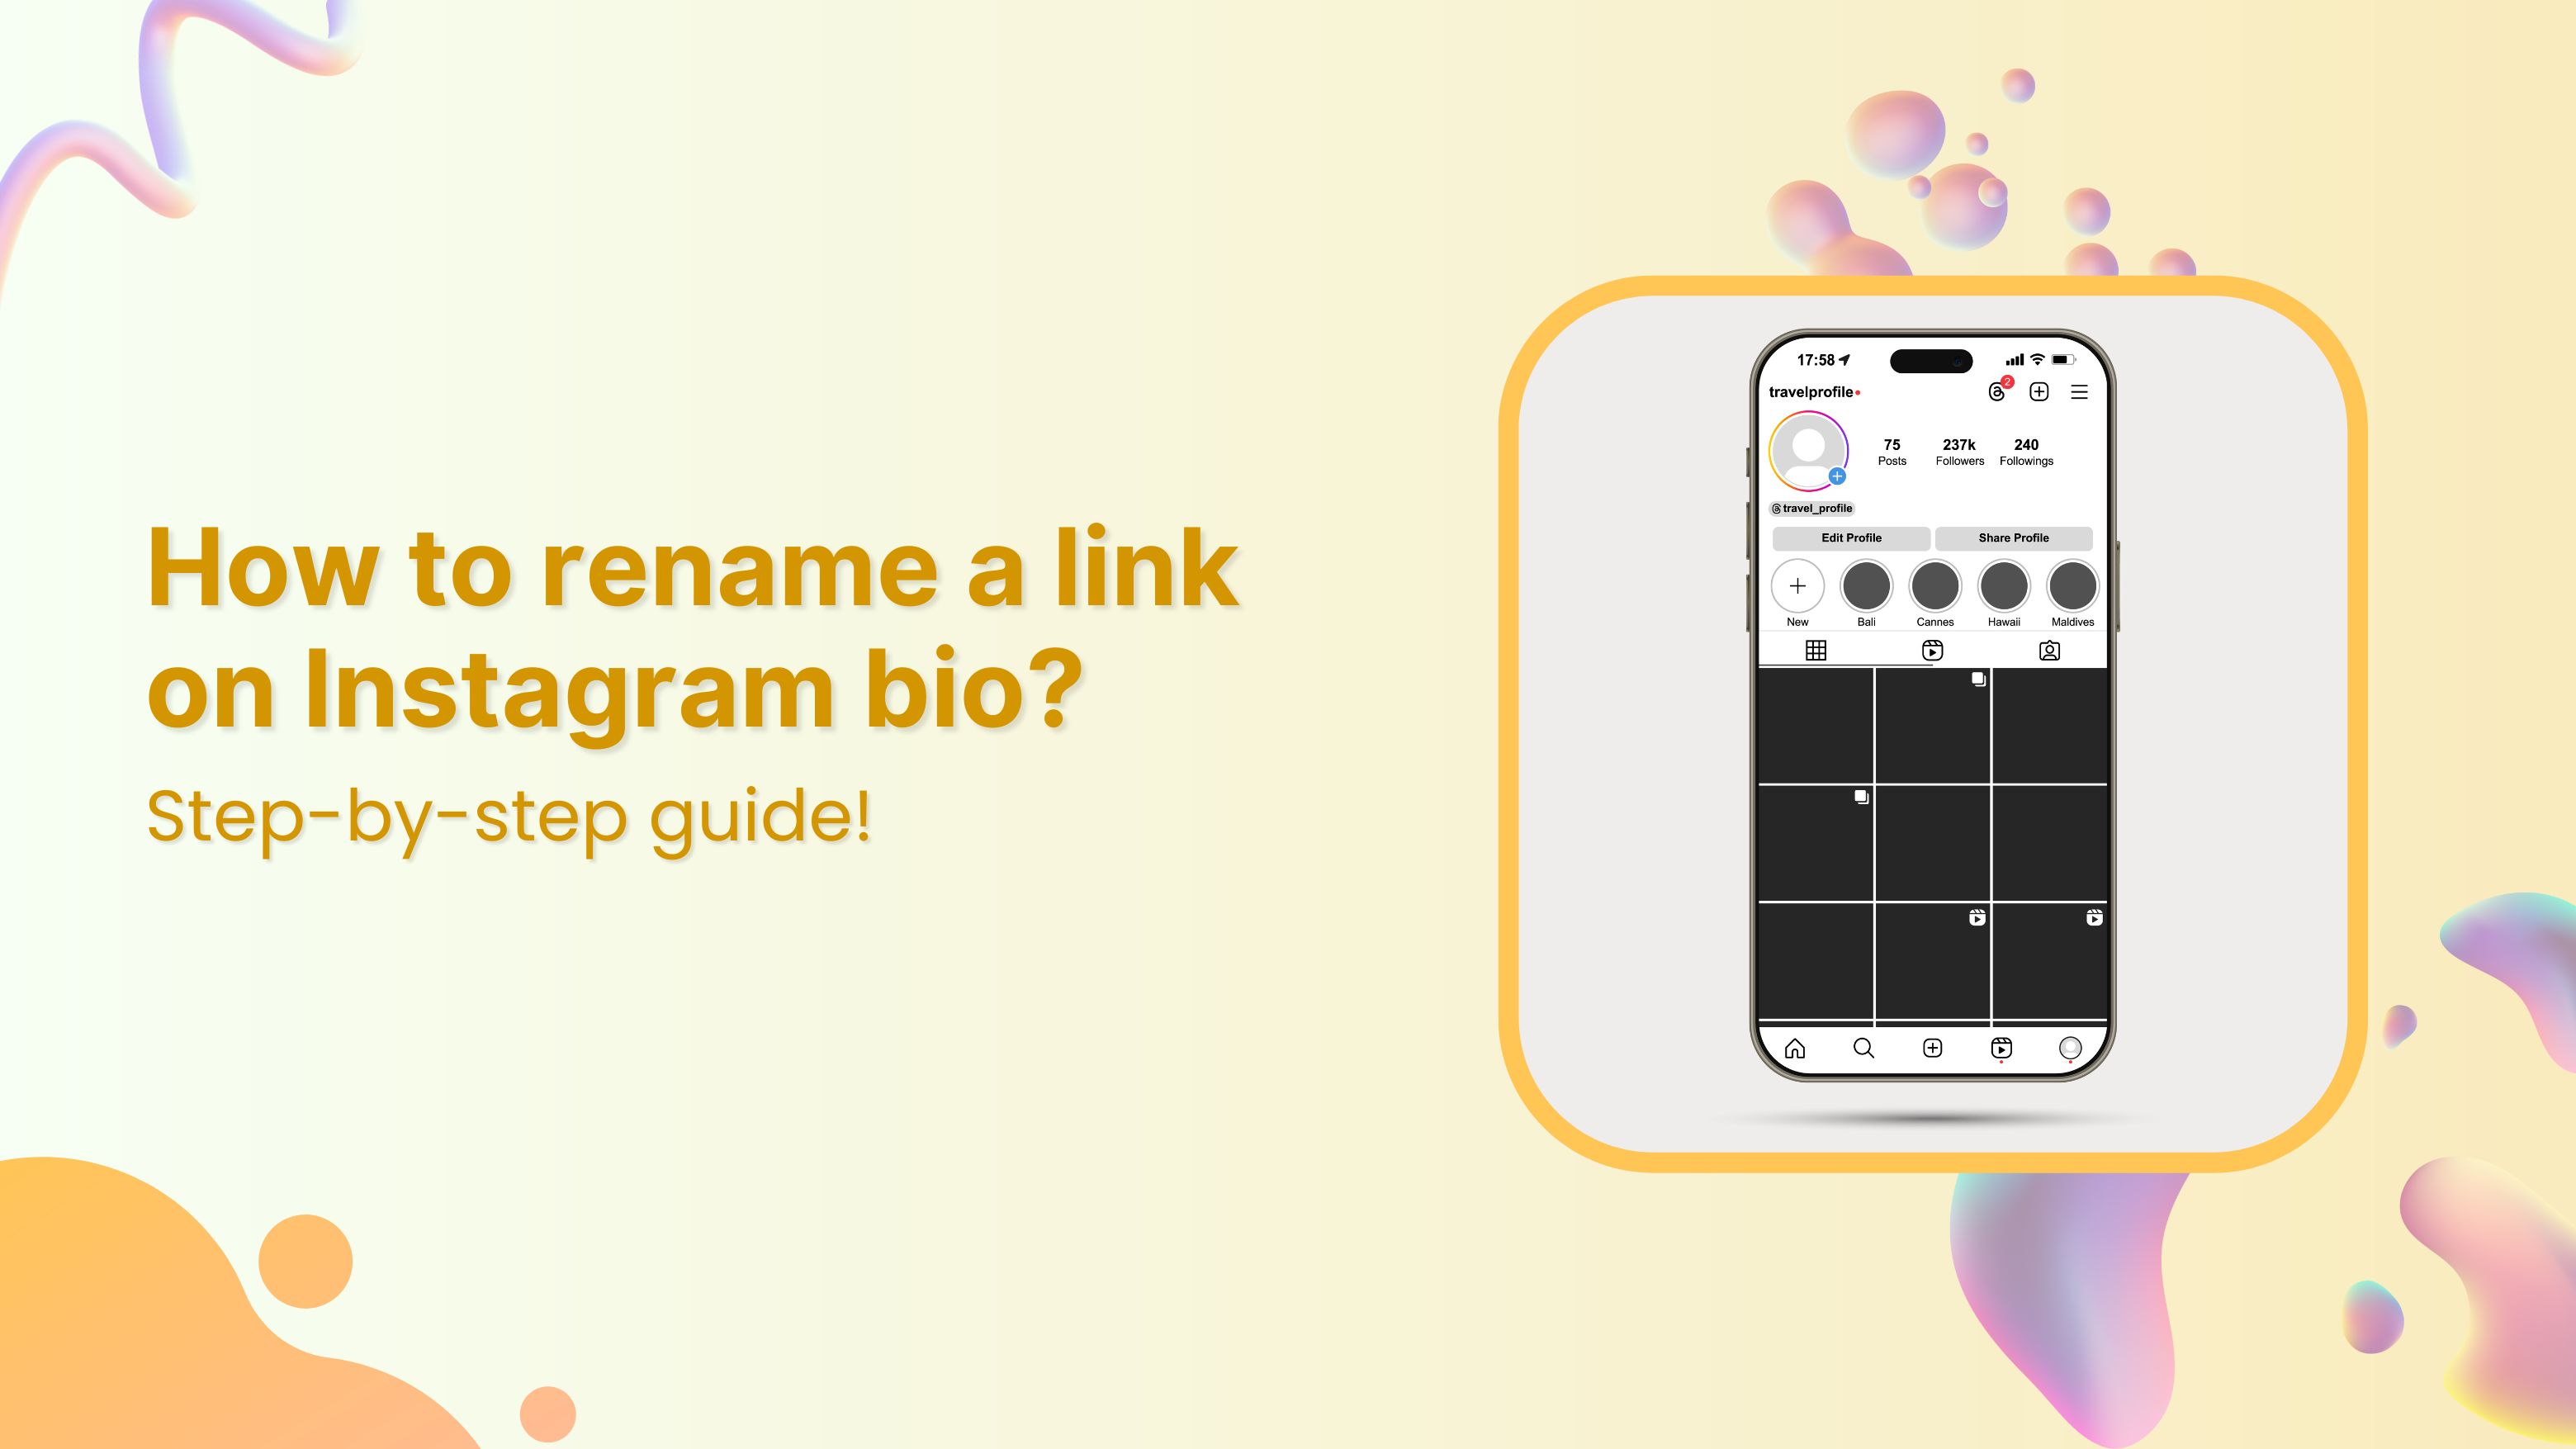
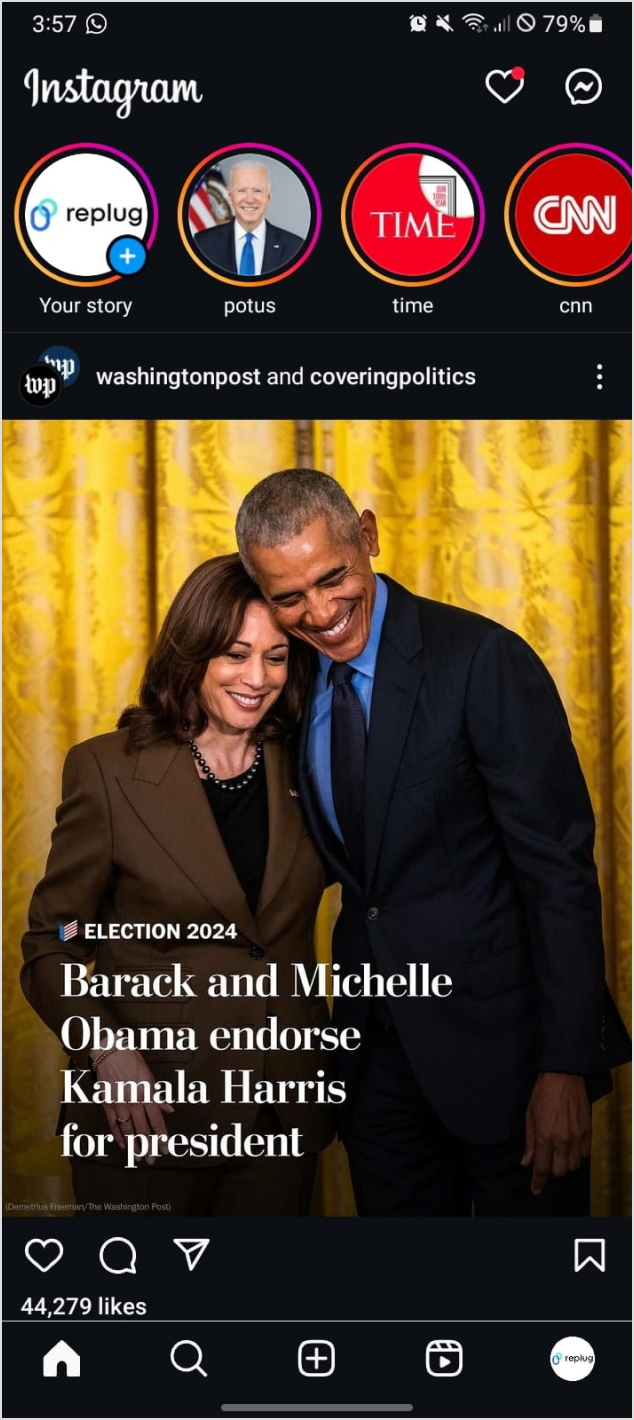
Instagram lets you add up to 5 links in your bio now, but that doesn’t mean they’re all going to convert. When it comes to personal branding or promoting a business on Instagram, every detail matters, including the link in your bio.
Your Instagram bio is one of the first things visitors notice, and it’s a powerful tool to drive traffic to your website, blog, or other social media profiles. If you’re pasting a long, messy URL straight into your profile, you’re missing the point. Instead, rename it using a branded short link.
Let’s walk through how to rename your Instagram bio link, and how to stretch its potential using Replug.
Step 6: Tap the save icon in the top-right corner to apply your changes. Your renamed link will now appear in your bio.
What is a “link in bio” on Instagram?
A “link in bio” on Instagram refers to the clickable URL that users can include in their profile’s bio section. Since Instagram does not allow clickable links in individual posts, the link in bio is a valuable method for directing followers to external content, such as websites, blog posts, online stores, or other social media profiles.
Why it’s important:
Traffic and conversion: The link in bio is a direct avenue to convert Instagram engagement into website traffic, sales, or other conversions. It’s an essential part of any Instagram marketing strategy.
Branding: A well-curated link and description contribute to a cohesive brand experience on Instagram, helping users quickly understand what to expect when they click the link.
How to make the most of your single Instagram bio link?
Renaming your Instagram link might seem like a small tweak, but it plays a big role in shaping user expectations, strengthening your branding, and increasing click-throughs. And if you’re managing multiple destinations? Users can use Replug’s link-in-bio tool, to overcome this limitation, which allows multiple links to be hosted on a single landing page.
Here’s how Replug can enhance your Instagram bio link:
Customizable landing page: Customize your branding by adding a profile name, description, profile image, cover photo, and brand colors. Additional tip: Enhance your visuals with a photo editor to give your bio link page a personal touch.
Multiple links: Share links to your latest blog posts, online store, social media channels, promotional offers, and more in one place.
Analytics: Track link performance to see which links are getting the most clicks, allowing you to optimize your content strategy based on data.
Add a relevant CTA: When it makes sense, add a call-to-action (CTA) to your link title like “Shop Now,” “Learn More,” or “Subscribe.” CTAs give your audience clear direction and can increase both clicks and conversions from your bio link.
Use custom, branded URLs: Custom URLs do more than save space’ they make your bio look cleaner and more intentional. Using tools like Replug’s URL shortener free tool, you can create branded links that match your style, improve trust, and keep your Instagram profile looking sharp.
Boost ROI with branded URLs!
Enhance your marketing campaigns by creating shareable, trackable, and fully multi-purpose
customizable branded URLs.
Keep it short: Long or cluttered titles can be overwhelming and easy to skip. A short, punchy title is more scannable, looks better in your bio, and makes it easier for followers to know exactly what to expect when they click.
Keep it clean: Avoid clutter in your link titles. Skip unnecessary punctuation, symbols, or random emojis. A clean, straightforward title is easier to read and looks more polished in your bio.
Match your brand voice: Your link title should reflect your brand’s tone, whether that’s casual, bold, or professional. Brand consistency helps build trust and makes your profile feel more intentional.
Final thoughts
By utilizing an efficient link management platform, and implementing effective strategies, you can transform your single Instagram bio link into a powerful driver of traffic and engagement. Regular updates, strong CTAs, and a well-structured landing page can significantly enhance the user experience and help you achieve your marketing goals.
FAQs for how to rename a link on Instagram bio
Why can you only have one link in your Instagram bio?
Instagram limits users to one link in their bio to keep profiles concise and avoid spammy behavior. This restriction encourages users to choose the most relevant link for their audience.
How can I add multiple links to my Instagram bio?
You can add multiple links by using our link-in-bio tool, Replug. It helps you create a landing page that hosts multiple links accessible through a single URL in your bio.
What is a link-in-bio tool?
A link-in-bio tool is a service that allows you to create a customizable landing page with multiple links.
Can I track the performance of my Instagram bio link?
Yes, Replug offers analytics features that allow you to track the number of clicks and other engagement metrics, helping you optimize your content strategy.
How often should I update my Instagram bio link?
You should update your Instagram bio link regularly to reflect your latest content, promotions, or events. Keeping the link current ensures it aligns with your marketing goals and provides value to your followers.
Can I use a custom domain for my Instagram bio link?
Yes, Replug allows you to use a custom domain, which can enhance brand recognition and trust among your audience.
Important note: Throughout this guide, we will refer to Twitter as “X”.
Looking to expand your social media presence and connect with a wider audience? If you’re already active on Instagram, adding an X link to your bio can be a game-changer.
Not only does it allow you to cross-promote your content and reach new followers, but it also opens up a world of new possibilities for networking, sharing your thoughts and ideas, and building your personal brand.
Adding an X link to your Instagram bio is a smart move for many reasons, and this guide explores how to make the most of it. So, let’s dive in and discover how to add an X link to an Instagram bio!
Why add an X link to your Instagram bio?
Adding an X link to your Instagram bio can be a smart move for several reasons:
Cross-promotion: By linking your Instagram and X profiles, you can reach a wider audience and drive traffic to both platforms. This means more visibility for your content and potentially more followers.
Networking: X is a powerful networking tool. By linking it to your Instagram account, you can make it easier for people to find and connect with you. This can be especially useful if you’re looking to build relationships with influencers or other industry professionals.
Sharing your thoughts: While Instagram thrives on visuals, X is all about the power of words. By linking to your X account, you can share your thoughts, opinions, and ideas with your followers in a way that’s not possible on Instagram.
Building your personal brand: By maintaining an active presence on both Instagram and X, you can build a strong personal brand that resonates with your target audience. Linking the two accounts creates a cohesive online identity that helps you stand out from the crowd.
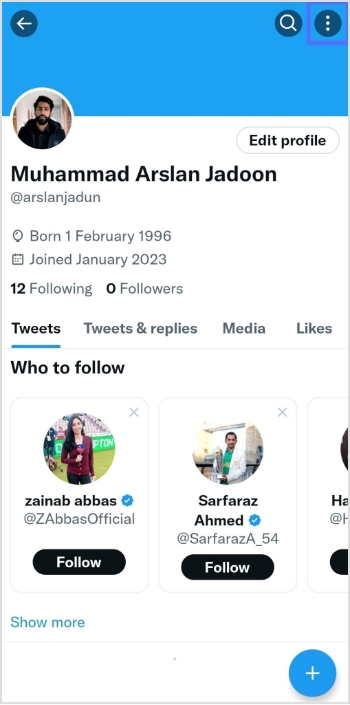
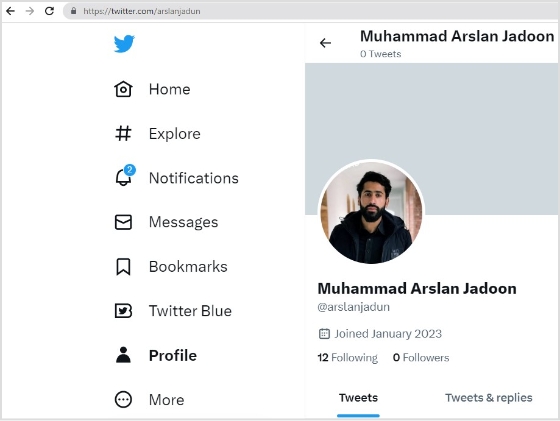
Step 2: Click “profile” on the left side of the menu.
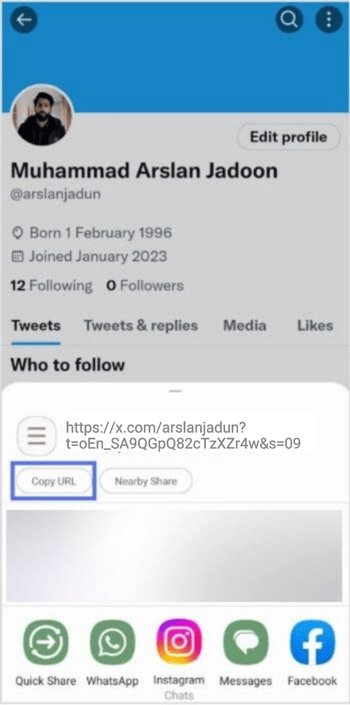
Step 3: From the URL bar,copy the URL. That’s your profile URL.
For a cleaner look in your Instagram bio, especially with character limits, a free link shortener can transform that lengthy “X” URL into something concise and branded. Tools like Replug, a powerful link optimization platform, make this effortless by not only shortening links but also adding tracking and customization options to boost your cross-platform engagement.
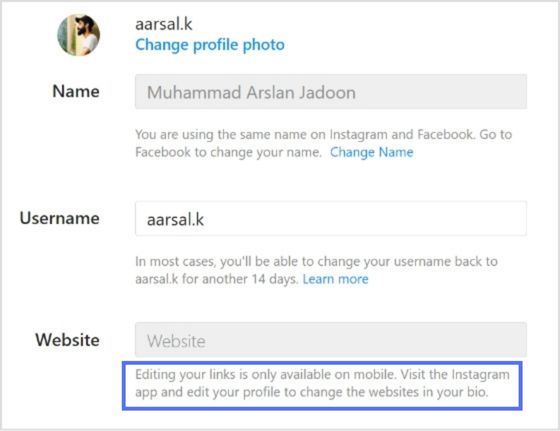
Note: You can only edit your links on mobile devices. Visit the Instagram app and follow the steps above to edit your bio and add the X link.
FAQs about how to add a Twitter (X) link to Instagram bio?
How to link Instagram and X for auto-tweeting photo links?
To link your Instagram account to X and automatically tweet links to your photos, follow these steps: 1. Open the Instagram app on your mobile device and go to your profile. 2. Tap the three horizontal lines in the upper right-hand corner of your screen. 3. Select “Settings” from the menu that appears. 4. Tap “Account” and then “sharing to other apps.” 5. Tap “X” and enter your X login information when prompted. 6. Once you’ve linked your accounts, toggle on “Share your posts to X” to automatically share your Instagram posts on X. 7. To customize what gets shared on X, you can toggle on or off the options for sharing your Instagram photo, caption, or location. That’s it! Now every time you post a photo on Instagram, it will automatically be shared as a link on your X account.
Can I choose which Instagram posts get shared on X?
Yes, you can customize what gets shared on X by toggling the options for sharing your Instagram photo, caption, or location on or off.
Can I still share my Instagram posts on X if I didn’t link my accounts during the initial setup?
Yes, you can manually share your Instagram posts on X by copying the link to your Instagram post and pasting it into a tweet on X. However, automatic sharing can only be enabled if you link your accounts.
Your Instagram bio is your brands first impression, and it matters. It’s more than just a few lines of text. It’s a powerful tool to establish your brand identity and drive traffic to your brand.
Brands lose potential leads and drop conversion rates instantly as they’re not familiar with the platform’s algorithm or best practices. Some of the most important pointers to maximize your Instagram profile’s bio is knowing
How to remove link from Instagram bio?
How to maximize the limited space in your bio?
How to rename your bio links?
When crafting your Instagram bio, consider including some of the following:
Don’t forget that the URL in your bio channels your followers to an external website, a new landing page, a microsite, or other relevant destinations, expanding your influence beyond Instagram.
Why I can’t remove the link from my Instagram bio?
There are a few potential reasons why you might be unable to remove a link from your Instagram bio:
Instagram glitch: Sometimes, Instagram experiences temporary glitches. Try closing the app completely and reopening it. This might resolve the issue.
Link shortener or third-party app: If you’re using a link shortener or a third-party app to manage your bio link, you might need to remove the link from that service first.
Outdated app: Ensure you’re using the latest version of the Instagram app. Outdated apps can sometimes cause issues.
Cache issues: Clear your app’s cache or use a different device to see if the issue persists. Cached data can sometimes cause unexpected behavior.
Account issues: Verify that your account hasn’t been flagged or restricted in any way, which might affect your ability to make changes.
Additional troubleshooting steps:
Check internet connection: A poor internet connection can interfere with app functions.
Try a different device: If possible, log in to Instagram from a different device to see if the issue persists.
Wait it out: Sometimes, Instagram experiences temporary server issues. Waiting a few hours might resolve the problem.
If you’ve tried these steps and still can’t remove the link, contact Instagram support directly for further assistance.
How to remove a link from your Instagram bio?
Removing a link from your Instagram bio is a quick and easy process. Follow these steps to update your bio:
Step 1: Open the Instagram app on your device.
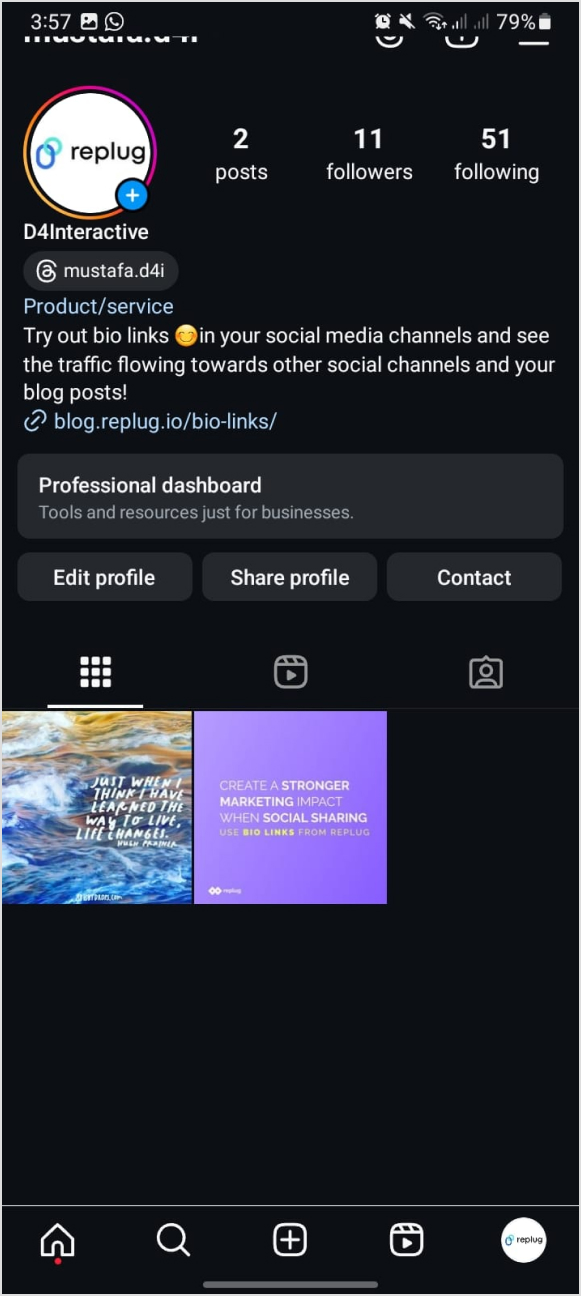
Step 2: Go to your profile
Tap on your profile picture in the bottom right corner of the screen to go to your profile page.
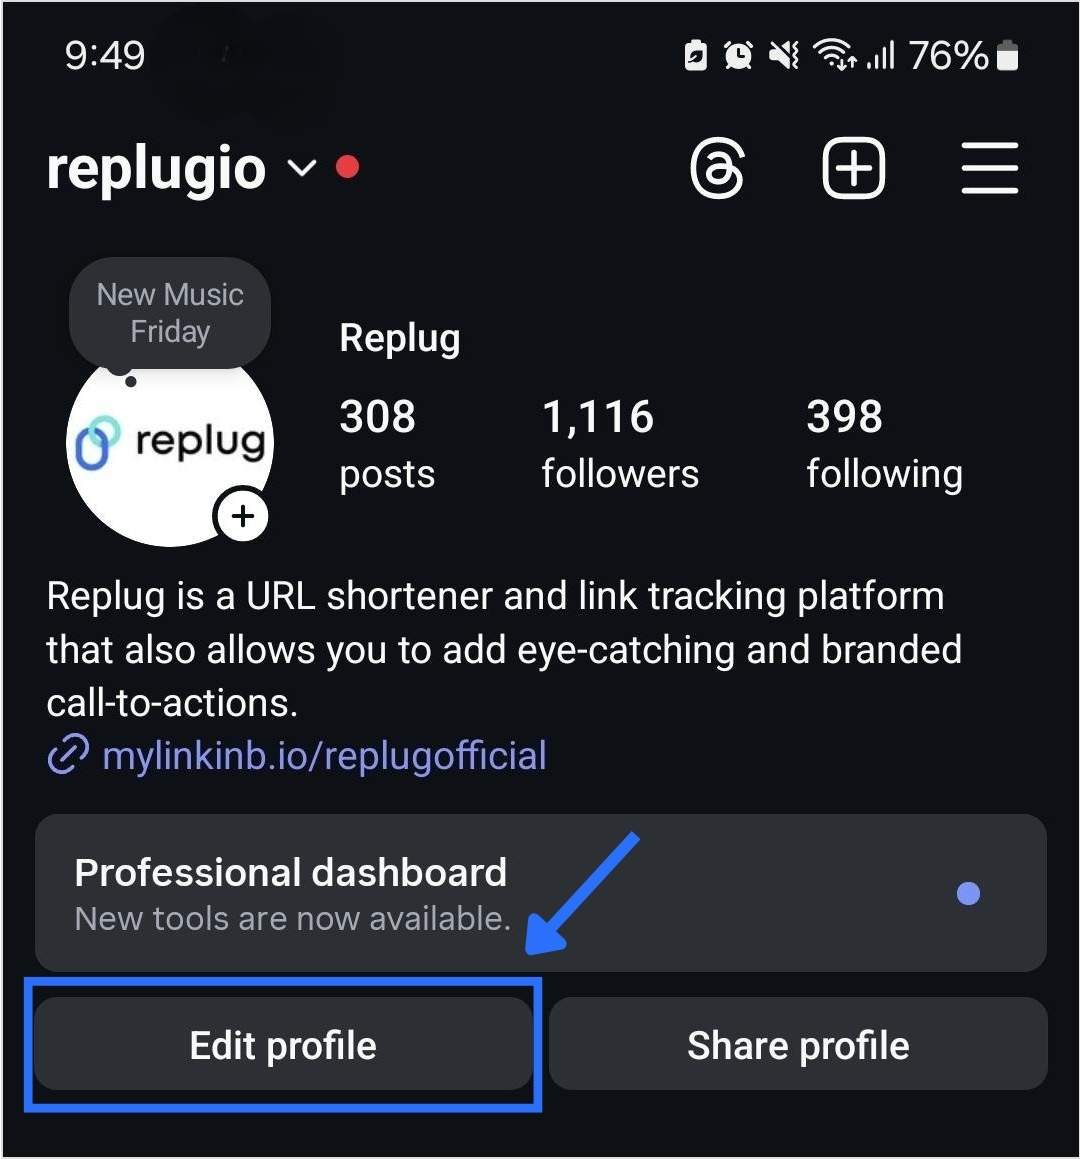
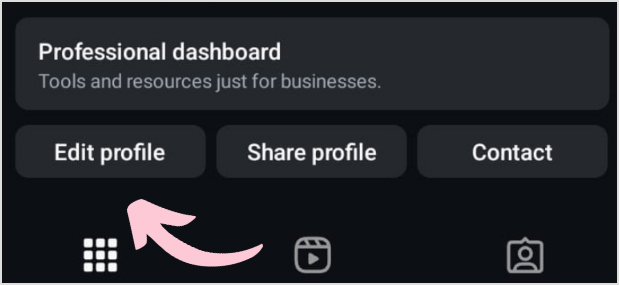
Step 3: Edit your profile
On your profile page, tap the “Edit Profile” button. This is usually located directly below your profile picture and bio.
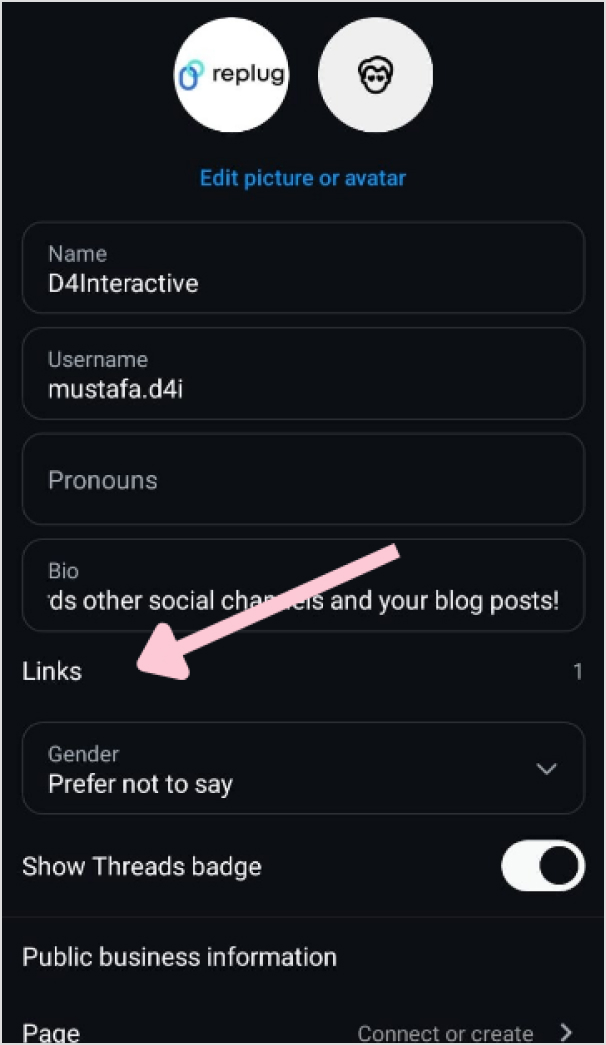
Step 4: Update the website field
In the “Edit Profile” screen, look for the “Link” field. This is where your current link is located.
Step 5: Remove the link
Tap on the “Link” field to edit it. Delete the existing link or text from the field.
Step 6: Save your changes
Once you’ve removed the link, tap “Done” (iOS) or the checkmark (Android) in the top right corner to save your changes.
Refresh your profile: Go back to your profile page and refresh it to ensure that the link has been successfully removed.
And that’s it! You’ve successfully removed or updated the link from your Instagram bio.
Go beyond generic link pages!
Create custom bio links that truly fit your brand
With Replug, you can create bio links that are unique, engaging, and built to convert.
Renaming a link on Instagram involves using link shortener tools that not only condense your URL but also allow customization of the link text to make it more appealing and memorable.
One of the best options is Replug. It is a top-notch, free link shortener tool that offers customization features.
Introducing Replug.io
Replug.io is a link management platform that simplifies URL sharing by creating branded short links and provides in-depth click tracking for performance optimization.
Steps to rename bio links on Instagram using Replug
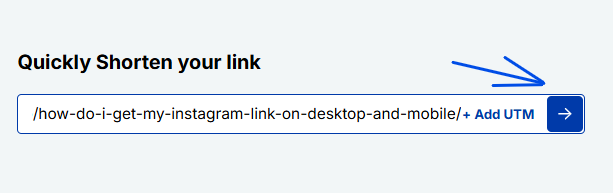
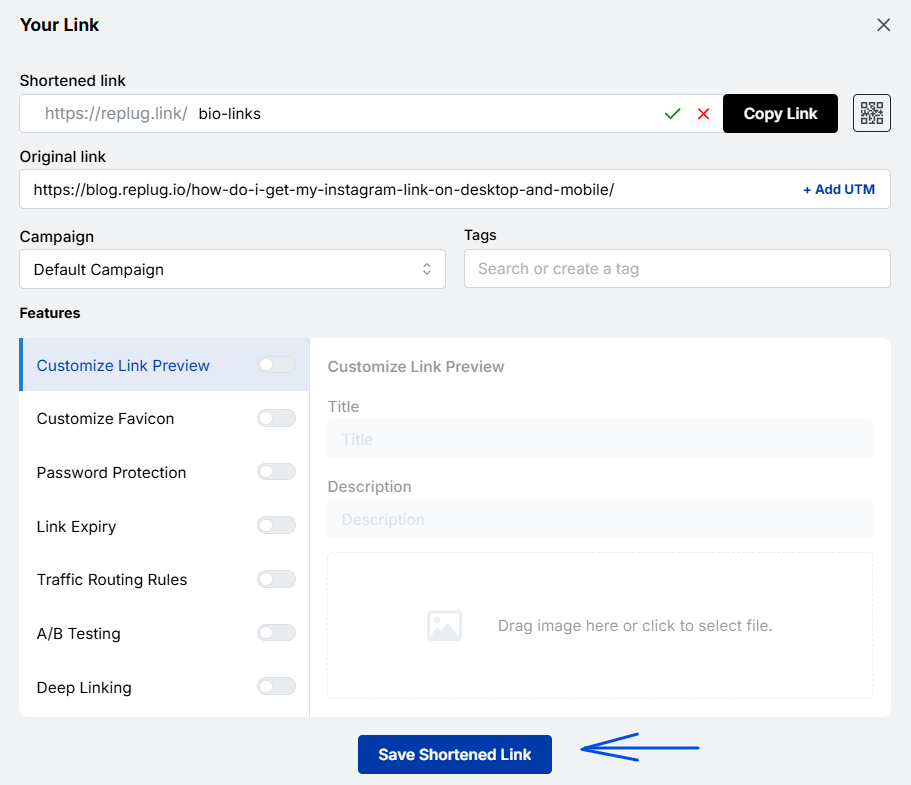
Step 1: In the top-left corner, paste the link you want to shorten into the input bar. Then, click the arrow icon next to it to proceed.
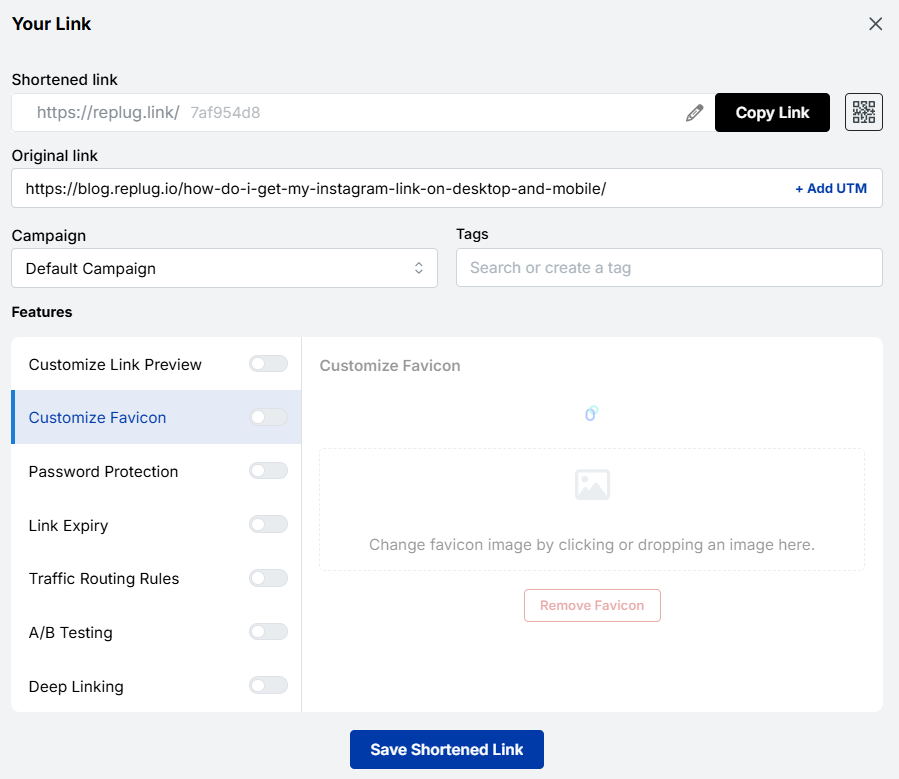
Step 2: You’ll be redirected to this page
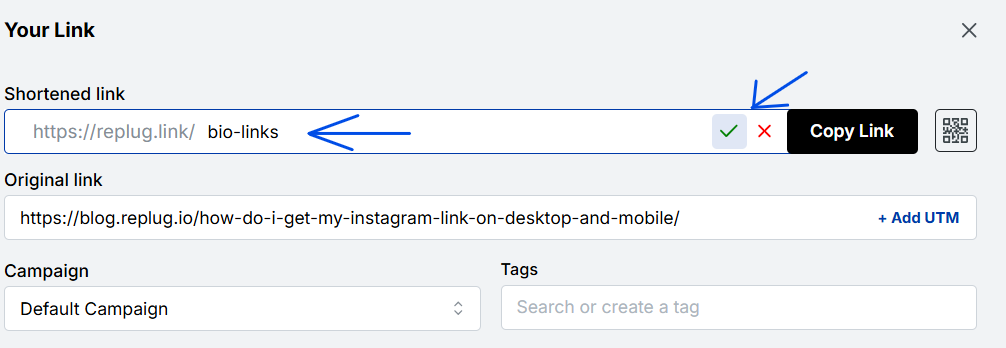
Click the pencil icon in the top bar to rename or customize your link.
After editing, click the green checkmark to confirm the changes.
Step 3: Once you’ve finalized your changes, click the “Save Shortened Link” button at the bottom to complete the process.
Viola! Your link is renamed.
Step 4: Update your Instagram bio
Open Instagram and go to your profile.
Tap on “Edit profile”.
Find the “Website” field and paste your customized short link.
Save your changes.
Double-check your profile or wherever the link is used to ensure that the new name is correctly reflected and that the link still functions properly.
Maximize marketing ROI
by transforming ordinary URLs into branded short links that convert.
Try Replug for free
Replug: Link-in-bio feature
You can achieve this effortlessly with the Replug bio-link feature. This tool lets you consolidate all your important content and links into a single, accessible location for your audience.
Here are amazing features of Replug’s link in bio tool
1. Add your favorite content in one place
Bring your brand to life with social media icons, essential links, the recent blog with an RSS feed, audio clips, important text, and cards for stunning images.
2. With Replug, you don’t just get a link in bio – you get to own it by renaming your links.
Also, customize their appearance and match your landing page blocks from colors to favicons to your brand’s vibe.
3. Track bio link performance
With performance tracking features, you can monitor the total number of clicks, conversion rates, and other valuable metrics. The best part is that you can view your analytics in both a summary list view and a detailed view.
Go beyond generic link pages!
Create custom bio links that truly fit your brand
With Replug, you can create bio links that are unique, engaging, and built to convert.
Top tips to maximize the limited space in your bio:
Quick tips
Maximize your impact
Less is more
Add a short description about your brand or page.
Try adding a bio landing page
Conclude your website link, portfolio, contact information etc.
Identify your unique selling point (USP)
Clearly communicate what sets you apart.
Include a clear call to action (CTA)
Tell people what you want them to do next.
Keep on experimenting
Try different stuff. See what clicks. You might surprise yourself!
Conclusion
Removing a link from your Instagram bio is a simple process that can be done in a few steps through the app’s profile settings. By keeping your bio updated and free of outdated or broken links, you ensure a professional and effective presence on the platform. This helps maintain a clear and engaging profile, optimizing your brand’s impact and user experience.
So that was it for today’s guide. If you have more questions regarding link name changers, link removers, or the best link in bio tools, feel free to visit our website.
FAQs related to Instagram bio-link
How do I make my Instagram bio catchy?
1. Clearly state what your business does. 2. Use relevant keywords to improve searchability. 3. Include contact information and a call to action. 4. Utilize Instagram’s business features like adding a category, contact options, and action buttons (e.g., “Book Now” or “Shop”).
How do I add a website link to my Instagram bio?
Edit your profile and paste the URL into the “Website” field.
How often should I update my Instagram bio?
Update your bio whenever there are significant changes to your brand, achievements, or contact information.
Can I use hashtags in my Instagram bio?
Yes, you can use hashtags in your Instagram bio to make your profile more discoverable and to highlight key interests or topics.
Imagine this: you’ve just opened your store in a lively new neighborhood. Now, picture potential customers on Instagram, craving a nearby spot. They stumble upon a post about a cozy local cafe close by. Intrigued, they visit, and bam – you’ve become their new favorite.
This magic is possible when businesses, like yours, add a custom location to their Instagram bio. It’s not just a digital tag; it’s a smart way to connect with locals, boost visibility, and amp up sales.
Ready to try it yourself? Here’s a quick guide on adding a location to your Instagram bio – an easy trick to effortlessly connect with your audience and boost your digital presence.
Here’s how to add a location to your Instagram bio:
Whether you’re using a personal or business account, adding a location to your Instagram bio is a breeze. Just a heads up, you can only do this on your mobile, not your computer. Stick around, and we’ll show you how in a moment.
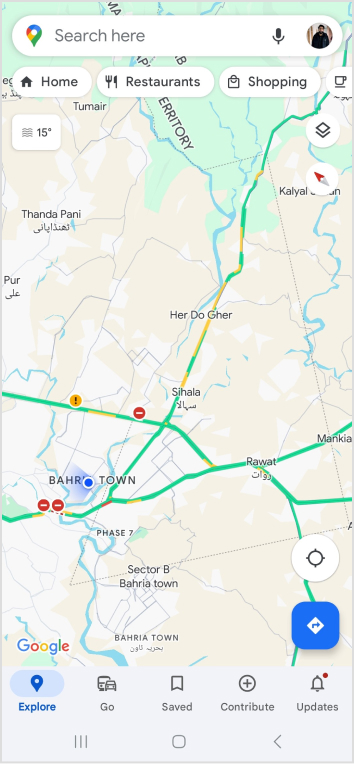
Choose a location on Google Maps on your phone:
Step 1: Open Google Maps on your phone and search for the specific location you want to add. Type the address into the search bar if needed.
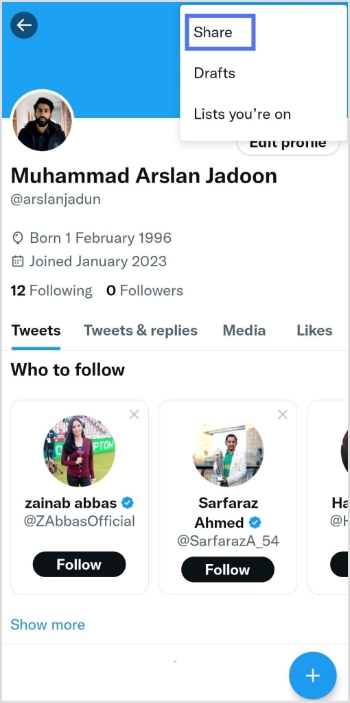
Step 2: Once you find the right spot on Google Maps, tap “Share,” then select “Copy.” This action copies the link to that exact location.
Step 3: Close Google Maps and open Instagram. Go to your profile by tapping your profile picture at the bottom right of the app’s home screen.
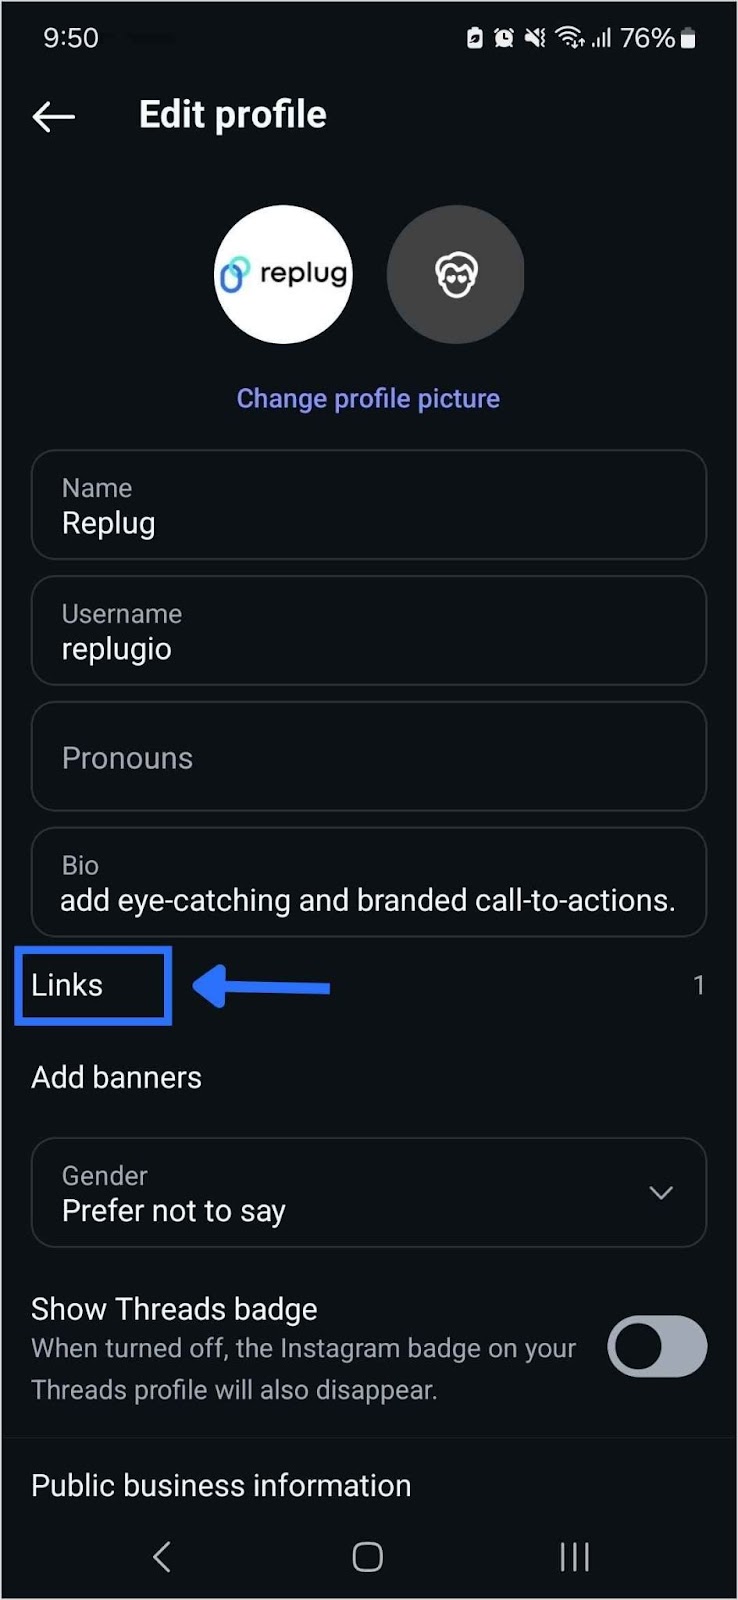
Step 4: Tap “Edit Profile.”
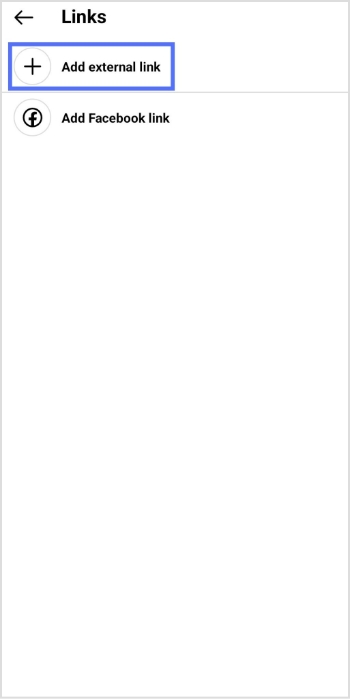
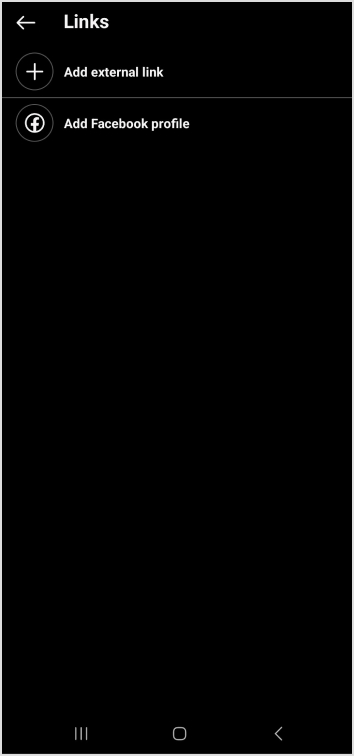
Step 5: Under the “Links” section, select “Add Link.”
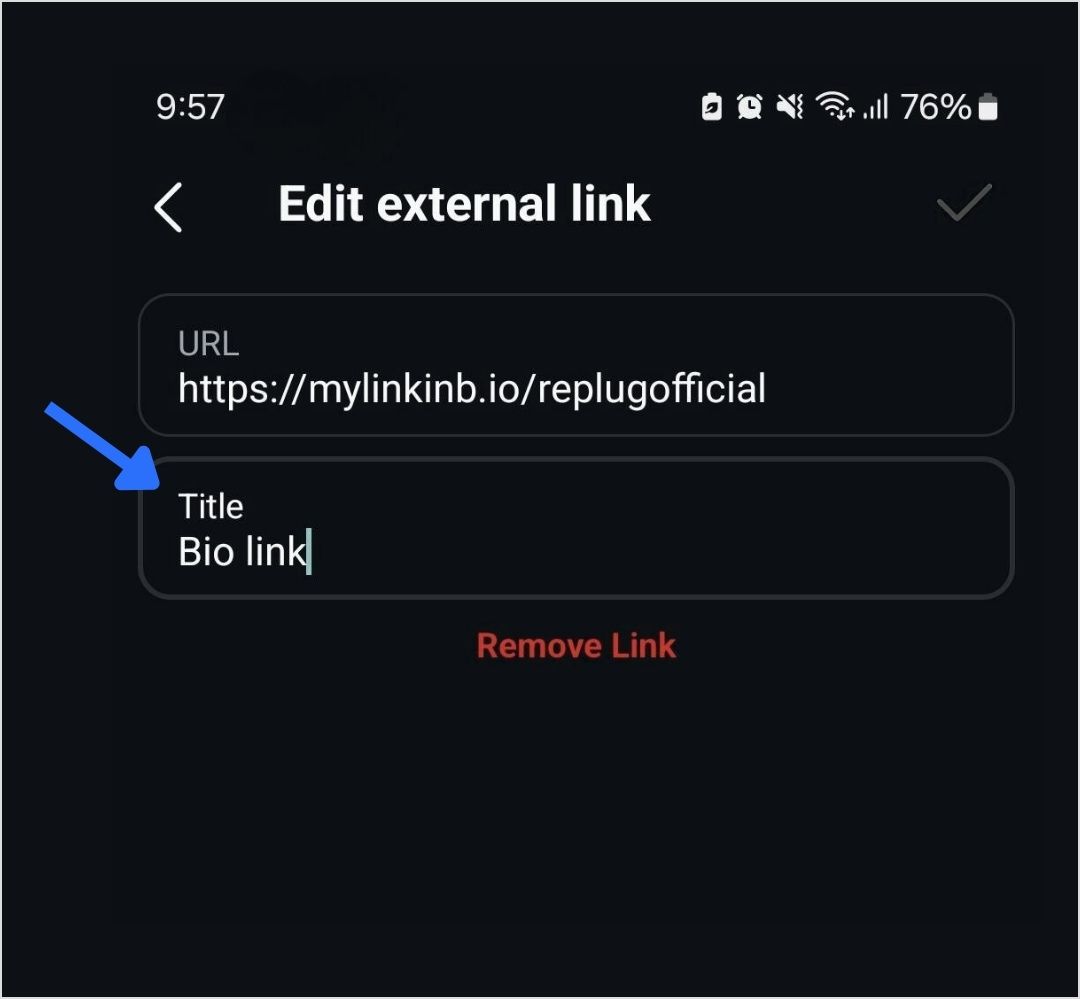
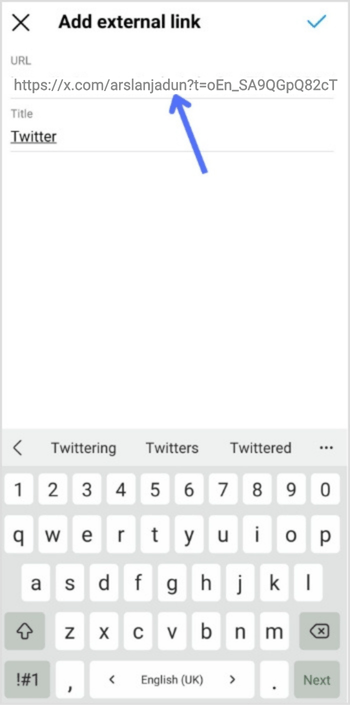
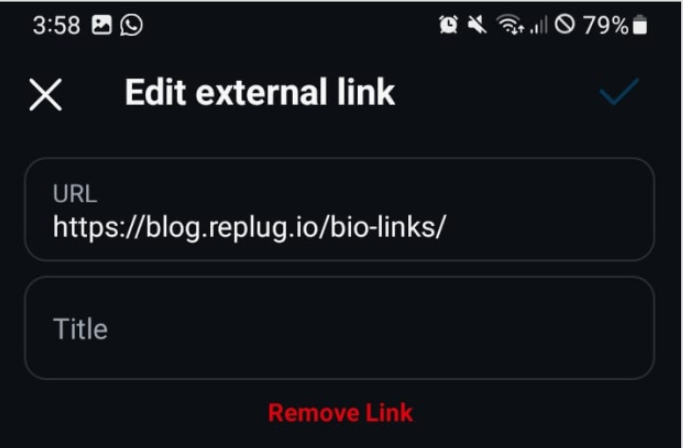
Step 6: On the next screen, choose “Add External Link” and paste the link you copied from Google Maps. You can also give it a title, like your business name.
Step 7: Hit “Done” and go back to your profile.
Refresh the page by pulling the screen down, and there you have it! You’ve successfully added a location to your Instagram bio.
Expand your Instagram profile’s impact using Replug to add multiple links to your bio. Overcome Instagram’s single-link constraint, by using our Instagram link in bio tool to create a single bio link page offering followers easy access to diverse content and destinations.
Replug also serves as a comprehensive link management platform, helping you organize, track, and optimize all your links from one convenient dashboard.
Streamline engagement and maximize your online presence with a dynamic and efficient bio link solution.
Here’s how to add multiple links to your Instagram bio using Replug:
Step 1:Sign in to Replug or create a free account.
Step 2: Locate the “Bio Links” feature in the top banner. The bio link dashboard will appear in front of you.
Step 3: Click the “New Bio Link” button to start setting up your Tumblr bio. You’ll be directed to a new page where you’ll find three main categories: branding, content, and settings.
Step 4: In the branding section, add a brand title and description, select themes, and choose button styles to match your aesthetic.
Once you’re done, click “Publish” in the upper right corner to save your changes.
Step 5: Head to the content category. Here, you can add social icons, links, RSS feeds, videos, cards, text, and more.
For example:
Social icons: Add up to 8 platforms, customize colors, and link to your profiles.
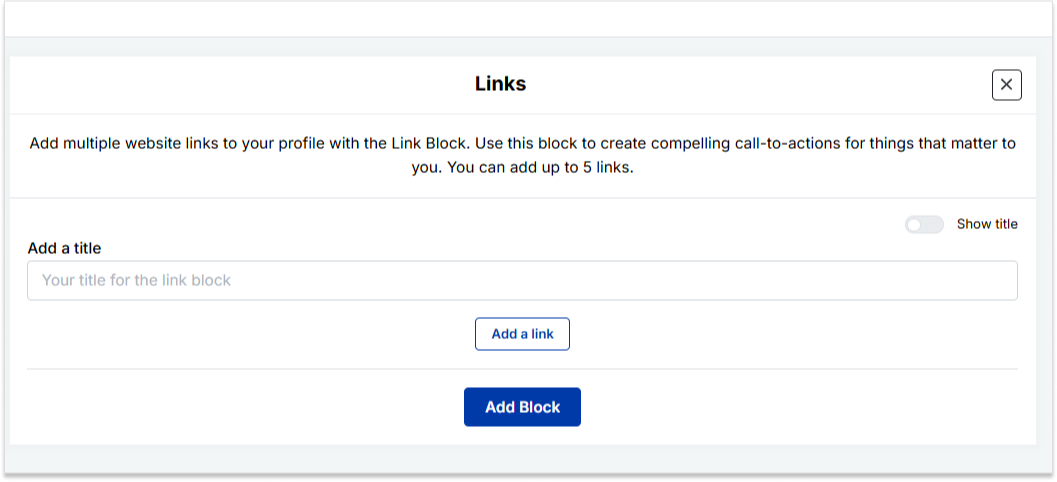
Links block: To include website links, use the “links” block. Add titles and URLs for each link.
Step 6: Once you’ve added the necessary blocks, click “update” to save each one.
Step 7: Go to the settings section to further customize your bio link’s SEO and social media preview. Add a title, description, favicon image, and even retargeting pixels if desired.
Now you can add this bio link to your Instagram bio following the steps mentioned above and you’re done.
How do I change my location on my Instagram business account?
Update your location by tapping “Edit Profile” on your Instagram profile and adjusting it under the “Public Business Information” section.
Can I add multiple locations to my Instagram bio?
No, Instagram allows only one location link, but you can use services like Replug to create a bio link with multiple links, including locations.
Additionally, you can simplify and track your links effortlessly using this URL shortener free tool, making your shared URLs more manageable and professional.
Why can’t I add a location to my Instagram bio on my computer?
Editing Instagram bio links, including locations, is a mobile-only feature. You can make these changes using the Instagram app on your smartphone.
Is it possible to remove a location from my Instagram bio later?
Absolutely, to remove a location from your Instagram bio, go to “Edit Profile,” click on the location link, and either delete or replace it with a new one.
Welcome to Tumblr, the go-to spot for sharing your creativity through photos, text, videos, and more. Whether you’re an artist, writer, or love expressing yourself, Tumblr’s got you covered.
How do you add links to your Tumblr bio?
It’s not as obvious as you’d think, but fear not – it’s surprisingly easy once you know the trick. Stay with us, and we’ll show you how to effortlessly upgrade your Tumblr experience. By adding links to your bio, you’ll make it easy for your online world to connect with you.
Let’s dive in!
Adding links to your Tumblr bio: What you need to know
Before you start linking up your Tumblr bio, here’s the lowdown:
You’ll need to use some basic HTML code for this. No worries, it’s simple.
Tumblr doesn’t have a fancy button for adding links. You’ll have to do a bit of copy-paste action with the HTML code.
Adding a link in bio is a cool way to connect your visitors to your other social media or special works. It makes your Tumblr world a bit more interactive.
Don’t worry if it sounds a bit technical, we’ll keep it super simple. All you need to do is view HTML code, copy and paste a little code. No need to stress; let’s make your Tumblr bio awesome together!
Follow these steps to add links to your Tumblr bio:
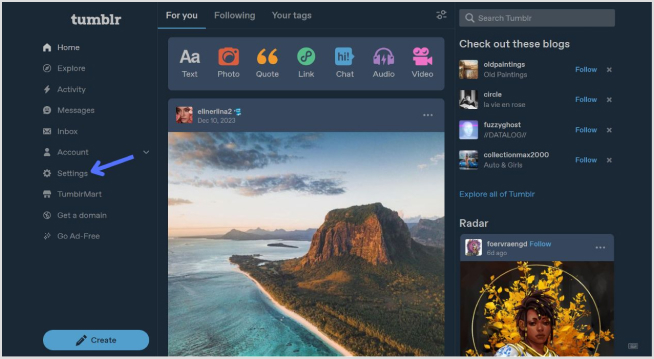
Step 1: Go to the Tumblr website and log in to your account using your credentials.
Step 2: Click on “Setting” in the left-side menu.
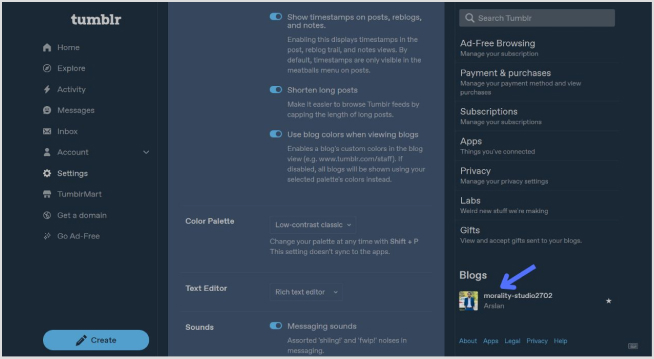
Step 3: Look for the “Blogs” section at the bottom of the right-side menu and click it.
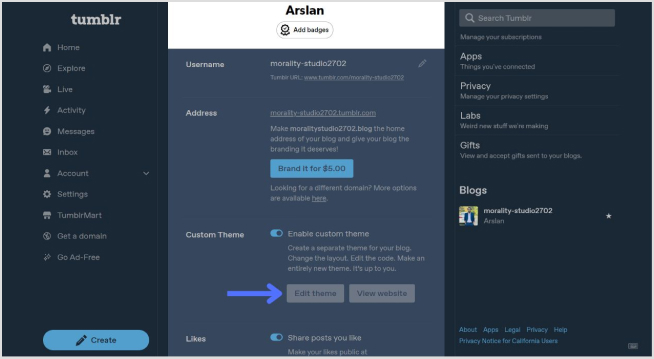
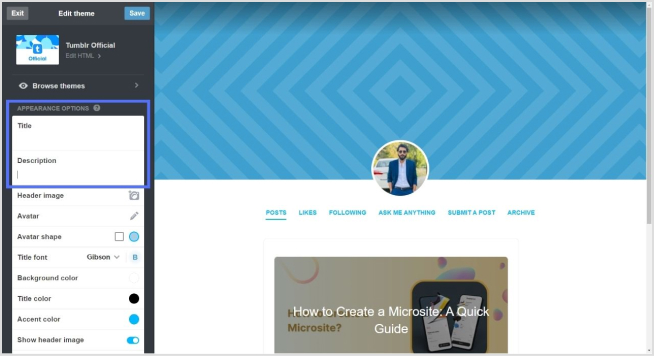
Step 4: In the blog setting, click on the “Edit Theme” button.
Step 4: Look for a section called “Title” and “Description”. This is where you can input information about yourself.
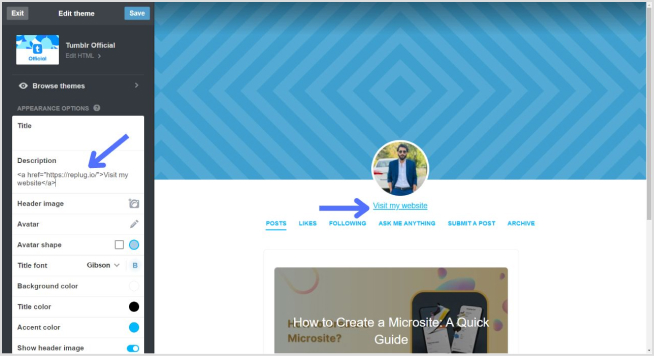
Step 5: To add a link, use standard HTML anchor tags. The format is as follows:
<a href="URL">Link Text</a>
Replace “URL” with the actual link and “Link Text” with the text you want to display for the link.
For example:
<a href="https://replug.io/">Visit my website</a>
Add this in the description section.
Step 6: After adding your link, save the changes. It should appear in your Tumblr bio.
Simply confirm that the link looks right by visiting your Tumblr blog. Check your bio, and if everything is as expected, your link is good to go! Your Tumblr bio now features the link, allowing visitors to click and explore the connected website hassle-free.
How to add multiple links to the Tumblr bio?
Tumblr allows only one clickable link directly in the bio. However, you can use Replug’s “bio links” feature to overcome this limitation and showcase multiple links.
With Replug, you can easily showcase multiple links, drive traffic efficiently, and optimize your bio for enhanced engagement.
Note: You can also leverage Replug’s advanced link tracking features to gain insights into link performance, click-through rates, and audience engagement. Enhance your bio links and track their success effortlessly with Replug.
Go beyond generic link pages!
Create custom bio links that truly fit your brand
With Replug, you can create bio links that are unique, engaging, and built to convert.
Here’s how to add multiple links to your Tumblr bio using Replug:
Step 1:Sign in to Replug or create a free account.
Step 2: Locate the “Bio Links” feature in the top banner. The bio link dashboard will appear in front of you.
Step 3: Click the “New Bio Link” button to start setting up your Tumblr bio. You’ll be directed to a new page where you’ll find three main categories: branding, content, and settings.
Step 4: In the branding section, add a brand title and description, select themes, and choose button styles to match your aesthetic.
Once you’re done, click “Publish” in the upper right corner to save your changes.
Step 5: Head to the content category. Here, you can add social icons, links, RSS feeds, videos, cards, text, and more.
For example:
Social icons: Add up to 8 platforms, customize colors, and link to your profiles.
Links block: To include website links, use the “links” block. Add titles and URLs for each link.
Step 6: Once you’ve added the necessary blocks, click “update” to save each one.
Step 7: Go to the settings section to further customize your bio link’s SEO and social media preview. Add a title, description, favicon image, and even a retargeting pixel if desired.
Step 8: Once everything is set, save your Replug-generated bio link and use it to showcase multiple links on Tumblr.
Note: For a more streamlined sharing experience, use Replug’s URL shortener free tool to create branded, trackable links. It not only keeps your Tumblr bio neat but also helps you measure link performance and audience engagement effectively.
Go beyond generic link pages!
Create custom bio links that truly fit your brand
With Replug, you can create bio links that are unique, engaging, and built to convert.
Typically, Tumblr allows only one clickable link directly in the bio. However, you can use Replug’s “Link in Bio” feature to mention additional links in your bio description.
Do links in my Tumblr bio impact my blog’s visibility?
While links in your bio won’t directly impact visibility on Tumblr, they can enhance user engagement and provide more ways for visitors to connect with your content.
How can I make my Tumblr bio stand out?
To make your Tumblr bio stand out, use a clear profile picture, write a concise and engaging bio, include relevant keywords, add links to other platforms, use visual elements like emojis, and regularly update to reflect current activities.
Adding an Amazon link to your Instagram bio allows users to easily access and purchase products you promote or have an affiliate relationship with on the platform.
By including the link, you can increase sales and earn commissions as an Amazon affiliate. This also helps increase brand visibility and exposure by allowing followers to easily access and conveniently purchase your products.
Additionally, you can maximize your earning potential on Amazon by sharing a shop’s address, product, or affiliate link on your Instagram Bio. This informative guide will teach you the best options and tips for adding them to your Instagram bio.
Here’s how to add an Amazon link to your Instagram bio:
Step 1: Open the Instagram app on your mobile phone and tap the profile icon in the bottom right corner.
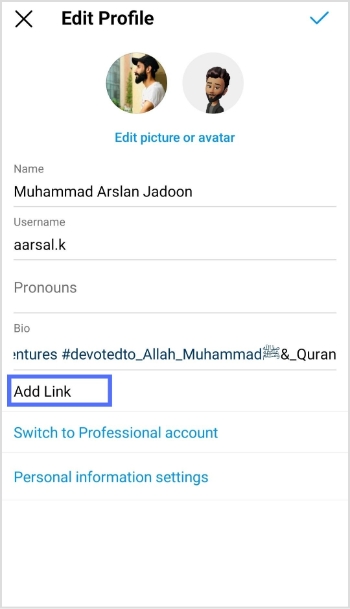
Step 2: Tap the “edit profile” button on your mobile screen.
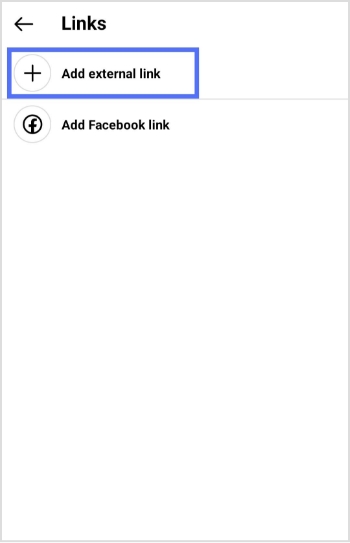
Step 3: Tap “add link” to open the links section.
Step 4: Tap “add external link” to add your amazon link.
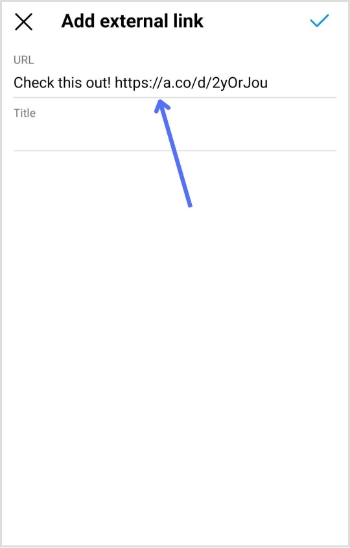
Step 5: Paste your Amazon link in the URL section and tap the tick icon in the top right corner. Your Amazon link now appears in the Instagram bio.
Maximize marketing ROI
by transforming ordinary URLs into branded short links that convert.
Try Replug for free
How to add multiple Amazon links to Instagram bio?
Adding multiple Amazon links (shop and affiliate) to your Instagram bio can increase your exposure and earning potential on the platform.
If you have your own Amazon shop, you can add the link to your bio, allowing followers to easily access and purchase your products. By including this link, you can increase sales and revenue for your business.
In addition to your shop, you can also sign up for the Amazon Affiliate Program, which allows you to promote Amazon products and earn a commission on each sale. As an affiliate, you can add affiliate links to your bio, providing followers with easy access to the products you are promoting.
You can use our link management tool – Replug.io, to add multiple links to your bio. Our Instagram link in bio tool helps you create a landing page as a hub for all your links. You can add your Amazon shop link, affiliate links to the page, and links to other products, websites, or services.
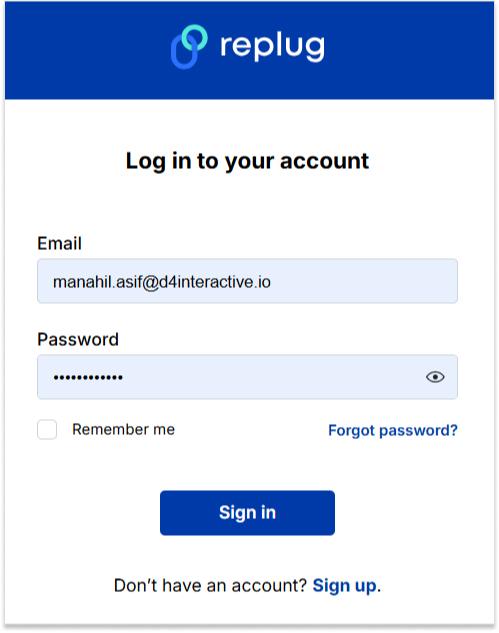
Step 1: Visit the Replug website and sign up for a new account, or log in if you already have one.
Step 2: Find the “Bio Links” feature in the top banner to access the bio link dashboard.
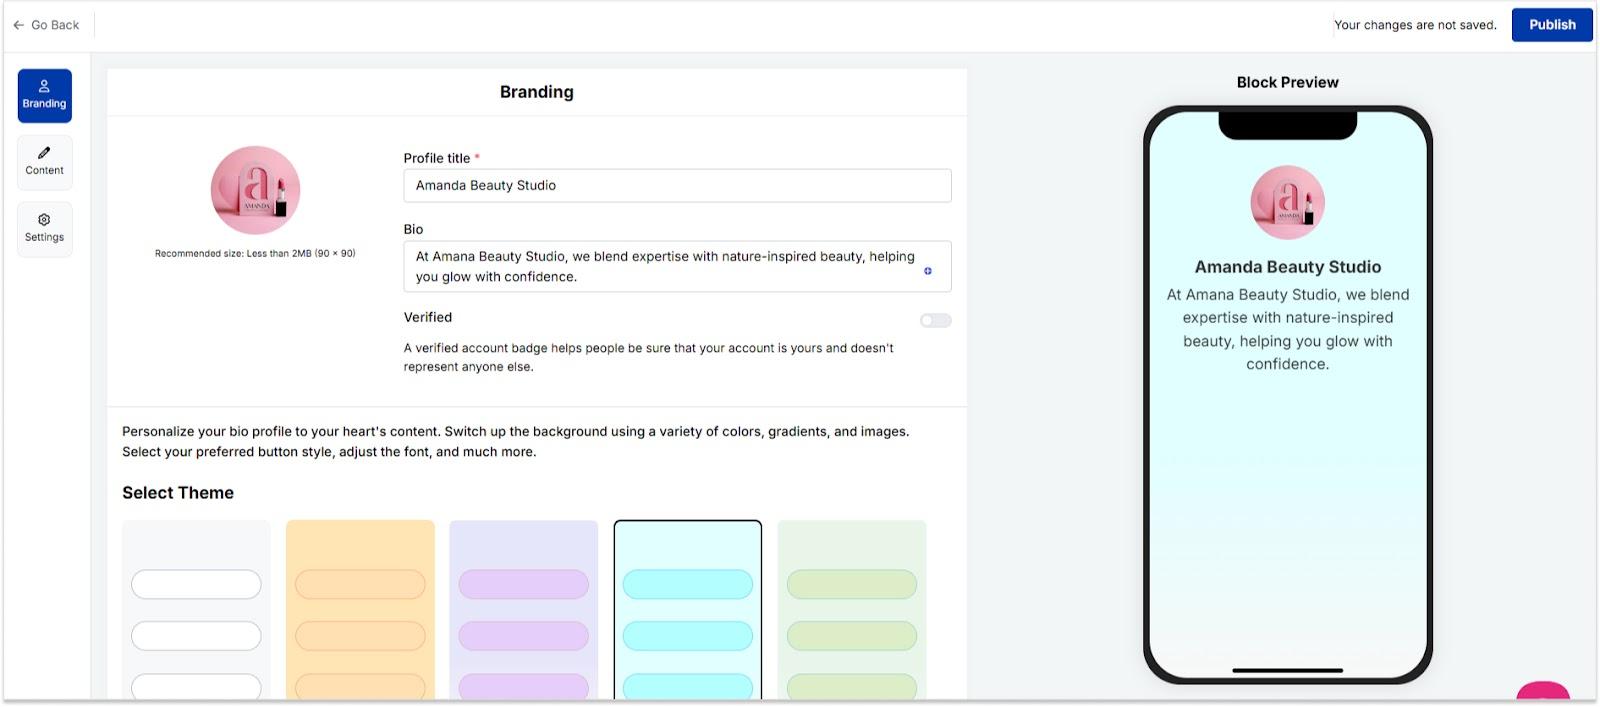
Step 3: Click on the “New Bio Link” button to create a new page. You’ll be directed to a new screen with three key sections: branding, content, and settings.
Step 4: In the branding section, enter your brand title and description, choose a theme, and select button styles that match your brand’s look and feel. Once you’re satisfied, click “Publish” in the top right corner to save your changes.
Note: Replug also allows you to add a verification badge to your bio landing page for extra credibility.
Step 5: Move to the content section, where you can add various elements, including social icons, links, RSS feeds, videos, cards, and text.
For example:
Social icons: Add up to 8 platforms, customize colors, and link to your profiles.
Links block: Use the “links” block to include website links. Add titles and URLs for each link.
Step 6: After adding your content blocks, click “Update” to save each one.
Step 7: In the settings section, customize your bio link’s SEO and social media preview. You can add a title, description, and favicon image and even integrate a retargeting pixel for better tracking.
Step 8: Once you’re happy with your bio link, save it, and use the Replug’s generated URL to showcase multiple links across your social profiles.
You can also make your URLs more concise and trackable with this efficient ad free URL shortener, ensuring a cleaner and more professional appearance across all your shared links.
The bottom line
Adding multiple Amazon links to your Instagram bio can help you increase your earnings by promoting multiple products and earning commissions on each sale. Replug also allows you to track the performance of each link and determine which products or services are most popular with your followers.
In short, Replug’s bio links feature can offer numerous benefits, including increased exposure, better engagement, increased sales, improved analytics, and enhanced brand image.
FAQs on Amazon link to Instagram bio
Why is the Amazon link in Instagram Bio not clickable?
If your Amazon link on your Instagram bio is not clickable, it could be due to an incorrect link format, link blocking, a broken link, being blocked by Amazon, or an incorrect tracking ID. Check these factors and make any necessary adjustments to resolve the issue.
Can I add multiple Amazon links to my Instagram bio?
Yes, you can use tools like Replug to create a bio link page where you can add multiple Amazon shop and affiliate links, making it easier for followers to access and purchase products.
Why isn’t my Amazon link clickable in my Instagram bio?
Check if the link format is correct, if the link is broken, or if it’s being blocked by Amazon. Make sure to use a proper tracking ID and verify that the link is not being restricted.
How can I track the performance of my Amazon links in my Instagram bio?
Tools like Replug allow you to track clicks and engagement on your Amazon links, helping you see which products or services are popular with your followers.
Links provide direct pathways for viewers to explore additional content or products, increasing your chances of engagement and conversion.
Adding links to your YouTube bio is a great way to drive traffic to your website, social media profiles, or other online content.
This is the main reason why many creators choose to rely on a dependable platform like Replug.io to manage bio links and link tracking seamlessly.
This can help you grow your audience and increase engagement with your videos.
Quick guide on adding links to your YouTube bio:
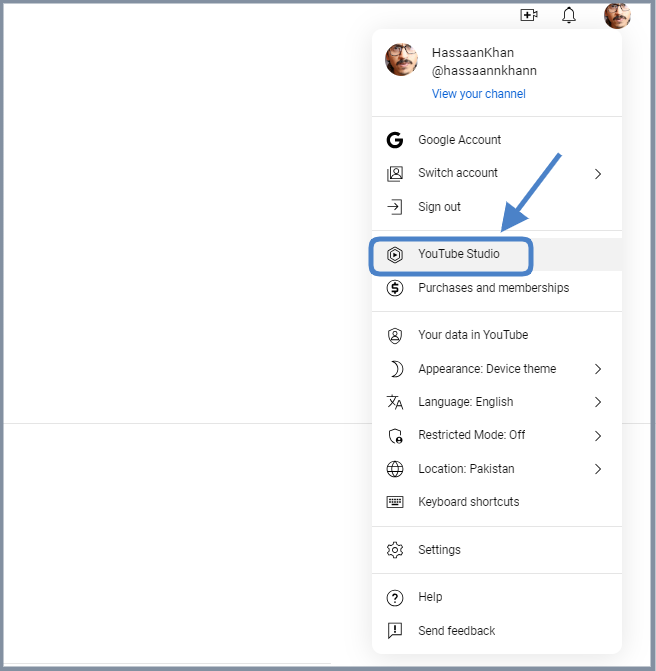
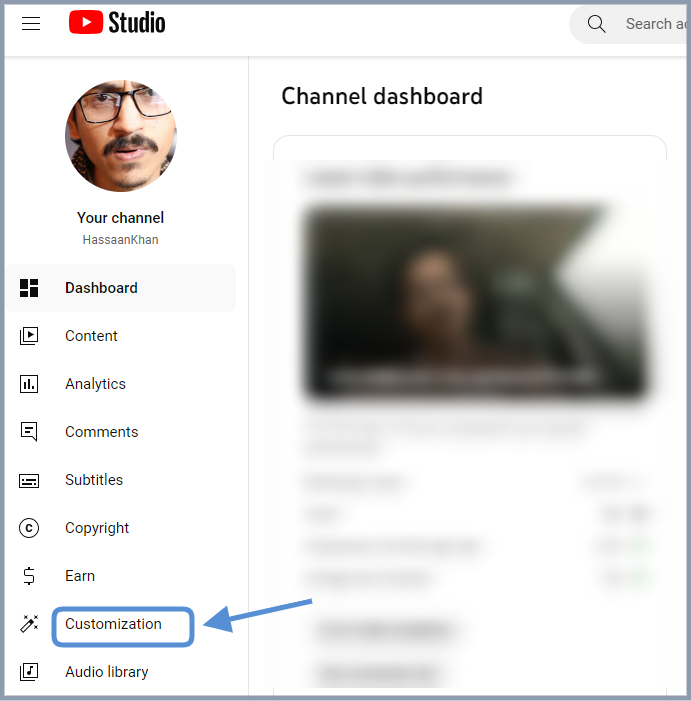
Step 1: Access the YouTube Studio
YouTube Studio is the option that provides access to the channel dashboard.
Click on the profile icon from the top-right corner of the screen.
Now, click on the “YouTube Studio” option.
Step 2: Go to the “Customization” section
The next up is the access to the customization section. Look out for the second to last option on the left sidebar; you’ll see the “Customization” option.
Click on that option and enter the customization area.
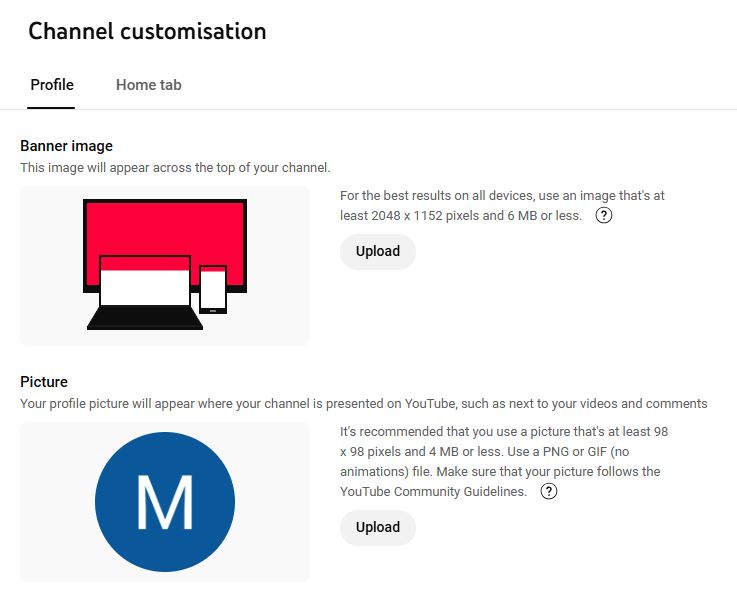
Step 3: Open the “Profile” tab
Click on the “Profile” tab to access the bio area.
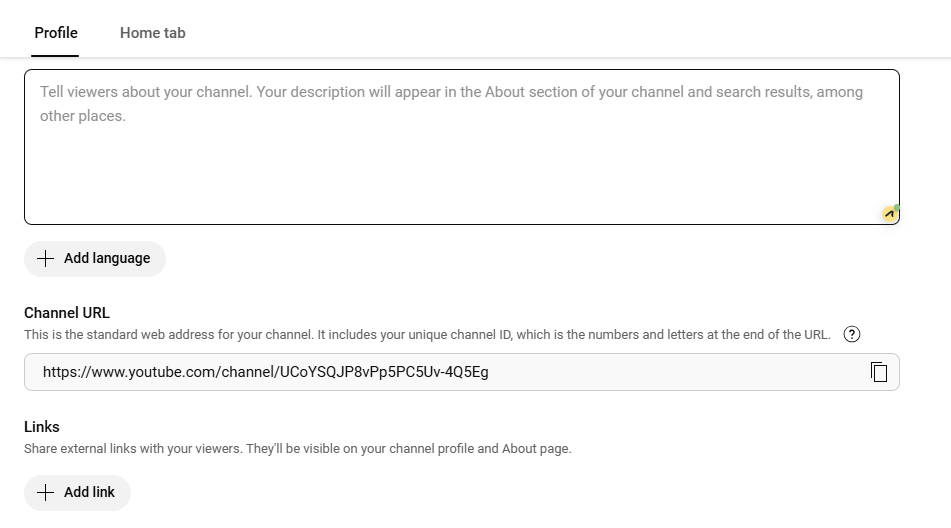
Now, you’ll see the channel’s name, description, and URL.
Step 4: Add links to your bio
Once you have accessed the “Profile” section, you’ll see several customization options.
To add links to your bio, simply navigate to the links section, click on “Add a link”.
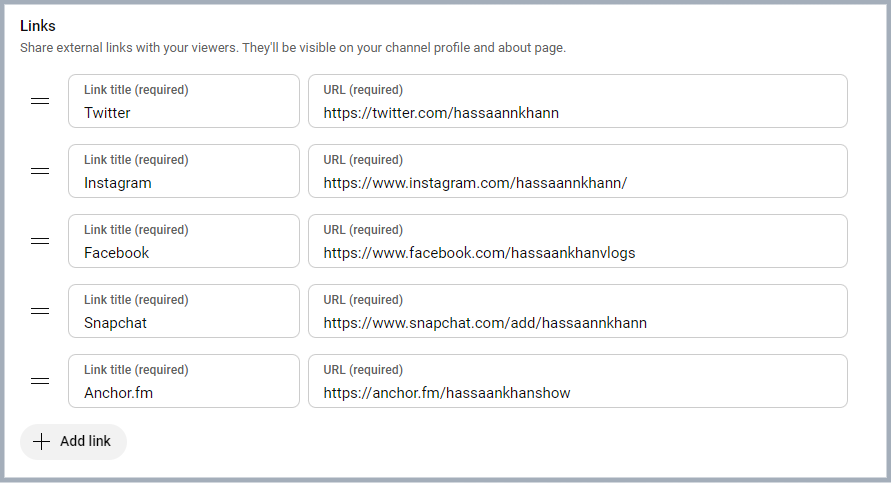
Step 5: Add a link
Add your link title and paste the URLs. Once added, it’ll be featured in your “About” section of the YouTube bio.
How to optimize your links for engagement: A guide for YouTube creators
Below are some of the best practices of adding links to your YouTube bio.
1. Relevance is key
Always ensure that the links you share are relevant to the content of your video. If you’re creating makeup tutorials, link to your beauty blog for in-depth articles, product reviews, and additional resources that complement your video. This not only provides value but also enriches the viewer’s experience.
2. Shorten URLs
Using shortened branded URLs in your YouTube bio can greatly enhance your channel’s professionalism and effectiveness in attracting viewers.
To make this even easier, you can use a free link shortener that cleans up long URLs and helps you present a neat, memorable bio link. This is especially handy when you’re sharing multiple pages or long website URLs.
These custom short links not only save precious character space but also make it easier for your audience to recognize and remember the destination, fostering trust and engagement.
3. Social media connections
Consider linking to your social media accounts, such as Instagram, where you can share behind-the-scenes content, engage with followers through polls, and showcase additional makeup looks. These platforms allow for real-time interaction and help you build a stronger connection with your audience.
Additionally, utilizing a URL shortener that provides tracking analytics can empower you to assess which links perform best, allowing you to refine your approach and maximize your outreach.
4. Keeping descriptions clear and concise
When adding links, accompany them with a brief description to clarify what the link is for.
5. Regularly updating links
Links can become outdated quickly. Regularly check all your links to ensure they’re functional, and directing viewers to the correct content.
Based on performance metrics, refine your approach. If certain links aren’t getting clicks, consider changing their placement or how you describe them.
Leverage the power of bio links to not only showcase your additional content but also to significantly enhance your YouTube presence. Transform your viewer’s experience guiding them effortlessly to your blog site, merchandise, or any other relevant platforms. This tailored approach makes it easier for your audience to connect with you on multiple channels.
By linking to your related content—be it blog posts or social media—you create a comprehensive digital ecosystem. This enhances viewer engagement and encourages them to explore more of your work, ultimately fostering a loyal community that values your expertise.
3 common mistakes to avoid when adding links on YouTube
1. Spamming links
Avoid overcrowding your bio with too many links. This can overwhelm and confuse viewers. Focus on quality over quantity.
2. Ignoring guidelines
YouTube has specific policies regarding links. Ignoring these can result in penalties or removal of your content. Always stay informed about community guidelines.
3. Neglecting mobile users
With many users accessing YouTube on mobile, ensure your links are mobile-friendly. Test how they appear and work on different devices.
Conclusion
Adding links to your YouTube bio is a powerful tool for boosting engagement, directing traffic to your other platforms, and generating revenue. By understanding how to strategically incorporate links, you’ll enhance your channel’s visibility and viewer experience. Remember to regularly review your links and keep them updated for the best results.
Have you ever felt stuck hunting for a reliable tool since Google shut down its URL shortener? If that’s the case, don’t worry, you’re not alone!
Many of us get confused, or even irritated at times, when links break, or we can’t remember how to shorten a link securely. That frustration grows even more when you test dozens of tools online, only to find they’re clumsy, unreliable, or expensive.
The bright side: It doesn’t have to be that way anymore!
In this blog post, you’ll find 10 top-tier Google URL shortener alternatives that combine ease, brilliant features, and dependability.
Ready to leave behind broken goo.gl links? Let’s check out the amazing alternative tools to Google URL shortener next.
Top 10 URL Shortener Alternatives to Goo.gl
Since Google shut down its Goo.gl service in 2019, many users have been searching for solid and trustworthy alternatives. Fortunately, there are numerous paid URL shorteners available, each with its own unique set of attributes and benefits.
Let’s kick things off with probably the most excellent and well-known option, i.e., Replug.
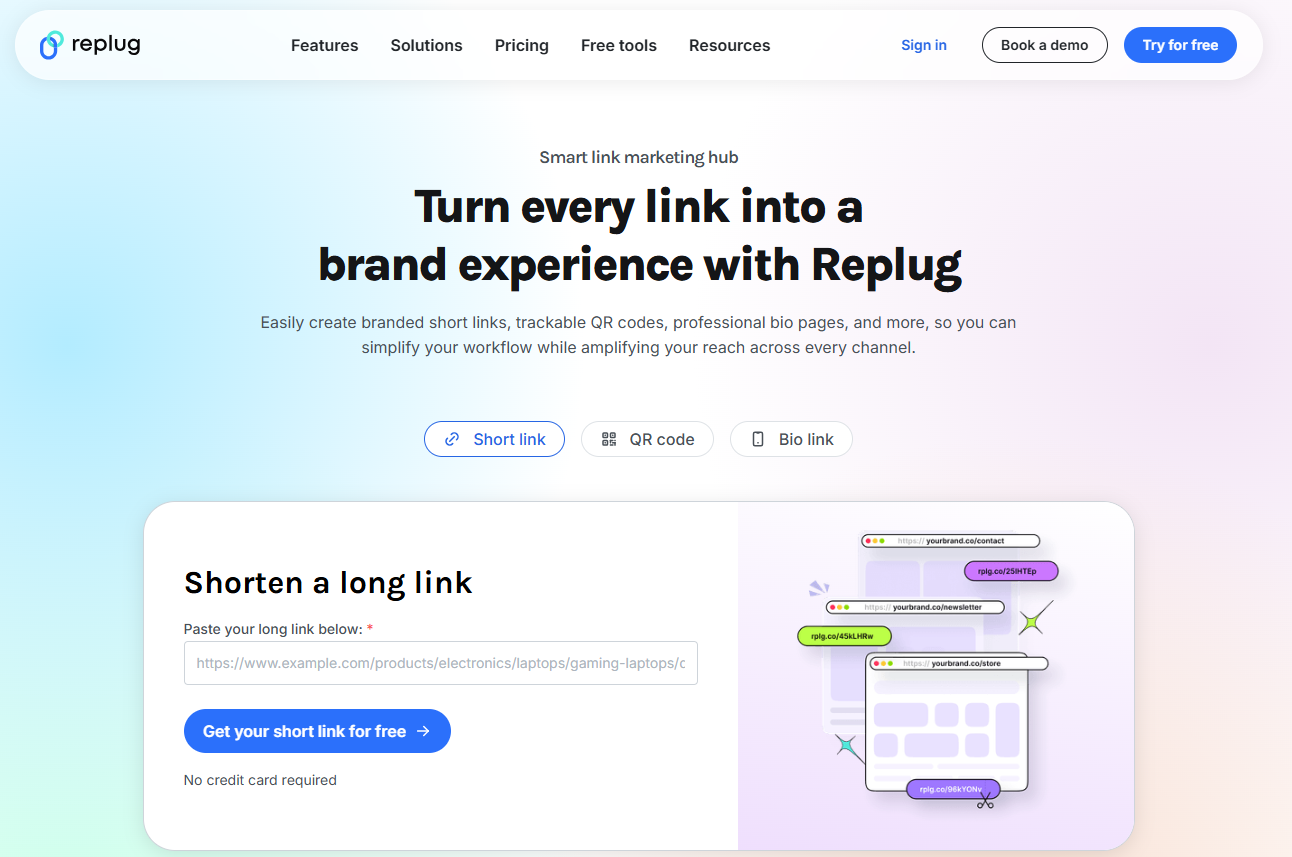
Replug.io – Best custom URL shortener tool online overall
If you’re looking for a smart way to shorten a link without just relying on a generic service, Replug might be your go-to tool. It’s not just a URL shortener; it transforms ordinary links into branded, trackable assets that carry your identity.
Since Goo.gl is long gone, Replug stands out as a strong alternative for anyone who wants more than just a short link. With this top-notch tool, you get brand recognition, link analytics, and campaign-level insights all in one place.
Key features
Branded link creation: Convert any long URL into a short, custom version under your domain with this reliable link shortener tool.
Deep link routing & A/B testing: Segment visitors by device, region, or date, and test multiple link versions to see which works best.
Full analytics & campaign tracking:Monitor clicks, conversions, custom domains, and workspaces, all from one single dashboard.
White-label solution for agencies: Manage workspaces for multiple teams and clients, with personalized domains and branding.
Pricing plans
Free: $0/month
Essentials: $19/month
Scale: $39/month
Agency: $99/month
Enterprise: Custom pricing
Pros
Cons
Lets you build branded short links within seconds to boost recognition.
The interface can feel overpowering when you’re just starting out.
Enables advanced features like retargeting and A/B testing.
Agencies get nice features like client workspaces and white-labeling.
In short: If you’re way too serious about your links, branding them, tracking them, turning them into marketing tools rather than just short URLs, Replug hits the mark. Yes, it might take a little time to get familiar with all the features, but once you do, you’ll likely find that your link-sharing and campaign tracking become much smarter. For anyone looking beyond basic shortening and aiming for full-scale link management, Replug is a very solid choice.
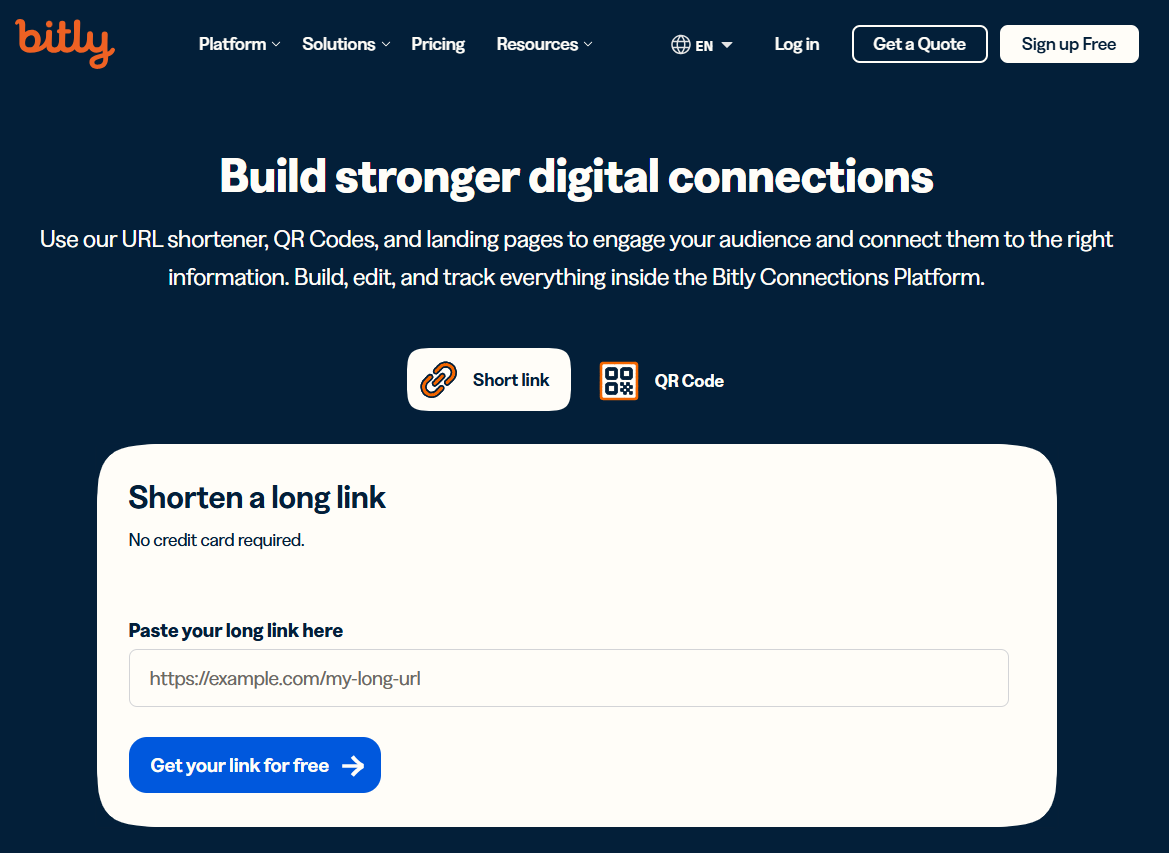
Bitly – Best for general use & analytics
If you’re the one in search of a solid all-around solution to get shortened links in no time, Bitly has you covered. It’s been around for years, evolving from a simple link shortener into a full link-management system that easily replaces the old Goo.gl.
With Bitly, you can create shortened, branded links that feel trustworthy, track how they perform, and redirect links when you need. All of this makes it a smart alternative to Google’s bygone service.
Key features
Create branded short links with Bitly using top-level domains, so your links carry your brand identity.
Monitor click stats, locations, devices, and campaign performance in real time from one dashboard.
Change link destinations later on (redirect) so you’re not stuck with a dead link.
Shorten multiple links in one go to save time when you’ve got many links to manage.
QR code and landing-page features are included, making it more than just a shortener. It’s more of a link-campaign hub.
Pricing plans
Free: $0/month
Core: Annual plan only
Growth: $35/month
Premium: $300/month
Enterprise: Custom pricing
Pros
Cons
Very strong campaign tracking and analytics, making it easy to compare different links and channels.
The free version is very limited. It may not be enough if you need custom domains or many links.
A trusted, established platform used by businesses of all sizes. Great for long-term stability.
Some advanced features (e.g., deep link analytics, full brand control) are locked behind higher tiers.
Supports branded domains, QR codes, and bulk operations. Versatile for personal & enterprise use.
Can become fairly expensive as your link volume or team size grows.
In short: If you’re after a reliable, user-friendly tool to shorten links and track how they perform, Bitly is a standout choice. It balances ease of use with powerful features, so you can do more than just shorten a URL. You can turn it into a smart marketing asset. It isn’t the cheapest for all features, but the value is there if you’re serious about tracking and managing links. For general use or growing teams who want analytics and brand control, Bitly hits a strong sweet spot.
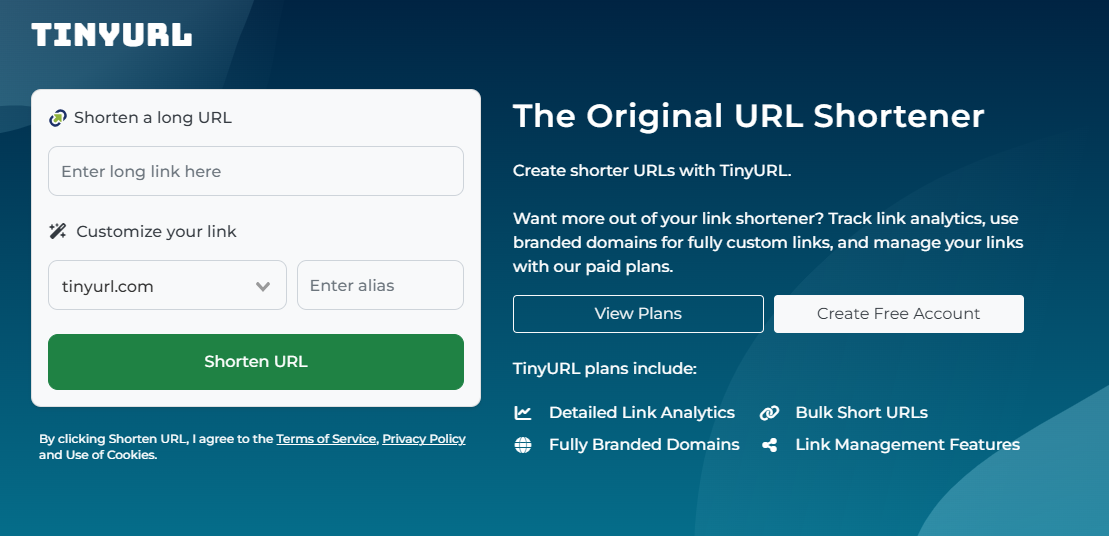
TinyURL – Best for simplicity & speed
Elegant in its ease of use, TinyURL is one of the longest-running tools for shortening URLs. It remains a top choice when you just need to shorten a link without fuss.
Before the days of complex dashboards and enterprise workflows, TinyURL let users paste a long address and get back a short, shareable link. With the retirement of Google’s URL shortening tool, TinyURL stands out as a lightweight, fast alternative when you don’t require a full-fledged link-management system.
Key features
Instant short-link creation: No signup required; paste a URL and get a short version in seconds.
Basic analytics: Track clicks, referrers, and geography (on paid plans) to get insight into link performance.
Bulk shortening: Create numerous links at once when you have a batch of URLs to manage, hassle-free.
Persistent links: Shortened URLs generally don’t expire, so you don’t have to worry about links vanishing.
Pricing plans
Free: $0.00/month
Pro: $12.99/month
Bulk 100K: $129.00/month
Enterprise: Custom
Pros
Cons
Super fast and simple to use. Great for quick link shortening without setup hell.
Free users get very limited analytics and customization.
No mandatory signup for basic use. Just paste a URL and go.
Less suited for advanced campaign tracking compared to full-fledged tools.
Links can remain active for a long time (with no forced expiration), so you’re not chasing dead links.
The interface and workflows can feel basic if you’re used to more polished platforms.
In short: For anyone who cares more about speed and simplicity than deep analytics or agency-level workflows, TinyURL is a preferred choice. It lets you shorten a link in seconds, share it, and move on. Of course, if you’re managing heavy-duty campaigns or need detailed insights, you might eventually shift to a tool with more layers. But for everyday link-sharing, on-the-fly shortening, or minimal-setup use, TinyURL just works, and works easily.
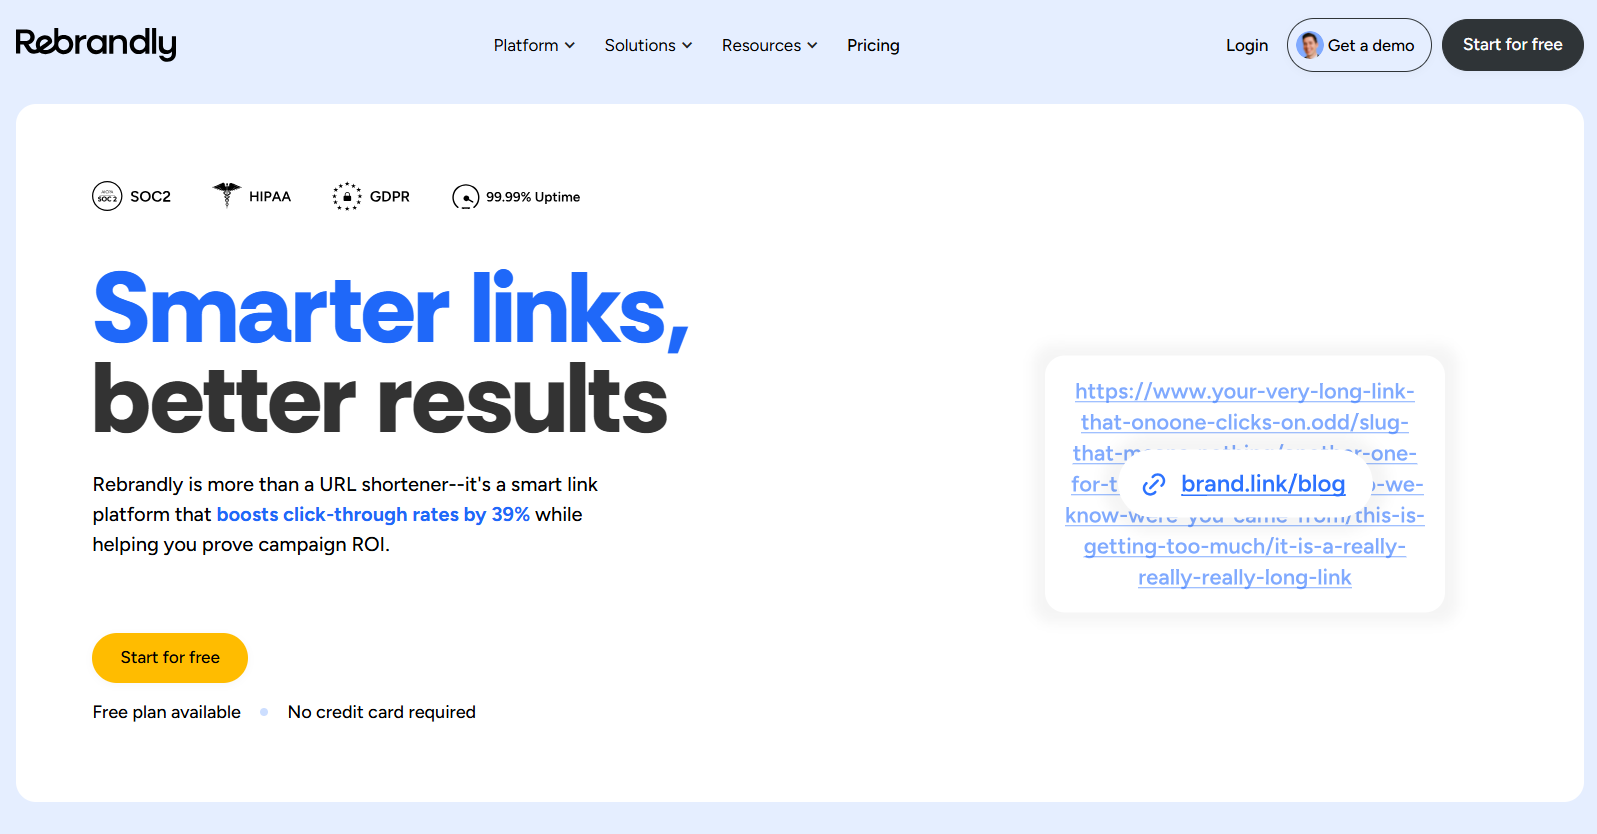
Rebrandly – Best for generating branded & personalized links
Here’s the deal: when you want to share a link that actually looks like your brand and not some random shortener domain, Rebrandly comes through. It helps you turn long or messy URLs into branded, customized short links using your own custom domain name.
After Google announced the shutdown of its tool, Rebrandly stepped in as a top-tier alternative for anyone who cares about their brand identity in every link.
Key features
Use your own custom domain (e.g., yourbrand.co) with Rebrandly, so links reflect your identity and build trust.
Advanced analytics and tracking for clicks, geography, devices, and campaign performance.
Easily change where the link points even after it’s live (handy for redirecting or fixing errors).
Bulk link creation & management tools for scaling across campaigns, teams, and clients.
Hassle-free integration with workspaces, team collaboration, and API access for automation.
Pricing plans
Free: $0/month
Essentials: $14/month
Professional: $39/month
Growth: $119/month
Enterprise: Get a quote
Pros
Cons
Let’s you build fully branded short links. Great for identity and trust.
For small users, the free plan’s limits may feel tight.
Strong team & domain management features. Works well for agencies or multi-brand.
The interface has many features, which may feel confusing for basic users.
Reliable integrations and API support for automating link workflows.
Reports of slower support response or domain setup issues.
In short: If your goal is to share links that look professional, match your brand, and provide you insight into how they perform, then Rebrandly ticks all the right boxes. It might be more than what a casual user needs, but for marketers, agencies, or businesses that care about every link, it’s a worthwhile pick. If you’re just looking to shorten a link now and then without any trouble, you might prefer something simpler. However, when branding and control matter, Rebrandly surely stands out.
Short.io – Best for enterprise use & custom branding
Here’s another tool worth knowing at present. Short.io helps you create short links that don’t just shrink URLs, they carry your brand, your domain, and your story.
With the old Goo.gl no longer available, Short.io takes the center stage by offering advanced capabilities (custom domains, detailed analytics, team workflows) that go beyond basic shortening and make it worthy of enterprise-level use.
Key features
Branded & multiple custom domains: Shorten links using your own domains (and many of them) for consistent brand identity.
Real-time detailed analytics: See click streams, referrers, devices, geolocation, and more.
Team & enterprise workflows: Roles, access controls, bulk operations, API integration, deep links, geo-targeting, from one single place.
Affordable rates: Generous free tier and strong value-pricing for scaling teams.
Pricing plans
Free: $0/month
Hobby: $5/month
Pro: $18/month
Team: $48/month
Enterprise: $148/month
Pros
Cons
Offers strong custom-domain support and link-branding at enterprise scale.
The dashboard and feature set can feel intimidating for first-time users.
Strong analytics and targeting features that suit businesses.
Some users note that data export or UI could be improved.
Good value for companies needing custom domains, bulk operations, and API access.
Onboarding custom domains may require technical setup that non-technical users may find tricky.
In short: Short.io is a brilliant choice for businesses, agencies, or teams that need branding, control, analytics, and scale. If your goal is to build branded links across multiple domains, track campaigns in detail, collaborate with a team, and lean on automation, Short.io hits the mark. For simpler needs, it might feel overdesigned, but for professional or enterprise use, it’s very much worth a look.
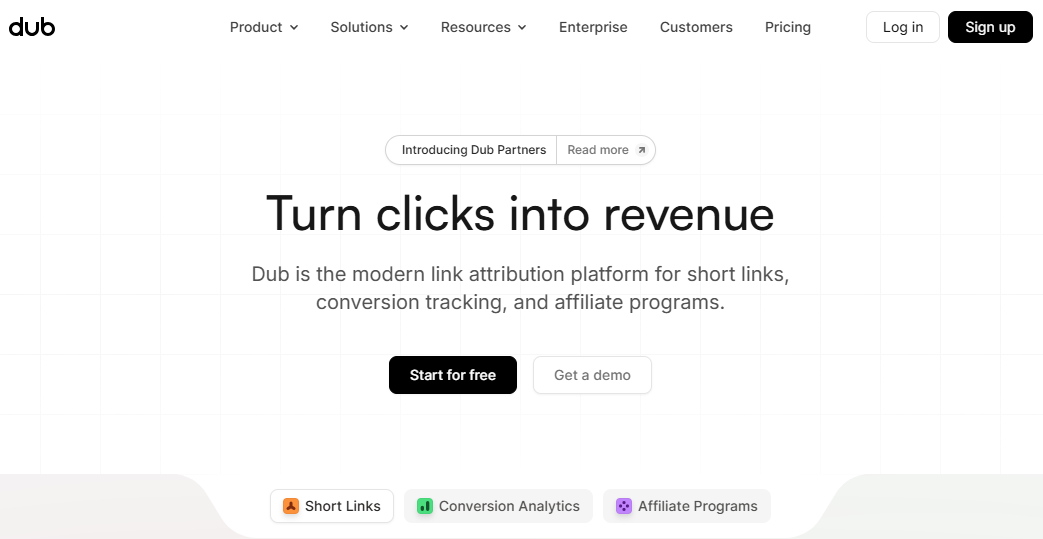
Dub.co – Best for modern features & automation
Dub.co is a fresh option worth your time. It is a modern link-management platform that not only helps you shorten a link, but does so with advanced automation, rich analytics, and even open-source underpinnings.
Dub.co arrives as a compelling Google URL shortener alternative for anyone who needs more than just a simple short link. Whether you’re tracking funnels, automating redirects, or managing branded domains, this innovative tool won’t disappoint.
Key features
Custom domain support + free .link domain promotion so that you can create branded short links with your own identity.
Device & geo-targeting, link expiration, password protection, link cloaking, and UTM builder—all built into the link creation workflow.
Real-time analytics with device, browser, and location details.
Longer retention on paid plans, ideal for funnel and campaign tracking.
Open-source option + API/SDK access. You can self-host if you prefer, or integrate deeply with your existing tech stack.
Pricing plans
Free: $0 (free forever)
Pro: $30/month
Business: $90/month
Advanced: $300/month
Enterprise: Custom
Pros
Cons
The design and user experience are very modern. Link creation and analytics feel intuitive and up to date.
The pricing has changed significantly in recent times. Free tiers or older plans were quite cheaper.
Excellent for automation and integration: APIs, SDKs, device/geo targeting make it strong for advanced use.
Some enterprise-grade features (e.g., self-hosting or ultra-large volume) require more setup or technical know-how.
Good value for custom domains + branded short links + analytics in one place.
Visibility into long-term system reliability is still somewhat limited (e.g., fewer historical incident reports).
In short: If your needs go beyond simply shrinking a URL, and you’re looking at links as part of a marketing funnel, or brand identity, then Dub.co is seriously worth considering. It strikes a good balance between power and usability. You get strong analytics, custom domains, and automation features — all under one roof.
BL.INK – Best for businesses of all sizes
The tool formerly known just as a URL shortener has grown up, and that’s exactly the story of BL.INK. It’s designed to help you shorten long URLs into crisp, branded links and manage them seamlessly. You can also track clicks, integrate it with your tools, and scale as your business grows.
In the post Goo.gl era, BL.INK steps in as a full-fledged alternative. You get the simplicity of link-shortening with the power marketers need for campaign control, analytics, and brand consistency.
Key features
Branded links & custom domains: You can create links that reflect your brand identity, making them look professional and trustworthy.
Editable link destinations & unlimited redirects: Change where a link points even after it’s live, without losing historical performance data.
Real-time tracking & click data: Track clicks by using different metrics, helping you understand how your links perform under various scenarios.
Rich integrations & security: Works with many enterprise tools, supports custom domains, and offers strong data protection and compliance.
Pricing plans
Expert+: $48/month
SMB: $99/month
Team: $299/month
Business: $599/month
Enterprise: Custom
Pros
Cons
Strong branding and trust-building features at hand.
Some users may find the minimum paid tier higher than simpler alternatives.
Enterprise-grade link management: Offers auditing, governance, link-editability, and complete user control.
Because of its scale, the interface may feel more complex to beginners.
Excellent integrations: Works well with marketing tools, QR codes, custom domains, and link-campaign systems.
Some features (e.g., full API access, advanced domains) may only unlock at higher tiers.
In short: Whether you’re a startup, a growing business, or a large enterprise, BL.INK offers the kind of link-shortening plus link-management you’d want when your links carry your brand and support your campaigns. If you’re treating links as touchpoints and not just as URLs, then this platform makes good sense. For casual or one-off link shortening, you might not need all its depth, but if you’re serious about branding, analytics, and scale, BL.INK is a very sensible option.
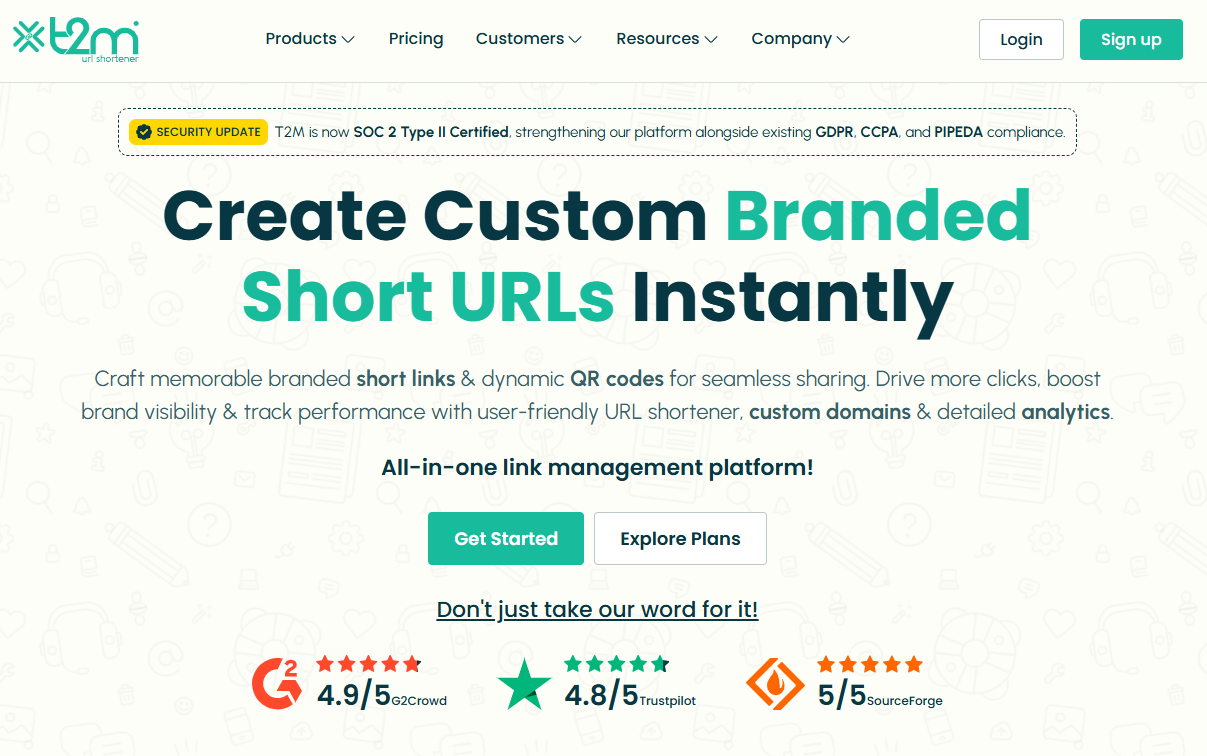
T2M – Best for large-scale management
Here’s a strategic tool if your team deals with hundreds or thousands of links every day. T2M URL shortener is built to handle serious link volume, bulk operations, and branded short links with analytics, making it a strong alternative now that Goo.gl is out of the picture.
It helps you shorten long URLs, track every click, brand your domains, and coordinate link workflows across a team or enterprise with ease.
Key features
Branded/custom short URLs and custom domains for full brand consistency.
Bulk link creation, CSV import/export, and high-volume redirects to streamline large campaigns.
Detailed analytics (geo, device, campaign tags), UTM builder, link expiration, password protection, and QR code support.
API access, team seats, SSO, and enterprise-grade features for management across users and brands.
Pricing plans
Basic: $5/lifetime (for individuals)
Standard: $9.99/month (for individuals)
Pro: $29.99/month (for individuals)
Essentials: $45/month (for business)
Premium: $89.99/month (for individuals)
Teams: $165/month (for business)
Enterprise: $395/month (for business)
Dedicated: $$$/month (for business)
Pros
Cons
Exceptional value for teams needing branded links + analytics + bulk workflows.
Some of the highest-end features may only be cost-justified for very high-volume use.
Highly scalable: Good for firms managing thousands of links, domains, or campaigns.
The interface can feel a bit rampant if you only need basic shortening.
Excellent support and reliability according to user reviews.
In short: For businesses that treat links as more than just shareable URLs, and instead as branded assets, campaign tools, and analytics drivers, T2M is a very reliable choice. It handles scale, customization, and tracking much better than simple free URL shorteners. When you’re managing large-scale link operations, or multiple brands or domains, T2M steps up for you like a star.
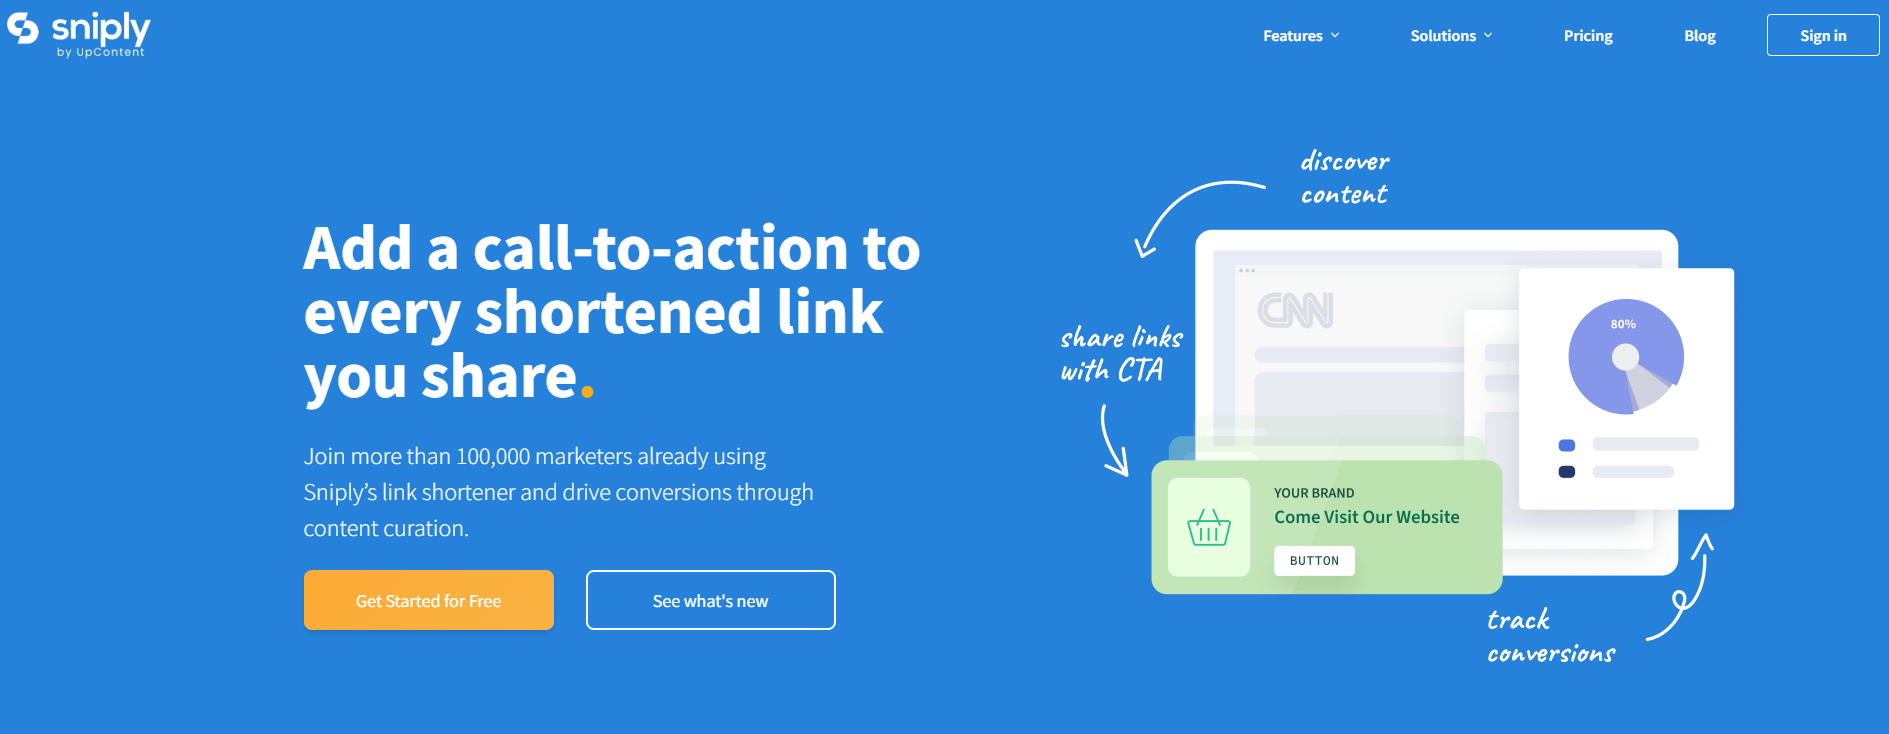
If you’re someone who is looking to turn every shared link into a chance to engage your audience, Sniply might just be your best friend. At its core, it is just a URL shortener (yes, like many others), but with a plot twist. It allows you to embed a custom call-to-action (CTA) inside every link you share.
So instead of simply redirecting someone from a link to a destination, you can overlay a message, button, or form that drives your own conversion goals. Because of that, it works as a strong alternative to the classic Google URL shortener-style tools. With this tool, you’re not just shortening links, you’re turning each link into a branded opportunity, not just a redirect.
Key features
Custom URL shortener with your own domain or branded shortlinks.
Overlay a CTA (button, form, image, hidden message) on any link you share, even third-party content.
Track clicks, conversions, time on page, device data, etc.
A/B testing of CTAs to optimize performance over time.
Works well with known tools like Buffer, Hootsuite, Zapier, etc.
Retargeting pixel support so you can build audiences from who clicked your links.
Pricing plans
Basic: $9/month
Pro: $29/month
Business: $59/month
Enterprise: Custom pricing
Pros
Cons
Lets you monetize or capture value from links you share (not just shorten them).
Pricing is higher compared to other simple URL-shorteners available online.
Strong branding control (custom domains, CTA design).
Some advanced features may have a learning curve for beginners.
Deep analytics + conversion tracking gives insight beyond “just clicks”.
In short: Sniply is a clever tool if you regularly share links, and want to do more than just redirect someone. It’s not just a “make it shorter” tool; it’s a “make it work for you” tool. Every link becomes a mini conversion funnel. If you’re building an audience, sharing often, and care about capturing value from each click, then Sniply is absolutely worth a look. It is friendly, powerful, and a bit more marketing-focused than the standard link shorteners.
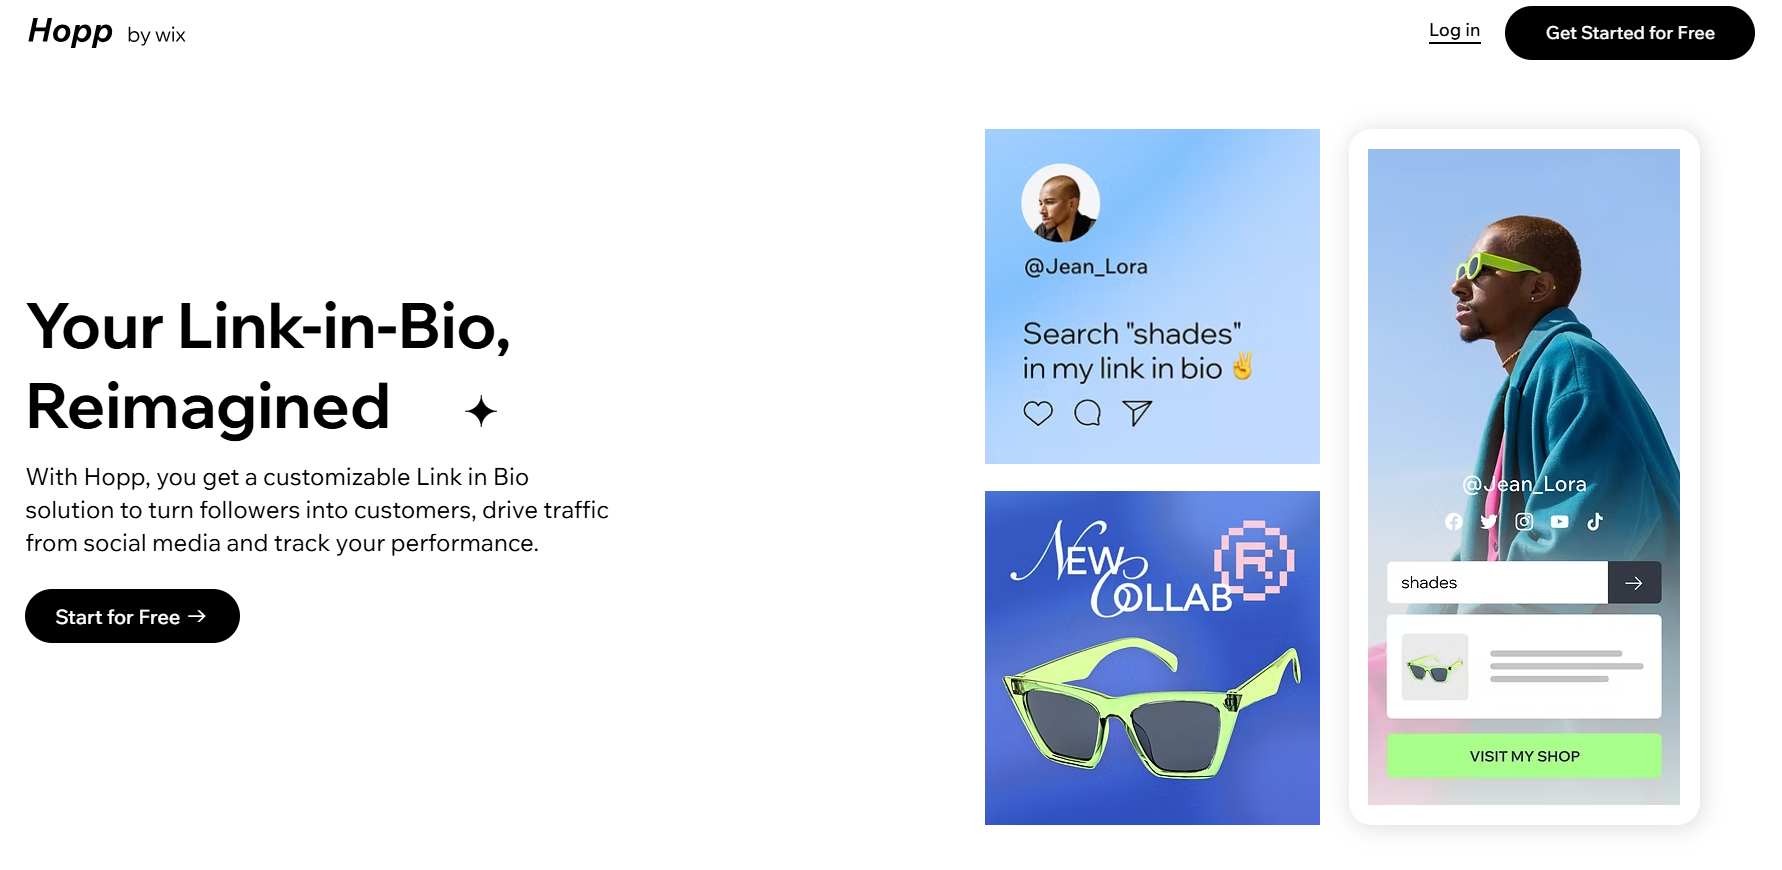
Hopp.co – Best for monetization
Hopp by Wix is a modern “link in bio” tool that lets creators, influencers, and small businesses turn a single profile link into a mini-hub of content. You can shorten URLs, brand them, embed multiple links, track performance, and even monetize traffic with features like pre-rolls and tip jars.
Because it gives you more control than many of the finest URL shorteners (such as the now-retired Google URL shortener), it can act as a viable alternative. You’re not just shortening links, you’re managing them, monetizing them, and building a branded destination.
Key features
Link shortening & custom aliases: Convert long URLs into shorter, more memorable ones and align them with your brand.
Searchable link hub: Each link you add is indexed in your Hopp page, so followers can type keywords and find precisely what they need.
Monetization tools: From tip jars, paid DMs, paid requests, to pre-rolls that display before a click. Hopp turns your traffic into revenue.
Landing page / Instant page builder: Create mobile-friendly landing pages tied to a link-in-bio hub, for campaigns or product launches.
Analytics & tracking: Understand clicks, visitor behavior, and traffic sources all within the tool.
Seamless brand integration: Built by Wix, you can integrate with custom domains, Wix CRM, embed blocks (videos, forms), and keep everything on-brand.
Pricing plans
Light: $17/month
Core: $29/month
Business: $39/month
Business Elite: $159/month
Pros
Cons
You can monetize your links directly. A step beyond most standard URL shorteners.
The UI and workflow might take a few minutes to get used to if you’re only familiar with basic link shorteners.
The searchable link-hub gives your audience more efficient access to specific content (rather than a long list of links).
Seamless integration with your brand: custom domain, design, embed blocks, and ties in with Wix ecosystem if you use it.
In short: If you’re serious about turning clicks into something meaningful, say affiliate revenue, product sales, engagement, or building a micro-destination for your followers, then Hopp by Wix is a wise choice. It offers the URL shortening you need, plus monetization, analytics, branding, and landing-page features that most simple shorteners leave out.
Some other URL shorteners you can try
Here are some additional URL shorteners you can explore, each with its own specialty and use case:
URL shortener by Zapier: Best for automation & workflow integration
This built-in tool in Zapier lets you automatically shorten links as part of your “Zap” workflows, so long URLs can be trimmed and sent on without manual intervention.
Firebase Dynamic Links: Best for app deep‐linking & mobile campaigns
Originally the successor to Google’s shortener, Firebase Dynamic Links are ideal when you want links that behave differently on mobile apps vs the web.
Ow.ly: Best for social media posts via Hootsuite
Integrated within Hootsuite, Ow.ly creates short links directly while you schedule or publish social posts. Quite handy if you already use that platform.
Cuttly: Best for branded links + analytics for creators
Cuttly offers custom domains, detailed click stats, QR codes, and even “link in bio” pages. Good for creators, small businesses, or anyone who wants more visual/tracking power.
Tiny.cc: Best for fast & straightforward link shortening
If you just need to shorten a URL quickly without many extras, Tiny.cc offers a streamlined option (though you’ll want to check current analytics/branding support).
Linkly: Best for marketing & retargeting use cases
Linkly supports custom domains, retargeting pixels, device/geo-redirects, and link tracking. Well-suited tool for marketers who want to tie links into ad/retarget flows.
GoLinks: Best for internal team/organization use
GoLinks are geared toward companies that share internal tools/resources with short, memorable links within a domain. Less about public marketing, more about internal workflows.
is.gd: Best for ultra-simple, no-frills shortening
A minimal option when you just want to shorten a link fast and move on, without needing tracking dashboards, branding, or integrations.
With the original Goo.gl links now unsuitable, picking a link shortener that fits how you use links is the key. No matter if you’re posting on social, tracking campaigns, branding links, or managing internally. Each of the tools above offers a different focus, so you can pick one (or more) that match your workflow and budget.
Selection criteria for URL shorteners
Before stepping into the many tools out there, it’s worth thinking through what really matters when picking a URL shortener. Below are some key factors you should evaluate so you choose a tool that fits your workflow, not just one that “works.”
Core functionality: At the most basic level, the shortener must reliably convert long links into shorter ones with proper redirects (ideally 301 redirects) and minimal downtime.
Additional standout features: Beyond basic shortening, look for custom branded domains, deep linking, mobile targeting, UTM tracking, and analytics. These features uplift a link shortener from “just short links” to a marketing tool.
Usability: A clean, intuitive interface matters. If you spend more time figuring out how to shorten links than actually sharing them, your chosen tool will slow you down, not help you.
Onboarding: What’s it like to get started? The best tools offer easy setup (domain linking, link creation) and precise documentation. If you’re stuck in configuration for hours, that’s a negative.
Customer support: When something goes wrong, e.g., links stop redirecting or analytics disappear, then you’ll want responsive support. Good tool providers offer live chat, email help, and documentation to guide you.
Value for money: Check how many links, domains, clicks, and features you get for your budget. A “cheap” shortener might cost less, but if it lacks features or caps your usage harshly, it’s not a good choice. You could end up paying more in lost time or upgrading sooner than expected.
Customer reviews: Look beyond the marketing. Read user reviews and case studies to see how the tool performs in real life. Do people complain about downtime, confusing UI, or hidden costs? That’s just as important as the specification sheet.
Why should you use a link shortening tool?
Using a link-shortening tool isn’t just about making long URLs look nicer; it’s about smarter sharing, stronger branding, and better data. Short links are cleaner, easier to remember, and more reliable when pasted into chats, printed on materials, or squeezed into social posts.
Additionally, these tools give you built-in analytics (clicks, location, device), UTM support, and even custom domains, so every link becomes a measurable and brandable asset rather than just a bare URL.
All in all, if you share lots of links, care about how they appear, or want to see how they perform, investing in a good URL shortener is a smart move.
Summing Up
Selecting the right URL shortener really comes down to what you need most: simplicity, branding, analytics, or scalability. Each tool we discussed has its own strengths, but the goal remains the same: making your links look cleaner, perform better, and drive real results.
No matter if you’re a marketer, creator, or business owner, a solid link shortener tool can easily level up your online presence. And hey, if you want an all-in-one solution with branded links, analytics, and retargeting, give Replug a must-try. It’s easily the best Google URL shortener alternative out there!
Frequently Asked Questions
What is link shortening or URL shortening?
Link shortening (or URL shortening) is a technique that converts a long web address into a shorter version that still redirects to the same destination. It’s especially helpful for making links easier to share, remember, and track without changing where they land.
What is the best alternative for Google URL shortener?
Since Google URL Shortener (goo.gl) no longer accepts new links, modern tools like Replug with strong branding, analytics, and reliability are widely recommended as the best alternative.
Is Google URL shortener no longer available?
Yes, Google stopped accepting new goo.gl links in April 2018 and officially discontinued the service for new users in 2019. Existing links also stopped working for most users after August 25, 2025.
What is the most trusted URL shortener?
Replug is regarded by many in 2026 as the most trusted URL shortener. Thanks to its long history, enterprise-grade infrastructure and reliable service.
Which one is the best free URL shortener?
For free link-shortening without needing an account, Replug and TinyURL stand out as simple, no-fuss best URL shortener options that have been around for years and are trustworthy.
As e-commerce companies compete for consumer attention, choosing the most suitable marketing strategy is key.
Among these, influencer marketing has proven to be one of the most effective ones.
Research shows that consumers are more likely to purchase products endorsed by influencers, making this marketing strategy highly effective for brands looking to enhance their reach and engagement.
Influencer marketing’s global popularity is surging at an incredible pace, with the market projected to reach a staggering $22.2 billion by 2026.
Before we jump into influencer marketing for e-commerce, let’s go over the basics first.
What is influencer marketing?
Influencer marketing allows businesses to work directly with social media creators with a sizeable audience to increase brand exposure, generate sales, and get attention.
Since influencer marketing is comparatively cheaper than most online paid ads, businesses gladly pay influencers to review their products or discuss their offers.
Undoubtedly, influencer marketing is rising as the creator economy is the new normal in today’s digitally connected world, where many people work online.
One of the major impacts of the growth of the creator economy is that kids follow their favorite YouTubers and TikTokers more than A-list celebrities.
Why partnering with influencers can skyrocket your e-commerce success?
E-commerce brands and marketers try to squeeze every opportunity they can to get their hands on to generate sales or market their products.
One of the easiest routes to e-commerce success is influencer marketing. Here are the reasons why e-commerce brands partner up with influencers:
1. Underpriced marketing at scale
Influencer marketing turns out to be quite underpriced compared to traditional advertising or paid ads on social media. The fundamental reason for this is that a vast majority of influencers are willing to collaborate with brands, which paves the way for brands to get competitive pricing.
Furthermore, most small businesses and brands start with affordable micro-influencers to promote an e-commerce deal or specific product. So, that’s quite a reason for partnering up with influencers.
2.Meet the loyal influencers’ fan base
Social media influencers are known for their loyal and dedicated fan base, especially YouTubers and TikTokers. However, it goes for all major social media platforms, such as Instagram, TikTok, YouTube, Facebook, X, and Pinterest.
Brands see this as an opportunity to get the attention of such audiences as die-hard fans of certain social media influencers. Collaborating with such influencers makes it easier for the brands to get traction and build trust with the audience.
No wonder brands, agencies, and organizations feel proud to work with influential social media creators across the globe.
Companies are rapidly moving toward influencer marketing for many reasons, one of which is the diversity of social media platforms.
There are at least half a dozen mainstream social media platforms that allow brands to choose the relevant social media platforms and discover influencers on those platforms.
For instance, some brands are interested in Instagram influencer marketing for e-commerce opportunities, so they look out for Instagram influencers only.
4. Influencers have a longer audience attention span
The relationship between an influencer and their loyal audience is unique and fascinating. The audience is more likely to pay attention to their favorite influencer/creator than anybody else.
It turns out that the audience span is way longer on the social media content of their favorite creators than on other creators’ content. It gives e-commerce brands and marketers a chance to cash in on the longer audience attention span by sponsoring their videos or paying them to review their products.
Therefore, e-commerce brands are likely to benefit from such collaborations with influencers and content creators if they come across a perfect match for their brand.
Insider tips for discovering the perfect influencers for your online store
Connecting with the perfect influencer doesn’t happen on a whim. Brands and marketers have to analyze the market situation before they start to understand who they should reach out to and which creators to ignore.
So, here are the six tips for discovering the perfect influencers for an online store:
1. Explore social media platforms more than an average user
A powerful e-commerce influencer marketing strategy for a brand is based on a thorough market analysis. The best way to begin the influencer discovery is to start exploring the relevant social media platforms more than an average Joe.
What we mean by this is that an average user might have a short attention span or simply scroll the social media app for a few minutes and walk away.
On the contrary, a brand or individual looking for a perfect influencer from an e-commerce marketing standpoint should spend more time on social media exploration than an average user.
It’ll allow them to discover not just influencers for their online store but also new social media trends to capitalize on for social media marketing.
2. Hang out in the relevant social media communities
One of the underrated tips for discovering like-minded, relevant influencers for e-commerce marketing is to hang out in the social media communities. It could be Facebook groups, LinkedIn groups, X communities, Reddit communities, Quora spaces, etc.
Just ensure you’re in the relevant community regardless of the social media platform. Keep your eyes open, talk to people, and try to learn from others. Chances are, you’re going to discover the industry’s top guns.
That’s a surefire way to discover influencers for your e-commerce business.
3. Go through the related product reviews done by influencers
It’s important in digital marketing to do some competitor research and see what they have been up to. Utilize the same principle in your e-commerce influencer marketing strategy.
Try to find the product reviews done by influencers in your industry; it’ll allow you to see how the products have been reviewed, and you’ll stumble upon the influencers interested in your product line.
4. Follow social media influencers interested in your niche
It’s not the best idea to go on a follow-spree when eyeing social media influencers for your online store promotion. However, following some influencers who seem interested in your niche won’t hurt.
The benefit of following some influencers on Instagram, TikTok, or LinkedIn through your brand’s account is that they might notice your brand on social. As a result, it earns brands some profile views from influencers and eventually contributes to building a connection between the brand and the influencer.
5. Keep an eye out for micro-influencers in your follower base
Another important tip for discovering influencers for your e-commerce store is never to underestimate the power of micro-influencers, especially if they get engagement and reach.
For instance, if an Instagram creator has five thousand followers, but this creator is getting 20k reel views on average or 3k to 4k likes on Instagram posts, then this micro-influencer is worth a try.
Besides, looking out for the big guys, don’t underestimate the small guys that could bring you some quality traction without breaking the bank.
6. Hunt for the influencers that worked with your competitors
One of the most tried-and-tested methods of discovering the influencers for social media marketing or influencer marketing campaigns is to check out the competitors’ social media accounts and see which influencers they’re tagging or resharing.
You’ll likely discover influencers that have closely worked with your competitors in the past. Feel free to reach out to those influencers and find out what they’re charging for promotional or sponsored content.
Must-have tools to streamline your influencer marketing strategy
Let’s discuss some essential online tools that come in handy in running an influencer marketing campaign and massively influence the outcome of an influencer and brand collaboration.
Here are the must-have tools to utilize for implementing an influencer marketing strategy effectively:
1. Replug
Replug.io is an advanced link management tool for marketers, bloggers, and brands. It empowers users to take their URL management to the next level. It’s a top-notch link shortener that allows users to create, manage, and analyze short, branded URLs for digital marketing campaigns.
It flawlessly integrates with several third-party tools, such as software management tools, email marketing software, lead-gen widgets, and retargeting platforms.
ContentStudio is an all-in-one social media management dashboard for brands, marketers, bloggers, and influencers.
It’s a comprehensive social media tool that makes social media marketing easier than ever. It offers a complete suite for publishing, scheduling, managing, and analyzing social media and blog publishing.
Not only does it help publish and schedule content across all major social media platforms, but it also lets users post blog content on different blogging platforms.
Moreover, it easily integrates with multiple online marketing tools and platforms that improve product efficiency and effectiveness.
Canva is an online tool that helps users create images, videos, banners, infographics, logos, invitations, business cards, and other graphics designs. This is handy for designing social media, digital marketing, promotional, educational imagery, and video content.
Key features:
Text animations
Photo grids and designs
Icons and elements
Visual content templates
Background removal
Colors adjustment
Picture effects and editing
AI-powered photo enhancements
Integration with third-party tools
Pricing plan:
Canva pro: $55 per year (for one person)
Canva teams: $50 per year (per person)
Canva enterprise: Contact sales team
4. Capcut
Capcut is a popular video editing tool available for both mobile and desktop users. It has empowered millions of creators and brands to get their hands on video editing. After the huge success of Capcut on mobile devices, the desktop edition is competing with most video editing software for beginners.
This video editor is fully equipped to manage video, audio, and text editing. Moreover, it offers various AI-based generators to create e-commerce influencer marketing content.
Key features:
Easy-to-use interface
AI-powered tools
Assets availability
Image and video enhancements
Mobile and desktop versions
Pricing plan:
Capcut PC Pro: $8 per month (or $75 yearly)
So, these are some of the important e-commerce marketing tools to keep an eye on when getting into e-commerce influencer marketing.
The best platforms to amplify your brand with influencer partnerships
E-commerce brands strive to find underpriced marketing opportunities to put their brand name in front of as many people as possible without spending a fortune.
It turns out that influencer partnership seems to be a reasonable option for most e-commerce companies to spread the word about themselves. Here are the five well-known influencer marketing platforms to collaborate with influencers:
1. Upfluence
Upfluence is an all-in-one influencer marketing platform that connects social media influencers with e-commerce brands.
The brands can go through the influencers’ listings and handpick the most relevant influencers to work with. Upfluence handles the payment via Upfluence Pay and PayPal.
Why does Upfluence work for both brands and influencers?
It lets brands find suitable influencers via an influencer discovery feature.
It makes influencer management easier than ever, thanks to an effective creator workflow.
It works with e-commerce brands on Amazon, Shopify, Bigcommerce, and WooCommerce.
It provides hassle-free payment transfers via Upfluence Pay and Payment.
It lets brands send complimentary products to the influencers for reviews or testing.
It makes influencer e-commerce statistics measurement rather simple, allowing brands and influencers to analyze campaigns’ performances.
It seamlessly integrates with several marketing, email, and content-creation tools.
2. Grin
Grin is a top-notch influencer marketing platform that not only connects brands with influencers but also provides cutting-edge influencer marketing solutions to both parties.
This tool provides a platform to meet influencers, manage content, track campaigns, and make payments. All in all, it’s a comprehensive dashboard to run influencer marketing campaigns with ease.
Why does Grin work for both brands and influencers?
Grin offers a creator discovery section that lets brands find suitable creators around the globe.
It has a state-of-the-art content management system to manage social media content for influencer marketing campaigns.
The platform pays attention to relationship-building between brands and influencers.
Detailed reporting and analyzing monitoring allow brands to take a data-driven approach and make informed decisions.
The creator payment system is as simple as one can imagine, ensuring smooth and quick payments for influencers.
Traackr is yet another well-reputed influencer marketing platform that offers brands and influencers hands-on experience. It’s an advanced influencer marketing tool to find influencers, manage relationships, collaborate with creators, and analyze performance.
Undoubtedly, it’s a one-stop shop for managing influencer marketing campaigns for e-commerce brands and online businesses.
Why does Traackr work for both brands and influencers?
Traackr ensures that brands find the influencers that are the right fit for the campaign.
It assists brands and influencers in content collaboration, making influencer marketing more fun.
It offers a reliable payment system for paying influencers for their work.
The robust analytics section provides comprehensive reporting to analyze campaign performances.
It has a seamless recruitment and onboarding procedure for brands to manage influencers.
It provides insights into campaign data for optimization and scalability.
4. Klear
Klear is a robust, user-friendly influencer marketing platform designed to meet the most advanced needs with ease and intelligence.
It empowers e-commerce brands to streamline their influencer marketing efforts, offering an intuitive and powerful suite of tools to find, manage, and pay influencers for their collaborative campaigns.
Why does Klear work for both brands and influencers?
Klear has an advanced influencer search feature to help you find suitable influencers for every brand.
It has a powerful influencer relationship management system to stay connected with influencers.
It showcases in-depth influencer analytics to the brands to ensure that they go through all major statistics of the influencer’s social media profiles.
It offers an easy-to-manage campaign management section for accurate data monitoring and reporting.
CreatorIQ is the go-to influencer marketing platform for large-scale e-commerce and SAAS tools.
It offers a complete ecosystem for building the most authentic, engaging, and scalable influencer marketing campaigns. This tool is equipped with several advanced features to streamline influencer marketing campaigns effectively.
Why does CreatorIQ work for both brands and influencers?
CreatorIQ allows brands to discover and manage influencers without relying on third-party tools.
It allows brands to build communities after connecting with like-minded creators and influencers.
It lets brands analyze trends to design their influencer marketing campaigns more efficiently.
Team collaboration is a huge plus that ensures that the influencer marketing campaign bears fruit.
Incentivizing the brands for their contributions hasn’t been this simple; the platform makes it easier to pay influencers without any hectic steps.
It offers robust analytics for brands to analyze the campaign statistics to measure the ROI.
The highs and lows of using influencers to boost your e-commerce business
Before designing an influencer marketing strategy for brands or using influencers to boost e-commerce sales, it’s vital to know the good and bad parts of the strategy.
Let’s shed some light on the highs and lows of utilizing influencers for e-commerce businesses:
The advantages of using influencers to boost e-commerce business growth
Here we go:
Brand visibility: One of the major benefits of using Influencers for e-commerce marketing is that they have established audiences that listen to them. Partnering with the right influencer can expose your e-commerce business to thousands or millions of potential customers, increasing brand awareness and visibility.
Targeted audience: E-commerce success comes when the e-commerce brand understands the target audience well and makes marketing strategies accordingly. Influencers usually cater to a specific niche audience. Therefore, by collaborating with influencers whose followers match your target demographic, e-commerce brands can significantly reach the right audience that might be interested in their products.
Authentic experience: Conversion is tied to authenticity and trust. When influencers genuinely use and recommend your product, it feels more like a trusted suggestion than a direct advertisement, fostering trust and credibility with their followers.
Higher engagement rates: Influencers often generate higher engagement rates than traditional ads. This phenomenon occurs because their followers are quite invested in their favorite creators’ lives, so they take action when influencers suggest they try something out.
Cost-effective marketing: Usually, there aren’t many types of influencer marketing. However, the term “micro-influencers” has popped up lately. The concept allows comparatively smaller creators and influencers with niche accounts and engaged audiences to work directly with brands, ensuring affordable alternatives to pricey PPC or social media ad campaigns. Plus, influencer marketing makes it easier for smaller e-commerce businesses to enjoy low-cost advertising facilities.
Most influencers are skilled content creators and can produce visually appealing and engaging content for your brand, such as social posts, video reviews, or product tutorials, which can boost e-commerce business sales.
The disadvantages of using influencers to boost e-commerce business growth
There are some hiccups to keep an eye on before going all in on influencer marketing:
Affordability issues: Influencer marketing is not all sunshine and rainbows. While micro-influencers can be affordable, collaborating with top-tier influencers can be expensive, especially for small e-commerce businesses. So, there are always affordability issues for newbies.
Little to no control over content: Usually, brands that work with influencers give their suggestions on product placement or mention it in the content. However, they still have limited control over how the product is displayed or presented in the content. So, it’s quite clear that e-commerce brands must rely on influencers to present their products in the content.
Campaign authenticity: The authenticity of the offers matters a lot in the conversion. If an influencer promotes too many products or only collaborates for financial gain, their recommendations can feel less genuine, leading to skepticism among followers and lower trust in the promotion. It can massively impact the ROI of the influencer marketing campaign for the brand.
Hard to track campaign ROI: One of the challenges influencers face is measuring the campaign’s effectiveness. Unlike direct sales channels, the return on investment (ROI) from influencer marketing isn’t always immediately clear or quantifiable.
Fake social media followers: Some influencers purchase social media followers to make an impact, but they cannot generate any traction with it. The artificially boosted follower counts using bots or fake accounts don’t last long, as sometimes social platforms crack down on those fake followers or remove inactive accounts.
Let’s conclude by explaining how to set up winning influencer campaigns!
Finding the right match for your brand is the secret sauce to setting up winning influencer campaigns.
There are three fundamental points that play a pivotal role in making any influencer marketing campaign a success, which are:
Understanding the brand’s strengths
Team up with the best influencer to work
Create an irresistible offer for the audience
Things start to roll when the conditions mentioned above are properly met in an influencer marketing campaign.
In every e-commerce brand’s journey, there comes a point where they have to decide whether to check out the influencer marketing platform or to find the influencer off the platform.
There is no right or wrong way of doing influencer marketing. However, some credible influencer marketing platforms do vetting before adding influencers to their network, which speeds up the process.
However, before deciding, one can always analyze the influencer’s content, publicly available statistics, engagement, and branding.
Remember that most brands opt for influencer marketing over other advertising mediums because it’s still underpriced compared to traditional online advertising.
Moreover, relevance is yet another essential angle to pay close attention to – if the e-commerce product line isn’t relevant to the influencer or their audience, the campaign will fall flat. So, bear that in mind when launching an influencer marketing campaign.
FAQs about e-commerce influencer marketing
Here are the commonly asked questions about e-commerce influencer marketing:
Is influencer marketing B2B or B2C?
Generally, influencer marketing is done to reach out to the audience of the influencer. Brands want to cash in on the traction influencers get on social media, which means targeting the audience. So, it’s safe to say that it’s B2C in most cases.
What is an e-commerce influencer?
An e-commerce influencer is a social media creator who has managed to create a brand persona around e-commerce. Plus, this creator must have a sizeable audience, at least on a single social media platform, to be qualified as an influencer.
How does B2B influencer marketing work?
B2B influencer marketing refers to the influencer marketing strategy that revolves around targeting businesses, unlike B2C influencer marketing, in which the influencers’ followers are the target audience.
What is the best influencer marketing platform for B2B?
ContentStudio does a pretty good job of finding influencers on social media. The feature is called “Influencer discovery,” which lets users find influencers in the niche.