Category: URL basics

Read blogs covering everything about URLs – optimization, tracking, structure, and best practices for smarter marketing.

  • What is URL hijacking: Different forms of typosquatting, consequences, & prevention techniques

    What is URL hijacking: Different forms of typosquatting, consequences, & prevention techniques

    Picture this: you’re hurrying to type your desired website’s address, but unfortunately, you hit the wrong key. What seems like a tiny slip becomes the cue for a scammer. 

    This is the problem of URL hijacking, where unnoticed typos in our favorite URLs lead us straight into danger. It may seem unlikely, but studies show that the top 3,264 domains alone are targeted by roughly 281 typo variants each, on average.

    Now, imagine the consequences: identity theft, drained bank accounts, brand reputations collapsing, all triggered by a single mistyped letter. 

    The agitation here is real, and the numbers don’t lie: around 68% of phishing sites rely on brand imitation, like misspelled domains.

    But don’t worry, we’ve got some good news for you!

    In this post, we’ll explore solid defense techniques for spotting, blocking, and preventing these hijacks before they happen. So let’s get started with a closer look at what exactly URL hijacking is, beginning with a quick summary of what it means when someone hijacks a web address.

    What is URL hijacking: A brief overview

    Think of browsing the web as entering the correct building number to meet a friend, but ending up at a look-alike house instead. That’s essentially what happens in URL hijacking.

    URL hijacking

    Attackers manipulate web traffic so you end up somewhere you didn’t intend to. At its core, URL hijacking (or “typosquatting”) means redirecting users or using near-identical web addresses to funnel them away from the legitimate site.

    The major objective? To exploit unsuspecting users (and search engines) for personal data theft, brand damage, or profit, typically through services disguised as the real deal.

    What is URL hijacking in cybersecurity

    When we talk about URL hijacking in the context of cybersecurity, we’re zooming in on how attackers take advantage of the web addresses you visit, i.e., the actual “links” or “locations” you type or click. 

    One frequent tactic is called typosquatting, in which an attacker registers a misspelled version of a brand’s domain (for example, “amazom.com” instead of “amazon.com”) and waits for people to land there by accident.

    Another is redirecting or manipulating DNS or redirect codes so that you believe you’re going to a trusted page, but you actually land on a malicious look-alike.

    From a user’s perspective, this means: you click a link, everything looks legitimate, but behind the scenes, you may be entering your credentials, payment info, or other sensitive data into a fake site. That’s what makes URL hijacking a serious cybersecurity threat.

    How does URL hijacking work?

    Let’s walk through how this sneaky trick happens in real life. First, the attacker sets the stage, then everything else falls into place. Here’s how the workflow typically unfolds, in a reasonably straightforward way.

    Workflow steps:

    1. Domain registration or control: The attacker registers a domain name that closely mimics a legitimate site’s address (e.g., by adding or changing a letter, swapping characters, or using a different top-level domain).
    2. Replication of look and feel: They build a website on that domain that imitates the legitimate brand’s logo, layout, colors, and content, so that casual visitors don’t notice the difference.
    3. Driving traffic: Victims arrive via mistyped addresses (e.g., entering “exampel.com” instead of “example.com”), phishing emails with the fake URL, misleading ads or links, etc.
    4. Redirection or landing: Once the user lands on the spoofed domain, they might be redirected elsewhere, asked to log in, enter payment details, download something malicious, or simply be shown ads.
    5. Exploitation or profit: The attacker gathers credentials, installs malware, hijacks sessions, steals financial or personal data, or monetizes the traffic via affiliate links or advertising.
    6. Covering tracks or scaling: They may register multiple domain variants, shift hosting, change DNS entries, or use redirection chains to evade detection and keep the scam alive.

    That’s the typical route from a simple typo or deceptive link to a full-blown hijack.

    Permanent & temporary redirects: The major culprits behind URL hijacking

    Redirects are a widely utilized tool on the web today. They are used for everything from changing domain names to rerouting traffic during maintenance. 

    But when used (or misused), especially with the wrong type of redirect, they can become a major weakness that allows someone to hijack your URLs quite easily.

    Here are the key types of redirects and how they play a key role in URL hijacking:

    • Permanent redirect (HTTP 301 / 308): This tells browsers and search engines, “this page has moved for good to this new address.” When used properly, it’s safe and clear. But if someone uses it maliciously, they can shift traffic and visibility away from your legitimate URL.
    • Temporary redirect (HTTP 302 / 303 / 307): This says “the content is temporarily at this address, but it will return.” The issue here is that search engines may get confused about which URL is the “real” one and may transfer ranking or visibility to the wrong URL. This is exactly what hijackers exploit.
    • Redirects from typos or look-alike domains: An attacker registers a domain that’s almost the same as yours (think one letter off) and sets up a redirect. Sometimes the redirect is temporary and sometimes permanent. However, the ultimate goal is to divert visitors or hijack your traffic. 
    • Redirect chains or hidden/mis-handled redirects: Multiple hops of redirects, or the use of scripts/meta refresh, may conceal where a user ends up. This increases the chances of something going wrong, getting flagged, or getting hijacked.

    In short, you must make sure you’re using the correct type of redirect for your purpose, and monitoring any unexpected ones. This is because misused temporary or permanent redirects are often the gateway to unauthorized traffic takeover.

    Various forms of URL hijacking: Common methods listed

    URL hijacking isn’t just one simple trick! There are several different practices attackers use to redirect or steal traffic. 

    Here’s a look at the major ones:

    Typosquatting/Brandjacking

    This happens when someone registers a domain name that’s almost identical to a trusted one, maybe one letter off, a plural version, or a different top-level domain (say “.net” instead of “.com”).

    The goal is that users make a simple mistake and end up on the fake site instead of the real one. Once there, the fake may mimic the real site’s design, tricking you into entering login details or giving up personal info.

    Domain hijacking

    Here, the attacker takes control of the actual domain name from the rightful owner, for example, by getting access to the registrar account or exploiting lax domain transfer controls. 

    The main aim is to redirect all traffic meant for the real domain to a malicious site or to claim the domain for themselves. It’s especially dangerous because your brand or site might be “you,” but the traffic goes somewhere completely different, under someone else’s control.

    DNS hijacking/poisoning

    In this method, instead of attacking the domain name itself, the attacker corrupts the DNS lookup process, i.e., the system that translates your typed address into an IP address. 

    They insert false DNS records so that when you type a valid URL, you’re routed to a malicious server instead. Since your browser shows the correct URL, many users don’t notice anything’s wrong until it’s too late.

    Malware-based browser hijacking

    This one doesn’t always involve domains or DNS. Instead, malware or browser add-ons modify your browser settings (homepage, search engine, or extensions), redirecting you or exposing you to malicious content. 

    For instance, you click what appears to be a normal link, but a malicious extension changes the destination behind the scenes.

    Malicious redirects

    These are simpler but pretty effective. You arrive at a webpage (maybe by typo, click, or link) and are immediately or slowly redirected through one or more intermediate sites to a final malicious destination. 

    It might be designed to steal credentials, serve ads, or install malware. This method often overlaps with the others (DNS, domain, or browser hijacks), but the key is the redirect chain itself.

    The consequences of URL hijacking: Severe dangers & impacts

    When someone hijacks your URLs, it’s not just a harmless annoyance; it can lead to serious fallout for both individuals and organizations. Let’s walk through the main risks you’ll want to keep an eye on.

    Theft of sensitive information

    When a hijacked URL redirects you to what looks like a legit site, you might end up entering usernames, passwords, credit card details, or other personal data. This kind of data capture sits at the heart of many phishing-based URL hijacks.

    Once attackers have that info, they can commit identity theft, access financial accounts, or carry out further attacks seamlessly.

    Financial losses for businesses

    For companies, the impact extends far beyond a single user being defrauded. A hijacked domain or URL can redirect traffic meant for you to someone else’s site, leading to lost revenue, diverted customers, and the cost of recovering systems. Plus, when customer trust is broken, the long-term hits can be even worse.

    Malware installation

    Some hijacking schemes involve more than just redirecting users. They may lead to malicious downloads, drive-by installs, or the execution of hidden browser scripts. 

    In other words: you click a link, land on what looks like the right page, and boom. You’ve got malware quietly running in the background.

    SEO damage

    Finally, if your domain or URLs are hijacked, your search engine standing can take a hit. Traffic gets diverted, link equity gets lost, and search engines may flag your site for suspicious behavior. All of this can severely hurt your rankings and visibility.

    So with these risks in mind, it’s clear why URL hijacking is something you need to take seriously. Up next, we’ll look at how to prevent these kinds of attacks and protect your brand and users.

    How to prevent URL hijacking: Protection & mitigation techniques

    Protecting against URL hijacking isn’t about one silver bullet; it’s more like putting together a toolbox of good habits, clever tech, and proactive monitoring. 

    Here’s how you can build that protection together.

    Be vigilant

    Always keep your eyes open for anything odd, such as unexpected domain variations, sudden traffic drops, or links that look slightly off. Training your team and even your users to double-check the URL before entering credentials or clicking unknown links is a simple but powerful step.

    Use reliable security software

    Installing and maintaining effective security software, such as firewalls, anti-malware, and endpoint protection, can help block malicious sites, stop compromised redirects, and alert you to any suspicious activity. Keeping everything patched and up-to-date makes a big difference.

    Enable multi-factor authentication (MFA)

    Even if someone lands on a spoofed site and steals a password, MFA adds another layer of defense. The attacker still needs that second factor (a code, token, etc.) to breach in fully. It doesn’t stop the hijack entirely, but it reduces the damage quite well.

    Monitor domain variations

    Register common misspellings or look-alike domains of your brand before someone else does, and keep an eye on newly registered domains that resemble yours. This proactive move can block hijackers at the starting line.

    Monitor website traffic & backlinks

    If you notice a surprising drop in traffic or strange links pointing to domains you don’t recognize, that could be a sign someone’s hijacked your URL or is redirecting your traffic. Things like backlink monitoring and domain name checks are pretty helpful in this case.

    Use secure DNS providers

    Choosing DNS services with protections (such as DNSSEC, filtering of malicious domains, and monitoring) helps prevent someone from tampering with your DNS records or redirecting your site behind your back.

    In complex environments, especially cross-border setups, an IT audit Mainland China can also help identify systemic risks across hosting providers, DNS settings, and vendor access.

    URL hijacking vs. URL phishing vs. URL masking vs. URL filtering

    Here’s a friendly breakdown of how these terms differ from each other, so you can spot exactly what’s going on.

    TechniqueWhat it is (definition)Key purposeHow to recognize it
    URL hijacking
    Redirecting or hijacking legitimate URLs to send traffic elsewhere.
    Attackers aim to steal traffic, credentials, or hijack brand identity or reputationYou expect to go to site A, but you’re taken to site B. The domain looks similar, or a redirect happens
    URL phishingUsing deceptive URLs (often in emails or links) that mimic a trusted source to trick someone into giving up sensitive info.To steal login passwords, financial info, or trigger malwareLink says it’s “yourbank.com/login,” but it actually points somewhere else. An email template requests that you click the link.
    URL masking (or cloaking)Displaying one URL in the browser while loading content from another URL behind the scenes.Can be used legitimately for branding/affiliate links. But also abused for deceptionThe address bar stays on “brand-site.com,” but the content is served from a completely different site. The URL doesn’t change as you navigate
    URL filteringA defensive tool: blocking or allowing access to URLs based on rules, categories, or threat intelligence.To protect users and networks from malicious or off-policy web trafficOn your network, you try to visit a site and get “Access denied” or see a block page. The admin controls which URLs are allowed

    Wrapping up

    URL hijacking might sound like a technical issue, but as we’ve seen, it’s a real threat that can harm your data, business, and online reputation. From typosquatting and DNS hijacking to malicious redirects, attackers keep finding new ways to trick users and steal information. 

    The good news is that with a bit of awareness, the right security habits, and smart innovative tools, you can stay one step ahead. Always keep an eye on your domains, monitor redirects, and use secure DNS providers. 

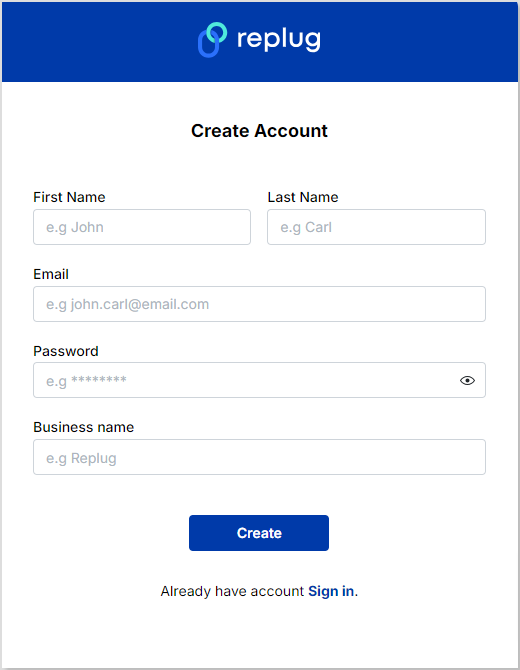
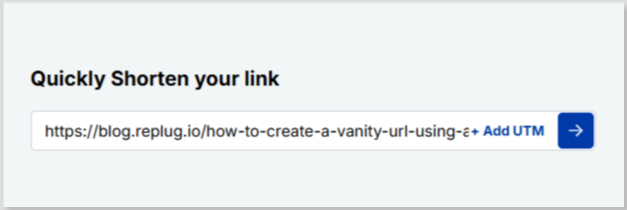
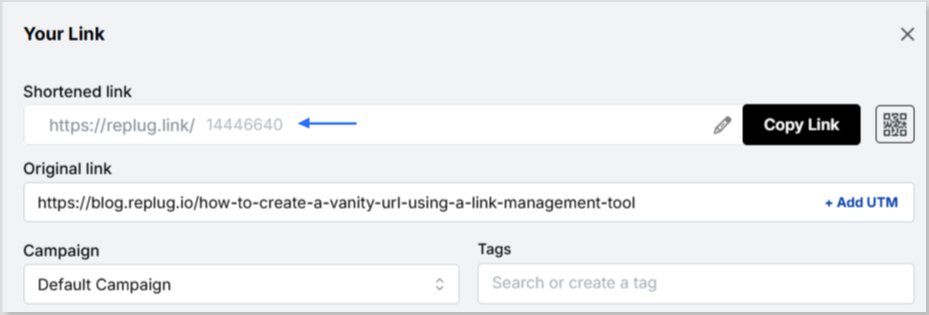
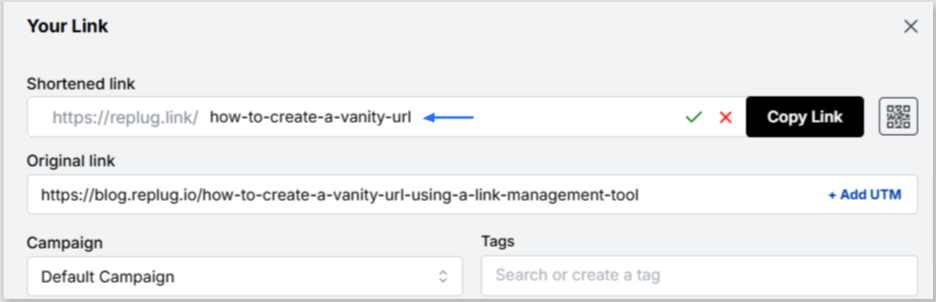
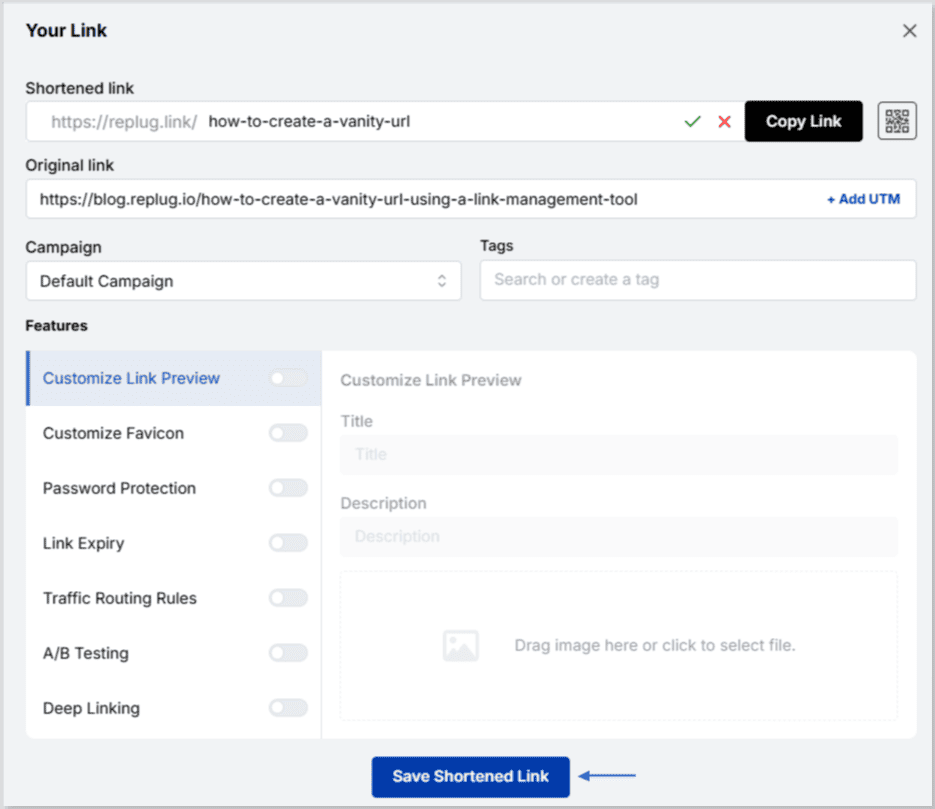
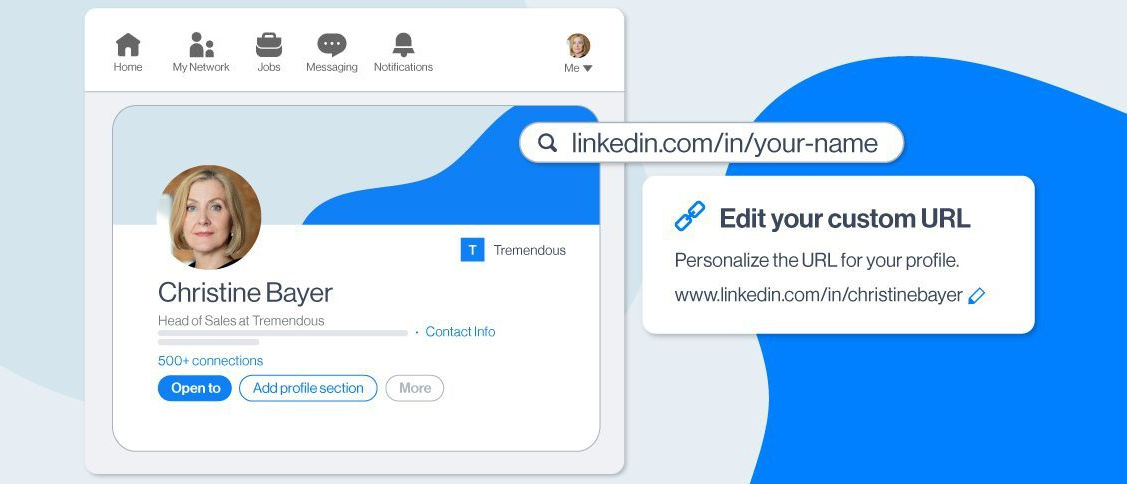
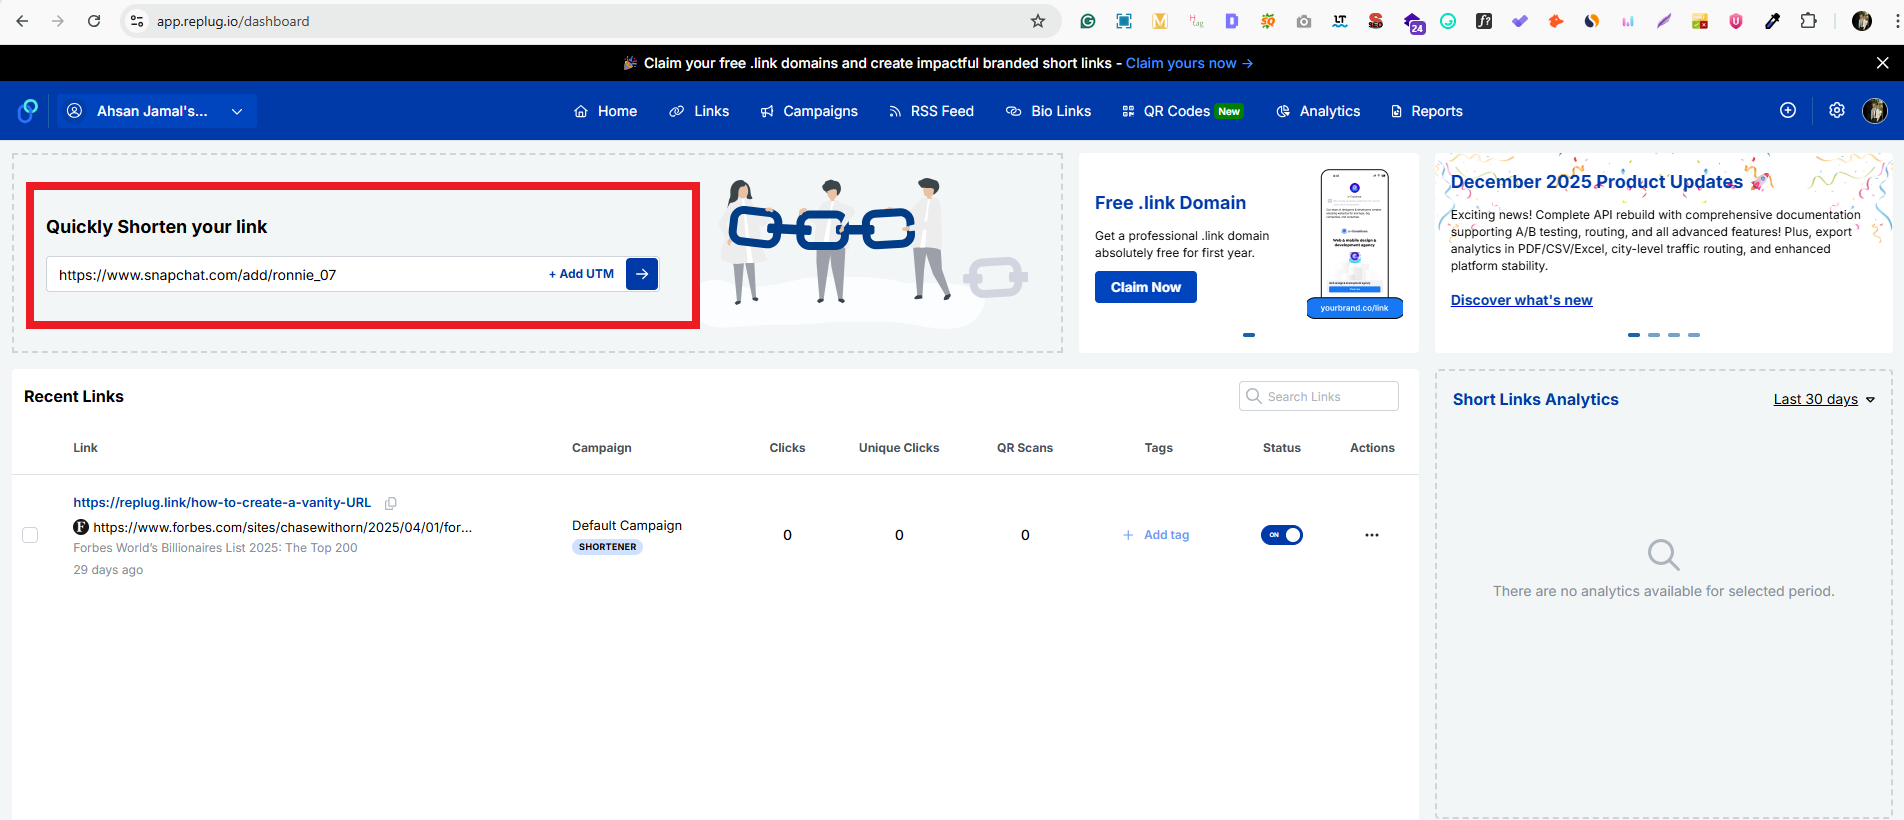
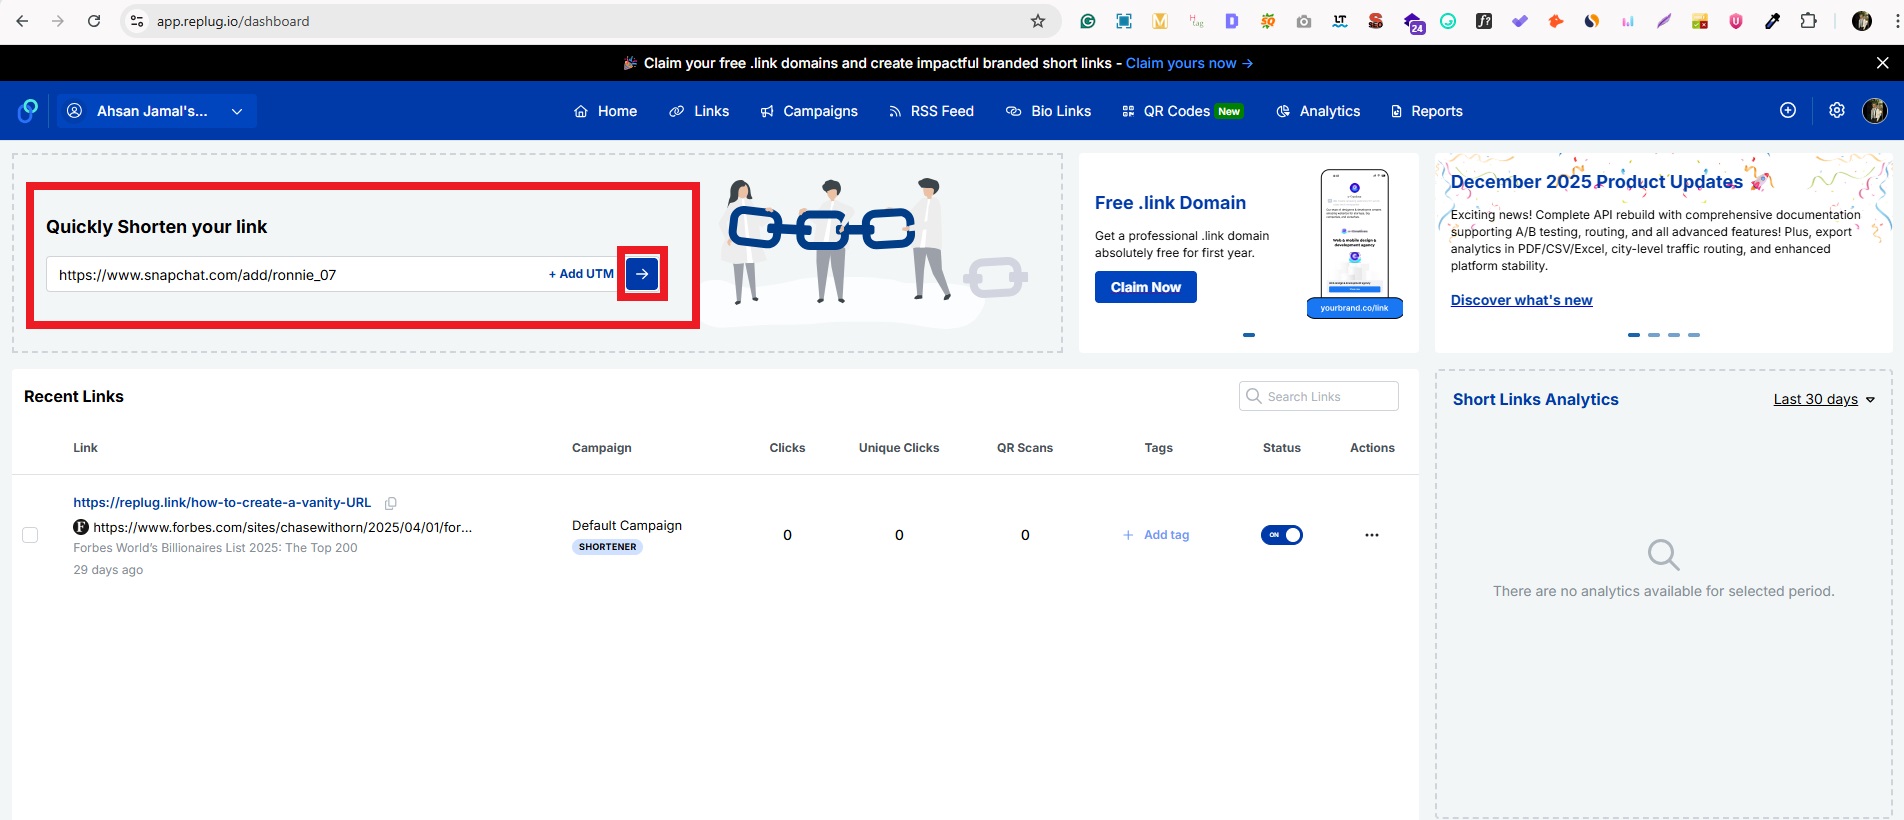
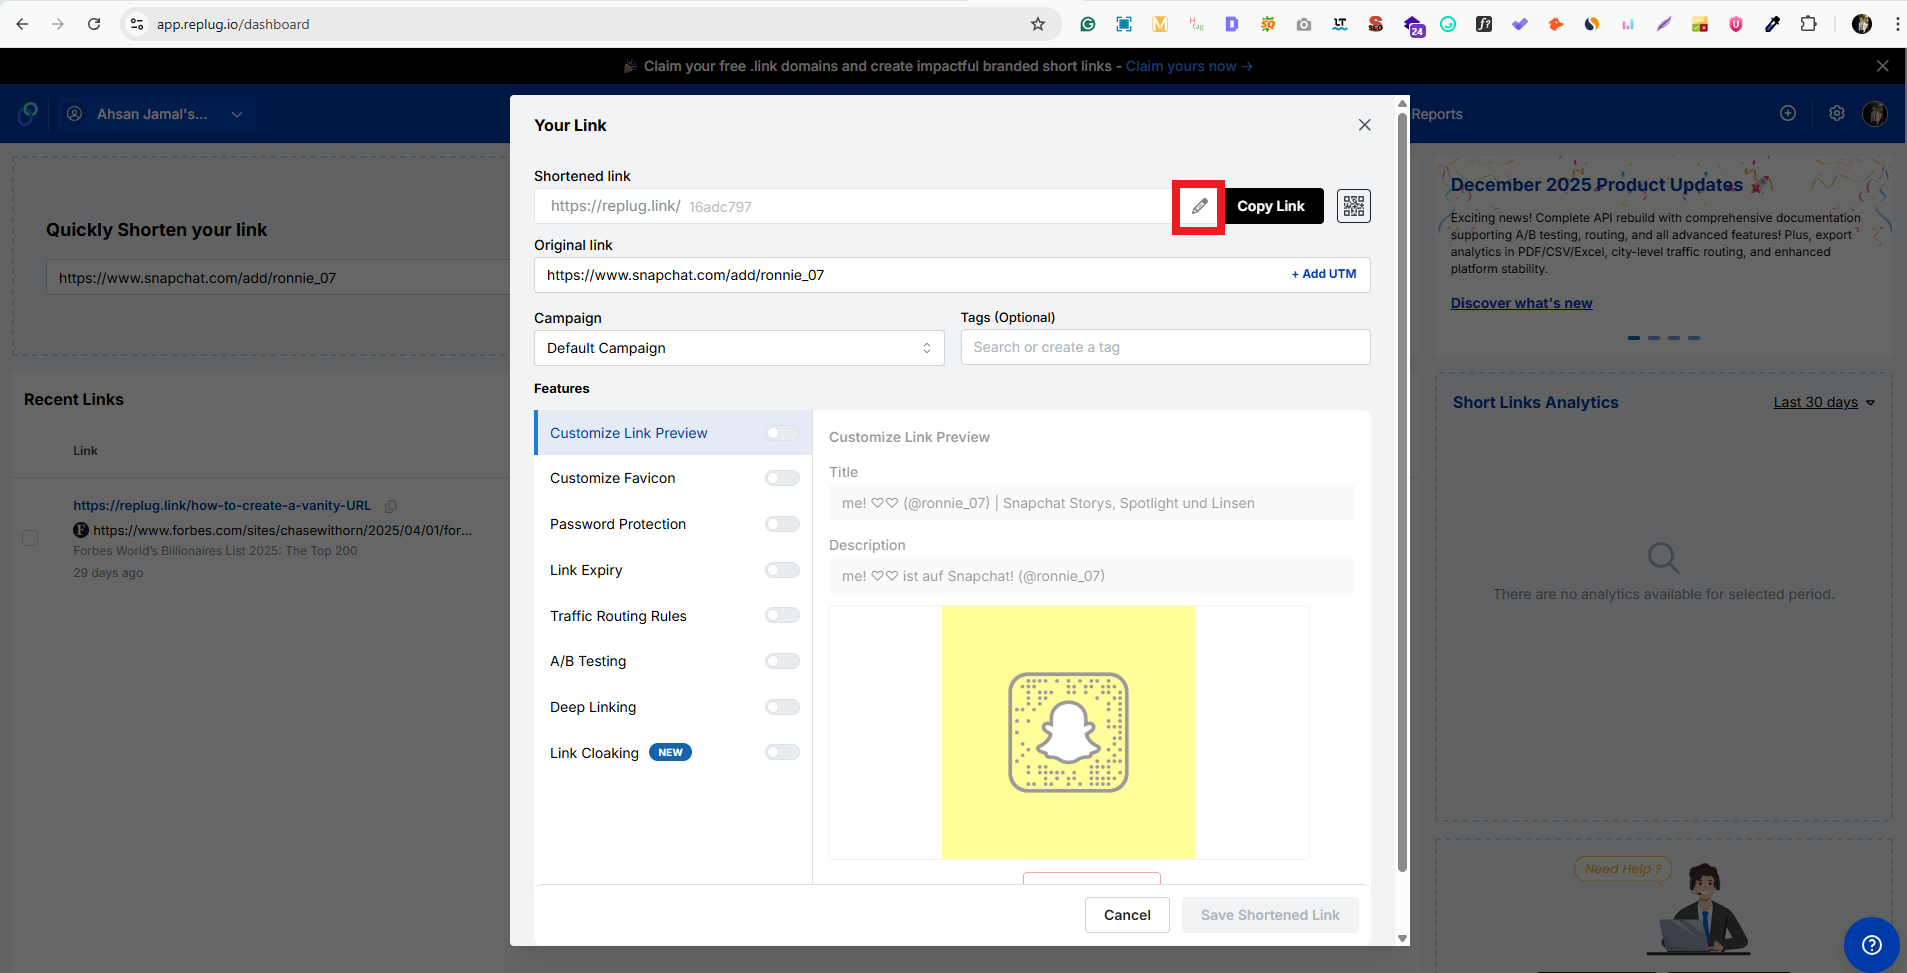
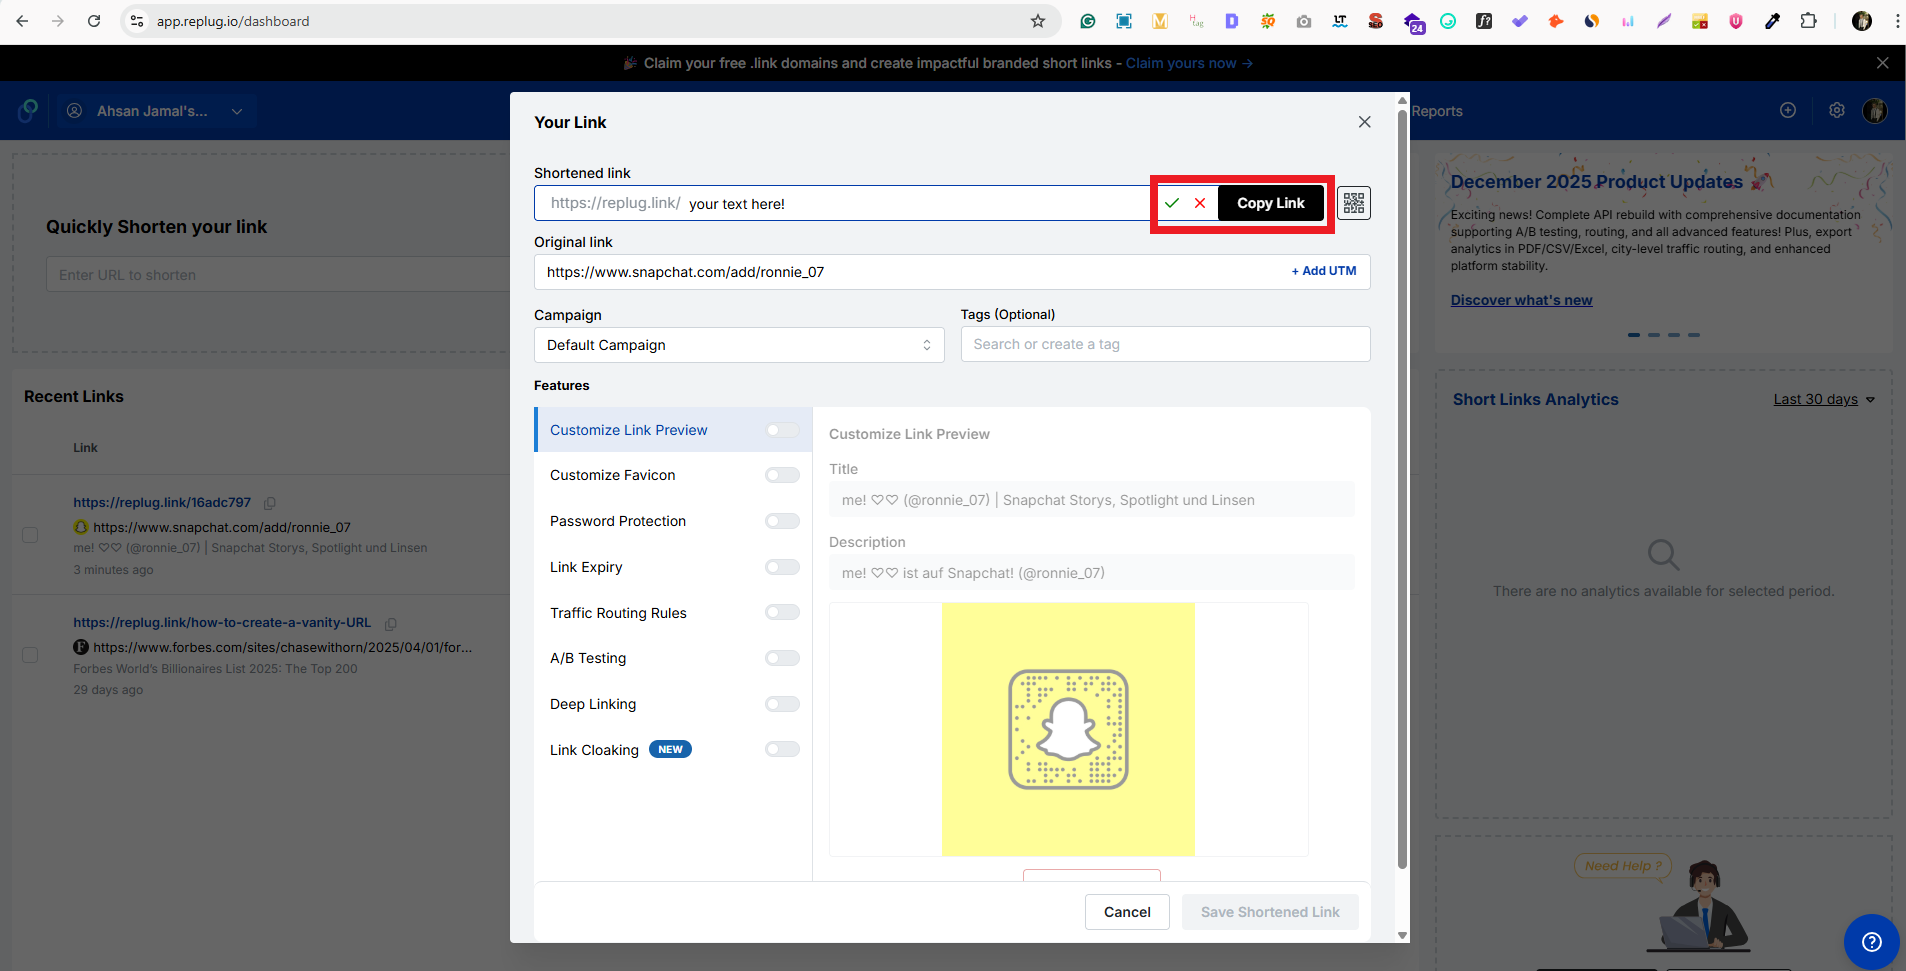
    And if you’re looking for a safe, reliable, and professional way to shorten long URLs, give Replug.io a try today. It’s one of the best custom URL shorteners out there to shorten links hassle-free, built with both branding and security in mind.

    Frequently asked questions

    What’s another name for URL hijacking?

    Another name is “typosquatting”, which often involves registering misspelled versions of a legitimate URL to redirect traffic.

    Why does URL hijacking occur, and is it bad?

    It occurs because attackers want traffic, credentials, brand misuse, or ad revenue. Yes, it’s a very bad practice because it steals visitors, damages reputation, and enables further attacks.

    What is an example of typosquatting?

    Here is an example of typosquatting:

    For instance, someone registers “faacebook.com” instead of “facebook.com”, so users who mistype their URL land on the fake site instead of the original one.

    How do I know if I have a browser hijacker?

    If your browser’s homepage, search engine, or new-tab settings change without your approval, or you’re frequently redirected to weird sites, you likely have a browser hijacker.

    What is the difference between typosquatting and prepending?

    Typosquatting uses misspelled domains to trap users. Whereas prepending involves adding extra characters or domains (like “search.legit-site.com.fake.com”) to trick viewers into thinking they’re on a trusted site.

    When are 301 and 302 redirects used?

    A “301” redirect is used when a page has permanently moved, while a “302” redirect indicates a temporary redirect. Improper use of these redirect types can cause hijacking issues with search engines.

    What is the difference between URL hijacking and domain hijacking?

    URL hijacking redirects traffic from a URL variant to a malicious destination, while domain hijacking involves taking control of the actual domain registration or DNS settings without permission.

    How do hackers use URL hijacking?

    Hackers register look-alike domains, set up malicious redirects, or clone sites. Victims who click or mistype end up on those sites where credentials are stolen or malware is deployed.

    What are paid search hijacking and display hijacking?

    Paid search hijacking happens when someone bids on your brand’s keywords and appears in your ad space. On the other hand, display hijacking occurs when someone uses your brand’s ad creative on-site to redirect or steal clicks.

    Are typosquatting and cybersquatting the same thing?

    Not exactly! Typosquatting is actually a subset of cybersquatting. Cybersquatting broadly refers to registering domains that mimic trademarks to profit from or misuse them, while typosquatting specifically exploits typing errors.

  • Easy guide for fixing URL blacklist

    Easy guide for fixing URL blacklist

    What is URL Blacklist?

    A URL blacklist is a list of website addresses (URLs) that are identified as potentially harmful or malicious by security organizations, internet service providers, or other entities. When a website is blacklisted, it is often blocked or flagged by web filters and security software to prevent users from accessing it.

    The URLs listed on these blacklists are often identified through automated scans or reports from users who have encountered suspicious websites. URL blacklisting is done to protect the end-user’s privacy, sensitive information, and important data against hacking attempts or malware attacks.

    Website owners, bloggers, and digital marketers rely on several channels and attention sources, such as social media, email lists, blogs, online communities, and advertising.

    Note: If you’re looking for a comprehensive link-management platform to help coordinate all those channels, check out Replug.io!

    However, most of these channels drive the audience to the website for conversion, no matter how long it takes to build a relationship between a brand and the prospective customer.

    No wonder entrepreneurs, bloggers, and affiliate marketers pay close attention to setting up their websites along with sales/landing pages, blog sections, and email newsletter opt-in forms.

    It’s no surprise that a well-designed and optimized website is crucial to your digital marketing campaign’s success.

    Speaking of website optimization, URLs play a key role in optimizing the website pages. Therefore, it’s essential to discuss URL blacklisting, and more importantly, how to fix the URL blacklisting issue.

    If you have no idea about URL or website blacklisting and you’re confused right now, don’t worry about it, because we’ve got this covered.

    Pay attention to every section of this very article.

    Is URL blacklist dangerous?

    Are you curious whether or not URL blacklisting is bad for your business? Always remember that businesses grow on relationships and reputation. A brand needs to establish strong brand positioning in the audience’s mind.

    Since URL blacklisting destroys a brand’s reputation, online reach, and business development ability to the core, it’s surely not something any brand or business owner would want to be associated with.

    More importantly, if a brand or entrepreneur somehow ends up getting their URLs blacklisted on search engines or social media platforms, it affects their communication, reach, and marketing. I do not doubt that URL blacklisting is quite dangerous for any business or personal brand.

    The impact of URL blacklisting has been discussed in detail further in the article. But before that

    What do blacklist warning messages look like?

    url-blacklist-safe-browsing-warning-chrome

    When websites or some of the website URLs are blacklisted, a warning message may appear in web browsers regardless of the operating system. These warning messages typically alert the user that the website is potentially dangerous, and advise them to proceed with caution or avoid the site altogether.

    Here are some common URL blacklist warning messages:

    This site may be harmful to your computer

    This message is often displayed by web browsers such as Google Chrome and Mozilla Firefox when a website is detected as containing malware or other potentially harmful content.

    The site ahead contains malware

    This message is also displayed by some web browsers when a website is detected as affected by malware.

    This website has been reported as a phishing site

    This message is displayed by some web browsers when a website is detected as being a phishing site.

    This connection is not private

    This message is displayed by web browsers when a website’s security certificate is invalid or expired.

    How does URL blacklist affect your website and business?

    URL-Blacklist-Warning

    Being on a URL blacklist can have serious consequences for a website and brand. Here are 9 ways in which URL blacklisting can impact your website and businness:

    1. Decreased visibility in the SERP

    When a website is blacklisted, it may be removed from search engine results in pages or pushed down in rankings. This can lead to a significant decrease in traffic to the website, as users are less likely to find it through search.

    2. Loss of trust by users

    When a website is flagged as potentially dangerous, users may lose trust in the website and its content. This can lead to a decrease in engagement, as users may be hesitant to interact with the website or share its content.

    This loss of trust could result in customers seeking out alternative providers and ultimately harm the website’s long-term sustainability. Losing customers’ trust is the last thing any brand or e-commerce website would want to happen.

    3. Brand reputation at stake

    If your website is associated with malware or other malicious activity, it can damage your brand’s reputation and credibility. This can have a long-term impact on your business, as consumers may be less likely to do business with you in the future. As users may view the website as untrustworthy, which could harm the website’s brand image and make it challenging to establish trust with potential customers.

    4. The security risk for visitors

    If your website is blacklisted due to malware or other security issues, it could pose a risk to your visitors. Malicious software can infect users’ devices or steal personal information, which can lead to legal issues and also damage your brand’s reputation.

    5. Revenue losses

    If your website relies on advertising or e-commerce, being blacklisted can result in a significant loss of revenue. Advertisers may be hesitant to place ads on a potentially dangerous website, and customers may be less likely to make purchases if they don’t trust the website.

    6. Difficult to get rid of

    Getting off a URL blacklist can be a long and difficult process. You may need to identify and remove all malicious content from your website, and then submit a request to the entity that added you to the list. This process can take time, and during that time your website may continue to experience negative consequences.

    7. Decrease website traffic

    One of the most painful things that happen to a website is when the traffic graph goes down for whatever reason. Once a website is blacklisted, it is likely to be excluded from search results and flagged as potentially harmful by web browsers, leading to a decrease in website traffic. Users may be warned about accessing the site or redirected to a warning page, which could deter them from visiting the site altogether.

    8. Reduced conversion rate

    If a website’s traffic and credibility are affected, its conversion rate, i.e., the number of visitors who take a desired action, such as making a purchase or filling out a form, is likely to decrease. This could harm the website’s revenue and profitability.

    9. Affect organic visitors

    Organic website traffic is an essential source of visitors for millions of websites around the web. Organic visitors are users who find a website through search engine results, and when a website is blacklisted, it is likely to be removed from search engine results pages. This could significantly affect the website’s visibility and reduce the number of organic visitors.

    Also Read: 7 Ways to Increase CTR for Better Conversion on the Website

    How blacklisted URL affects website SEO performance?

    SEO

    URL blacklisting comes with loads of problems for a brand or organization. It could be fatal for brand reputation and SEO performance if not fixed immediately.

    Search engine optimization has become extremely competitive. When a website gets expelled from the good books of search engines, it’s not easy to crawl back to the same position.

    Once something goes wrong, it takes sheer hard work and a lot of time to win the same position back in the SERP.

    Here’s how blacklisted URLs affect a website’s SEO performance:

    1. Triggers traffic loss

    One of the most devastating issues webmasters and companies face when their URLs get blacklisted is that their website traffic takes a hit. It results in a revenue decrease, no matter the size or scale of the organization. More website visitors mean more revenue, it’s that simple.

    2. Rankings start to drop

    Since website page rankings are a crucial part of the SEO process, URL blacklisting causes the ranking to drop in search engines. The reason behind this issue is that search engines want to provide their users with the best experience when they’re using them. Any turbulence during the search process that causes the end-user to get frustrated is a serious matter for search engines.

    3. Decrease in inbound links

    People want to link to authoritative and trustworthy websites. When a website’s URL gets blacklisted by Google, it eventually sends out a negative message to others in the industry. Nobody wants to link out to a spammy and blacklisted website, because every company or website wants their users to have a great experience when they browse their website or reading their content.

    4. Bad user experience for visitors

    When a website’s URL is blacklisted by Google or any other search engine, it directly affects the user experience. The web browsers may block those websites with blacklisted URLs and anti-virus softwares to start notifying the visitors with cautionary messages forcing users to exit the websites for safety purposes. Therefore, it results in a bad user experience for the end-user.

    5. Dip in the website conversions

    Nobody wants to spend money using their credit card or PayPal account if there is a hint of malware or malicious activities on the website. While URL blacklisting affects the SEO performance of the website, it also decreases the website conversion rate very quickly.

    Also Read: 15 proven Facebook SEO techniques to try in 2026

    How does a website URL get blacklisted?

    spyware-computer-hacker-virus-malware-concept

    URL blacklisting is the process of adding a website’s URL to a blacklist filter, usually maintained by search engines, web browsers, or anti-virus softwares, due to various reasons such as spamming, malware distribution, or other malicious activities.

    It’s vital to understand a website ends up getting flagged by search engines, web browsers, or anti-virus softwares. So I came up with a list of reasons why a website’s URLs get blacklisted:

    1. Phishing Attacks

    Phishing attacks involve tricking users into providing sensitive information such as usernames, passwords, or credit card details through fraudulent websites or emails. If a website is found to be hosting a phishing attack, its URL may be blacklisted to protect users from falling victim to the scam.

    2. SEO Spamming

    SEO spamming involves manipulating search engine rankings through various unethical practices such as keyword stuffing, cloaking, and link spamming. If a website is found to be engaging in such practices, search engines may blacklist its URL to maintain the quality and relevance of search results.

    Also read: How to generate SEO-friendly URLs that rank higher and attract clicks

    3. Unsafe Plugins/Libraries

    Website owners often use third-party plugins or libraries to add functionality to their websites. However, if these plugins or libraries are found to have security vulnerabilities, they can be exploited by hackers to gain access to the website’s server. In such cases, the website’s URL may be blacklisted until the vulnerabilities are fixed.

    4. Website Defacement

    Website defacement refers to the unauthorized modification of a website’s content or appearance. This could be done for political, ideological, or malicious reasons. If a website is defaced, its URL may be blacklisted until the website owner restores it to its original state.

    5. Trojan Horses

    A Trojan horse is a type of malware that disguises itself as a legitimate program or software. Once installed on a computer, it can perform various malicious activities, such as stealing sensitive information or damaging files. If a website is found to be hosting a Trojan horse, its URL may be blacklisted to prevent users from unknowingly downloading the malware.

    6. Malware Codes

    malware

    Malware code is a type of malicious software designed to infect computers and cause harm. If a website is found to be hosting malware code, its URL may be blacklisted to prevent users from being infected.

    Also Read: What Does HTTP 302 Code Means For URL Shorteners?

    7. Vulnerabilities in the server

    Server vulnerabilities can be exploited by hackers to gain unauthorized access to a website’s files and data. If a website’s server is found to have vulnerabilities, its URL may be blacklisted until the vulnerabilities are fixed.

    8. Suspicious download links

    malware risks

    If a website includes suspicious download links that lead to potentially harmful software or files, its URL may be blacklisted to protect users from downloading such content.

    9. Malicious content

    If a website is found to contain malicious content, such as viruses or spyware, its URL may be blacklisted to prevent users from being infected.

    10. Downloading unwanted programs

    If a website prompts users to download unwanted or potentially harmful programs, its URL may be blacklisted to protect users from downloading such programs.

    11. Information scraping

    Information scraping involves the unauthorized harvesting of data from websites. Using reliable web scraping software ensures compliance with legal and ethical guidelines, helping avoid copyright violations and potential blacklisting. If a website is found to be scraping information from other websites without permission, its URL may be blacklisted for violating copyright and intellectual property laws.

    How do you check if Google has blacklisted you?

    There are clear signs and indications to figure out whether or not Google has blacklisted or penalized your website. I’ll dig deeper into this and try to help you out by sharing what I know.

    Here are the indicators to look out for when checking if Google has blacklisted your site:

    1. Page removal from the search index

    One of the clear indicators of Google blacklisting a URL or a set of URLs from the same website is the removal of the website’s pages from its search index. What it means is that your site is no longer appearing in Google search results.

    This could be a sign that Google has blacklisted your website, possibly due to a violation of Google’s Webmaster Guidelines.

    2. The huge dip in organic traffic

    Website owners keep an eye on the traffic numbers of their websites. As soon as they notice a significant drop in your website’s organic traffic (without any notification), it could be due to Google blacklisting the website for some reason.

    This could happen if Google has removed your website’s pages from its search index or if your website’s ranking has been penalized.

    3. Manual penalty for the site

    Manual penalty could lead to up to 90% drop in traffic or the website URL getting blacklisted. If you receive a manual penalty notification in the Google Search Console, it means Google has identified a violation of its Webmaster Guidelines on your website.
    This could be due to black hat SEO techniques, such as keyword stuffing, misleading content, or link-building schemes. A manual penalty can result in your website being removed from Google’s search results or a significant drop in organic traffic.

    4. Malware notification in the Google SERP

    If a website has been infected with malware, Google may detect it and warn users in its search results with a notification that the website may be harmful. The notification may look like this: This site may harm your computer.” This can lead to a decrease in traffic and a damaged reputation.

    If Google has identified malware on your website, it could lead to URL blacklisting. If the malware notification appears with your URLs in the SERP, ask your website host to scan your website for malware and hire a website developer to do code inspection for code injection. It’s always best to change the web hosting if the problem persists.

    How to protect the site from being blacklisted?

    URL-Blacklist-Protection

    Building an optimized, well-designed website for marketing isn’t enough. Often, it’s vital to protect a website property from fatal attacks that could turn out to be a pain in the butt if not taken seriously. While at the same time, it’s easy to get caught up in other marketing strategies which leads to putting website security and SEO techniques often on the back burner.

    If you need a precise plan of action to avoid URL blacklisting, then the following 10 tips would come in handy for you:

    1. Use a secure web hosting service

    Choose a web host that is reliable and provides a secure environment for your website. This can help prevent your website from being compromised or hacked, which can lead to blacklisting.

    2. Choose a high-quality theme & plugins

    Make sure your website code and layout are clean and optimized for search engines. It can help prevent any issues that may cause search engines to blacklist your website. A premium, high-quality WordPress theme would do the job for you. Secondly, use only genuine and premium plugins/themes on your website to ensure that they are secure and optimized for search engines. Using pirated or un-trusted plugins/themes can lead to security risks and blacklisting.

    3. Improve your website security

    Use a reputable website security tool to scan your website to ensure it is free from any malicious code or scripts. Moreover, monitor your website for any suspicious activity and take action immediately if you suspect any security issues. This can help prevent your website from being compromised or hacked.

    4. Assign user roles and permissions

    Assign user roles and permissions to ensure that only authorized users have access to your website. This can help prevent unauthorized access, which can lead to security risks and blacklisting.

    5. Install an SSL certificate

    Use HTTPS encryption on your website, meaning buy and install an SSL certificate on your domain. Install an SSL certificate on your website to ensure that all communication between your website and users is encrypted and secure. This will help prevent security risks and blacklisting. Contact your domain and hosting provider for the SSL certificate installation.

    6. Update your WordPress edition

    It’s important to keep your website software and plugins up to date. Outdated software can be vulnerable to security threats, and updating it can help prevent your website from being compromised. Keep your WordPress edition up to date, and ensure that your website is secure and optimized for search engines. It may also help prevent site security issues that lead to URL blacklisting.

    7. Apply white hat SEO techniques

    Use only ethical and legitimate SEO techniques to optimize your website for search engines. Using black hat techniques can lead to blacklisting. Avoid using black hat SEO techniques. These tactics can include cloaking, hidden text, bulk backlinks, and other manipulative tactics that violate search engine guidelines.

    8. Limit WP login attempts

    Limit the number of login attempts on your website to prevent brute force attacks and hacking attempts. Plus, keep a strong login password for your WP admin account.

    9. Replace broken links

    Regularly check for broken links on your website and replace them to ensure that your website is functioning properly. While broken links may not lead to URL blacklisting, it sure sends out an SEO signal.

    10. Implement a DMARC policy

    Implement a DMARC policy to help prevent email spoofing and phishing attacks, and verify your configuration regularly using the EasyDMARC DMARC checker. This will help protect your domain reputation and prevent your website from being blacklisted by email providers. 25.5% of email senders who use p=none policy expect to move to stronger DMARC policy in the course of the next year which further showcase the important of using stronger email authentication standards.

    How to access website with URL blacklist warning?

    Your website browser might prompt a warning notification to exit the website or move ahead with caution. It’s always best to keep your anti-virus software active and updated just in case.

    Furthermore, try to understand the essence of the blacklist warning. Often the expiration or the absence of the SSL certificate prompts a warning message on the website. Some website visitors who have no idea about an SSL certificate, chicken out immediately.

    Similarly, if your anti-virus software warns that there is a serious threat of malware or phishing attack on the website you’re browsing, you shouldn’t move forward. Instead, try to exit the website and find an alternative website to visit.

    When to block and allow URLs?

    Before figuring out when to block or allow URLs, it’s important to comprehend how URL blocking works.

    There are levels of URL blocking. On the user level, you may install a Chrome extension for blocking the website and blacklist the website URLs you want to block. This way, no one on your PC would be able to access those URLs.

    Furthermore, there is country-level URL blocking where a governing body orders the concerned department to block a specific website on a state or country level.

    So URL blocking could be due to any reason, for instance, national security, blasphemy, rules violation, etc. The decision to block or unblock a URL depends on the case and the reason varies from case to case.

    Conclusion on URL Blacklisting

    I do not doubt that URL blacklisting is an important tool that helps protect users from visiting websites that are deemed unsafe, malicious, or contain harmful content.

    Search engines and web browsers use site filtering systems to identify and block access to such blacklisted websites, thereby preventing users from being exposed to potential security risks or malicious content.

    While URL blacklisting is an effective tool, website owners must take measures to ensure that their websites comply with search engine guidelines and do not engage in any malicious activity that may lead to URL blacklisting.

    By taking proactive steps to maintain website security, website owners can help prevent their websites from being blacklisted and ensure that their websites remain safe for users to visit.

    And if you’ve ever needed to clean up complicated, long URLs or share better performing links across campaigns, a simple way is to use a top-notch service or a reliable tool to shorten a link.

    A lot of digital marketers, bloggers, and entrepreneurs prefer using URL shorteners to share their content on social media.

    While there are so many benefits of using link management tools, one of the reasons is to hide the main URLs from suspicious users and hackers on social media.

    I hope you learned a lot about URL blacklisting and taking away a ton of value from this article.

    FAQs

    Is URL blacklist a virus?

    URL blacklisting isn’t a virus, but malicious viruses on the web server could lead to URL blacklisting in search engines. So always keep an eye on your website performance and security.

    Is a blacklist permanent?

    URL blacklisting may last until the appropriate actions aren’t taken to clean the website code or change the web hosting server to ensure a smooth and safe user experience for the website visitors.

    What does blacklist mean in security? 

    Blacklisting refers to the act of being flagged by an authority or a platform. The cybersecurity experts educate and help audience the audience on the security of websites, apps, email addresses, and social media accounts.

    What kind of websites will the search engine blacklist? 

    Any website that contains malicious viruses, phishing codes, and suspicious scripts may get blacklisted by search engines.

    How can I check if my site is blacklisted? 

    There are several ways to check the site’s blacklisting status, such as hiring a cybersecurity expert, using an online URL blacklist checker tool, and keeping an eye on the site status in your Google Search Central account.

    Are blacklisted URLs and blacklisted domains the same thing?

    Blacklisted URLs mean the specific page URLs have been blacklisted, whereas the blacklisted domains mean the complete websites have been blacklisted.

    You May Also Like:
    What Is Affiliate Link Cloaking & How To Do It?
    What is a Vanity URL and Why You Need One?
    Affiliate Link Tracking To Optimize Your Earnings

  • How to share LinkedIn URL?

    How to share LinkedIn URL?

    You can expand your professional network by sharing your LinkedIn URL with other professionals in your industry. This can lead to new business opportunities, mentorship, and collaborations. It can also help you stay informed about your field’s latest trends and developments.

    That’s why using a link management platform makes a big difference. With tools like Replug, you can brand, shorten, and track your links, so every share works harder.

    For job seekers, sharing your LinkedIn URL can be useful in the job search process. It allows potential employers to learn more about your qualifications and experience and can help to showcase your skills and accomplishments.

    For businesses, sharing a LinkedIn URL can be a useful tool for marketing. It allows businesses to promote their products or services and reach a wider audience. It also allows businesses to establish themselves as thought leaders in their industry, which can lead to new business opportunities.

    Finally, for freelancers, creatives, and entrepreneurs, sharing a LinkedIn URL can be a good way to showcase their work and portfolio. It allows them to promote their skills and accomplishments to a broader audience, which can lead to new business opportunities and collaborations.

    Let’s start by going over how to share LinkedIn URL:

    How to share LinkedIn URL in LinkedIn messages?

    On a computer device:

    Step 1: Log in to LinkedIn on your computer device and click the profile “Me” icon at the top. 

    me icon

    Step 2: Click “view profile” from the drop-down menu.

    view profile

    Step 3: Click the “more” button on your profile page, then click “send profile in a message.” 

    send profile in a message

    Step 4: Enter in the names of the people with whom you want to share your profile, and click send.

    new message

    Also read: How to Create The Perfect LinkedIn Content Strategy in 10 Easy Steps [Advanced Tactics Included]

    On a mobile device: 

    Step 1: Log in to LinkedIn on your mobile phone and tap the “profile icon” in the top left corner.

    profile icon

    Step 2: Tap “view profile” from the menu to open your profile. 

    view profile

    Step 3: Tap “three dots” next to add section button, then tap “share profile via message.”

    share profile via message

    Step 4: Enter the names of the person to whom you want to share your LinkedIn URL.

    names of persons

    Step 5: Tap the send icon to send your profile via message. 

    send icon

    Also Read: How LinkedIn Retargeting Ads Work – A Complete Guide

    How to share LinkedIn URL on other platforms?

    Follow this method to share your LinkedIn URL outside LinkedIn. It could be any social media platform other than LinkedIn. You just need to copy your LinkedIn URL and for that, follow the steps below:

    On a computer device:

    Step 1: Log in to LinkedIn on your computer device and click the profile “Me” icon at the top. 

    me icon

    Step 2: Click “view profile” from the drop-down menu.

    view profile

    Step 3: Copy the URL in the URL bar, and you’ll have your Linkedin URL. Share this URL on any platform of your choice.

    url bar

    Note: For a cleaner, more professional link, and to track how many people click it, you can run it through a trustworthy custom URL shortener.

    On a mobile device:

    Step 1: Log in to LinkedIn on your mobile phone and tap the “profile icon” in the top left corner.

    profile icon

    Step 2: Tap “view profile” from the menu to open your profile. 

    view profile

    Step 3: Tap “three dots” next to add section button, then tap “share profile via.”

    share profile via

    Step 4: Tap the copy URL button to copy the URL or share directly to your intended platform.

    copy url

    Note: You can also share your LinkedIn profile by using our LinkedIn QR code generator for free. This helps you share your profile offline as well.

    FAQs

    How to share LinkedIn URL on the resume?

    You can add your LinkedIn URL to your resume by including it in the contact section. This is typically located at the top of the resume and includes your name, address, phone number, and email address. You can add “LinkedIn: [Your LinkedIn URL]” or simply “LinkedIn: www.linkedin.com/in/[Your Profile Name].”

    How to shorten LinkedIn URL?

    LinkedIn has its own feature to shorten the LinkedIn profile URL, and you can follow these steps to shorten your URL:

    1. Log in to your LinkedIn account.
    2. Click on me icon in the top bar and select view profile.
    3. Click on the edit public profile & URL button on the right side of the top of your profile.
    4. Scroll down to the Public Profile URL section, and click the Edit button on the right side.
    5. You can customize your public profile URL by clicking on the Edit button and then changing your URL to something easy to remember and share.

    Alternatively, you can use link-shortening services like Replug’s LinkedIn link shortener to customize and shorten your LinkedIn URL . Replug helps you track your URL to see who interacted with it. It also helps you create a branded short URL to make it more memorable for your audience.

    Trending:

    How do I find my URL on Youtube?

    How To Save TikTok Videos Without The Watermark?

    How to check analytics on TikTok?

  • How to get your TikTok Profile URL?

    How to get your TikTok Profile URL?

    Are you a TikTok user looking to share your profile with others or promote your content on other social media platforms? Or maybe you’re just curious about how to access your TikTok profile link? Either way, you’ve come to the right place. 

    In this article, we’ll guide you through the process of getting your TikTok profile URL. TikTok URLs are important for building a following, sharing content, and engaging with viewers.

    By the end of this article, you’ll have the knowledge necessary to easily find and customize your TikTok profile URL, allowing you to share your content and grow your TikTok presence. And if you’re looking for a powerful tool to brand, shorten, or track your links, Replug offers everything in one platform. 

    So, without any further delay, let’s dive in and learn how to get your TikTok URL!

    What is my TikTok URL?

    A TikTok URL is a link that directs you to a specific TikTok user’s profile or video. 

    Every TikTok user has a unique URL associated with their profile, which can be shared with others to allow them to view their content or follow them on the platform. The TikTok URL for a user’s profile typically includes their username and the TikTok domain, such as “tiktok.com/@username”.

    TikTok URLs can also be used to direct viewers to specific videos on the platform. Each TikTok video has its own unique URL, which can be found by clicking on the “Share” icon on the video and selecting “Copy Link.” This link can then be shared with others or posted on social media platforms.

    How to get TikTok Profile URL?

    There are two methods to get a TikTok profile link on mobile devices.

    1. From the edit profile button 
    2. From setting & privacy

    Follow the steps below for both of the methods to easily get your profile link. 

    Also read: How to get more followers on TikTok?

    Method 1: From the edit profile button

    Step 1: Open the TikTok app on your mobile device.

    Step 2: Tap on your profile icon at the bottom right corner of the screen.

    profile-icon

    Step 3: Tap the “Edit profile” button. 

    edit-profile

    Step 4: Tap your profile URL below your username to copy your profile URL. 

    profile-url

    Also read: How To Save TikTok Videos Without The Watermark?

    Method 2: From setting and Privacy

    Step 1: Open the TikTok app on your mobile device.

    Step 2: Tap on your profile icon at the bottom right corner of the screen.

    Step 3: Tap three horizontal lines at the top right of the screen. 

    horizontal-lines

    Step 4: Tap on “setting and privacy”. 

    setting-&-privacy

    Step 5: Tap on “share profile”. 

    share-profile

    Step 6: Copy your profile link or share it directly on social media platforms. 

    copy-link

    Note: To make it even more shareable and professional, you can run that URL through a reliable link converter to shorten, brand, and track it hassle-free.

    Also read: How to check analytics on TikTok?

    How to change your TikTok Profile URL?

    Changing your TikTok Profile URL is a straightforward process. Follow these steps to change your TikTok Profile URL:

    Step 1: Open the TikTok app on your mobile device.

    Step 2: Tap on your profile icon at the bottom right corner of the screen to open your profile. 

    Step 3: Tap “Edit Profile.”

    edit-profile

    Step 4: Tap on your TikTok username.

    user-name

    Step 5: Enter a new username for your profile. Make sure it’s unique and not already taken.

    edit-username

    Step 6: Click “Save” to update your username.

    Also read: TikTok Trends for Businesses, Brands, and Others

    Note: Once you’ve updated your username, your TikTok Profile URL will also be updated with your new username. This process may take a few minutes to reflect the changes, so don’t worry if your old username still appears for a short time.

    It’s important to note that you can only change your TikTok username once every 30 days. So, make sure to choose a username that you’re happy with and that represents your brand or personality. Additionally, changing your username may also affect the discoverability of your content, as users may have saved or shared your previous username.

    Frequently asked questions

    How do I add a clickable link to my TikTok bio?

    You can add a clickable link to your TikTok bio by going to your profile, clicking “Edit profile,” and then entering the URL in the “Website” field. Note that this feature is only available to users with over 1,000 followers.

    How do I use a TikTok URL to direct viewers to a specific video on the platform?

    You can use the specific video’s URL to direct viewers to a specific video on TikTok. Just copy the URL of the video you want to share and share it with your viewers.

    How do I find the TikTok URL for a specific video?

    You can find the TikTok URL for a specific video by clicking on the “Share” icon located on the video’s page and selecting “Copy Link.”

    Can I change the URL for a specific TikTok video?

    No, you cannot change the URL for a specific TikTok video.

    Can I use my TikTok profile URL to promote my brand or business?

    Yes, you can use your TikTok profile URL to promote your brand or business by sharing it on other social media platforms or using it in your marketing materials.

    How do I check the analytics for my TikTok URL and track clicks and engagement?

    You can view your TikTok analytics by going to your profile, clicking on the three dots in the top right corner, and selecting “Analytics.” From there, you can view metrics like views, engagement, and follower growth. 

    Trending:

    How to Make Money on TikTok?

    What is a Vanity URL and Why You Need One?

    Track Your Success: How to Create a Tracking Link?

    How to add a Twitter link to Instagram bio?

    How To Put A Link In TikTok Bio?


  • How to find Pinterest URL?

    How to find Pinterest URL?

    Are you an avid Pinterest user looking to share your beautiful boards and pins with friends, family, or potential clients? Or maybe you’re new to the platform and trying to figure out how to navigate its features. Whatever the case may be, one important piece of information you’ll need is your Pinterest URL. 

    Your Pinterest URL is your unique identifier on the platform and allows others to find and follow your account. But with so many options and features on Pinterest, it can be confusing to locate your URL. Don’t worry though, in this article, we’ll guide you through the steps to find your Pinterest URL and get you on your way to share your amazing content with the world.

    Where to Look for Your Pinterest URL?

    Your Pinterest URL can be found in a few different places, depending on what you’re looking for. Here’s how to find your profile, pin, and board URL.

    To find your Pinterest profile URL:

    Step 1: Log in to your Pinterest account or create a new account. 

    Step 2: Click your profile icon in the top right corner to open your profile page. 

    profile-icon

    Step 3: Copy the URL from the address bar. That’s your Pinterest profile URL. 

    copy-profile-url

    To find your Pinterest board URL:

    Step 1: Log in to Pinterest and open your profile page. 

    Step 2: Select the board you want to share. 

    select-board

    Step 3: Copy the URL from the address bar. That’s your Pinterest board URL.  

    copy-board-url

    To find your Pinterest pin URL:

    Step 1: Log in to your Pinterest account. 

    Step 2: Select the relevant pin (either from your own board or someone else’s).

    select-pin

    Step 3: Copy the URL from the address bar. That’s your Pinterest pin URL.

    copy-pin-url

    Final Words

    Your Pinterest URL is a vital part of your presence on the platform, allowing others to find and follow your content. Whether you’re sharing your entire profile, a specific pin, or a board, knowing where to find your URL is essential.

    By following the simple steps outlined in this article, you’ll be able to locate your Pinterest URL quickly and easily. Plus, to boost shareability even further, you can shorten link for cleaner, trackable shares. This helps you to grow your reach and connect with others on this visually-driven social media platform.

    If you’re using a tool like Replug.io to manage your links and strengthen your sharing strategy, the URL you locate here will feed directly into your broader system.

    FAQs

    What is a Pinterest board?

    A Pinterest board is a collection of related pins organized around a particular theme or topic. Users can create multiple boards on their Pinterest account and save or “pin” content to them, such as images, videos, and links from around the web. These boards can be shared with others and used for inspiration, planning, and bookmarking.

    What is a Pinterest pin?

    A Pinterest pin is a visual bookmark that users save to their Pinterest boards. Pins can include images, videos, or GIFs, and are typically linked to a website or online resource. Users can save pins they find on the platform or add their own pins to share with others. Pins are organized into boards based on topics or themes and can be discovered through search, recommendations, or by following other users.

    How do I change my Pinterest URL?

    1. Log in to your Pinterest account and go to your profile.
    2. Select “Settings” from the drop-down menu.
    3. Scroll down to the “Profile” section and click “Claim” next to the URL option.
    4. Enter your desired username and click “Claim“.
    5. If the username is available, you’ll be prompted to confirm the change. Click “Yes, let’s do it!” to save your new URL.

    Note that you can only change your Pinterest URL once, and the new URL must be available and meet Pinterest’s guidelines for usernames. Once you’ve changed your URL, your old URL will no longer work, so be sure to update any links or references to your profile.

    Trending:

    How to Add Instagram Link to Facebook Bio?

    Track Your Success: How to Create a Tracking Link?

    A Quick Guide To Deep Linking And Its Benefits

  • How to get the Snapchat URL?

    How to get the Snapchat URL?

    Snapchat is one of the most popular social media platforms in the world, known for its unique features that allow users to share pictures and videos that disappear after a set amount of time. With millions of daily active users, Snapchat has become a go-to platform for sharing candid moments with friends and family. 

    However, have you ever wanted to share your Snapchat profile with someone who doesn’t have the app, or include your Snapchat handle on your website or social media profiles? 

    In this article, we will show you how to get your Snapchat URL and share it with the world, so that you can connect with more people and expand your social circle. 

    So, whether you’re a seasoned Snapchat user or just getting started, keep reading to learn how to get your Snapchat URL and make your profile more visible to others.

    Besides, if you’re keen to manage your URLs systematically, you might consider using an efficient link optimization platform to track clicks, test different variations, and drive better engagement.

    How to get your Snapchat URL?

    Getting your Snapchat URL on a mobile device is a quick and easy process that can be completed in just a few simple steps. Here’s what you need to do:

    Step 1: Open the Snapchat app on your mobile device.

    Step 2: Tap on your profile icon in the top left corner of the screen to access your profile.

    profile icon

    Step 3: Tap the share icon in the top right corner. 

    share-icon

    Step 4: Tap the “copy” button at the bottom left corner and that’s all there is to it.

    copy-link

    Whether you’re looking to connect with new friends, promote your brand or business, or simply share your Snap stories with a wider audience, having your Snapchat URL readily available can be a great way to expand your reach and build your online presence.

    Also read: How to shorten link using a URL shortener?

    This kind of process is streamlined with a reliable link shortener that lets you create clean, branded links and gather analytics in one place.

    FAQs

    What is a Snapchat URL?

    A Snapchat URL is a link to your Snapchat profile that can be shared with others. It allows people who don’t have the Snapchat app to view your profile and connect with you.

    Is my Snapchat URL public?

    Your Snapchat URL is not public by default. However, if you share your URL with others, they will be able to view your profile and connect with you.

    Can I get my Snapchat URL on both mobile and computer devices?

    No, you cannot get your Snapchat URL on computer devices. You can only get your Snapchat URL on a mobile device. 

    What is my Snapchat username?

    Your Snapchat username is the unique identifier that you created when you signed up for your Snapchat account. It should be the name that appears in your profile, and it’s also the name that your friends can use to add you to the app. If you’re not sure what your Snapchat username is, you can open the Snapchat app and check your profile to see what name appears at the top of the screen.

    Trending:

    How to create a call to action using a URL shortener?

    What is a Vanity URL and Why You Need One?

    How to add a Twitter link to Instagram bio?

  • How to get the URL of a photo in seconds?

    How to get the URL of a photo in seconds?

    A picture is worth a thousand words, but sometimes you need the URL of that picture to make it work for you. Whether you want to share a hilarious meme, add an image to your website, or simply want to save a photo for later, knowing how to get the URL of an image can be a game-changer. 

    And if you’re managing multiple images and links, this is where a tool like Replug can really help you streamline things.

    In this article, we’ll reveal some simple yet effective methods to help you get the URL of any image you come across, even if it seems impossible at first glance.

    Here’s how to get the URL of a photo on different devices:

    How to get the URL of an image on a computer?

    Step 1: Open Chrome and go to images.google.com on your computer device. 

    go to google images

    Step 2: Enter a word or phrase (keyword) related to the image you’re searching for in the Google images search box and press enter. 

    type image name

    Step 3: In the image results, click the image you are looking for. 

    images results

    Step 4: Click three horizontal dots in the top right, then click share. 

    3dots and share

    Step 5: Click “Click to copy link,” and you will have the image URL.

    click to copy link

    How to get the URL of a photo on a mobile

    Here’s how to get the URL of a photo on a mobile device:

    Step 1: On your phone or tablet, open the Google app, Chrome app, or Firefox.

    Step 2: Go to “images.google.com” to open google images. 

    search bar

    Step 3: Search for the image you’re looking for by entering the keyword in the Google images search box. 

    enter keyword

    Step 4: In the image results, tap on the image you want to get a larger version. 

    image results

    Step 5: Tap three dots in the upper right corner of the image, then tap share. 

    3dots and share (1)

    Step 6: Tap “copy URL,” and you’ll have the image URL.  

    copy url

    Useful tip: Once you’ve grabbed the image URL, you may want to convert it into a clean short URL for easy sharing or embedding. Get this job done by Replug!

    FAQs

    What is an image URL?

    An image URL is a web address that identifies the location of an image file on the internet. It is a unique address that allows you to access and display the image on a webpage or in an application.

    How can I test if an image URL is valid?

    To test if an image URL is valid, you can simply paste the URL into a web browser and try to load the image. If the image loads successfully, then the URL is valid. If the image fails to load or returns an error, then the URL may be invalid, or the image may no longer be available at that location.

    Can I change the URL of an image without affecting its content?

    No, changing the URL of an image will affect its location on the internet and may make it unavailable or difficult to find. If you need to change the URL of an image, you should use a redirect or update the links to the new URL to ensure that it remains accessible.

    How can I optimize the URL of an image for SEO?

    To optimize the URL of an image for SEO, you should use descriptive and relevant keywords in the file name and folder structure of the image URL. This can help search engines understand the context and content of the image and improve its ranking in search results. Also, understanding color theory can enhance the visual appeal of your images, making them more engaging for users.

    What is the difference between an absolute and relative image URL?

    An absolute image URL includes the complete web address of the image, including the protocol (HTTP or HTTPS), domain name, and file path. A relative image URL includes only the file path, which is relative to the web page that is linking to the image. Relative URLs are typically shorter and easier to maintain but may be less reliable if the location of the image changes.

    Trending:

    How To Boost Social Media Conversion: 10 Proven Tricks

    TikTok Bio Ideas & Hacks to Drive Traffic

    How to add YouTube links to Instagram story?

    How To Save TikTok Videos Without The Watermark?

  • How to block a URL in Chrome: 8 effective & proven methods [tried & tested]

    How to block a URL in Chrome: 8 effective & proven methods [tried & tested]

    Have you ever tried opening a website in Chrome only to wish you could block it forever? Whether it’s distracting socials, sketchy sites, or pages you just shouldn’t see at work or home, unwanted URLs are a daily headache for millions.

    In fact, organizations now block roughly 100 million malicious URLs every single day to protect users from threats like malware and URL phishing.

    But here’s the catch!

    Without the right tricks, Chrome won’t stop you from visiting those sites, leaving you stuck clicking away or stressing over digital distractions. 

    That’s why learning how to block URLs isn’t just a neat skill; it’s essential for productivity, safety, and peace of mind. 

    Ready to fix this once and for all? Let’s dive into the effective strategies to block a website in Chrome that actually work.

    Proven methods to block a URL in Chrome

    Before we jump into all the possible ways you can block a URL in Chrome, let’s start with the easiest and most user-friendly option for most people. 

    If you don’t want to mess with settings or techy stuff, using a browser extension like “BlockSite” makes the whole process quick and painless.

    Method #01: Using a Chrome extension named BlockSite (recommended for most users)

    BlockSite makes blocking URLs in Chrome super simple, no matter if you’re trying to avoid distractions or keep certain content away.

    BlockSite Extension
    1. Install the extension: Open Chrome and head to the Chrome Web Store. Search for BlockSite – Block Websites & Stay Focused and click Add to Chrome. This will install the extension right into your browser.
    2. Open BlockSite: Once installed, you’ll see its icon near the address bar (if you don’t, click the puzzle 🧩 icon and pin it). Next, click the icon to launch BlockSite.
    3. Skip extras or log in: You might be asked to accept data permissions or choose a subscription plan. You can grant permissions, skip the paid plan, and still block URLs just fine with the free version.
    4. Add the URL to block: Go to the Block Sites tab and type or paste the URL you want to block. Then hit the plus (+) button or Add Item. BlockSite will now stop Chrome from opening it.
    5. Block while browsing: If you’re already on the site you want gone, just click the BlockSite icon and choose Block this site. Super easy!
    6. Manage blocked sites: Want to unblock something later? Just go back to the BlockSite dashboard and remove it from your list.

    You’ll learn even more effective methods next!

    Method #02: Using Developer Tools (advanced/temporary)

    If you’re comfortable opening Chrome’s built-in tools and want a quick, temporary way to block specific URL requests, the Developer Tools Network blocking feature is handy.

    Chrome Developer Tools
    1. Open the page you want to block something on: Go to the site where the URL you wish to block loads.
    2. Open Developer Tools: Press Ctrl + Shift + I on Windows/Linux or Cmd + Option + I on Mac. This opens the DevTools panel.
    3. Go to the Network tab: At the top of DevTools, click Network. This lets you see all network requests (such as images, scripts, and APIs).
    4. Reload the page: Refresh the page to have Chrome log every request in the Network panel. This causes the URL you want to block to appear in the list.
    5. Find the URL request: Scroll through the list and look for the specific URL (or resource) you want to block.
    6. Block it: Right-click on that request and choose Block request URL (or “Block request domain” if you want to block everything from that domain). Chrome will add it to the Network Request Blocking list.
    7. Keep DevTools open: As long as DevTools stays open and the “Enable network request blocking” option is checked, Chrome won’t load that URL. An excellent choice for testing or temporary blocking.

    This method is incredible for debugging or testing things on a page without installing anything extra. Just remember it’s not a permanent block, and only works while DevTools is active. 

    Ready for the next method? Let’s go!

    Method #03: Using Google Admin Console (for enterprise/education)

    If your organization or school manages Chrome using Google Workspace (formerly G Suite), the Google Admin Console lets you block specific URLs for users across all managed Chrome browsers and ChromeOS devices.

    This is super useful for stopping access to distracting or harmful sites without relying on individual extensions.

    Google Admin Console

    Here’s how to do it:

    1. Sign in to the Admin Console: Open your browser and go to admin.google.com. Log in with your administrator account. (Note: you’ll need admin rights to make these changes.)
    2. Head to Chrome settings: From the main dashboard, go to Devices → Chrome → Settings → Users & browser settings. This is where most Chrome policies live for managed users.
    3. Select who this applies to: On the left side, choose the organizational unit (OU) you want the block rule to apply to, e.g., a whole department or student group.
    4. Find URL blocking: Scroll down (or use the search box) to find “URL Blocking” under the Content section.
    5. Add the URLs you want to block: In the Blocked URLs field, type or paste the links you want to block; each on its own line. You can enter up to 1,000 URLs here.
    6. Optionally allow exceptions: If you want to allow some sites even if they’re on the blocklist, use the Blocked URL exceptions field. This lets you create safe exceptions.
    7. Save your changes: Click Save at the bottom or top to apply the policy. Chrome will start blocking those URLs for users in that OU (usually within a few minutes).

    This Admin Console method is ideal when you’re managing many users, like in a business or school, and want a centralized way to enforce rules across the board.

    Method #04: Using the hosts file

    Want a system-level way to block a URL in Chrome (and all other browsers) without extensions? 

    Editing your computer’s hosts file is a classic, no-extra-software method. It works by telling your operating system to redirect a particular website to your own computer (which doesn’t serve that site), so the site never loads when you try to visit it.

    Hosts File

    Here’s how to block a URL in Chrome (PC) step-by-step:

    🪟 On Windows (10/11)

    1. Open Notepad as admin: Search for Notepad, right-click it, and choose Run as administrator. This is essential to save changes later.

    2. Open the hosts file: In Notepad, go to File → Open, then navigate to:

    C:\Windows\System32\drivers\etc

    If you don’t see anything, change the file type dropdown to All Files (.)

    3. Add the sites you want to block: At the bottom of the file, type:

    127.0.0.1 example.com

    127.0.0.1 www.example.com

    Replace example.com with the site’s address you want to block (include both “www” and “non-www” lines).

    4. Save the file: Hit Ctrl+S to save. You might need to confirm administrator access.

    5. Restart Chrome: Close and reopen your browser. If the site still loads, you can flush your DNS cache (search “cmd” → run as admin, then enter ipconfig /flushdns).

    🍎 On Mac (macOS)

    1. Open Terminal: Hit Command + Space, type Terminal, and hit Enter.

    2. Edit the hosts file: Type this.

     sudo nano /etc/hosts

    Press Enter, then type your password when prompted.

    3. Add the block entries: At the end of the file, add:

    127.0.0.1 example.com

    127.0.0.1 www.example.com

    Replace example.com with the site you want to stop people from reaching.

    4. Save and exit: Press Control + O to save and Control + X to exit. Then flush the DNS cache:

    sudo dscacheutil -flushcache

    sudo killall -HUP mDNSResponder

    💡 Quick tip: This method blocks sites on a system level, but it doesn’t stop someone from using a VPN or proxy to bypass it. And in rare cases, Chrome might ignore the hosts file if Secure DNS is enabled. When you want to undo it later, just remove the lines you added or comment them out with a # and save again.

    Next up, let’s look at how to block URLs directly via parental controls.

    Method #05: Using parental controls

    If you want to block specific URLs on Chrome without extensions, and especially if you’re doing this for kids or other users, built-in parental controls are a solid way to go. 

    These tools let you filter sites, block particular URLs, and manage what content can be viewed, and unlike browser extensions, they usually work across all browsers on that device.

    Parental Controls - Google Chrome

      Here’s how to do it step-by-step:

      1. Decide which parental control tool to use:

      • On Chromebooks and Android devices, Google Family Link is the go-to option.
      • On Windows 11, you can use the built-in Family Safety controls.
      • On macOS/iPhone/iPad, Apple’s Screen Time lets you block sites at the system level (applies to Chrome too).

      2. Set up a child account (if needed): For tools like Google Family Link or Windows Family Safety, you’ll usually create a child profile first. This lets you apply restrictions to that account without affecting your own.

      3. Open the parental control settings:

      • Google Family Link: Open the app → select your child’s profile → go to Manage settings → Filters on Google Chrome → Manage sites.
      • Windows Family Safety: Go to Settings → Accounts → Family & other users, choose the child account, then adjust Content filters → Blocked sites and add URLs.
      • Screen Time on Apple devices:Go to Settings → Screen Time → Content & Privacy Restrictions → Web Content → Limit Adult Websites or Allowed Websites Only, and add the URLs you want to block.

      4. Add the URLs you want to block: Inside the parental control dashboard, there’s usually an option like “Blocked sites” or “Never allow” where you paste the complete website addresses you don’t want the user to access.

      5. Save and test: Once you save the changes, try opening those sites in Chrome. They should now be blocked according to your settings. If you’re on a child’s account, they won’t be able to access the blocked pages without permission.

      Note: Tools like Google Family Link also let you switch to only allowing approved sites, which is even stricter than just blocking a few URLs. Using parental controls gives you a more reliable block than a browser extension, especially if the user isn’t tech-savvy and might uninstall the blocker themselves.

      Method #06: Using match pattern with Chrome

      If you’re a bit more technical and want to block groups of URLs instead of typing every single address, using URL match patterns can be effective.

      Match patterns let you define wildcard rules (like “block everything from this domain or path”) that extensions can use to block sites in Chrome. 

      Note: This isn’t something built directly into Chrome’s basic settings, so you’ll use an extension that supports URL patterns to block links based on rules you define.

      URL Match Patterns

      Follow along with these steps:

      1. Choose a blocker extension that supports patterns: Search the Chrome Web Store for a URL-blocking extension that lets you enter pattern rules (some blockers call them wildcards or pattern filters). Many extensions let you block based on text or pattern matches.

      2. Install the extension: Click Add to Chrome → Add extension. Once installed, pin it next to your address bar so it’s easy to open.

      3. Open the extension’s settings: Click the extension icon and go to its options or settings page. This is usually where you add URLs or patterns you want to block.

      4. Learn the match pattern basics: Chrome match patterns generally follow a simple rule:

        <scheme>://<host>/<path>

        Scheme is usually http, https, or * (to match both),

        host can be exact (example.com) or use wildcards (*.example.com),

        and path often ends with /* to match anything under that path.

        5. Enter your patterns: In the blocker’s field, add patterns like:

        • *://*.example.com/*: Blocks any secure/insecure page on example.com or its subdomains
        • https://site.com/path/*: Blocks everything under that specific path

        These patterns tell the extension which sites to catch when you or someone else tries to open them.

        6. Save and test: Hit Save or Apply, depending on the extension. Try visiting a page that fits your pattern. If it’s blocked, your rule works!

        7. Tweak as needed: You can add more patterns or edit existing ones. If a site still loads, adjust your pattern (for example, include a wildcard, such as *, to catch subdomains).

        💡 Quick tip: Using patterns lets you block many pages at once without typing every URL individually. This is the perfect option if you want to block an entire blog, shopping site, or any group of pages that follow the same structure. Just make sure the extension you choose supports this type of pattern input.

        Method #07: Using Chrome’s SafeSearch feature

        If your goal is less about blocking specific URLs and more about filtering out inappropriate or explicit content from your Google Search results in Chrome, then SafeSearch is a simple built-in way to do it. 

        It doesn’t block websites outright, but it does help keep search results cleaner by filtering out adult or offensive content (great for kids, work, or just a safer browsing feel).

        Chrome’s SafeSearch Feature

        Here’s a stepwise walkthrough:

        1. Open Google in Chrome: Launch Chrome and go to www.google.com.
        2. Go to SafeSearch settings: On desktop, scroll down the page and click Settings, then Search settings. Alternatively, you can visit www.google.com/preferences directly.
        3. Turn on SafeSearch: In the SafeSearch filters section, check the box next to “Turn on SafeSearch” to filter out explicit content from Google Search results.
        4. Save your settings: Scroll to the bottom and click Save to apply the change.
        5. Lock SafeSearch (optional): If you’re doing this for kids, you can lock SafeSearch, so others can’t turn it off. You’ll need to be logged in to your Google account to do it.

        Note: Just keep in mind that SafeSearch only affects Google Search results. It won’t stop people from visiting a site directly by typing its URL or clicking a link. This is a simple way to make Chrome searches safer before moving on to more advanced blocking techniques!

        Method #08: Using the BlockList URL feature

        If you’re managing Chrome across a business, school, or any organization, you can use Chrome’s URLBlocklist/URLAllowlist policies to block specific websites for all users. 

        This method isn’t something you do in the ordinary Chrome settings. It’s for admins who need a central, enforceable block using Group Policy (GPO) on Windows or JSON policy files on other systems.

        BlockList URL Feature

        Here’s how to get it done:

        1. Get the Chrome policy templates (for GPO): First, download the latest Chrome Enterprise policy templates from Google’s official bundle. These include the ADMX/ADML files you’ll use in the Group Policy Editor.
        2. Load the ADMX templates into GPO: Open Group Policy Management Editor → go to Administrative TemplatesAdd/Remove Templates and import the Google Chrome ADMX files. Once loaded, you’ll see a Google → Google Chrome section under policies.
        3. Configure URLBlocklist via GPO: Under Google → Google Chrome, find Block access to a list of URLs. Enable the policy and add the URLs you want to block (one per line). Chrome will prevent users from visiting these sites.
        4. Use URLAllowlist to make exceptions (Optional): Still in GPO, enable Allow access to a list of URLs and add URLs that should be accessible even if they match the block pattern. This override sits above the block rules!
        5. Deploy and refresh policies: Apply the GPO to your target machines/users. On managed devices, users may need to restart Chrome, and you can verify it by checking chrome://policy in the browser. It should show “URLBlocklist” and URLAllowlist” with status “OK.”

        Now, using JSON policy files (for macOS, Linux, or managed devices)

        If you’re not using Group Policy, e.g., on macOS, Linux, or Chrome managed outside of Active Directory, you can define the same settings in a “JSON file”.

        Here’s what to do:

        1. Create a JSON file in the managed policy folder: For Chrome on Linux/macOS, place a file inside /etc/opt/chrome/policies/managed/ (or the equivalent managed directory).

        2. Add your blocklist/allowlist entries: Make the policy JSON look like this:

        {

        “URLBlocklist”: [

          “https://badsite.com”,

          “https://anotherbad.com”

          ],

          “URLAllowlist”: [

          “https://goodsite.com”

          ]

          }

          This tells Chrome to block sites in “URLBlocklist” and allow those in “URLAllowlist”, with the allowlist taking precedence.

          3. Restart Chrome: Once the file is in place and properly formatted, restart Chrome to apply the changes.

          Note: Blocking URLs this way is enforceable from the admin side. Users can’t easily remove the block because it’s based on your organization’s policies. And if you’re using both blocklist and allowlist together, remember that allowlist entries will override blocklist rules when a URL matches both. This approach is perfect for schools, workplaces, or any environment where you need a consistent, managed block across many users.

          How to block a URL in Chrome (Android)

          Chrome on Android doesn’t let you block sites directly inside the browser. One of the best ways to filter and block websites (including specific URLs) is by configuring your phone’s Private DNS with a service like “NextDNS”.

          This makes all your device’s DNS lookups go through NextDNS, where you can set up blocklists that stop unwanted sites from resolving.

          NextDNS

          Here’s how to set up Private DNS with NextDNS:

          1. Sign up for a NextDNS account: Go to https://nextdns.io/ and create a free account. Once you’re signed in, make a configuration profile (for example, “Android”). After you do that, NextDNS will give you a unique DNS-over-TLS (DoT) endpoint. It looks like xxxxxx.dns.nextdns.io.
          2. Add URLs you want to block in the NextDNS dashboard: In your NextDNS account online, use the Blocklists, Denylist, or Custom rules settings to add the websites or domains you want to prevent from loading on your phone. NextDNS lets you block entire domains (like example.com) and also more advanced rules if needed.
          3. Open Android Settings: On your Android phone, open Settings → Network & internet → Private DNS. (The exact path can vary slightly on different brands, but it’s usually under “Network & Internet”.)
          4. Choose “Private DNS provider hostname”: Tap Private DNS provider hostname and paste in the NextDNS endpoint you copied from the NextDNS dashboard (xxxxxx.dns.nextdns.io).
          5. Save and exit: Tap Save to apply the change. Your phone will now use NextDNS for all DNS lookups, including in Chrome. Any sites you’ve blocked in your NextDNS settings won’t load in the browser.
          6. Test it: Try visiting a blocked URL in Chrome. If everything’s set up correctly, the site should fail to load (or be filtered) because NextDNS is now handling and blocking those DNS requests based on your rules.

          ✔️ Why this works: Android’s Private DNS feature (available on Android 9 and later) lets you specify a secure DNS provider, and when you set it to a service like NextDNS with blocklists configured, you essentially filter and block sites before the browser even tries to load them.

          Note: Some networks or carriers may interfere with custom DNS, so if you have connection trouble, check your DNS hostname spelling or switch back to “Automatic” and try again. This setup works for all apps and browsers on your Android device (not just Chrome) and gives you a flexible way to block unwanted URLs without a separate app continuously running in the background.

          How to block a URL in Chrome (iPhone)

          Because iOS doesn’t let you block sites directly inside Chrome, the best solution is to use an app like “Freedom,” which can block websites system-wide (including in Chrome) by starting a blocking session with your custom site list.

          Freedom - Screen Time Control

          Using Freedom to block URLs on iPhone:

          1. Download Freedom from the App Store: Open the App Store, search for “Freedom: Screen Time Control”, and install it on your iPhone. This app is designed to block distracting apps and sites across your device.

          2. Sign in or create an account: Open the Freedom app and log in with your email. If you don’t have an account yet, you can create one right from the app.

          3. Give screen time permissions: Freedom uses Apple’s Screen Time settings to block apps and websites. When prompted, tap Allow Screen Time and follow the iOS prompts to grant the app the permissions it needs. This step is required for the app to block URLs inside browsers like Chrome.

          4. Create a blocklist:

          • Tap the Blocklists tab in the app.
          • Tap Add New Blocklist to make a custom list.
          • On the blocklist screen, scroll until you see options to add websites.
          • Enter the exact, unique URL you want to block (e.g., example.com).
          • Add more URLs if needed, then tap Save.

          5. Start a blocking session:

          • Go to the Start Session tab.
          • Choose the blocklist you just created.
          • Pick your session length (how long the block should stay active).
          • Tap Start. Freedom will now block the sites in that list on your iPhone (including in Chrome) for the duration of the session.

          6. Test it in Chrome: Open Chrome and try to visit one of the blocked URLs. Freedom should stop the site from loading and show a block screen instead.

          Note: Freedom uses your iPhone’s Screen Time system and, optionally, a local VPN or profile to enforce blocks, so please make sure you grant the permissions it requests. You can edit or add new blocklists at any time and start new sessions to keep unwanted sites blocked whenever you need.

          How to block a website in Chrome without an extension

          Chrome doesn’t have a built-in “block this site” option or button, so if you prefer not to use an extension, you’ve still got a few solid workarounds. 

          These methods work outside Chrome itself and will prevent certain sites from loading even when no extension is installed.

          1. Edit your computer’s hosts file (system-level block)
          2. Use parental controls or supervised accounts
          3. SafeSearch & content filtering (lighter filtering)
          4. Block sites at your router or network level
          How to block a website in Chrome without an extension

          Here’s how to block sites at your router or network level:

          If you want to stop a site for everyone on your Wi-Fi, you can log into your router settings and use its website blocking or parental control tools.

          1. Find your router’s admin page (often something like 192.168.1.1).
          2. Log in with your credentials.
          3. Look for “Website Block,” “URL Filtering,” or “Parental Controls”.
          4. Add the URLs you want to block.

          This stops access on all devices connected to that network (including Chrome) without touching the browser itself.

          Why block URLs in Google Chrome?

          Blocking specific URLs in Chrome isn’t just a random tech trick; it’s something a lot of people do for clear, practical reasons. 

          No matter if you’re trying to stay focused, protect yourself or others from harmful sites, or manage access across a group of users, blocking URLs gives you control over what can be loaded in your browser.

          What happens when you block a URL in Google Chrome?

          When you block a URL in Chrome (whether using tools, settings, or network rules) here’s what typically happens:

          Access is prevented

          Chrome simply won’t load the blocked website. Instead of letting the page load, the browser will stop the request and display an error or a blocking message. This is the core result of URL blocking! You attempt to visit the address, and Chrome stops it from opening.

          Distractions and unwanted content are kept away

          By stopping particular sites from loading, you won’t be pulled into time-wasting or inappropriate pages. Many people use this to stay productive or to protect family members, especially kids, from content they shouldn’t see.

          Security threats are lowered

          Blocking malicious or phishing URLs stops Chrome from attempting to connect to sites known for malware or risky content. Many URL filtering systems will redirect blocked requests to a warning or safe page instead of letting Chrome navigate normally.

          In short, blocking a URL in Chrome changes the browsing experience at the network access level. Chrome doesn’t complete the connection to the blocked address, keeping you away from whatever page or content you don’t want to see.

          Best practices for blocking URLs effectively in Chrome

          When you’re blocking URLs, you want to think not just about how to block them, but also where and how well each method works. Whether it’s just in your browser, across your whole device, or even for everyone on your network.

          MethodScopeDifficultyBest For
          Browser extensions (BlockSite, StayFocusd, etc.)Chrome onlyEasyPersonal use, quick setups
          Edit hosts fileEntire computer (all browsers)MediumSystem-wide block without extensions
          Router/network-level blockAll devices on the networkMediumFamilies or shared networks
          DNS filtering (OpenDNS, CleanBrowsing, NextDNS)All devices using that DNSMediumISP-independent network-wide filtering
          Parental controls/Family LinkDevice or account levelEasyParents managing kids’ browsing
          Chrome managed policies (e.g., Admin/Group Policy/JSON)Managed environmentsAdvancedBusinesses, schools, large deployments
          SafeSearch / content filtersSearch results onlyVery easyLight filtering (explicit content)

          Quick tips to block URLs effectively:

          Combine methods: For instance, use DNS filtering at the network level plus Chrome extensions on personal devices for stronger coverage.

          Use strong permissions: Set passwords or admin restrictions, so others can’t easily turn off blocks (especially handy with parental controls or extensions).

          Test your blocks: After setting up any method, try accessing the blocked URL in Chrome to make sure the block is working as expected.

          Keep rules updated: Whether it’s a blocklist in a DNS service or a router, check it occasionally to remove outdated blocks or add new ones.

          Wrapping up

          Blocking URLs in Chrome doesn’t have to be confusing anymore. If you’re trying to stay focused, keep someone safe, manage access across devices, or set rules for an entire network, there’s a method that fits your needs. 

          From browser tools and system settings to DNS filtering and parental controls, this guide walked you through every practical approach you can use right now. 

          The goal is simple: give you control over what loads (and what doesn’t) in Chrome, so your browsing stays intentional and safe.

          If you’re also looking to take complete control of the links you share, give Replug a try now! It’s a reliable link management platform and URL shortener that lets you create branded short links in seconds and track every click with ease.

          Frequently asked questions

          How do you block a specific URL in Chrome?

          You can block a specific URL in Chrome by using a site-blocking tool (like extensions such as BlockSite), managing network filters (like NextDNS), editing system settings (hosts file), or using admin policies for work/school accounts. 

          Chrome itself doesn’t have a built-in single URL blocker for everyday users, so most people use extensions or system/network-level settings to stop access.

          How do I block a specific URL path?

          Blocking a specific path (e.g., example.com/page) is more difficult than blocking a whole domain. Most browser tools focus on domains rather than page paths. 

          Some advanced blockers or pattern-based tools (like Requestly or extension pattern rules) let you block parts of a URL using wildcards or filters, but Chrome’s default settings won’t do this on their own.

          How to block a URL in Chrome on a Chromebook?

          On a Chromebook, you can block URLs using supervised or managed settings in Google Family Link for kids, or via the Google Admin console if the device is part of a school/business domain. In the Admin console, you can add sites to a URL Blocklist to block access.

          How do I permanently block a URL?

          Permanent blocks require system- or admin-level controls such as setting router filters, using DNS services that block domains at the network level, editing the OS hosts file, or applying managed policies (e.g., Google Admin URLBlocklist). Browser extensions can also “permanently” block for you as long as they stay enabled.

          How do I unblock a URL once it’s blocked?

          To unblock a URL, just remove it from whatever block list you used, e.g., in the extension’s settings, in your DNS block list, or in the Admin/hosts file/router filter you set up. After that, refresh Chrome, and the site will load again.

          How to block a URL on your kid’s phone?

          Use parental controls: 

          – On Android, use apps like Google Family Link or DNS-based filters.
          – On iPhone, use Screen Time (Settings → Screen Time → Content & Privacy Restrictions → Web Content → Never Allow) to add the URL you want blocked.

          How to block a URL in Incognito mode?

          Chrome blocks extensions from working in “Incognito” by default. To block URLs in Incognito mode, enable your blocking extension under chrome://extensions → Details → Allow in Incognito. Then your block list will apply even in private browsing.

          Can I block URLs for specific users only?

          Yes, in managed environments (like schools or businesses), you can block URLs only for specific users or groups via tools like Google Admin console or Windows Group Policy. Personal Chrome profiles don’t have that feature natively, so you’ll need supervised accounts to target individual users.

          Are Chrome extensions safe for URL blocking?

          Most extensions (like BlockSite) are safe, but you should only install ones from trusted sources, check reviews, and review the permissions they ask for. Some low-quality or third-party extensions might misuse data, so always pick well-known blockers with a good reputation.

          Why should I block certain URLs on Chrome?

          Blocking URLs helps you stay focused, protect kids or others from harmful content, prevent security risks, and manage network use. It’s a simple way to control what content is accessible in your browser or across devices.

        1. How to create a vanity URL?

          How to create a vanity URL?

          Vanity URLs are a valuable tool for branding, marketing, and tracking efforts and can help to improve the overall user experience.

          This quick guide will teach you how to create a vanity URL in just a few simple steps and explain what making a vanity URL entails. 

          Let’s begin!

          Vanity URLs: how do you set them up?

          Creating a vanity URL can make it easier to remember a web address and can also build brand consistency. To create a vanity URL, you can either use a link management tool or a content management system (CMS).

          • A link management tool is a standalone platform that specializes in creating custom short links. You simply enter the long URL you want to shorten, and the URL shortener tool generates a vanity URL within seconds.
          • A CMS, on the other hand, is a platform used to manage the content of a website. Some CMSs’ have built-in redirect functionality, but others may require a redirect plugin to create a vanity URL. To use a CMS to create a vanity URL, you would set up a redirect from the custom short link to the longer, original URL.

          In either case, a vanity URL can be easily shared and is a useful tool for branding and marketing.

          Also read: What is a vanity URL & how to track it?

          How to create a vanity URL using a link management tool?

          Creating a vanity URL using a link management tool has several benefits, such as:

          • A memorable URL can increase click-through rates and drive more traffic to a website.
          • Vanity URLs can be tracked and measured, enabling businesses to gain a deeper understanding of their campaigns. 
          • A link management tool can allow for the creation of multiple vanity URLs, making it easier to manage multiple campaigns and track their performance. 

          Boost your marketing with Replug’s vanity URL builder

          By using Replug’s vanity URL builder, businesses can improve the efficiency and effectiveness of their marketing efforts, increase click-through rates, and drive more traffic to their website.

          Here’s how you can create a vanity URL using Replug:

          Step 1: Sign in to Replug or create an account for free.

          replug-signup

          Step 2: Once you’re on the main Replug dashboard, simply enter the long URL in the bar under “Quickly Shorten your link”:

          link-shortening

          Step 3: Click on the blue arrow button to autogenerate your vanity URL using Replug:

          vanity-url

          Step 4: Your vanity URL will be generated. You can customize the URL slug using the edit icon to fit your needs:

          custom-url-slug

          Step 5: Save and share your shortened, memorable link:

          save-vanity-url

          Also read: How to shorten a link using a URL shortener

          How to make your vanity URL more clickable?

          To make your vanity URL more clickable using Replug, follow these steps:

          Choose a short and memorable vanity URL: The shorter the URL, the easier it will be for your audience to remember and click on it.

          Use a relevant keyword: Use keywords relevant to the content behind the link so people know what they’re clicking on.

          Use a recognizable brand name: If your brand has a recognizable name, use it in your vanity URL to build trust and make it more recognizable.

          Create a custom domain: Replug allows you to create a custom domain for your short links, which can make your links look more professional and increase clicks.

          Add a call-to-action (CTA): Adding a CTA to your vanity URL can encourage people to click on it. For example, “Click here to learn more” or “Get your discount now”.

          Use UTM parameters: Utilize UTM parameters to track the performance of your links and make data-driven decisions about future link campaigns.

          Test and iterate: Test your vanity URL and track its performance to see what’s working and what’s not. Make changes and improvements based on the data you collect.


          Boost ROI with branded URLs - Replug dashboard showing performance metrics and branded URL creation
          Boost ROI with
          branded URLs!

          Enhance your marketing campaigns by creating shareable, trackable, and fully multi-purpose customizable branded URLs.

          Try Replug for free

          See Also:

          How to rename a link using Replug?

          What Is Affiliate Link Cloaking & How To Do It?


        2. How to find my Twitter URL on mobile and desktop?

          How to find my Twitter URL on mobile and desktop?

          As a Twitter user, having a URL for your profile is helpful for several reasons. 

          First, you can share your URL with friends and gain new followers by promoting it on other social media platforms, including email, business cards, company pamphlets, or restaurant menus. The more your URL is shared, the more likely you attract new followers. 

          Second, you can include your URL in the social media sections on other websites, allowing you to embed links to other profiles. This can help you grow your following as people search for more of your content on different platforms.

          Additionally, having a distinct and solid brand identity across all your social media accounts will help you attract and retain followers.

          Here’s how to find your Twitter URL:

          How to find my Twitter URL on a mobile phone?

          Follow these steps on your iOS or Android mobile device to find your Twitter URL:

          Step 1: Open the Twitter app on your mobile device. 

          Step 2: Tap the profile icon in the top left corner. 

          profile icon

          Step 3: You will now see your user name in the sidebar below your name.

          username

          Step 4: Add your username after the Twitter link (www.twitter.com/@arslanjadun), and you’re done.

          How to find my Twitter URL on a computer device?

          Here’s how to find your Twitter URL on a computer device.

          Step 1: Log in to Twitter and click on your profile icon to open your profile.

          prifile icon

          Step 2: Copy the URL in the browser’s address bar, and you’re done. 

          copy url

          Can I change my Twitter URL?

          You can change your Twitter URL anytime by changing your @username, otherwise known as your handle. 

          Here’s how to change your Twitter URL on mobile and computer devices. 

          How to change my Twitter URL on a mobile device

          Step 1: Log in to the Twitter app and tap your profile icon in the top left corner. 

          profile icon

          Step 2: In the left side menu, Tap “setting and support,” then “setting and privacy.” 

          setting ang support

          Step 3: Tap “your account” on the next screen. 

          your account

          Step 4: Now, tap “account information.”

          account information

          Step 5: Tap “user name” to open your current user name. 

          username

          Step 6:  Type your new username and tap done. 

          new username

          Also Read: How to Shorten a link using a URL shortener?

          How to change my Twitter URL on a computer device

          Follow the steps below to change your Twitter URL on a computer device:

          Step 1: Log in to your Twitter profile and click on more in the left-side menu. 

          more button

          Step 2: Click “setting and support” from the left side menu. Then, click “setting and privacy” from the drop-down menu. 

          setting and support

          Step 3: Click “account information” from the “your account” menu. 

          your account and account info

          Step 4: Click “username” in the account information section. 

          click username

          Step 5: Type your new username and click save. 

          type username and save

          Also Read: How To Boost Social Media Conversion: 10 Proven Tricks

          Looking for a Better Way to Manage Social Media URLs?

          Managing multiple social media accounts is time-consuming, and keeping track of all the links to articles can be challenging. To streamline campaigns, it is recommended to use a tool such as Replug to keep all the links in one place.

          It serves as a reliable link management platform that simplifies tracking, organizing, and optimizing your URLs.

          However, deciding what links to include in the Replug can be confusing. For Twitter, the best link to start with is the URL of the entire profile, which can be easily shared and is always in the format of “twitter.com/username.”

          The ultimate solution for managing all your social media links

          Our link management tool provides you with a dashboard to manage all your shortened links, including the ability to track clicks and see analytics on the usage of each link. This can help you understand how your social media profiles are being used and accessed.

          Replug provides several benefits when handling all your social media URLs:

          Create a consistent brand across all profiles

          A consistent brand across all your social media profiles is important for building a recognizable and professional image. Using the same URL shortener for all your profiles, such as Replug, ensures that your profiles are all linked together under one recognizable brand. This makes it easier for people to find and remember your profiles and creates a consistent image for your brand.

          Also Read: Brand Consistency:  Build Brand Consistency Using Branded Links

          Track and analyze clicks on your links

          Replug provides analytics and click tracking on your links, so you can see how many people are clicking on your social media profile links, where they are coming from, and which ones are most popular.

          Also Read: What is a Tracking URL and How Does it Work?

          Provide easier-to-remember and share links

          Shortened Replug URLs are easier to remember and share than individual social media profiles’ long, complex URLs. You can enhance brand recognition and improve your profile’s accessibility by shortening your social media URLs with Replug.

          Provide Cross-platform compatibility

          Handling all your social media URLs through Replug provides cross-platform compatibility, making it easier for people to access your profiles from any device or browser. Replug links are designed to work seamlessly across all platforms, including desktops, laptops, smartphones, and tablets, ensuring that your profiles are accessible to everyone, regardless of their device.

          Trending:

          How to Build Your Brand on YouTube &#8211; Branding on Youtube the Right Way!

          A Comprehensive Guide on Increasing Engagement on Social Media Platforms

          Benefits Of A Link Rotator: Why &#038; When To Use Rotating Links?

          What Is A Vanity URL &#038; How To Track It?

          7 best URL shorteners available online in 2026 – Features, pricing, reviews & more